Windows串口通信
Windows串口通信相比较Android串口通信,在开发上面相对方便一些。原理都是一样,需要仔细阅读厂商设备的串口通信协议。结合串口调试助手进行测试,测试通过后,编写代码实现。
比如近期就接触到了一款天平,其最大测量值为100g,测量精度0.001g。
拿到手之后我就先阅读串口通信协议,然后用工具进行测试。
串口通信协议测试
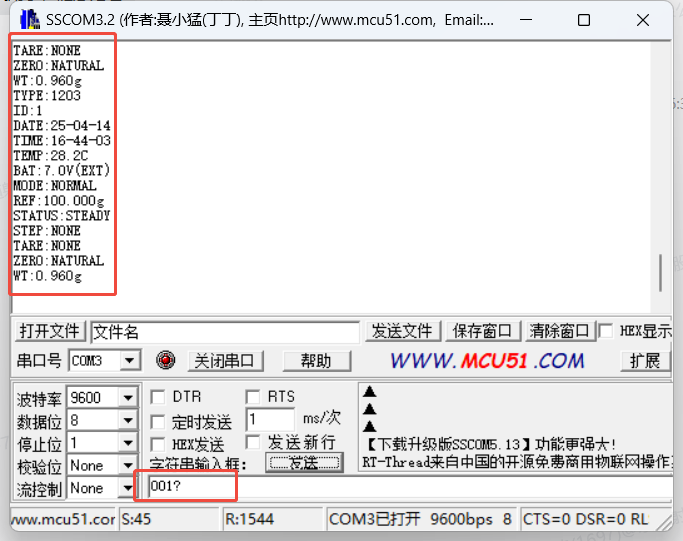 发送之后看到返回的测量结果,说明测试成功。
接下来就是封装成C#代码。
编写C#串口通信代码
- 初始化串口连接参数
private void InitializeSerialPort()
 {
     serialPort = new SerialPort("COM3")
     {
         BaudRate = 9600,
         Parity = Parity.None,
         DataBits = 8,
         StopBits = StopBits.One,
         ReadTimeout = 500,
         WriteTimeout = 500
     };


     // 订阅数据接收事件
     serialPort.DataReceived += SerialPort_DataReceived;
 }
- 按钮点击事件获取重量信息
/// <summary>
/// 获取重量
/// </summary>
/// <param name="sender"></param>
/// <param name="e"></param>
private void button1_Click(object sender, EventArgs e)
{
    if (serialPort.IsOpen)
    {
        serialPort.Close();
        textBox1.AppendText("串口已关闭\r\n");
    }
    else
    {
        try
        {
            serialPort.Open();
            //textBox1.AppendText($"已打开 {serialPort.PortName}\r\n");

            serialPort.Write("001?"); //发送获取重量的命令
        }
        catch (Exception ex)
        {
            MessageBox.Show($"错误: {ex.Message}", "串口操作失败", MessageBoxButtons.OK, MessageBoxIcon.Error);
        }
    }
}
- 接收串口返回的信息
private void SerialPort_DataReceived(object sender, SerialDataReceivedEventArgs e)
{
    try
    {
        //加个延迟保证数据一次性得到
        Thread.Sleep(400);
        string data = serialPort.ReadExisting();

        // 跨线程安全更新 UI
        this.BeginInvoke(new Action(() =>
        {
            textBox1.AppendText($"{data}\r\n");
            //textBox1.AppendText($"[{DateTime.Now:HH:mm:ss}] 接收: {data}\r\n");
            textBox1.ScrollToCaret(); // 自动滚动到底部
        }));
    }
    catch (Exception ex)
    {
        this.BeginInvoke(new Action(() =>
        {
            textBox1.AppendText($"读取错误: {ex.Message}\r\n");
        }));
    }
}

 浙公网安备 33010602011771号