
Spring Security框架的小demo
前言:
我们之前在javaweb部分,以及ssm部分使用的是Filter或者拦截器,去做登陆控制,现在我们使用Spring Secutriy去做登陆控制
一、Spring Security的小demo
1、新建一个工程,导入maven依赖
<properties>
    <spring.version>4.2.4.RELEASE</spring.version>
  </properties>
  <dependencies>
    <dependency>
      <groupId>org.springframework</groupId>
      <artifactId>spring-core</artifactId>
      <version>${spring.version}</version>
    </dependency>
    <dependency>
      <groupId>org.springframework</groupId>
      <artifactId>spring-web</artifactId>
      <version>${spring.version}</version>
    </dependency>
    <dependency>
      <groupId>org.springframework</groupId>
      <artifactId>spring-webmvc</artifactId>
      <version>${spring.version}</version>
    </dependency>
    <dependency>
      <groupId>org.springframework</groupId>
      <artifactId>spring-context-support</artifactId>
      <version>${spring.version}</version>
    </dependency>
    <dependency>
      <groupId>org.springframework</groupId>
      <artifactId>spring-test</artifactId>
      <version>${spring.version}</version>
    </dependency>
    <dependency>
      <groupId>org.springframework</groupId>
      <artifactId>spring-jdbc</artifactId>
      <version>${spring.version}</version>
    </dependency>
    <dependency>
      <groupId>org.springframework.security</groupId>
      <artifactId>spring-security-web</artifactId>
      <version>4.1.0.RELEASE</version>
    </dependency>
    <dependency>
      <groupId>org.springframework.security</groupId>
      <artifactId>spring-security-config</artifactId>
      <version>4.1.0.RELEASE</version>
    </dependency>
    <dependency>
      <groupId>javax.servlet</groupId>
      <artifactId>servlet-api</artifactId>
      <version>2.5</version>
      <scope>provided</scope>
    </dependency>
  </dependencies>
  <build>
    <plugins>
      <!-- java编译插件 -->
      <plugin>
        <groupId>org.apache.maven.plugins</groupId>
        <artifactId>maven-compiler-plugin</artifactId>
        <version>3.2</version>
        <configuration>
          <source>1.7</source>
          <target>1.7</target>
          <encoding>UTF-8</encoding>
        </configuration>
      </plugin>
      <plugin>
        <groupId>org.apache.tomcat.maven</groupId>
        <artifactId>tomcat7-maven-plugin</artifactId>
        <configuration>
          <!-- 指定端口 -->
          <port>9090</port>
          <!-- 请求路径 -->
          <path>/</path>
        </configuration>
      </plugin>
    </plugins>
  </build>
2、web.xml文件中的配置
<?xml version="1.0" encoding="UTF-8"?>
<web-app xmlns:xsi="http://www.w3.org/2001/XMLSchema-instance"
         xmlns="http://java.sun.com/xml/ns/javaee"
         xsi:schemaLocation="http://java.sun.com/xml/ns/javaee http://java.sun.com/xml/ns/javaee/web-app_2_5.xsd"
         version="2.5">
<!--加载spring-security配置文件-->
  <context-param>
    <param-name>contextConfigLocation</param-name>
    <param-value>classpath:spring-security.xml</param-value>
  </context-param>
  <listener>
    <listener-class>
      org.springframework.web.context.ContextLoaderListener
    </listener-class>
  </listener>
  <filter>
    <filter-name>springSecurityFilterChain</filter-name>
    <filter-class>org.springframework.web.filter.DelegatingFilterProxy</filter-class>
  </filter>
  <filter-mapping>
    <filter-name>springSecurityFilterChain</filter-name>
    <url-pattern>/*</url-pattern>
  </filter-mapping>
</web-app>
3、spring-security.xml配置文件
intercept-url 表示拦截页面
/* 表示的是该目录下的资源,只包括本级目录不包括下级目录
/** 表示的是该目录以及该目录下所有级别子目录的资源
form-login 为开启表单登陆
use-expressions 为是否使用使用 Spring 表达式语言( SpEL ),默认为true ,如果开启,则拦截的配置应该写成以下形式
login-processing-url=”/login2” 指定其他登录页
username-parameter="" password-parameter="" 来改写login的 用户名和属性名
<?xml version="1.0" encoding="UTF-8"?>
<beans:beans xmlns="http://www.springframework.org/schema/security"
             xmlns:beans="http://www.springframework.org/schema/beans"
        xmlns:xsi="http://www.w3.org/2001/XMLSchema-instance"
             xsi:schemaLocation="http://www.springframework.org/schema/beans http://www.springframework.org/schema/beans/spring-beans.xsd
             http://www.springframework.org/schema/security http://www.springframework.org/schema/security/spring-security.xsd">
    <!-- 页面拦截规则 表示拦截的页面  use-expressions为是否适用SpEL,默认为true,-->
    <http use-expressions="false">
        <intercept-url pattern="/**" access="ROLE_USER" />
        <!-- 开启表单登陆 ,若use-expressions设置为true,login-processing-url="/login2" 用于指定其他登录页-->
        <form-login/>
    </http>
    <!-- 认证管理器 -->
    <authentication-manager>
        <authentication-provider>
            <user-service>
                <!--可以添加很多个   ROLE_USER角色,用户必须上面的角色-->
                <user name="admin" password="123456" authorities="ROLE_USER"/>
            </user-service>
        </authentication-provider>
    </authentication-manager>
</beans:beans>

二、创建我们自己的登陆界面
默认不登录,直接跳转到我们的登录界面,登陆失败,跳转到失败页面
1、创建login.html,login_error.html
<!DOCTYPE html>
<html>
<head>
    <meta charset="UTF-8">
    <title>登陆</title>
</head>
<body>

--欢迎的登陆我的系统--
<form action="/login" method="post">
    用户名:<input name="username"><br>
    密码:<input name="password"><br>
    <button>登陆</button>
</form>
</body>
</html>
<!DOCTYPE html>
<html>
<head>
    <meta charset="UTF-8">
    <title>首页</title>
</head>
<body>
用户名或密码错误~~~
</body>
</html>
2、修改spring-security.xml配置文件
security="none" 设置此资源不被拦截.
login-page:指定登录页面。
authentication-failure-url:指定了身份验证失败时跳转到的页面。
default-target-url:指定了成功进行身份验证和授权后默认呈现给用户的页面。
csrf disabled="true"
<?xml version="1.0" encoding="UTF-8"?>
<beans:beans xmlns="http://www.springframework.org/schema/security"
             xmlns:beans="http://www.springframework.org/schema/beans" xmlns:xsi="http://www.w3.org/2001/XMLSchema-instance"
             xsi:schemaLocation="http://www.springframework.org/schema/beans http://www.springframework.org/schema/beans/spring-beans.xsd
                        http://www.springframework.org/schema/security http://www.springframework.org/schema/security/spring-security.xsd">

    <!-- 以下界面不进行拦截 -->
    <http pattern="/login.html" security="none" ></http>
    <http pattern="/login_error.html" security="none" ></http>
   <!--  配置拦截规则 -->
    <http use-expressions="false">
       <!-- 拦截所有请求,跳转至登录页面。  配置角色 -->
        <intercept-url pattern="/*" access="ROLE_USER"/>
        <form-login login-page="/login.html" default-target-url="/index.html" authentication-failure-url="/login_error.html"/>
        <csrf disabled="true"/>
    </http>
    <!-- 认证管理器 -->
    <authentication-manager>
        <authentication-provider>
            <user-service>
                <!--可以添加很多个   ROLE_USER角色,用户必须上面的角色-->
                <user name="admin" password="123456" authorities="ROLE_USER"/>
            </user-service>
        </authentication-provider>
    </authentication-manager>
</beans:beans>
如果你没有设置登录页security="none" ,将会出现以下错误

注意:
我在自己操作时下方的登陆页面写成了“login.html”忘记了“/”也会报上面的错误,希望大家注意
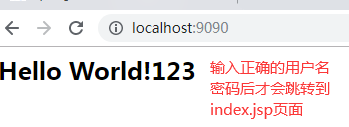
此时访问页面会跳转到我们自己创建的登陆界面,且只有输入正确的用户名和密码之后才会跳转到inex.html页面

 浙公网安备 33010602011771号