centos7.3环境使用kubeadm离线部署kubernetes1.10.1
环境要求:本文部署方式必须在centos7.3系统环境下部署,因为在centos7.4和centos7.5环境下测试部署不成功!
linux-node1 master节点 172.16.1.201
linux-node2 node节点 172.16.1.202
部署前确保关闭防火墙,SELinux,swap(所有节点)
#设置主机名
[root@linux-node1 ~]# hostnamectl  --static  set-hostname linux-node1.goser.com
#设置hosts文件
[root@linux-node1 ~]# vim /etc/hosts

127.0.0.1   localhost localhost.localdomain localhost4 localhost4.localdomain
4
::1         localhost localhost.localdomain localhost6 localhost6.localdomain
6
172.16.1.201    linux-node1 linux-node1.goser.com
172.16.1.202    linux-node2 linux-node2.goser.com
#关闭防火墙、selinux略
#关闭swap
[root@linux-node1 ~]# swapoff -a
[root@linux-node1 ~]# vim  /etc/fstab
#UUID=357d0896-049e-4259-8d90-a267e3f2728d swap                    swap    de
faults        0 0
#重启设备
[root@linux-node1 ~]# reboot
新版本的kubernetes部署方式为启动kubernetes各个组件的docker容器,如果是在线部署kubernetes的话,就需要从k8s.gcr.io站点下载docker镜像来启动容器,而国内访问k8s.gcr.io是被墙了的,所以为了能顺利地部署kubernetes只能使用离线方式来部署。
首先下载部署kubernetes的离线包,下载地址为:https://pan.baidu.com/s/1rK_xt8OOJC002DC1qj-avw
master节点和node节点需要做如下相同操作
#上传好kubernetes的离线包,解压后如下所示
[root@linux-node1 ~]# ls
admin-role.yaml  docker-packages.tar  k8s-images-1.10.tar.gz  kube-packages-1.10.1.tar              kubernetes-dashboard-http.yaml
anaconda-ks.cfg  heapster.tar         kube-flannel.yml        kubernetes-dashboard-admin.rbac.yaml
#安装docker,这里安装的docker为docker-ce
[root@linux-node1 ~]# tar  xf  docker-packages.tar
[root@linux-node1 ~]# cd docker-packages
[root@linux-node1 docker-packages]# rpm  -Uvh  *
[root@linux-node1 ~]# systemctl  enable  docker
[root@linux-node1 ~]# systemctl  start docker
#添加docker的加速器,这里用到的是阿里云的docker加速器
[root@linux-node1 ~]# vim /etc/docker/daemon.json

{
  "registry-mirrors": ["https://0wtxe175.mirror.aliyuncs.com"]
}
[root@linux-node1 ~]# systemctl  daemon-reload
[root@linux-node1 ~]# systemctl  restart  docker
#查看docker的版本信息
[root@linux-node1 ~]# docker version
Client:
 Version:       18.04.0-ce
 API version:   1.37
 Go version:    go1.9.4
 Git commit:    3d479c0
 Built: Tue Apr 10 18:21:36 2018
 OS/Arch:       linux/amd64
 Experimental:  false
 Orchestrator:  swarm

Server:
 Engine:
  Version:      18.04.0-ce
  API version:  1.37 (minimum version 1.12)
  Go version:   go1.9.4
  Git commit:   3d479c0
  Built:        Tue Apr 10 18:25:25 2018
  OS/Arch:      linux/amd64
  Experimental: false
#安装kubeadm  kubectl  kubelet kubernetes-cni  socat
[root@linux-node1 ~]# tar  xf  kube-packages-1.10.1.tar
[root@linux-node1 ~]# cd kube-packages-1.10.1
[root@linux-node1 kube-packages-1.10.1]# rpm  -Uvh  *
#查看docker的Cgroup驱动,驱动为cgroupfs
[root@linux-node1 ~]# docker info|grep Cgroup
Cgroup Driver: cgroupfs
#要使kubelet能够正常启动,那么kubelet的cgoup驱动要和docker保持一致,修改如下
[root@linux-node1 ~]# vim  /etc/systemd/system/kubelet.service.d/10-kubeadm.conf
Environment="KUBELET_CGROUP_ARGS=--cgroup-driver=cgroupfs"
[root@linux-node1 ~]# systemctl daemon-reload
[root@linux-node1 ~]# systemctl  enable kubelet
[root@linux-node1 ~]# systemctl  start  kubelet
#修改iptables,不然后面使用kubeadm命令会报错
[root@linux-node1 ~]# vim  /etc/sysctl.d/k8s.conf

net.bridge.bridge-nf-call-ip6tables = 1
net.bridge.bridge-nf-call-iptables = 1
[root@linux-node1 ~]# sysctl --system
#导入kubernetes镜像,总共11个镜像
[root@linux-node1 ~]# docker  load  -i  k8s-images-1.10.tar.gz
待master和node节点按上述部署方式部署完成后,接下来就可以在master节点对kubernetes做初始化操作了。这里一定要指定kubernetes的版本为1.10.1


[root@linux-node1 ~]# kubeadm init --kubernetes-version=v1.10.1 --token-ttl 0 --pod-network-cidr=10.244.0.0/16
[init] Using Kubernetes version: v1.10.1
[init] Using Authorization modes: [Node RBAC]
[preflight] Running pre-flight checks.
        [WARNING SystemVerification]: docker version is greater than the most recently validated version. Docker version: 18.04.0-ce. Max validated version: 17.03
        [WARNING FileExisting-crictl]: crictl not found in system path
Suggestion: go get github.com/kubernetes-incubator/cri-tools/cmd/crictl
[certificates] Generated ca certificate and key.
[certificates] Generated apiserver certificate and key.
[certificates] apiserver serving cert is signed for DNS names [linux-node1.goser.com kubernetes kubernetes.default kubernetes.default.svc kubernetes.default.svc.cluster.local] and IPs [10.96.0.1 172.16.1.201]
[certificates] Generated apiserver-kubelet-client certificate and key.
[certificates] Generated etcd/ca certificate and key.
[certificates] Generated etcd/server certificate and key.
[certificates] etcd/server serving cert is signed for DNS names [localhost] and IPs [127.0.0.1]
[certificates] Generated etcd/peer certificate and key.
[certificates] etcd/peer serving cert is signed for DNS names [linux-node1.goser.com] and IPs [172.16.1.201]
[certificates] Generated etcd/healthcheck-client certificate and key.
[certificates] Generated apiserver-etcd-client certificate and key.
[certificates] Generated sa key and public key.
[certificates] Generated front-proxy-ca certificate and key.
[certificates] Generated front-proxy-client certificate and key.
[certificates] Valid certificates and keys now exist in "/etc/kubernetes/pki"
[kubeconfig] Wrote KubeConfig file to disk: "/etc/kubernetes/admin.conf"
[kubeconfig] Wrote KubeConfig file to disk: "/etc/kubernetes/kubelet.conf"
[kubeconfig] Wrote KubeConfig file to disk: "/etc/kubernetes/controller-manager.conf"
[kubeconfig] Wrote KubeConfig file to disk: "/etc/kubernetes/scheduler.conf"
[controlplane] Wrote Static Pod manifest for component kube-apiserver to "/etc/kubernetes/manifests/kube-apiserver.yaml"
[controlplane] Wrote Static Pod manifest for component kube-controller-manager to "/etc/kubernetes/manifests/kube-controller-manager.yaml"
[controlplane] Wrote Static Pod manifest for component kube-scheduler to "/etc/kubernetes/manifests/kube-scheduler.yaml"
[etcd] Wrote Static Pod manifest for a local etcd instance to "/etc/kubernetes/manifests/etcd.yaml"
[init] Waiting for the kubelet to boot up the control plane as Static Pods from directory "/etc/kubernetes/manifests".
[init] This might take a minute or longer if the control plane images have to be pulled.
[apiclient] All control plane components are healthy after 19.504087 seconds
[uploadconfig] Storing the configuration used in ConfigMap "kubeadm-config" in the "kube-system" Namespace
[markmaster] Will mark node linux-node1.goser.com as master by adding a label and a taint
[markmaster] Master linux-node1.goser.com tainted and labelled with key/value: node-role.kubernetes.io/master=""
[bootstraptoken] Using token: 6k8r7z.jpkng1irnz45wykr
[bootstraptoken] Configured RBAC rules to allow Node Bootstrap tokens to post CSRs in order for nodes to get long term certificate credentials
[bootstraptoken] Configured RBAC rules to allow the csrapprover controller automatically approve CSRs from a Node Bootstrap Token
[bootstraptoken] Configured RBAC rules to allow certificate rotation for all node client certificates in the cluster
[bootstraptoken] Creating the "cluster-info" ConfigMap in the "kube-public" namespace
[addons] Applied essential addon: kube-dns
[addons] Applied essential addon: kube-proxy

Your Kubernetes master has initialized successfully!

To start using your cluster, you need to run the following as a regular user:

  mkdir -p $HOME/.kube
  sudo cp -i /etc/kubernetes/admin.conf $HOME/.kube/config
  sudo chown $(id -u):$(id -g) $HOME/.kube/config

You should now deploy a pod network to the cluster.
Run "kubectl apply -f [podnetwork].yaml" with one of the options listed at:
  https://kubernetes.io/docs/concepts/cluster-administration/addons/

You can now join any number of machines by running the following on each node
as root:

  kubeadm join 172.16.1.201:6443 --token 6k8r7z.jpkng1irnz45wykr --discovery-token-ca-cert-hash sha256:389aff00919dee40f0a6a3f04dd705c0bbfb934fd0a5b3321bef991f11b86ba2
根据kubernetes初始化操作完成后,执行提示的命令,保存kubeconfig
[root@linux-node1 ~]# mkdir -p $HOME/.kube
[root@linux-node1 ~]# sudo cp -i /etc/kubernetes/admin.conf $HOME/.kube/config
[root@linux-node1 ~]# sudo chown $(id -u):$(id -g) $HOME/.kube/config
此时执行kubectl get node 已经可以看到master节点,notready是因为还未部署网络插件
[root@linux-node1 ~]# kubectl  get  nodes
NAME                    STATUS     ROLES     AGE       VERSION
linux-node1.goser.com   NotReady   master    9m        v1.10.1
查看所有的pod,kubectl get pod –all-namespaces。kubedns也依赖于容器网络,此时pending是正常的
[root@linux-node1 ~]# kubectl get pod --all-namespaces
NAMESPACE     NAME                                            READY     STATUS    RESTARTS   AGE
kube-system   etcd-linux-node1.goser.com                      1/1       Running   0          9m
kube-system   kube-apiserver-linux-node1.goser.com            1/1       Running   0          9m
kube-system   kube-controller-manager-linux-node1.goser.com   1/1       Running   0          9m
kube-system   kube-dns-86f4d74b45-q7xw6                       0/3       Pending   0          10m
kube-system   kube-proxy-x4jtw                                1/1       Running   0          10m
kube-system   kube-scheduler-linux-node1.goser.com            1/1       Running   0          9m
配置KUBECONFIG变量:后面node节点加入到集群需要用到,所以这个变量必须设置,否则node节点加入集群会报证书过期错误
[root@linux-node1 ~]# echo "export KUBECONFIG=/etc/kubernetes/admin.conf" >> /etc/profile
[root@linux-node1 ~]# source /etc/profile
[root@linux-node1 ~]# echo $KUBECONFIG
/etc/kubernetes/admin.conf
部署flannel网络
k8s支持多种网络方案,flannel,calico,openvswitch,此处选择flannel。 在熟悉了k8s部署后,可以尝试其他网络方案。
[root@linux-node1 ~]# kubectl apply -f kube-flannel.yml
clusterrole.rbac.authorization.k8s.io "flannel" created
clusterrolebinding.rbac.authorization.k8s.io "flannel" created
serviceaccount "flannel" created
configmap "kube-flannel-cfg" created
daemonset.extensions "kube-flannel-ds" created
使用kubeadm命令将node节点加入到集群
使用在master节点上初始化后产生的node添加到集群的命令即可
#node节点加入到kebernetes集群
[root@linux-node2 ~]# kubeadm join 172.16.1.201:6443 --token 6k8r7z.jpkng1irnz45wykr --discovery-token-ca-cert-hash sha256:389aff00919dee40f0a6a3f04dd705c0bbfb934fd0a5b3321bef991f11b86ba2
验证node节点是否加入到集群中
[root@linux-node1 ~]# kubectl  get nodes
NAME                    STATUS    ROLES     AGE       VERSION
linux-node1.goser.com   Ready     master    16m       v1.10.1
linux-node2.goser.com   Ready     <none>    14s       v1.10.1
部署kubernetes-ui,及部署kubernetes-dashboard
[root@linux-node1 ~]# kubectl  apply -f kubernetes-dashboard-http.yaml
[root@linux-node1 ~]# kubectl apply -f admin-role.yaml
[root@linux-node1 ~]# kubectl  apply -f kubernetes-dashboard-admin.rbac.yaml
[root@linux-node1 ~]#  kubectl get pod --all-namespaces
NAMESPACE     NAME                                            READY     STATUS    RESTARTS   AGE
kube-system   etcd-linux-node1.goser.com                      1/1       Running   0          19m
kube-system   kube-apiserver-linux-node1.goser.com            1/1       Running   0          18m
kube-system   kube-controller-manager-linux-node1.goser.com   1/1       Running   0          18m
kube-system   kube-dns-86f4d74b45-q7xw6                       3/3       Running   0          19m
kube-system   kube-flannel-ds-9stw9                           1/1       Running   0          3m
kube-system   kube-flannel-ds-ndfmk                           1/1       Running   0          7m
kube-system   kube-proxy-h4nq6                                1/1       Running   0          3m
kube-system   kube-proxy-x4jtw                                1/1       Running   0          19m
kube-system   kube-scheduler-linux-node1.goser.com            1/1       Running   0          19m
kube-system   kubernetes-dashboard-5c469b58b8-ll62w           1/1       Running   0          1m
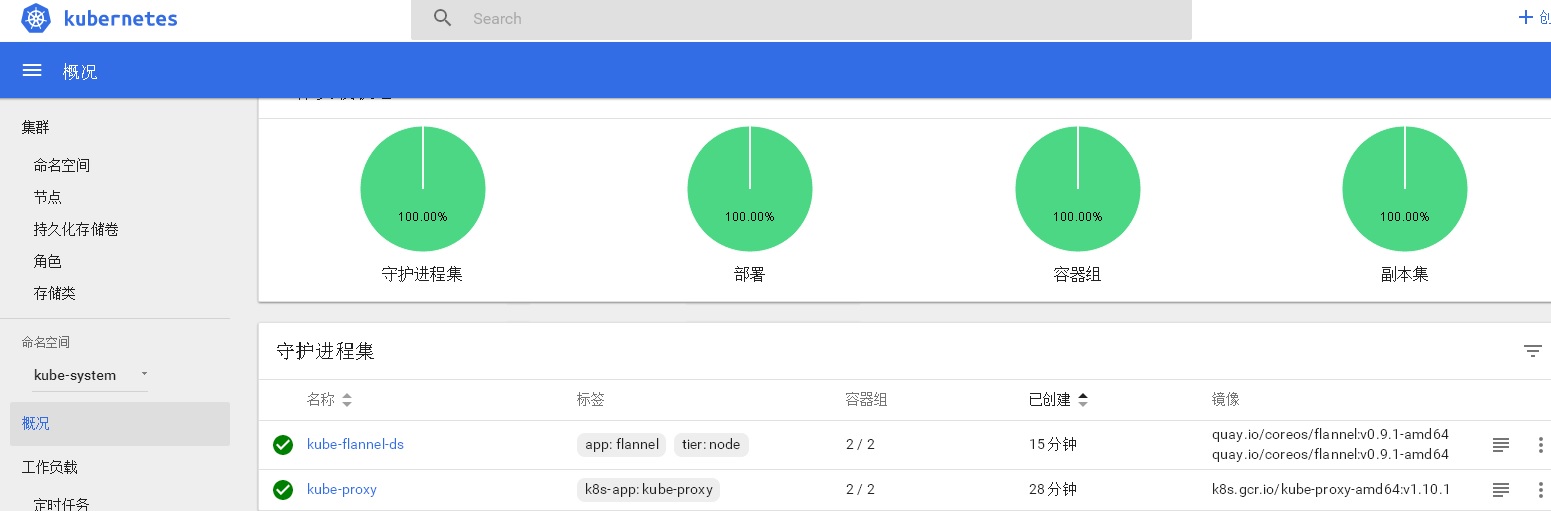
查看kubernetes-dashboard的web界面如下

 浙公网安备 33010602011771号