

电子架子鼓棒制作
平时感兴趣学习架子鼓玩,但是有很多限制。
1架子鼓实物占地,费钱一套900起步,噪声大扰民。
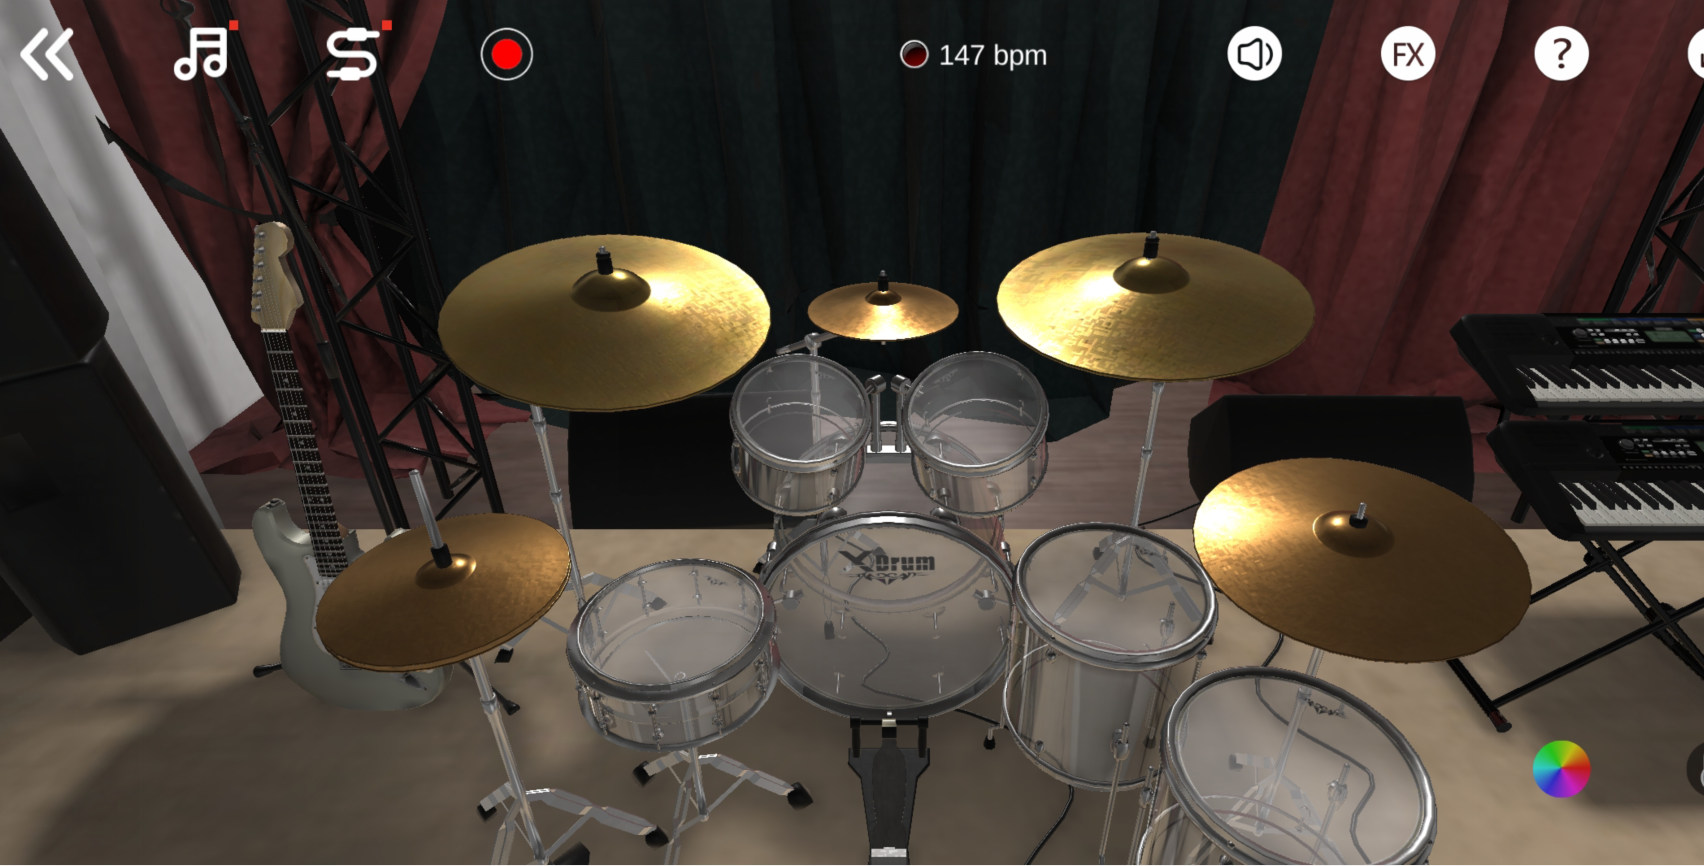
2手机app模拟架子鼓软件,触摸发生没有敲击感觉。
能否做一对鼓棒敲击空气中不同位置,使用手机当发声器,戴上耳机或者插上音响听声音???
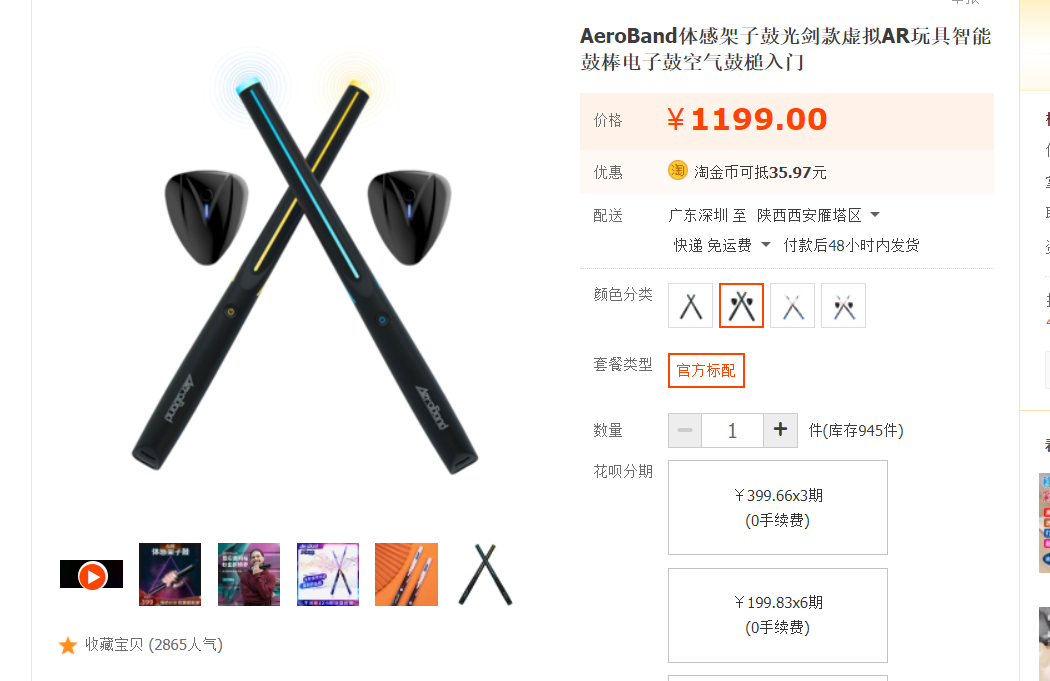
淘宝上查了下还真的有在卖??? 一个外国小哥哥做出来了而且众筹了???
https://item.taobao.com/item.htm?spm=a230r.1.14.24.4c7963f3lSEiex&id=635844845233&ns=1&abbucket=10#detail
作为一个diy理工科男,有什么是我们没有办法自己做一个的?(主要是太贵了,而且不利于后期自定义修改),造起来。
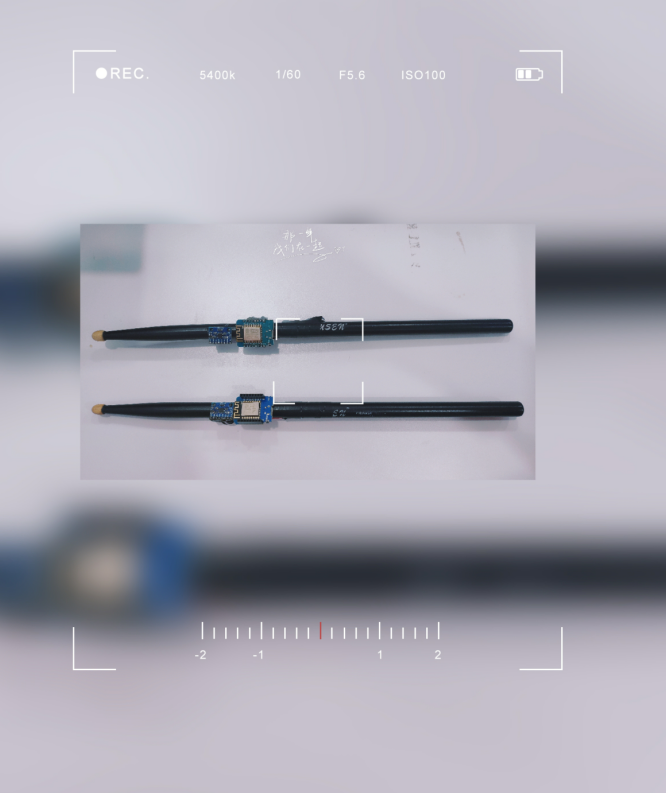
第一版 实物
立个flag,未来我要用自己做的鼓棒敲会这个伴奏。

整体原理
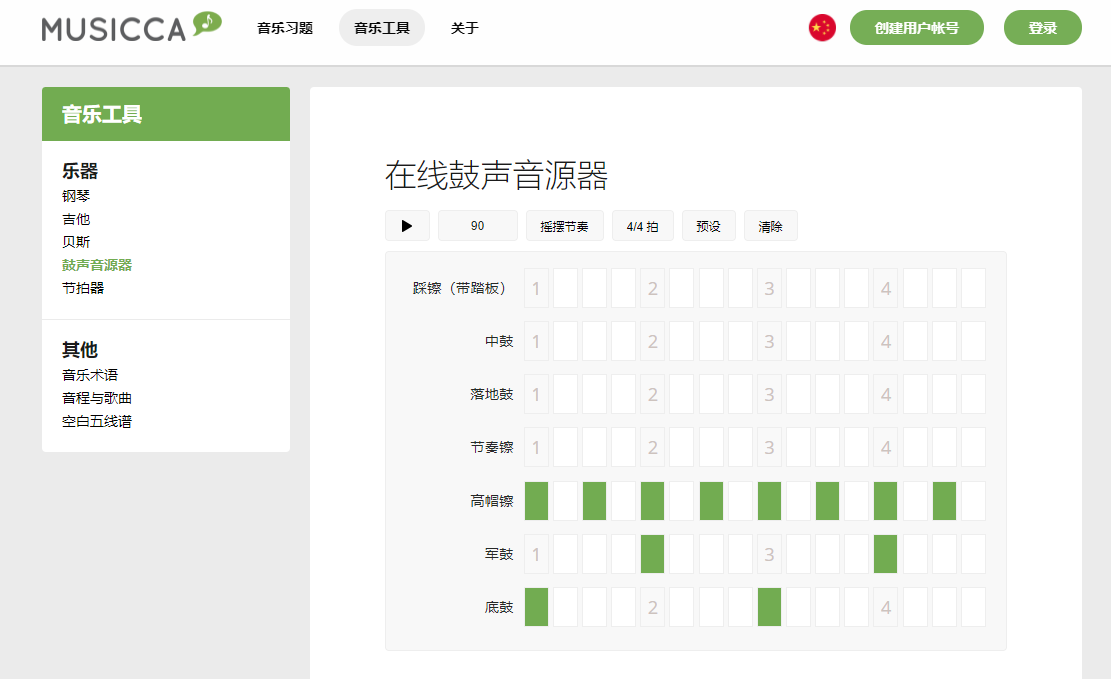
1 音效模拟
首先需要获取每一个鼓声的原生mp3,这里发现一个网站,配合录音软件截取。
https://www.musicca.com/zh/drum-machine
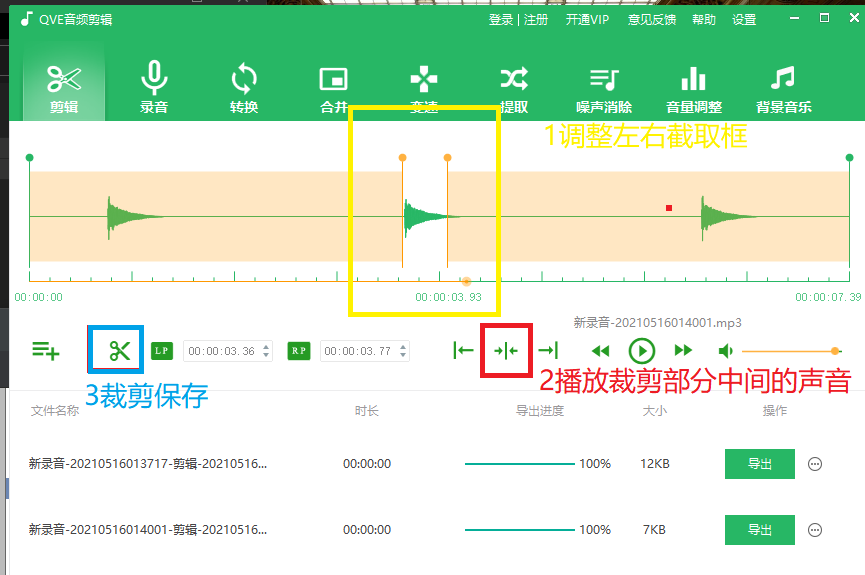
2 mp3录音和剪辑软件
录制鼓声的mp3并且裁剪有效音效。
(当然有更好的资源可以留言分享啊,第一版凑合用)
http://www.qvevideo.com/business/audio?source=baidu&plan=QVEyinpinjianji&unit=mp3jianji&keyword=mp3jianqie&e_creative=41700007844&e_keywordid=188718847046&e_keywordid2=188718847046&jingxuan=1&bd_vid=8150660224007026547
选择系统录音,这样音质最高。
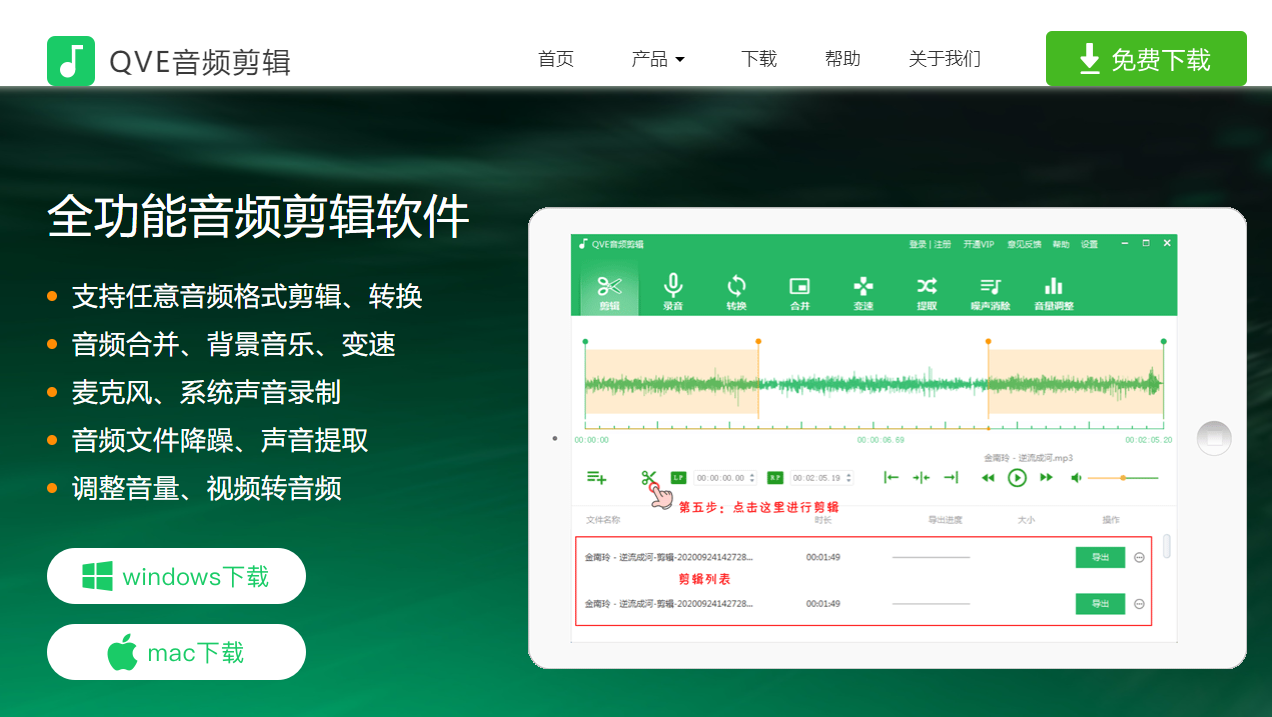
网页开启播放声音
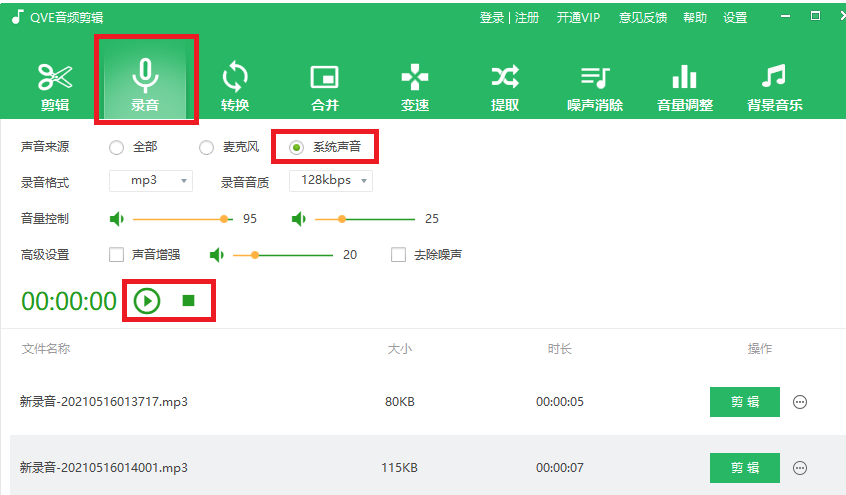
这样就可以获取一个单纯的鼓声音乐。
后期用手机app调用这个mp3播放模拟鼓声。
2实物调试
1获取实物
鼓棒
可用又便宜的店家。
https://item.jd.com/15976274162.html

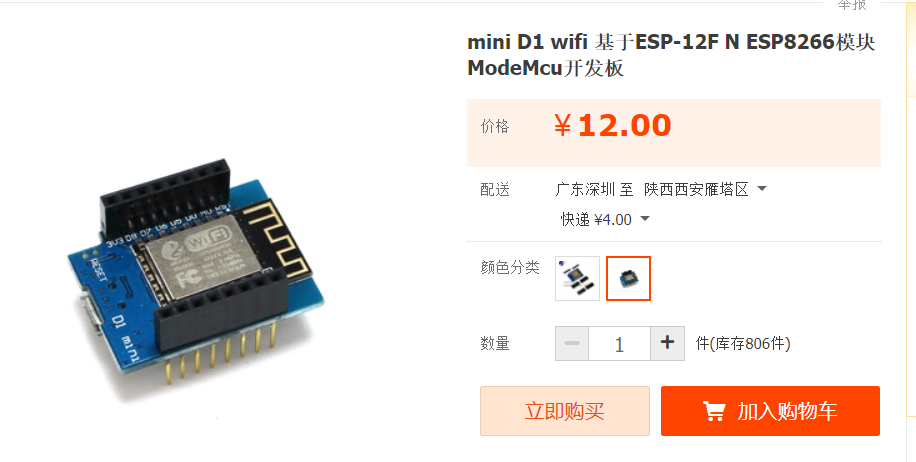
单片机
用来读取加速度数值和建立tcp连接手机通信,发送指令。
ESP8266 开发板 带排针 D1 mini
https://item.taobao.com/item.htm?spm=a1z09.2.0.0.58d52e8d5L6lht&id=561146450656&_u=m1qf7bf56abb
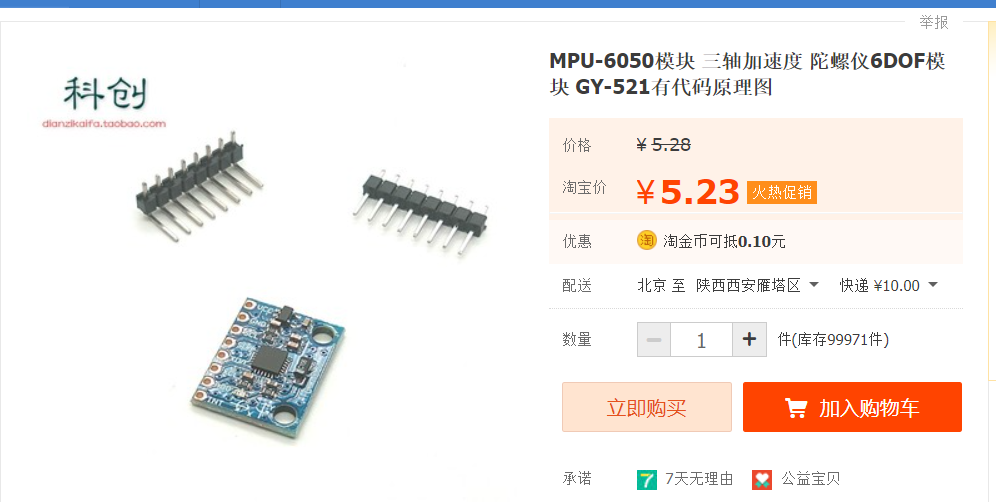
传感器 获取3轴加速度
用来获取手部运动
https://item.taobao.com/item.htm?spm=a1z09.2.0.0.58d52e8d5L6lht&id=619413655777&_u=m1qf7bf5d5d9
连线图

调试阶段用usb线供电,未来可用一节可以充电的锂电池。
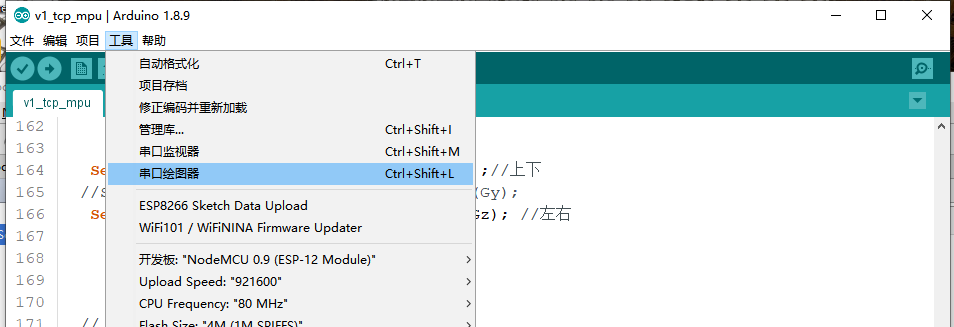
2烧录程序
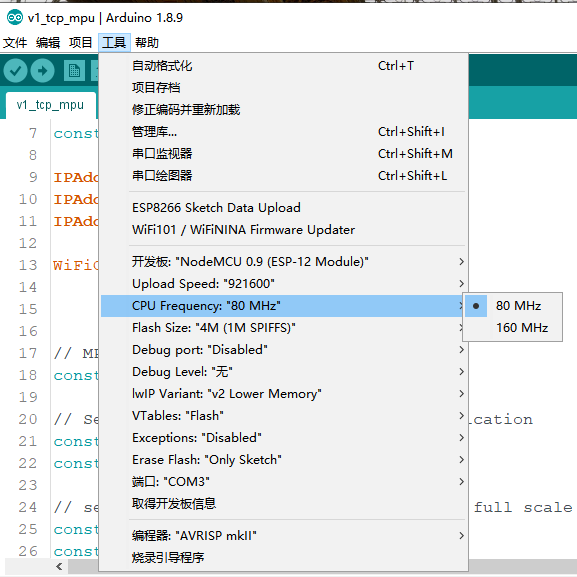
代码修改
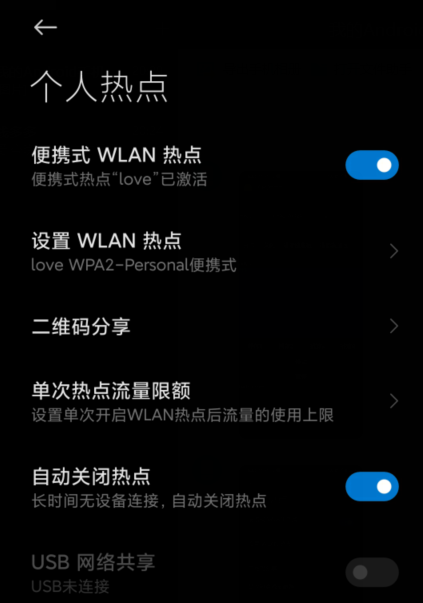
1修改wifi连接信息
手机辐射一个wifi,名字 love 密码 love123456(根据自己的修改对应名字)
2修改tcp的地址和端口
打开手机端app 查看 app中tcp服务器的ip,修改到单片机程序里
(架子鼓app界面很丑,未来可以加上鼓的界面,现在第一版只是调试命令窗口)
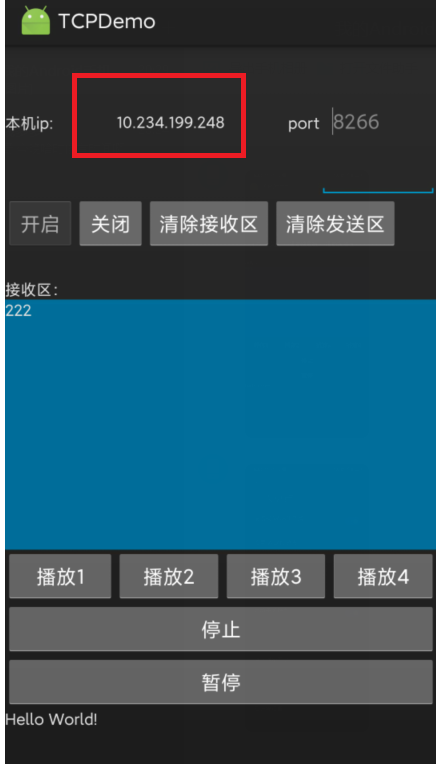
未来界面可以优化(有没有开源app开发好心人)
#include <ESP8266WiFi.h>
#include <Wire.h>
const char* ssid = "love";
const char* password = "love123456";

const char* host = "10.120.236.68";
const int httpPort = 8266;

IPAddress staticIP(192,168,1,20);
IPAddress gateway(192,168,1,1);
IPAddress subnet(255,255,255,0);

WiFiClient client;


// MPU6050 Slave Device Address
const uint8_t MPU6050SlaveAddress = 0x68;

// Select SDA and SCL pins for I2C communication
const uint8_t scl = D1;
const uint8_t sda = D2;

// sensitivity scale factor respective to full scale setting provided in datasheet
const uint16_t AccelScaleFactor = 16384;
const uint16_t GyroScaleFactor = 131;

// MPU6050 few configuration register addresses
const uint8_t MPU6050_REGISTER_SMPLRT_DIV   =  0x19;
const uint8_t MPU6050_REGISTER_USER_CTRL    =  0x6A;
const uint8_t MPU6050_REGISTER_PWR_MGMT_1   =  0x6B;
const uint8_t MPU6050_REGISTER_PWR_MGMT_2   =  0x6C;
const uint8_t MPU6050_REGISTER_CONFIG       =  0x1A;
const uint8_t MPU6050_REGISTER_GYRO_CONFIG  =  0x1B;
const uint8_t MPU6050_REGISTER_ACCEL_CONFIG =  0x1C;
const uint8_t MPU6050_REGISTER_FIFO_EN      =  0x23;
const uint8_t MPU6050_REGISTER_INT_ENABLE   =  0x38;
const uint8_t MPU6050_REGISTER_ACCEL_XOUT_H =  0x3B;
const uint8_t MPU6050_REGISTER_SIGNAL_PATH_RESET  = 0x68;

int16_t AccelX, AccelY, AccelZ, Temperature, GyroX, GyroY, GyroZ;

void I2C_Write(uint8_t deviceAddress, uint8_t regAddress, uint8_t data){
  Wire.beginTransmission(deviceAddress);
  Wire.write(regAddress);
  Wire.write(data);
  Wire.endTransmission();
}

// read all 14 register
void Read_RawValue(uint8_t deviceAddress, uint8_t regAddress){
  Wire.beginTransmission(deviceAddress);
  Wire.write(regAddress);
  Wire.endTransmission();
  Wire.requestFrom(deviceAddress, (uint8_t)14);
  AccelX = (((int16_t)Wire.read()<<8) | Wire.read());
  AccelY = (((int16_t)Wire.read()<<8) | Wire.read());
  AccelZ = (((int16_t)Wire.read()<<8) | Wire.read());
  Temperature = (((int16_t)Wire.read()<<8) | Wire.read());
  GyroX = (((int16_t)Wire.read()<<8) | Wire.read());
  GyroY = (((int16_t)Wire.read()<<8) | Wire.read());
  GyroZ = (((int16_t)Wire.read()<<8) | Wire.read());
}

//configure MPU6050
void MPU6050_Init(){
  delay(150);
  I2C_Write(MPU6050SlaveAddress, MPU6050_REGISTER_SMPLRT_DIV, 0x07);
  I2C_Write(MPU6050SlaveAddress, MPU6050_REGISTER_PWR_MGMT_1, 0x01);
  I2C_Write(MPU6050SlaveAddress, MPU6050_REGISTER_PWR_MGMT_2, 0x00);
  I2C_Write(MPU6050SlaveAddress, MPU6050_REGISTER_CONFIG, 0x00);
  I2C_Write(MPU6050SlaveAddress, MPU6050_REGISTER_GYRO_CONFIG, 0x00);//set +/-250 degree/second full scale
  I2C_Write(MPU6050SlaveAddress, MPU6050_REGISTER_ACCEL_CONFIG, 0x00);// set +/- 2g full scale
  I2C_Write(MPU6050SlaveAddress, MPU6050_REGISTER_FIFO_EN, 0x00);
  I2C_Write(MPU6050SlaveAddress, MPU6050_REGISTER_INT_ENABLE, 0x01);
  I2C_Write(MPU6050SlaveAddress, MPU6050_REGISTER_SIGNAL_PATH_RESET, 0x00);
  I2C_Write(MPU6050SlaveAddress, MPU6050_REGISTER_USER_CTRL, 0x00);
}

void setup(void)
{
  Serial.begin(115200);
  Serial.println();


  Serial.printf("Connecting to %s\n", ssid);
 // WiFi.config(staticIP, gateway, subnet);
  WiFi.begin(ssid, password);
  while (WiFi.status() != WL_CONNECTED)
  {
    delay(500);
    Serial.print(".");
  }
  Serial.println();
  Serial.print("Connected, IP address: ");
  Serial.println(WiFi.localIP());


  if (!client.connect(host, httpPort)) {
    Serial.println("connection failed");
    return;
  }


   Wire.begin(sda, scl);
   MPU6050_Init();


}
 int i=0;

int zuoyou=0;//0 中间

double Ax, Ay, Az, T, Gx, Gy, Gz;

void loop() {


  Read_RawValue(MPU6050SlaveAddress, MPU6050_REGISTER_ACCEL_XOUT_H);

  //divide each with their sensitivity scale factor
  //Ax = (double)AccelX/AccelScaleFactor;
  //Ay = (double)AccelY/AccelScaleFactor;
  //Az = (double)AccelZ/AccelScaleFactor;
  //T = (double)Temperature/340+36.53; //temperature formula
  Gx = (double)GyroX/GyroScaleFactor;
  Gy = (double)GyroY/GyroScaleFactor;
  Gz = (double)GyroZ/GyroScaleFactor;


  if (Gz>120){
    zuoyou=1;
   // Serial.println("回右手中鼓 ");
    }
  else if(Gz<-160){
    zuoyou=0;
   // Serial.println("切右手右鼓 ");
    }


    if (Gx<-150){// x逆时针往下敲击 负号

        String msg=String("")+String(0)+"";
        if(zuoyou==1){
          msg=String("")+String(2)+"";
         //  Serial.println("3敲回右中鼓 ");
        }
        else if(zuoyou==0){
          msg=String("")+String(1)+"";
          //  Serial.println("4敲右右鼓 ");
          }

         client.print(msg);
         delay(180);
    }


   //Serial.print(" Gx: "); Serial.print(Gx);//上下
  //Serial.print(" Gy: "); Serial.println(Gy);
   //Serial.print(" Gz: "); Serial.println(Gz); //左右


  // if(i>4){i=0;}
  // String msg=String("")+String(i++)+"";
  // client.print(msg);
  // delay(2000);


  }
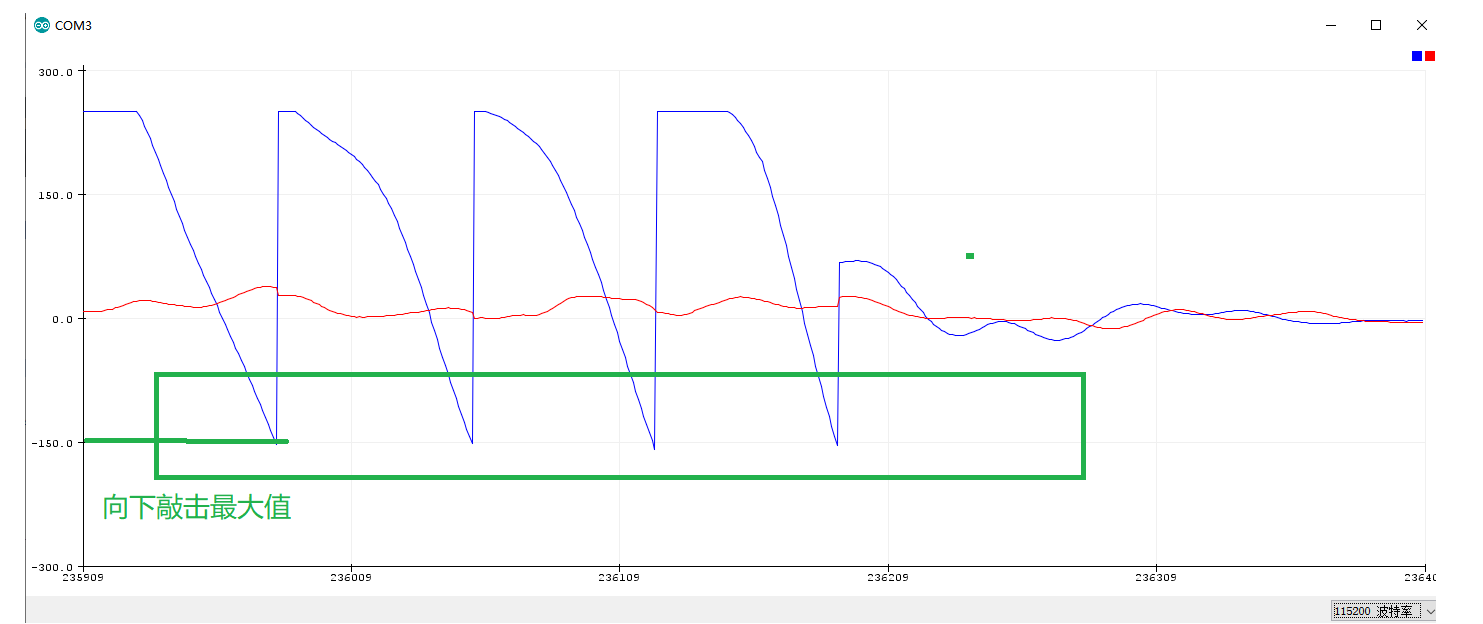
3调试阈值
鼓棒绑上传感器,水平左右晃动,测试出左右最大的数值,用来做切换鼓的判断。 敲击上下也是同理,测出敲击阈值,超过就触发。
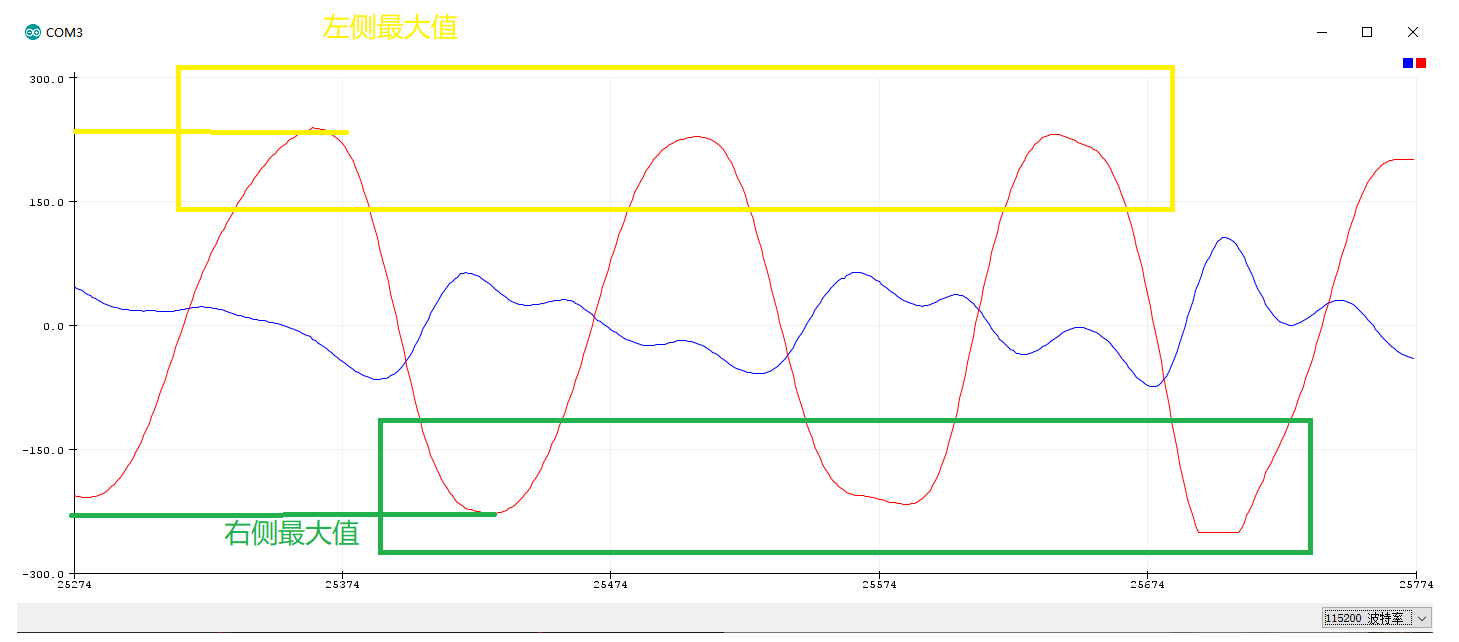
然后测试出上下敲击的最大值
手机APP
开发软件

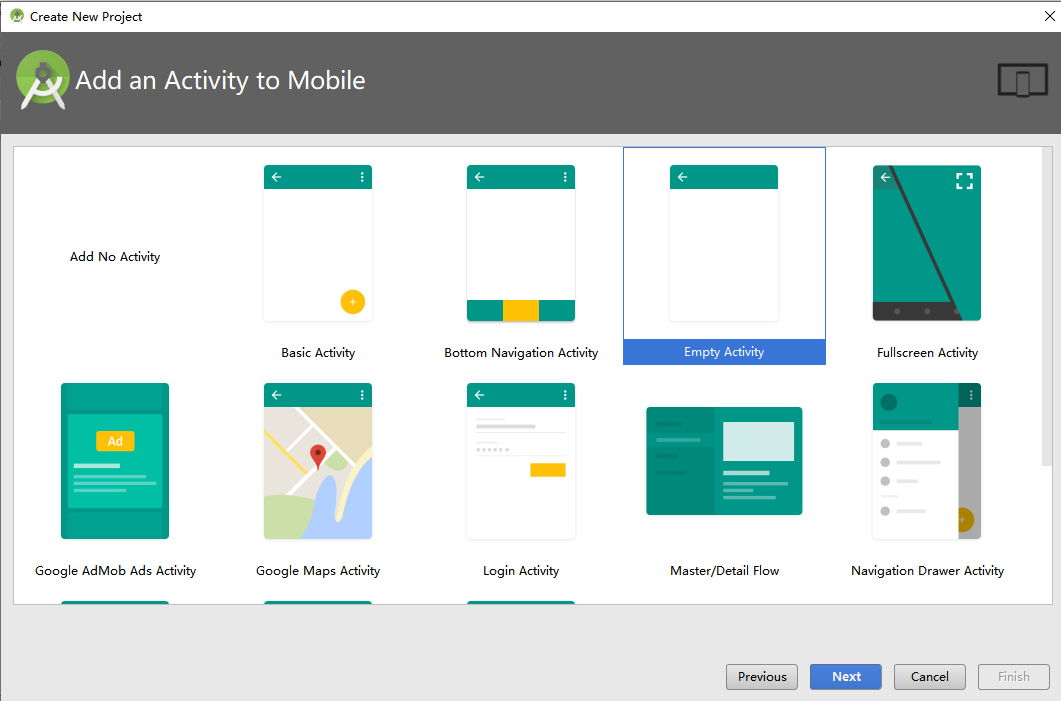
建立一个空白工程
添加代码
1我们使用tcp通信传输命令,所以要给予网络权限

<uses-permission android:name="android.permission.INTERNET"/>
2界面布局
布局管理器,初步调试版本,重在接收消息。
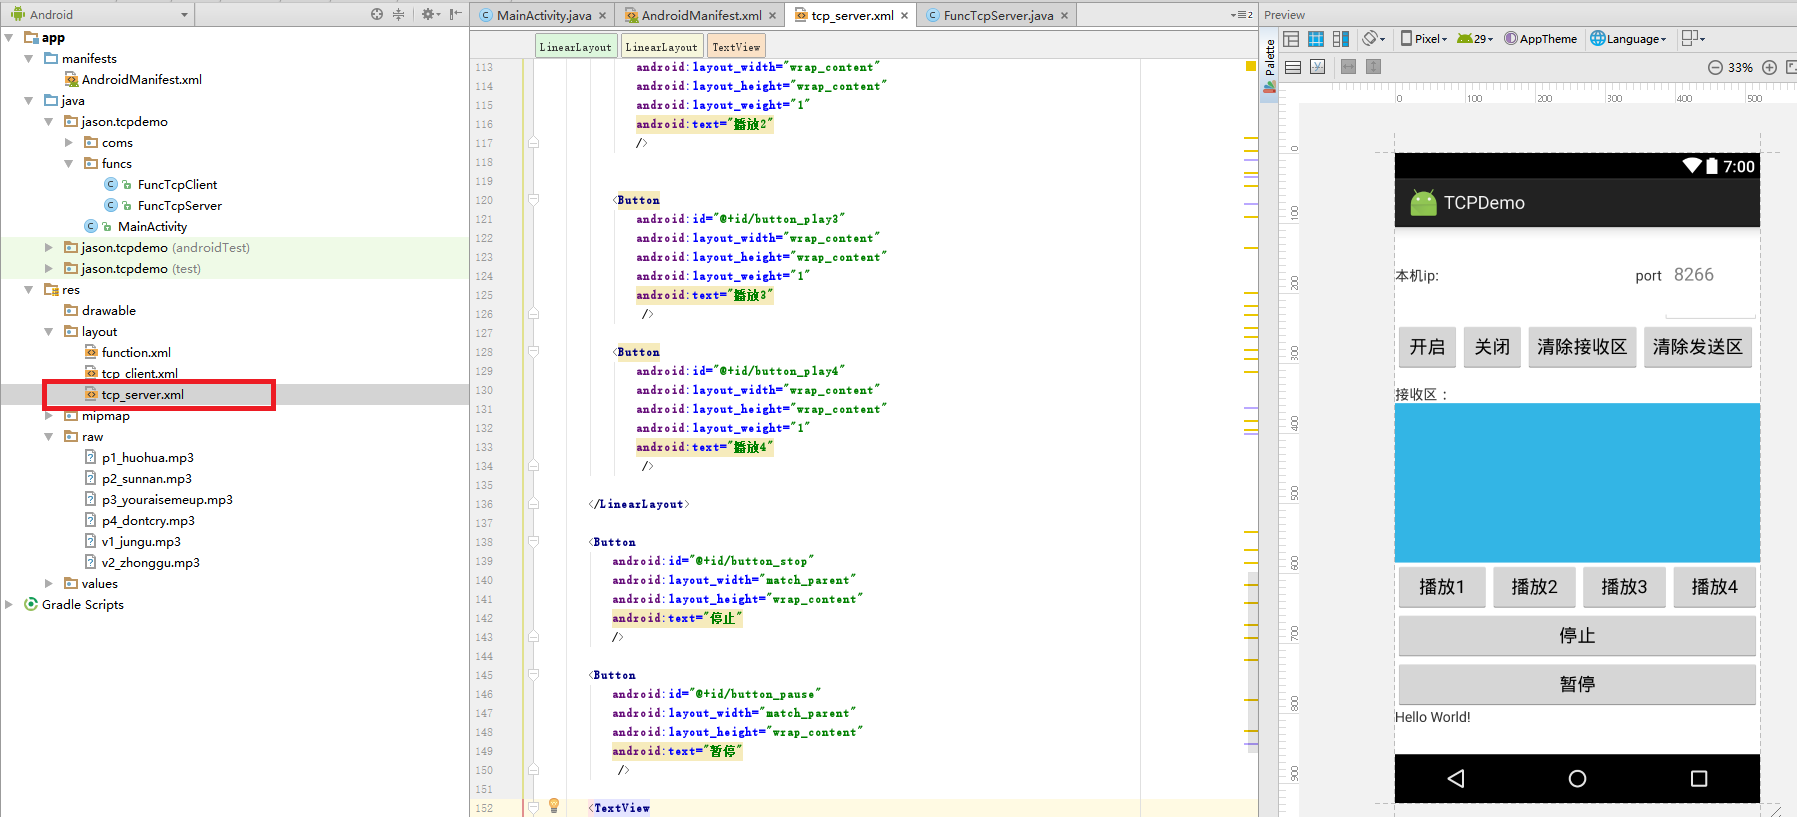
<LinearLayout xmlns:android="http://schemas.android.com/apk/res/android"
    android:layout_width="match_parent"
    android:layout_height="match_parent"
    android:orientation="vertical"
    android:weightSum="5"


    >

    <LinearLayout
        android:layout_width="match_parent"
        android:layout_height="0dp"
        android:orientation="vertical"
        android:layout_weight="1">
        <LinearLayout
            android:layout_width="match_parent"
            android:layout_height="0dp"
            android:layout_weight="1"
            android:orientation="horizontal">
            <TextView
                android:layout_width="wrap_content"
                android:layout_height="wrap_content"
                android:text="本机ip:"/>
            <TextView
                android:layout_width="0dp"
                android:layout_weight="2"
                android:layout_height="match_parent"
                android:gravity="center"
                android:id="@+id/txt_Server_Ip"/>
            <TextView
                android:layout_width="wrap_content"
                android:layout_height="wrap_content"
                android:text="port"/>

            <EditText
                android:id="@+id/edit_Server_Port"
                android:layout_width="0dp"
                android:layout_height="match_parent"
                android:layout_weight="1"
                android:hint="8266"
                android:inputType="number" />
        </LinearLayout>


    </LinearLayout>
    <LinearLayout
        android:layout_width="match_parent"
        android:layout_height="wrap_content"
        >
        <Button
            android:layout_width="wrap_content"
            android:layout_height="wrap_content"
            android:text="开启"
            android:id="@+id/btn_tcpServerConn"/>
        <Button
            android:layout_width="wrap_content"
            android:layout_height="wrap_content"
            android:text="关闭"
            android:id="@+id/btn_tcpServerClose"/>
        <Button
            android:layout_width="wrap_content"
            android:layout_height="wrap_content"
            android:text="清除接收区"
            android:id="@+id/btn_tcpCleanServerRecv"/>
        <Button
            android:layout_width="wrap_content"
            android:layout_height="wrap_content"
            android:text="清除发送区"
            android:id="@+id/btn_tcpCleanServerSend"/>
    </LinearLayout>
    <LinearLayout
        android:layout_width="match_parent"
        android:layout_height="0dp"
        android:orientation="vertical"
        android:layout_weight="2">
        <TextView
            android:layout_width="match_parent"
            android:layout_height="0dp"
            android:layout_weight="1"
            android:gravity="bottom"
            android:text="接收区:" />
        <TextView
            android:layout_width="match_parent"
            android:layout_weight="5"
            android:layout_height="0dp"
            android:id="@+id/txt_ServerRcv"
            android:background="@android:color/holo_blue_light"
            />

    </LinearLayout>


    <LinearLayout
        android:layout_width="match_parent"
        android:layout_height="0dp"
        android:orientation="vertical"
        android:layout_weight="2">

        <LinearLayout
            android:layout_width="match_parent"
            android:layout_height="wrap_content"
            >

            <Button
                android:id="@+id/button_play1"
                android:layout_width="wrap_content"
                android:layout_height="wrap_content"
                android:text="播放1"
                android:layout_weight="1.25" />

            <Button
                android:id="@+id/button_play2"
                android:layout_width="wrap_content"
                android:layout_height="wrap_content"
                android:layout_weight="1"
                android:text="播放2"
                />


            <Button
                android:id="@+id/button_play3"
                android:layout_width="wrap_content"
                android:layout_height="wrap_content"
                android:layout_weight="1"
                android:text="播放3"
                 />

            <Button
                android:id="@+id/button_play4"
                android:layout_width="wrap_content"
                android:layout_height="wrap_content"
                android:layout_weight="1"
                android:text="播放4"
                 />

        </LinearLayout>

        <Button
            android:id="@+id/button_stop"
            android:layout_width="match_parent"
            android:layout_height="wrap_content"
            android:text="停止"
            />

        <Button
            android:id="@+id/button_pause"
            android:layout_width="match_parent"
            android:layout_height="wrap_content"
            android:text="暂停"
             />

        <TextView
            android:id="@+id/myTextView1"
            android:layout_width="wrap_content"
            android:layout_height="wrap_content"
            android:text="Hello World!"
             />


    </LinearLayout>


</LinearLayout>
主工程
package jason.tcpdemo.funcs;
import android.annotation.SuppressLint;
import android.app.Activity;
import android.content.BroadcastReceiver;
import android.content.Context;
import android.content.Intent;
import android.content.IntentFilter;
import android.media.MediaPlayer;
import android.os.Bundle;
import android.os.Message;
import android.util.Log;
import android.view.View;
import android.widget.Button;
import android.widget.EditText;
import android.widget.TextView;
import java.lang.ref.WeakReference;
import java.net.Inet6Address;
import java.net.InetAddress;
import java.net.NetworkInterface;
import java.net.SocketException;
import java.util.Enumeration;
import java.util.concurrent.ExecutorService;
import java.util.concurrent.Executors;
import jason.tcpdemo.R;
import jason.tcpdemo.coms.TcpServer;
import java.util.HashMap;
import android.media.AudioManager;
import android.media.SoundPool;
import android.view.View.OnClickListener;
import android.os.Build;
/**
* Created by Jason Zhu on 2017-04-24.
* Email: cloud_happy@163.com
*/
public class FuncTcpServer extends Activity {
private Button btnStartServer,btnCloseServer, btnCleanServerSend, btnCleanServerRcv;
private TextView txtRcv,txtSend,txtServerIp;
private EditText editServerSend,editServerRandom, editServerPort;
private static TcpServer tcpServer = null;//建立TCP服务器
private MyBtnClicker myBtnClicker = new MyBtnClicker();//按键触发监听函数
private final MyHandler myHandler = new MyHandler(this);//线程通信
private MyBroadcastReceiver myBroadcastReceiver = new MyBroadcastReceiver();//广播接收消息
@SuppressLint("StaticFieldLeak")
public static Context context;
//创建一个可缓存线程池,如果线程池长度超过处理需要,可灵活回收空闲线程,若无可回收,则新建线程,但是在以前构造的线程可用时将重用它们。对于执行很多短期异步任务的程序而言,这些线程池通常可提高程序性能。
ExecutorService threadPooltcp = Executors.newCachedThreadPool();//线程池
//1MP3变量定义
private TextView tv;//状态显示文本
private Button button_stop,button_pause;//暂停和停止按钮
public Button btnplay1; //播放按键1
public Button btnplay2; //播放按键2
public Button btnplay3; //播放按键3
public Button btnplay4; //播放按键4
public SoundPool soundpool; //声明一个SoundPool对象
//使用HashMap管理各种音频
public HashMap<Integer, Integer> soundmap = new HashMap<Integer, Integer>(); //创建一个HashMap对象
//主线程处理其他新线程通信消息
private class MyHandler extends android.os.Handler{
private final WeakReference<FuncTcpServer> mActivity;
MyHandler(FuncTcpServer activity){
mActivity = new WeakReference<FuncTcpServer>(activity);
}
@Override
public void handleMessage(Message msg) {
FuncTcpServer activity = mActivity.get();
if (activity!= null){
switch (msg.what){
case 1:
txtRcv.append(msg.obj.toString());//接受区
String recmsg= msg.obj.toString();
switch (recmsg) {
case "1":
soundpool.play(soundmap.get(1), 1, 1, 0, 0, 1); //播放指定的音频
break;
case "2":
soundpool.play(soundmap.get(2), 1, 1, 0, 0, 1); //播放指定的音频
break;
case "3":
soundpool.play(soundmap.get(3), 1, 1, 0, 0, 1); //播放指定的音频
break;
case "4":
soundpool.play(soundmap.get(4), 1, 1, 0, 0, 1); //播放指定的音频
break;
}
break;
case 2:
//txtSend.append(msg.obj.toString());//发射区
txtRcv.append(msg.obj.toString());//接受区
break;
}
}
}
}
//广播接收器
private class MyBroadcastReceiver extends BroadcastReceiver{
//广播接收器接收到相应广播后,会自动回调 onReceive() 方法
//一般情况下,onReceive方法会涉及 与 其他组件之间的交互,如发送Notification、启动Service等
//默认情况下,广播接收器运行在 UI 线程,因此,onReceive()方法不能执行耗时操作,否则将导致ANR
@Override
public void onReceive(Context context, Intent intent) {
String mAction = intent.getAction();//触发器被触发
switch (mAction){//出发行为是不是tcpServerReceiver
case "tcpServerReceiver":
String msg = intent.getStringExtra("tcpServerReceiver");//获取其消息
Message message = Message.obtain();//创建线程通信数据
message.what = 1;
message.obj = msg;
myHandler.sendMessage(message);
break;
}
}
}
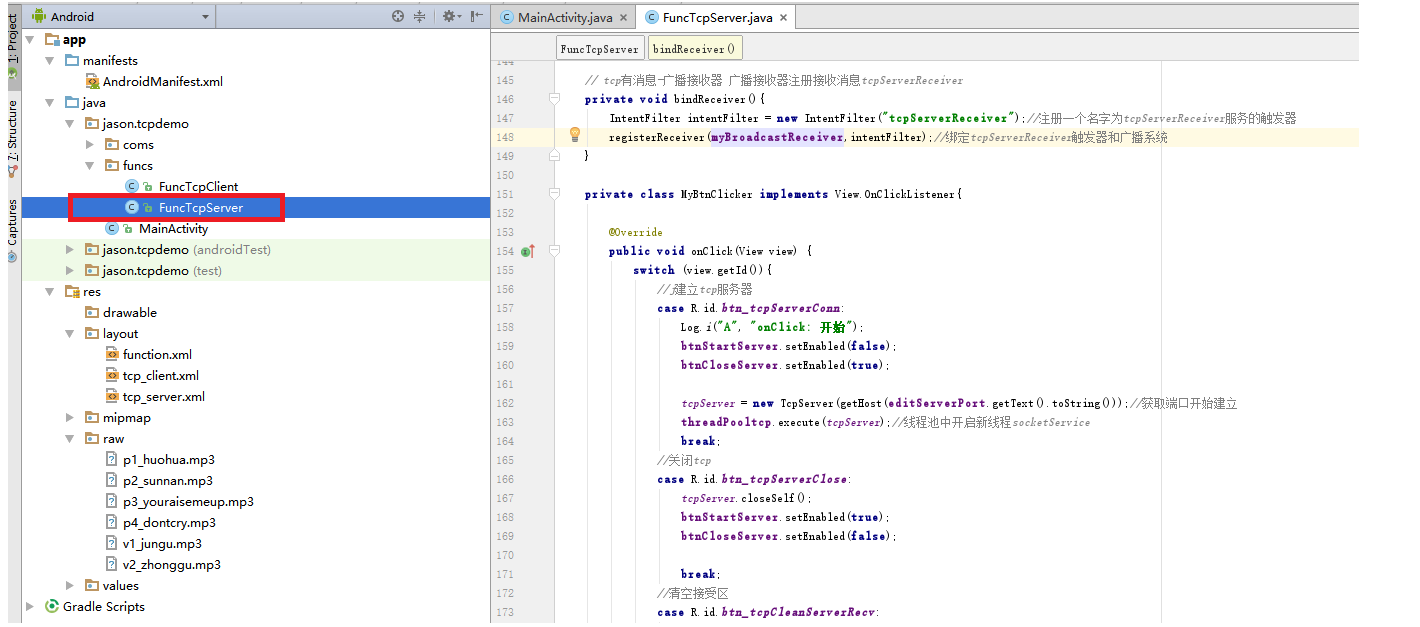
// tcp有消息-广播接收器 广播接收器注册接收消息tcpServerReceiver
private void bindReceiver(){
IntentFilter intentFilter = new IntentFilter("tcpServerReceiver");//注册一个名字为tcpServerReceiver服务的触发器
registerReceiver(myBroadcastReceiver,intentFilter);//绑定tcpServerReceiver触发器和广播系统
}
private class MyBtnClicker implements View.OnClickListener{
@Override
public void onClick(View view) {
switch (view.getId()){
//j建立tcp服务器
case R.id.btn_tcpServerConn:
Log.i("A", "onClick: 开始");
btnStartServer.setEnabled(false);
btnCloseServer.setEnabled(true);
tcpServer = new TcpServer(getHost(editServerPort.getText().toString()));//获取端口开始建立
threadPooltcp.execute(tcpServer);//线程池中开启新线程socketService
break;
//关闭tcp
case R.id.btn_tcpServerClose:
tcpServer.closeSelf();
btnStartServer.setEnabled(true);
btnCloseServer.setEnabled(false);
break;
//清空接受区
case R.id.btn_tcpCleanServerRecv:
txtRcv.setText("");
break;
//清空发射区
case R.id.btn_tcpCleanServerSend:
txtSend.setText("");
break;
}
}
}
private int getHost(String msg){
if (msg.equals("")){
msg = "8266";
}
return Integer.parseInt(msg);
}
protected void onCreate(Bundle savedInstanceState) {
super.onCreate(savedInstanceState);
setContentView(R.layout.tcp_server);
context = this;
bindID(); //初始化-绑定按键变量和控件
bindListener();//按键绑定触发函数
bindReceiver();
ini();
Button play1 = (Button) findViewById(R.id.button_play1); //获取“风铃声”按钮
Button play2 = (Button) findViewById(R.id.button_play2); //获取“布谷鸟叫声”按钮
Button play3 = (Button) findViewById(R.id.button_play3); //获取“门铃声”按钮
Button play4 = (Button) findViewById(R.id.button_play4); //获取“电话声”按钮
if (Build.VERSION.SDK_INT >= Build.VERSION_CODES.LOLLIPOP) {
soundpool = new SoundPool.Builder()
.setMaxStreams(10)
.build();
} else {
soundpool = new SoundPool(10, AudioManager.STREAM_MUSIC, 1);
}
//将要播放的音频流保存到HashMap对象中
soundmap.put(1, soundpool.load(this, R.raw.v1_jungu, 1));
soundmap.put(2, soundpool.load(this, R.raw.v2_zhonggu, 1));
soundmap.put(3, soundpool.load(this, R.raw.p3_youraisemeup, 1));
soundmap.put(4, soundpool.load(this, R.raw.p4_dontcry, 1));
//为各按钮添加单击事件监听器
play1.setOnClickListener(new OnClickListener() {
@Override
public void onClick(View v) {
soundpool.play(soundmap.get(1), 1, 1, 0, 0, 1); //播放指定的音频
}
});
play2.setOnClickListener(new OnClickListener() {
@Override
public void onClick(View v) {
soundpool.play(soundmap.get(2), 1, 1, 0, 0, 1); //播放指定的音频
}
});
play3.setOnClickListener(new OnClickListener() {
@Override
public void onClick(View v) {
soundpool.play(soundmap.get(3), 1, 1, 0, 0, 1); //播放指定的音频
}
});
play4.setOnClickListener(new OnClickListener() {
@Override
public void onClick(View v) {
soundpool.play(soundmap.get(4), 1, 1, 0, 0, 1); //播放指定的音频
}
});
}
private void ini(){
btnCloseServer.setEnabled(false);
txtServerIp.setText(getHostIP());//虎丘ip
}
private void bindListener() {
btnStartServer.setOnClickListener(myBtnClicker);
btnCloseServer.setOnClickListener(myBtnClicker);
btnCleanServerRcv.setOnClickListener(myBtnClicker);
btnCleanServerSend.setOnClickListener(myBtnClicker);
}
private void bindID() {
btnStartServer = (Button) findViewById(R.id.btn_tcpServerConn);
btnCloseServer = (Button) findViewById(R.id.btn_tcpServerClose);
btnCleanServerRcv = (Button) findViewById(R.id.btn_tcpCleanServerRecv);
btnCleanServerSend = (Button) findViewById(R.id.btn_tcpCleanServerSend);
txtRcv = (TextView) findViewById(R.id.txt_ServerRcv);
txtServerIp = (TextView) findViewById(R.id.txt_Server_Ip);
editServerSend = (EditText) findViewById(R.id.edit_tcpClientSend);
editServerPort = (EditText)findViewById(R.id.edit_Server_Port);
}
/**
* 获取ip地址
* @return
*/
public String getHostIP() {
String hostIp = null;
try {
Enumeration nis = NetworkInterface.getNetworkInterfaces();
InetAddress ia = null;
while (nis.hasMoreElements()) {
NetworkInterface ni = (NetworkInterface) nis.nextElement();
Enumeration<InetAddress> ias = ni.getInetAddresses();
while (ias.hasMoreElements()) {
ia = ias.nextElement();
if (ia instanceof Inet6Address) {
continue;// skip ipv6
}
String ip = ia.getHostAddress();
if (!"127.0.0.1".equals(ip)) {
hostIp = ia.getHostAddress();
break;
}
}
}
} catch (SocketException e) {
Log.i("FuncTcpServer", "SocketException");
e.printStackTrace();
}
return hostIp;
}
}
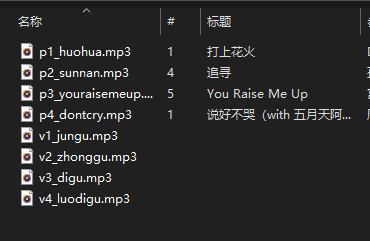
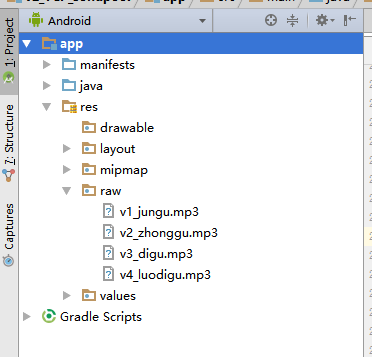
4添加声音音效
把之前截取的4个鼓声mp3放进去工程,命名调用。
第一版只搞了4个鼓声,后期可以扩展成8个。
使用调试
1 手机辐射wifi
2 打开app,然后开启服务器
3 鼓棒上电
4敲击鼓棒手机发出不同的声音。
鼓棒左右挥动切换鼓。
鼓棒上下敲击触发敲鼓。
未来扩展
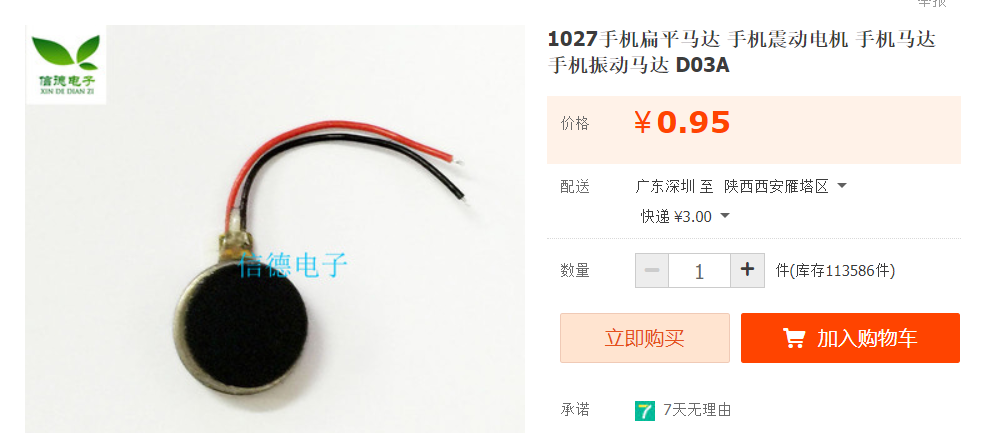
1 目前只是简单使用加速度来切换左右鼓,未来可以计算出3轴角度,通过转动的角度位置触发不同的鼓棒。
2 未来扩展更多的声音。增加两个传感器绑在脚上,脚踏触发敲鼓。
3 加入震动传感器,每次敲击一次震动反馈
https://item.taobao.com/item.htm?spm=a1z09.2.0.0.70b12e8dIfJ6ns&id=590062846389&_u=m1qf7bf5dbe7
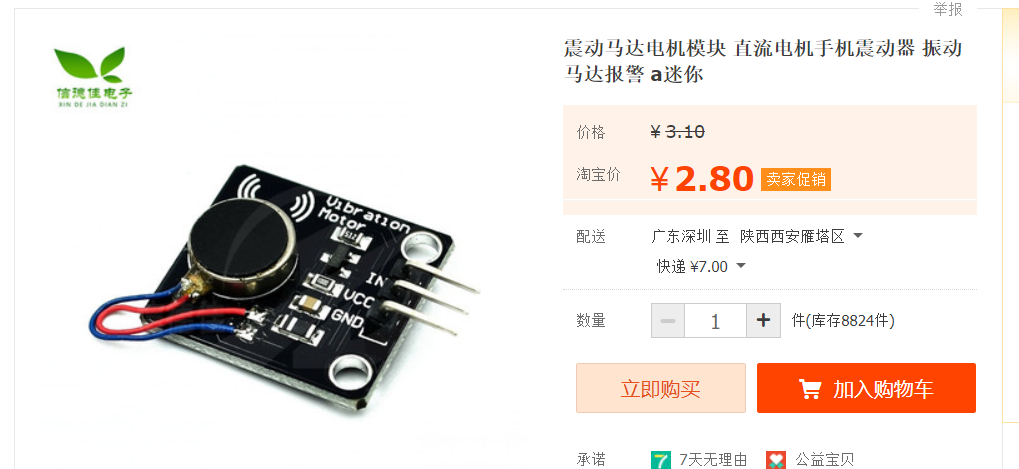
https://item.taobao.com/item.htm?spm=a1z09.2.0.0.70b12e8dIfJ6ns&id=562055718901&_u=m1qf7bf587b0
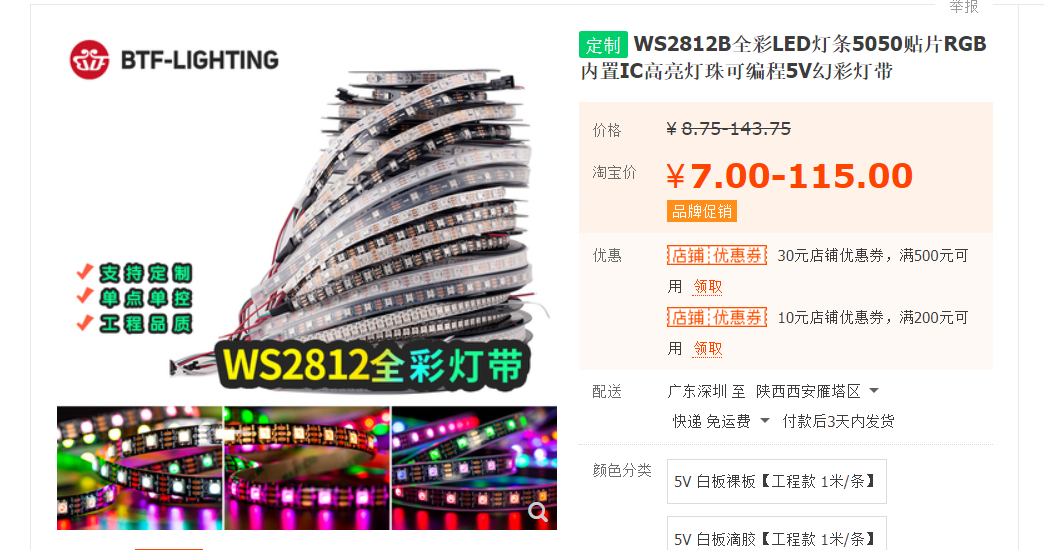
4加入流水七彩灯。
https://item.taobao.com/item.htm?id=522197656009&ali_refid=a3_430582_1006:1150791344:N:ZAtEZNUrVeERmT8W%2BdWwiw%3D%3D:fce75c544dc690fe01e55763d14736c7&ali_trackid=1_fce75c544dc690fe01e55763d14736c7&spm=a230r.1.14.1#detail

 浙公网安备 33010602011771号