

Nornir MCP获取交换机配置
一、下载nornir_mcp仓库
git clone https://github.com/yhvh-chen/nornir_mcp.git
二、安装创建python虚拟环境,安装依赖包
uv venv --python 3.12 nornir_mcp
cd nornir_mcp
.\.venv\Scripts\activate
uv sync
uv add fastmcp==2.10.6 --python .venv/Scripts/python.exe  #更新fastmcp
三、修改配置文件
修改conf/groups.yaml,添加huawei_vrp组
huawei_vrp:
  platform: huawei_vrp
  connection_options:
    napalm:
      extras:
        optional_args:
          transport: ssh
          # You might define 'secret' here if it's specific to this group
          # and different from defaults.yaml or hosts.yaml
          # secret: "group_specific_enable_password"
修改conf/hosts.yaml,添加测试交换机
core_switch:
  hostname: 10.x.x.x
  platform: huawei_vrp
  username: admin
  password: <change_your_password>
  groups:
    - huawei_vrp
  data:
    role: core_switch
四、运行Nornir_MCP服务
uv run --python .venv/Scripts/python.exe .\server.py
2025-08-11 10:00:53,176 - nornir_ops - INFO - [Setup] Nornir initialized successfully!
2025-08-11 10:00:53,182 - nornir_mcp - INFO - [Setup] Starting Nornir MCP server...
╭─ FastMCP 2.0 ──────────────────────────────────────────────────────────────╮
│ │
│ _ __ ___ ______ __ __ _____________ ____ ____ │
│ _ __ ___ / ____/___ ______/ /_/ |/ / ____/ __ \ |___ \ / __ \ │
│ _ __ ___ / /_ / __ `/ ___/ __/ /|_/ / / / /_/ / ___/ / / / / / │
│ _ __ ___ / __/ / /_/ (__ ) /_/ / / / /___/ ____/ / __/_/ /_/ / │
│ _ __ ___ /_/ \__,_/____/\__/_/ /_/\____/_/ /_____(_)____/ │
│ │
│ │
│ │
│ 🖥️ Server name: Nornir_MCP │
│ 📦 Transport: SSE │
│ 🔗 Server URL: http://0.0.0.0:8000/sse/ │
│ │
│ 📚 Docs: https://gofastmcp.com │
│ 🚀 Deploy: https://fastmcp.cloud │
│ │
│ 🏎️ FastMCP version: 2.10.6 │
│ 🤝 MCP version: 1.12.4 │
│ │
╰────────────────────────────────────────────────────────────────────────────╯
[08/11/25 10:00:53] INFO Starting MCP server 'Nornir_MCP' with transport 'sse' on http://0.0.0.0:8000/sse/ server.py:1448
INFO: Started server process [19132]
INFO: Waiting for application startup.
INFO: Application startup complete.
INFO: Uvicorn running on http://0.0.0.0:8000 (Press CTRL+C to quit)
五、导入Dify DSL文件
将Nornir MCP.yml导入Dify应用中

修改模型为自己的模型
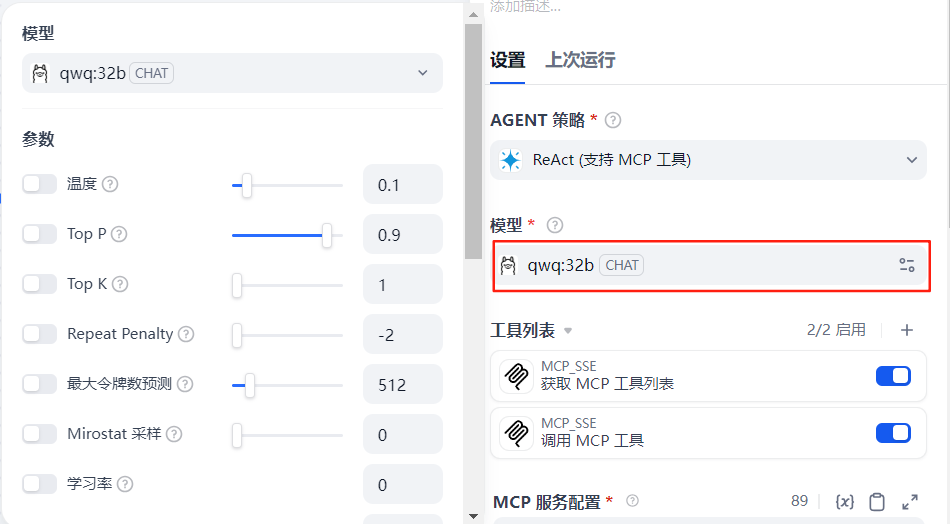
修改MCP服务配置

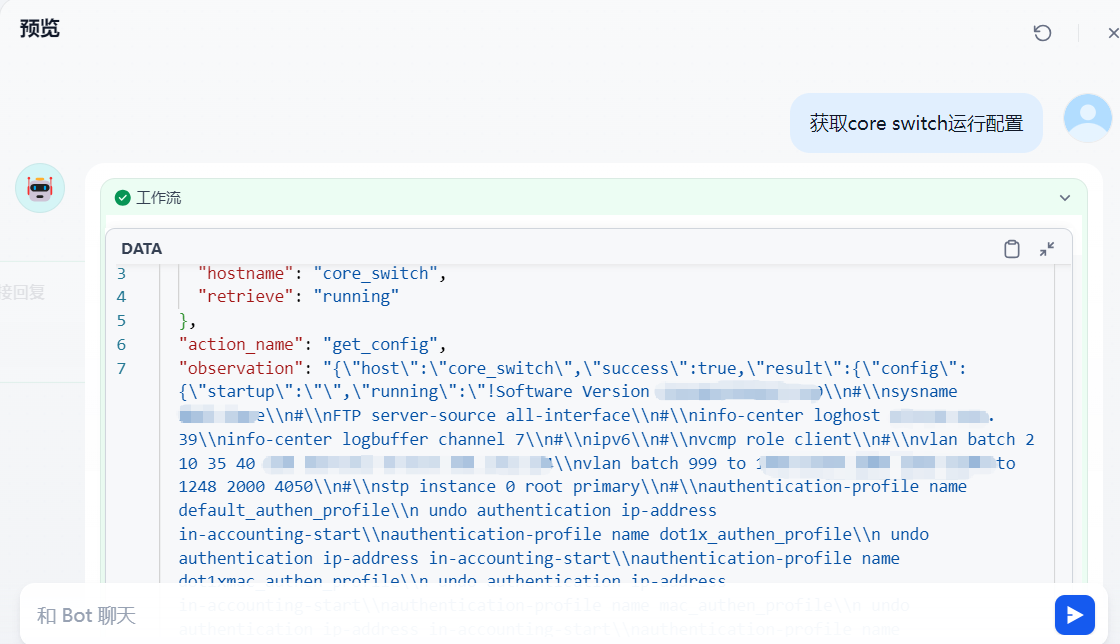
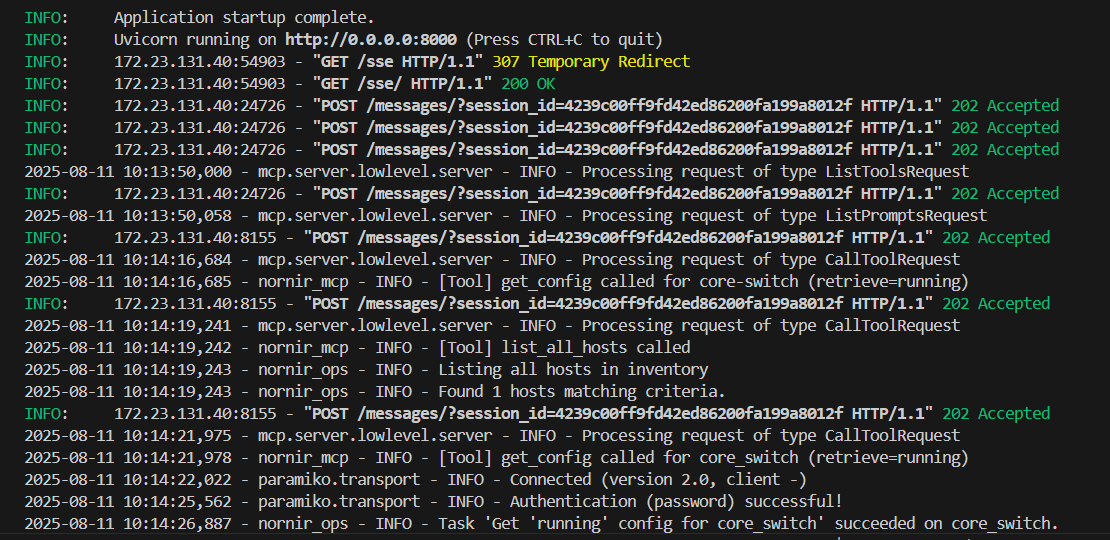
六、测试运行效果

 浙公网安备 33010602011771号