


1.拉取镜像docker pull registry.cn-hangzhou.aliyuncs.com/helowin/oracle_11g
2.安装容器:docker run -d --name oracle11g -p 1521:1521 registry.cn-hangzhou.aliyuncs.com/helowin/oracle_11g
3.启动容器:docker start oracle11g
4.进入容器:docker exec -it oracle11g bash
5.切换到root用户:su root 密码:helowin
6.编辑/etc/profile文件配置ORACLE环境变量,在最后加上:
export ORACLE_HOME=/home/oracle/app/oracle/product/11.2.0/dbhome_2
export ORACLE_SID=helowin
export PATH=$ORACLE_HOME/bin:$PATH
执行source /etc/profile使环境变量生效
7.创建软连接
ln -s $ORACLE_HOME/bin/sqlplus /usr/bin
8.切换到oracle 用户:su - oracle
这里还要说一下,一定要写中间的内条 - 必须要,否则软连接无效
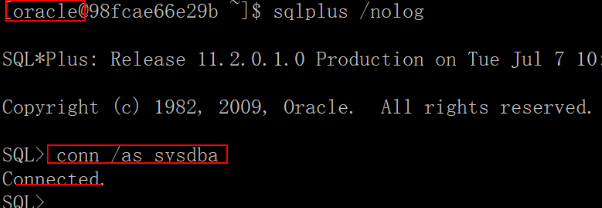
9.登录sqlplus–修改sys、system用户密码–创建用户
sqlplus /nolog
conn /as sysdba
修改密码:
alter user system identified by system;
alter user sys identified by sys;
ALTER PROFILE DEFAULT LIMIT PASSWORD_LIFE_TIME UNLIMITED;
创建用户
create user test identified by test;
并给用户赋予权限
grant connect,resource,dba to test;
遇到如上的报错可以通过输入如下命令解决:
alter database mount;
alter database open;
oracle服务器端已经完成所有的配置了.
客户端打开navicat premium建立连接后,填入:
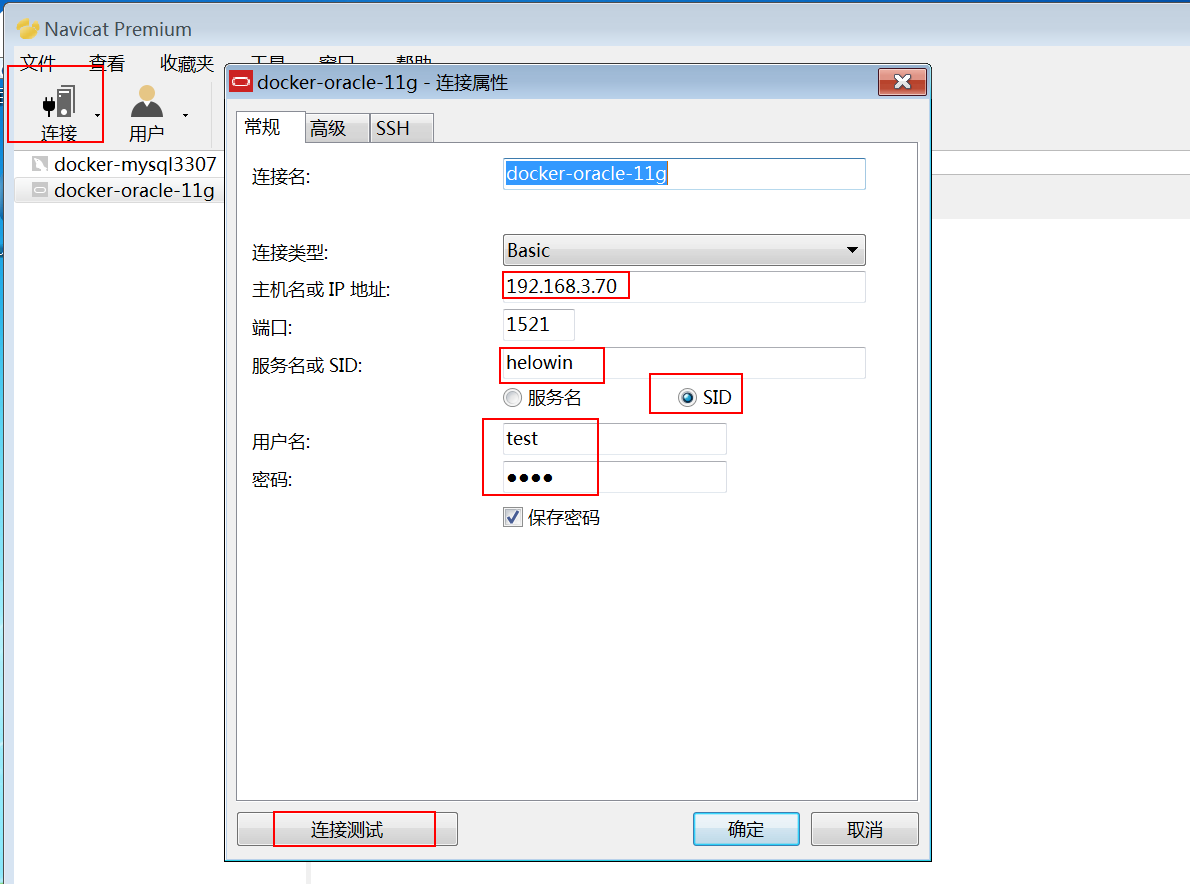
SID为helowin
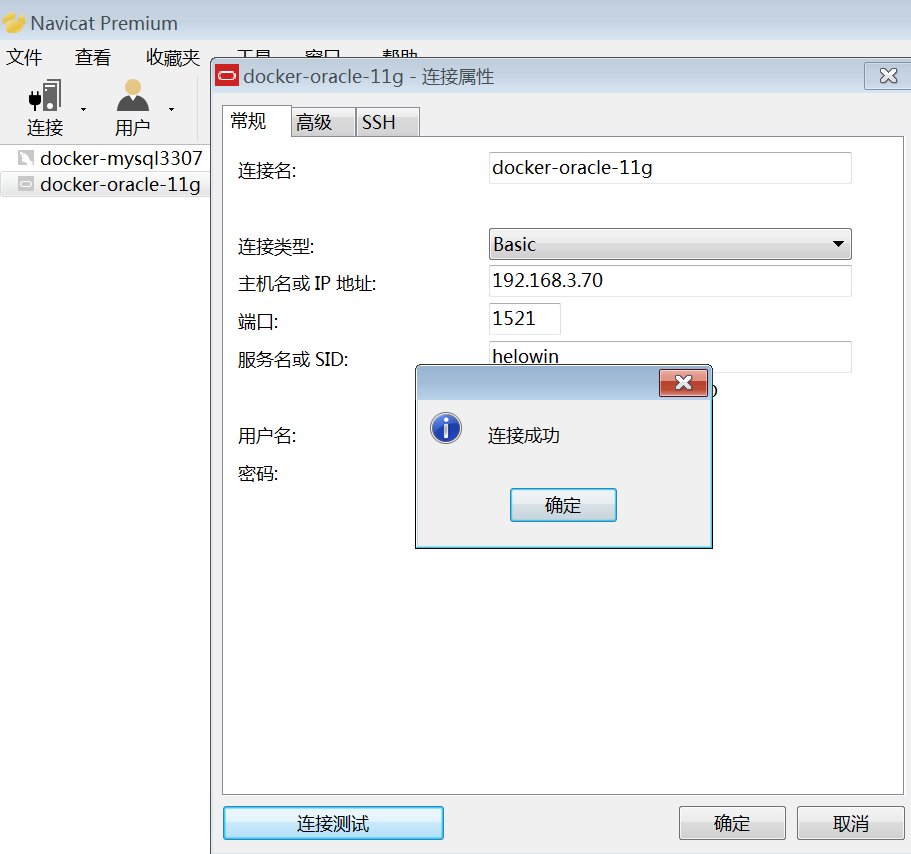
点击连接测试,测试通过说明已经完成了oracle的所有配置了!!
参考链接:
https://blog.csdn.net/weixin_43583693/article/details/90243856

 浙公网安备 33010602011771号