
Centos6.6下安装nginx1.6.3
安装环境:
[root@nginx ~]# cat /etc/redhat-release
CentOS release 6.6 (Final)
[root@nginx ~]# uname -r
2.6.32-504.el6.x86_64
Nginx安装
1:安装必须的包
[root@nginx ~]# yum install -y pcre pcre-devel openssl-devel
pcre全称(Perl Compatible Regular Expressions),中文perl兼容正则表达式!(nginx的rewite模块需要它)
2:添加虚拟用户
[root@nginx tools]# useradd -s /sbin/nologin -M nginx
[root@nginx tools]# id nginx
uid=501(nginx) gid=501(nginx) groups=501(nginx)
3:新建一目录,用于安装nginx
[root@nginx nginx-1.6.3]# mkdir /application
4:下载nginx
wget -q http://nginx.org/download/nginx-1.6.3.tar.gz
百度下载:http://pan.baidu.com/s/1jIE37Oa
微云下载:https://share.weiyun.com/8b3117629c6381199df93809ce26d81e
5:编译安装nginx
wget -q http://nginx.org/download/nginx-1.6.3.tar.gz
tar zxf nginx-1.6.3.tar.gz
./configure --prefix=/application/nginx-1.6.3 --user=nginx --group=nginx --with-http_ssl_module --with-http_stub_status_module
make        #只要结尾没有报错就OK
make install
6:创建软链接
[root@nginx application]# ln -s nginx-1.6.3 nginx
[root@nginx application]# ll
total 4
lrwxrwxrwx 1 root root   11 Feb 14 21:31 nginx -> nginx-1.6.3
drwxr-xr-x 6 root root 4096 Feb 14 21:30 nginx-1.6.3
7:启动nginx
[root@nginx application]# /application/nginx/sbin/nginx
查看是否启动成功:
[root@nginx application]# ps -ef|grep nginx
root      5205     1  0 21:32 ?        00:00:00 nginx: master process /application/nginx/sbin/nginx
nginx     5206  5205  0 21:32 ?        00:00:00 nginx: worker process
root      5208   967  0 21:32 pts/0    00:00:00 grep nginx
查看nginx端口号:
[root@nginx application]# ss -lnput|grep nginx
tcp    LISTEN     0      511                    *:80                    *:*      users:(("nginx",5205,6),("nginx",5206,6))
停掉nginx:
[root@nginx application]# /application/nginx/sbin/nginx -s stop
重启nginx:
[root@nginx application]# /application/nginx/sbin/nginx -s reload
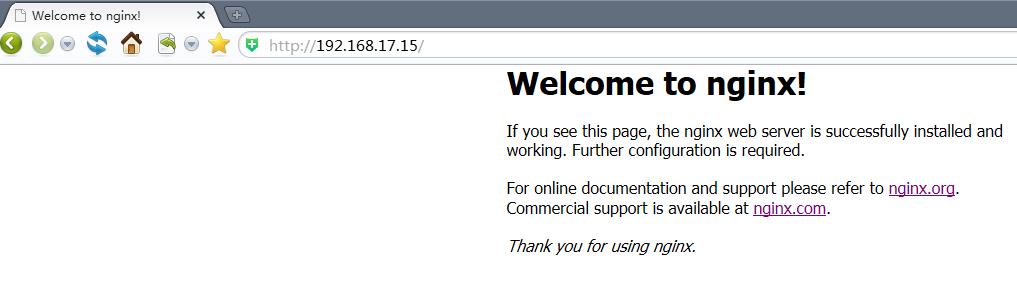
以上就是nginx1.6.3的安装!此时在windonws浏览器下输入IP地址,即可看到如下页面:
Linux本机测试:
[root@nginx application]# curl 192.168.17.15
<!DOCTYPE html>
<html>
<head>
<title>Welcome to nginx!</title>
<style>
    body {
        width: 35em;
        margin: 0 auto;
        font-family: Tahoma, Verdana, Arial, sans-serif;
    }
</style>
</head>
<body>
<h1>Welcome to nginx!</h1>
<p>If you see this page, the nginx web server is successfully installed and
working. Further configuration is required.</p>

<p>For online documentation and support please refer to
<a href="http://nginx.org/">nginx.org</a>.<br/>
Commercial support is available at
<a href="http://nginx.com/">nginx.com</a>.</p>

<p><em>Thank you for using nginx.</em></p>
</body>
</html>
nginx常用模块介绍
nginx技术内幕课程视频:http://edu.51cto.com/lesson/id-56899.html
nginx核心模块:http://nginx.org/en/docs
Nginx配置文件(nginx.conf)配置详解
[root@ClientA nginx]# cat conf/nginx.conf

#user  nobody;								#Nginx用户及组:用户 组。window下不指定
worker_processes  1;							#工作进程:数目。根据硬件调整,通常等于CPU数量或者2倍于CPU。
#error_log  logs/error.log;
#error_log  logs/error.log  notice;
#error_log  logs/error.log  info;
#pid        logs/nginx.pid;					#pid(进程标识符):存放路径。
events {
    worker_connections  1024;
}
#每个工作进程的最大连接数量。根据硬件调整,和前面工作进程配合起来用,尽量大,但是别把cpu跑到100%就行。每个进程允许的最多连接数,理论上每台nginx服务器的最大连接数为:worker_processes*worker_connections

http {
    include       mime.types;			#设定mime类型,类型由mime.type文件定义
    default_type  application/octet-stream;

    #log_format  main  '$remote_addr - $remote_user [$time_local] "$request" '
    #                  '$status $body_bytes_sent "$http_referer" '
    #                  '"$http_user_agent" "$http_x_forwarded_for"';

    #access_log  logs/access.log  main;

    sendfile        on;			#开启高效传输模式
    #tcp_nopush     on;

    #keepalive_timeout  0;
    keepalive_timeout  65;

    #gzip  on;

    server {
        listen       80;
        server_name  localhost;

        #charset koi8-r;

        #access_log  logs/host.access.log  main;

        location / {
            root   html;
            index  index.html index.htm;
        }

        #error_page  404              /404.html;

        # redirect server error pages to the static page /50x.html
        #
        error_page   500 502 503 504  /50x.html;
        location = /50x.html {
            root   html;
        }

        # proxy the PHP scripts to Apache listening on 127.0.0.1:80
        #
        #location ~ \.php$ {
        #    proxy_pass   http://127.0.0.1;
        #}

        # pass the PHP scripts to FastCGI server listening on 127.0.0.1:9000
        #
        #location ~ \.php$ {
        #    root           html;
        #    fastcgi_pass   127.0.0.1:9000;
        #    fastcgi_index  index.php;
        #    fastcgi_param  SCRIPT_FILENAME  /scripts$fastcgi_script_name;
        #    include        fastcgi_params;
        #}

        # deny access to .htaccess files, if Apache's document root
        # concurs with nginx's one
        #
        #location ~ /\.ht {
        #    deny  all;
        #}
    }


    # another virtual host using mix of IP-, name-, and port-based configuration
    #
    #server {
    #    listen       8000;
    #    listen       somename:8080;
    #    server_name  somename  alias  another.alias;

    #    location / {
    #        root   html;
    #        index  index.html index.htm;
    #    }
    #}


    # HTTPS server
    #
    #server {
    #    listen       443 ssl;
    #    server_name  localhost;

    #    ssl_certificate      cert.pem;
    #    ssl_certificate_key  cert.key;

    #    ssl_session_cache    shared:SSL:1m;
    #    ssl_session_timeout  5m;

    #    ssl_ciphers  HIGH:!aNULL:!MD5;
    #    ssl_prefer_server_ciphers  on;

    #    location / {
    #        root   html;
    #        index  index.html index.htm;
    #    }
    #}

}
基于域名的虚拟主机配置步骤
为了让配置文件规范化,我们使用一个网站一个配置文件,操作步骤如下:
1:编辑nginx.conf配置文件
[root@nginx application]# vim /application/nginx/conf/nginx.conf
worker_processes  1;
events {
    worker_connections  1024;
}
http {
    include       mime.types;
    default_type  application/octet-stream;
    sendfile        on;
    keepalive_timeout  65;
    # nginx vhosts config
    include extra/www.conf;
    #include extra/bbs.conf;
    #include extra/blog.conf;      ##如果有多个网站在这里添加配置文件路径
}
##编辑后的文件,删除了注释,添加include几行
2:在/application/nginx/conf/extra目录下创建对应的网站配置文件
[root@nginx conf]# mkdir extra
[root@nginx conf]# cd extra
[root@nginx extra]# cat www.conf
server {
    listen  80;
    server_name www.ginvip.com alias ginvip.com;
    location / {
        root    html/ginvip;
        index   index.html index.htm;
    }
}
上面的alias ginvip.com就是别名配置!类似于IIS里的301重定向
3:创建对应的网站目录(路径就是上面的配置文件中:html/ginvip)
[root@nginx nginx]# mkdir html/ginvip
4:创建测试文件
[root@nginx nginx]# cd html/ginvip
[root@nginx ginvip]# ll
total 0
[root@nginx ginvip]# echo "this is a test nginx website" >index.html
[root@nginx ginvip]# ll
total 4
-rw-r--r-- 1 root root 29 Feb 14 22:07 index.html
5:检查语法,重启nginx
[root@nginx ginvip]# /application/nginx/sbin/nginx -t
nginx: the configuration file /application/nginx-1.6.3/conf/nginx.conf syntax is ok
nginx: configuration file /application/nginx-1.6.3/conf/nginx.conf test is successful
[root@nginx ginvip]# /application/nginx/sbin/nginx -s reload
6:添加IP,域名到本地的hosts文件
Linux平台添加:
[root@nginx ginvip]# vim /etc/hosts
192.168.17.15   www.ginvip.com ginvip.com
windows平台添加:(路径:C:\Windows\System32\drivers\etc\hosts)
7:测试
Linux平台测试:
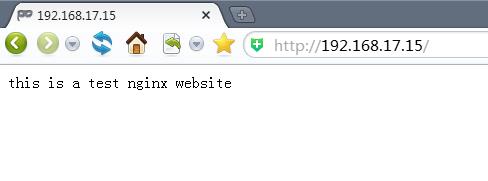
[root@nginx ginvip]# curl www.ginvip.com
this is a test nginx website
测试别名:
[root@nginx ginvip]# curl ginvip.com
this is a test nginx website
windows平台测试:
基于端口的虚拟主机配置
基于端口的虚拟主机在生产环境中不多见,仅偶尔会用到,一般是为公司内部人员提供访问的,如OA系统,网站程序的后台,CMS发布后台,Mysql的web客户端phpmyadmin等。
配置文件中的配置与基于域名的配置大致一样,只是修改上面配置文件中的80端口为你想要访问的端口!测试访问的时候,域名后面加上 :端口号
基于IP的虚拟主机实战
只需要在配置文件中的80端口前加上IP地址即可!
Nginx状态信息功能实战
1:在extra目录增加一个status.conf配置文件,内容如下:
[root@nginx nginx]# vim conf/extra/status.conf
## website status
server {
    listen  80;
    server_name status.ginvip.com;
    location / {
        stub_status on;  #开启http_stub_status_module模块
        access_log  off;
    }
}
2:在主配置文件包含status.conf配置文件
[root@nginx nginx]# cat conf/nginx.conf
worker_processes  1;
events {
    worker_connections  1024;
}
http {
    include       mime.types;
    default_type  application/octet-stream;
    sendfile        on;
    keepalive_timeout  65;
    # nginx vhosts config
    include extra/www.conf;
    include extra/status.conf;
}
3:检查语法,重启nginx
[root@nginx nginx]# sbin/nginx -t
nginx: the configuration file /application/nginx-1.6.3/conf/nginx.conf syntax is ok
nginx: configuration file /application/nginx-1.6.3/conf/nginx.conf test is successful
[root@nginx nginx]# sbin/nginx -s reload
4:添加域名到/etc/hosts文件
5:测试status.ginvip.com
[root@nginx nginx]# curl status.ginvip.com
Active connections: 1      #活跃的连接数量
server accepts handled requests
 4      4        4       4
Reading: 0 Writing: 1 Waiting: 0
第一个server表示Nginx启动到现在共处理了4个连接
第三个accepts表示Nginx启动到现在共成功创建了4次握手:请求丢失数=(握手数-连接数),可以看出,本次状态显示没有丢失请求
第三个handled requests,表示总共处理了4次请求
Reading: 0 Writing: 1 Waiting: 0
Reading:Nginx读取到客户端的header信息数
Writing:Nginx返回给客户端的header信息数
Waiting:Nginx已经处理完正在等候下一次请求指令的驻留连接。开启keep-alive的情况下,这个值等于active-(reading+writing)
为Nginx增加错误日志(error_log)配置
error_log的语法格式及参数语法说明如下:
error_log		file				level;
#关键字		    日志文件	            错误日志级别
生产场景一般是warn|error|crit这三个级别之一,注意不要配置info等较低级别,会带来更多的磁盘I/O消耗
error_log的默认值为:
#default: error_log logs/error.log error;
可以放置的标签段为:
#context: main, http, server, location
官方参考资料:http://nginx.org/docs/ngx_core_module.html#error_log
在主配置文件nginx.conf中添加日志项:
[root@nginx nginx]# cat conf/nginx.conf
worker_processes  1;
error_log   logs/error.log  error;
events {
    worker_connections  1024;
}
http {
    include       mime.types;
    default_type  application/octet-stream;
    sendfile        on;
    keepalive_timeout  65;
    # nginx vhosts config
    include extra/www.conf;
    include extra/status.conf;
}
Nginx访问日志介绍
Nginx软件会把每个用户访问网站的日志信息记录到指定的日志文件里,供网站提供都分析用户浏览器行为等,此功能由ngx_http_log_module模块负责。
对应官方地址:http://nginx.org/en/docs/http/ngx_http_log_module.html
Nginx的访问日志主要由下面的两个参数控制:
|
参数 |
说明 |
|
log_format |
用来定义记录日志的格式(可以定义多种日志格式,取不同名字即可) |
|
access_log |
用来指定日志文件的路径及使用的何种日志格式记录日志 |
Nginx日志格式中默认的参数配置格如下:
[root@ClientA nginx]# cat conf/nginx.conf.default
    #log_format  main  '$remote_addr - $remote_user [$time_local] "$request" '
    #                  '$status $body_bytes_sent "$http_referer" '
    #                  '"$http_user_agent" "$http_x_forwarded_for"';
将上面三行代码去掉#号,复制到主配置文件nginx.conf
[root@nginx nginx]# cat conf/nginx.conf
worker_processes  1;
error_log   logs/error.log  error;
events {
    worker_connections  1024;
}
http {
    include       mime.types;
    default_type  application/octet-stream;
    sendfile        on;
    keepalive_timeout  65;
    log_format  main  '$remote_addr - $remote_user [$time_local] "$request" '
                      '$status $body_bytes_sent "$http_referer" '
                      '"$http_user_agent" "$http_x_forwarded_for"';
    # nginx vhosts config
    include extra/www.conf;
    include extra/status.conf;
}
Nginx日志变量说明如下:
|
Nginx日志变量 |
说明 |
|
$remote_addr |
记录访问网站的客户端地址 |
|
$http_x_forwarded_for |
当前端有代理服务器时,设置WEB节点记录客户端地址的配置,此参数生效的前提是代理服务器上也要进行相关的x_forwarded_for设置 |
|
$remote_user |
远程客户端用户名称 |
|
$time_local |
记录访问时间与时区 |
|
$request |
用户的http请求起始行信息 |
|
$status |
http状态码,记录请求返回的状态,如:200 , 404 , 301等 |
|
$body_bytes_sents |
服务器发送给客户端的响应body字节数 |
|
$http_referer |
记录此次请求是从哪个链接访问过来的,可以根据referer进行防盗链设置 |
|
$http_user_agent |
记录客户端访问信息,如:浏览器,手机客户端 |
没有特殊要求,默认的配置即可,更多可以设置的记录日志信息变量见:http://nginx.org/en/docs/http/ngx_http_log_module.html
记录日志的access_log参数说明
access_log off; #这里的off,表示不记录访问日志
默认配置:access_log logs/access.log combined;
放置位置:http , server , location , if in location , limit_except
访问日志最好在单独的配置文件中配置:
[root@nginx nginx]# cat conf/extra/www.conf
server {
    listen  80;
    server_name www.ginvip.com alias ginvip.com;
    location / {
        root    html/ginvip;
        index   index.html index.htm;
    }
    access_log  logs/access_www.log main;
}
如果不指定日志格式就会用默认的combined格式记录日志
也可以对日志进行压缩,可以在记录日志参数中加上buffer和flush选项,这样做会在高并发场景下提升网站访问....:
access_log logs/access_www.log main gzip buffer=32k flush=5s;
更多内容参考:http://nginx.org/en/docs/http/ngx_http_log_module.html
Nginx访问日志轮询切割
默认情况nginx会把所有的访问日志生成到一个指定的访问日志文件access.log里,如果自己配置了日志,如上面我就对网站做了配置,写到了logs/access_www.conf文件里,时间长了会导致日志容量过大,不利于分析日志和处理,因此,有必要对Nginx按天或按指定时间进行切割成不同的文件保留,这里使用按天切割的方法:
[root@nginx scripts]# cat cut_nginx_log.sh
#!/bin/sh
Dateformat=`date +%Y%m%d -d -1day`
Basedir='/application/nginx'
Nginxlogdir="$Basedir/logs"
Logname="access_www"
[ -d $Nginxlogdir ] && cd $Nginxlogdir || exit 1
[ -f ${Logname}.log ] || exit 1
/bin/mv ${Logname}.log ${Dateformat}_${Logname}.log
$Basedir/sbin/nginx -s reload
将此脚本加入到定时任务中即可!
Nginx常用日志收集及分析工具
见:http://oldboy.blog.51cto.com/2561410/775056

 浙公网安备 33010602011771号