安卓Android碎片fragment实现静态加载
静态加载好后的界面如下,两个碎片分别位于一个活动的左边和右边: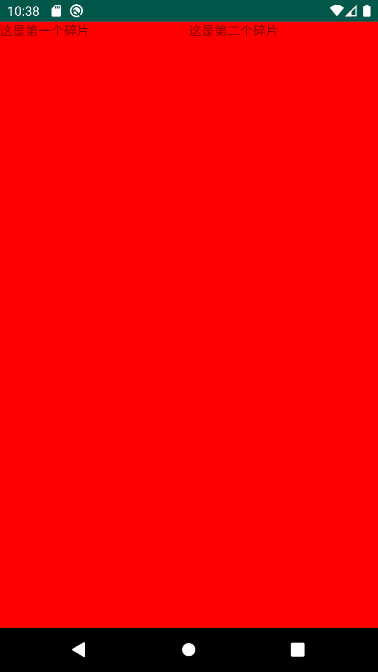
左边和右边分别为一个碎片,这两个碎片正好将一整个活动布满。一个活动当中可以拥有多个碎片,碎片的含义就是可以在同一个UI界面下,将这个界面分成好几个界面,并且可以分别更新自己的状态,如果没有碎片,那么如果你想要单独在某一个区域实现活动的“跳转”就不可能了,因此我们可以引入碎片,这样就可以在这个区域单独进行碎片的跳转。在利用底部标题栏进行首页UI的切换的时候就需要用到碎片,因此碎片在安卓开发当中十分广泛,这篇博客将会与你讲解如何实现静态加载碎片,除了静态加载碎片,还具有动态加载碎片的方式,两种方式不同的方式都进行理解与引用,才可以把碎片的威力发挥到最大。下面是代码,第一个是主活动当中的代码,主活动一定得继承Fragment这个类才可以实现碎片:
一.MainActivity.java
import androidx.fragment.app.FragmentActivity;
import android.os.Bundle;
import android.util.Log;

public class MainActivity extends FragmentActivity {

    public MainActivity() {
        Log.e("TAG", "MainActivity()..");
    }

    @Override
    protected void onCreate(Bundle savedInstanceState) {
        Log.e("TAG", "MainActivity onCreate()..");
        super.onCreate(savedInstanceState);
        setContentView(R.layout.activity_main);
    }
}
然后咱们创建碎片,在上述的UI界面当中有两个碎片的区块,因此我们连续创建两个碎片:
二.MyFragment.java
我们在这个碎片当中利用Java直接引入TextView控件,当然在这个碎片所对应的xml文件当中也可以,这是相互等效的,都比较简单。
import android.graphics.Color;
import android.os.Bundle;
import androidx.fragment.app.Fragment;
import android.view.LayoutInflater;
import android.view.View;
import android.view.ViewGroup;
import android.widget.TextView;

public class MyFragment extends Fragment {

    @Override
    public View onCreateView(LayoutInflater inflater, ViewGroup container,
                             Bundle savedInstanceState) {

        //加载布局得到View对象并返回

        //创建一个视图对象, 设置数据并返回
        TextView  textView = new TextView(getActivity());
        textView.setText("这是第一个碎片");
        textView.setBackgroundColor(Color.RED);

        return textView;
    }
}
三.MyFragment2.java
import android.graphics.Color;
import android.os.Bundle;
import androidx.fragment.app.Fragment;
import android.view.LayoutInflater;
import android.view.View;
import android.view.ViewGroup;
import android.widget.TextView;


public class MyFragment2 extends Fragment {

    @Override
    public View onCreateView(LayoutInflater inflater, ViewGroup container,
                             Bundle savedInstanceState) {

        //加载布局得到View对象并返回

        //创建一个视图对象, 设置数据并返回
        TextView  textView = new TextView(getActivity());
        textView.setText("这是第二个碎片");
        textView.setBackgroundColor(Color.RED);

        return textView;
    }
}
之后在咱们的主活动的UI界面当中将代码修改为:
四.activity_main.xml
<?xml version="1.0" encoding="utf-8"?>
<LinearLayout xmlns:android="http://schemas.android.com/apk/res/android"
    xmlns:app="http://schemas.android.com/apk/res-auto"
    xmlns:tools="http://schemas.android.com/tools"
    android:layout_width="match_parent"
    android:layout_height="match_parent"
    android:orientation="horizontal"
    tools:context=".MainActivity">
    <fragment
        android:name="com.example.fragment.MyFragment"
        android:id="@+id/myfragment_1"
        android:layout_weight="1"
        android:layout_width="0dp"
        android:layout_height="match_parent"
        />
    <fragment
        android:name="com.example.fragment.MyFragment2"
        android:id="@+id/myfragment_2"
        android:layout_weight="1"
        android:layout_width="0dp"
        android:layout_height="match_parent"

        />
</LinearLayout>
这样就可以把fragment引入到咱们的主活动上面来啦,运行安卓项目,大功告成!!
如果想要在第二个碎片当中更改一下界面,那么咱们也可以直接在fragment的布局当中进行布局,而不是使用Java代码来实现,毕竟在大多数时候,在实际的开发·过程当中,我们都会使用直接在碎片所对应的xml界面当中进行布局而不是用Java进行布。因为用Java布局实在是太难了,很难实现一些更加详细同时华丽的效果。用碎片所对应的xml界面如下所示:
五.fragment_my_fragment2.xml
在主界面右边的这个碎片是第二个碎片,因此只需要修改第二个碎片当中布局代码为ImageView就好啦,修改后的代码如下图所示:
<?xml version="1.0" encoding="utf-8"?>
<LinearLayout xmlns:android="http://schemas.android.com/apk/res/android"
    xmlns:tools="http://schemas.android.com/tools"
    android:layout_width="match_parent"
    android:layout_height="match_parent"
    tools:context=".MyFragment2">

<ImageView
    android:layout_width="300dp"
    android:layout_height="300dp"
    android:src="@drawable/girl"
    />

</LinearLayout>
这样就引入了一个ImageView,并在ImageView当中加入了一张外国美女的图片。Preview当中显示为:

当然有了这个还不够,之前我们在fragment所对应的Java代码当中是返回的textview对象,这里我们已经对fragment进行了整体布局,因此应该返回一整个view对象,才可以将整个布局显示出来,因此修改Java代码为:
六.MyFragment2.java
import android.os.Bundle;
import androidx.fragment.app.Fragment;
import android.view.LayoutInflater;
import android.view.View;
import android.view.ViewGroup;
import android.widget.TextView;


public class MyFragment2 extends Fragment {

    @Override
    public View onCreateView(LayoutInflater inflater, ViewGroup container,
                             Bundle savedInstanceState) {

        //加载布局得到View对象并返回

        //创建一个视图对象, 设置数据并返回
       /* TextView  textView = new TextView(getActivity());
        textView.setText("这是第二个碎片");
        textView.setBackgroundColor(Color.RED);*/
       View view=inflater.inflate(R.layout.fragment_my_fragment2,container,false);
        return view;
    }
}
最后的界面运行结果如下:

 浙公网安备 33010602011771号