
采样
1,最小标准随机数生成器Linear congruential generator(LCG):
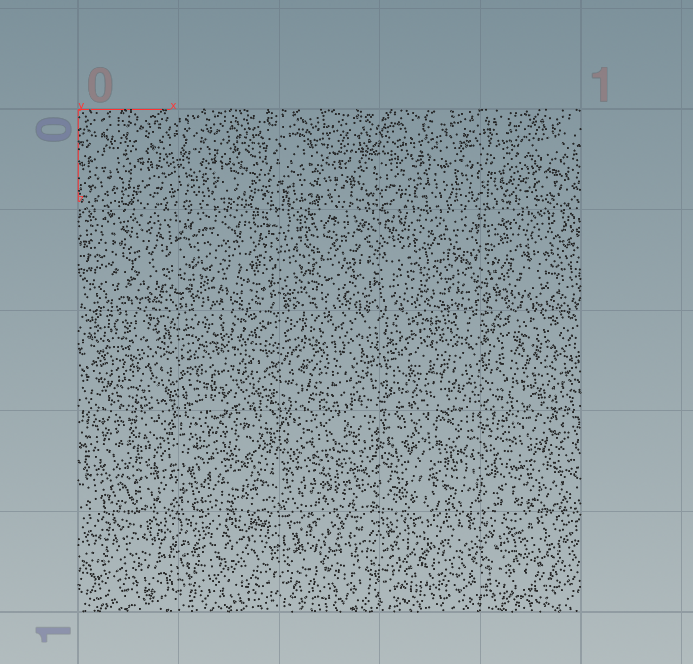
如图所示:感觉随机度很高。书中这个随机周期很高了,绝对够用。


void gen_points(int npts;float ptpos[])
{
    int m = pow(2,31) - 1;
    int a = 16807;
    int b = 45454;

    int seed = 1412133;
    float ui = 0.0f;
    for(int i=0;i<npts*3;i++){

        seed = (a * seed + b)  % m;
        ui = float(seed) / float(m);
        //printf("%f  ,%f \n",ui,seed);
        append(ptpos,ui);
    }
}


float pts[];
int   np = 10000;

// generation random points
gen_points(np,pts);


for(int i=0;i<np;i++)
{
    float x = pts[i*3];
    float y = pts[i*3+1];
    float z = pts[i*3+2];
    addpoint(geoself(),set(x,y,z));
}
2,随机游走random walk:
int np = 100;
float w = 0 ;
float scale = 0.1;

for(int i=0;i<np;i++)
{
    // add main point
    int add_ptnum = addpoint(geoself(),set(i*scale,w,0));

    if (rand(i*10000)> (1.0/2.0) )
    {
        // up
        w += 1.0f * scale;
    }
    else{
        // down
        w -= 1.0f* scale;
    }
}

3,布朗运动brownian motion
不改变期望,也不改变方差.............
int np = 100;
float w = 0 ;
float scale = 1;

// substeps movement!
int substeps = 6;
float substep_scale = 1 / sqrt(substeps);
for(int i=0;i<np;i++)
{
    for(int j =0;j<substeps;j++)
    {
            // add main point
        int add_ptnum = addpoint(geoself(),set( (i*substeps + j)*scale/substeps,w,0));
        if (rand(i*10+j*1000)> (1.0/2.0f) )
        {
            // up
            w += 1.0f * scale * substep_scale;
        }
        else{
            // down
            w -= 1.0f* scale * substep_scale;
        }
    }

}
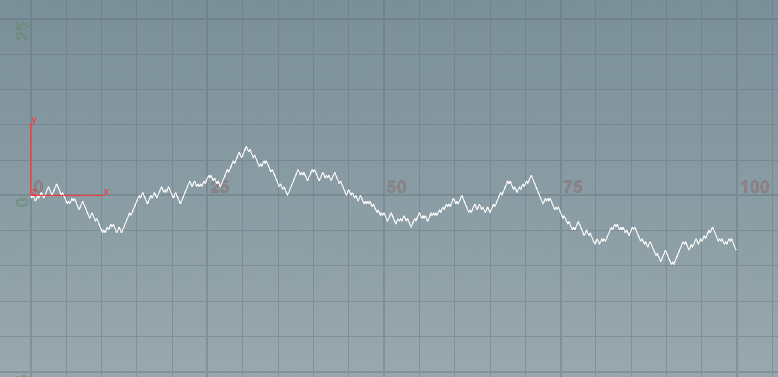
然后书中给了 用randn生成正态分布,模拟布朗运动,在houdini随便对应个rand
int k = 100;
float dt = 1.0/24.000f;
float sqdelt = sqrt(dt);
float b = 0;
for (int i=0;i<k;i++)
{
    addpoint(geoself(),set(i,b,0));
    b = b + sqdelt  * fit(rand(i),0,1,-5,5);
}
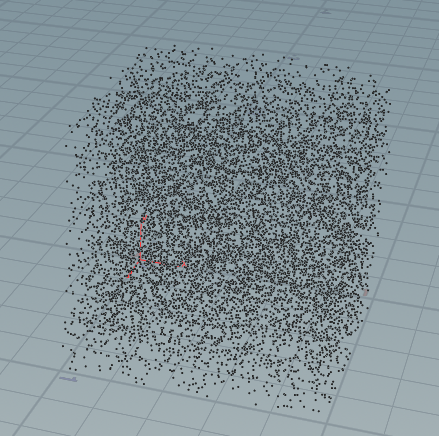
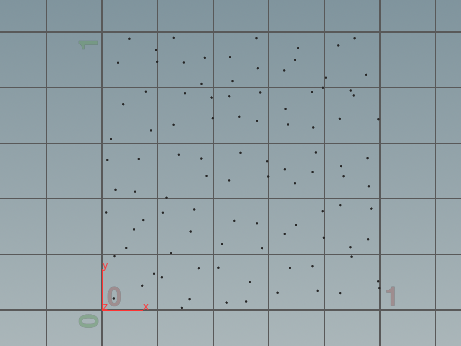
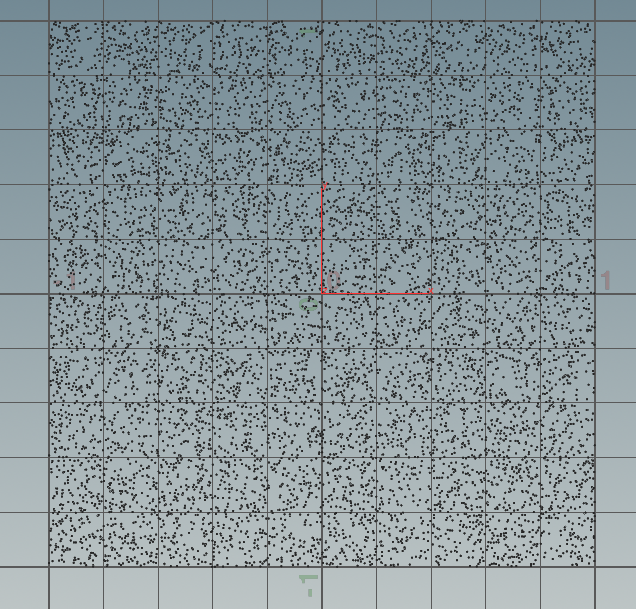
单位方块的采样点:
1,抖动采样
int n = 10;
for(int j=0;j<n;j++){
    for(int i=0;i<n;i++){
        float x = (i + rand(i*500+j*500))/n;
        float y = (j + rand(j*5000+i*1000000))/n;
        addpoint(geoself(),set(x,y,0));
    }
}
抗锯齿 抖动采样:
注释的部分就是像素中心发射一根光线:
但是这个引来一个问题,这个方法肯定不能并发,因为书中讲的random方法,不是线程安全。应该把houdini的rand()方法做出来。
void RT_World::render()
{

    // INIT our PPMIO
    PPMIO *imageIo = new PPMIO;
    PPMIO::WriteParam imageIoParam;
    //

    imageIoParam.width = vp.hres;
    imageIoParam.height = vp.vres;
    imageIoParam.maxPixelValue = 255;

    // IO will save ascii type for easy reading
    imageIoParam.imageIOType = PPMIO::ASCII_P3_TYPE;
    imageIoParam.imageType = PPMIO::RGB_TYPE;
// IO image buffer;
    PPMIO::RGB  *data = new PPMIO::RGB[vp.hres*vp.hres];
//
    RT_RGB pixel_color;
    RT_Ray ray;
    double zw = 100;
    ray.d = RT_VEC_3D({ 0,0,-1 });

    RT_VEC_2D sample_point; // unit square sample point
    RT_VEC_2D pixel_pos;    // pixel pos with sample point

    RT_Log_StdOut("Start Rendering");
    for (int r = 0; r < vp.vres; r++) {        // loop the row
        for (int c = 0; c < vp.hres; c++) {    // loop the column

            pixel_color = black_color;
            //double x = vp.size  * (c - 0.5 *(vp.hres - 1.0));
            //double y = vp.size  * (r - 0.5 *(vp.vres - 1.0));
            //cout << "rendering pixel x/y:   " << x << "/" << y << endl;
            //ray.o = RT_VEC_3D({ x,y,zw });
            //pixel_color = tracer_ptr->trace_ray(ray);
            //cout << "trace ptr get color->" << pixel_color << endl;


            // for samples
            for (int i = 0; i < vp.num_samples; i++) {
                sample_point = vp.sampler_ptr->sample_unit_square();
                pixel_pos[0] = vp.size * (c - 0.5*vp.hres + sample_point[0]);
                pixel_pos[1] = vp.size * (r - 0.5*vp.vres + sample_point[1]);
                ray.o = RT_VEC_3D({ pixel_pos[0],pixel_pos[1],RT_SCALAR(zw) });
                pixel_color += tracer_ptr->trace_ray(ray);
            }
            pixel_color /= vp.num_samples;


            // because our ray born from Cartesian coordinates
            // we need trans to our image coord
            int row = (vp.vres-1) - r;
            int column = c;
            // our pixel_color is 0~1 , we need convert to RGB 0~255 space
            //cout << "current set x y :" << row << "|" << column << endl;
            int index = row * vp.hres + column;
            PPMIO::RGB indexRGB;
            indexRGB.R = unsigned char(pixel_color[0] * 255);
            indexRGB.G = unsigned char(pixel_color[1] * 255);
            indexRGB.B = unsigned char(pixel_color[2] * 255);
            data[index] = indexRGB;

        }
    }


    imageIo->writeImage("c:/test_aa.ppm", data, imageIoParam);
    delete imageIo;
    delete []data;

    RT_Log_StdOut("End Rendering");

}
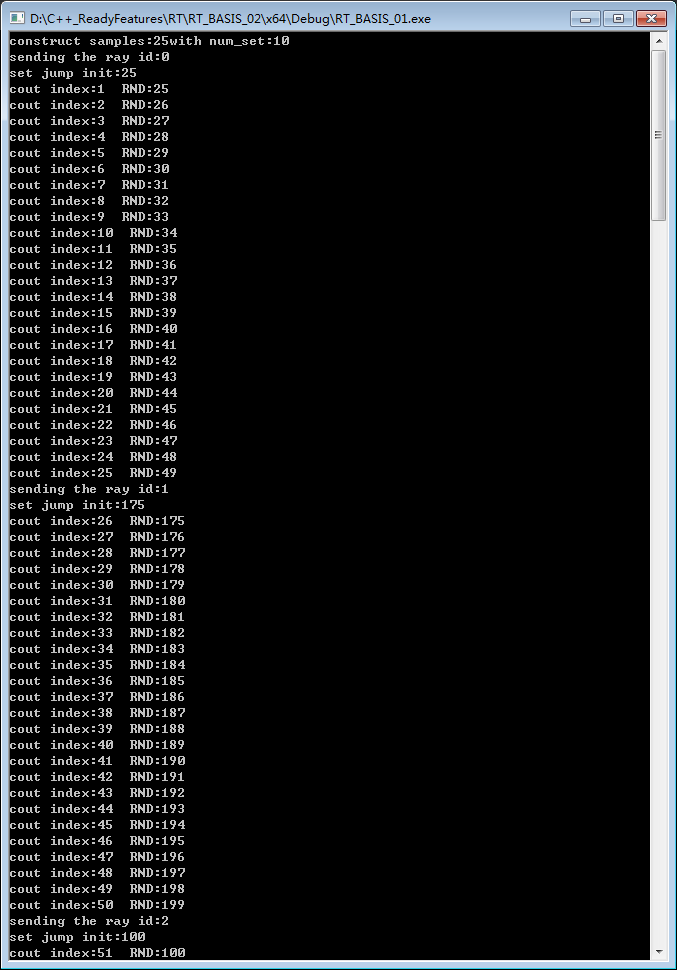
2,比较有意思的,相邻像素随机在 采样集合 采取不同的 samples:
inline int
rand_int(void) {
    return(rand());
}

void unit_test_random_ray() {
    int num_samples = 25;
    int num_sets = 10;
    int count = 0;
    int jump = 0;
    // per ray has unique own jump
    cout << "construct samples:" << num_samples << "with num_set:" << num_sets << endl;
    for (int ray = 0; ray < 5; ray++) {
        cout << "sending the ray id:" << ray << endl;
        // loop 25 times,get 25 points
        for (int i = 0; i < num_samples; i++)
        {
            if (count % num_samples == 0) {
                jump = (rand_int() % num_sets) * num_samples;
                cout << "set jump init:" << jump << endl;

            }
            // 25  samples position index we get:
            cout <<"cout index:" << count <<"  RND:" << jump + (count++ % num_samples) << endl;
        }
    }
}
而且在set里面访问连续的samples,还可以把这些连续的打乱访问。
void unit_test_random_ray2() {
    int num_samples = 25;
    int num_sets = 10;
    int count = 0;
    int jump = 0;


    vector<int> shuffled_indices;
    // set up shuffle_indices
    vector <int> indices;
    for (int i = 0; i < num_samples; i++) {
        indices.push_back(i);
    }
    for (int p = 0; p < num_sets; p++) {
        random_shuffle(indices.begin(), indices.end());
        for (int j = 0; j < num_samples; j++) {
            shuffled_indices.push_back(indices[j]);
        }
    }


    // per ray has unique own jump
    cout << "construct samples:" << num_samples << "with num_set:" << num_sets << endl;
    for (int ray = 0; ray < 5; ray++) {
        cout << "sending the ray id:" << ray << endl;
        // loop 25 times,get 25 points
        for (int i = 0; i < num_samples; i++)
        {
            if (count % num_samples == 0) {
                jump = (rand_int() % num_sets) * num_samples;
                cout << "set jump init:" << jump << endl;

            }
            // 25  samples position index we get:
            cout << "cout index:" << count << "  RND:" << jump + shuffled_indices[jump+(count++ % num_samples)] << endl;
        }
    }
}

例如书中给的图是用的第一种方式访问,反射有明显的水波纹.第二种就改善这个问题:


3,圆采样映射。
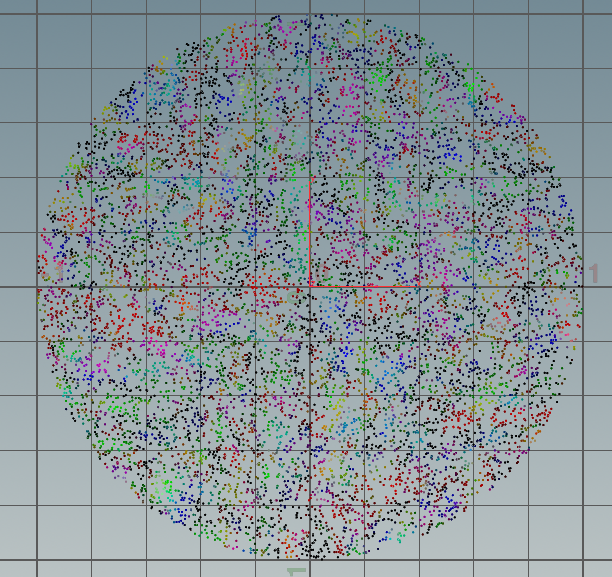
float r = 0;
float phi = 0;
if(@P.x > -@P.y)
{
    if(@P.x > @P.y)
    {
        r = @P.x;
        phi = @P.y / @P.x;
    }
    else
    {
        r= @P.y;
        phi = 2 - @P.x / @P.y;
    }
}

else{
    if(@P.x < @P.y)
    {
        r = -@P.x;
        phi = 4 + @P.y/@P.x;
    }
    else{
        r = -@P.y ;
        if(@P.y != 0.0){
            phi = 6 - @P.x / @P.y;
        }
        else
            phi = 0.0;
    }
}


phi *= 3.1415926/4.0;
@P.x = r * cos(phi);
@P.y = r * sin(phi);
4,(书里是8.4章)采样与轴对齐透视,也就是当eye点z轴有数值,然后定义在视线方向有个距离d

void RT_World::render_perspective_zw() {

    // INIT our PPMIO
    PPMIO *imageIo = new PPMIO;
    PPMIO::WriteParam imageIoParam;
    //

    imageIoParam.width = vp.hres;
    imageIoParam.height = vp.vres;
    imageIoParam.maxPixelValue = 255;

    // IO will save ascii type for easy reading
    imageIoParam.imageIOType = PPMIO::ASCII_P3_TYPE;
    imageIoParam.imageType = PPMIO::RGB_TYPE;

    std::cout << "Start Construct Image buffer data\n";
    // IO image buffer;
    PPMIO::RGB  *data = new PPMIO::RGB[vp.hres*vp.hres];
    std::cout << "End Construct Image buffer data\n";

    //
    RT_RGB pixel_color;
    RT_Ray ray;

    RT_SCALAR eye = 100; // view point
    RT_SCALAR d = 20;    // distance view point to ViewPlane!
    ray.o = RT_VEC_3D({0.0,0.0,eye});

    RT_VEC_2D sample_point; // unit square sample point
    RT_VEC_2D pixel_pos;    // pixel pos with sample point

    RT_Log_StdOut("Start Rendering");
    for (int r = 0; r < vp.vres; r++) {        // loop the row
        for (int c = 0; c < vp.hres; c++) {    // loop the column

            pixel_color = black_color;


            // for samples
            for (int i = 0; i < vp.num_samples; i++) {
                sample_point = vp.sampler_ptr->sample_unit_square();
                pixel_pos[0] = vp.size * (c - 0.5*vp.hres + sample_point[0]);
                pixel_pos[1] = vp.size * (r - 0.5*vp.vres + sample_point[1]);
                // cal ray direction
                ray.d = RT_VEC_3D({ pixel_pos[0] - ray.o[0],pixel_pos[1] - ray.o[1],-d });
                ray.d.normalize();
                //ray.o = RT_VEC_3D({ pixel_pos[0],pixel_pos[1],RT_SCALAR(zw) });
                pixel_color += tracer_ptr->trace_ray(ray);
            }
            pixel_color /= vp.num_samples;


            // because our ray born from Cartesian coordinates
            // we need trans to our image coord
            int row = (vp.vres - 1) - r;
            int column = c;
            // our pixel_color is 0~1 , we need convert to RGB 0~255 space
            //cout << "current set x y :" << row << "|" << column << endl;
            int index = row * vp.hres + column;
            PPMIO::RGB indexRGB;
            indexRGB.R = unsigned char(pixel_color[0] * 255);
            indexRGB.G = unsigned char(pixel_color[1] * 255);
            indexRGB.B = unsigned char(pixel_color[2] * 255);
            data[index] = indexRGB;

        }
    }


    imageIo->writeImage("c:/test_aa_pzw_e100_d_100.ppm", data, imageIoParam);
    delete imageIo;
    delete[]data;

    RT_Log_StdOut("End Rendering");
}
参考
<<数值分析>>
<<RayTracing from ground up>>
<<Fundamentals of computer graphics>>

 浙公网安备 33010602011771号