
Flutter for OpenHarmony 实战:资料加密解密器完整开发指南
Flutter for OpenHarmony 实战:文件加密解密器完整开发指南
摘要
欢迎加入开源鸿蒙跨平台社区:开源鸿蒙跨平台开发者社区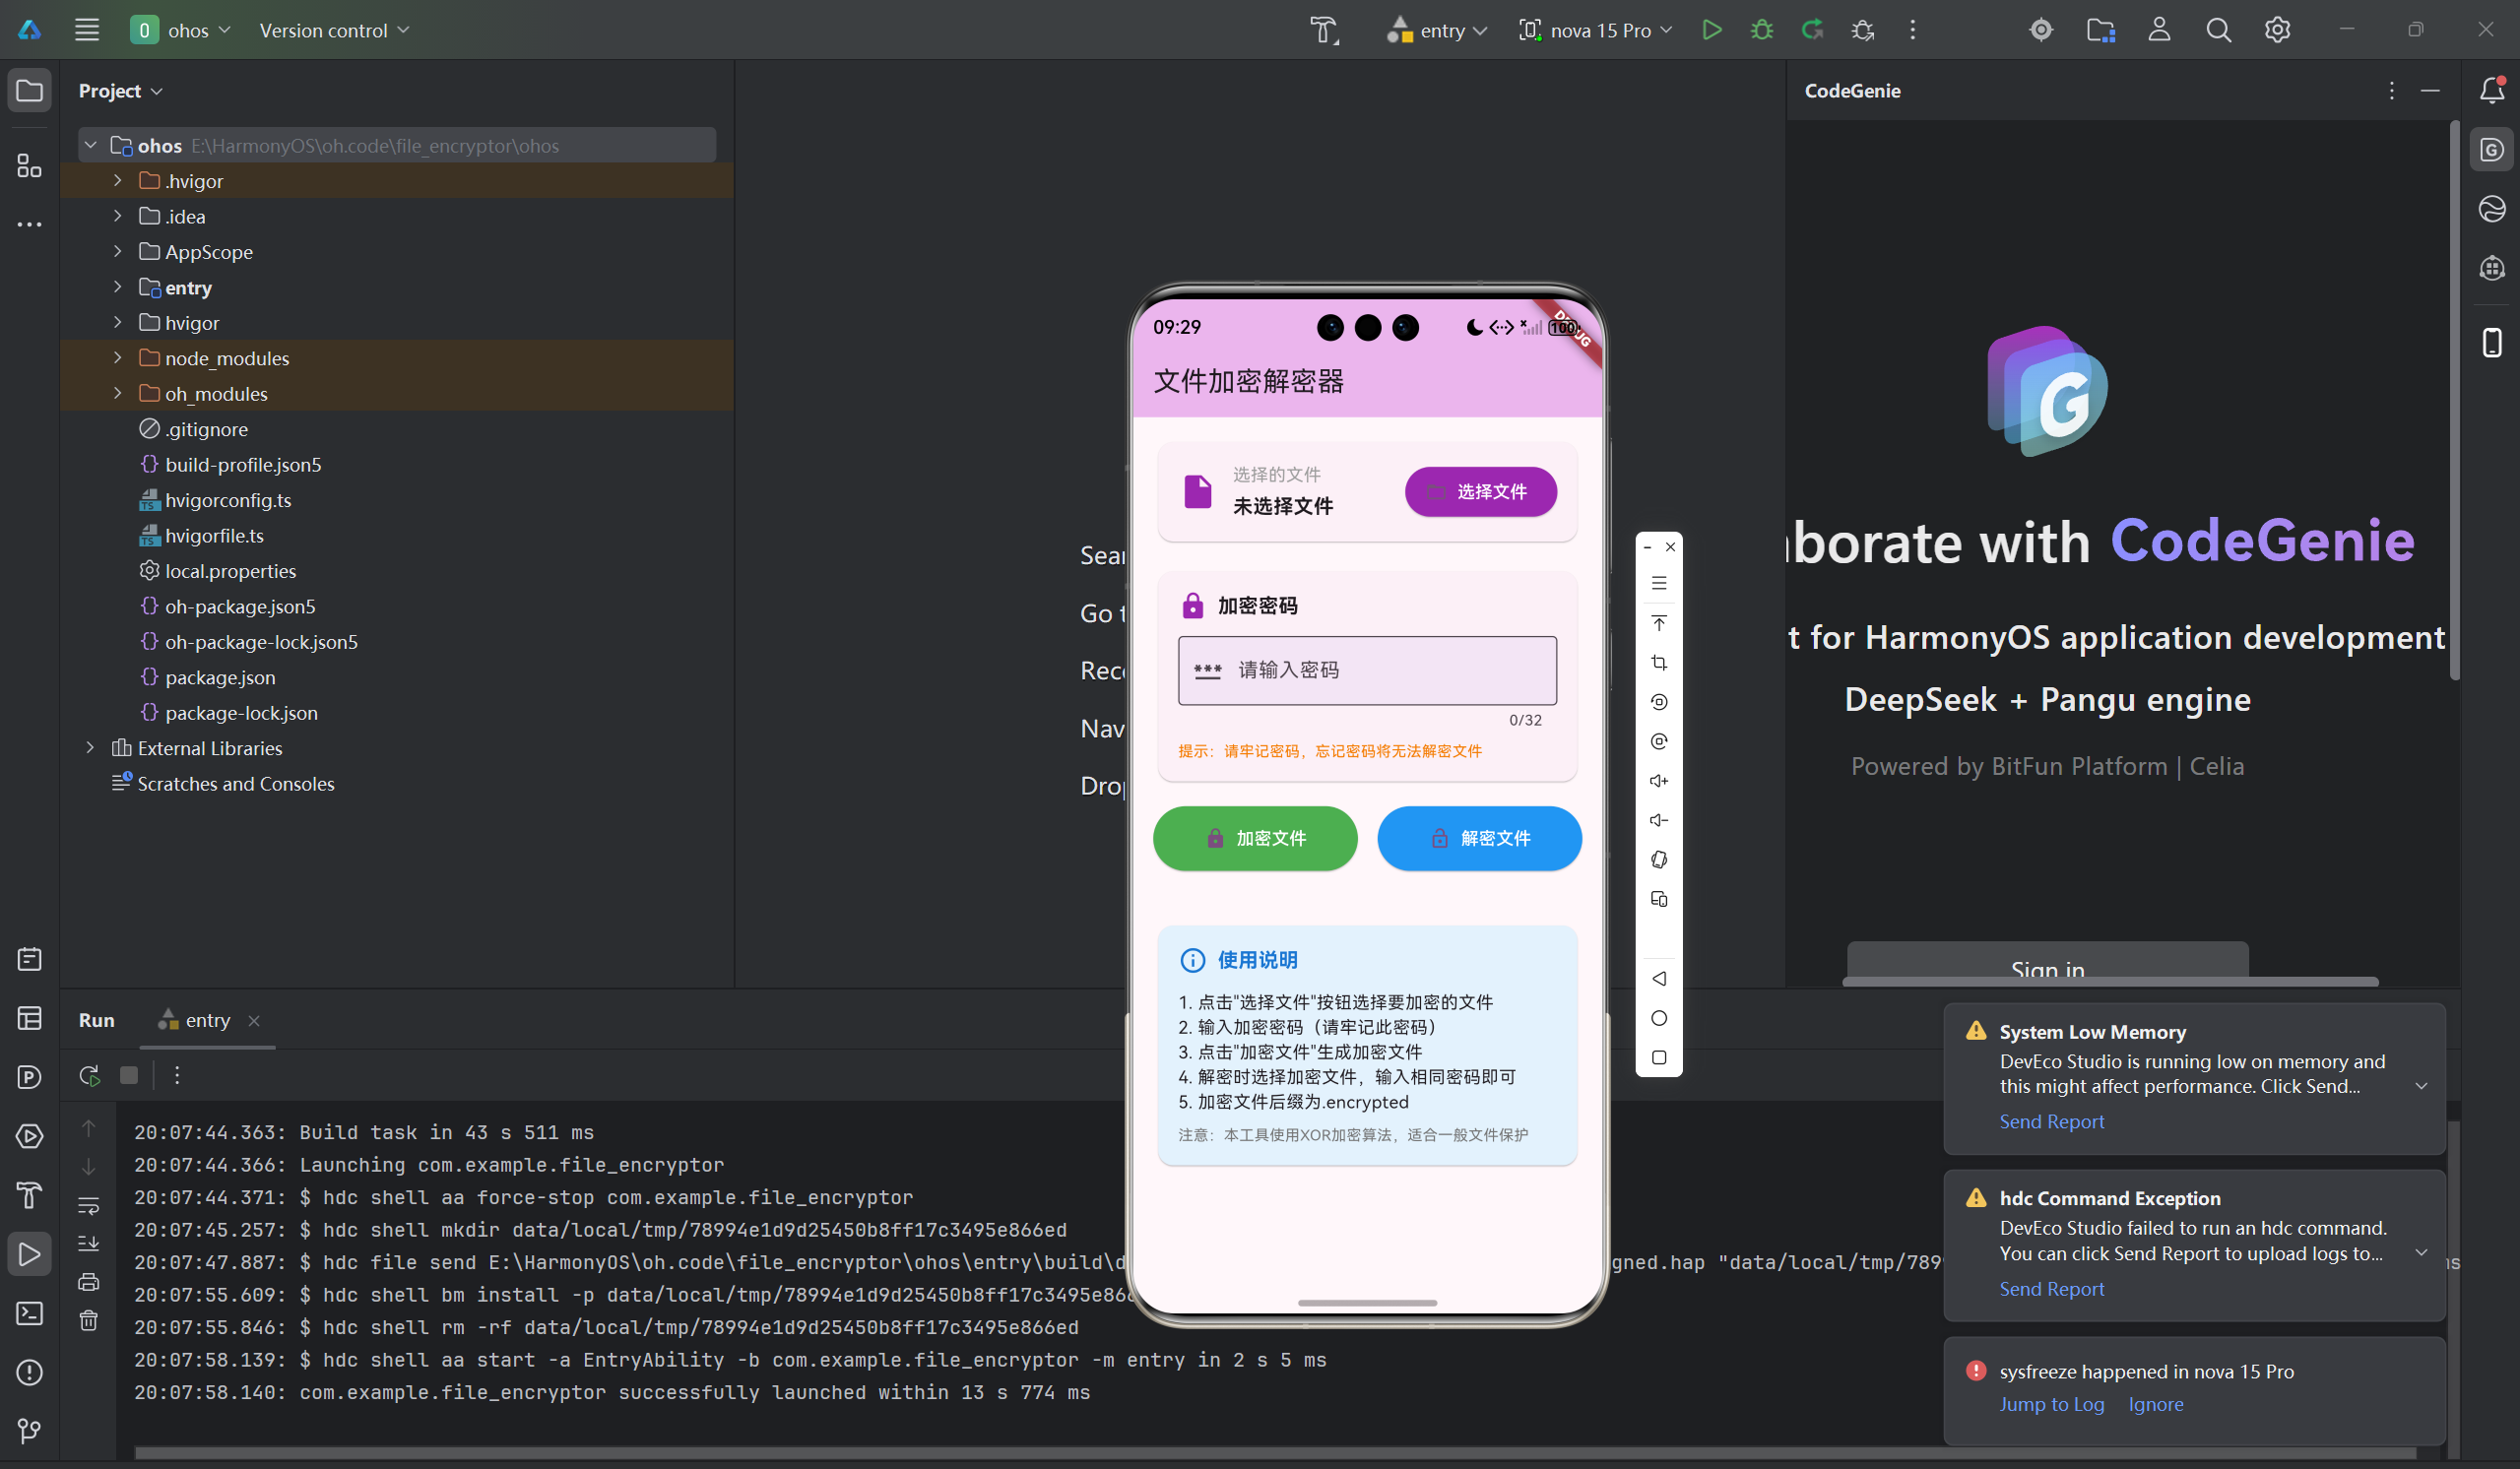
文件加密是保护数据安全的重要手段。本文将详细介绍如何使用Flutter for OpenHarmony框架开发一款功能完整的文件加密解密器应用。文章涵盖了XOR加密算法原理、文件读写操作、密码验证、加密解密流程等核心技术点。通过本文学习,读者将掌握Flutter在鸿蒙平台上开发安全类应用的完整流程,了解对称加密算法的实现方法。
一、项目背景与功能概述
1.1 文件加密的重要性
文件加密是保护敏感数据的重要手段:
- 防止未授权访问
- 保护个人隐私
- 保护商业机密
- 防止数据泄露
1.2 应用功能规划
| 功能模块 | 具体功能 |
|---|---|
| 文件选择 | 选择要加密/解密的文件 |
| 密码设置 | 设置加密密码 |
| 文件加密 | 使用XOR算法加密文件 |
| 文件解密 | 使用相同密码解密文件 |
| 结果显示 | 显示操作结果和输出文件路径 |
1.3 XOR加密算法
XOR(异或)加密是一种对称加密算法:
- 加密和解密使用相同算法
- 简单高效,适合一般文件保护
- 密钥循环使用于整个文件
二、技术选型与架构设计
2.1 核心技术栈
文件操作
- dart:io:File类读写文件
- readAsBytes:读取文件字节
- writeAsBytes:写入文件字节
加密算法
- XOR异或运算
- 密钥循环使用
- 字节级别加密
UI组件
- TextField:密码输入
- ElevatedButton:操作按钮
- Card:信息展示
2.2 应用架构
FileEncryptorApp (应用根组件)
    └── FileEncryptorPage (加密解密页面)
        ├── 文件选择区域
        │   ├── 文件信息显示
        │   └── 选择文件按钮
        ├── 密码输入区域
        │   ├── 密码输入框
        │   └── 密码提示
        ├── 操作按钮区域
        │   ├── 加密按钮
        │   └── 解密按钮
        ├── 结果显示区域
        └── 使用说明
2.3 数据流设计

三、XOR加密算法实现
3.1 XOR算法原理
异或运算规则:
- 0 XOR 0 = 0
- 0 XOR 1 = 1
- 1 XOR 0 = 1
- 1 XOR 1 = 0
特性:
- A XOR B = C,则 C XOR B = A(可逆性)
- 加密和解密使用相同算法
3.2 算法实现
// XOR加密算法
List<int> _xorEncrypt(List<int> data, String password) {
  // 将密码转换为字节数组
  final passwordBytes = utf8.encode(password);
  final result = <int>[];
    // 对每个字节进行XOR运算
    for (int i = 0; i < data.length; i++) {
    result.add(data[i] ^ passwordBytes[i % passwordBytes.length]);
    }
    return result;
    }
算法说明
- 密码转换为UTF-8字节数组
- 密钥循环使用(取模运算)
- 每个数据字节与对应密钥字节XOR
3.3 加密示例
原始数据: [0x48, 0x65, 0x6C, 0x6C]  // "Hell"
密码: "abc"
密码字节: [0x61, 0x62, 0x63]
加密过程:
0x48 XOR 0x61 = 0x29  // 'H' XOR 'a'
0x65 XOR 0x62 = 0x07  // 'e' XOR 'b'
0x6C XOR 0x63 = 0x0F  // 'l' XOR 'c'
0x6C XOR 0x61 = 0x0D  // 'l' XOR 'a'
加密结果: [0x29, 0x07, 0x0F, 0x0D]
四、文件操作实现
4.1 选择文件
Future<void> _selectFile() async {
  final controller = TextEditingController();
  if (!mounted) return;
  showDialog(
  context: context,
  builder: (context) => AlertDialog(
  title: const Text('选择文件'),
  content: TextField(
  controller: controller,
  decoration: const InputDecoration(
  labelText: '文件路径',
  hintText: '输入文件的完整路径',
  border: OutlineInputBorder(),
  ),
  ),
  actions: [
  TextButton(
  onPressed: () => Navigator.pop(context),
  child: const Text('取消'),
  ),
  TextButton(
  onPressed: () {
  if (controller.text.isNotEmpty) {
  final file = File(controller.text);
  if (file.existsSync()) {
  setState(() {
  _selectedFilePath = controller.text;
  _selectedFileName = controller.text.split(Platform.pathSeparator).last;
  });
  Navigator.pop(context);
  } else {
  ScaffoldMessenger.of(context).showSnackBar(
  const SnackBar(content: Text('文件不存在')),
  );
  }
  }
  },
  child: const Text('确定'),
  ),
  ],
  ),
  );
  }
4.2 读取文件
final inputFile = File(_selectedFilePath);
final bytes = await inputFile.readAsBytes();
4.3 写入文件
final outputFile = File(outputPath);
await outputFile.writeAsBytes(encryptedBytes);
五、加密功能实现
5.1 加密流程
Future<void> _encryptFile() async {
  // 验证输入
  if (_selectedFilePath.isEmpty) {
  _showMessage('请先选择文件', Colors.orange);
  return;
  }
  if (_passwordController.text.isEmpty) {
  _showMessage('请输入密码', Colors.orange);
  return;
  }
  setState(() {
  _isProcessing = true;
  _resultMessage = '正在加密...';
  });
  try {
  // 1. 读取文件
  final inputFile = File(_selectedFilePath);
  final bytes = await inputFile.readAsBytes();
  // 2. XOR加密
  final encryptedBytes = _xorEncrypt(bytes, _passwordController.text);
  // 3. 生成加密文件路径
  final outputPath = '$_selectedFilePath.encrypted';
  final outputFile = File(outputPath);
  await outputFile.writeAsBytes(encryptedBytes);
  // 4. 显示结果
  setState(() {
  _resultMessage = '加密成功!\n加密文件: ${outputPath.split(Platform.pathSeparator).last}';
  });
  _showMessage('加密成功!', Colors.green);
  } catch (e) {
  setState(() {
  _resultMessage = '加密失败: $e';
  });
  _showMessage('加密失败', Colors.red);
  } finally {
  setState(() {
  _isProcessing = false;
  });
  }
  }
5.2 加密文件命名
原文件: test.txt
加密后: test.txt.encrypted
原文件: document.pdf
加密后: document.pdf.encrypted
六、解密功能实现
6.1 解密流程
Future<void> _decryptFile() async {
  // 验证输入
  if (_selectedFilePath.isEmpty) {
  _showMessage('请先选择文件', Colors.orange);
  return;
  }
  if (_passwordController.text.isEmpty) {
  _showMessage('请输入密码', Colors.orange);
  return;
  }
  setState(() {
  _isProcessing = true;
  _resultMessage = '正在解密...';
  });
  try {
  // 1. 读取加密文件
  final inputFile = File(_selectedFilePath);
  final bytes = await inputFile.readAsBytes();
  // 2. XOR解密(XOR是对称的)
  final decryptedBytes = _xorEncrypt(bytes, _passwordController.text);
  // 3. 生成解密文件路径
  String outputPath;
  if (_selectedFilePath.endsWith('.encrypted')) {
  outputPath = _selectedFilePath.substring(0, _selectedFilePath.length - '.encrypted'.length);
  outputPath += '.decrypted';
  } else {
  outputPath = '$_selectedFilePath.decrypted';
  }
  // 4. 写入解密文件
  final outputFile = File(outputPath);
  await outputFile.writeAsBytes(decryptedBytes);
  // 5. 显示结果
  setState(() {
  _resultMessage = '解密成功!\n解密文件: ${outputPath.split(Platform.pathSeparator).last}';
  });
  _showMessage('解密成功!', Colors.green);
  } catch (e) {
  setState(() {
  _resultMessage = '解密失败: $e';
  });
  _showMessage('解密失败,密码可能错误', Colors.red);
  } finally {
  setState(() {
  _isProcessing = false;
  });
  }
  }
6.2 解密文件命名
加密文件: test.txt.encrypted
解密后: test.txt.decrypted
加密文件: data.encrypted
解密后: data.decrypted
七、UI界面实现
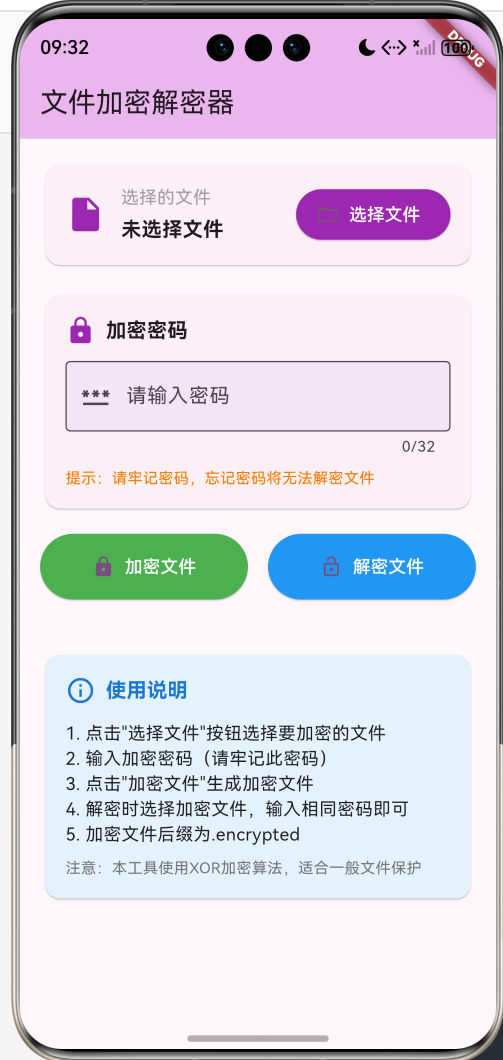
7.1 文件选择区域
Card(
child: Padding(
padding: const EdgeInsets.all(16),
child: Column(
crossAxisAlignment: CrossAxisAlignment.start,
children: [
Row(
children: [
const Icon(Icons.insert_drive_file, size: 32, color: Colors.purple),
const SizedBox(width: 12),
Expanded(
child: Column(
crossAxisAlignment: CrossAxisAlignment.start,
children: [
const Text('选择的文件'),
const SizedBox(height: 4),
Text(
_selectedFileName,
style: const TextStyle(
fontSize: 16,
fontWeight: FontWeight.bold,
),
),
if (_selectedFilePath.isNotEmpty)
Text(
_selectedFilePath,
style: TextStyle(
fontSize: 12,
color: Colors.grey.shade600,
),
maxLines: 2,
overflow: TextOverflow.ellipsis,
),
],
),
),
const SizedBox(width: 12),
ElevatedButton.icon(
onPressed: _isProcessing ? null : _selectFile,
icon: const Icon(Icons.folder_open),
label: const Text('选择文件'),
style: ElevatedButton.styleFrom(
backgroundColor: Colors.purple,
foregroundColor: Colors.white,
),
),
],
),
],
),
),
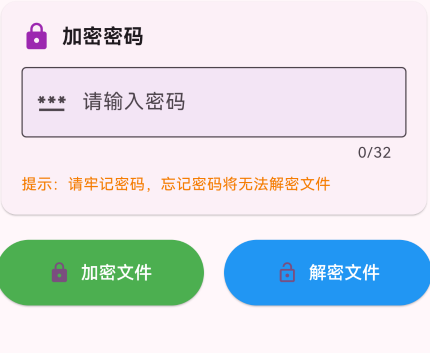
)7.2 密码输入区域

Card(
child: Padding(
padding: const EdgeInsets.all(16),
child: Column(
crossAxisAlignment: CrossAxisAlignment.start,
children: [
const Row(
children: [
Icon(Icons.lock, size: 24, color: Colors.purple),
SizedBox(width: 8),
Text(
'加密密码',
style: TextStyle(
fontSize: 16,
fontWeight: FontWeight.bold,
),
),
],
),
const SizedBox(height: 12),
TextField(
controller: _passwordController,
obscureText: true,
decoration: InputDecoration(
labelText: '请输入密码',
hintText: '用于加密和解密的密钥',
prefixIcon: const Icon(Icons.password),
border: const OutlineInputBorder(),
filled: true,
fillColor: Colors.purple.shade50,
),
maxLength: 32,
),
const SizedBox(height: 8),
Text(
'提示:请牢记密码,忘记密码将无法解密文件',
style: TextStyle(
fontSize: 12,
color: Colors.orange.shade700,
),
),
],
),
),
)
7.3 操作按钮区域
Row(
children: [
Expanded(
child: ElevatedButton.icon(
onPressed: _isProcessing ? null : _encryptFile,
icon: const Icon(Icons.lock),
label: const Text('加密文件'),
style: ElevatedButton.styleFrom(
backgroundColor: Colors.green,
foregroundColor: Colors.white,
padding: const EdgeInsets.symmetric(vertical: 16),
),
),
),
const SizedBox(width: 16),
Expanded(
child: ElevatedButton.icon(
onPressed: _isProcessing ? null : _decryptFile,
icon: const Icon(Icons.lock_open),
label: const Text('解密文件'),
style: ElevatedButton.styleFrom(
backgroundColor: Colors.blue,
foregroundColor: Colors.white,
padding: const EdgeInsets.symmetric(vertical: 16),
),
),
),
],
)
7.4 结果显示区域
if (_resultMessage.isNotEmpty)
Card(
color: _resultMessage.contains('成功')
? Colors.green.shade50
: Colors.red.shade50,
child: Padding(
padding: const EdgeInsets.all(16),
child: Column(
crossAxisAlignment: CrossAxisAlignment.start,
children: [
Row(
children: [
Icon(
_resultMessage.contains('成功')
? Icons.check_circle
: Icons.error,
color: _resultMessage.contains('成功')
? Colors.green
: Colors.red,
),
const SizedBox(width: 8),
const Text(
'处理结果',
style: TextStyle(
fontSize: 16,
fontWeight: FontWeight.bold,
),
),
],
),
const SizedBox(height: 12),
Text(_resultMessage),
],
),
),
)
八、运行效果与测试
8.1 项目运行命令
cd E:\HarmonyOS\oh.code\file_encryptor
flutter run -d ohos
8.2 功能测试清单
文件选择测试
- 点击选择文件按钮弹出对话框
- 输入正确路径显示文件名
- 输入不存在路径提示错误
密码输入测试
- 密码框隐藏输入内容
- 密码长度限制32位
- 密码提示显示正常
加密功能测试
- 选择文件后可加密
- 无密码时提示错误
- 加密生成.encrypted文件
- 加密成功显示绿色提示
解密功能测试
- 选择加密文件可解密
- 正确密码解密成功
- 错误密码解密失败
- 解密生成.decrypted文件
处理状态测试
- 处理中显示进度提示
- 处理中按钮禁用
- 处理完成显示结果
九、总结
本文详细介绍了使用Flutter for OpenHarmony开发文件加密解密器的完整过程,涵盖了以下核心技术点:
- XOR加密算法:对称加密、密钥循环使用
- 文件操作:读写文件字节流
- 密码验证:输入验证、安全提示
- 加密流程:读取、加密、写入
- 解密流程:读取、解密、写入
- UI交互:文件选择、密码输入、结果显示
这个项目展示了Flutter在安全类应用开发中的完整流程,代码结构清晰,功能实用。读者可以基于此项目添加更多功能,如:
- AES等更强加密算法
- 文件拖放选择
- 批量加密解密
- 加密进度显示
- 密码强度检测
- 加密文件预览
通过本文的学习,读者应该能够独立开发类似的安全应用,掌握Flutter在鸿蒙平台上的加密算法实现技巧。
欢迎加入开源鸿蒙跨平台社区: 开源鸿蒙跨平台开发者社区

 浙公网安备 33010602011771号