

Linux操作文档——Apache网站服务(httpd-2.4.25)
一、Apache简介
Apache的主要特点
开放源代码
跨平台应用
支持各种Web编程语言:Apache服务器可支持的网页编程语言包括Perl,PHP,PythonJava 等,甚至微软的ASP技术也可以在Apache服务器中使用。
模块化设计:其他软件开发商可以编写标准的模块程序,从而添加Apache本身并不具有的其他功能。
运行非常稳定:Apache服务器可用于构建具有大负载访问量的Web站点。
良好的安全性:Apache服务器具有相对较好的安全性,Apache的维护团队会及时对已发现的漏洞提供修补程序,为Apache的所有使用者提供 尽可能安全的服务器程序。
二、安装httpd服务器
1、普通安装
1、安装相应的库和头文件
[root@localhost ~]# rpm -q httpd                 //查看是否安装
[root@localhost ~]# rpm -e httpd --nodeps                 //卸载已安装的程序
[root@localhost ~]# yum -y install apr apr-devel cyrus-sasl-devel expat-devel libdb-devel openldap-devel apr-util-devel apr-util pcre-devel pcre
2、源码编译及安装
[root@localhost media]# tar zxf httpd-2.4.25.tar.gz -C /usr/src/
[root@localhost media]# cd /usr/src/httpd-2.4.25/
[root@localhost httpd-2.4.25]# ./configure --prefix=/usr/local/httpd --enable-so --enable-rewrite --enable-charset-lite --enable-cgi && make && make install
[root@localhost ~]# /usr/local/httpd/bin/apachectl start                 //启动服务
[root@localhost ~]# /usr/local/httpd/bin/apachectl restart                 //重启服务
[root@localhost ~]# /usr/local/httpd/bin/apachectl stop                 //停止服务
| 常用参数 | 说明 |
|---|---|
| –prefix | 指定httpd服务程序的安装目录 |
| –enable-so | 启用动态加载模块支持,使httpd具备进一步扩展功能的能力 |
| –enable-rewrite | 启用网页地址重写,用于网站优化及目录迁移维护 |
| – enable-charset-lite | 启动字符集支持,以便支持使用各种字符集编码的网页 |
| –enable-cgi | 启用CGI脚本程序支持,便于扩展网站的应用访问能力 |
| –enable-ssl | 编译SSL模块 |
| –with-zlib | 支持ZLIB压缩 |
| –with-pcre | 支持正则表达式 |
| –enable-mpms-shared=all | 以共享方式编译的模块 |
| –with-mpm=prefork | 指明httpd的工作方式为prefork |
3、确认安装结果
[root@localhost ~]# ls /usr/local/httpd/
bin    cgi-bin  error   icons    logs  manual
build  conf     htdocs  include  man   modules
| 主要子目录 | 用途 |
|---|---|
| /usr/local/httpd/bin | 存放httpd服务各种执行程序文件,主程序httpd、服务控制工具apachectl等 |
| /usr/local/httpd/cgi-bin | 存放各种CGI程序文件 |
| /usr/local/httpd/logs | 存放httpd服务的日志文件 |
| /usr/local/httpd/conf | 存放httpd服务的各种配置文件,包括主配置文件httpd.conf |
| /usr/local/httpd/htdocs | 存放网页文档,包括首页文件index.html等 |
| /usr/loca/httpd/modules | 存放httpd服务的各种模块文件 |
4、优化执行路径
[root@localhost ~]# ln -s /usr/local/httpd/bin/* /usr/local/bin/
[root@localhost ~]# ls -l /usr/local/bin/httpd /usr/local/bin/apachectl
lrwxrwxrwx. 1 root root 30 6月   1 15:31 /usr/local/bin/apachectl -> /usr/local/httpd/bin/apachectl
lrwxrwxrwx. 1 root root 26 6月   1 15:31 /usr/local/bin/httpd -> /usr/local/httpd/bin/httpd
5、添加httpd系统服务
建立[service].service配置文件
[root@localhost ~]# vim /lib/systemd/system/httpd.service
[Unit]
Description = The Apache HTTP Server    #设置服务单元描述字符串
After = network.target    #设置服务单元的启动先后顺序(先启动httpd.service,后启动network.target)

[Service]
Type = forking   #设置服务进程的启动类型
PIDFile = /usr/local/httpd/logs/httpd.pid    #设置服务的守护进程的PID文件
ExecStart = /usr/local/bin/apachectl $OPTIONS   #设置服务启动时执行的命令
ExecReload = /bin/kill -HUP $MAINPID   #设置服务重新加载时执行的命令
KillMode = process  #设置在单元停止时,杀死进程的方法。 process表示仅杀死主进程
Restart = on-failure  #表示仅在进程异常退出时重启
RestartSec = 42s  #设置在重启服务前暂停多长时间

[Install]
WantedBy = graphical.target  #设置该服务所在的Target
[root@localhost ~]# systemctl enable httpd                 //设置httpd服务开机启动
Created symlink from /etc/systemd/system/graphical.target.wants/httpd.service to /usr/lib/systemd/system/httpd.service.
2、优化安装
1、检查是否已安装rpm包httpd
[root@localhost ~]# rpm -q httpd                 //查看是否安装
[root@localhost ~]# rpm -e httpd --nodeps                 //卸载已安装的程序
2、编写脚本安装前提软件
软件包:https://download.csdn.net/download/g950904/12504171
[root@localhost ~]# vim httpd.sh
#!/bin/bash
cd /media
yum -y install zlib-*
tar zxf apr-1.5.2.tar.gz -C /usr/src
tar zxf apr-util-1.5.4.tar.gz -C /usr/src
tar zxf pcre-8.39.tar.gz -C /usr/src
tar zxf openssl-1.0.1u.tar.gz -C /usr/src
tar zxf httpd-2.4.25.tar.gz -C /usr/src

cd /usr/src
cd apr-1.5.2
./configure --prefix=/usr/local/apr && make && make install

cd ..
cd apr-util-1.5.4
./configure --prefix=/usr/local/apr-util --with-apr=/usr/local/apr && make && make install

cd ..
cd pcre-8.39
./configure --prefix=/usr/local/pcre && make && make install

cd ..
cd openssl-1.0.1u
./config -fPIC --prefix=/usr/local/openssl enable-shared && make && make install

cd ..
cd httpd-2.4.25
./configure --prefix=/usr/local/httpd --enable-so --enable-cgi --enable-cgid --enable-ssl --with-ssl=/usr/local/openssl --enable-rewrite --with-pcre=/usr/local/pcre --with-apr=/usr/local/apr --with-apr-util=/usr/local/apr-util --enable-modules=most --enable-mods-shared=most --enable-mpms-shared=all --with-mpm=event --enable-proxy --enable-proxy-fcgi --enable-expires --enable-deflate && make && make install
ln -s /usr/local/httpd/bin/* /usr/local/bin
[root@localhost install]# sh httpd.sh
| 模块 | 说明 |
|---|---|
| –enable-so | 支持动态共享模块(即打开 DSO 支持) |
| –enable-rewrite | 支持 url 重写 |
| –enable-ssl | 支持 ssl |
| –with-ssl=/usr/local/openssl | 指定 ssl 安装位置 |
| –enable-cgi | 启用 cgi |
| –enable-cgid | MPM 使用的是 event 或 worker 要启用 cgid |
| –enable-modules=most | 指明要静态编译到 httpd 二进制文件的模块,all 或者 most,all 表示包含所有模块,most 表示包含大部分常用模块 |
| –enable-mods-shared=most | 指明要以 DSO 方式编译的模块 |
| –enable-mpms-shared=all | 启用 MPM 所有支持的模式 |
| –with-mpm=event | 指定启用的 mpm 模式,默认使用 enevt 模式 |
| –with-pcre=/usr/local/pcre | 支持 pcre |
| –with-z=/usr/local/zlib | 使用 zlib 压缩库 |
| –with-apr=/usr/local/apr | 指定 apr 的安装路径 |
| –with-apr-util=/usr/local/apr-util | 指定 apr-util 的安装路径 |
| –enable-expires | 激活彧通过配置文件控制 HTTP 的“Expires:”和“Cache-Control:”头内容 |
| –enable-deflate | 提供对内容的压缩传输编码支持,一般是 html、js、css 等内容的站点 |
3、优化链接
[root@localhost ~]# cp /usr/local/httpd/bin/apachectl /etc/init.d/httpd
[root@localhost ~]# vim /etc/init.d/httpd
#!/bin/sh
# chkconfig: 35 85 15   #声明服务启动级别,开机启动顺序,关机关闭顺序
# description: apache 2.4.25  #服务声明,简要信息
......
[root@localhost ~]# chkconfig --add httpd                 //添加httpd到系统服务
[root@localhost ~]# chkconfig httpd on                 //设置服务开机自启(等同于:systemctl enable httpd)
[root@localhost ~]# systemctl start httpd                 //开启服务(等同于:service httpd start)
4、查看httpd模块
[root@localhost ~]# httpd -V                 //查看版本和已装模块
[root@localhost ~]# httpd -l                 //只查看静态编译模块
[root@localhost ~]# httpd -M                 //查看所有模块
二、httpd服务器的基本配置
1、Web站点的部署过程
1、配置并启动httpd服务
配置httpd服务
[root@localhost ~]# vim /usr/local/httpd/conf/httpd.conf
ServerName www.csnd.com:80
对配置内容进行语法检查
[root@localhost ~]# apachectl -t
Syntax OK
启动httpd服务
[root@localhost ~]# systemctl start httpd
[root@localhost ~]# netstat -anpt | grep httpd
tcp6       0      0 :::80                   :::*                    LISTEN      40420/httpd
2、部署网页文档
[root@localhost ~]# cat /usr/local/httpd/htdocs/index.html
<html><body><h1>It works!</h1></body></html>
3、在客户机中访问Web站点

4、查看Web站点的访问情况
[root@localhost ~]# tail /usr/local/httpd/logs/access_log
192.168.1.10 - - [01/Jun/2020:15:35:49 +0800] "GET / HTTP/1.1" 200 45
192.168.1.10 - - [01/Jun/2020:15:35:49 +0800] "GET /favicon.ico HTTP/1.1" 404 209
2、httpd.conf配置文件
1、全局配置项
[root@localhost ~]# vim /usr/local/httpd/conf/httpd.conf
ServerRoot "/usr/local/httpd"                 //设置httpd服务器的根目录。默认情况下,httpd服务器的根目录为httpd的安装目录。
Listen 80                 //设置httpd服务器监听的网络端口号,默认为80
User daemon                 //设置运行httpd进程时的用户身份,默认为daemon
Group daemon                 //设置运行httpd进程时的组身份,默认为daemon
ServerAdmin webmaster@csdn.com                 //设置httpd服务器的管理员E-mail地址,可以通过此E-mail地址及时联系Web站点的管理员
ServerName www.csdn.com                 //设置Web站点的完整主机名(主机名+域名)
DocumentRoot "/usr/local/httpd/htdocs"                 //设置网站根目录,即网页文档在系统中的实际存放路径
Directoryindex index.html index.php                 //设置网站的默认索引页(首页),可以设置多个首页文件,以空格分开,默认的首页文件为index.html.
ErrorLog "logs/error_log"                 //设置错误日志文件的路径,默认路径为logs/error_logo
LogLevel warn                 //设置记录日志的级别,默认级别为warn(警告)
CustomLog "logs/access_log" common                 //设置访问日志文件的路径、日志类型
PidFile "logs/httpd.pid"                 //设置用于保存httpd进程号(PID)的文件
AddDefaultCharset UTF-8                 //设置站点中的网页默认使用的字符集编码,如utf-8、gb2312等
Include conf/extra/httpd-default.conf                 //包含另一个配置文件的内容
2、区域配置项
<Directory />
    Options Indexes FollowSymLinks                 //控制选项,允许使用符号链接
    AllowOverride none                 //不允许隐含控制文件中的覆盖配置
    Require all denied                 //禁止任何人访问此区域
</Directory>
三、httpd服务的访问控制
1、客户机地址限制
[root@localhost ~]# vim /usr/local/httpd/conf/httpd.conf
<Directory "/usr/local/httpd/htdocs">
    #
    # Possible values for the Options directive are "None", "All",
    # or any combination of:
    #   Indexes Includes FollowSymLinks SymLinksifOwnerMatch ExecCGI MultiViews
    #
    # Note that "MultiViews" must be named *explicitly* --- "Options All"
    # doesn't give it to you.
    #
    # The Options directive is both complicated and important.  Please see
    # http://httpd.apache.org/docs/2.4/mod/core.html#options
    # for more information.
    #
    Options Indexes FollowSymLinks

    #
    # AllowOverride controls what directives may be placed in .htaccess files.
    # It can be "All", "None", or any combination of the keywords:
    #   AllowOverride FileInfo AuthConfig Limit
    #
    AllowOverride None

    #
    # Controls who can get stuff from this server.
    #
    Require all granted
</Directory>
[root@localhost ~]# systemctl restart httpd
| 字段 | 说明 |
|---|---|
| Require all granted | 表示允许所有主机访问 |
| Require all denied | 表示拒绝所有主机访问 |
| Require local | 表示仅允许本地主机访问 |
| Require [not] host〈主机名或域名列表〉 | 表示允许或拒绝指定主机或域访问 |
| Require [not] ip<ip地址或网段列表〉 | 表示允许或拒绝指定P地址或网段访问 |
(1)只希望IP地址为173.17.17.173的主机能够访问/usr/local/httpd/htdocs网页目录下的网页内容
Require ip 173.17.17.173
(2)只希望禁止来自两个内网网段192.168.0.0/24和 192.168.1.0/24的主机访问,但允许其他任何主机访问
Require all granted
Require not ip 192.168.0.0/24 192.168.1.0/24
2、用户授权限制
1、创建用户认证数据文件
新建数据文件/usr/local/httpd/conf/.awspwd,其中包含一个名为webadmin的用户信息
[root@localhost ~]# cd /usr/local/httpd/
[root@localhost httpd]# bin/htpasswd -c /usr/local/httpd/conf/.awspwd webadmin
New password:
Re-type new password:
Adding password for user webadmin
[root@localhost httpd]# cat /usr/local/httpd/conf/.awspwd
webadmin:$apr1$y4m4WWpU$KgA4ZB5wlQgjPOdrEIxwo1
添加一个新用户zhangsan
[root@localhost httpd]# bin/htpasswd /usr/local/httpd/conf/.awspwd zhangsan
New password:
Re-type new password:
Adding password for user zhangsan
[root@localhost httpd]# cat /usr/local/httpd/conf/.awspwd
webadmin:$apr1$y4m4WWpU$KgA4ZB5wlQgjPOdrEIxwo1
zhangsan:$apr1$.6GiuPa6$klmZ81AiYEHGDfORn5IFs/
2、添加用户授权配置
[root@localhost ~]# vim /usr/local/httpd/conf/httpd.conf
<Directory "/usr/local/httpd/htdocs">
#
# Possible values for the Options directive are "None", "All",
# or any combination of:
# Indexes Includes FollowSymLinks SymLinksifOwnerMatch ExecCGI MultiViews
#
# Note that "MultiViews" must be named *explicitly* --- "Options All"
# doesn't give it to you.
#
# The Options directive is both complicated and important. Please see
# http://httpd.apache.org/docs/2.4/mod/core.html#options
# for more information.
#
Options Indexes FollowSymLinks
#
# AllowOverride controls what directives may be placed in .htaccess files.
# It can be "All", "None", or any combination of the keywords:
# AllowOverride FileInfo AuthConfig Limit
#
AllowOverride None
#
# Controls who can get stuff from this server.
#
Require all denied //拒绝所有主机访问
AuthName " DocumentRoot " //定义受保护的领域名称,该内容将在浏览器弹出的认证对话框中显示
AuthType Basic //设置认证的类型,Basic表示基本认证
AuthUserFile /usr/local/httpd/conf/.awspwd //设置用于保存用户账号、密码的认证文件路径
Require valid-user //要求只有认证文件中的合法用户才能访问。其中,valid-user表示所有合法用户,若只授权给单个用户,可改为指定的用户名(如webadmm)
</Directory>
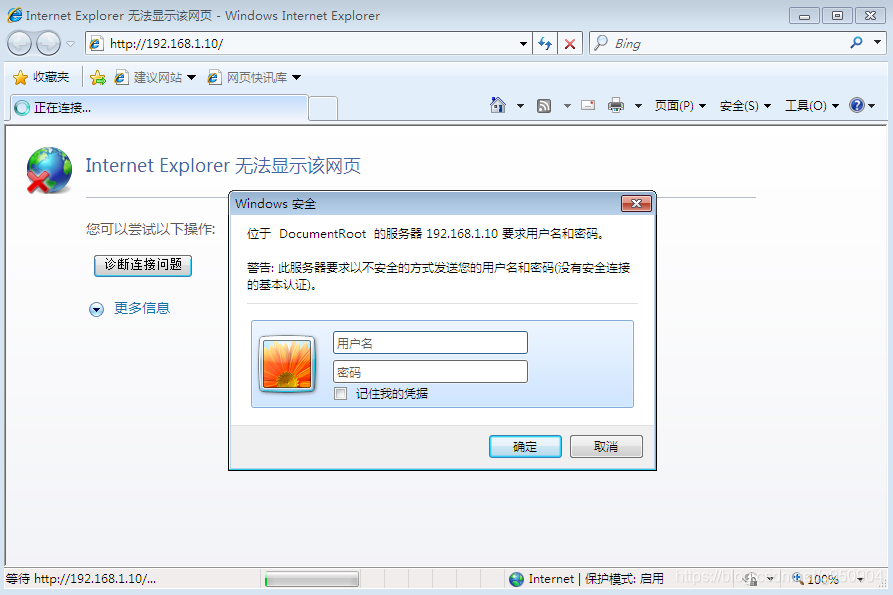
[root@localhost ~]# systemctl restart httpd
重新启动服务后访问
四、构建虚拟Web主机
基于域名:为每个虚拟主机使用不同的域名,但是其对应的IP地址是相同的。
基于IP地址:为每个虚拟主机使用不同的域名,且各自对应的P地址也不相同。
基于端口:这种方式并不使用域名、IP地址来区分不同的站点内容,而是使用了不同的TCP 端口号,因此用户在浏览不同的虚拟站点时需要同时指定端口号才能访问。
安装DNS服务
[root@localhost ~]# yum -y install bind bind-chroot
1、基于域名的虚拟主机
1、为虚拟主机提供域名解析
[root@localhost ~]# vim /etc/named.conf
options {
        listen-on-v6 port 53 { ::1; };
        directory       "/var/named";
        dump-file       "/var/named/data/cache_dump.db";
        statistics-file "/var/named/data/named_stats.txt";
        memstatistics-file "/var/named/data/named_mem_stats.txt";
        recursing-file  "/var/named/data/named.recursing";
        secroots-file   "/var/named/data/named.secroots";
......
zone "." IN {
        type hint;
        file "named.ca";
};
zone "web1.com" IN {
        type master;
        file "web1.com.zone";
};
zone "web2.com" IN {
        type master;
        file "web2.com.zone";
};
include "/etc/named.rfc1912.zones";
include "/etc/named.root.key";
[root@localhost ~]# vim /var/named/web1.com.zone
$ttl    86400
@       in      soa     web1.com.      admin.web1.com.        (
        20200601
        3h
        15m
        1w
        1d
)
        in      ns      ns1.web1.com.
ns1     in      a       192.168.1.10
www     in      a       192.168.1.10
[root@localhost ~]# vim /var/named/web2.com.zone
$ttl    86400
@       in      soa     web2.com.      admin.web2.com.        (
        20200601
        3h
        15m
        1w
        1d
)
        in      ns      ns1.web2.com.
ns1     in      a       192.168.1.10
www     in      a       192.168.1.10
重启服务
[root@localhost ~]# systemctl restart named
2、为虚拟主机准备网页文档
[root@localhost ~]# mkdir -p /var/www/html/web1
[root@localhost ~]# mkdir -p /var/www/html/web2
[root@localhost ~]# echo "www.web1.com" > /var/www/html/web1/index.html
[root@localhost ~]# echo "www.web2.com" > /var/www/html/web2/index.html
3、添加虚拟主机配置
[root@localhost ~]# vim /usr/local/httpd/conf/extra/httpd-vhosts.conf                 //创建独立的配置文件
#设置web1虚拟站点区域
<VirtualHost *:80>
    ServerAdmin webmaster@web1.com
    DocumentRoot "/var/www/html/web1"
    ServerName www.web1.com
    ErrorLog "logs/www.web1.com.error_log"
    CustomLog "logs/www.web1.com.access_log" common
    #设置目录访问权限
    <Directory "/var/www/html">
       Require all granted
    </Directory>
</VirtualHost>
#设置web2虚拟站点区域
<VirtualHost *:80>
    ServerAdmin webmaster@web2.com
    DocumentRoot "/var/www/html/web2"
    ServerName www.web2.com
    ErrorLog "logs/www.web2.com.error_log"
    CustomLog "logs/www.web2.com.access_log" common
    <Directory "/var/www/html">
       Require all granted
    </Directory>
</VirtualHost>
[root@localhost ~]# vim /usr/local/httpd/conf/httpd.conf                 //加载独立的配置文件
Include conf/extra/httpd-vhosts.conf
[root@localhost ~]# systemctl restart httpd                 //重启服务使新配置生效
4、在客户机中访问虚拟Web主机


2、基于IP地址的虚拟主机
[root@localhost network-scripts]# cp ifcfg-ens33 ifcfg-ens33:0
[root@localhost network-scripts]# vim ifcfg-ens33:0                 //修改IP地址
[root@localhost network-scripts]# systemctl restart network
[root@localhost ~]# vim /usr/local/httpd/conf/extra/httpd-vhosts.conf
<VirtualHost 192.168.1.10:80>
    ServerAdmin webmaster@web1.com
    DocumentRoot "/var/www/html/web1"
    ServerName www.web1.com
    ErrorLog "logs/www.web1.com.error_log"
    CustomLog "logs/www.web1.com.access_log" common
    <Directory "/var/www/html">
       Require all granted
    </Directory>
</VirtualHost>

<VirtualHost 192.168.1.100:80>
    ServerAdmin webmaster@web2.com
    DocumentRoot "/var/www/html/web2"
    ServerName www.web2.com
    ErrorLog "logs/www.web2.com.error_log"
    CustomLog "logs/www.web2.com.access_log" common
    <Directory "/var/www/html">
       Require all granted
    </Directory>
</VirtualHost>
[root@localhost ~]# vim /usr/local/httpd/conf/httpd.conf                 //加载独立的配置文件
Include conf/extra/httpd-vhosts.conf
[root@localhost ~]# systemctl restart httpd                 //重启服务使新配置生效
3、基于端口的虚拟主机
[root@localhost ~]# vim /usr/local/httpd/conf/extra/httpd-vhosts.conf
<VirtualHost 192.168.1.10:80>
    ServerAdmin webmaster@web1.com
    #正常访问的网站目录
    DocumentRoot "/var/www/html/web1"
    ServerName www.web1.com
    ErrorLog "logs/www.web1.com.error_log"
    CustomLog "logs/www.web1.com.access_log" common
    <Directory "/var/www/html">
       Require all granted
    </Directory>
</VirtualHost>

<VirtualHost 192.168.1.10:8080>
    ServerAdmin webmaster@web2.com
    #后台管理系统的网站目录
    DocumentRoot "/var/www/html/web2"
    ServerName www.web2.com
    ErrorLog "logs/www.web2.com.error_log"
    CustomLog "logs/www.web2.com.access_log" common
    <Directory "/var/www/html">
       Require all granted
    </Directory>
</VirtualHost>
Listen 80                 //监听80端口
Listen 8080                 //监听8080端口
[root@localhost ~]# vim /usr/local/httpd/conf/httpd.conf                 //加载独立的配置文件
Include conf/extra/httpd-vhosts.conf
[root@localhost ~]# systemctl restart httpd                 //重启服务使新配置生效
在客户机中访问虚拟Web主机


五、其他
1、HTTP返回状态码
| 返回状态码 | 说明 | 返回状态码 | 说明 |
|---|---|---|---|
| 200 | 请求成功 | 201 | 上传文件成功 |
| 301 | 永久重定向(redirect) | 302,307 | 临时重定向(redirect) |
| 304 | 浏览器缓存 | 403 | 请求不到首页,没有权限 |
| 404 | 请求的资源在前端查明不存在 | 405 | 请求方法不支持 |
| 500 | 服务器的内部错误,程序错误 | 502 | 请求的资源前端有记录指向后端数据库,却找不到后端资源 |
| 503 | 服务暂时不可用 | 504 | 请求超时 |
2、用户访问网站携带的参数,以及服务器返回的参数
1、General概况
Request URL: https://www.baidu.com/                 //请求的URL地址
Request Method: GET                 //请求的方法(获取)
Status Code: 200 OK                 //成功状态码
Remote Address: [2408:80f0:410c:1d:0:ff:b07a:39af]:443                 //请求的地址(ipv4或ipv6)
Referrer Policy: no-referrer-when-downgrade                 //降级不推荐(从https降级到http)
2、Request Headers:客户端请求头部信息
Accept: text/html                 //请求的类型
Accept-Encoding: gzip, deflate, br                 //是否进行压缩
Accept-Language: zh-CN,zh;q=0.9	                 //请求的语言
Connection: keep-alive                 //TCP长连接
cache-control:max-age=0                 //缓存时间
Cookie:                 //客户端缓存,用户密码等网站信息
Host:www.baidu.com/	                 //请求的域名
Upgrade-Insecure-Requests: 1                 //启用升级https访问
User-Agent: Mozilla/5.0                 //客户端浏览器
3、Response Headers:服务器响应头部信息
Cache-Control: private                 //缓存类型非公开(公开:pubLic)
Connection: keep-alive                 //长连接
Content-Encoding: gzip                 //压缩格式gzip
Content-Type: text/html;charset=utf-8                 //文档类型
Date: Sat, 14 Mar 2020 08:48:02 GMT                 //响应时间
Expires: Sat, 14 Mar 2020 08:47:42 GMT                 //失效时间
Server: BWS/1.1                 //网站服务器软件
status:200	                 //状态码
3、HTTP统计术语
PV:页面浏览量
UV:独立客户浏览量
IP:独立ip浏览量

 浙公网安备 33010602011771号