Git 简单介绍 + 实战
本文基于孟宁老师的公众号文章:五⼤场景玩转 Git,只要这一篇就够了!
1. Git基础
1.1 安装Git
各个版本的操作系统安装Git的方式不尽相同,以Ubuntu为例:
sudo apt install git
1.2 创建仓库
init —— 创建一个Git仓库
首先选择一个位置。
$ cd ~
$ mkdir hello-git
$ cd hello-git/
使用git init命令可以创建一个本地的git仓库。
$ git init
Initialized empty Git repository in /home/fzh/hello-git/.git/
创建后,当前目录下会自动生成一个.git隐藏目录,该目录下保存了git的所需信息,如非必要尽量不要手动修改。
$ ls -a
.  ..  .git
clone —— 从远程克隆一个Git仓库
首先,在Github上创建一个仓库。
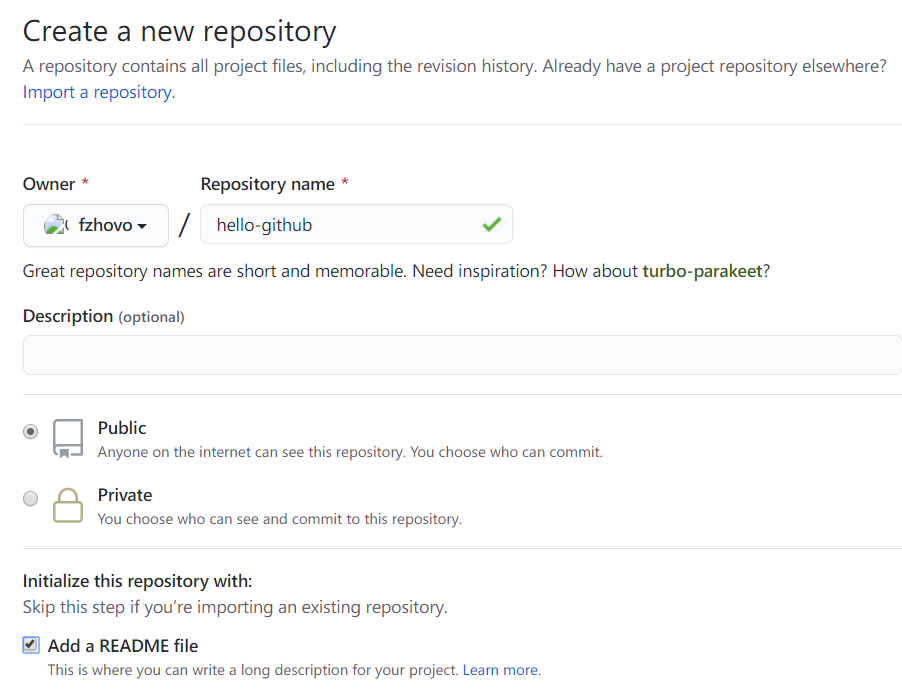
点击复制地址
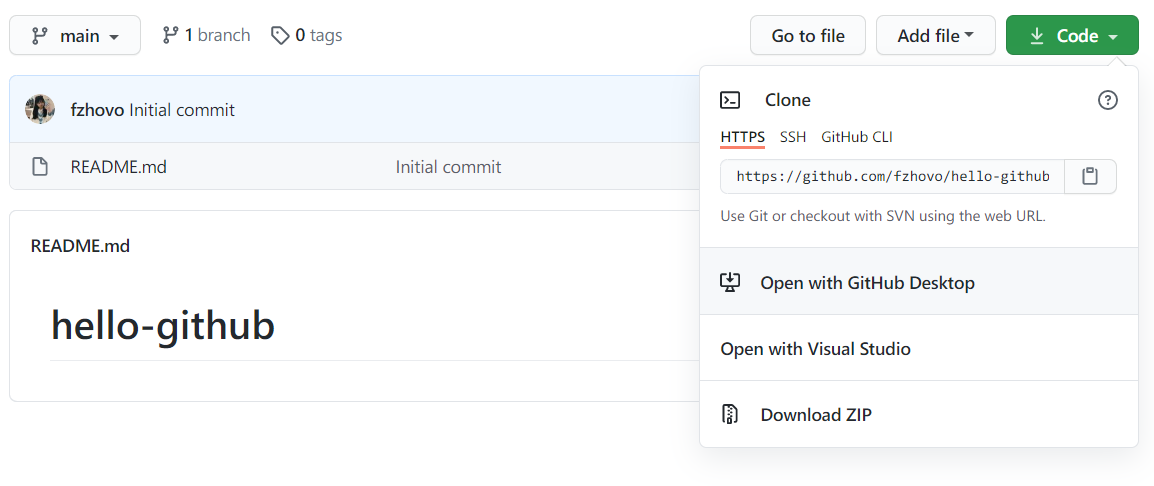
$ git clone https://github.com/fzhovo/hello-github.git
Cloning into 'hello-github'...
remote: Enumerating objects: 3, done.
remote: Counting objects: 100% (3/3), done.
remote: Total 3 (delta 0), reused 0 (delta 0), pack-reused 0
Unpacking objects: 100% (3/3), 586 bytes | 48.00 KiB/s, done.

$ ls hello-github/
README.md
1.3 修改与提交
首先创建一个文件用于示范。
$ cd hello-git

$ echo This is the first version. > code.txt

$ cat code.txt
This is the first version.
add —— 将修改添加到暂存区
修改文件后,利用add命令将工作区修改后的文件添加到暂存区。
$ git add code.txt
此时使用git ls-files可以看到我们刚才添加的文件。
$ git ls-files
code.txt
除了单个文件,git add命令还可以一次添加多个文件,或者添加整个目录。
commit —— 提交已经暂存的修改
$ git commit -m "initial commit"
[master (root-commit) 2d383ab] initial commit
 1 file changed, 1 insertion(+)
 create mode 100644 code.txt
执行commit命令会将之前添加到暂存区中的全部修改提交到版本库。
使用-m参数可以为这次提交添加一段描述。
如果是首次使用,可能会出现以下提示:
*** Please tell me who you are.

Run

  git config --global user.email "you@example.com"
  git config --global user.name "Your Name"

to set your account's default identity.
Omit --global to set the identity only in this repository.
这时只需按照提示配置下邮箱和姓名即可。
提交完成后可以使用git log命令查看版本记录。
$ git log
commit 2d383ab81f8048dbb377eb88d1ff43a94d49d8d8 (HEAD -> master)
Author: fzh <fzhovo@163.com>
Date:   Sun Oct 4 13:46:02 2020 +0800

    initial commit
1.4 穿越时空
reset —— 回到过去
首先我们对code.txt做一点点修改,之后再提交上去。
$ sed -i 's/first/second/g' code.txt

$ cat code.txt
This is the second version.

$ git add .

$ git status
On branch master
Changes to be committed:
  (use "git restore --staged <file>..." to unstage)
        modified:   code.txt

$ git commit -m "second commit"
[master cf8d20c] second commit
 1 file changed, 1 insertion(+), 1 deletion(-)
这时,使用git log查看一下提交历史,使用--oneline参数可以将每次提交的简略信息在一行内显示.
$ git log --oneline
cf8d20c (HEAD -> master) second commit
2d383ab initial commit
假如我们现在想要回到初始的版本,可以使用reset命令
$ git reset --hard HEAD^
HEAD is now at 2d383ab initial commit

$ cat code.txt
This is the first version.
可以看到文件已经回到了初始的版本。这里的HEAD^是指当前版本的上一个版本,同理,当前版本的上一个版本的上一个版本可以表示成HEAD^^,或者HEAD~2,以此类推。
除此之外,我们还可以使用版本号进行切换,例如我们可以通过版本号回到第二个版本,如果忘记了可以使用git reflog命令查看。
$ git reset --hard cf8d20c
HEAD is now at cf8d20c second commit

$ cat code.txt
This is the second version.
现在我们就又穿越回来啦。
2. 远程版本库
回到第一章里我们在Github中创建的仓库。在本地创建两个目录user1和user2,来模拟两个用户。使用git clone命令克隆两份到本地。
$ mkdir user1 user2

$ ls
hello-git  hello-github  user1  user2

$ cd user1
$ git clone https://github.com/fzhovo/hello-github.git
Cloning into 'hello-github'...
remote: Enumerating objects: 3, done.
remote: Counting objects: 100% (3/3), done.
remote: Total 3 (delta 0), reused 0 (delta 0), pack-reused 0
Unpacking objects: 100% (3/3), 586 bytes | 39.00 KiB/s, done.
$ cd ../user2/
$ git clone https://github.com/fzhovo/hello-github.git
Cloning into 'hello-github'...
remote: Enumerating objects: 3, done.
remote: Counting objects: 100% (3/3), done.
remote: Total 3 (delta 0), reused 0 (delta 0), pack-reused 0
Unpacking objects: 100% (3/3), 586 bytes | 117.00 KiB/s, done.
push —— 推送
假设现在用户1使用vim编辑一下README文档,并在本地提交修改。
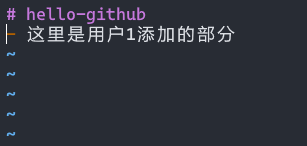
$ cat README.md
# hello-github
- 这里是用户1添加的部分

$ git add README.md

$ git commit -m "user1"
[main 01d9143] user1
 1 file changed, 2 insertions(+), 1 deletion(-)
之后可以使用git push将本地的版本推送到远程仓库
$ git push
Enumerating objects: 5, done.
Counting objects: 100% (5/5), done.
Writing objects: 100% (3/3), 282 bytes | 282.00 KiB/s, done.
Total 3 (delta 0), reused 0 (delta 0)
To https://github.com/fzhovo/hello-github.git
   c02f188..01d9143  main -> main
在Github界面就可以看到提交的修改啦。
pull —— 拉取
这时用户2想要从远程仓库获取最新的版本,就可以使用git pull。
$ cat README.md
# hello-github
$ git pull
remote: Enumerating objects: 5, done.
remote: Counting objects: 100% (5/5), done.
remote: Total 3 (delta 0), reused 3 (delta 0), pack-reused 0
Unpacking objects: 100% (3/3), 262 bytes | 20.00 KiB/s, done.
From https://github.com/fzhovo/hello-github
c02f188..01d9143 main -> origin/main
Updating c02f188..01d9143
Fast-forward
README.md | 3 ++-
1 file changed, 2 insertions(+), 1 deletion(-)
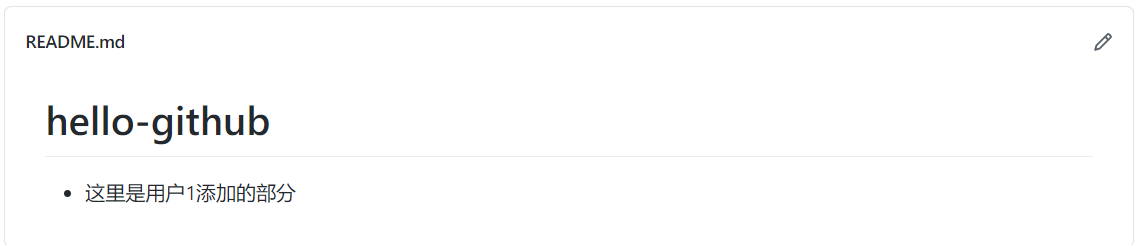
$ cat README.md
# hello-github
- 这里是用户1添加的部分
拉取成功后即可看到用户1添加的部分。
3. 分支
3.1 创建分支
使用git branch branchName创建一个分支。
$ git branch newBranch

$ git branch
* main
  newBranch
可以用git branch查看现有的分支,前面用“*”标注的是当前分支。使用git checkout可以切换分支。
$ git checkout newBranch
Switched to branch 'newBranch'

$ git branch
  main
* newBranch
还可以使用git checkout -b branchName一键创建切换分支
$ git checkout -b newBranch
3.2 合并分支
$ git checkout main
Switched to branch 'main'
Your branch is up to date with 'origin/main'.

$ git merge newBranch
Already up to date.
4. 团队合作
4.1 基本流程
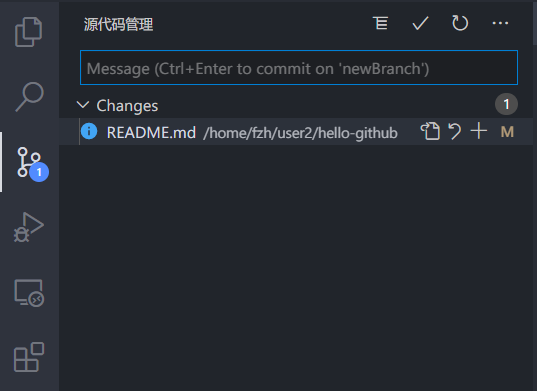
假如在实际工作中,用户2在自己的新分支上修改了代码,以VSCode为例,如下图:
修改后,在源代码管理界面会提示添加并提交修改。
提交完成后,先切换回主分支
再从远程仓库拉取代码
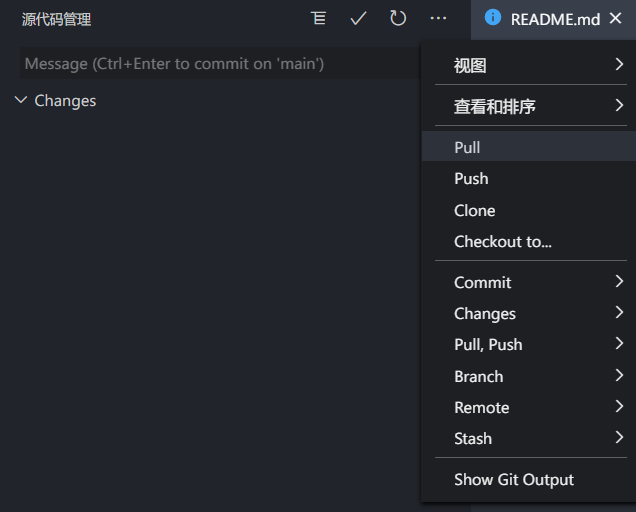
执行下面命令合并分支
git merge --no-ff newBranch
$ git merge --no-ff newBranch
Merge made by the 'recursive' strategy.
 README.md | 5 +++++
 1 file changed, 5 insertions(+)
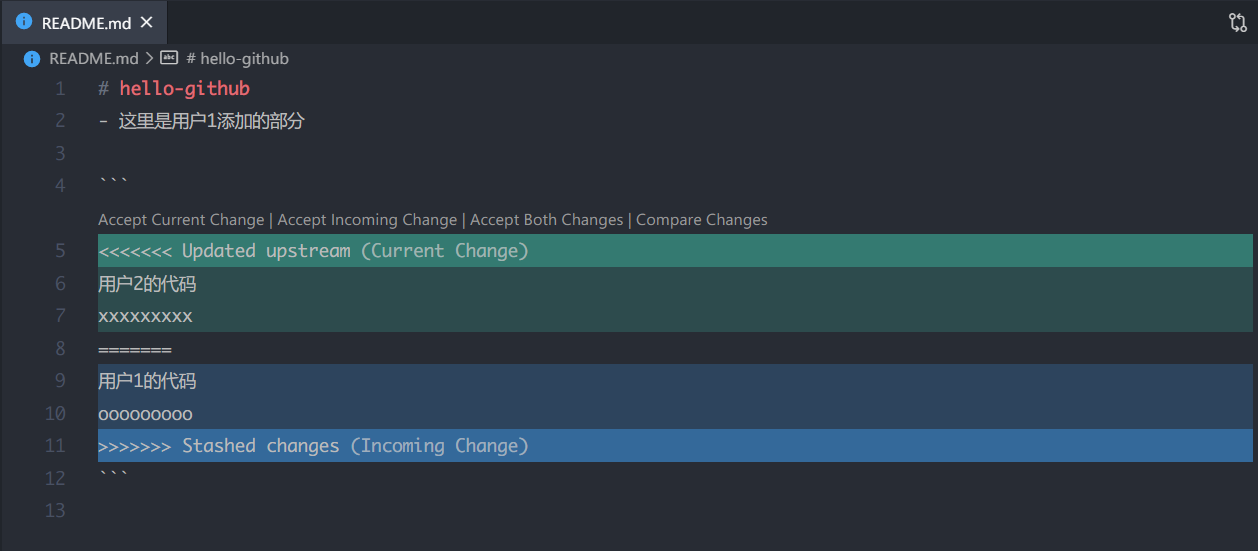
4.2 处理冲突
当发生冲突时,VSCode会提供如下图的交互界面,可以手动处理冲突后,重新提交。
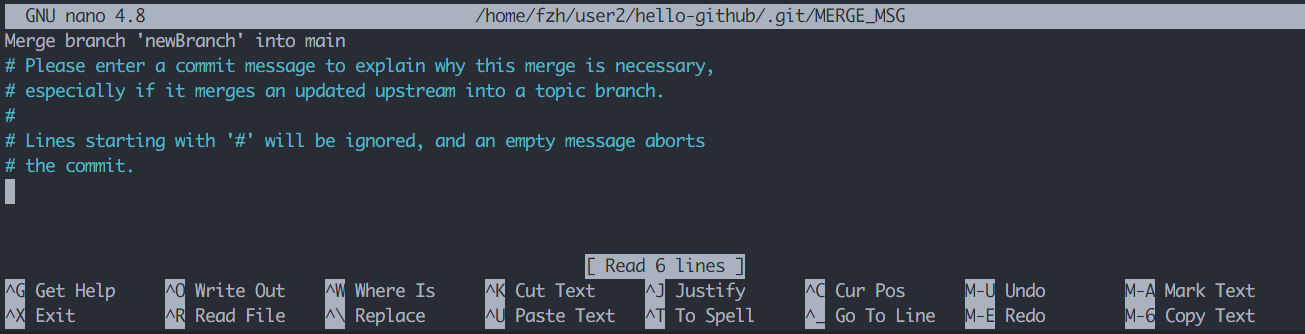
5. Rebase
$ git log --oneline
d75bd55 (HEAD -> main) 4
05592ee 3
3b1cf19 2
0e447c5 1
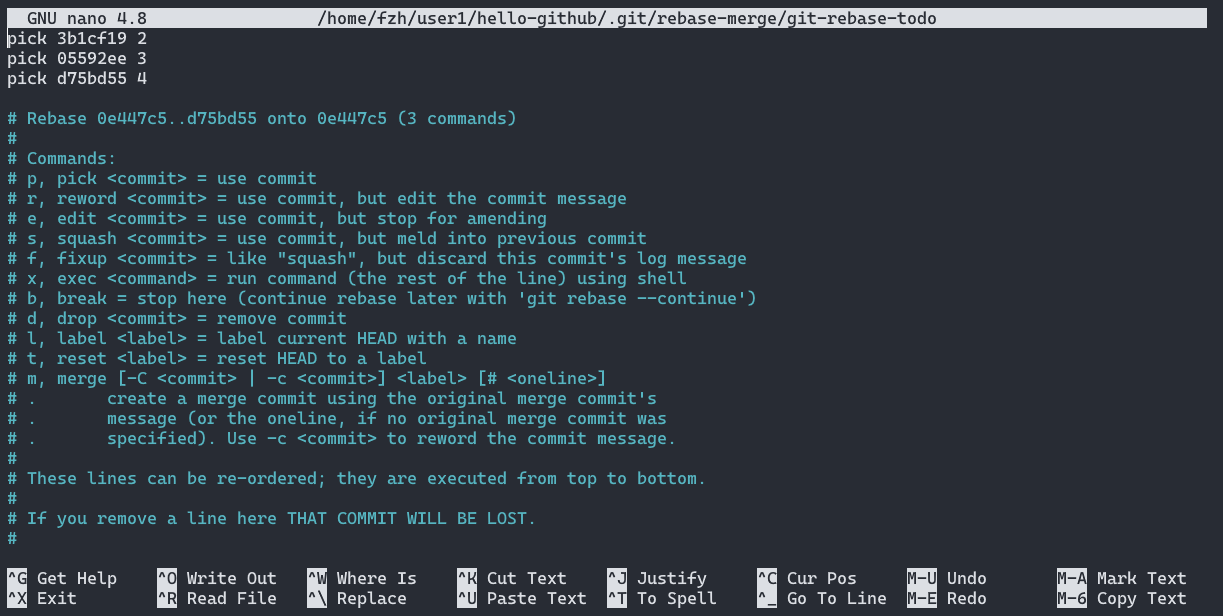
使用rebase命令
$ git rebase -i HEAD^^^
这时会打开文本编辑界面
pick 3b1cf19 2
pick 05592ee 3
pick d75bd55 4

# Rebase 0e447c5..d75bd55 onto 0e447c5 (3 commands)
#
# Commands:
# p, pick <commit> = use commit
# r, reword <commit> = use commit, but edit the commit message
# e, edit <commit> = use commit, but stop for amending
# s, squash <commit> = use commit, but meld into previous commit
# f, fixup <commit> = like "squash", but discard this commit's log message
# x, exec <command> = run command (the rest of the line) using shell
# b, break = stop here (continue rebase later with 'git rebase --continue')
# d, drop <commit> = remove commit
# l, label <label> = label current HEAD with a name
# t, reset <label> = reset HEAD to a label
# m, merge [-C <commit> | -c <commit>] <label> [# <oneline>]
# .       create a merge commit using the original merge commit's
# .       message (or the oneline, if no original merge commit was
# .       specified). Use -c <commit> to reword the commit message.
#
# These lines can be re-ordered; they are executed from top to bottom.
#
# If you remove a line here THAT COMMIT WILL BE LOST.
#
# However, if you remove everything, the rebase will be aborted.
#
# Note that empty commits are commented out
删除掉3号版本
$ git rebase -i HEAD^^^
Auto-merging README.md
CONFLICT (content): Merge conflict in README.md
error: could not apply d75bd55... 4
Resolve all conflicts manually, mark them as resolved with
"git add/rm <conflicted_files>", then run "git rebase --continue".
You can instead skip this commit: run "git rebase --skip".
To abort and get back to the state before "git rebase", run "git rebase --abort".
Could not apply d75bd55... 4
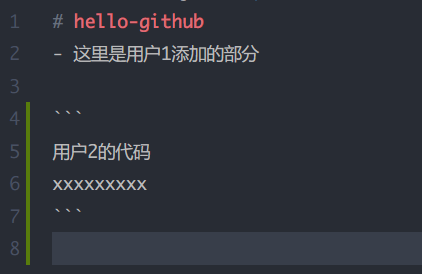
此时打开VSCode,可以看到冲突
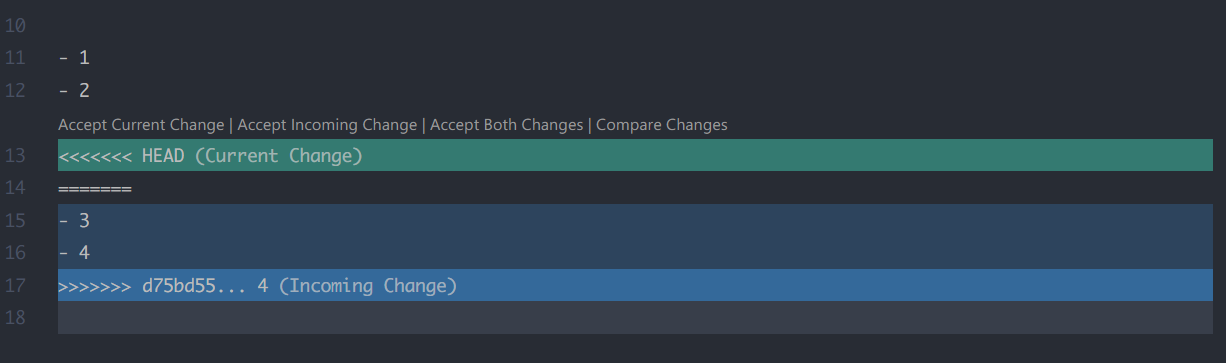
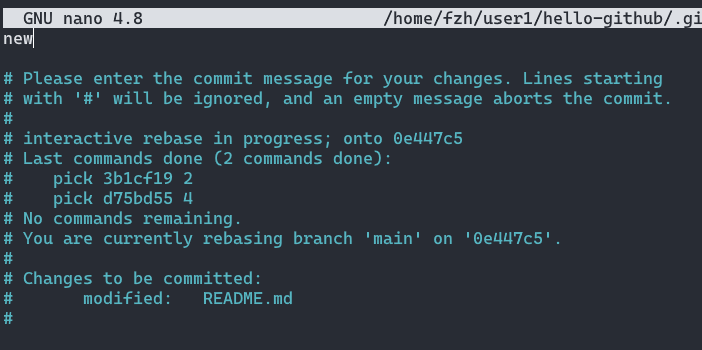
处理好冲突后,使用git add将文件添加到暂存区后,执行git rebase,根据提示提交新的commit message
$ git rebase --continue
[detached HEAD 611a631] new
 1 file changed, 5 insertions(+)
Successfully rebased and updated refs/heads/main.
$ git log --oneline
611a631 (HEAD -> main) new
3b1cf19 2
0e447c5 1
可以使用下面的命令撤销rebase操作。
$ git rebase --abort
6. Fork + PR
在Github中选择一个项目,点击Fork,将该项目fork到自己的仓库中。

对项目进行修改后,点击Pull Request

再点击New Pull Request按钮提交PR,等待处理。

 浙公网安备 33010602011771号