redhat7上搭建web开发环境
JDK
删除当前系统的jdk
yum remove java*
下载安装包,官网地址https://www.oracle.com/java/technologies/javase-jdk8-downloads.html
我下载的是Linux x64 RPM Package jdk-8u251-linux-x64.rpm,安装:
rpm -ivh jdk-8u231-linux-x64.rpm
安装完成后添加环境变量:
[root@localhost share]# vim /etc/profile
在最后添加如下内容:
JAVA_HOME=/usr/java/jdk1.8.0_231-amd64
CLASSPATH=$JAVA_HOME/lib/
PATH=$PATH:$JAVA_HOME/bin
export PATH JAVA_HOME CLASSPATH
使配置生效:
source /etc/profile
安装Eclipse
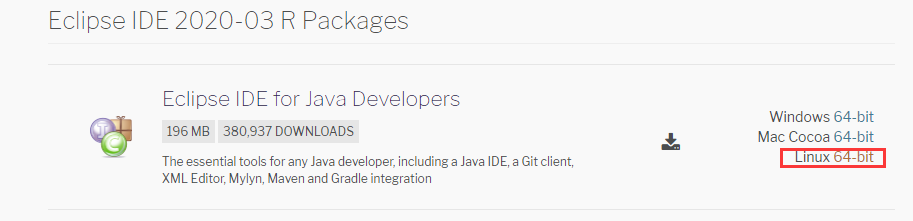
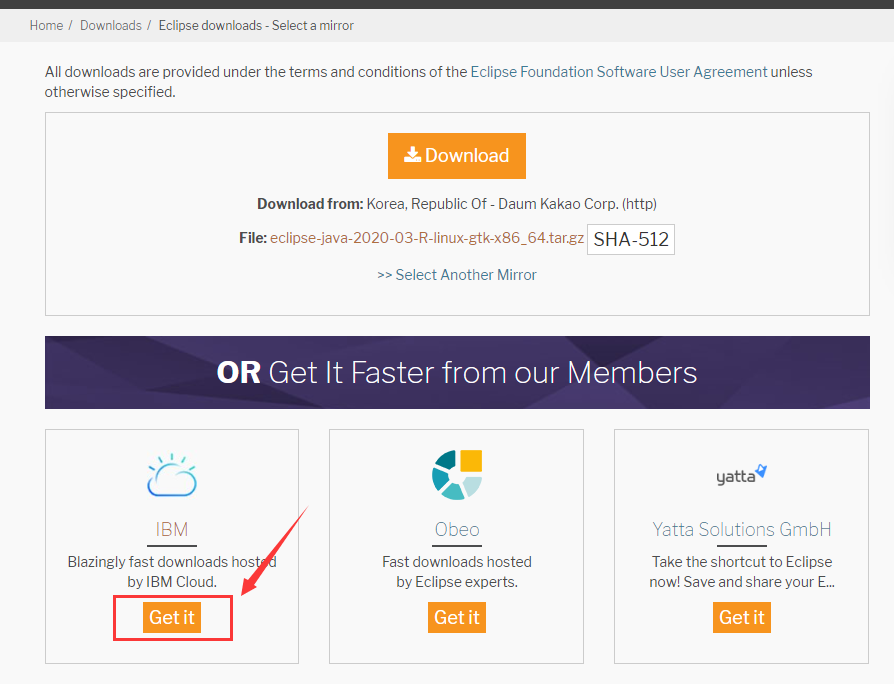
官网地址https://www.eclipse.org/downloads/packages/
这有个坑,点击最上方的官方下载通道死活下载不下来,建议点击下面的IBMCloud下载,不过下载速度太慢了,我这边上传个网盘
百度盘 提取码:tuw6
解压后进入目录,运行
./eclipse
自动弹出窗口
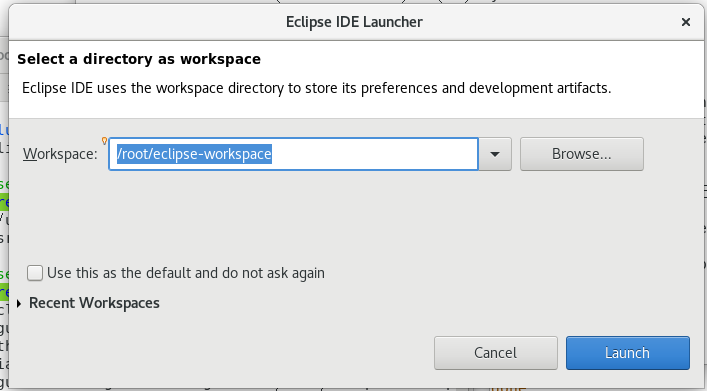
自定义工作目录后即可进入
添加一个自定义命令方便下次启动:
[root@localhost eclipse]# cd
[root@localhost ~]# vim .bashrc
        alias eclipse='cd /usr/local/eclipse&&./eclipse'#目录根据解压位置自定义
[root@localhost ~]# source .bashrc
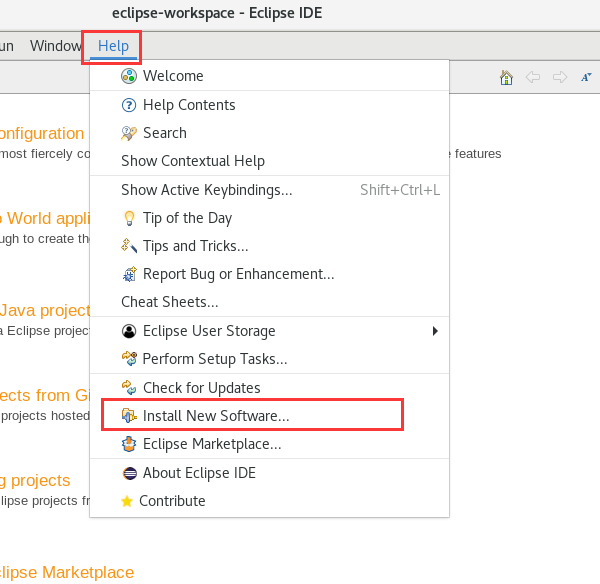
接下来需要添加web相关插件,否则无法新建web项目:
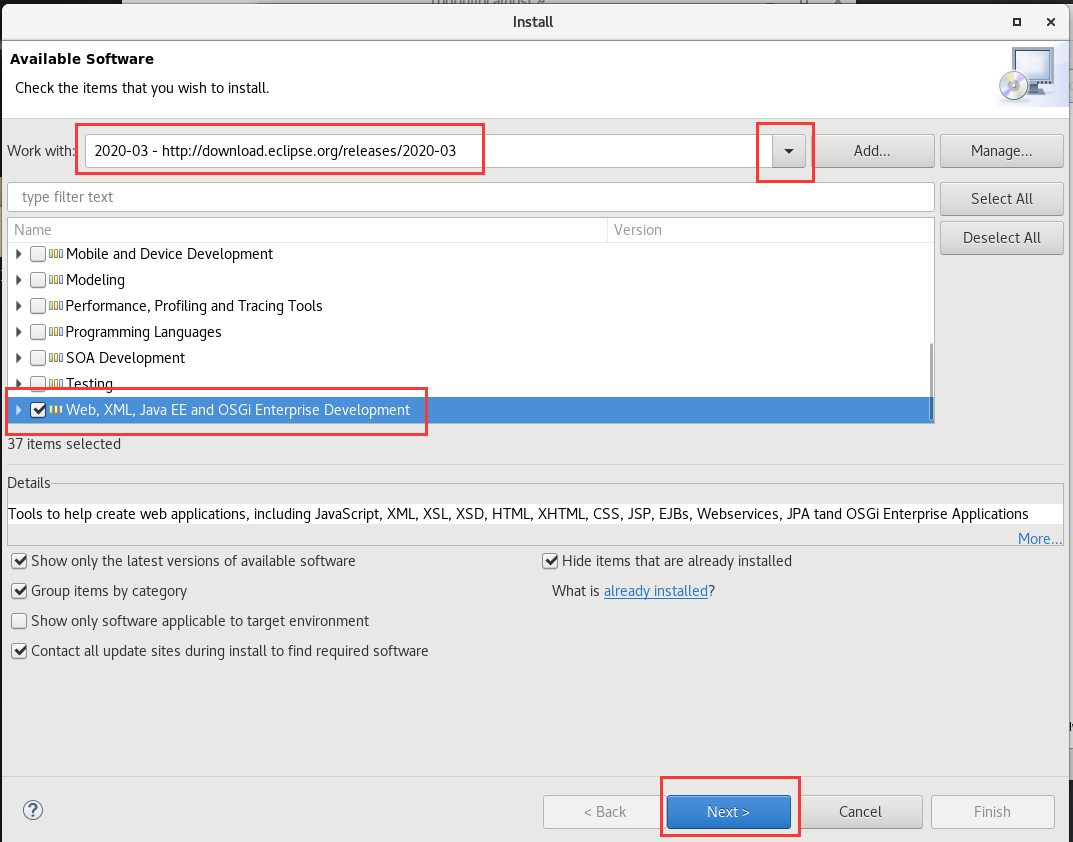
在下拉框中根据软件版本选择安装:
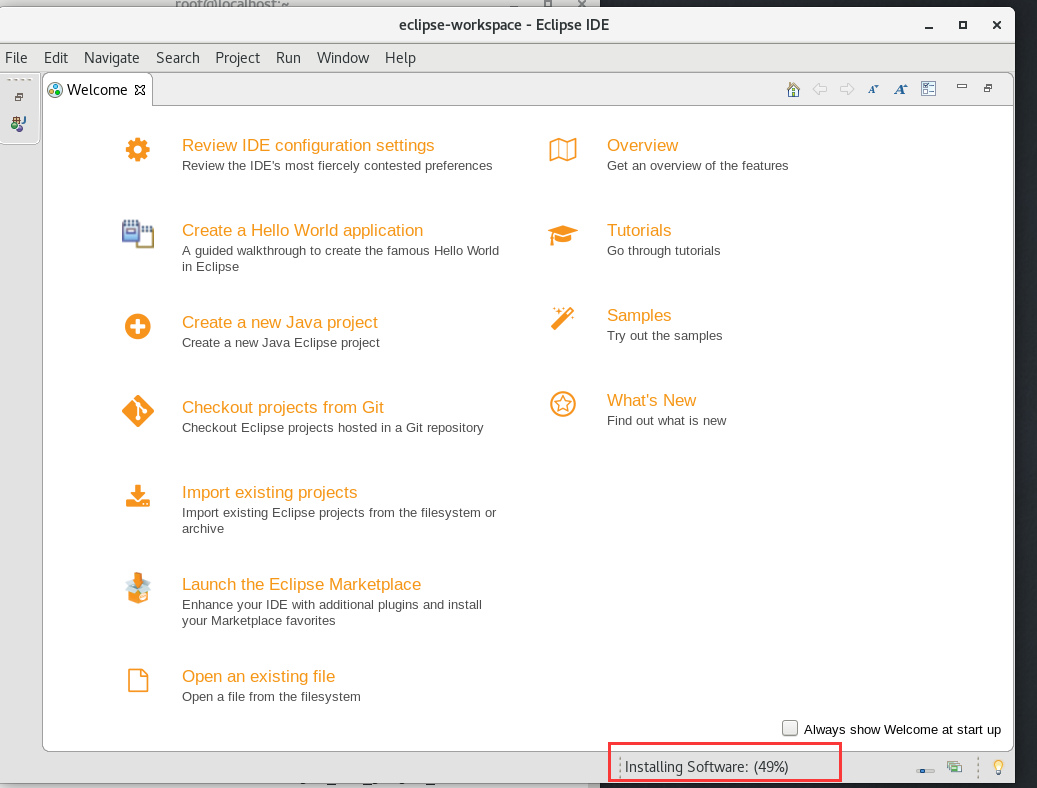
等待下载安装完成,很慢:
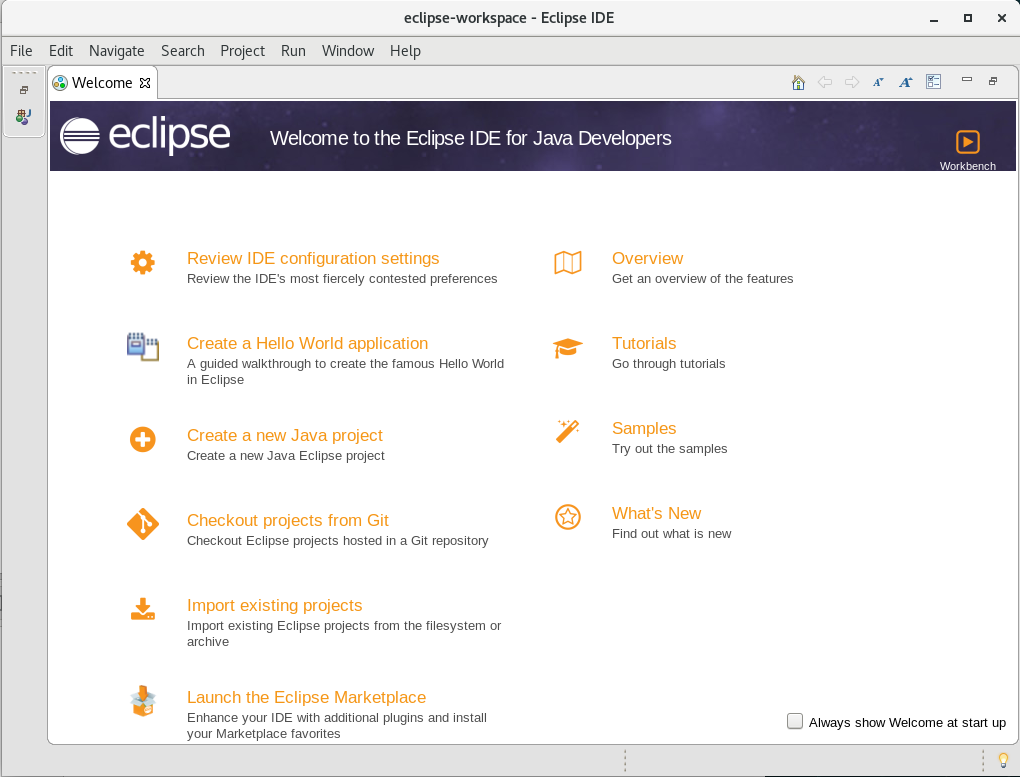
到此eclipse安装完毕
安装mysql
官方下载地址https://dev.mysql.com/downloads/mysql/
百度盘 提取码:uu7o
解压后使用yum安装,可自动解决依赖问题:
yum install -y mysql-co*
启动数据库,开机自启:
systemctl start mysqld.service
systemctl enable mysqld.service
直接登陆是登不上去的,需要查看系统自动生成的密码:
vim /var/log/mysqld.log
  2020-05-11T08:28:40.795461Z 0 [System] [MY-013169] [Server] /usr/sbin/mysqld (mysqld 8.0.20) initializing of server in progress as process 31317
  2020-05-11T08:28:40.805569Z 1 [System] [MY-013576] [InnoDB] InnoDB initialization has started.
  2020-05-11T08:28:41.740314Z 1 [System] [MY-013577] [InnoDB] InnoDB initialization has ended.
  2020-05-11T08:28:42.726452Z 6 [Note] [MY-010454] [Server] A temporary password is generated for root@localhost: c6o-k-EsD7lc
  2020-05-11T08:28:44.922164Z 0 [System] [MY-010116] [Server] /usr/sbin/mysqld (mysqld 8.0.20) starting as process 31367
  2020-05-11T08:28:44.934474Z 1 [System] [MY-013576] [InnoDB] InnoDB initialization has started.
使用该密码登录:
[root@localhost mysql]# mysql -u root -p
Enter password:
Welcome to the MySQL monitor.  Commands end with ; or \g.
Your MySQL connection id is 13
Server version: 8.0.20

Copyright (c) 2000, 2020, Oracle and/or its affiliates. All rights reserved.

Oracle is a registered trademark of Oracle Corporation and/or its
affiliates. Other names may be trademarks of their respective
owners.

Type 'help;' or '\h' for help. Type '\c' to clear the current input statement.
确认登录成功后建议先exit退出,修改密码,否则dbeaver登录时会报错,注意密码要包含符合安全要求:
[root@localhost ~]# mysqladmin -u root -p password '新密码'
Enter password: 旧密码
dbeaver
mysql图形化管理工具,https://github.com/dbeaver/dbeaver/releases
百度盘 提取码:aq6u
上传服务器,解压后直接运行即可
./dbeaver
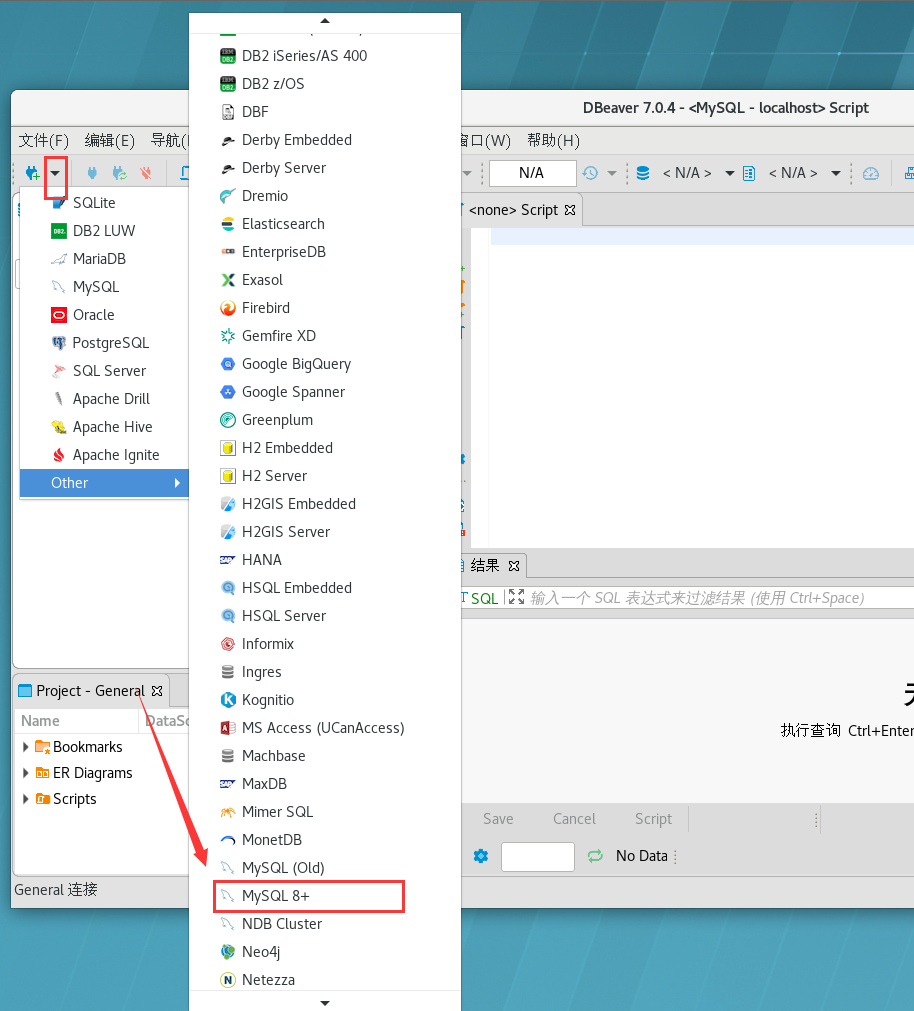
连接时选择Mysql8+,否则会报‘Unable to load authentication plugin 'caching_sha2_password’:
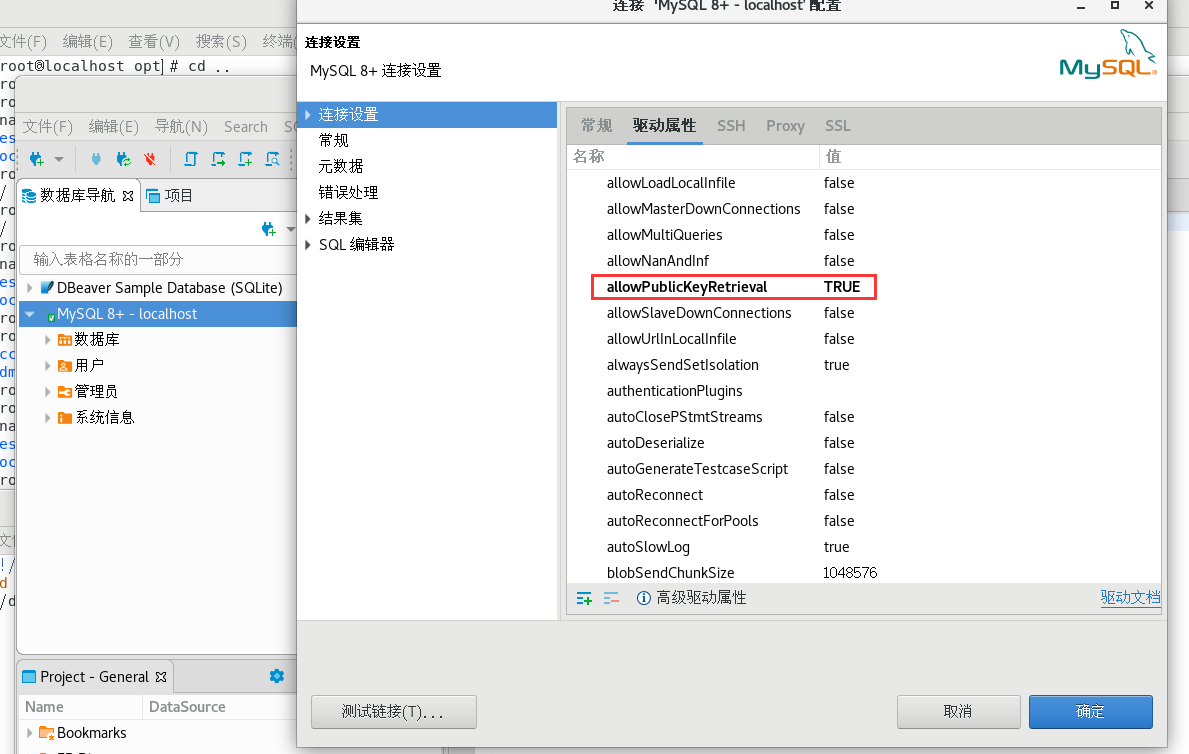
右击数据库编辑连接,进入驱动属性页面,把以下参数改为True,否则连接会报错:
连接出现报错
The server time zone value 'PDT' is unrecognized or represents more than one time zone. You must configure either the server or JDBC driver (via the serverTimezone configuration property) to use a more specifc time zone value if you want to utilize time zone support.
我看了下linux时区设置有问题,参考我的另一篇redhat时区设置
建议自定义个命令方便下次启动
cd
vim .bashrc
    alias dbeaver='cd /usr/local/dbeaver&&./dbeaver'#添加这行内容,目录根据自己解压的地方更改
source .bashrc
dbeaver安装完毕
tomcat安装
官方地址https://tomcat.apache.org/download-90.cgi
下载并解压到目录
wget https://mirrors.tuna.tsinghua.edu.cn/apache/tomcat/tomcat-9/v9.0.34/bin/apache-tomcat-9.0.34.tar.gz
tar -xzvf apache-tomcat-9.0.34.tar.gz
mv apache-tomcat-9.0.34 /usr/local/tomcat
修改环境变量,添加两行:
vim /etc/profile
   export TOMCAT_HOME=/usr/local/tomcat
   export CATALINA_HOME=/usr/local/tomcat
运行tomcat:
cd /usr/local/tomcat/bin
./startup.sh
添加服务并设置开机启动(脚本部分内容请根据jdk和tomcat安装情况自行更改):
vim /etc/init.d/tomcat9
  #!/bin/bash
  #cription: Tomcat Start Stop Restart
  #chkconfig: 345 91 10
  JAVA_HOME=/usr/java/jdk1.8.0_231-amd64
  export JAVA_HOME
  PATH=$JAVA_HOME/bin:$PATH
  export PATH
  CATALINA_HOME=/usr/local/tomcat

  case $1 in
  start)
  sh $CATALINA_HOME/bin/startup.sh
  ;;
  stop)
  sh $CATALINA_HOME/bin/shutdown.sh
  ;;
  status)
  numproc=`ps -ef | grep catalina | grep -v "grep catalina" | wc -l`
  if [ $numproc -gt 0 ]; then
  echo "Tomcat is running..."
  else
  echo "Tomcat is stopped..."
  fi
  ;;
  restart)
  sh $CATALINA_HOME/bin/shutdown.sh
  sh $CATALINA_HOME/bin/startup.sh
  ;;
  esac
  exit 0
chkconfig --add tomcat9
systemctl enable tomcat9
  tomcat9.service is not a native service, redirecting to /sbin/chkconfig.#无视这个提示,不影响
  Executing /sbin/chkconfig tomcat9 on
chkconfig --list|grep tomcat9
注:该输出结果只显示 SysV 服务,并不包含
原生 systemd 服务。SysV 配置数据
可能被原生 systemd 配置覆盖。
要列出 systemd 服务,请执行 'systemctl list-unit-files'。
查看在具体 target 启用的服务请执行
'systemctl list-dependencies [target]'。
tomcat9 0:关 1:关 2:开 3:开 4:开 5:开 6:关 #配置成功
配置完毕后即可使用如下命令:
systemctl status tomcat9    #查看状态
systemctl start tomcat9      #启动
systemctl stop tomcat9       #停止
systemctl restart tomcat9    #重启
到此tomcat配置完毕。
未完待补充

 浙公网安备 33010602011771号