

[转]【Angular4】基础(二):创建组件 Component
本文转自:https://blog.csdn.net/u013451157/article/details/79445138
创建一个组件很简单,比如我们创建一个 card 组件:
ng g c card- 1
这里我使用的是 Angular CLI 脚手架,当然你要是不觉得麻烦,也可以一个个文件建。
不过!要提醒一点,当使用 ng 创建时,会将创建的组件、服务这些自动添加到 app/app.module.ts 中,如果你是手动创建的话一定要记得在模块中写入你创建的。
现在来看下 app/card/card.component.ts :
import { Component, OnInit } from '@angular/core';

@Component({
    selector: 'app-card',
    templateUrl: './card.component.html',
    styleUrls: ['./card.component.scss']
})

export class CardComponent implements OnInit {
  constructor() { }
  ngOnInit() {}
}- 1
- 2
- 3
- 4
- 5
- 6
- 7
- 8
- 9
- 10
- 11
- 12
@Component() 是一个装饰器,唯一需要的参数是一个元数据对象。
参数说明:
- selector:组件选择器名称,一般采取横杠方式
- templateUrl:模板文件路径
-
styleUrls:样式文件路径
当然,如果你使用内联模板和内联样式的话,可以将templateUrl换为template,styleUrls换成styles -
template:模板字符串
- styles:样式数组
export class CardComponent implements OnInit { } 是一个控制器
现在我们动手做一个小 demo
创建一个 demo-component 组件,用来放置实例
比如在 app/demo/demo-component.component.html 中直接使用:
<app-card></app-card>- 1
你可能会问为什么是 app-card,之前创建的不是 card 组件么?
这里需要看你的配置文件 .angular-cli.json,一般默认添加 app 的前缀 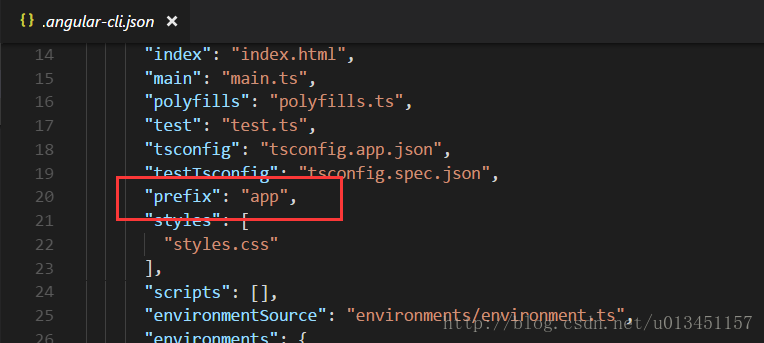
所以你创建的 card 组件的 selector 就变成了 app-card。 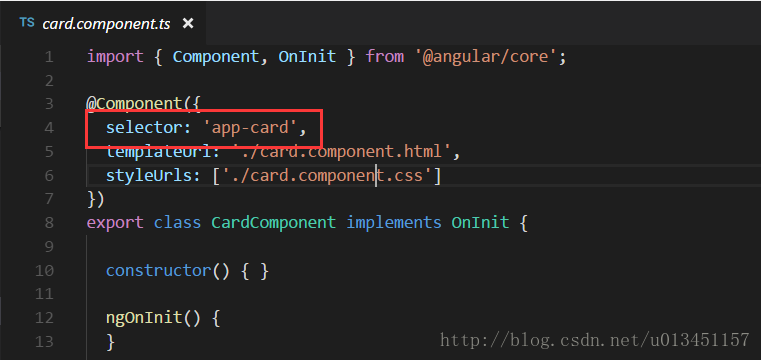
这时你启动项目后会发现页面中显示 card works!(当你用 ng 创建组件后都会自动在 template 中添加 “组件名 works!”)
若没有显示这预期的效果,就去检查下 app/app.component.html 中是否为
<app-demo-component></app-demo-component>- 1
这里暂停下来梳理下思路,
index.html 为整个应用的入口文件 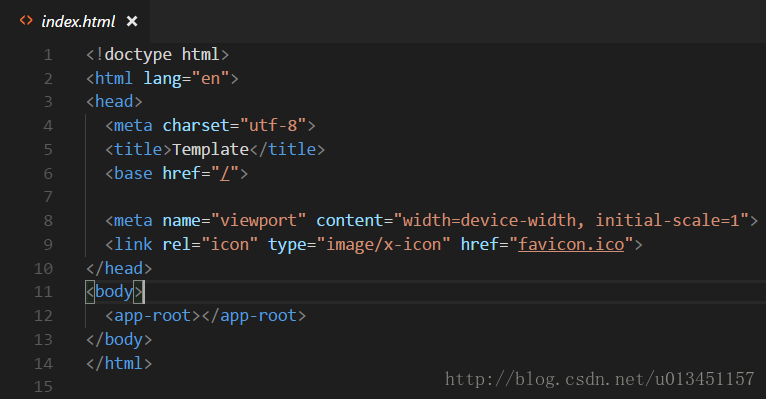
你会发现 body 中嵌入了 <app-root></app-root>
而这个组件也就是根组件 app.component.ts 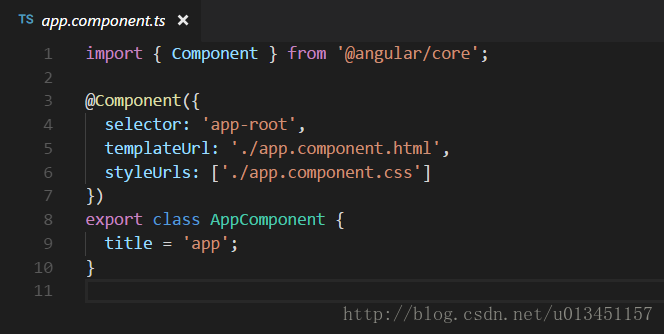
为了方便管理我们就将所有的实例都放置在 app.component.html 中,这里只有一个实例
<app-demo-component></app-demo-component>- 1
在 demo-component.html 中实例化的是一个 card 组件,内容为:
<app-card></app-card>- 1
好了!想着思路应该也梳理清楚了,那么思考下如何 动态嵌入内容 呢?
在 app/demo/demo-component.html 中修改如下:
<app-card>
    <h3>卡头</h3>
    我是卡的内容
</app-card>- 1
- 2
- 3
- 4
当打开页面时发现没有出现动态嵌入的内容?别慌~
// app/card/card.component.html

<ng-content></ng-content>- 1
- 2
- 3
上面的代码表示将组件内部的内容插入指定位置,ng-content 还有一个特别的属性,值可以是”element”, #id”, “.class”, “[name=value]”等CSS选择器,比如我们可以这样:
// card.component.html

<ng-content selector="h3"></ng-content>- 1
- 2
- 3
上面的代码意思是将包含h3的内容插入指定位置。
模板ts文件说明
import {BrowserModule} from '@angular/platform-browser';
import {NgModule} from '@angular/core';

import {AppComponent} from './app.component';
import {FormsModule} from '@angular/forms';
import {HttpModule} from '@angular/http';

@NgModule({
    declarations: [ // 声明在该模块中有哪些东西(组件、指令、管道)
        AppComponent
    ],
    imports: [ // 声明该模块需要正常运转时需要用到哪些模块(即:该模块依赖哪些其它模块)
        BrowserModule,
        FormsModule,
        HttpModule
    ],
    providers: [], // 声明模块中的服务
    bootstrap: [AppComponent] // 声明该模块的主组件
})
export class AppModule {
}- 1
- 2
- 3
- 4
- 5
- 6
- 7
- 8
- 9
- 10
- 11
- 12
- 13
- 14
- 15
- 16
- 17
- 18
- 19
- 20
- 21
关于 moduleId(Angular2 与 Angular4区别)
上述创建的组件是用 Angular4,默认配置了 moduleId。
这里主要说下 Angular2 中的 moduleId。
没有module.id:
@Component({
    selector: 'my-component',
    templateUrl: 'app/components/my.component.html', <- Starts from base path
    styleUrls:  ['app/components/my.component.css'] <- Starts from base path
})- 1
- 2
- 3
- 4
- 5
- 6
使用module.id:
tsconfig.json:
{
    "compilerOptions": {
        "module": "commonjs", <- need to change this if you want to use module.id property
...

@Component({
    moduleId: module.id,
    selector: 'my-component',
    templateUrl: 'my.component.html', <- relative to the components current path
    styleUrls:  ['my.component.css'] <- relative to the components current path
})
posted on 2018-09-15 21:42 freeliver54 阅读(276) 评论(0) 收藏 举报


 浙公网安备 33010602011771号