[转]Connect Microsoft Forms to SharePoint using Power Automate
本文转自:https://plumsail.com/blog/connect-microsoft-forms-to-sharepoint-list/
Connect Microsoft Forms to SharePoint using Power Automate
In this article:
- How to Connect Microsoft Forms to a SharePoint List: A Step-by-Step Guide
- Power Automate flows for complex scenarios
- Conclusion
How to Connect Microsoft Forms to a SharePoint List: A Step-by-Step Guide
Microsoft SharePoint is widely used to store data and documents while Microsoft Forms allows to collect data from anonymous users and within your organization.
In this tutorial we'll show how to create or use existing template to create a Microsoft form, how to collect and process data in Power Automate to save it to SharePoint, which can be used in other platforms. In the examples section, you will find how to work with attachments, send emails and automate the approval process.
Step 1: Create a Microsoft Form
Microsoft Forms is available for free at https://forms.office.com, where you can design forms and collect data.
It has easy-to-use interface with limited variety of field types to select from:
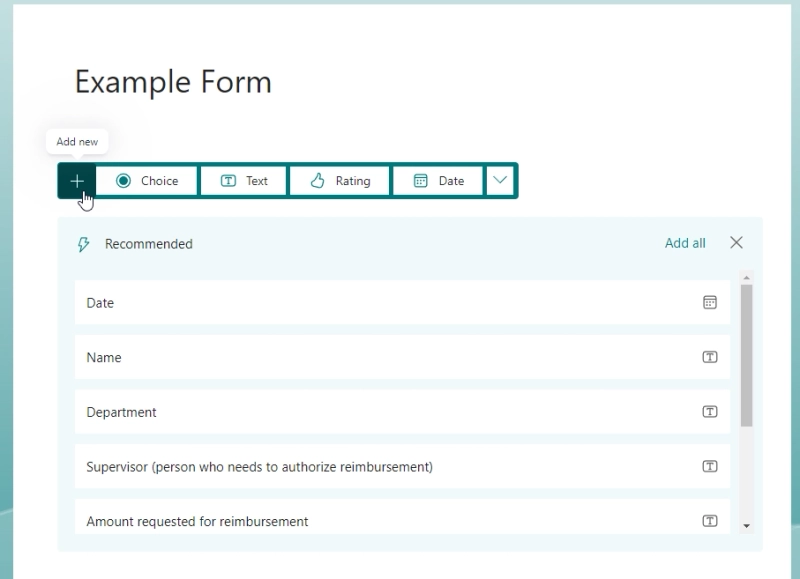
Microsoft Form field types
All the forms are responsive, meaning that they automatically adjust for all screen sizes, including mobiles:
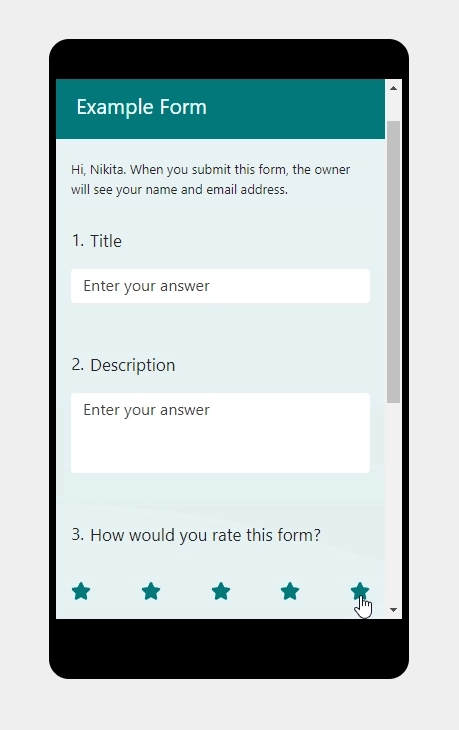
Microsoft Form mobile view
Forms can be shared via a link which can be shortened:
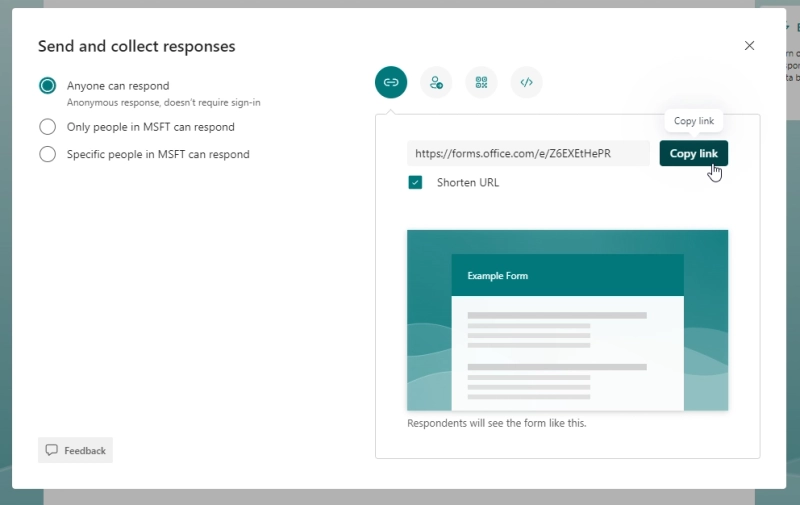
Microsoft Form web link
And you can also limit access to users within your organization:
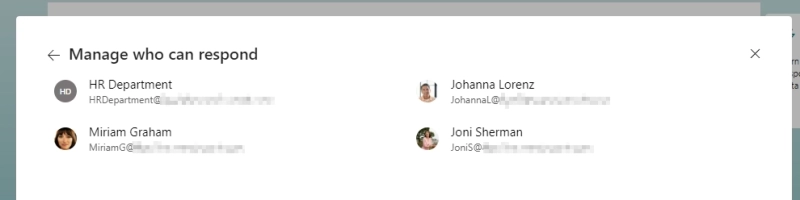
Microsoft Form manage respondents
For demonstration purposes, let's take an expense reimbursement form from Microsoft templates
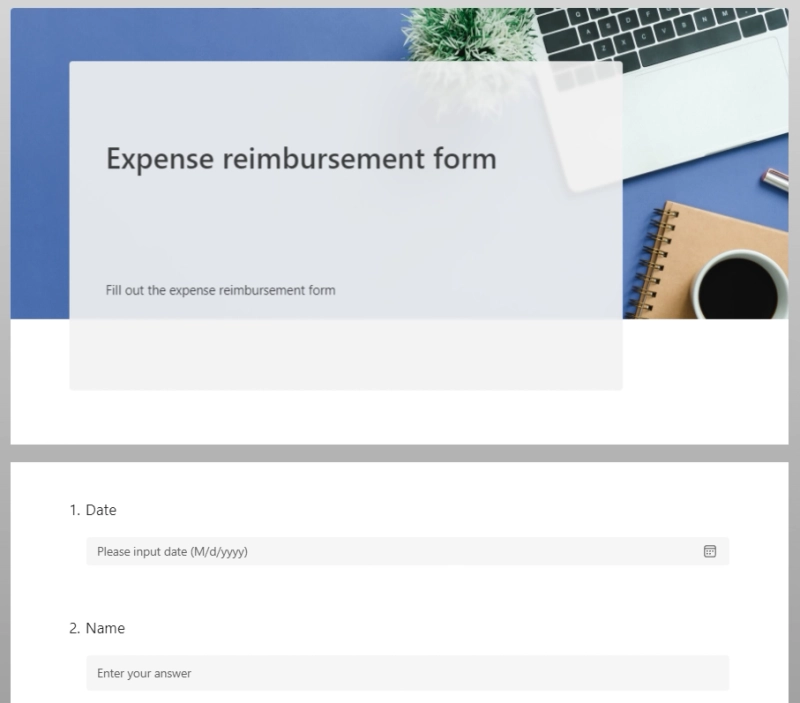
Expense reimbursement form
It has the following fields:
- Date field to input the current day
- Name text field to input the name of the employee
- Department text field to enter employee's department, can also be switched to choice field
- Supervisor text field to input the name of the supervisor, can also be used to collect email address instead
- Amount requested for reimbursement text field, limited to numeric values, to enter reimbursement amount
- Type of payment choice field to select from Cash, Personal card, Employee card and Other
- Date of transaction field to enter the date of transaction which needs to be reimbursed
- Reason for purchase long text field to explain the need for purchase and reimbursement
It also includes attachments field for the receipts, which you can limit the number of as well as supported file types:
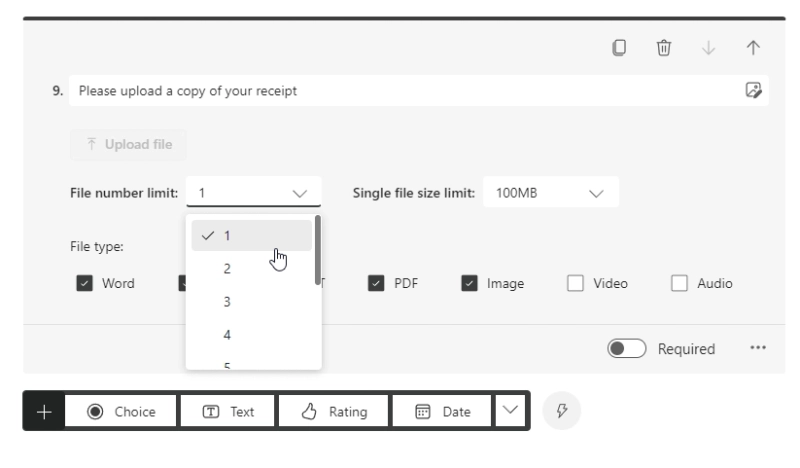
Expense reimbursement form attachments
Let's save and test the form:
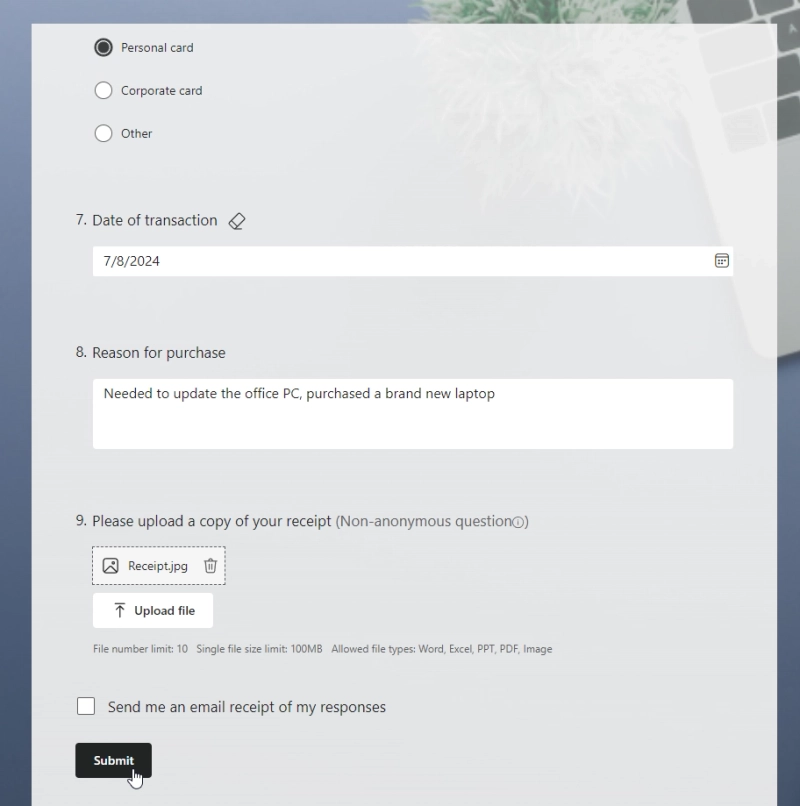
Expense reimbursement form filled
All the data collected from the form will be stored in your account:
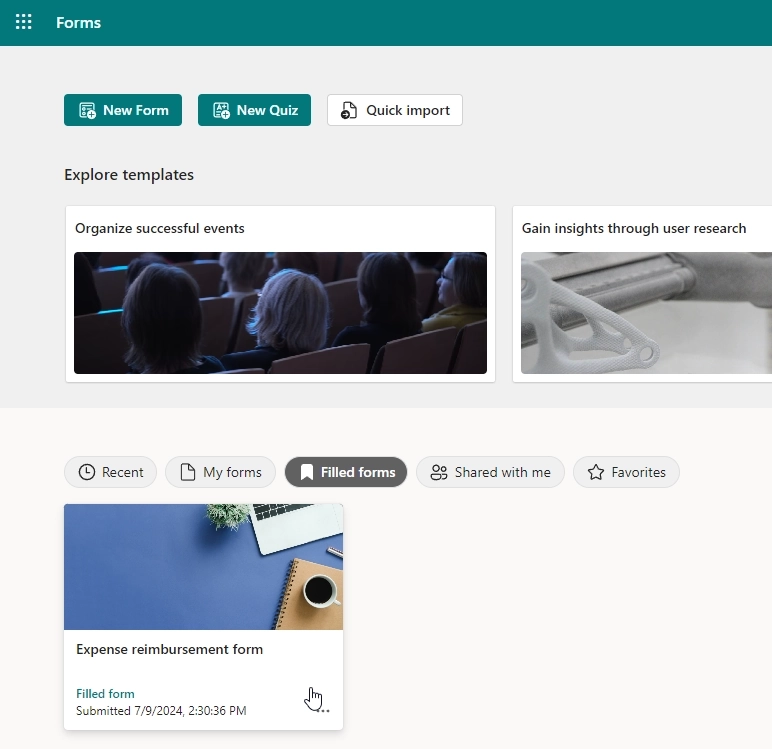
Expense reimbursement form saved
Next we'll showcase how to use Power Automate to save it to SharePoint:
Step 2: Set up a SharePoint list
First of all, we need to create a list with columns that correspond to the questions in the form:
- Date column for the day of the request
- Name column can be a text or person/group column, however the latter will be more sensitive to typos
- Department text or choice column to save the department
- Supervisor column can also be a text, choice or person/group column
- Amount requested for reimbursement can be a text or a currency column
- Type of payment should be a choice column with Cash, Personal card, Employee card and Other options
- Date of transaction column for the date of the transaction
- Reason for purchase multiline text column to describe the reason for purchase

SharePoint list with all the columns
Attachments can be enabled for this list, we'll showcase two methods how you can handle attachments with Power Automate, saving them either directly to SharePoint List item, or creating a separate related Document Library.
Step 3: Use Power Automate to Connect the Form to the List
You can build automated flow from scratch or use the existing template to Record form responses in SharePoint:
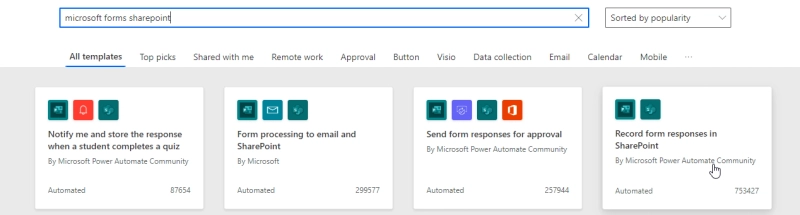
Use one of available flow templates for Microsoft Forms
Inside of the template, you first need to populate the When a new response is submitted trigger with the form that you've created:
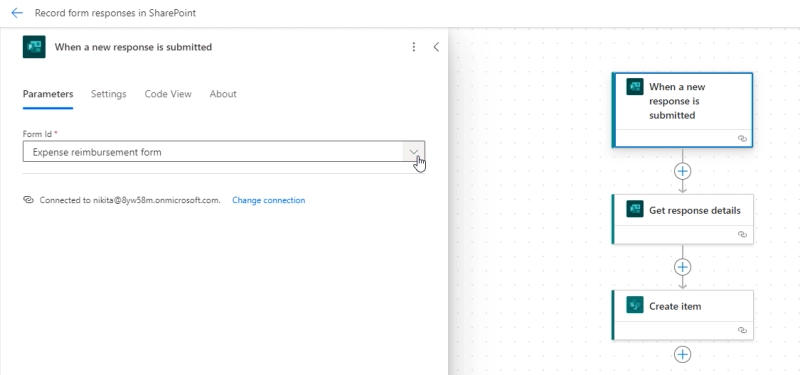
When a new response is submitted triggers the flow
Then, make sure to use the same form in Get response details action:
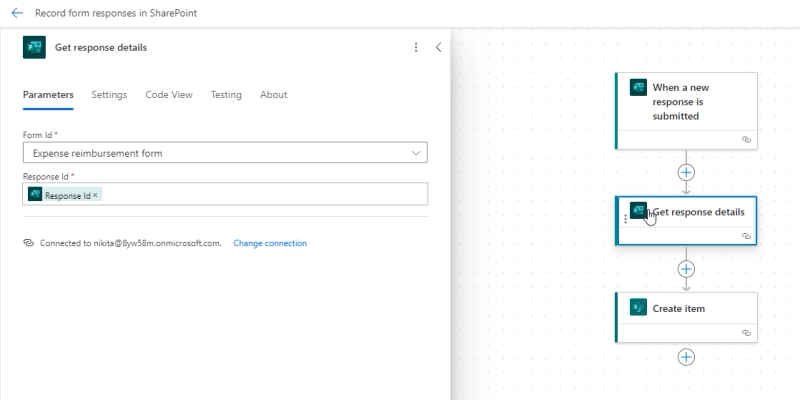
Get response details will retrieve info from the form
Next, update Create item step with information from the form:
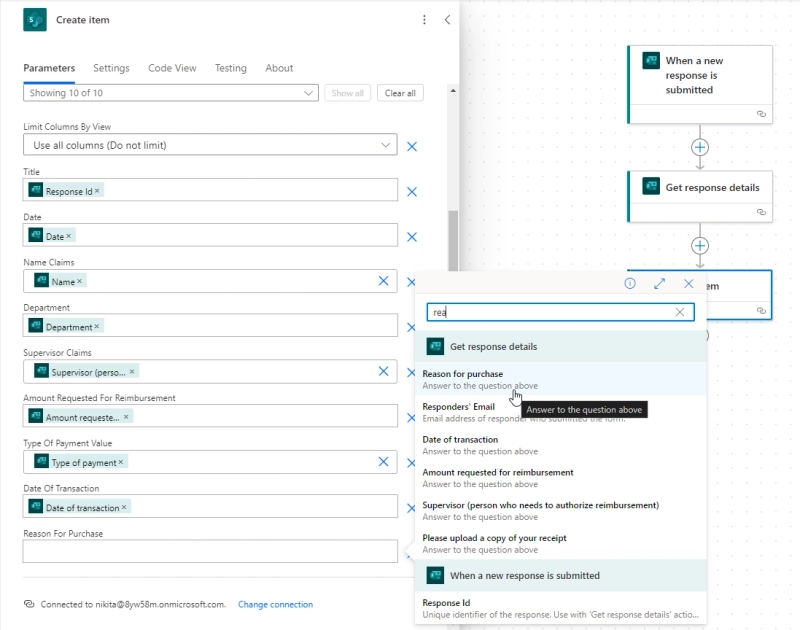
Create item in SharePoint
Submit the form once more, and if it runs successfully, you'll see in Power Automate:
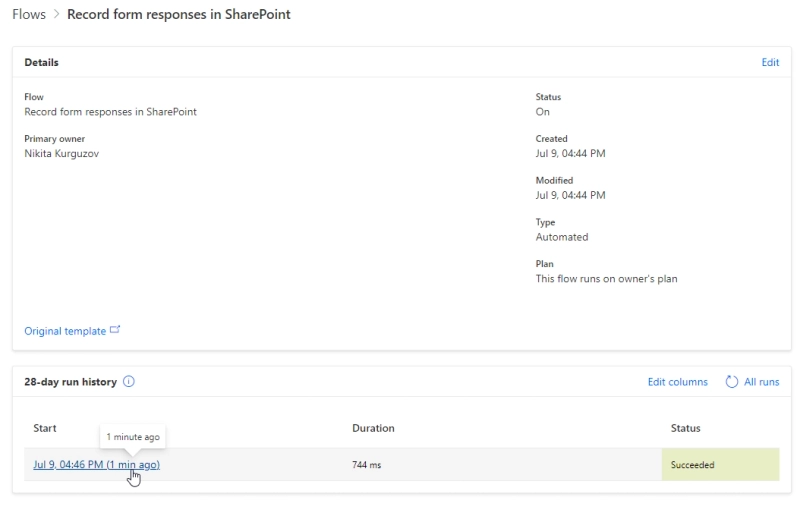
Flow ran successfully, click for details
Finally, the result will be available in SharePoint:

Created item in SharePoint
Customize Power Automate flows for complex scenarios
In some cases, you may need to create more complex flows to handle specific business needs. Here, we'll give examples on how to upload attachments, send emails, automate approvals and more.
Example 1: Upload attachments to SharePoint
Handling attachments will require a few extra steps.
Parse JSON
Most important step is to get the information about attachments and for this, we can use Parse JSON action:
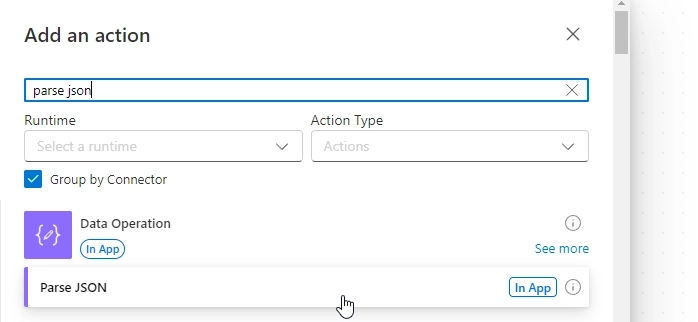
Add Parse JSON action
Insert the attachments field, such as Please upload a copy of your receipt, inside of the Content field and copy the following schema to the Schema field:
{
    "type": "array",
    "items": {
        "type": "object",
        "properties": {
            "name": {
                "type": "string"
            },
            "link": {
                "type": "string"
            },
            "id": {
                "type": "string"
            },
            "type": {},
            "size": {
                "type": "integer"
            },
            "referenceId": {
                "type": "string"
            },
            "driveId": {
                "type": "string"
            },
            "status": {
                "type": "integer"
            },
            "uploadSessionUrl": {}
        },
        "required": [
            "name",
            "link",
            "id",
            "type",
            "size",
            "referenceId",
            "driveId",
            "status",
            "uploadSessionUrl"
        ]
    }
}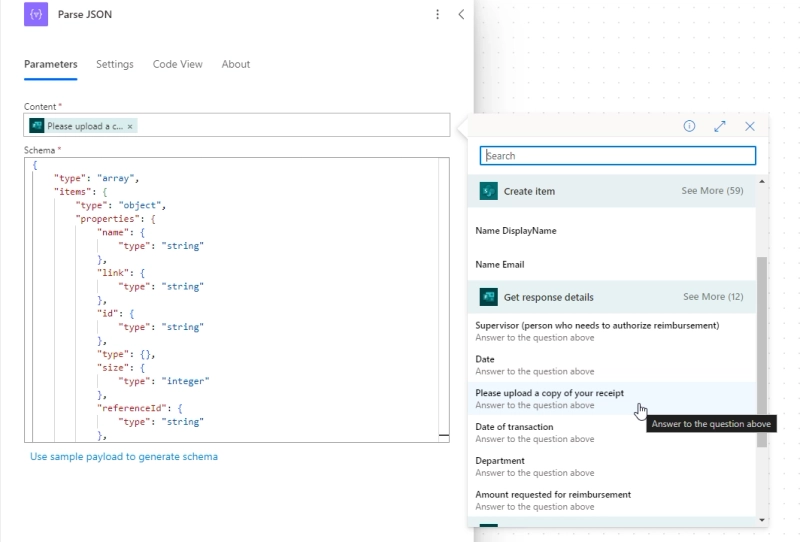
Parse JSON
Get file content
To get file content, select Get file content using path OneDrive action and copy the path to your forms attachments within your OneDrive:
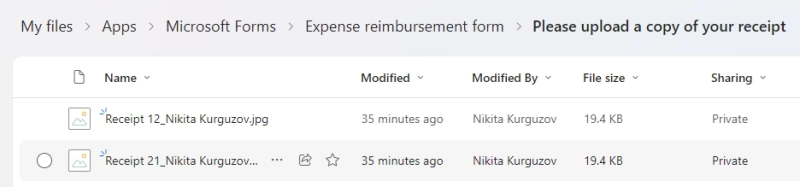
Attachments in OneDrive
Add dynamic content link from your Parse JSON action:
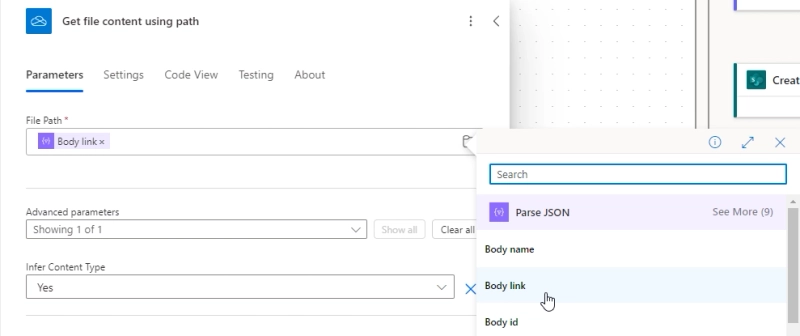
Get file content using path
This will automatically convert your single action into an Apply to each block which will retrieve every attachment:
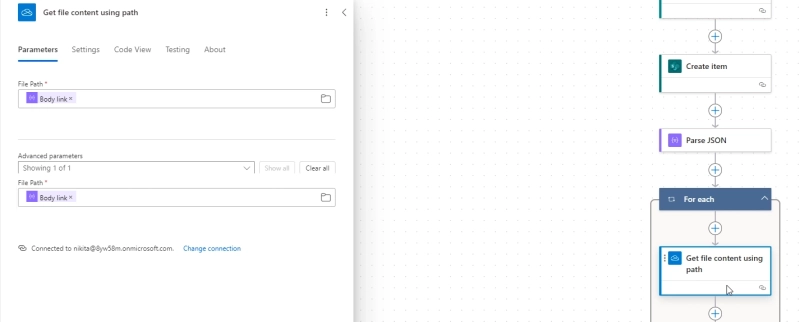
For each block within flow
Add attachments to SharePoint List item
Final action is to add attachments to the SharePoint item that we've created. Inside of the Apply to each block, add Add attachment action, select your site, list name, item ID from the Create item action, add dynamic content name from your Parse JSON action, and Body from Get file content using path OneDrive action inside of the File Content:
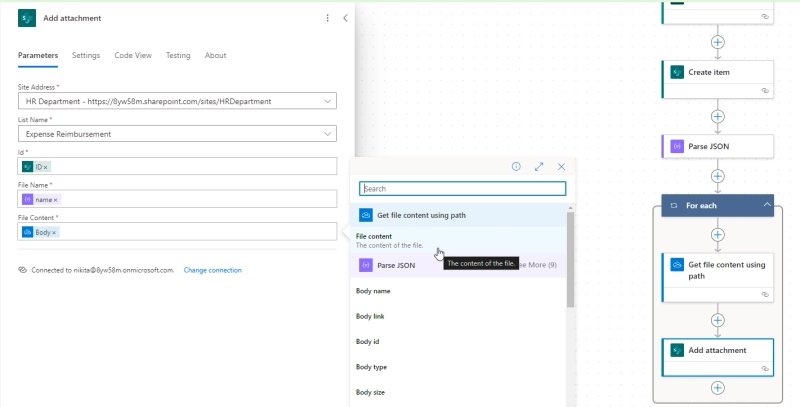
Add attachments to SharePoint item
Add attachments to SharePoint Document Library
Instead of uploading attachments to the SharePoint list item, you can upload them to a Document Library. Why use a Document Library instead of Attachments?
Most common scenario is if you have several attachments fields on your Microsoft Form, SharePoint List item only has one Attachments field, so the attachments cannot be sorted and have to be uploaded to the same field.
Instead, you can create a related Document Library, let's say Receipts, with a Lookup field to the main list:
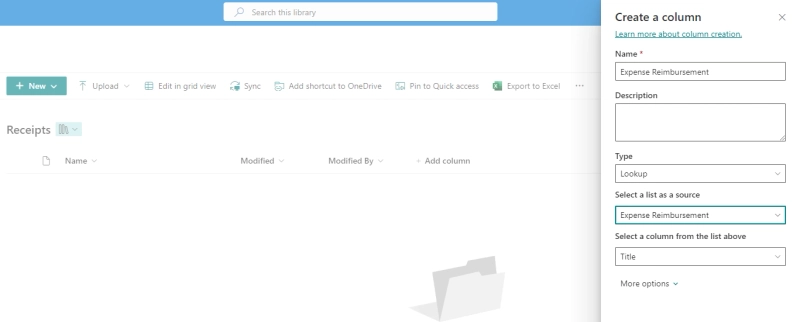
Create lookup to Expense Reimbursement list
Use Create file SharePoint action in Power Automate to create a file, same way as you would do with Attachments:
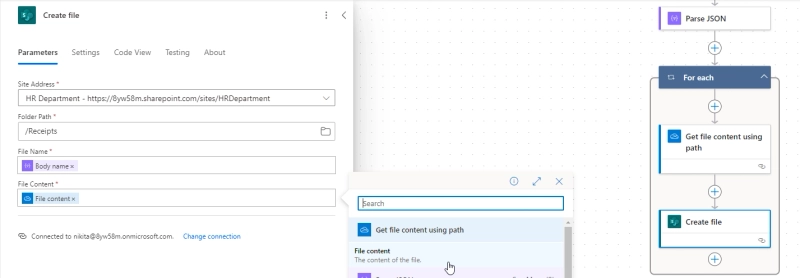
Create a file in SharePoint Doc Library
Then, use Update file properties SharePoint action in order to set the ID of the created item in the Lookup field:
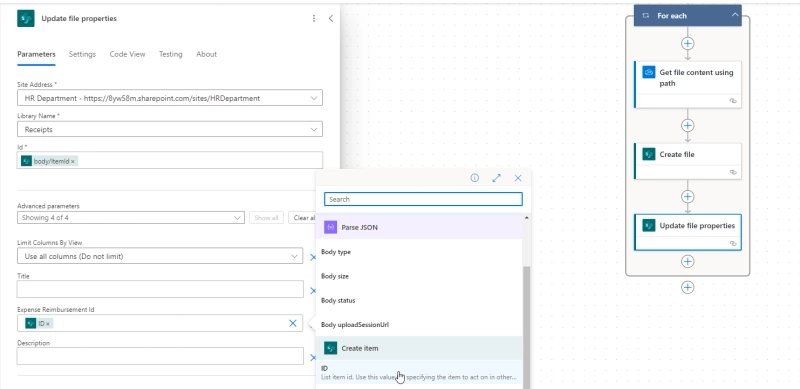
Update file properties to set Lookup parent ID
That way, when you upload attachments through MS Form, your files will go to the Document Library, but they'll still be connected to a specific item in your parent list. In our case, uploaded receipts are connected to the Expense reimbursement request:
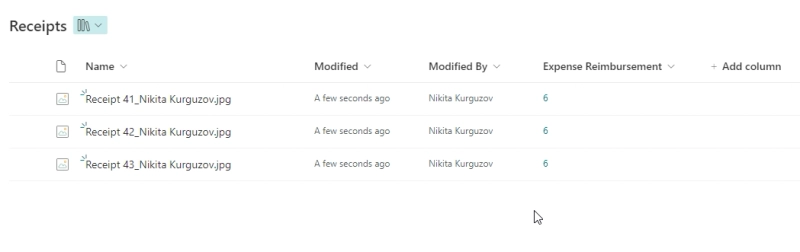
Receipts uploaded to document library
This can be done for multiple attachments fields, such as receipts, bills, id documents, quotas, etc. even if they are all present on the same form. Moreover, if you use Plumsail Forms for SharePoint, you can use List or Library control to display them all inside of the parent form, as seen in our Expense Reimbursement form in SharePoint:
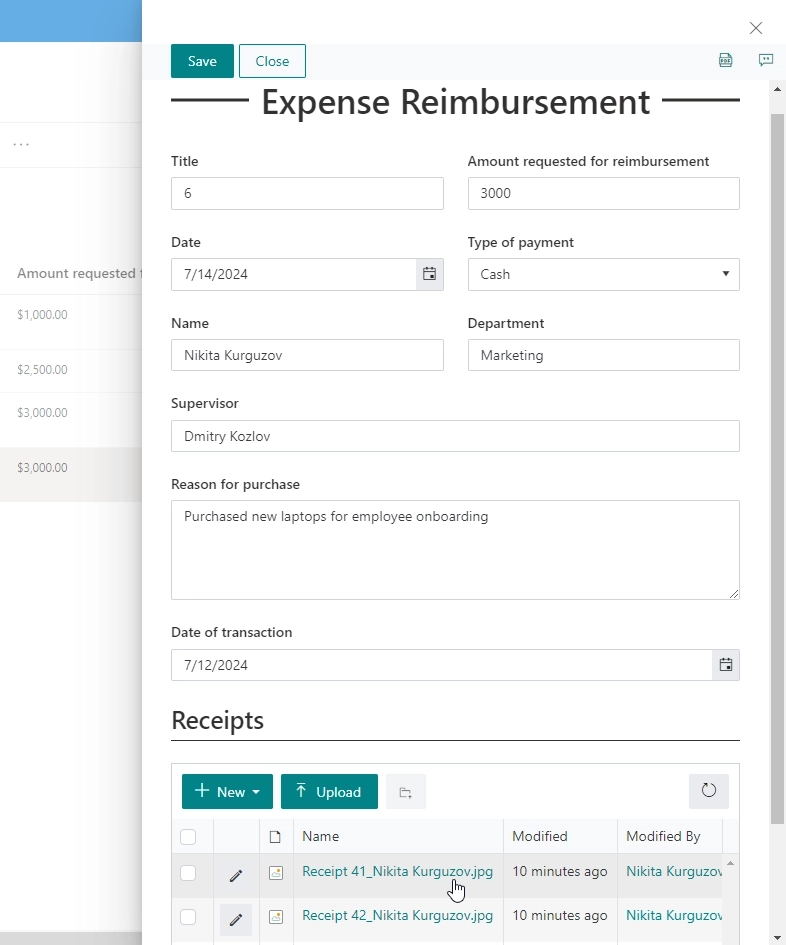
Related libraries can be displayed on the parent form
Example 2: Send an email with attachments
This will show you how to send email with information from Microsoft Forms and add attachments to the email.
Send email action
All you need to do to send an email, is to add Send an email action from Outlook or any other service that you use, make sure to add it outside of any For each block, and populate it with information from Get response action:
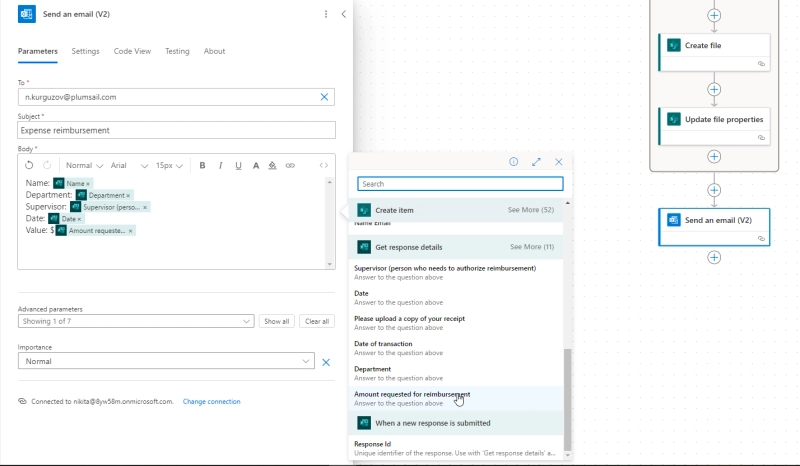
Send an email action
Initialize Attachments array
If you want to send an email with attachments, you'll still need to do Parse JSON and Get file content actions, but also add a new action after Parse JSON:
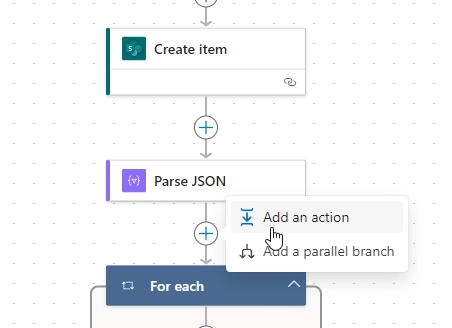
Add action after Parse JSON
Add Initialize variable action:
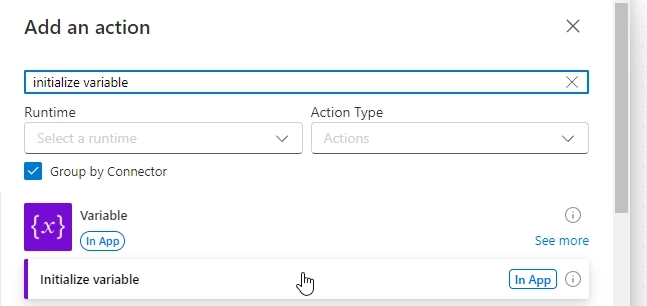
Add initialize variable
And initialize variable of array type, for example, Attachments:
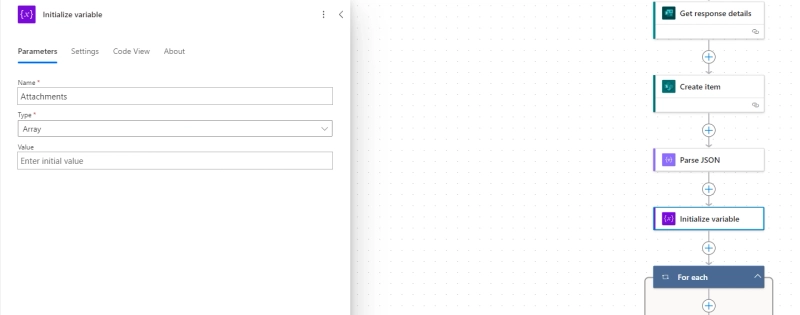
Initialize variable of array type
Append attachments to the array
Then use Append to array variable action to add attachments to it, using the following schema:
{
  "Name": [name variable],
  "ContentBytes": [file content]
}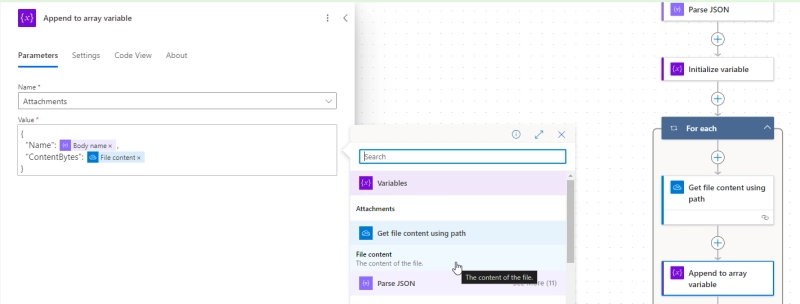
Append attachments to array
Add array to the email
This can then be used as attachments in the final step - open advanced parameters, find attachments and switch to input entire array:
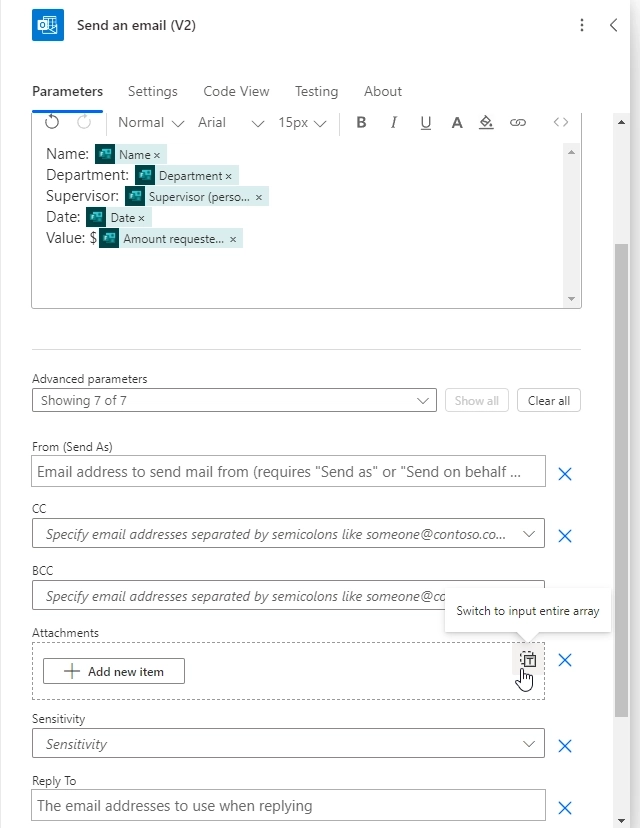
Switch to input array
Add the array that we've just created and save the flow:
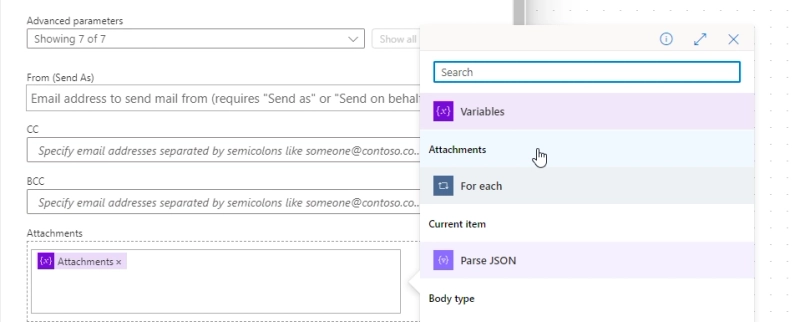
Add Attachments array to the email
This will generate an email on submit:
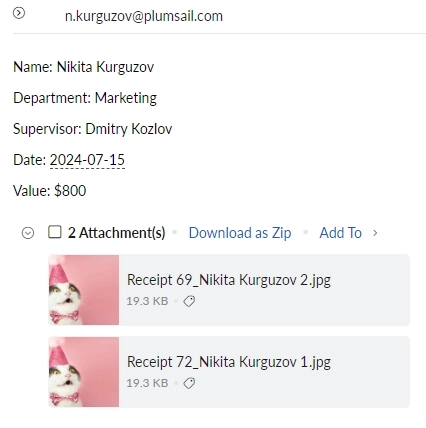
Received an email
Example 3: Conditional approvals for forms based on expense amount
In this section, we'll show how to check for conditions and how to configure approval process in Power Automate.
Require email value for the supervisor
If you want approval from Supervisor field on the form, it's a good idea to require an email on the form:
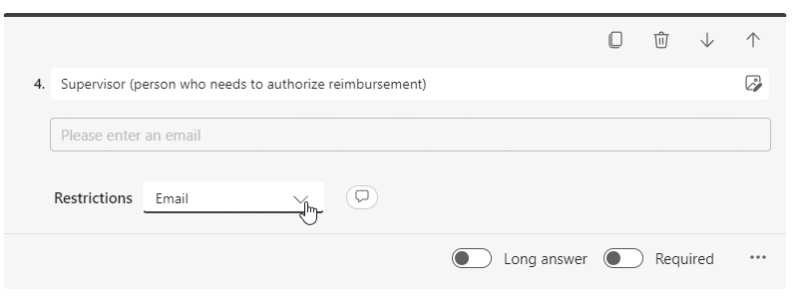
Supervisor field accepts email only
Add condition to flow to check value
You can run an approval process on every flow, but we'll add a conditions to run the approval process if the requested amount is over $1,000. For this, search and add Condition step to your flow:
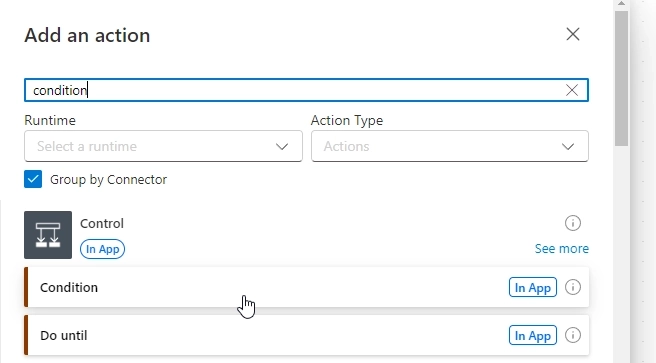
Search and add Condition
This should come after getting the response details, but before anything else:
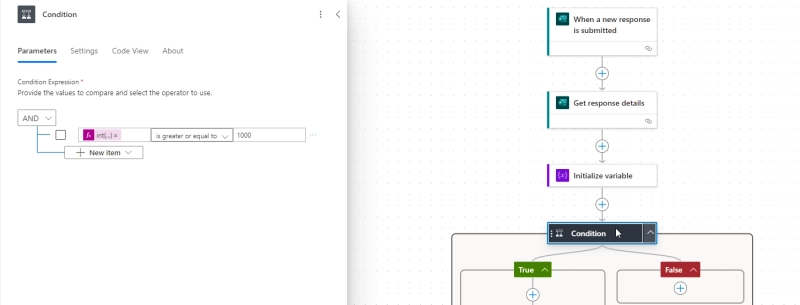
Search and add Condition
If you plan to retrieve attachments for the email, move Initialize variable before the condition, everything else can run inside True or False blocks.
To check for value, you need to convert it from string to integer, or it wouldn't run a comparison, insert expression int() and inside of the brackets, insert dynamic content with the value to convert:
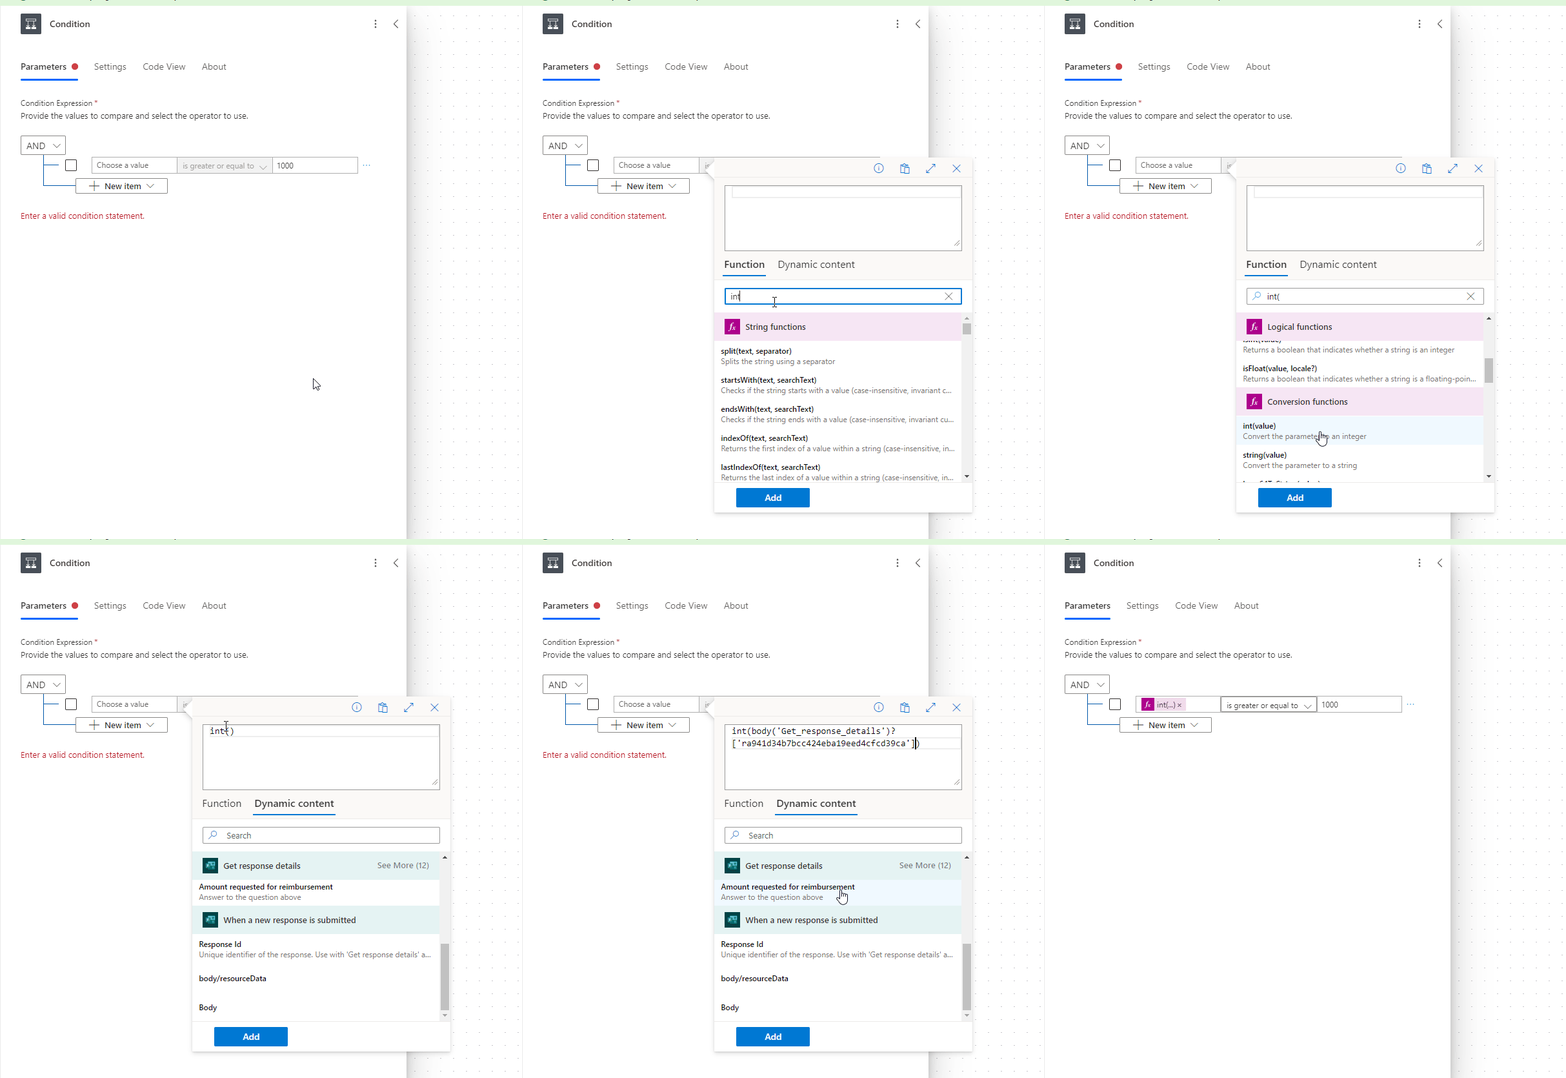
Convert string to int
You also need to recreate all the steps that you want to take place inside of the False section:
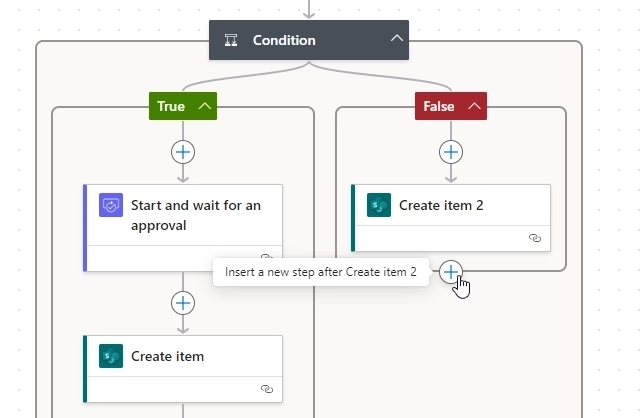
Recreate steps if condition is false
Start and wait for an approval
Now, you need to find and add Start and wait for an approval action:
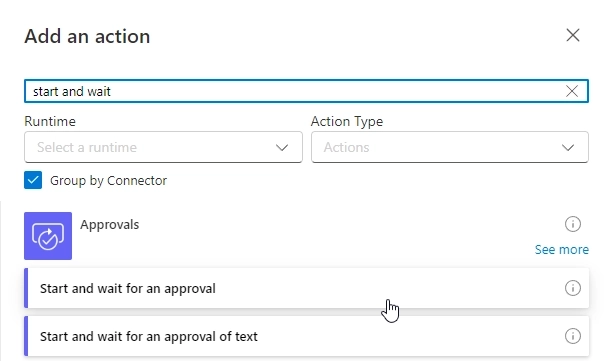
Recreate steps if condition is false
Inside of the action, you can use information from the form, including Supervisor field to fill out the details of the approval and the approver's email:
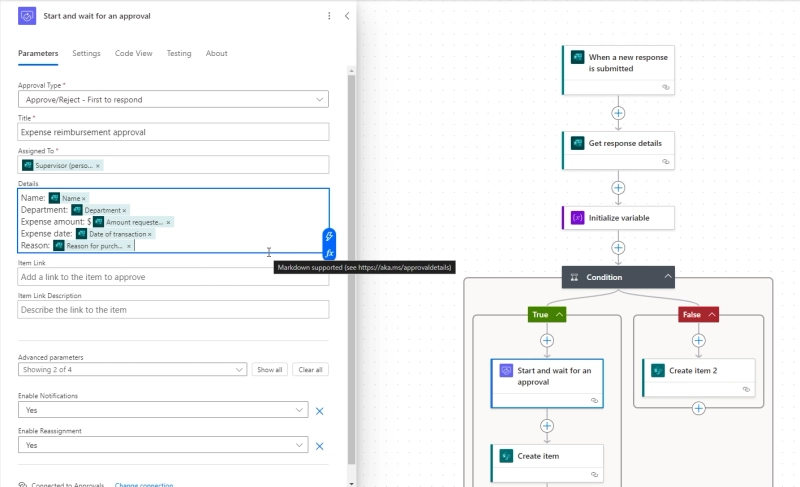
Approval information and supervisor email
Now, if the form is submitted with expense amount over $1,000, it has to be approved by the supervisor before the flow runs. This can be done via the email:
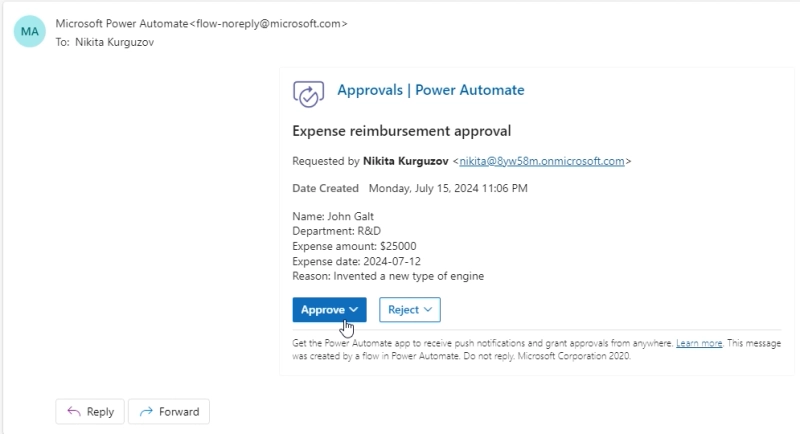
Approval email
Check out Plumsail Forms for advanced integrations
If you're looking for a more advanced forms solution to cover the same bases and more, check out Plumsail Forms:
- Forms with many more field types, containers and controls, including Data Table, Likert Scale and Signature
- Forms with dynamic content: Add no-code rules to hide, show, enable, or disable fields and controls based on user input.
- Forms with advanced functionality: Add custom validation, auto-calculate values, pre-fill fields, or change form styling with CSS and JavaScript.
- Forms with no limitations: any number of fields, third-party integrations such as Airtable or Excel data sources and more
For example, this is how your Expense reimbursement form could look like with Plumsail Forms, allowing multiple expenses and signature to be added:
It's up to you which app to choose for your forms. Find more in our comparison between MS Forms and Plumsail Forms, or read and watch customer success stories with advanced integrations.
If you're about to try Plumsail Forms as an alternative to MS Forms, this video may help you to get started:
Conclusion
Connecting Microsoft Forms to a SharePoint list using Power Automate streamlines data collection and management, making it easier to handle responses, attachments, and automate processes. By creating a Microsoft form, setting up a corresponding SharePoint list, and using Power Automate, users can seamlessly transfer form data to SharePoint. This integration allows for handling attachments, sending emails, and automating approvals.
For advanced needs, tools like Plumsail Forms offer additional features and flexibility, providing robust solutions for complex form requirements and integrations, and can be used for SharePoint Forms or as a more powerful alternative to Microsoft Forms.
posted on 2026-09-21 20:25 freeliver54 阅读(6) 评论(0) 收藏 举报


 浙公网安备 33010602011771号