

2.SpringBoot的properties的属性配置详解
    SpringBoot是为了简化Spring应用的创建、运行、调试、部署等一系列问题而诞生的产物,自动装配的特性让我们可以更好的关注业务本身而不是外部的XML配置,
我们只需遵循规范,引入相关的依赖就可以轻易的搭建出一个 WEB 工程
   SpringBoot虽然干掉了 XML 但未做到零配置,它体现出了一种约定优于配置,也称作按约定编程,是一种软件设计范式,旨在减少软件开发人员需做决定的数量,
获得简单的好处,而又不失灵活性。一般情况下默认的配置足够满足日常开发所需,但在特殊的情况下,我们往往需要用到自定义属性配置、自定义文件配置、多环境配置、
外部命令引导等一系列功能。不用担心,这些SpringBoot都替我们考虑好了,我们只需要遵循它的规则配置即可.
一.准备前提
为了让SpringBoot更好的生成数据,我们需要添加如下依赖(该依赖可以不添加,但是在 IDEA 和 STS 中不会有属性提示,没有提示的配置就跟你用记事本写代码一样苦逼,出个问题弄哭你去),该依赖只会在编译时调用,所以不用担心会对生产造成影响…
1 <dependency>
2     <groupId>org.springframework.boot</groupId>
3     <artifactId>spring-boot-configuration-processor</artifactId>
4     <optional>true</optional>
5 </dependency>
二.使用系统的application.properties属性文件进行相关配置和值的注入
在application.properties写入如下配置内容
1 stu1.age=25
2 stu1.name=Luis
其次定义StudentProperties.java文件,用来映射我们在application.properties中的内容,这样一来我们就可以通过操作对象的方式来获得配置文件的内容了
1.创建StudentProperties.java

 1 package cn.kgc.properties;
 2 import org.springframework.boot.context.properties.ConfigurationProperties;
 3 import org.springframework.stereotype.Component;
 4 /**
 5  * 注解Component: 标注传递数据的实体类
 6  * 注解ConfigurationProperties:标注属性文件的,
 7  * prefix前缀则是属性文件中属性的前缀,
 8  * 因为一个属性文件中可能配置很多,可以通过前缀区分
 9  */
10 @Component
11 @ConfigurationProperties(prefix = "stu")
12 public class StudentProperties {
13     private int age;
14     private String name;
15     public int getAge() {
16         return age;
17     }
18     public void setAge(int age) {
19         this.age = age;
20     }
21     public String getName() {
22         return name;
23     }
24     public void setName(String name) {
25         this.name = name;
26     }
27     @Override
28     public String toString() {
29         return "StudentProperties{" +
30                 "age=" + age +
31                 ", name='" + name + '\'' +
32                 '}';
33     }
34 }
2.定义controller类来给StudentProperties类注入值
定义我们的PropertiesController用来注入StudentProperties测试我们编写的代码,值得注意的是Spring4.x以后,推荐使用构造函数的形式注入属性…
 1 package cn.kgc.controller;
 2
 3 import cn.kgc.properties.StudentProperties;
 4 import org.slf4j.Logger;
 5 import org.slf4j.LoggerFactory;
 6 import org.springframework.beans.factory.annotation.Autowired;
 7 import org.springframework.web.bind.annotation.GetMapping;
 8 import org.springframework.web.bind.annotation.RequestMapping;
 9 import org.springframework.web.bind.annotation.RestController;
10 /**
11  * Created by Administrator on 2018/10/16.
12  */
13 @RequestMapping("/properties")
14 @RestController
15 public class PropertiesController {
16     //对本类做日志记录
17     private static final Logger log = LoggerFactory.getLogger(PropertiesController.class);
18     //创建接受属性文件的值的实体类
19     private final StudentProperties studentProperties;
20     @Autowired
21     public PropertiesController(StudentProperties studentProperties) {
22         this.studentProperties = studentProperties;
23     }
24     @GetMapping("/stuProperties")
25     public StudentProperties studentProperties() {
26         log.info("=================================================================================================");
27         log.info(studentProperties.toString());
28         log.info("=================================================================================================");
29         return studentProperties;
30     }
31 }
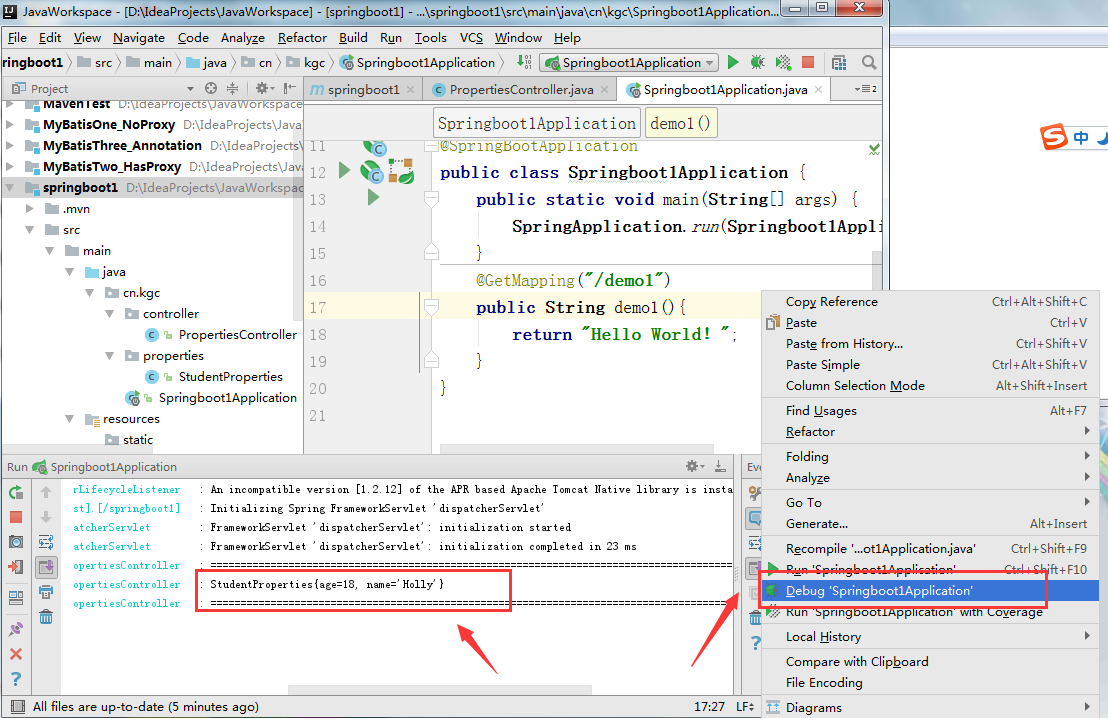
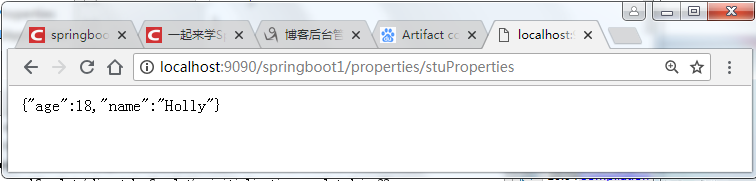
3.运行开启springBoot,在浏览器输入:http://localhost:9090/springboot1/properties/stuProperties ,可以在控制台和浏览器看到我们的数据
三、使用自定义的属性配置文件,进行值的相关注入
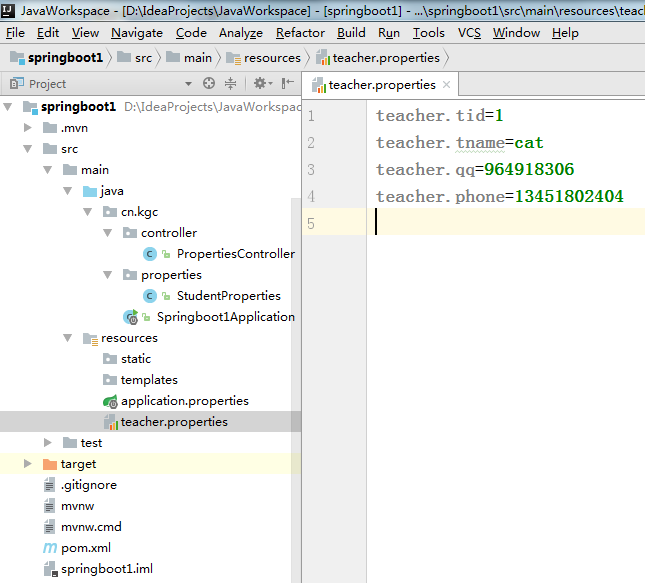
1. 定义一个名为teacher.properties的资源文件,自定义配置文件的命名不强制application开头
2.定义实体类用来接受springboot将将属性文件注入值
其次定义TeacherProperties.java文件,用来映射我们在teacher.properties中的内容。
 1 package cn.kgc.properties;
 2 import org.springframework.boot.context.properties.ConfigurationProperties;
 3 import org.springframework.context.annotation.PropertySource;
 4 import org.springframework.stereotype.Component;
 5 /**
 6  * Created by Administrator on 2018/10/16.
 7  */
 8 @Component
 9 @PropertySource("classpath:teacher.properties")
10 @ConfigurationProperties(prefix = "teacher")
11 public class TeacherProperties {
12     private int tid;
13     private String tname;
14     private String qq;
15     private String phone;
16
17     public TeacherProperties() {
18     }
19
20     public TeacherProperties(int tid, String tname, String qq, String phone) {
21         this.tid = tid;
22         this.tname = tname;
23         this.qq = qq;
24         this.phone = phone;
25     }
26
27     public int getTid() {
28         return tid;
29     }
30
31     public void setTid(int tid) {
32         this.tid = tid;
33     }
34
35     public String getTname() {
36         return tname;
37     }
38
39     public void setTname(String tname) {
40         this.tname = tname;
41     }
42
43     public String getQq() {
44         return qq;
45     }
46
47     public void setQq(String qq) {
48         this.qq = qq;
49     }
50
51     public String getPhone() {
52         return phone;
53     }
54
55     public void setPhone(String phone) {
56         this.phone = phone;
57     }
58
59     @Override
60     public String toString() {
61         return "TeacherProperties{" +
62                 "tid=" + tid +
63                 ", tname='" + tname + '\'' +
64                 ", qq='" + qq + '\'' +
65                 ", phone='" + phone + '\'' +
66                 '}';
67     }
68 }
3.在PropertiesController用来注入TeacherProperties测试我们编写的代码
 1 package cn.kgc.controller;
 2
 3 import cn.kgc.properties.StudentProperties;
 4 import cn.kgc.properties.TeacherProperties;
 5 import org.slf4j.Logger;
 6 import org.slf4j.LoggerFactory;
 7 import org.springframework.beans.factory.annotation.Autowired;
 8 import org.springframework.web.bind.annotation.GetMapping;
 9 import org.springframework.web.bind.annotation.RequestMapping;
10 import org.springframework.web.bind.annotation.RestController;
11 /**
12  * Created by Administrator on 2018/10/16.
13  */
14 @RequestMapping("/properties")
15 @RestController
16 public class PropertiesController {
17
18     //对本类做日志记录
19     private static final Logger log = LoggerFactory.getLogger(PropertiesController.class);
20     //创建接受属性文件的值的实体类
21     private final StudentProperties studentProperties;
22     //创建接受属性文件的值的实体类
23     private final TeacherProperties teacherProperties;
24
25
26     @Autowired
27     public PropertiesController(TeacherProperties teacherProperties, StudentProperties studentProperties) {
28         this.studentProperties = studentProperties;
29         this.teacherProperties = teacherProperties;
30     }
31     @GetMapping("/tecProperties")
32     public TeacherProperties teacherProperties() {
33         log.info("=================================================================================================");
34         log.info(teacherProperties.toString());
35         log.info("=================================================================================================");
36         return teacherProperties;
37     }
38     //---
39
40     @GetMapping("/stuProperties")
41     public StudentProperties studentProperties() {
42         log.info("=================================================================================================");
43         log.info(studentProperties.toString());
44         log.info("=================================================================================================");
45         return studentProperties;
46     }
47     //
48 }
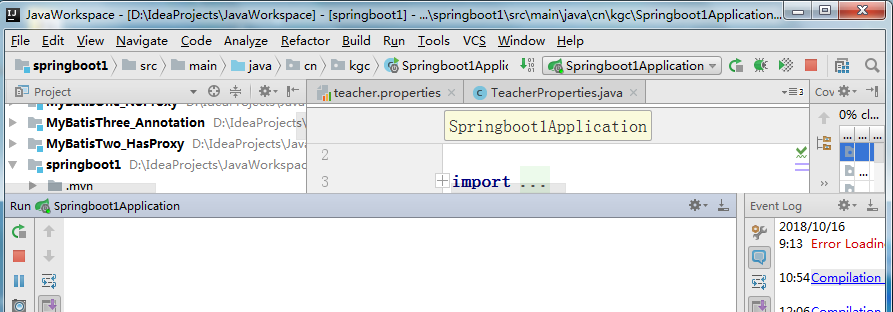
4.先启动springBoot
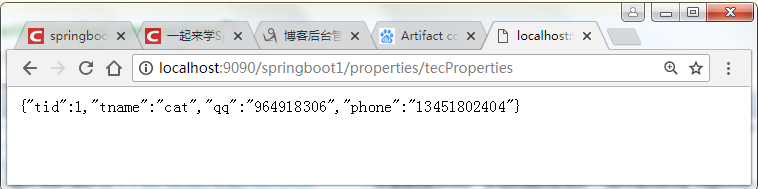
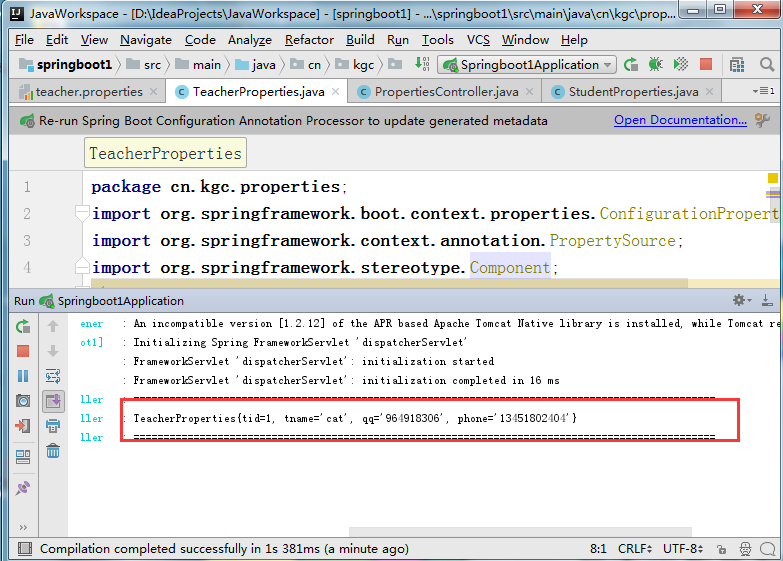
5.在地址栏输入地址:http://localhost:9090/springboot1/properties/tecProperties查看结果

 浙公网安备 33010602011771号