
CentOS7下搭建postfix邮箱服务器并实现extmail的web访问
CentOS7下搭建postfix邮箱服务器并实现extmail的web访问
1. 准备工作
关闭selinux
-
[root@localhost ~]# setenforce 0
-
[root@localhost ~]# getenforce
-
Permissive
-
[root@localhost ~]#
关闭firewalld防火墙,并清空iptables规则:
-
[
-
[
-
[
-
[
-
Chain INPUT (policy ACCEPT 38 packets, 7291 bytes)
-
pkts bytes target prot opt in out source destination
-
-
Chain FORWARD (policy ACCEPT 0 packets, 0 bytes)
-
pkts bytes target prot opt in out source destination
-
-
Chain OUTPUT (policy ACCEPT 12 packets, 1208 bytes)
-
pkts bytes target prot opt in out source destination
-
[root@localhost ~]#
由于CentOS7默认安装的是MariaDB,所以要添加MySQL的yum源,有些编译需要的devel包只有epel扩展源有,所以我们需要把epel源也一并添加。因为是通过wget命令从下载地址中下载,但是最小化安装的CentOS7不自带wget命令,还需要先安装这个命令:
-
yum install -y wget
-
wget http://dev.mysql.com/get/mysql-community-release-el7-5.noarch.rpm
-
rpm -ivh mysql-community-release-el7-5.noarch.rpm
-
wget http://dl.fedoraproject.org/pub/epel/epel-release-latest-7.noarch.rpm
-
rpm -ivh epel-release-latest-7.noarch.rpm
2. 安装postfix
首先需要安装编译环境及其他所需要的包,免得一会编译过程中老报缺少包的错误,因为需要安装的包有点多,所以这个过程有点慢:
yum install nginx vim gcc gcc-c++ openssl openssl-devel db4-devel ntpdate mysql mysql-devel mysql-server bzip2 php-mysql cyrus-sasl-md5 perl-GD perl-DBD-MySQL perl-GD perl-CPAN perl-CGI perl-CGI-Session cyrus-sasl-lib cyrus-sasl-plain cyrus-sasl cyrus-sasl-devel libtool-ltdl-devel telnet mail libicu-devel -y安装完以上所需的包后,开始编译安装postfix:
1.首先卸载系统自带的postfix,并删除postfix用户,重新指定uid、gid创建新用户postfix,postdrop,嫌一条条命令去执行有点麻烦就写成脚本文件去执行:
-
yum remove postfix -y
-
userdel postfix
-
groupdel postdrop
-
groupadd -g 2525 postfix
-
useradd -g postfix -u 2525 -s /sbin/nologin -M postfix
-
groupadd -g 2526 postdrop
-
useradd -g postdrop -u 2526 -s /sbin/nologin -M postdrop
2.下载源码包并解压编译(如果下载地址失效就到官网去找下载连接):
-
cd /usr/local/src/
-
wget http://cdn.postfix.johnriley.me/mirrors/postfix-release/official/postfix-3.0.11.tar.gz
-
tar -zxvf postfix-3.0.11.tar.gz
-
cd postfix-3.0.11
-
make makefiles 'CCARGS=-DHAS_MYSQL -I/usr/include/mysql -DUSE_SASL_AUTH -DUSE_CYRUS_SASL -I/usr/include/sasl -DUSE_TLS ' 'AUXLIBS=-L/usr/lib64/mysql -lmysqlclient -lz -lrt -lm -L/usr/lib64/sasl2 -lsasl2 -lssl -lcrypto'
-
make && make install
-
echo $?
在make install环节的时候会有个交互式的界面,可以自定义一些目录,我这里只更改了第二项临时文件目录,其他的都选择了默认目录:
-
Please specify the prefix for installed file names. Specify this ONLY
-
if you are building ready-to-install packages for distribution to OTHER
-
machines. See PACKAGE_README for instructions.
-
install_root: [/]
-
-
Please specify a directory for scratch files while installing Postfix. You
-
must have write permission in this directory.
-
tempdir: [/usr/local/src/postfix-3.0.11] /tmp/extmail // 就只更改这一项为tmp目录,其他的全部默认
-
-
Please specify the final destination directory for installed Postfix
-
configuration files.
-
config_directory: [/etc/postfix]
-
-
Please specify the final destination directory for installed Postfix
-
administrative commands. This directory should be in the command search
-
path of adminstrative users.
-
command_directory: [/usr/sbin]
-
-
Please specify the final destination directory for installed Postfix
-
daemon programs. This directory should not be in the command search path
-
of any users.
-
daemon_directory: [/usr/libexec/postfix]
-
-
Please specify the final destination directory for Postfix-writable
-
data files such as caches or random numbers. This directory should not
-
be shared with non-Postfix software.
-
data_directory: [/var/lib/postfix]
-
-
Please specify the final destination directory for the Postfix HTML
-
files. Specify "no" if you do not want to install these files.
-
html_directory: [no]
-
-
Please specify the owner of the Postfix queue. Specify an account with
-
numerical user ID and group ID values that are not used by any other
-
accounts on the system.
-
mail_owner: [postfix]
-
-
Please specify the final destination pathname for the installed Postfix
-
mailq command. This is the Sendmail-compatible mail queue listing command.
-
mailq_path: [/usr/bin/mailq]
-
-
Please specify the final destination directory for the Postfix on-line
-
manual pages. You can no longer specify "no" here.
-
manpage_directory: [/usr/local/man]
-
-
Please specify the final destination pathname for the installed Postfix
-
newaliases command. This is the Sendmail-compatible command to build
-
alias databases for the Postfix local delivery agent.
-
newaliases_path: [/usr/bin/newaliases]
-
-
Please specify the final destination directory for Postfix queues.
-
queue_directory: [/var/spool/postfix]
-
-
Please specify the final destination directory for the Postfix README
-
files. Specify "no" if you do not want to install these files.
-
readme_directory: [no]
-
-
Please specify the final destination pathname for the installed Postfix
-
sendmail command. This is the Sendmail-compatible mail posting interface.
-
sendmail_path: [/usr/sbin/sendmail]
-
-
Please specify the group for mail submission and for queue management
-
commands. Specify a group name with a numerical group ID that is
-
not shared with other accounts, not even with the Postfix mail_owner
-
account. You can no longer specify "no" here.
-
setgid_group: [postdrop]
-
-
Please specify the final destination directory for Postfix shared-library
-
files.
-
shlib_directory: [no]
3.更改目录的属主和属组:
-
chown -R postfix:postdrop /var/spool/postfix
-
chown -R postfix:postdrop /var/lib/postfix/
-
chown root /var/spool/postfix
-
chown -R root /var/spool/postfix/pid
4.修改postfix的配置文件:
-
[root@localhost ~]# vim /etc/postfix/main.cf
-
myhostname = mail.everyoo.com //设置主机名
-
mydomain = everyoo.com //指定域名
-
myorigin = $mydomain //指明发件人所在的域名
-
inet_interfaces = //all指定postfix系统监听的网络接口
-
mydestination = $myhostname, localhost.$mydomain, localhost,$mydomain //指定postfix接收邮件时收件人的域名 [使用虚拟域需要禁用]
-
mynetworks_style = host //指定信任网段类型
-
mynetworks = 192.168.77.1/24, 127.0.0.0/8 //指定信任的客户端
-
relay_domains = $mydestination //指定允许中转邮件的域名
-
alias_maps = hash:/etc/aliases //设置邮件的别名
5.然后需要在/etc/init.d/目录下提供一个脚本来管理postfix的启动与停止:
[root@localhost /var/www/extsuite/extman]# vim /etc/init.d/postfix
把下面的内容放在/etc/init.d/postfix里面:
-
-
#
-
# postfix Postfix Mail Transfer Agent
-
#
-
# chkconfig: 2345 80 30
-
# description: Postfix is a Mail Transport Agent, which is the program \
-
# that moves mail from one machine to another.
-
# processname: master
-
# pidfile: /var/spool/postfix/pid/master.pid
-
# config: /etc/postfix/main.cf
-
# config: /etc/postfix/master.cf
-
-
# Source function library.
-
. /etc/rc.d/init.d/functions
-
-
# Source networking configuration.
-
. /etc/sysconfig/network
-
-
# Check that networking is up.
-
[ $NETWORKING = "no" ] && exit 3
-
-
[ -x /usr/sbin/postfix ] || exit 4
-
[ -d /etc/postfix ] || exit 5
-
[ -d /var/spool/postfix ] || exit 6
-
-
RETVAL=0
-
prog="postfix"
-
-
start() {
-
# Start daemons.
-
echo -n $"Starting postfix: "
-
/usr/bin/newaliases >/dev/null 2>&1
-
/usr/sbin/postfix start 2>/dev/null 1>&2 && success || failure $"$prog start"
-
RETVAL=$?
-
[ $RETVAL -eq 0 ] && touch /var/lock/subsys/postfix
-
echo
-
return $RETVAL
-
}
-
-
stop() {
-
# Stop daemons.
-
echo -n $"Shutting down postfix: "
-
/usr/sbin/postfix stop 2>/dev/null 1>&2 && success || failure $"$prog stop"
-
RETVAL=$?
-
[ $RETVAL -eq 0 ] && rm -f /var/lock/subsys/postfix
-
echo
-
return $RETVAL
-
}
-
-
reload() {
-
echo -n $"Reloading postfix: "
-
/usr/sbin/postfix reload 2>/dev/null 1>&2 && success || failure $"$prog reload"
-
RETVAL=$?
-
echo
-
return $RETVAL
-
}
-
-
abort() {
-
/usr/sbin/postfix abort 2>/dev/null 1>&2 && success || failure $"$prog abort"
-
return $?
-
}
-
-
flush() {
-
/usr/sbin/postfix flush 2>/dev/null 1>&2 && success || failure $"$prog flush"
-
return $?
-
}
-
-
check() {
-
/usr/sbin/postfix check 2>/dev/null 1>&2 && success || failure $"$prog check"
-
return $?
-
}
-
-
restart() {
-
stop
-
start
-
}
-
-
# See how we were called.
-
case "$1" in
-
start)
-
start
-
;;
-
stop)
-
stop
-
;;
-
restart)
-
stop
-
start
-
;;
-
reload)
-
reload
-
;;
-
abort)
-
abort
-
;;
-
flush)
-
flush
-
;;
-
check)
-
check
-
;;
-
status)
-
status master
-
;;
-
condrestart)
-
[ -f /var/lock/subsys/postfix ] && restart || :
-
;;
-
*)
-
echo $"Usage: $0 {start|stop|restart|reload|abort|flush|check|status|condrestart}"
-
exit 1
-
esac
-
-
exit $?
为脚本添加执行权限,并将服务添加到开机启动项中:
-
[root@localhost /var/www/extsuite/extman]# chmod +x /etc/init.d/postfix
-
[root@localhost /var/www/extsuite/extman]# chkconfig --add postfix
-
[root@localhost /var/www/extsuite/extman]# chkconfig postfix on
-
[root@localhost /var/www/extsuite/extman]# chown postfix.postfix -R /var/lib/postfix/
-
[root@localhost /var/www/extsuite/extman]# chown postfix.postfix /var/spool/ -R
3. 安装dovecot
yum安装:
[root@localhost ~]# yum install -y dovecot dovecot-mysql
配置dovecot:
-
[root@localhost ~]# cd /etc/dovecot/
-
[root@localhost dovecot]# vim dovecot.conf //直接在配置文件最后添加即可
-
protocols = imap pop3
-
!include conf.d/*.conf
-
listen = *
-
base_dir = /var/run/dovecot/
-
[root@localhost dovecot]# cd conf.d/
-
[root@localhost conf.d]# vim 10-auth.conf
-
disable_plaintext_auth = no
-
[root@localhost conf.d]# vim 10-mail.conf
-
mail_location = maildir:~/Maildir
-
mail_location = maildir:/var/mailbox/%d/%n/Maildir
-
mail_privileged_group = mail
-
[root@localhost conf.d]# vim 10-ssl.conf
-
ssl = no
-
[root@localhost conf.d]# vim 10-logging.conf
-
log_path = /var/log/dovecot.log
-
info_log_path = /var/log/dovecot.info
-
log_timestamp = "%Y-%m-%d %H:%M:%S "
-
[root@localhost conf.d]# cp auth-sql.conf.ext auth-sql.conf
-
[root@localhost conf.d]# vim auth-sql.conf
-
passdb {
-
driver = sql
-
-
# Path for SQL configuration file, see example-config/dovecot-sql.conf.ext
-
args = /etc/dovecot/dovecot-sql.conf.ext
-
}
-
-
userdb {
-
driver = sql
-
args = /etc/dovecot/dovecot-sql.conf.ext
-
}
编辑dovecot通过mysql认证的配置文件:
-
[root@localhost conf.d]
-
driver = mysql
-
connect = host=localhost dbname=extmail user=extmail password=extmail
-
default_pass_scheme = CRYPT
-
password_query = SELECT username AS user,password AS password FROM mailbox WHERE username = '%u'
-
user_query = SELECT maildir, uidnumber AS uid, gidnumber AS gid FROM mailbox WHERE username = '%u'
4. 安装courier-authlib
下载解压并编译:
-
[root@localhost ~]# cd /usr/local/src/
-
[root@localhost /usr/local/src]# wget https://sourceforge.net/projects/courier/files/authlib/0.66.2/courier-authlib-0.66.2.tar.bz2
-
[root@localhost /usr/local/src]# tar -jxvf courier-authlib-0.66.2.tar.bz2
-
[root@localhost /usr/local/src]# cd courier-authlib-0.66.2
-
[root@localhost /usr/local/src/courier-authlib-0.66.2]# ./configure --prefix=/usr/local/courier-authlib --sysconfdir=/etc --without-authpam --without-authshadow --without-authvchkpw --without-authpgsql --with-authmysql --with-mysql-libs=/usr/lib64/mysql --with-mysql-includes=/usr/include/mysql --with-redhat --with-authmysqlrc=/etc/authmysqlrc --with-authdaemonrc=/etc/authdaemonrc --with-mailuser=postfix
-
[root@localhost /usr/local/src/courier-authlib-0.66.2]# make && makeinstall
编译过程中发生了一个错误:
configure: error: The Courier Unicode Library 1.2 appears not to be installed. You may need to install a separate development subpackage, in addition to the main package这是因为Courier Unicode Library没有安装,我们下载courier-unicode-1.2并编译安装:
-
[root@localhost ~]# wget https://sourceforge.net/projects/courier/files/courier-unicode/1.2/courier-unicode-1.2.tar.bz2
-
[root@localhost ~]# tar jxvf courier-unicode-1.2.tar.bz2
-
[root@localhost ~]# cd courier-unicode-1.2
-
[root@localhost courier-unicode-1.2]# ./configure
-
[root@localhost courier-unicode-1.2]# make && make install
完成Courier Unicode Library的安装后,倒回去再次编译courier-authlib就没问题了
配置courier-authlib:
-
[
-
[
-
[
-
[
-
authmodulelist="authmysql"
-
authmodulelistorig="authmysql"
-
[
-
MYSQL_SERVER localhost
-
MYSQL_USERNAME extmail
-
MYSQL_PASSWORD extmail
-
MYSQL_SOCKET /var/lib/mysql/mysql.sock
-
MYSQL_PORT 3306
-
MYSQL_DATABASE extmail
-
MYSQL_USER_TABLE mailbox
-
MYSQL_CRYPT_PWFIELD password
-
DEFAULT_DOMAIN test.com
-
MYSQL_UID_FIELD '2525'
-
MYSQL_GID_FIELD '2525'
-
MYSQL_LOGIN_FIELD username
-
MYSQL_HOME_FIELD concat('/var/mailbox/',homedir)
-
MYSQL_NAME_FIELD name
-
MYSQL_MAILDIR_FIELD concat('/var/mailbox/',maildir)
courier-authlib添加服务启动脚本及其他:
-
[root@localhost courier-authlib-0.66.2]# cp courier-authlib.sysvinit /etc/init.d/courier-authlib
-
[root@localhost courier-authlib-0.66.2]# chmod +x /etc/init.d/courier-authlib
-
[root@localhost courier-authlib-0.66.2]# chkconfig --add courier-authlib
-
[root@localhost courier-authlib-0.66.2]# chkconfig courier-authlib on
-
[root@localhost courier-authlib-0.66.2]# echo "/usr/local/courier-authlib/lib/courier-authlib" >> /etc/ld.so.conf.d/courier-authlib.conf
-
[root@localhost courier-authlib-0.66.1]# ldconfig
-
[root@localhost courier-authlib-0.66.1]# service courier-authlib start
-
Starting Courier authentication services: authdaemond
smtp以及虚拟用户相关的设置:
-
[
-
pwcheck_method: authdaemond
-
log_level: 3
-
mech_list: PLAIN LOGIN
-
authdaemond_path:/usr/local/courier-authlib/var/spool/authdaemon/socket
-
[
-
-
smtpd_sasl_auth_enable = yes
-
smtpd_sasl_local_domain = ''
-
smtpd_recipient_restrictions = permit_mynetworks,permit_sasl_authenticated,reject_unauth_destination
-
broken_sasl_auth_clients=yes
-
smtpd_client_restrictions = permit_sasl_authenticated
-
smtpd_sasl_security_options = noanonymous
-
-
virtual_mailbox_base = /var/mailbox
-
virtual_mailbox_maps = mysql:/etc/postfix/mysql_virtual_mailbox_maps.cf //这里的配置文件需在后面extman
-
里复制过来
-
virtual_mailbox_domains = mysql:/etc/postfix/mysql_virtual_domains_maps.cf
-
virtual_alias_domains =
-
virtual_alias_maps = mysql:/etc/postfix/mysql_virtual_alias_maps.cf
-
virtual_uid_maps = static:2525
-
virtual_gid_maps = static:2525
-
virtual_transport = virtual
安装extmail
下载extmail和extman:
-
[root@localhost ~]# cd /usr/local/src/
-
[root@localhost /usr/local/src]# wget http://7xivyw.com1.z0.glb.clouddn.com/extmail-1.2.tar.gz
-
[root@localhost /usr/local/src]# wget http://7xivyw.com1.z0.glb.clouddn.com/extman-1.1.tar.gz
创建站点目录并解压、重命名extmail包:
-
[root@localhost /usr/local/src]# mkdir -p /var/www/extsuite
-
[root@localhost /usr/local/src]# tar -zxvf extmail-1.2.tar.gz -C /var/www/extsuite/
-
[root@localhost /usr/local/src]# mv /var/www/extsuite/extmail-1.2/ /var/www/extsuite/extmail
更改extmail的配置文件:
-
[
-
[
-
[
-
SYS_SESS_DIR = /tmp/extmail
-
SYS_UPLOAD_TMPDIR = /tmp/extmail/upload
-
SYS_USER_LANG = zh_CN
-
SYS_MIN_PASS_LEN = 8
-
SYS_MAILDIR_BASE = /var/mailbox
-
SYS_MYSQL_USER = extmail
-
SYS_MYSQL_PASS = extmail
-
SYS_MYSQL_DB = extmail
-
SYS_MYSQL_HOST = localhost
-
SYS_MYSQL_SOCKET = /var/lib/mysql/mysql.sock
-
SYS_MYSQL_TABLE = mailbox
-
SYS_MYSQL_ATTR_USERNAME = username
-
SYS_MYSQL_ATTR_DOMAIN = domain
-
SYS_MYSQL_ATTR_PASSWD = password
-
SYS_AUTHLIB_SOCKET = /usr/local/courier-authlib/var/spool/authdaemon/socket
建立临时文件目录与session目录,并更改权限:
-
[root@localhost extmail]# mkdir -p /tmp/extmail/upload
-
[root@localhost extmail]# chown -R postfix.postfix /tmp/extmail/
安装extman
回到extman的下载目录下,解压extman包:
-
[root@localhost ~]# cd /usr/local/src/
-
[root@localhost /usr/local/src]# tar -zxvf extman-1.1.tar.gz -C /var/www/extsuite/
-
[root@localhost /usr/local/src]# cd /var/www/extsuite/
-
[root@localhost /var/www/extsuite]# mv extman-1.1/ extman
拷贝extman的配置文件:
-
[root@localhost /var/www/extsuite]# cd extman/
-
[root@localhost /var/www/extsuite/extman]# cp webman.cf.default webman.cf
更改cgi目录的属主属组:
-
[root@localhost /var/www/extsuite/extman]# chown -R postfix.postfix /var/www/extsuite/extman/cgi/
-
[root@localhost /var/www/extsuite/extman]# chown -R postfix.postfix /var/www/extsuite/extmail/cgi/
导入数据库:
由于数据库不能识别TYPE=MyISAM,所以这里直接导入会出错,需要先编辑extmail.sql数据库文件,将文件中的TYPE=MyISAM更改为ENGINE=MyISAM,共有五处修改:
-
[root@localhost /var/www/extsuite/extman]# vim docs/extmail.sql
-
:% s/TYPE/ENGINE/g
我这里导入数据的时候发生了一个错误,提示找不到mysql.sock文件:
-
[root@localhost /var/www/extsuite/extman]# mysql -uroot < docs/extmail.sql
-
ERROR 2002 (HY000): Can't connect to local MySQL server through socket '/var/lib/mysql/mysql.sock' (2)
-
[root@localhost /var/www/extsuite/extman]# ls /var/lib/mysql/mysql.sock
-
ls: 无法访问/var/lib/mysql/mysql.sock: 没有那个文件或目录
解决:然后我去查看了一下/etc/my.cnf文件,发现没问题,socket参数指向的也是 /var/lib/mysql/mysql.sock 这个路径,于是我就重启了mysql服务,然后再尝试就没有报找不到mysql.sock文件的错误了,但是报了另一个错误:
-
[root@localhost /var/www/extsuite/extman]
-
ERROR 1364 (HY000) at line 31: Field 'ssl_cipher' doesn't have a default value
-
[root@localhost /var/www/extsuite/extman]
这错误的意思是:字段 'ssl密码' 没有默认值
于是又得去查看一下/etc/my.cnf文件,然后把sql_mode参数给注释掉:
接着重启mysql服务后,继续导入数据,这次就没问题了:
-
[root@localhost /var/www/extsuite/extman]# !service
-
service mysqld restart
-
Redirecting to /bin/systemctl restart mysqld.service
-
[root@localhost /var/www/extsuite/extman]# mysql -uroot < docs/extmail.sql
-
[root@localhost /var/www/extsuite/extman]# mysql -uroot < docs/init.sql
导入数据成功后再次修改/etc/my.cnf文件,把刚刚注释的那行给去掉注释,不去掉的话,mysql服务可能会出现不能启动的问题:

数据导入成功后,登录mysql,创建一个mysql数据库用户extmail并授予权限:
-
[
-
mysql> GRANT ALL ON extmail.* to extmail@'%' identified by 'extmail'; //我这里是直接授予全部权限在任意的IP地址上了,实际情况根据需求而定
-
Query OK, 0 rows affected (0.00 sec)
-
-
mysql> FLUSH PRIVILEGES;
-
Query OK, 0 rows affected (0.00 sec)
-
-
mysql>
复制之前提到的配置文件:
-
[root@localhost ~]# cd /var/www/extsuite/extman/docs/
-
[root@localhost /var/www/extsuite/extman/docs]# cp mysql_virtual_* /etc/postfix/
为extman创建临时目录:
-
[root@localhost /var/www/extsuite/extman/docs]# mkdir /tmp/extman
-
[root@localhost /var/www/extsuite/extman/docs]# chown -R postfix.postfix /tmp/extman/
启动postfix、dovecot、saslauthd服务,并查看进程是否正常:
-
[root@localhost /var/www/extsuite/extman]# service postfix start
-
Starting postfix (via systemctl): [ 确定 ]
-
[root@localhost /var/www/extsuite/extman]# ps aux |grep postfix
-
root 63586 0.0 0.1 95392 2160 ? Ss 01:29 0:00 /usr/libexec/postfix/master -w
-
postfix 63587 0.0 0.2 95448 3808 ? S 01:29 0:00 pickup -l -t unix -u
-
postfix 63588 0.0 0.2 95496 3816 ? S 01:29 0:00 qmgr -l -t unix -u
-
root 63592 0.0 0.0 112680 976 pts/0 S+ 01:33 0:00 grep --color=auto postfix
-
[root@localhost /var/www/extsuite/extman]# ss -tnluo | grep :25
-
tcp LISTEN 0 100 *:25 *:*
-
[root@localhost /var/www/extsuite/extman]# service dovecot start
-
Redirecting to /bin/systemctl start dovecot.service
-
[root@localhost /var/www/extsuite/extman]# ps aux |grep dovecot
-
root 63834 0.3 0.0 15652 1484 ? Ss 02:15 0:00 /usr/sbin/dovecot -F
-
dovecot 63837 0.0 0.0 9320 1012 ? S 02:15 0:00 dovecot/anvil
-
root 63838 0.0 0.0 9448 1164 ? S 02:15 0:00 dovecot/log
-
root 63840 0.0 0.1 12464 2196 ? S 02:15 0:00 dovecot/config
-
root 63842 0.0 0.0 112680 972 pts/0 S+ 02:15 0:00 grep --color=auto dovecot
-
[root@localhost /var/www/extsuite/extman]# systemctl start saslauthd
-
[root@localhost /var/www/extsuite/extman]# ps aux |grep saslauthd
-
root 63131 0.0 0.0 69648 916 ? Ss 01:19 0:00 /usr/sbin/saslauthd -m /run/saslauthd -a pam
-
root 63132 0.0 0.0 69648 676 ? S 01:19 0:00 /usr/sbin/saslauthd -m /run/saslauthd -a pam
-
root 63133 0.0 0.0 69648 676 ? S 01:19 0:00 /usr/sbin/saslauthd -m /run/saslauthd -a pam
-
root 63134 0.0 0.0 69648 676 ? S 01:19 0:00 /usr/sbin/saslauthd -m /run/saslauthd -a pam
-
root 63135 0.0 0.0 69648 676 ? S 01:19 0:00 /usr/sbin/saslauthd -m /run/saslauthd -a pam
-
root 63144 0.0 0.0 112680 972 pts/0 S+ 01:20 0:00 grep --color=auto saslauthd
-
[root@localhost /var/www/extsuite/extman]# ps aux |grep courier-authlib
-
root 61661 0.0 0.0 4316 444 ? S 00:07 0:00 /usr/local/courier-authlib/sbin/courierlogger -pid=/usr/local/courier-authlib/var/spool/authdaemon/pid -start /usr/local/courier-authlib/libexec/courier-authlib/authdaemond
-
root 61662 0.0 0.0 35512 1796 ? S 00:07 0:00 /usr/local/courier-authlib/libexec/courier-authlib/authdaemond
-
root 61663 0.0 0.0 35512 468 ? S 00:07 0:00 /usr/local/courier-authlib/libexec/courier-authlib/authdaemond
-
root 61664 0.0 0.0 35512 468 ? S 00:07 0:00 /usr/local/courier-authlib/libexec/courier-authlib/authdaemond
-
root 61665 0.0 0.0 35512 468 ? S 00:07 0:00 /usr/local/courier-authlib/libexec/courier-authlib/authdaemond
-
root 61666 0.0 0.0 35512 468 ? S 00:07 0:00 /usr/local/courier-authlib/libexec/courier-authlib/authdaemond
-
root 61667 0.0 0.0 35512 468 ? S 00:07 0:00 /usr/local/courier-authlib/libexec/courier-authlib/authdaemond
-
root 63660 0.0 0.0 112680 980 pts/0 S+ 02:00 0:00 grep --color=auto courier-authlib
7. 测试
测试虚拟用户:
-
[root@localhost courier-authlib-0.66.2]# /usr/local/courier-authlib/sbin/authtest -s login postmaster@extmail.org extmail
-
Authentication succeeded. //显示这个表示成功,测试时使用的是postmaster@extmail.org,因为我们导入的数据库init.sql里面自带了这个。
-
Authenticated: postmaster@extmail.org (uid 2525, gid 2525)
-
Home Directory: /var/mailbox/extmail.org/postmaster //这里需要注意/var/mailbox这个目录现在我们还没有创建,后面web访问的时候如果没有会报错,所以提前创建。
-
Maildir: /var/mailbox/extmail.org/postmaster/Maildir/
-
Quota: (none)
-
Encrypted Password: $1$phz1mRrj$3ok6BjeaoJYWDBsEPZb5C0
-
Cleartext Password: extmail
-
Options: (none)
-
[root@localhost courier-authlib-0.66.2]# mkdir /var/mailbox
-
[root@localhost courier-authlib-0.66.2]# chown -R postfix.postfix /var/mailbox/
测试smtp发信:
-
[root@localhost ~]# printf "postmaster@extmail.org" | openssl base64
-
cG9zdG1hc3RlckBleHRtYWlsLm9yZw==
-
[root@localhost ~]# printf "extmail" | openssl base64
-
ZXh0bWFpbA==
-
[root@localhost ~]# telnet localhost 25
-
Trying ::1...
-
telnet: connect to address ::1: Connection refused
-
Trying 127.0.0.1...
-
Connected to localhost.
-
Escape character is '^]'.
-
220 mail.daen.com ESMTP Postfix
-
auth login
-
334 VXNlcm5hbWU6
-
cG9zdG1hc3RlckBleHRtYWlsLm9yZw==
-
334 UGFzc3dvcmQ6
-
ZXh0bWFpbA==
-
235 2.7.0 Authentication successful //成功
-
quit
-
221 2.0.0 Bye
-
Connection closed by foreign host.
8. 启动nginx实现web访问
nginx本身并不能解析cgi,extmail自带了解析cgi的程序,但是有些地方需要修改下:
-
[root@localhost ~]# vim /var/www/extsuite/extmail/dispatch-init
-
SU_UID=postfix
-
SU_GID=postfix
启动dispatch-init:
-
[root@localhost ~]# /var/www/extsuite/extmail/dispatch-init start
-
Starting extmail FCGI server...
-
[root@localhost ~]# /var/www/extsuite/extman/daemon/cmdserver -v -d
-
loaded ok
添加nginx虚拟主机:
vim /etc/nginx/conf.d/extmail.conf
文件内容如下:
-
server {
-
listen 8080;
-
server_name mail.everyoo.com;
-
index index.html index.htm index.php index.cgi;
-
root /var/www/extsuite/extmail/html/;
-
location /extmail/cgi/ {
-
fastcgi_pass 127.0.0.1:8888;
-
fastcgi_index index.cgi;
-
fastcgi_param SCRIPT_FILENAME /var/www/extsuite/extmail/cgi/$fastcgi_script_name;
-
include fcgi.conf;
-
}
-
location /extmail/ {
-
alias /var/www/extsuite/extmail/html/;
-
}
-
location /extman/cgi/ {
-
fastcgi_pass 127.0.0.1:8888;
-
fastcgi_index index.cgi;
-
fastcgi_param SCRIPT_FILENAME /var/www/extsuite/extman/cgi/$fastcgi_script_name;
-
include fcgi.conf;
-
}
-
location /extman/ {
-
alias /var/www/extsuite/extman/html/;
-
}
-
access_log /var/log/extmail_access.log;
-
}
创建fcgi.conf文件:
vim /etc/nginx/fcgi.conf
文件内容如下:
-
fastcgi_param GATEWAY_INTERFACE CGI/1.1;
-
fastcgi_param SERVER_SOFTWARE nginx;
-
fastcgi_param QUERY_STRING $query_string;
-
fastcgi_param REQUEST_METHOD $request_method;
-
fastcgi_param CONTENT_TYPE $content_type;
-
fastcgi_param CONTENT_LENGTH $content_length;
-
fastcgi_param SCRIPT_NAME $fastcgi_script_name;
-
fastcgi_param REQUEST_URI $request_uri;
-
fastcgi_param DOCUMENT_ROOT $document_root;
-
fastcgi_param SERVER_PROTOCOL $server_protocol;
-
fastcgi_param REMOTE_ADDR $remote_addr;
-
fastcgi_param REMOTE_PORT $remote_port;
-
fastcgi_param SERVER_ADDR $server_addr;
-
fastcgi_param SERVER_PORT $server_port;
-
fastcgi_param SERVER_NAME $server_name;
安装Unix::Syslog:
-
[root@localhost ~]# cd /usr/local/src/
-
[root@localhost /usr/local/src]# wget http://www.cpan.org/authors/id/M/MH/MHARNISCH/Unix-Syslog-1.1.tar.gz
-
[root@localhost /usr/local/src]# tar zxvf Unix-Syslog-1.1.tar.gz
-
[root@localhost /usr/local/src]# cd Unix-Syslog-1.1
-
[root@localhost /usr/local/src/Unix-Syslog-1.1]# perl Makefile.PL
-
[root@localhost /usr/local/src/Unix-Syslog-1.1]# make && make install
启动nginx,并检查进程和监听端口是否正常:
-
[root@localhost ~]# service nginx start
-
Redirecting to /bin/systemctl start nginx.service
-
[root@localhost ~]# ps aux |grep nginx
-
root 72338 0.0 0.1 122892 2296 ? Ss 03:22 0:00 nginx: master process /usr/sbin/nginx
-
nginx 72339 0.0 0.1 123336 3192 ? S 03:22 0:00 nginx: worker process
-
nginx 72340 0.0 0.1 123336 3192 ? S 03:22 0:00 nginx: worker process
-
nginx 72341 0.0 0.1 123336 3192 ? S 03:22 0:00 nginx: worker process
-
nginx 72342 0.0 0.1 123336 3192 ? S 03:22 0:00 nginx: worker process
-
root 72344 0.0 0.0 112680 976 pts/0 S+ 03:22 0:00 grep --color=auto nginx
-
[root@localhost ~]# netstat -lntp
-
Active Internet connections (only servers)
-
Proto Recv-Q Send-Q Local Address Foreign Address State PID/Program name
-
tcp 0 0 0.0.0.0:110 0.0.0.0:* LISTEN 63834/dovecot
-
tcp 0 0 0.0.0.0:143 0.0.0.0:* LISTEN 63834/dovecot
-
tcp 0 0 0.0.0.0:80 0.0.0.0:* LISTEN 72338/nginx: master
-
tcp 0 0 0.0.0.0:8080 0.0.0.0:* LISTEN 72338/nginx: master
-
tcp 0 0 0.0.0.0:22 0.0.0.0:* LISTEN 1482/sshd
-
tcp 0 0 127.0.0.1:8888 0.0.0.0:* LISTEN 64100/dispatch.fcgi
-
tcp 0 0 0.0.0.0:25 0.0.0.0:* LISTEN 64328/master
-
tcp6 0 0 :::3306 :::* LISTEN 62442/mysqld
-
tcp6 0 0 :::80 :::* LISTEN 72338/nginx: master
-
tcp6 0 0 :::22 :::* LISTEN 1482/sshd
-
[root@localhost ~]#
然后到windows上访问你服务器IP的8080端口:
extman的登录账户为root@extmail.org密码为extmail*123*,首次使用需要先添加域,添加之后再修改域,改为可自由注册,再注册用户就可以登录发邮件了: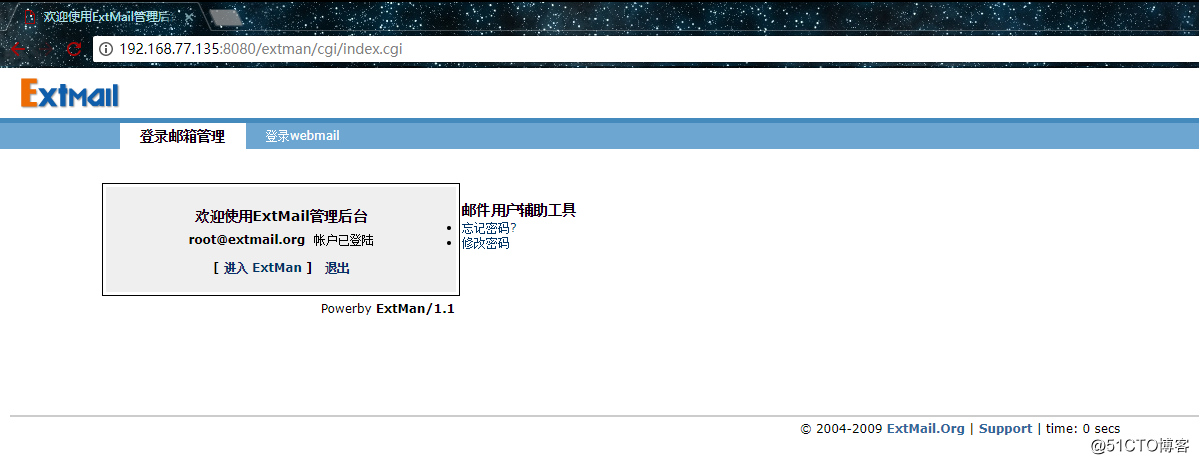
本文转自 ZeroOne01 51CTO博客,原文链接:http://blog.51cto.com/zero01/2064693,如需转载请自行联系原作者

 浙公网安备 33010602011771号