
使用calabash测试开源中国Android客户端
Calabash-android是支持android的UI自动化测试框架,前面已经介绍过《中文Win7下成功安装calabash-android步骤》,这篇博文尝试测试一个真实应用:开源中国客户端。目的是和大家一起学习calabash测试工具。
测试环境与源码准备
先介绍一下oschina.net
<www.oschina.net>

oschina除了有网站,还有三大平台手机客户端:

客户端已经开源!
那么开源可以用来做什么呢?
我正在学用calabash-android,得找到一个合适的待测app,平时手机上开源中国这个app用的蛮顺手了,所以就选它了,在此特别向开源中国的开发工程师致谢!
环境准备:ADT+calabash-android
可以参考:
中文Win7下成功安装calabash-android步骤
下载oschina/android-app源代码
首先到 http://git.oschina.net/oschina/android-app ,
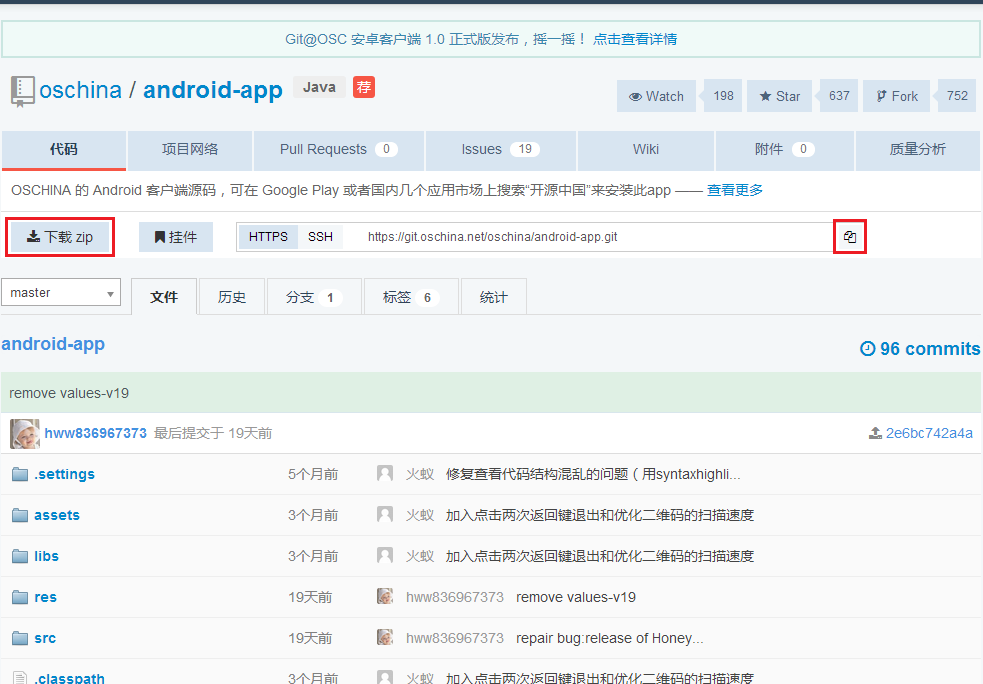
以下两种下载源代码方式的方式都可以:
- 可以直接点击”下载zip“
- 复制git仓库url: https://git.oschina.net/oschina/android-app.git ,然后在Eclipse/ADT中打开Windows > Open Perspective > Other... > Get Resporsitory Exploring,clone源代码
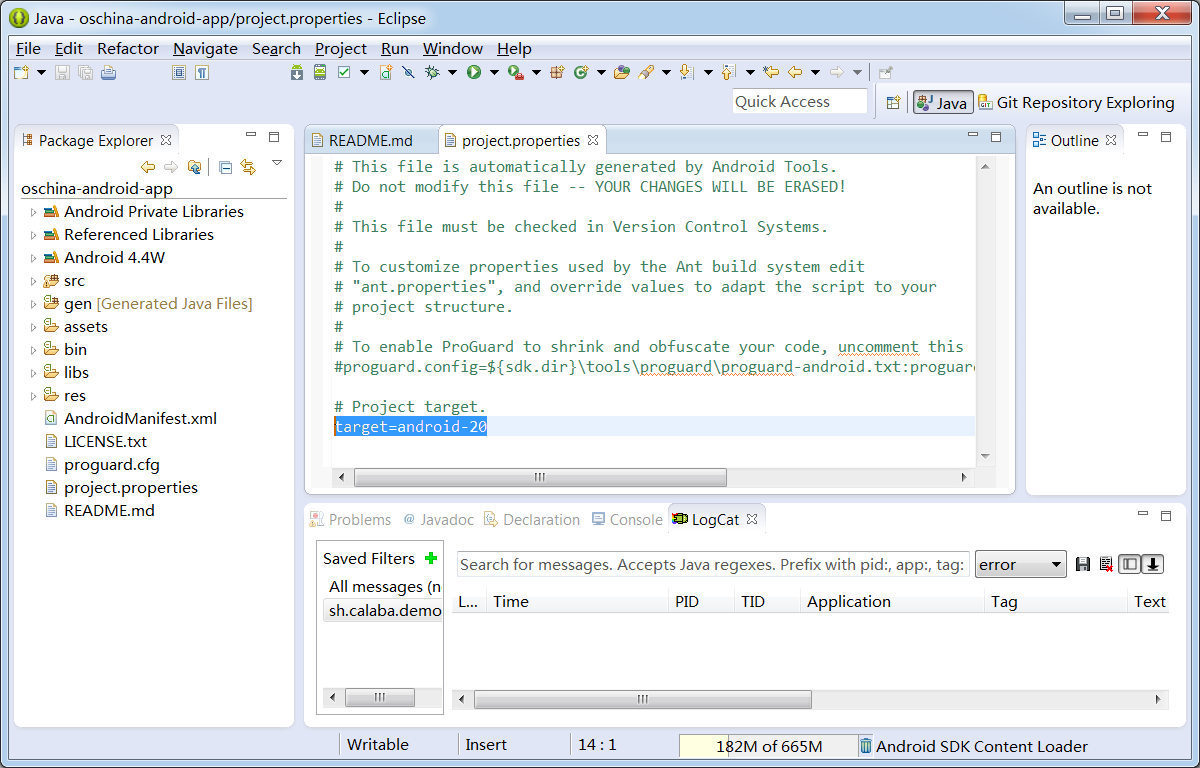
导入到ADT中后,源代码如下:
在adt-bundle-20140702中编译运行oschina/android-app的几个问题
问题1: adt-bundle-20140702的API版本是20,所以要修改project.properties:
target=android-15 改成 target=android-20
问题2: 源代码是使用了已作废的class: android.webkit.CacheManager
oschina-android-app/src/net/oschina/app/AppContext.java中使用了android.webkit.CacheManager
所以要把相关代码禁掉:
61行:
//import android.webkit.CacheManager;
1503到1509行:
// File file = CacheManager.getCacheFileBaseDir();
// if (file != null && file.exists() && file.isDirectory()) {
// for (File item : file.listFiles()) {
// item.delete();
// }
// file.delete();
// }
问题3:Run As Android Application报错:Installation error: INSTALL_FAILED_VERSION_DOWNGRADE
原因是:手机已经装了一个开源中国的1.7.7.0版本,而ADT要下载的是1.7.6.9版本,Android系统不允许安装一个比已安装版本更旧的版本,所以从手机上卸载已有的1.7.7.0版本就可以了。
ADT编译并上传oschina/android-app到手机
Run As Android Application > 选择连接到电脑Usb的手机 > OK

calabash测试步骤
先确认oschina/android-app声明了访问网络的权限
oschina/android-app项目的AndroidManifest.xml中应该如下行:
在oschina/android-app根目录中创建calabash目录
在命令行下进入oschina/android-app的源代码根目录:
D:\git\oschina>cd android-app
D:\git\oschina\android-app>dir
Volume Serial Number is 9823-AB19
Directory of D:\git\oschina\android-app
2014/09/01 20:26
2014/09/01 20:26
2014/09/01 20:21 783 .classpath
2014/09/01 20:21
2014/09/01 20:21 64 .gitignore
2014/09/01 20:21 822 .project
2014/09/01 20:21
2014/09/01 20:21 10,829 AndroidManifest.xml
2014/09/01 20:21
2014/09/01 20:42
2014/09/01 20:26
2014/09/01 20:21
2014/09/01 20:21 18,092 LICENSE.txt
2014/09/01 20:21 1,424 proguard.cfg
2014/09/01 20:41 563 project.properties
2014/09/01 20:21 4,183 README.md
2014/09/01 20:21
2014/09/01 20:21
8 File(s) 36,760 bytes
10 Dir(s) 133,131,993,088 bytes free
D:\git\oschina\android-app>
创建calabash目录:
D:\git\oschina\android-app>mkdir calabash
创建cucumber skeleton:
D:\git\oschina\android-app>cd calabash
D:\git\oschina\android-app\calabash>calabash-android gen
----------Question----------
I'm about to create a subdirectory called features.
features will contain all your calabash tests.
Please hit return to confirm that's what you want.
---------------------------
----------Info----------
features subdirectory created.
---------------------------
D:\git\oschina\android-app\calabash>dir
Volume Serial Number is 9823-AB19
Directory of D:\git\oschina\android-app\calabash
2014/09/01 21:54
2014/09/01 21:54
2014/09/01 21:54
0 File(s) 0 bytes
3 Dir(s) 133,131,988,992 bytes free
D:\git\oschina\android-app\calabash>
编辑 D:\git\oschina\android-app\calabash\features\my_first.feature:
初始内容:
Feature: Login feature
Scenario: As a valid user I can log into my app
When I press "Login"
Then I see "Welcome to coolest app ever"
第一行Feature: XX,第二行 Scenario: YY是给人读的,所以随便填写什么中文英文内容都可以
关键内容是第三行When I press ..和第四行Then I see .., 这是给Cucumber软件识别的。
When后面跟动作语句,Then后面跟内容检查语句
先尝试如下改动:
Feature: 启动开源中国
Scenario: 启动应用后,能看到软件版本更新信息
Then I see "软件版本更新"
用 %windir%\system32\cmd.exe /k chcp65001&&ansicon 启动ansicon,
运行calabash-andriod run
D:\git\oschina\android-app\calabash>calabash-android run D:\git\oschina\android-app\bin\oschina-android-app.apk
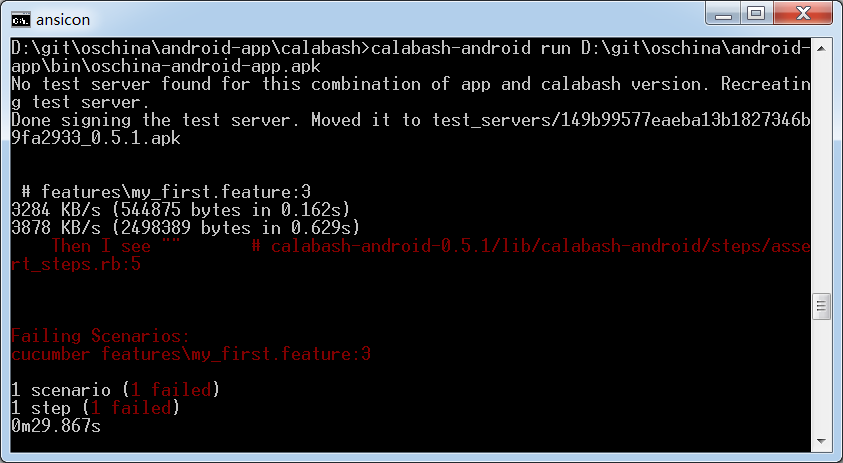
测试失败,原因是Then的默认等待时间只有2秒,开源中国app的启动时间比较长。
ansicon中未能显示中文:"软件版本更新",这个后面补充中有描述。
按照 https://github.com/calabash/calabash-android/blob/master/ruby-gem/lib/calabash-android/canned_steps.md的指导,可以指定等待几秒:
Feature: 启动开源中国
Scenario: 启动应用后,能看到软件版本更新信息
Then I wait for 10 seconds
Then I see "软件版本更新"

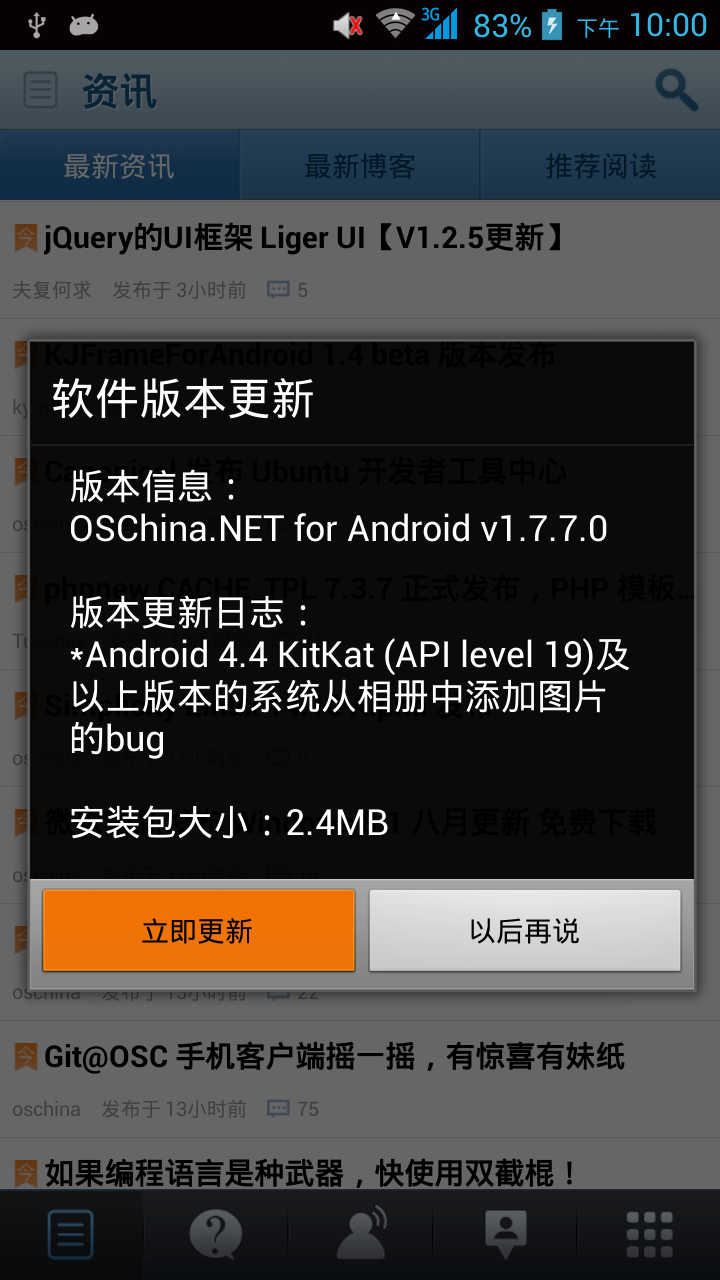
手机上看到的开源中国启动后画面:
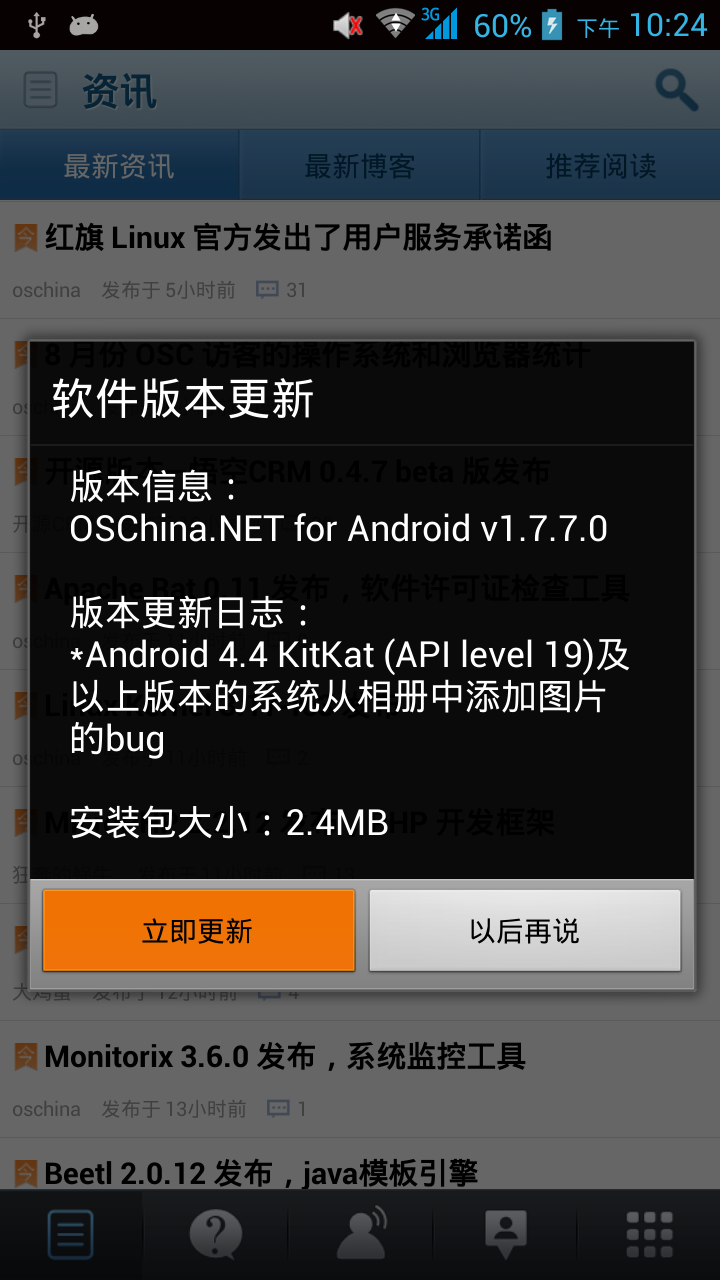
按钮“立即更新”为什么是红色的?以后再解决。
到此步为止,calabash测试开源中国Android客户端的环境已经建立完毕,接下去同学们就可以欢快的尝试canned_steps.md里的各个预定义步骤了。
我也会继续完成这个测试用例,大家一起共同进步!
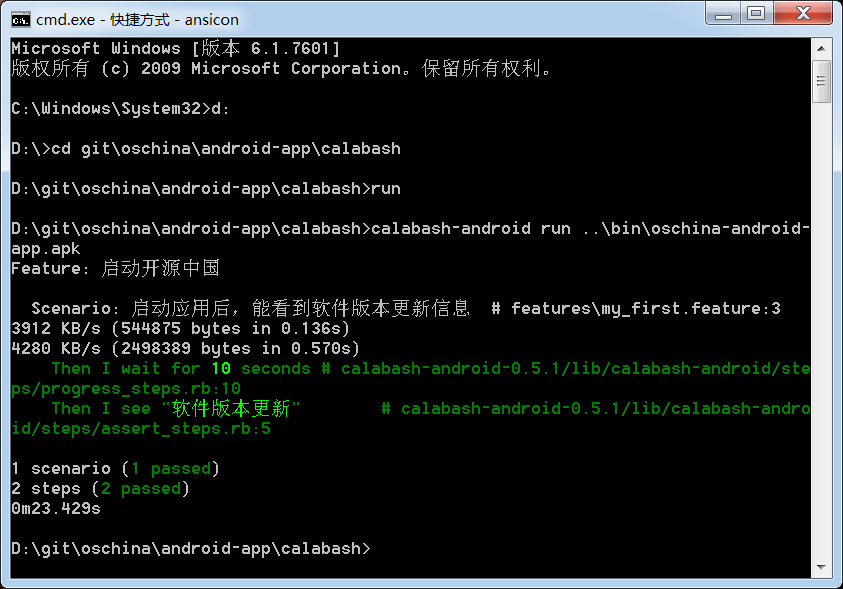
补充解决问题:calabash测试输出中不能显示中文
解决方法:
ansicon启动时,不要用chcp 65001设置为UTF-8编码,
用 %windir%\system32\cmd.exe /k ansicon 启动ansicon,然后运行calabash:
试用calabash预定义指令
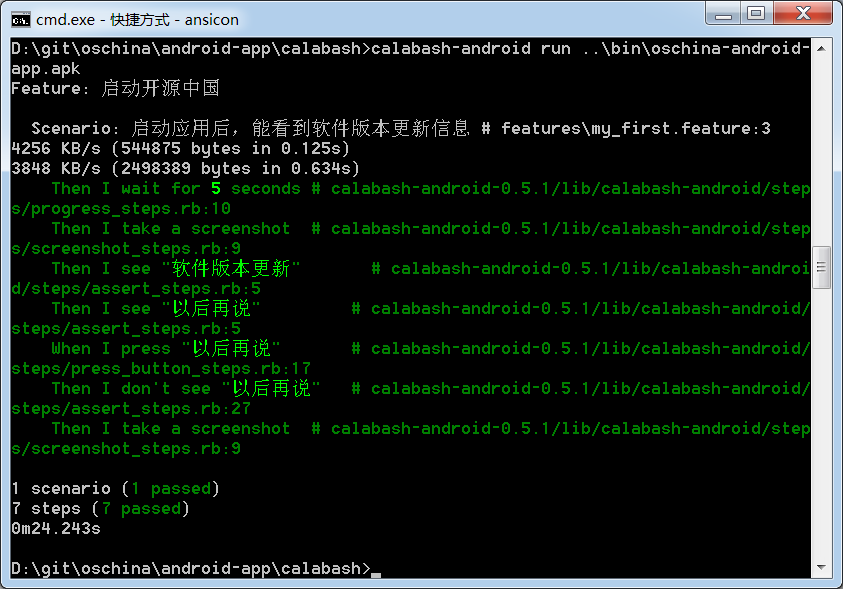
试用 press, don't see, screenshot
运行前,先把D:\git\oschina\android-app\calabash下的screenshot_*.png都删了,避免搞不清楚旧图和新图。
不解释,看脚本和截图:
Feature: 启动开源中国
Scenario: 启动应用后,能看到软件版本更新信息
Then I wait for 5 seconds
Then I take a screenshot
Then I see "软件版本更新"
Then I see "以后再说"
When I press "以后再说"
Then I don't see "以后再说"
Then I take a screenshot
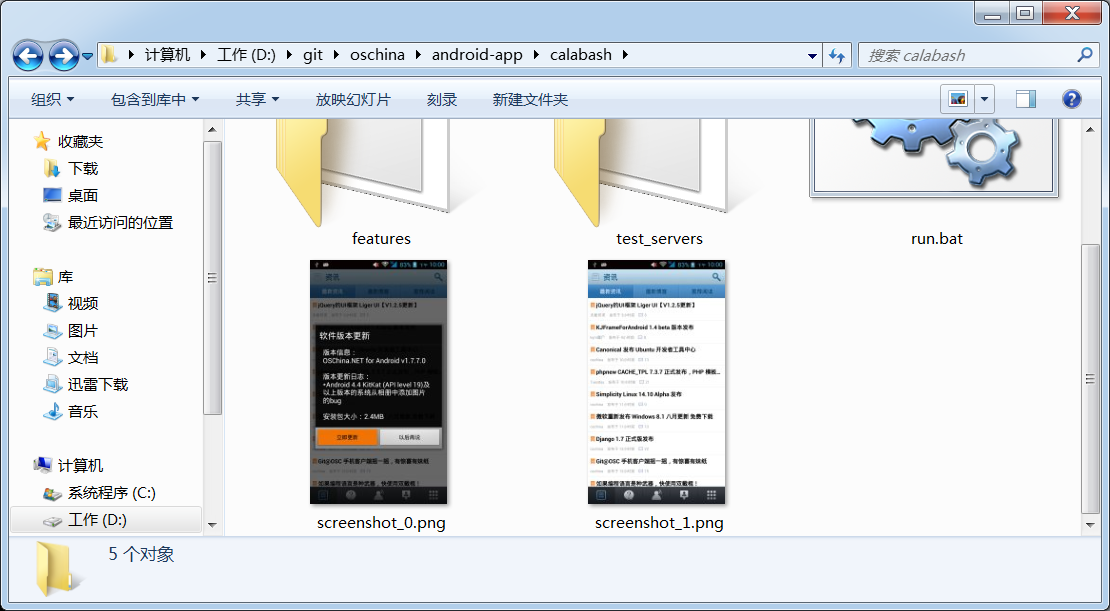
calabash脚本生成的手机截图:
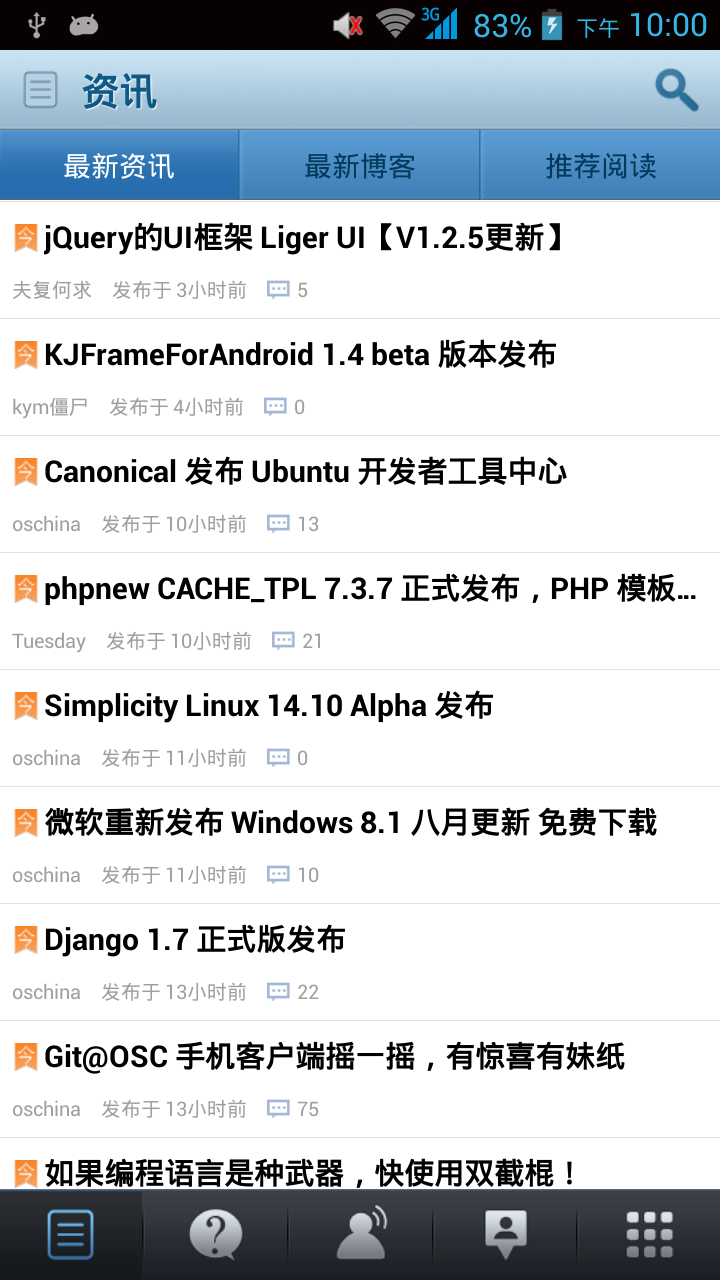
到系统设置中启用左右滑动,为了后面测试手势指令
Feature: 启动开源中国
Scenario: 启动应用后,能看到软件版本更新信息
Then I wait for 5 seconds
Then I see "软件版本更新"
Then I see "以后再说"
Then I take a screenshot
When I press "以后再说"
Then I don't see "以后再说"
Then I see "最新资讯"
Then I take a screenshot
Then I press the menu key
Then I see "系统设置"
Then I take a screenshot
When I press "系统设置"
Then I see "已关闭左右滑动"
Then I take a screenshot
When I press "已关闭左右滑动"
Then I see "已启用左右滑动"
Then I take a screenshot
Then I go back
Then I see "最新资讯"
Then I take a screenshot

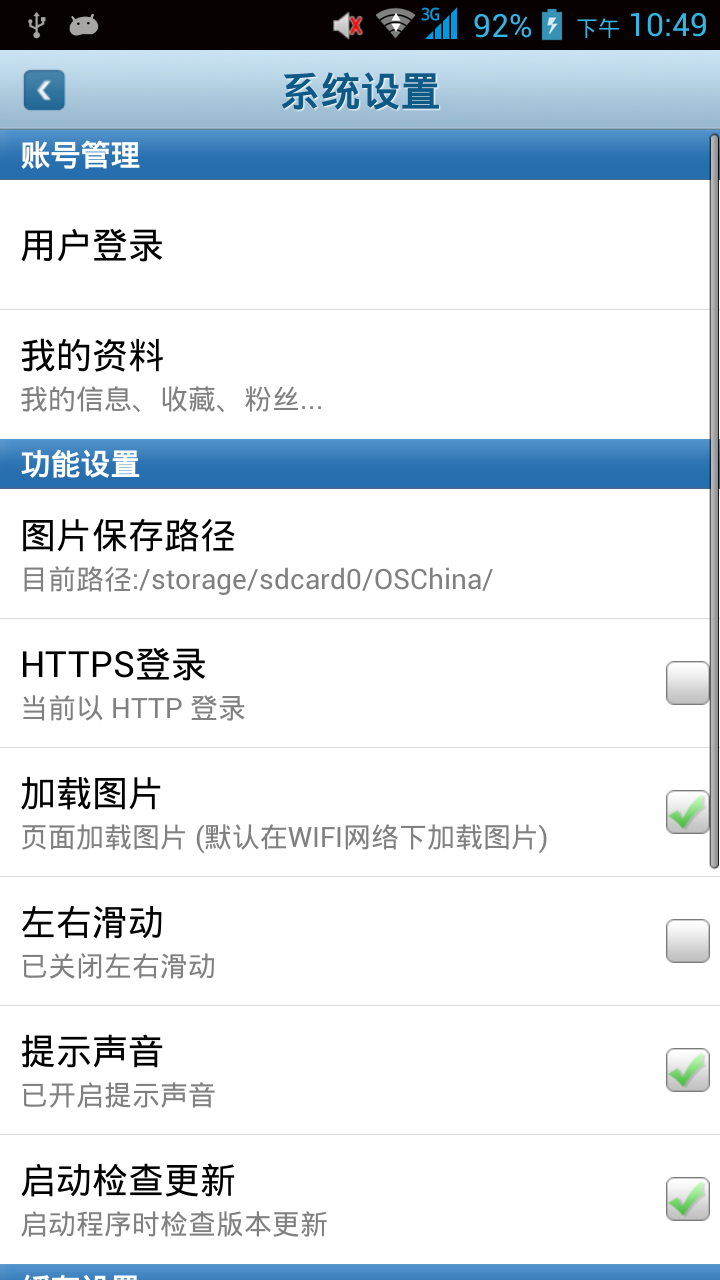
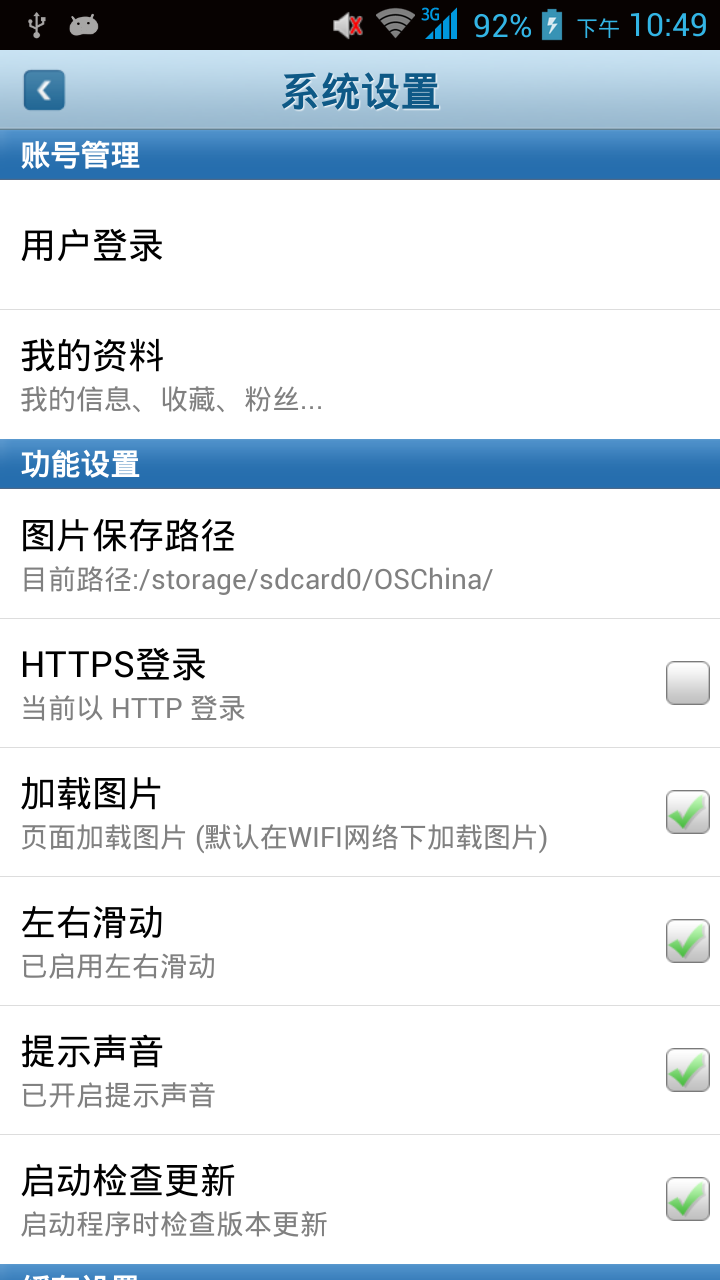
手势:swipe right = 翻看右边的内容
这个right比较难理解,是不是解释为“翻看右边的内容”比较容易记住。
Feature: 启动开源中国
...
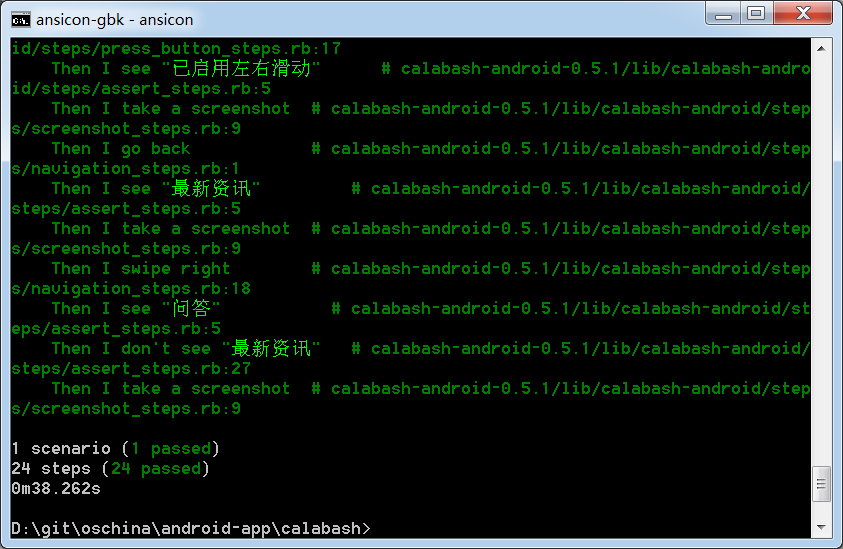
Then I swipe right
Then I see "问答"
Then I don't see "最新资讯"
Then I take a screenshot

scroll up 运行失败
Then I scroll up
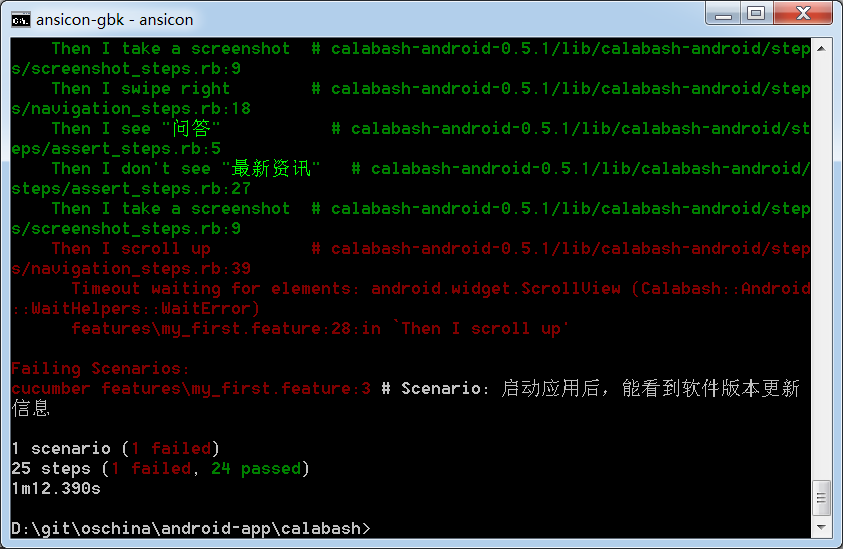
找不到android.widget.ScrollView元素,看样子oschina的可滚动区域不是用标准控件实现的。
通过id找到控件并做相应操作
接下去我要搜索包含"calabash"的博客,
首先要点击首页右上角的放大镜图标:

这个图标上没有text可以识别,所以必须到首页布局文件mail.xml中找到搜索图标的id,
ADT中打开文件:D:\git\oschina\android-app\res\layout\main.xml
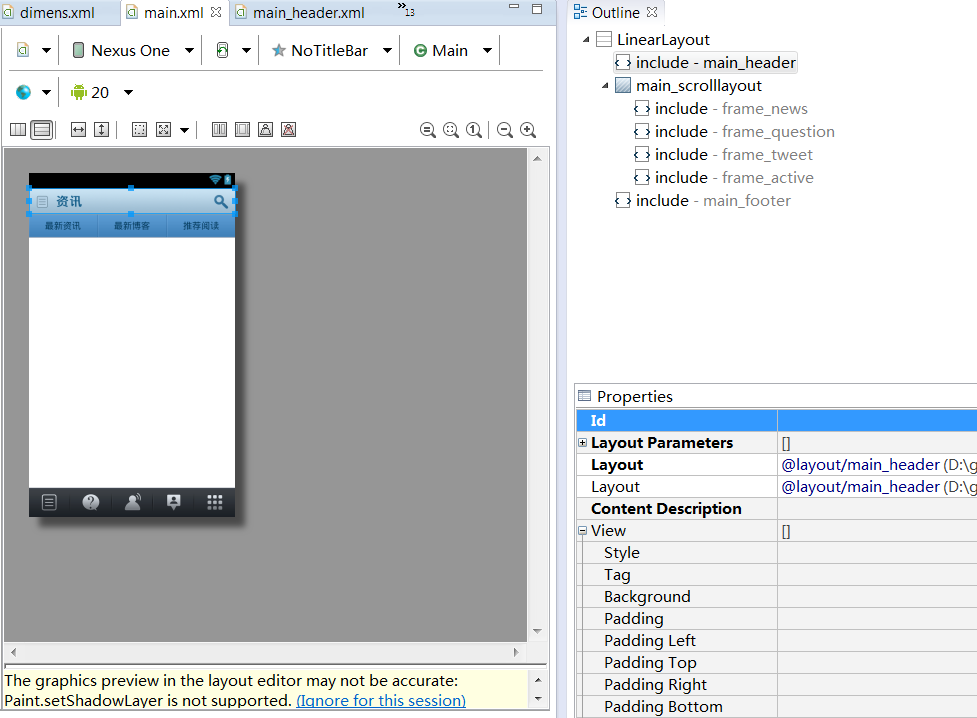
点击搜索图标,右上角的Outline指示搜索图标在main_header.xml中定义。
双击 include-main_header,ADT打开main_header.xml:
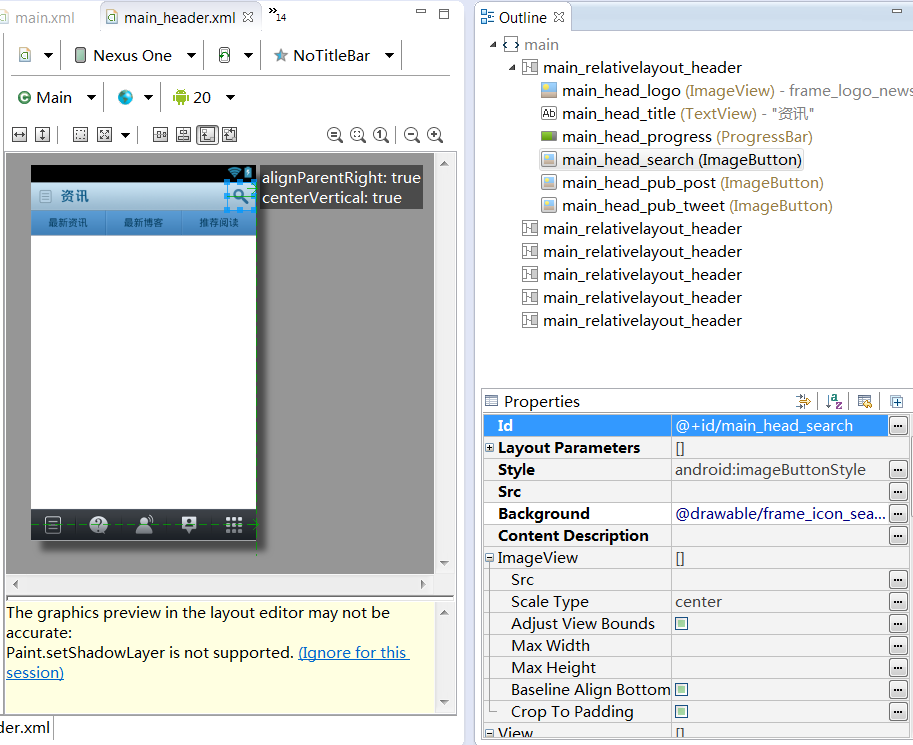
点击搜索图标,右边的Outline和Properties区都指示搜索图标的id是main_head_search,控件类型是:ImageButton
接下去在calabash中可以用id点击搜索图标了:
Feature: 搜索包含calabash的博客
Scenario: 启动应用后,能搜到包含calabash的博客
Then I wait for 5 seconds
Then I see "软件版本更新"
Then I see "以后再说"
Then I take a screenshot
When I press "以后再说"
Then I don't see "以后再说"
Then I see "最新资讯"
Then I take a screenshot
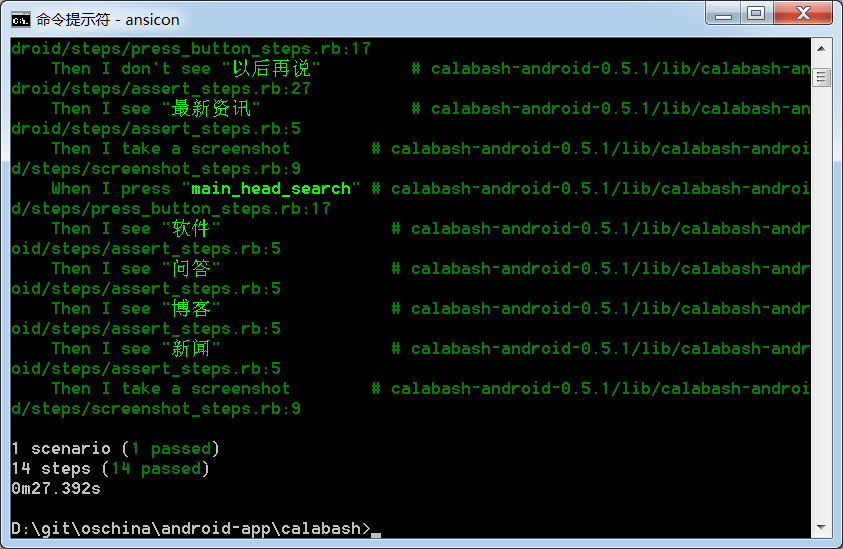
When I press view with id "main_head_search"
Then I see "软件"
Then I see "问答"
Then I see "博客"
Then I see "新闻"
Then I take a screenshot
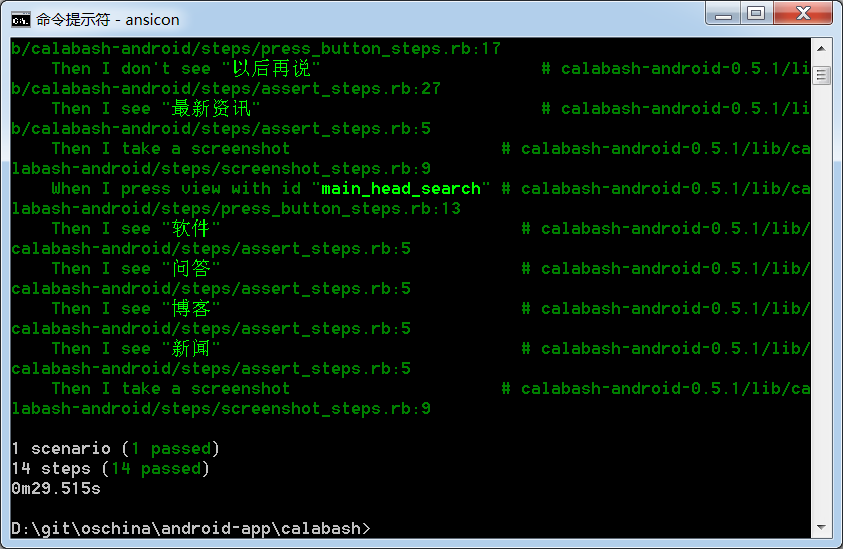

我尝试了把I press view with id "main_head_search" 改成 I press "main_head_search",也能找到该搜索图标。
说明:I press "test/id" 是万能语法,同时支持文本和id定位控件。那我就不用再记住复杂语句I press view with id "main_head_search"了。
输入文本并按回车键搜索
Feature: 搜索包含calabash的博客
...
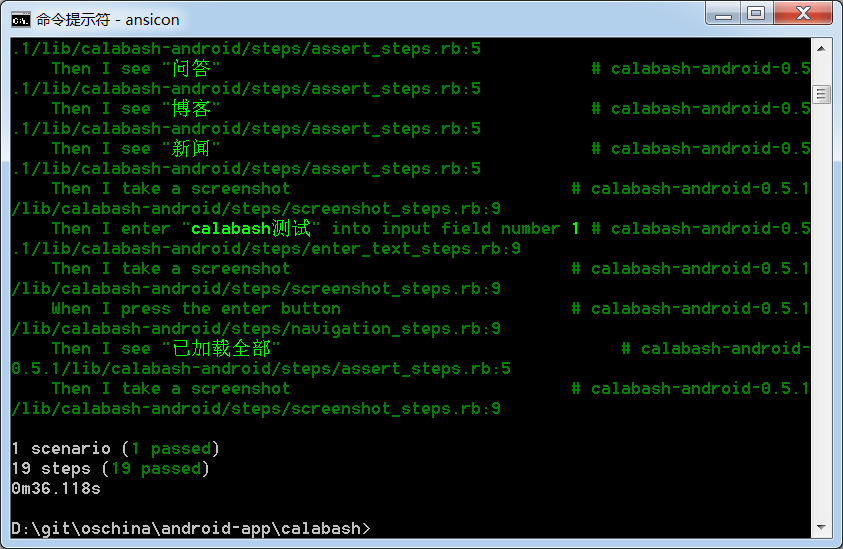
When I enter "calabash测试" into input field number 1
Then I take a screenshot
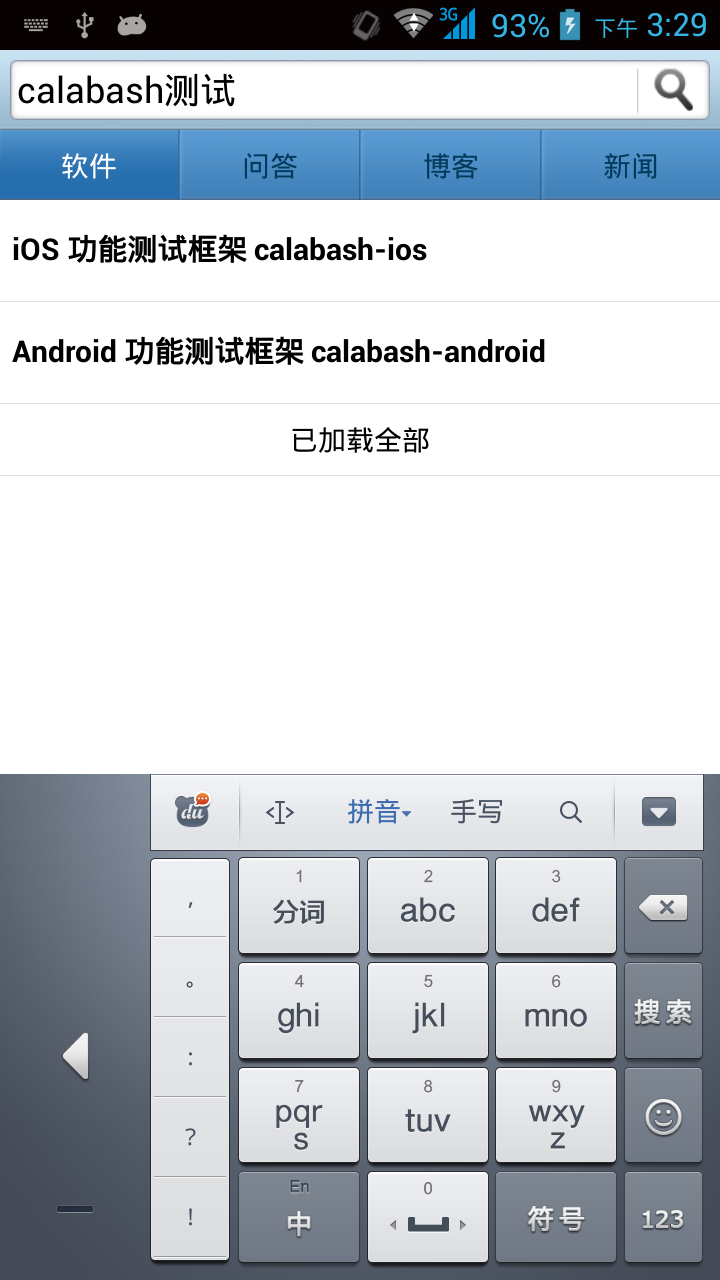
When I press the enter button
Then I see "已加载全部"
Then I take a screenshot
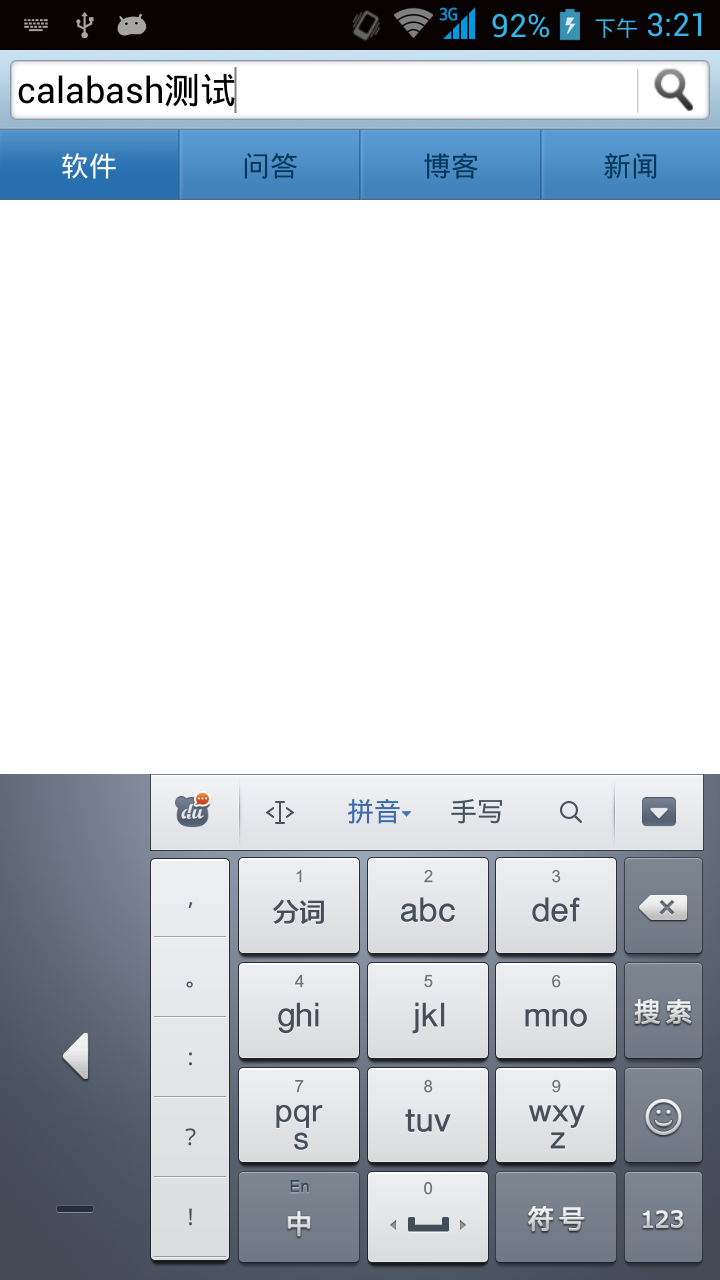
这里的enter button 就是软键盘上的"搜索"键。
注意: 用index查找控件,是从1开始的,而不是像C/Java数组的元素下标那样从0开始。
为了验证index从1开始,下面再尝试登录
Feature: 登录开源中国
Scenario: 启动应用后,输入账号和密码能登录开源中国
Then I wait for 5 seconds
Then I see "软件版本更新"
Then I see "以后再说"
Then I take a screenshot
When I press "以后再说"
Then I don't see "以后再说"
Then I see "最新资讯"
Then I take a screenshot
Then I press the menu key
Then I see "用户登录"
Then I take a screenshot
When I press "用户登录"
Then I see "记住我的登录信息"
Then I take a screenshot
When I enter "username" into input field number 1
And I enter "123456" into input field number 2
And I press button number 2
Then I see "登录失败用户名或口令错"
Then I take a screenshot
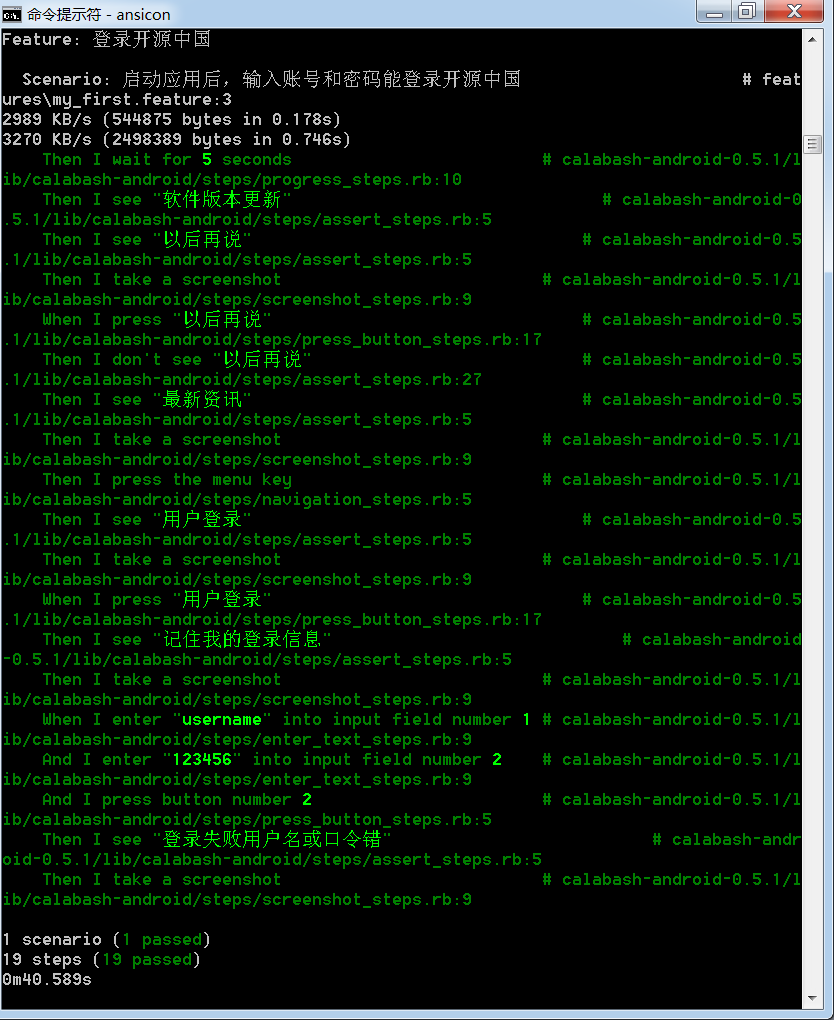
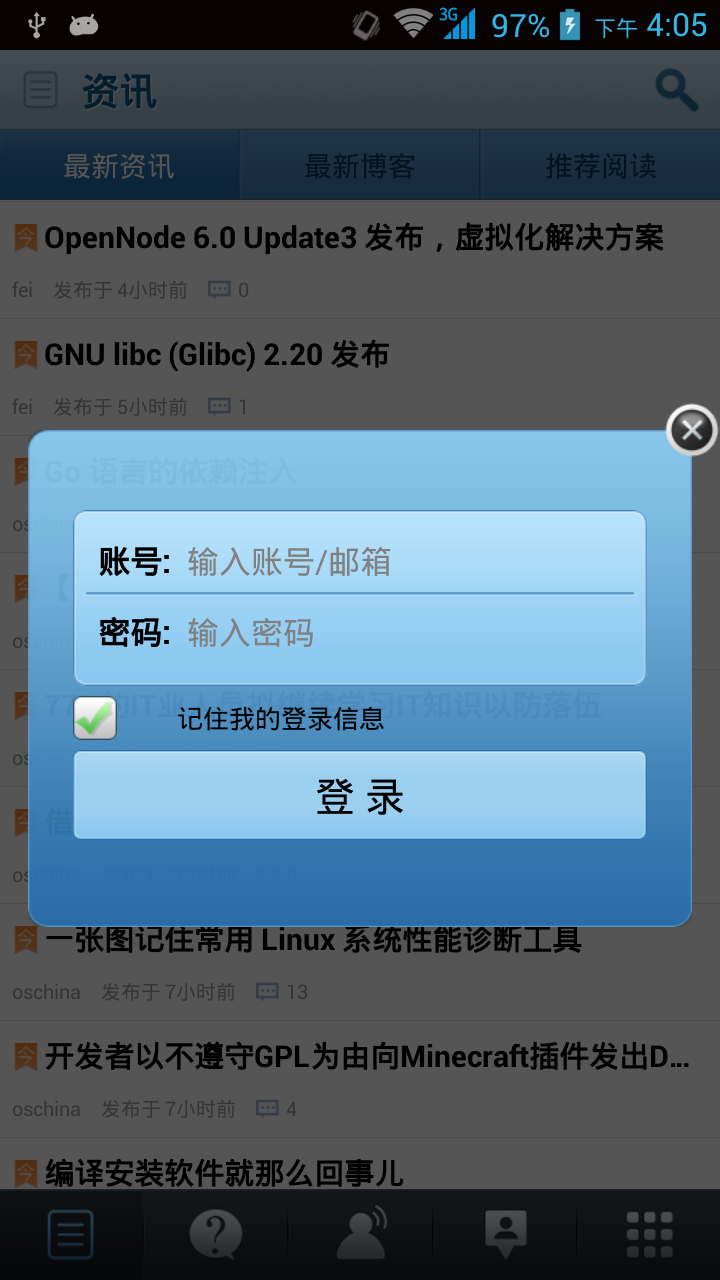

说明:
- 登录窗口中,有两个输入框:"账号"和"密码",index分别是1和2
- 登录窗口中,有两个button:"记住我的登录信息"和"登录",index分别是1和2,checkbox也是button,奇怪吧?
- 尝试
I press "登录"定位登录按钮失败
calabash测试集管理
一个Feature下包含多个Scenario
把 D:\git\oschina\android-app\calabash\features\first.feature 改名为 startup.feature,内容如下:
Feature: 启动开源中国
Scenario: 首次启动应用后,启用左右滑动
When I wait up to 5 seconds to see "软件版本更新"
Then I see "以后再说"
Then I take a screenshot
When I press "以后再说"
Then I don't see "以后再说"
Then I see "最新资讯"
Then I take a screenshot
Then I press the menu key
Then I see "系统设置"
Then I take a screenshot
When I press "系统设置"
Then I see "已关闭左右滑动"
And I see "启动检查更新"
Then I take a screenshot
When I press "已关闭左右滑动"
Then I see "已启用左右滑动"
When I press "启动检查更新"
Then I take a screenshot
Scenario: 第二次启动应用后,往右滑动到"问答"
When I wait up to 5 seconds to see "最新资讯"
When I swipe right
Then I see "问答"
Then I take a screenshot
本Feature有两个Scenario:
- 第一个在系统设置中启用左右滑动,关闭启动时检查更新
- 第二个往右滑动到“问答”页
需要说明的是:
- 每个Feature在运行前都会退出app,卸载app,重装app,启动app
- 每个Scenario在运行前都会退出app,启动app
I see "启动检查更新"只有在1280x720分辨率的手机上才能看到;854x480的手机上看不到,会运行错误。
一次运行多个Feature文件
按照 http://www.cnblogs.com/puresoul/archive/2011/12/28/2305160.html 的《Cucumber入门之Gherkin》介绍,
一旦我们写好了一个feature文件,我们就可以使用 cucumber命令来运行它。如果cucumber命令后不跟任何东西的话,那么它会执行所有的.feature文件。如果我们只想运行某一个.feature文件,我们可以使用命令cucumber features\feature_name
我现在在目录D:\git\oschina\android-app\calabash\features下有两个feature文件:
D:\git\oschina\android-app\calabash>dir features*.feature
驱动器 D 中的卷是 工作
卷的序列号是 9823-AB19
D:\git\oschina\android-app\calabash\features 的目录
2014/09/14 21:17 775 login.feature
2014/09/15 21:20 932 startup.feature
2 个文件 1,707 字节
0 个目录 131,744,169,984 可用字节
login.feature 和 startup.feature,feature的执行顺序无关紧要,因为每个feature运行时都要重新安装一遍app。
D:\git\oschina\android-app\calabash>calabash-android run ..\bin\oschina-android-app.apk
将执行这两个feature文件。
如果只想执行 startup.feature 文件,要在calabash-android命令后面添加 features\startup.feature :
D:\git\oschina\android-app\calabash>calabash-android run ..\bin\oschina-android-app.apk features\startup.feature
中文Win7环境特别说明:
如果feature文件名是中文的,比如:启动.feature,那么在cmd 中 chcp 65001 后,运行命令:
D:\git\oschina\android-app\calabash>calabash-android run ..\bin\oschina-android-app.apk features\启动.feature
将报错:
invalid byte sequence in UTF-8 (ArgumentError)
中文Win7下中文编码统计:
- 文件名:GBK
- feature文件内容:UTF-8
- cmd:首次测试app或换手机后,UTF-8,feature中的中文显示为空白
- cmd:第二次测试app,GBK,feature中的中文能正确显示
Ubuntu环境下,feature文件名包含中文没有任何问题。
我们看一下calabash-android的命令参数格式:
D:\git\oschina\android-app\calabash>calabash-android
Usage: calabash-android
help
prints more detailed help information.
gen
generate a features folder structure.
setup
sets up a non-default keystore to use with this test project.
resign
resigns the app with the currently configured keystore.
build
builds the test server that will be used when testing the app.
run
runs Cucumber in the current folder with the enviroment needed.
version
prints the gem version
-v, --verbose
Turns on verbose logging
我猜想其中的[parameters]就是指cucumber参数
扩展calabash预定义指令
从环境变量读取测试数据
有一个现实的需求:
如果有一个oschina测试帐号要在多个Feature中使用,
或者我的calabash测试脚本共享给其他人后,他的oschina测试帐号要换成自己的。
如果直接修改Feature文件中的账号和密码,可能要修改多个地方。
所以,设想是否能扩展calabash预定义指令:
Then /^I enter "([^"]*)" into input field number (\d+)$/ do |text, index|
扩展为支持从环境变量读取输入文本:
Then /^I enter $([^$]*) into input field number (\d+)$/ do |text_ev, index|
从文件 D:\ruby-1.9.3-p545-i386-mingw32\lib\ruby\gems\1.9.1\gems\calabash-android-0.5.1\lib\calabash-android\steps\enter_text_steps.rb 中拷贝:
Then /^I enter "([^"]*)" into input field number (\d+)$/ do |text, index|
enter_text("android.widget.EditText index:#{index.to_i-1}", text)
end
到 D:\git\oschina\android-app\calabash\features\step_definitions\calabash_steps.rb 中,改动后,如下:
require 'calabash-android/calabash_steps'
Then /^I enter %([^%]*)% into input field number (\d+)$/ do |text_ev, index|
text = ENV[text_ev]
enter_text("android.widget.EditText index:#{index.to_i-1}", text)
end
Then /^I enter $([^$]*) into input field number (\d+)$/ do |text_ev, index|
text = ENV[text_ev]
enter_text("android.widget.EditText index:#{index.to_i-1}", text)
end
这里环境变量支持两种格式:
%test_ev%Windows cmd的格式$test_evLinux Bash的格式
然后运行calabash前,设置环境变量:
D:\git\oschina\android-app\calabash>set td_username_1=username1
D:\git\oschina\android-app\calabash>set td_password_1=123456
上述两条命令也可以放到 testdata.bat 文件中,然后执行testdata.bat:
set td_username_1=username1
set td_password_1=123456
修改 login.feature :
Feature: 登录开源中国
Scenario: 启动应用后,输入错误的账号和密码不能登录
Then I wait for 5 seconds
Then I see "软件版本更新"
Then I see "以后再说"
Then I take a screenshot
When I press "以后再说"
Then I don't see "以后再说"
Then I see "最新资讯"
Then I take a screenshot
Then I press the menu key
Then I see "用户登录"
Then I take a screenshot
When I press "用户登录"
Then I see "记住我的登录信息"
Then I take a screenshot
When I enter %td_username_1% into input field number 1
And I enter $td_password_1 into input field number 2
And I press button number 2
Then I see "登录失败用户名或口令错"
Then I take a screenshot
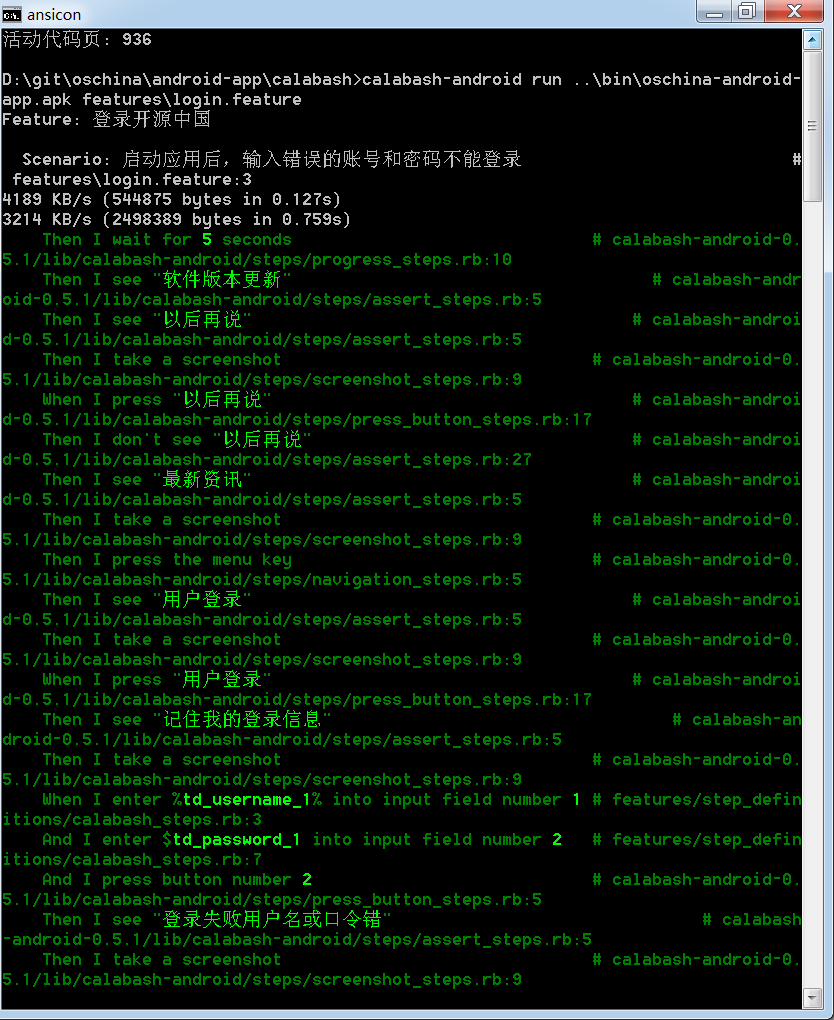
运行calabash:
D:\git\oschina\android-app\calabash>calabash-android run ..\bin\oschina-android-app.apk features\login.feature
为了支持跨平台测试数据维护,可以把环境变量设置放入ruby脚本 testdata.rb 中:
ENV["td_username_1"]="username1"
ENV["td_password_1"]="123456"
在irb中运行calabash:
D:\git\oschina\android-app\calabash>irb
irb(main):001:0> require './testdata.rb'
=> true
irb(main):002:0> ENV["td_username_1"]
=> "username1"
irb(main):003:0>exec('calabash-android run ..\bin\oschina-android-app.apk features\login.feature')
Ruby设置和读取环境变量真是太方便了,执行系统命令也很方便,不需要到处import库,值得深入掌握。
Linux补充:
Linux下可以把测试数据写入testdata.bashrc 中:
export td_username_1="username1"
export td_password_1="123456"
enter_text_steps.rb 文件位置:
/var/lib/gems/1.9.1/gems/calabash-android-0.5.2/lib/calabash-android/steps/enter_text_steps.rb
ruby控制台下使用query查询app当前页面的控件
参考文档:
https://github.com/calabash/calabash-android/wiki/05-Query-Syntax
http://blog.lesspainful.com/2012/12/18/Android-Query/
按照上述文档很容易查询控件的id, 比如启动开源中国后的首页,查询结果:
D:\git\oschina\android-app\calabash>calabash-android console ..\bin\oschina-android-app.apk
irb(main):001:0> reinstall_apps
5168 KB/s (2498389 bytes in 0.472s)
3800 KB/s (544875 bytes in 0.140s)
nil
irb(main):002:0> start_test_server_in_background
nil
启动后首页弹出升级提示对话框:
irb(main):003:0> query('button')
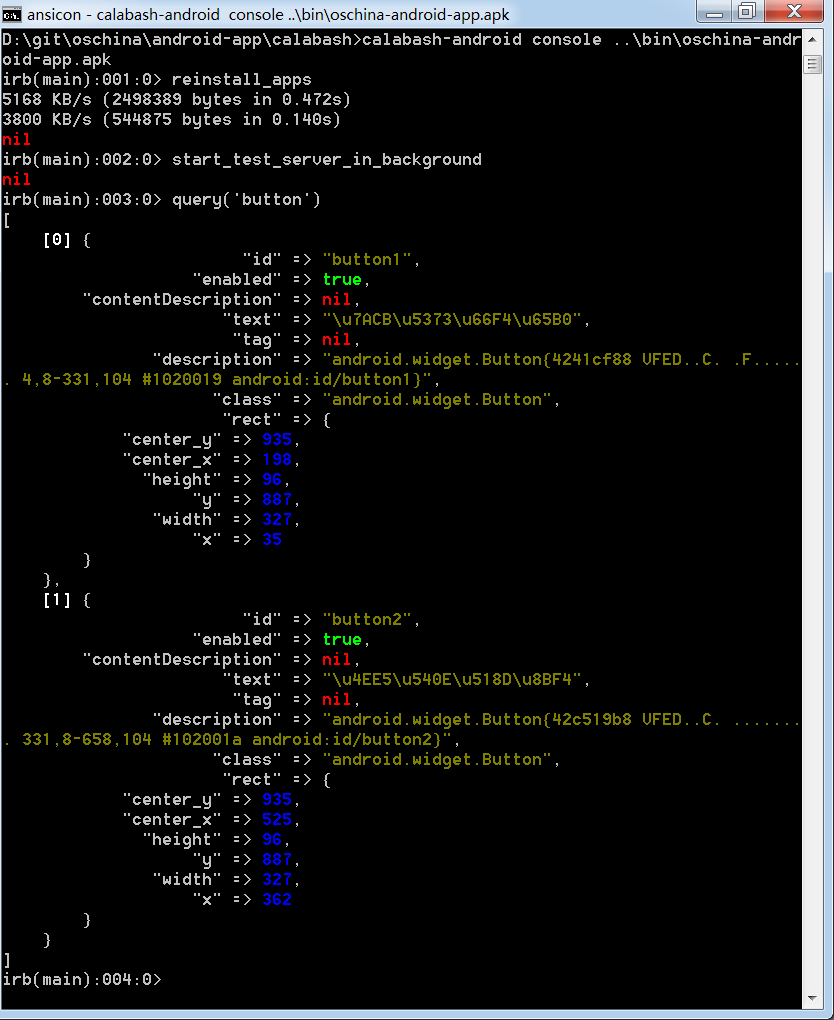
看出问题没有,中文编码问题又来捣乱了:
"text" => "\u7ACB\u5373\u66F4\u65B0", 的中文是"立即更新",这里只能看的是4个中文字
"text" => "\u4EE5\u540E\u518D\u8BF4", 的中文是"以后再说"
又要说人家Ubuntu了,Ubuntu下query结果的中文能直接显示。
在console下还可以点击按钮,
https://github.com/calabash/calabash-android/blob/master/ruby-gem/lib/calabash-android/steps/press_button_steps.rb 中定义了按button编号点击的指令 :
Then /^I press button number (\d+)$/ do |index|
tap_when_element_exists("android.widget.Button index:#{index.to_i-1}")
end
要选择按钮"以后再说",把 #{index.to_i-1} 代成1, 在console下输入:
tap_when_element_exists("android.widget.Button index:1")
然后按钮"以后再说"被点击,升级提示对话框消失了:
所以,可以放心的在feature文件中加入指令:
Then I press button number 2
下面还希望找到右上角搜索图标的id,在console下输入:
query("*")
总共列出了111个控件,编号从0到110,其中第7个是:
irb(main):008:0> query("*")
[
...
7 {
"id" => "main_head_search",
"enabled" => true,
"contentDescription" => nil,
"class" => "android.widget.ImageButton",
"rect" => {
"center_y" => 90,
"center_x" => 676,
"height" => 80,
"y" => 50,
"width" => 80,
"x" => 636
},
...
]
根据其坐标(x,y) = (636,50),可以确定就是右上角的搜索按钮,按钮的id是main_head_search。
还可以查询本页面的button:
query("imagebutton")
只有1个查询结果,就是搜索按钮:
irb(main):008:0> query("imagebutton")
[
[0] {
"id" => "main_head_search",
"enabled" => true,
"contentDescription" => nil,
"class" => "android.widget.ImageButton",
"rect" => {
"center_y" => 90,
"center_x" => 676,
"height" => 80,
"y" => 50,
"width" => 80,
"x" => 636
},
"tag" => nil,
"description" => "android.widget.ImageButton{42a889a0 VFED..C. ..
...... 636,0-716,80 #7f0b00a3 app:id/main_head_search}"
}
]
接下来可以用两者方式点击搜索按钮,
第一种,对应指令是 Then I press image button number 1:
tap_when_element_exists("android.widget.ImageButton index:0")
第二种,对应指令是 Then I press "main_head_search":
tap_when_element_exists("* marked:'main_head_search'")

 浙公网安备 33010602011771号