谷粒商城(二):逆向工程
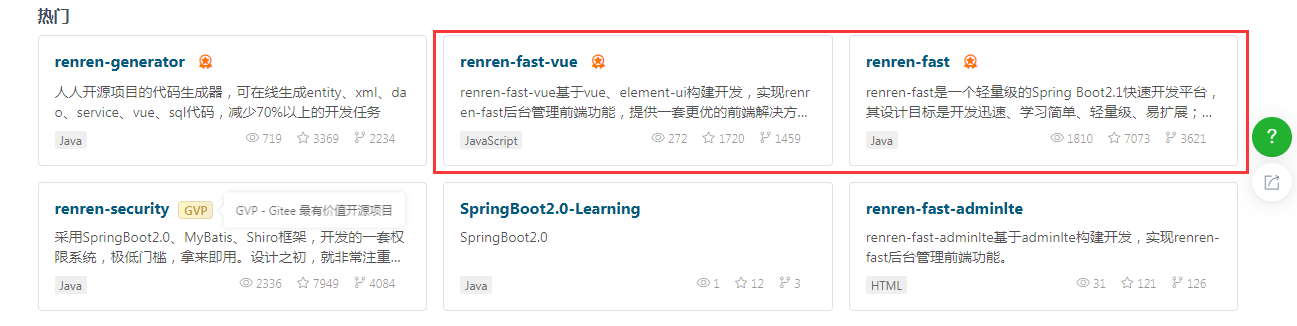
人人开源
在码云上搜索人人开源,我们使用 renren-fast(后端)、renren-fast-vue(前端)项目。
将 renren-fast 放到 gulimall 项目中,在根项目的 pom 文件中加入 renren-fast 项目 module。
<modules>
    <module>gulimall-coupon</module>
    <module>gulimall-member</module>
    <module>gulimall-order</module>
    <module>gulimall-product</module>
    <module>gulimall-ware</module>
    <module>renren-fast</module>
</modules>
接着用 renren-fast/db/mysql.sql 在 MySQL 中创建库 guli-admin。
然后修改项目里 renren-fast 中的 application-dev.yml 中的数据库的 url,通常把 localhost 修改为 192.168.56.10 即可。
url: jdbc:mysql://192.168.56.10:3306/gulimall_admin?useUnicode=true&characterEncoding=UTF-8&serverTimezone=Asia/Shanghai
username: root
password: root
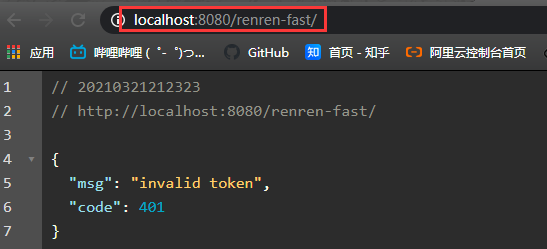
然后运行该 RenrenApplication。浏览器中访问 http://localhost:8080/renren-fast/ 。
用 Vscode 打开 renren-fast-vue,运行 Vue 项目需要 NodeJs 环境。
# 设置npm淘宝镜像
npm config set registry http://registry.npm.taobao.org/

# 下载前端依赖包,在vscode的项目终端输入以下
npm install

# 运行项目
npm run dev
这里在下载node-sass依赖的时候报了如下错误:
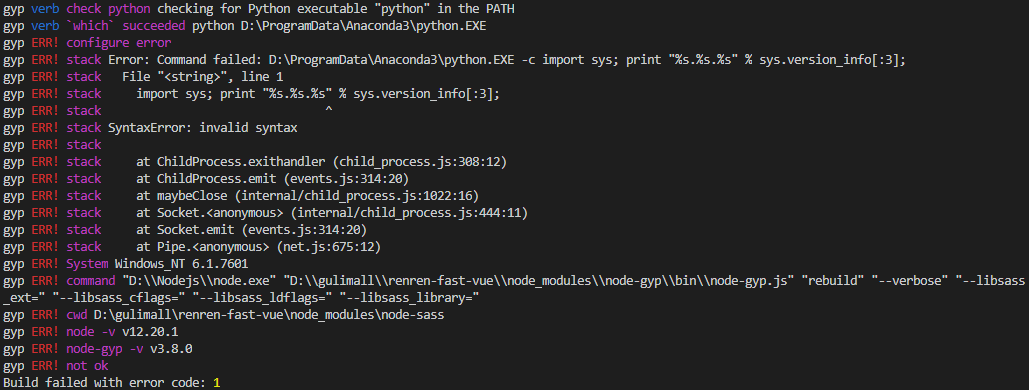
因为安装了Anaconda,把原来的Python覆盖了,但是我添加了原来的path还是报错。看了评论区就解决了。
先 npm uninstall node-sass 卸载原来下载失败的 node-sass。
然后再执行 npm i node-sass --sass_binary_site=https://npm.taobao.org/mirrors/node-sass/重新下载。成功后,再次执行 npm install 就成功了。
逆向工程
下载 renren-generator 到 guli 项目下,并在主 pom 文件中增加其对应 module,同上修改 renren-generator 项目中数据库信息。连接的数据库是要你要逆向的工程所对应的数据库。
url: jdbc:mysql://192.168.56.10:3306/gulimall_pms?useUnicode=true&characterEncoding=UTF-8&useSSL=false&serverTimezone=Asia/Shanghai
username: root
password: root
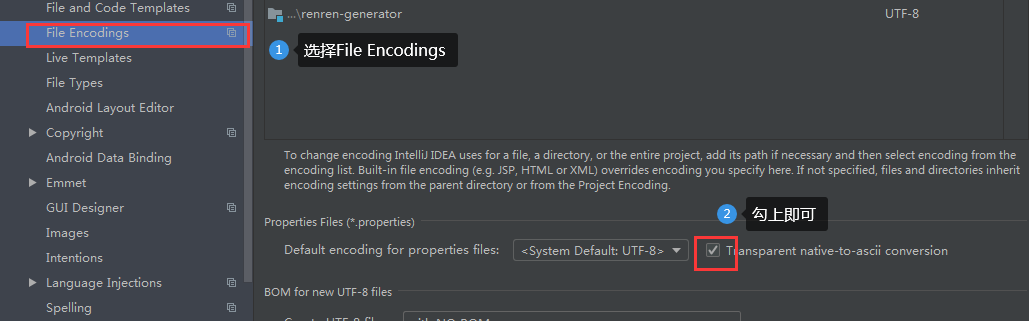
在 generator.properties 修改逆向工程的相关配置。如果打开的文件注释是乱码的,在 setting 中设置如下。
mainPath=com.qjy

# 包名
package=com.qjy.gulimall
moduleName=product

# 作者
author=QJY

# Email
email=304735221@qq.com

# 表前缀(类名不会包含表前缀)
tablePrefix=pms_
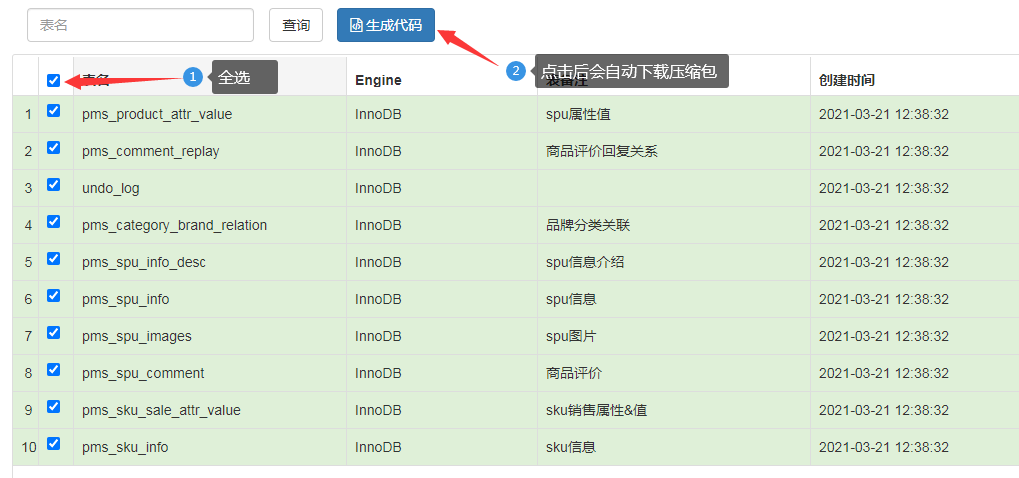
然后启动该项目,浏览器访问 80 端口,并全选字段生成代码压缩包,然后替换对应项目的main文件。
公共依赖
创建 maven 项目。

在服务的 pom 文件中引入 common 依赖。
<dependency>
    <groupId>com.qjy.gulimall</groupId>
    <artifactId>gulimall-common</artifactId>
    <version>0.0.1-SNAPSHOT</version>
</dependency>
然后在 gulimall-common 项目的 pom 中引入所需要的依赖。
<!-- mybatisPLUS-->
<dependency>
    <groupId>com.baomidou</groupId>
    <artifactId>mybatis-plus-boot-starter</artifactId>
    <version>3.4.1</version>
</dependency>

<!--简化实体类-->
<dependency>
    <groupId>org.projectlombok</groupId>
    <artifactId>lombok</artifactId>
    <version>1.18.8</version>
</dependency>

<!-- httpcomponent包:发送http请求 -->
<dependency>
    <groupId>org.apache.httpcomponents</groupId>
    <artifactId>httpcore</artifactId>
    <version>4.4.13</version>
</dependency>

<dependency>
    <groupId>commons-lang</groupId>
    <artifactId>commons-lang</artifactId>
    <version>2.6</version>
</dependency>

<dependency>
    <groupId>mysql</groupId>
    <artifactId>mysql-connector-java</artifactId>
    <version>8.0.17</version>
</dependency>

<dependency>
    <groupId>javax.servlet</groupId>
    <artifactId>servlet-api</artifactId>
    <version>2.5</version>
    <!--tomcat自带,打包的时候不需要-->
    <scope>provided</scope>
</dependency>
在 gulimall-common 项目的 java 文件下创建 com.qjy.common.utils 文件路径。
- renren-fast 中 utils包下的 Query 、PageUtils、R 和 Constant 复制到 common 项目的
java/com.qjy.common.utils下。 - 复制 renren-fast 中的xss包和exception包粘贴到 common 的
com.qjy.common目录下。 - 删掉 common 项目里xss包下 xssfiler.java 和 XssHttpServletRequestWrapper.java。
- 删除 common 项目里exception包下 RRExceptionHandler.java。
在 gulimall-product 项目的resources目录下新建 application.yml。并且在启动类上增加注解@MapperScan()。
spring:
  datasource:
    username: root
    password: root
    url: jdbc:mysql://192.168.56.10:3306/gulimall_pms?useUnicode=true&characterEncoding=UTF-8&useSSL=false&serverTimezone=Asia/Shanghai
    driver-class-name: com.mysql.cj.jdbc.Driver

# MapperScan
# sql映射文件位置
mybatis-plus:
  mapper-locations: classpath:/mapper/**/*.xml
  global-config:
    db-config:
	  # 主键自增
      id-type: auto
同理完成其他服务的逆向工程。

 浙公网安备 33010602011771号