angular入门篇4----路由配置&&守卫路由
Angular入门----路由配置&&守卫路由
这里以加入购物车后的内容作为例子
1. 创建几个组件
1.1 创建组件cartDetail && checkout
在Store/src/app/store下创建:
cartDetail.component.ts
这里组件使用了template,可以对比前面的组件是使用的是templateUrl,后者是直接加载Url内的html模板,而template则是直接的html代码。
因为我们现在主要的目的是添加Url路由,模板的扩充会在文末进行。
import { Component } from "@angular/core";
import { Cart } from "../model/cart.model";
@Component({
    moduleId: module.id,
    template: `<div><h3 class="bg-info p-e-1">Cart Detail Component</h3></div>`
})

export class CartDetailComponent {
 }
checkout.component.ts
import { Component } from "@angular/core"

@Component({
   moduleId: module.id,
   template: `<div><h3 class="bg-info p-a-1"> Cart Detail Component</h3></div>`
})
export class CheckOutComponent {
}
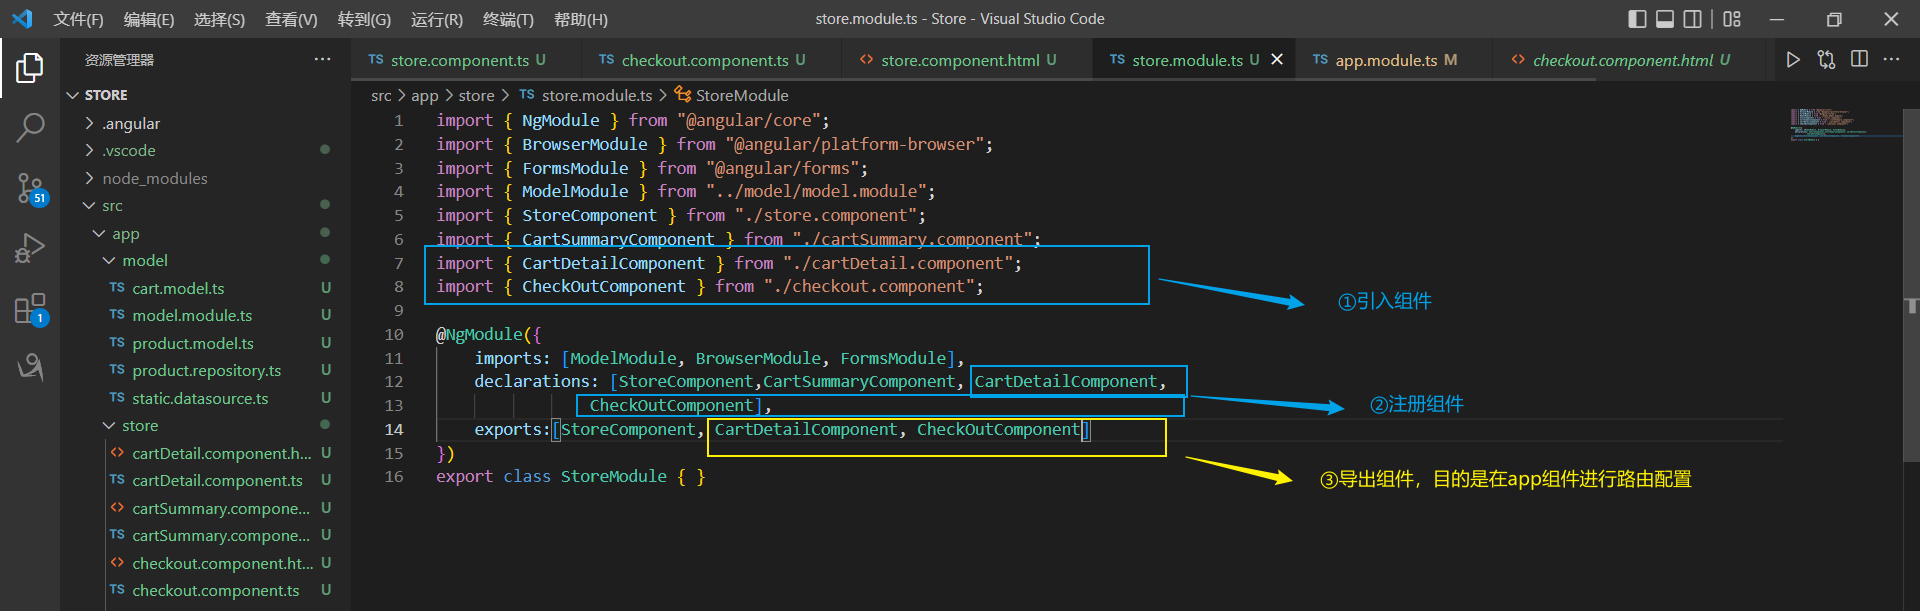
1.2.注册组件
在store.module.ts中注册上述两个组件:
2. 配置路由
路由配置的目的是将Url映射到组件上,从而实现引用导航。
2.1 引入组件
将我们的组件引入到app.module.ts
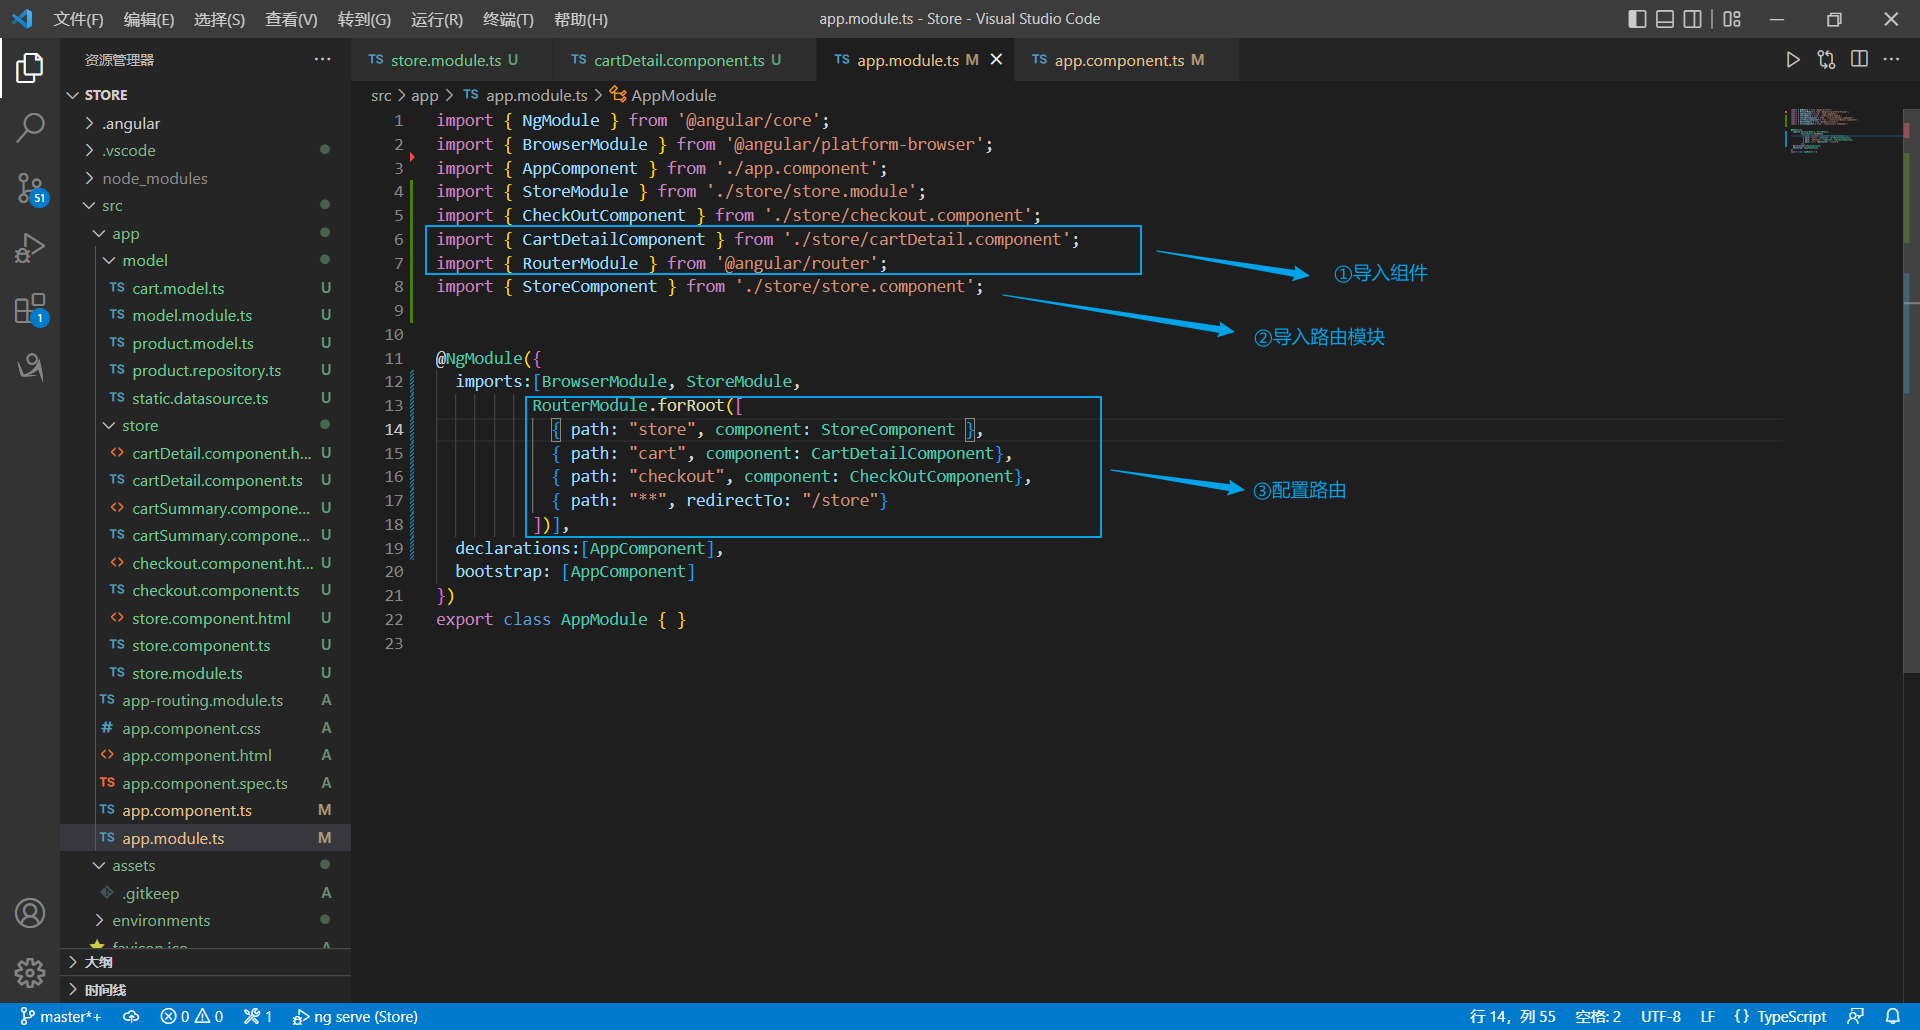
第③步添加的代码:
 RouterModule.forRoot([
            { path: "store", component: StoreComponent },
            { path: "cart", component: CartDetailComponent},
            { path: "checkout", component: CheckOutComponent},
            { path: "**", redirectTo: "/store"}
          ])
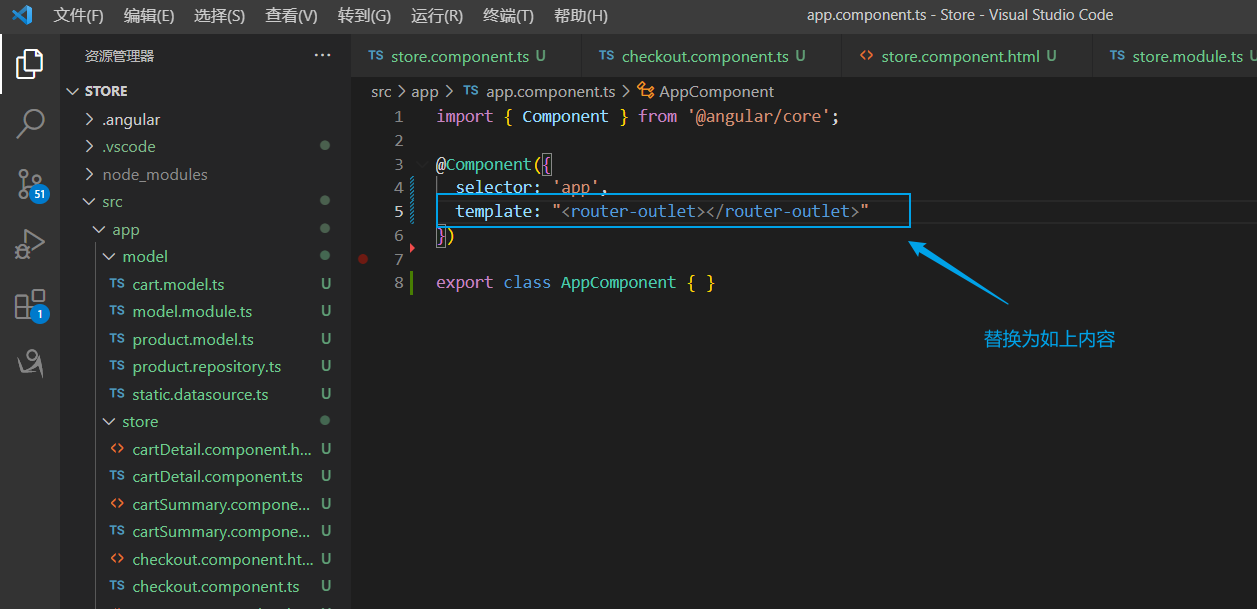
2.2 定义路由目标
app.component.ts
2.3 查看效果
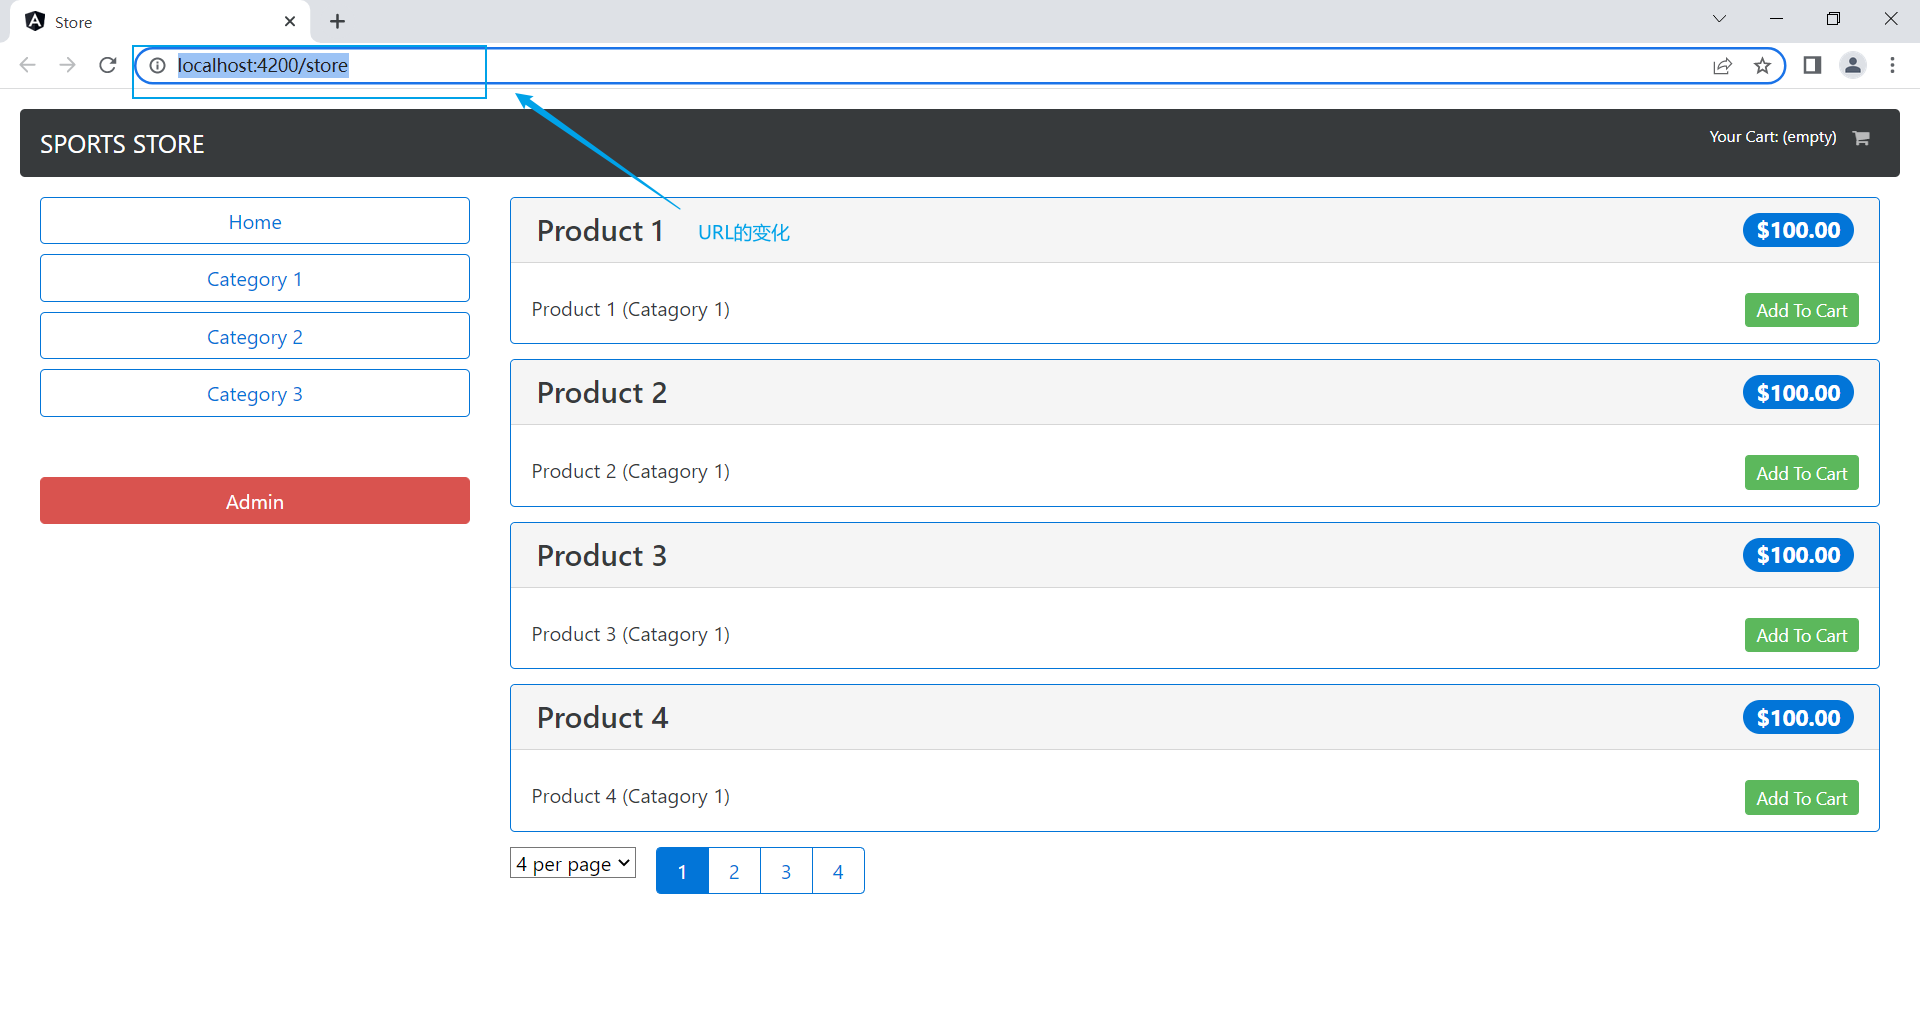
看似没什么效果,但我们看到url处:
这是前一篇的:
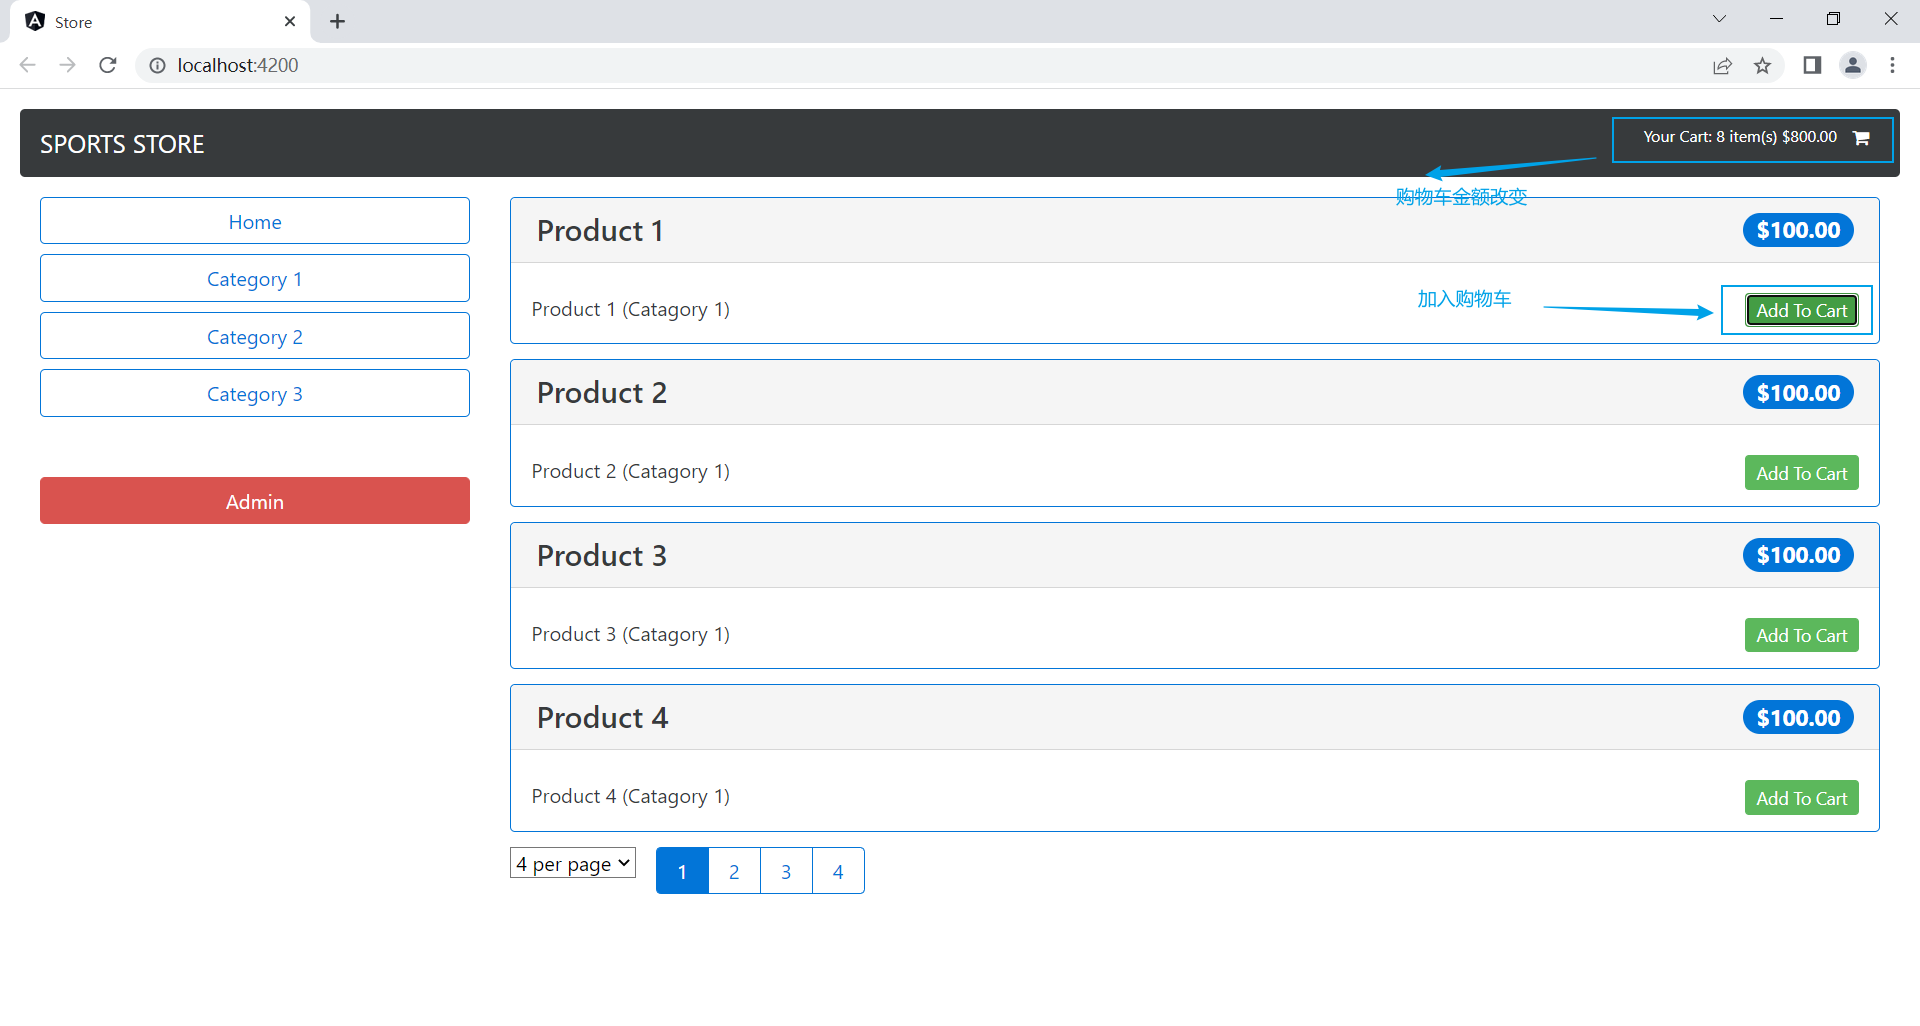
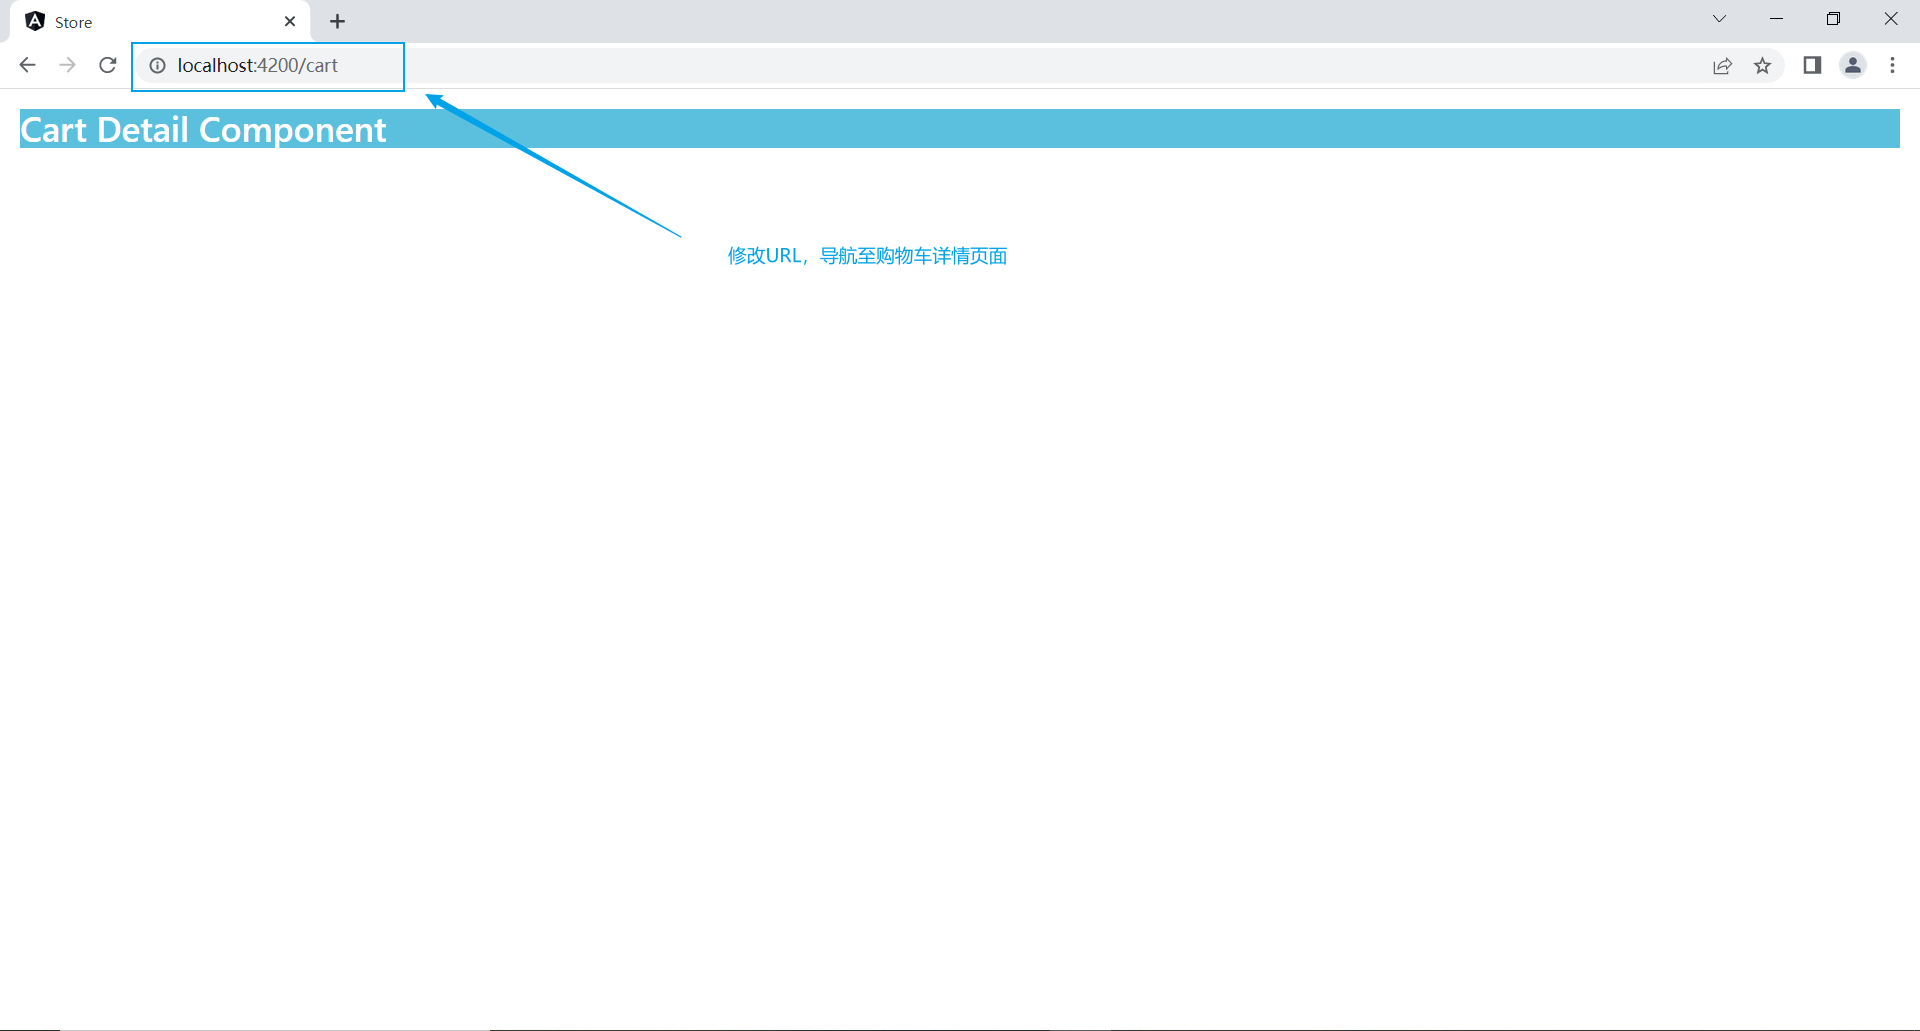
配置路由后的效果:
我们把URL处的/store改为/cart,便能转至购物车详情页面
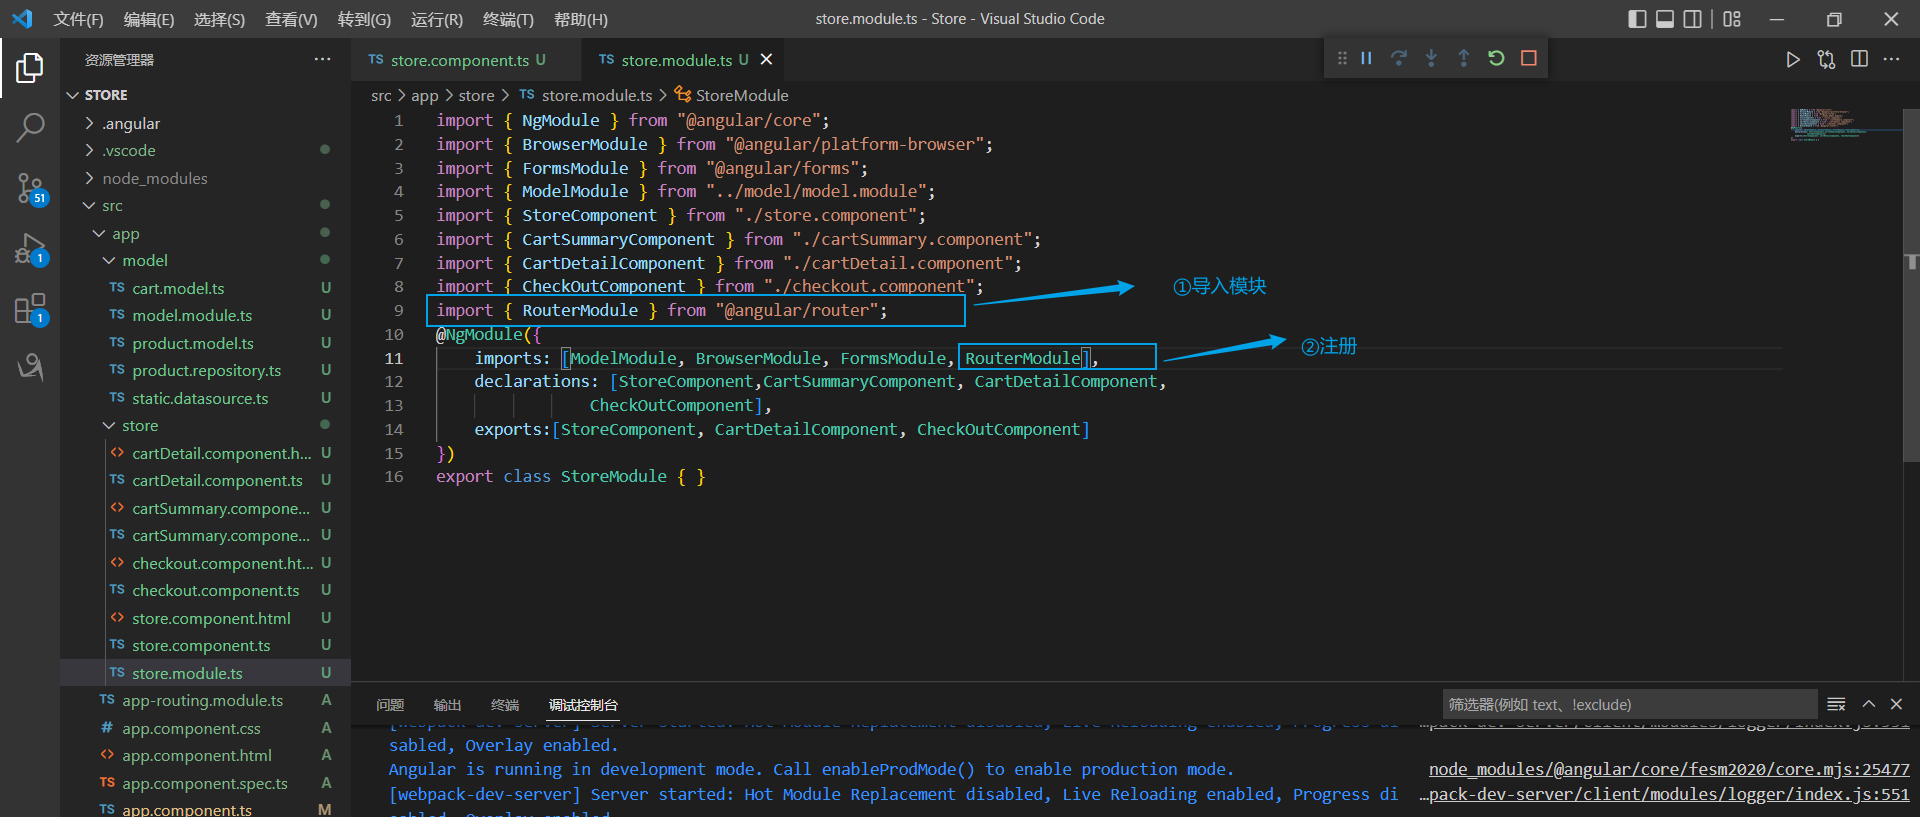
2.4 导入路由模块
在store.module.ts导入路由模块
store.module.ts
此时我们点击"Add To Cart"按键,系统会跳转到Cart页面。
因为我们在cartSummary.component.ts页面已经配置好了按键的导航,在实现导航后功能便能正常使用:

3. 守卫路由
先奉上官方解释:
"导航”表示路由正在发生改变。正如其名,vue-router提供的导航守卫主要用来通过跳转或取消的方式守卫导航。有多种机会植入路由导航过程中:全局的, 单个路由独享的, 或者组件级的。(来自同行vue框架~)
可以理解为从一个链接转到另一个链接时安排一些检验等流程确保安全。
3.1 创建路由保护
Store/src/app下创建:
StoreFirst.guard.ts
import { Injectable } from "@angular/core";
import { ActivatedRouteSnapshot, RouterStateSnapshot, Router } from "@angular/router";
import { StoreComponent } from "./store/store.component";

@Injectable()

export class StoreFirstGuard {
    private firstNavigate= true;

    constructor(private router: Router) { }

    canActivate(router: ActivatedRouteSnapshot,state: RouterStateSnapshot): boolean {
        if(this.firstNavigate){
            this.firstNavigate=false;

            if(router.component != StoreComponent){
                this.router.navigateByUrl("/");
                return false;
            }
        }
        return true;
    }
}
StoreFirstGuard类内的canActivate方法的意义为:如果为第一次调用canActivte方法或目标组件为StoreComponent,则导航至目标URL。
3.2 注册并使用路由守卫
app.module.ts

import { NgModule } from '@angular/core';
import { BrowserModule } from '@angular/platform-browser';
import { AppComponent } from './app.component';
import { StoreModule } from './store/store.module';
import { CheckOutComponent } from './store/checkout.component';
import { CartDetailComponent } from './store/cartDetail.component';
import { RouterModule } from '@angular/router';
import { StoreComponent } from './store/store.component';
import { StoreFirstGuard } from './storeFirst.guard';

@NgModule({
  imports:[BrowserModule, StoreModule,
          RouterModule.forRoot([
            { path: "store", component: StoreComponent,
          canActivate:[StoreFirstGuard] },
            { path: "cart", component: CartDetailComponent,
          canActivate:[StoreFirstGuard]},
            { path: "checkout", component: CheckOutComponent,
          canActivate:[StoreFirstGuard]},
            { path: "**", redirectTo: "/store"}
          ])],
  providers:[StoreFirstGuard],
  declarations:[AppComponent],
  bootstrap: [AppComponent]
})
export class AppModule { }
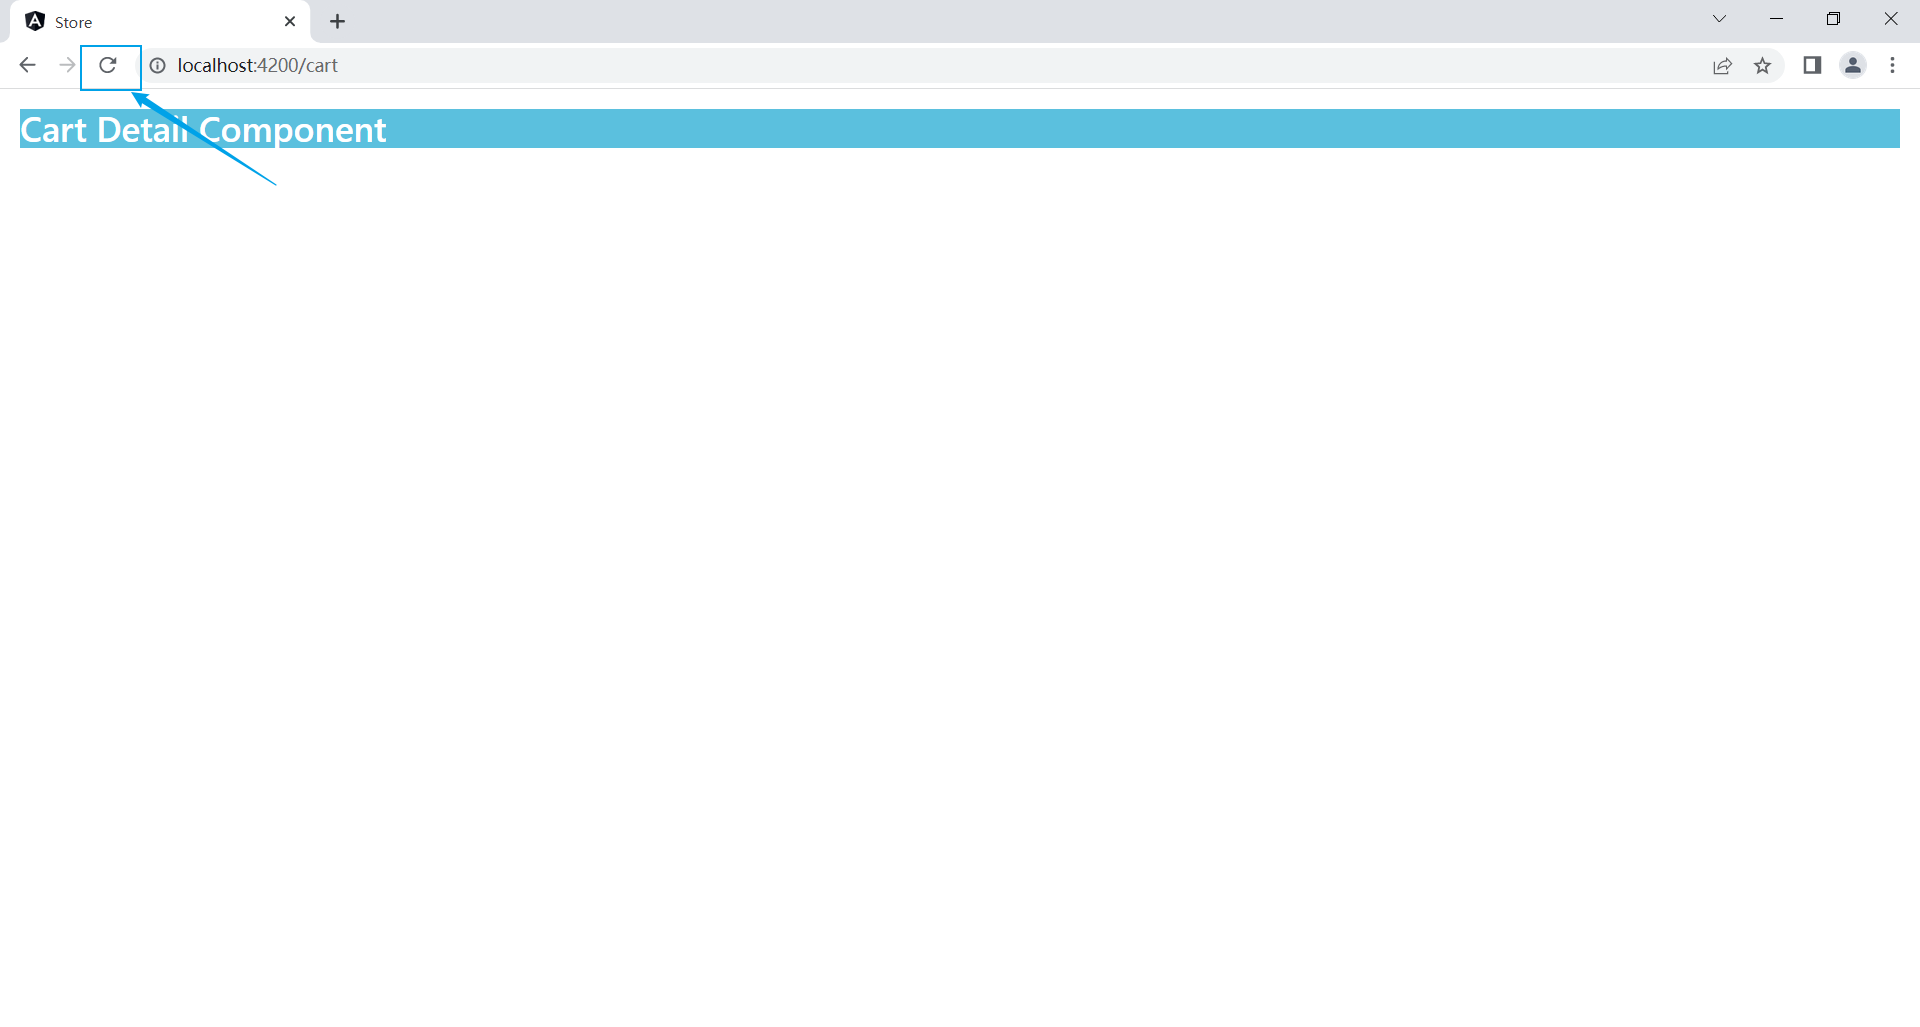
启动项目,选择一个商品,点击"Add To Cart"跳转至/cart,再点击浏览器的刷新键,就会导航到/store,即首页。
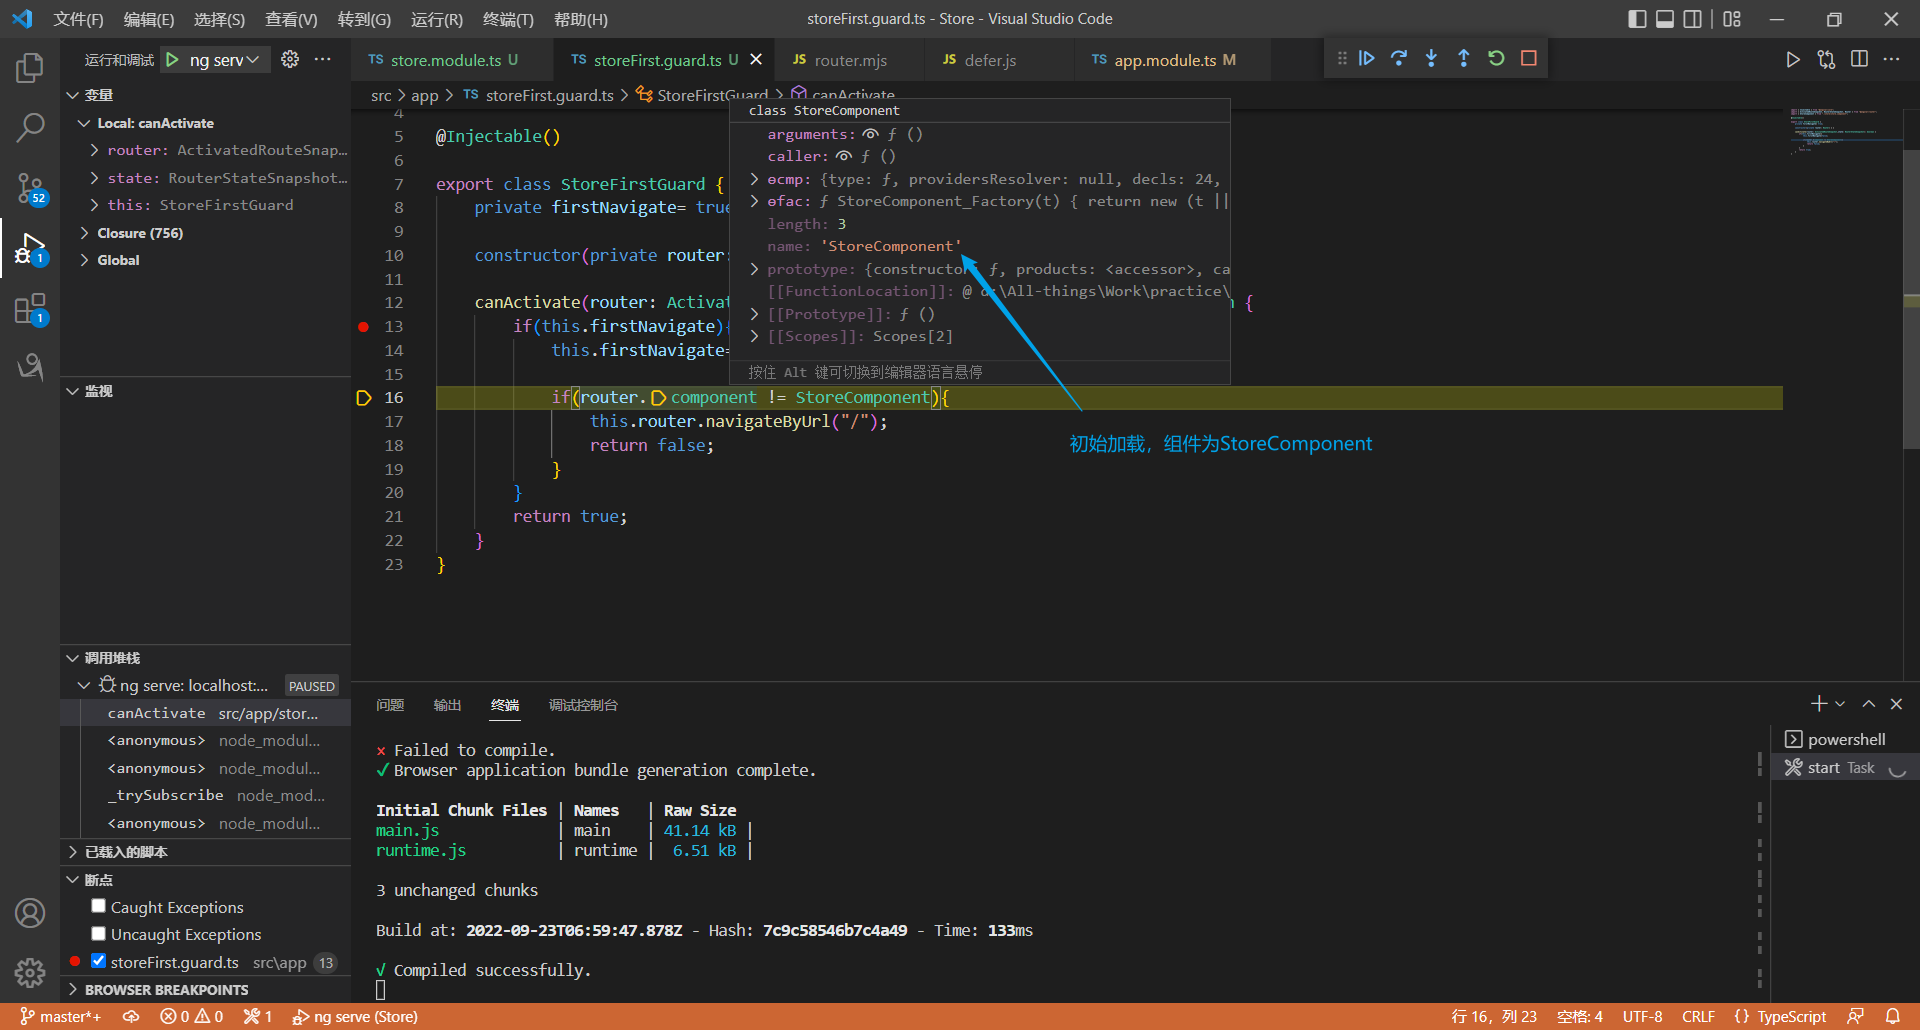
若在canActivate函数上设置一个断点:
初始加载时,因为初始化的firstNavigate是true,且检验结果为StoreComponent,自然允许导航至/store:
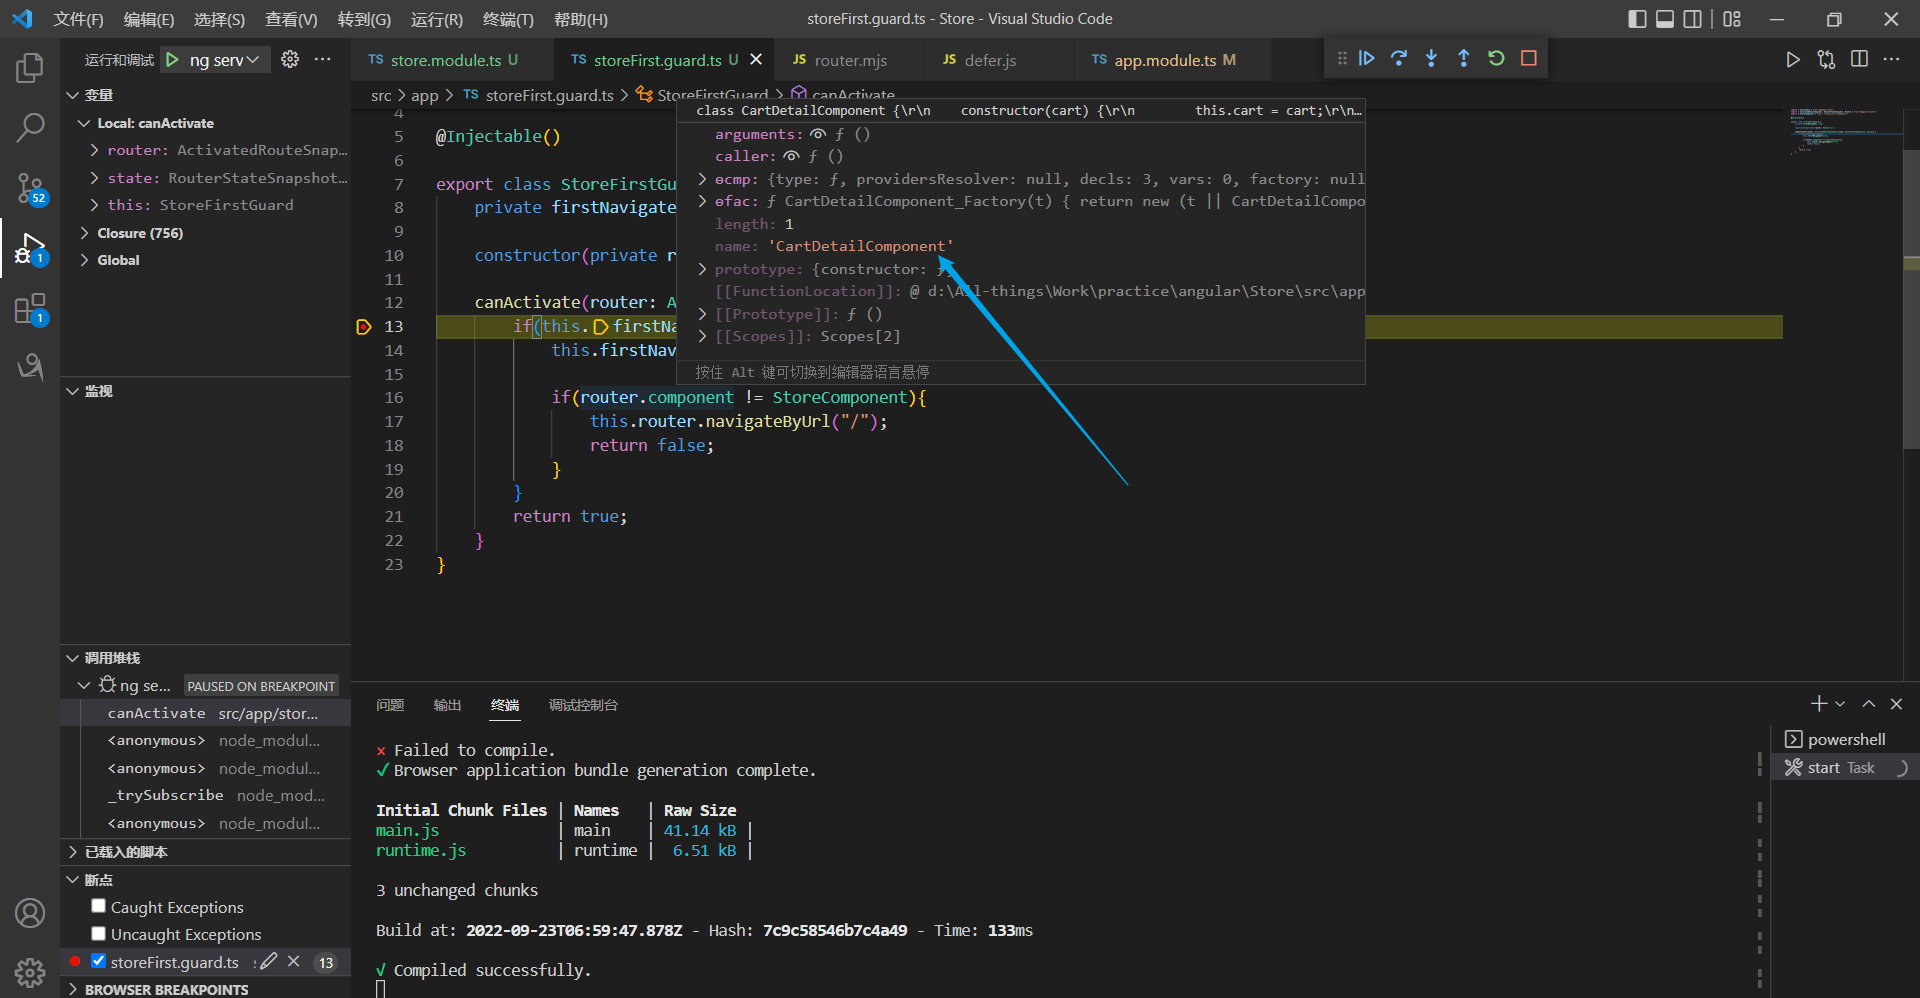
点击Add To Cart,因为上一步执行时把firstNavigate置为false,因此直接返回true。
点击刷新时,我们会看到导航的目标时CartDetailComponent(刷新),但我们把刷新视为一个意外事件,所以返回了false,默认导航至/store:
4. 内容填充
下面就是完成购物车详情页面了。
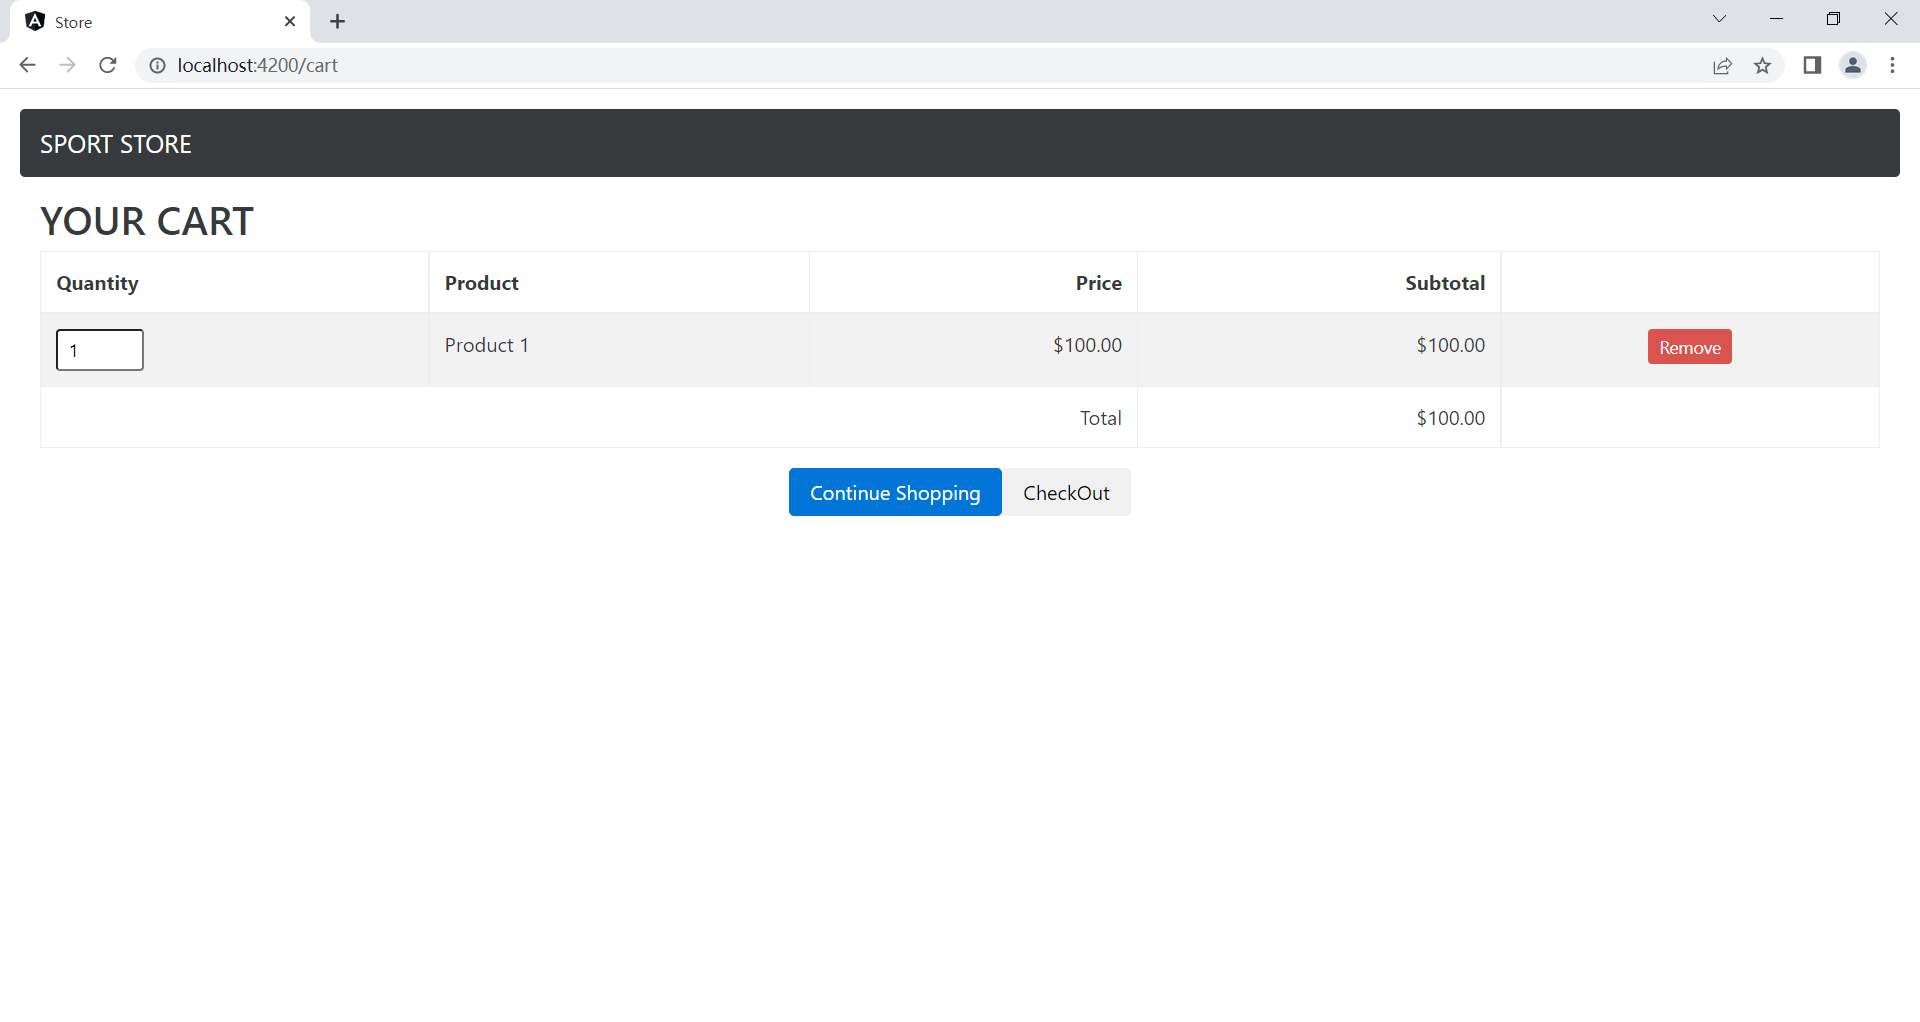
4.1 填充购物车页面
Store/src/app/store下创建:
cartDetail.component.html
<div class="navbar navbar-inverse bg-inverse">
    <a class="navbar-brand">SPORT STORE</a>
</div>
<div class="m-a-1">
    <h2 class="txt-xs-center">YOUR CART</h2>
    <table class="table table-bordered table-striped p-a-1">
        <thead>
            <tr>
                <th>Quantity</th>
                <th>Product</th>
                <th class="text-xs-right">Price</th>
                <th class="text-xs-right">Subtotal</th>
            </tr>
        </thead>
        <tbody>
            <tr *ngIf="cart.lines.length == 0">
                <td colspan="4" class="text-xs-right">
                    YOUR CART is EMPTY
                </td>
            </tr>
            <tr *ngFor="let line of cart.lines">
                <td>
                    <input type="number" class="form-control-sm"
                    style="width: 5em;"
                    [value]="line.quantity"
                    (change)="cart.updateQuantity(line.product, $event.target)">
                </td>
                <td>{{line.product.name}}</td>
                <td class="text-xs-right">
                    {{line.product.price | currency:"USD" : true:"2.2-2"}}
                </td>
                <td class="text-xs-right">
                    {{line.lineTotal | currency:"USD":true:"2.2-2"}}
                </td>
                <td class="text-xs-center">
                    <button class="btn btn-sm btn-danger"
                    (click)="cart.removeLine(line.product.id)">
                    Remove
                </button>
                </td>
            </tr>
        </tbody>
        <tfoot>
            <tr>
                <td colspan="3" class="text-xs-right">Total</td>
                <td class="text-xs-right">
                    {{cart.cartPrice | currency:"USD":true:"2.2-2"}}
                </td>
            </tr>
        </tfoot>
    </table>
</div>
<div class="text-xs-center">
    <button class="btn btn-primary" routerLink="/store">Continue Shopping</button>
    <button class="btn btn-sencondary" routerLink="/checkout" [disabled]="cart.lines.length == 0">CheckOut</button>
</div>
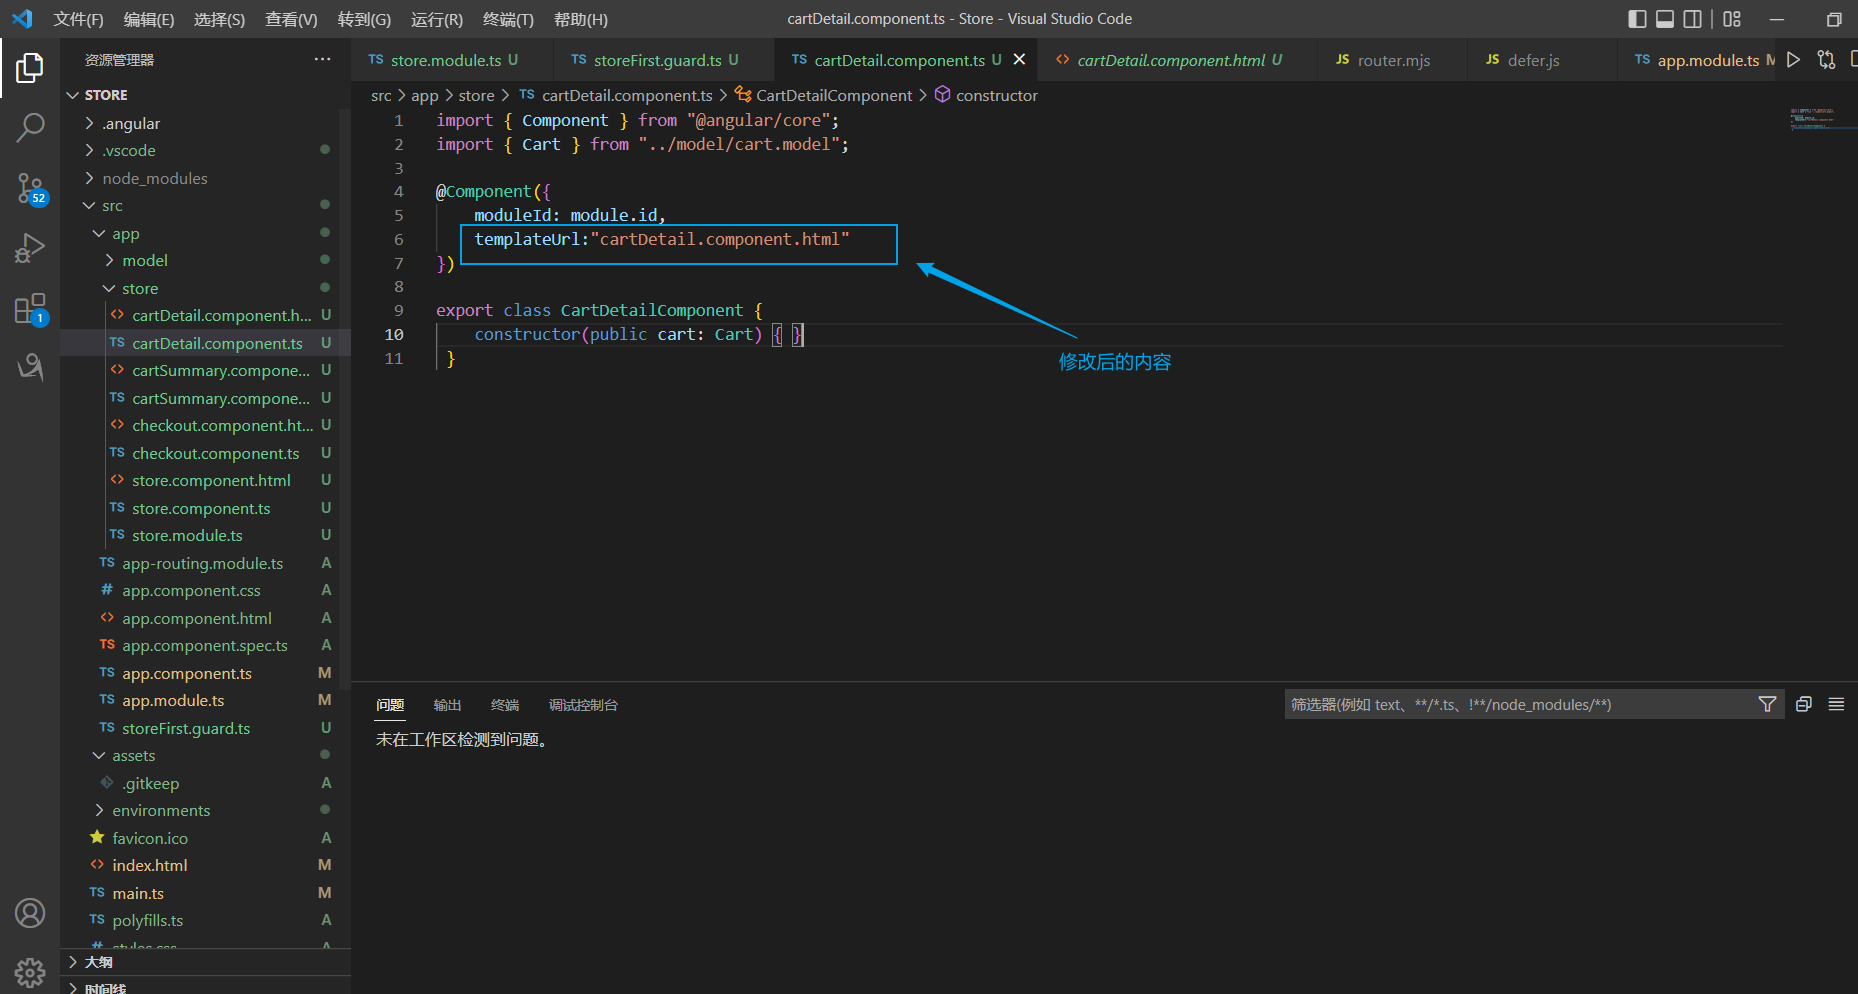
此时我们就需要把cartDetail.component.html内简单的"template"改成"templateUrl: "cartDetail.component.html"",抛弃那个简单的HTML代码,换上刚才写的模板了。
cartDetail.component.ts
看看效果,还过得去,CSS不错的朋友可以给他再修修。
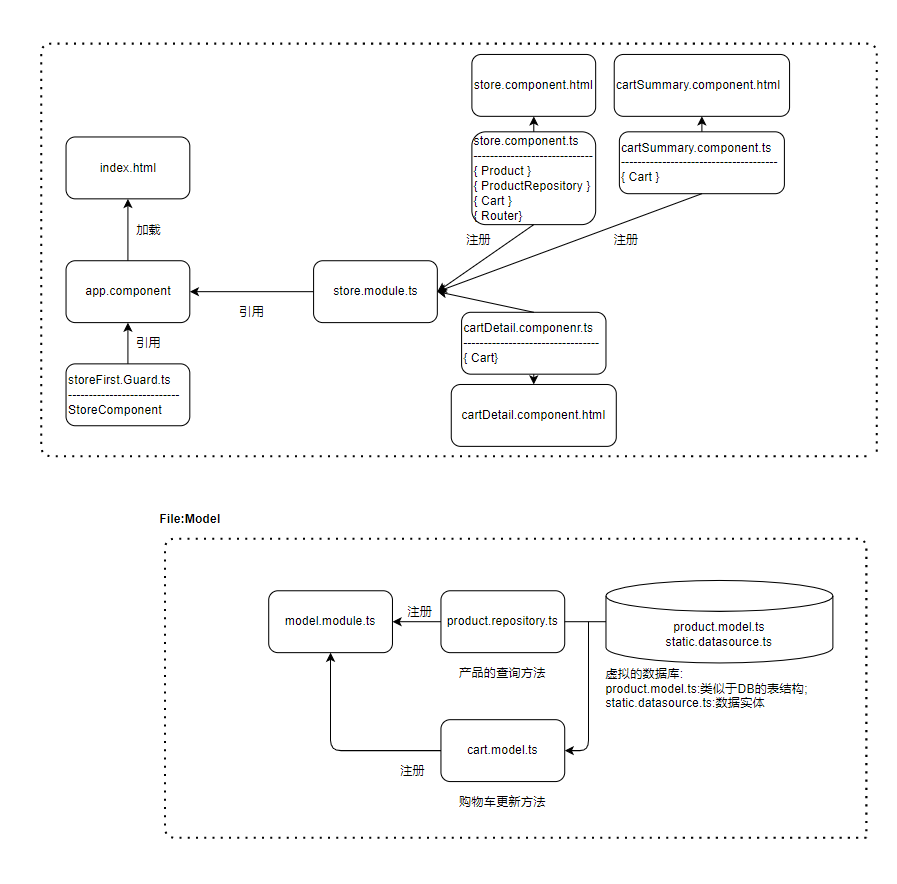
5. 项目结构
这是目前为止的项目结构:

 浙公网安备 33010602011771号