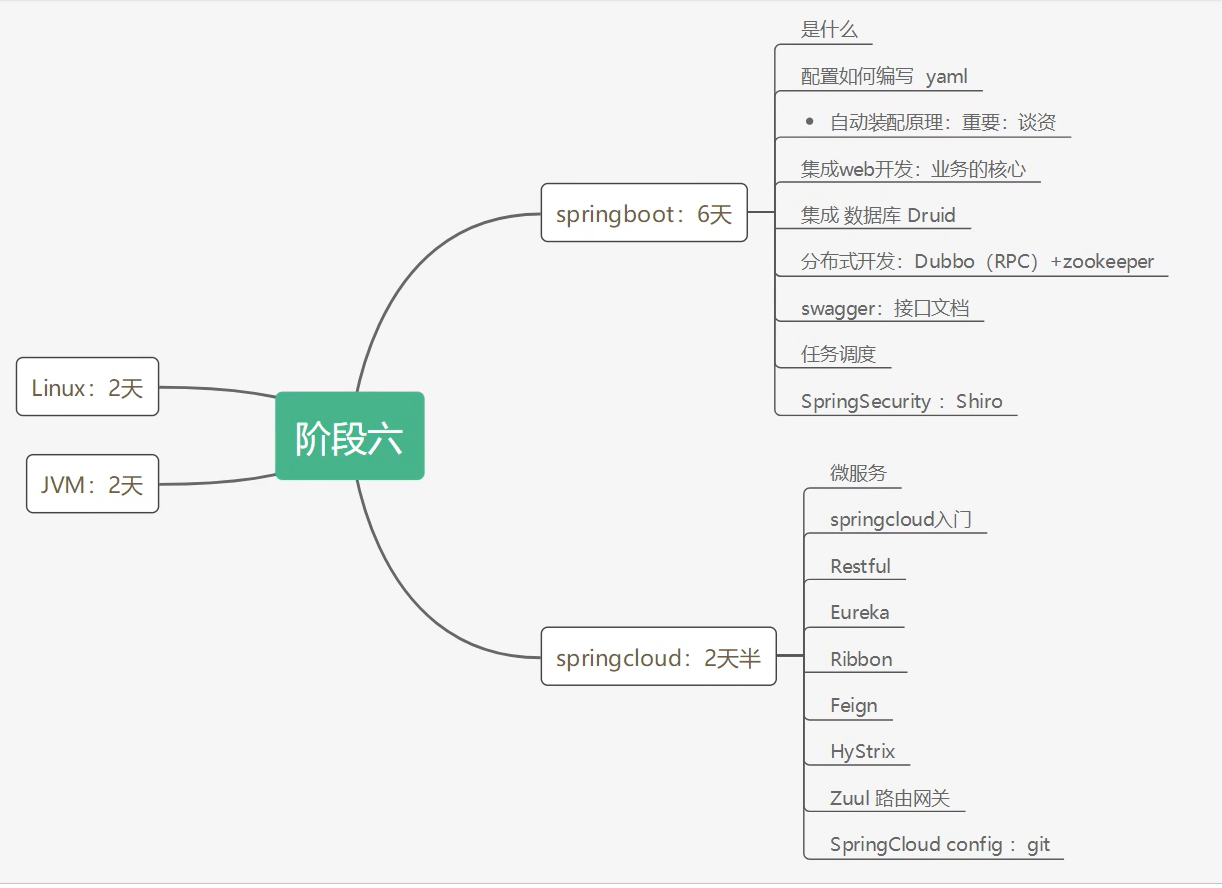
springboot笔记
微服务阶段
javase: OOP
mysql:持久化
html+css+js+jquery+框架:视图,框架不熟练,css不好;
Javaweb:独立开发MVC三层架构的网站了:原始
ssm:框架:简化了我们的开发流程,配置也开始较为复杂;
war:tomcat运行
spring再简化:SpringBoot - jar: 内嵌tomcat; 微服务架构!
服务越来越多:springcloud;
学习路线
微服务论文:https://www.jianshu.com/p/8c3d8b067f26
1 第一个SpringBoot程序
到底多么简单:
- jdk1.8
- maven
- springboot
- IDEA
官方:提供了一个快速生成的网站!IDEA集成了这个网站!
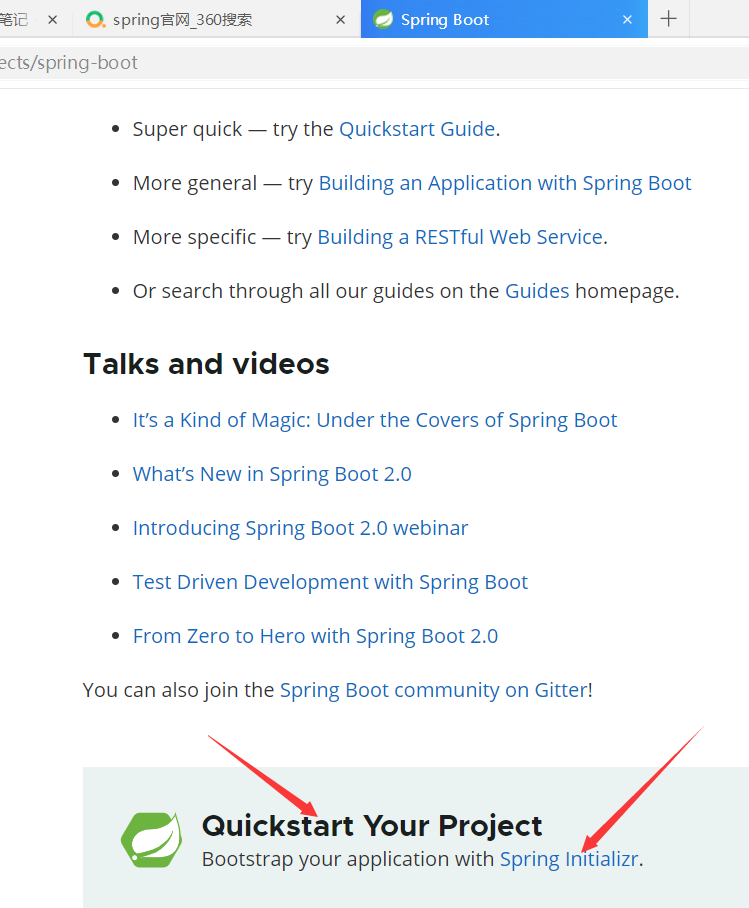
1.1 官网构建
- 可以在官网直接下载后,导入idea开发(官网在哪)
进入spring官网
https://spring.io/projects/spring-boot
快速构建
项目配置
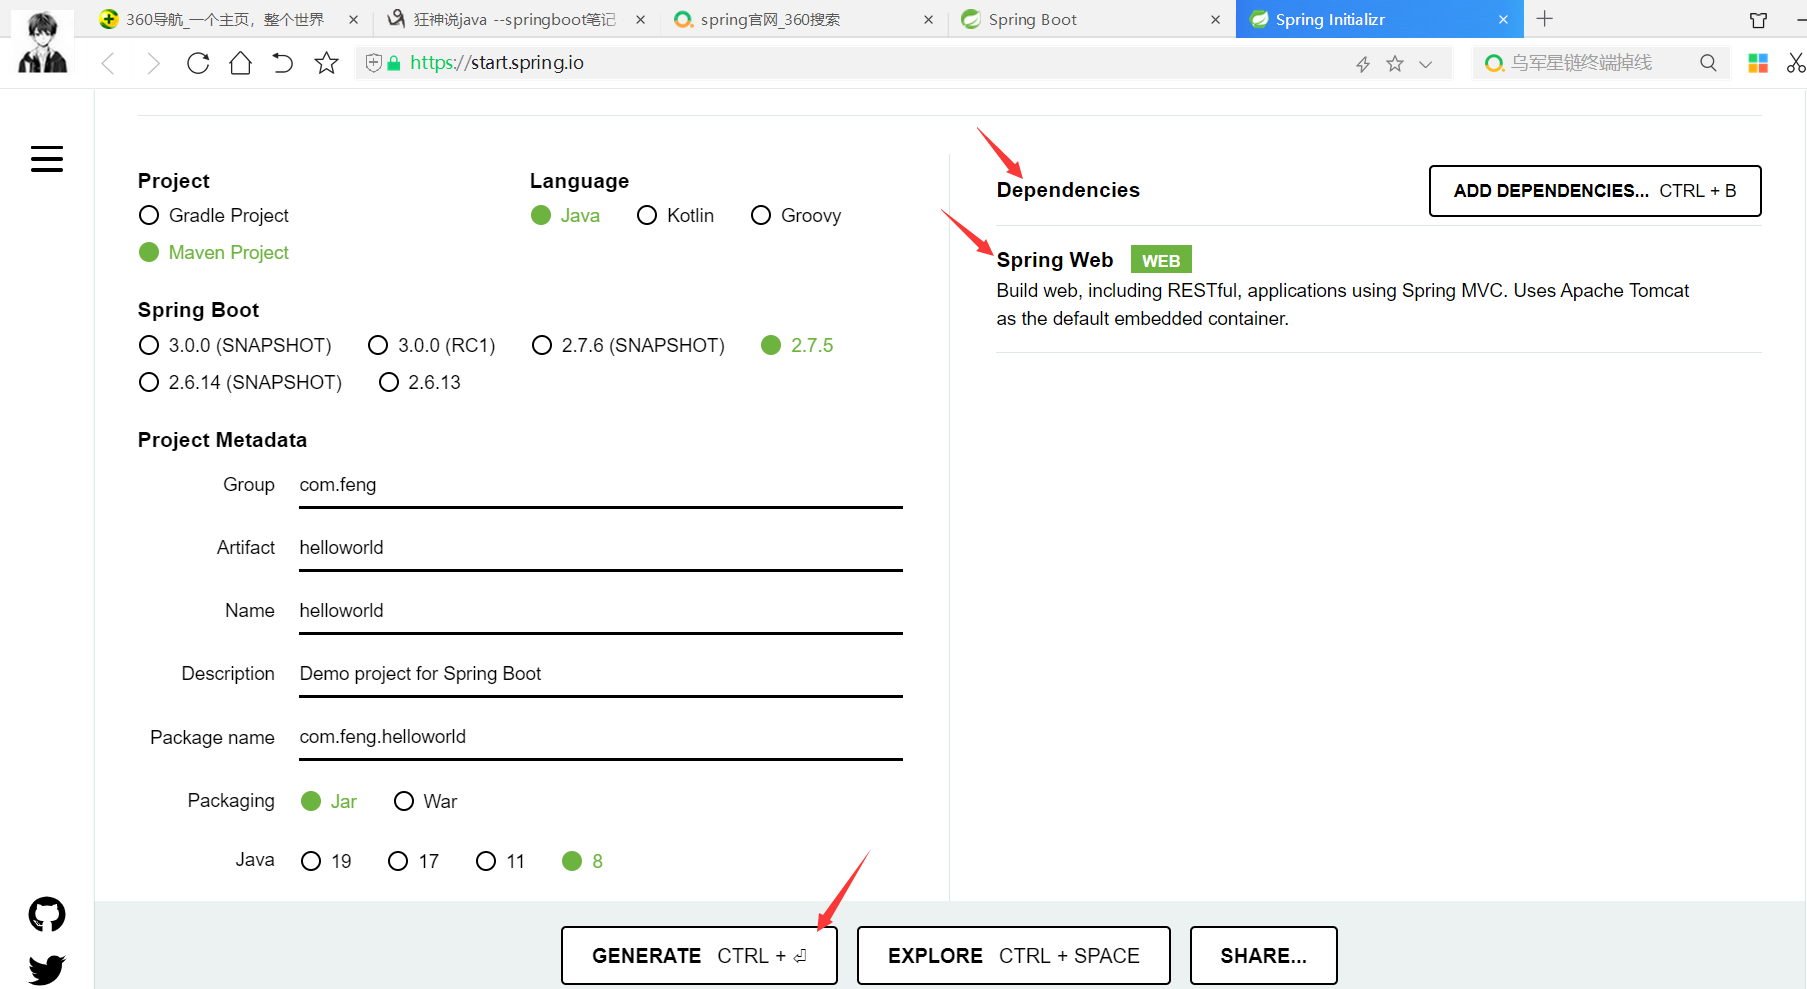
下载项目
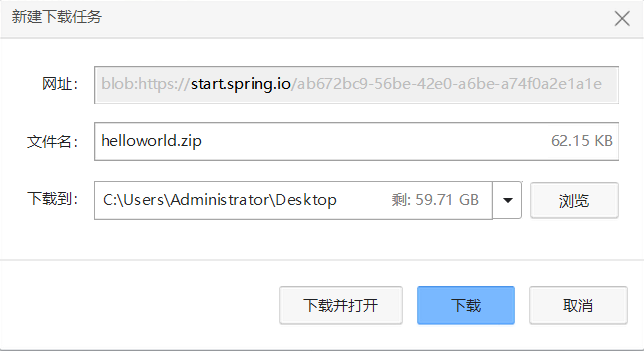
用idea打开项目
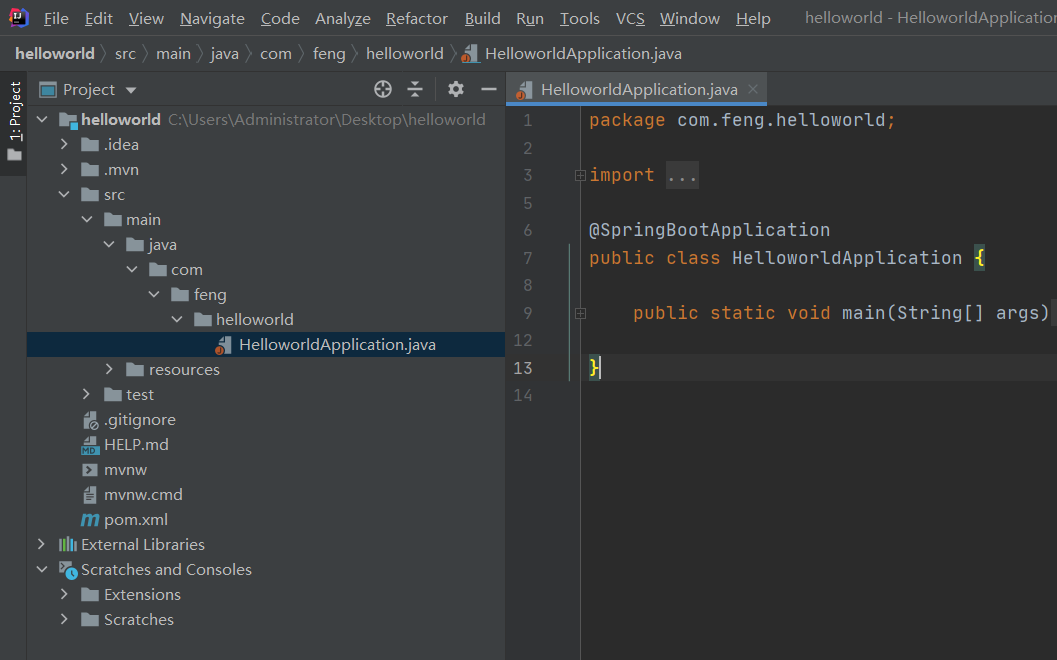
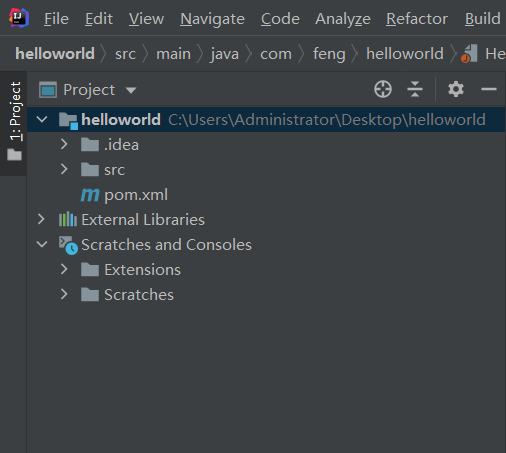
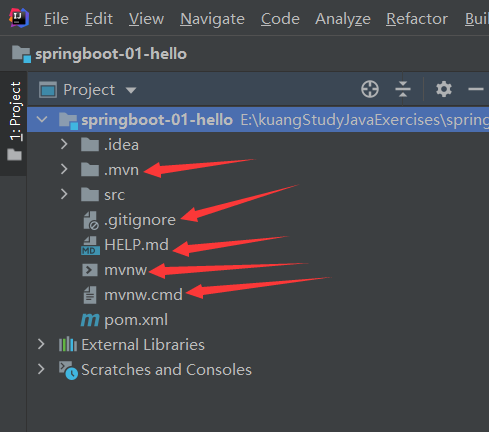
删除多于的文件后,就是我们熟悉的项目结构
这个地方依赖一直报错。。。
解决方案:
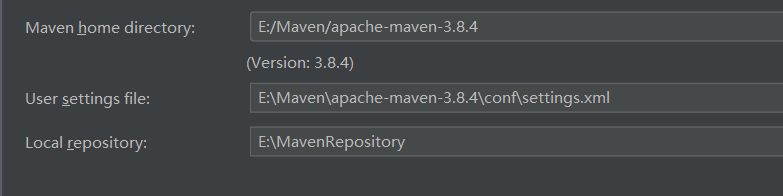
修改maven的地址
maven地址修改后,自动重置解决:https://blog.csdn.net/sinat_25207295/article/details/117634511
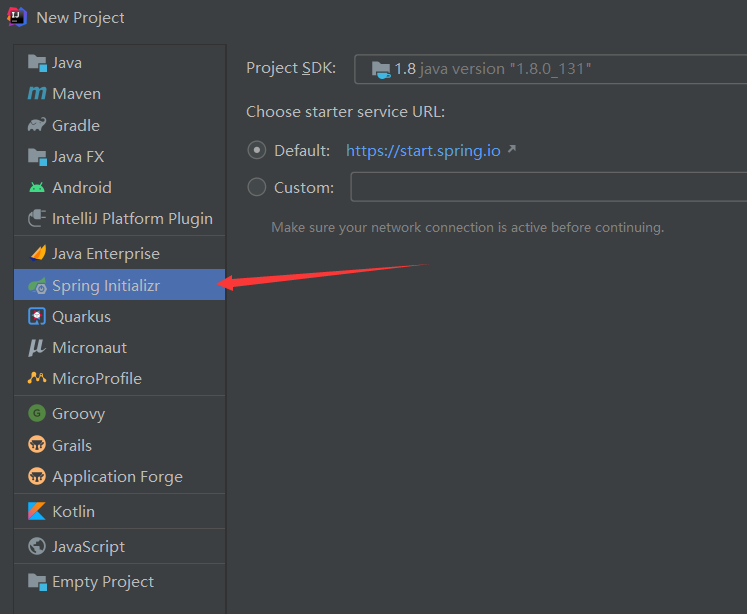
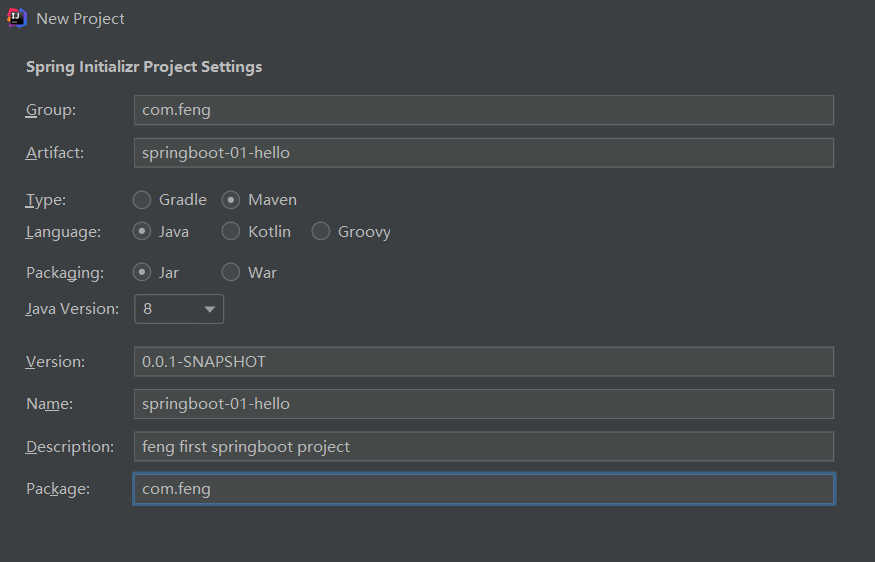
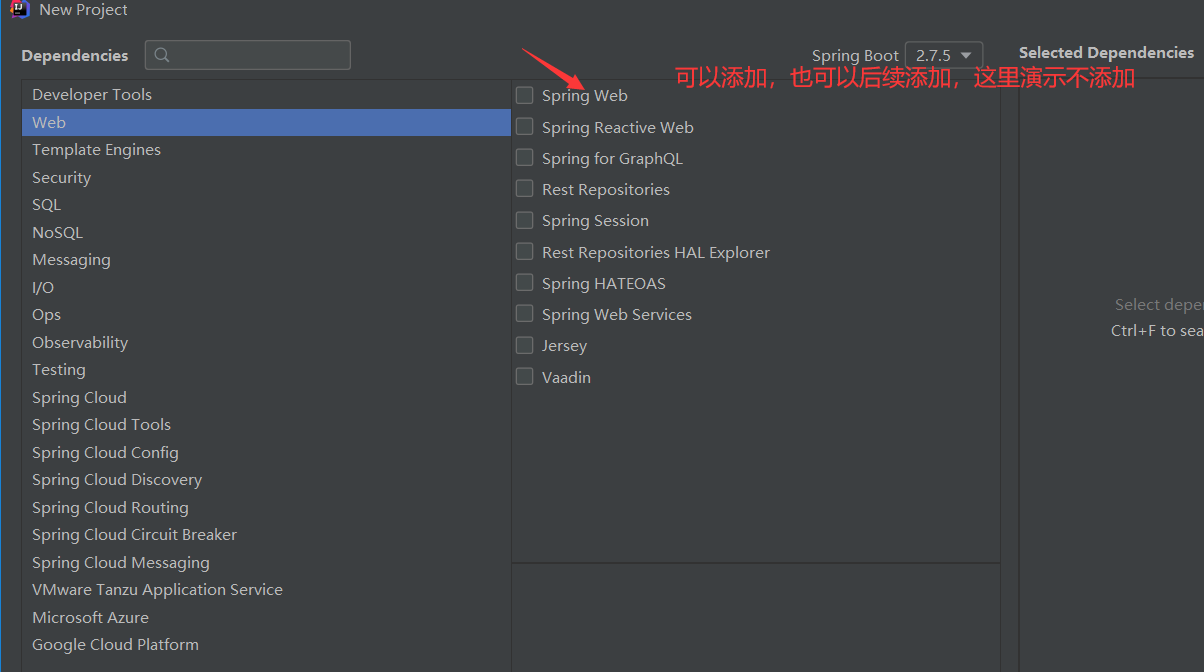
1.2 IDEA创建(推荐)
- 直接使用idea创建一个springboot项目(一般开发直接在IDEA中创建)


如果依赖报错
解决方案:
修改maven的地址
maven地址修改后,自动重置解决:https://blog.csdn.net/sinat_25207295/article/details/117634511
重新加载依赖
运行程序,可能会报testxxx的错误,(版本冲突原因!!!)修改pom中parent中的版本,重新加载执行程序。
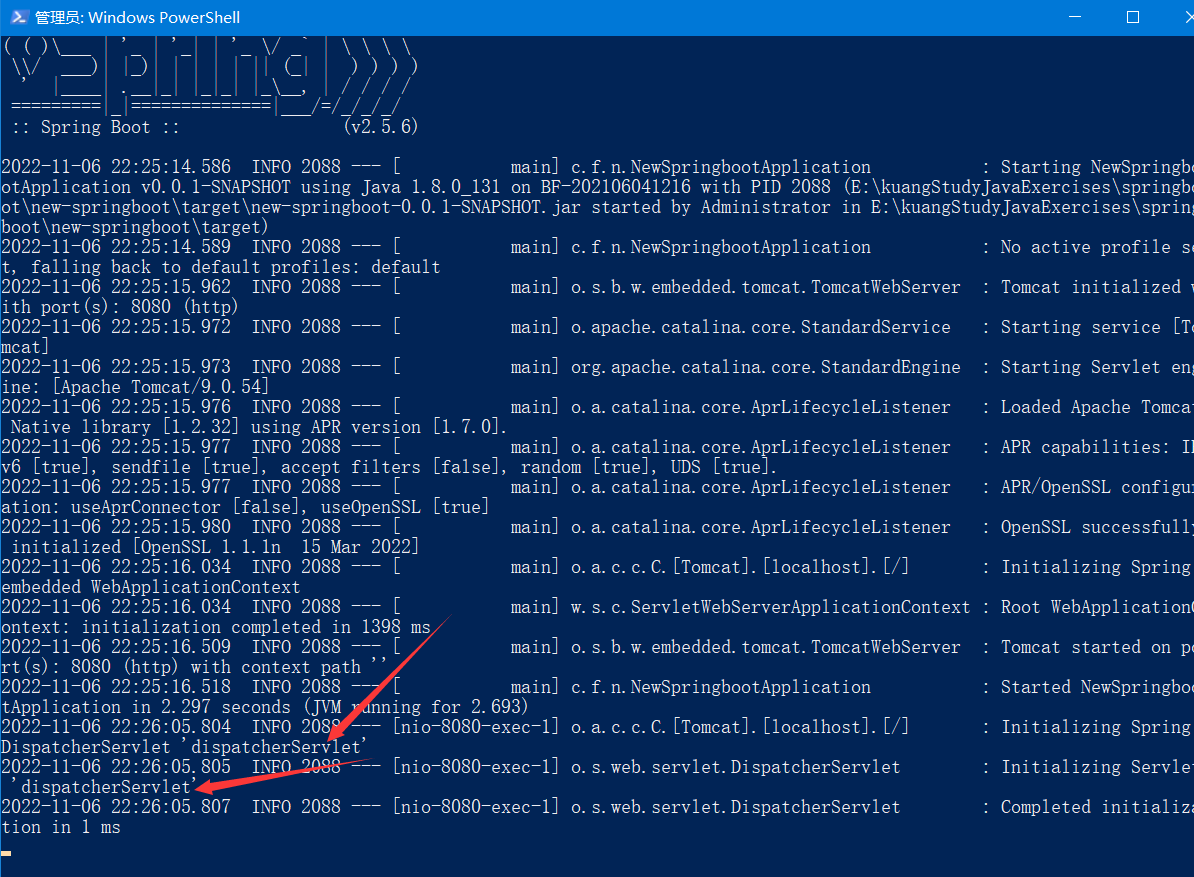
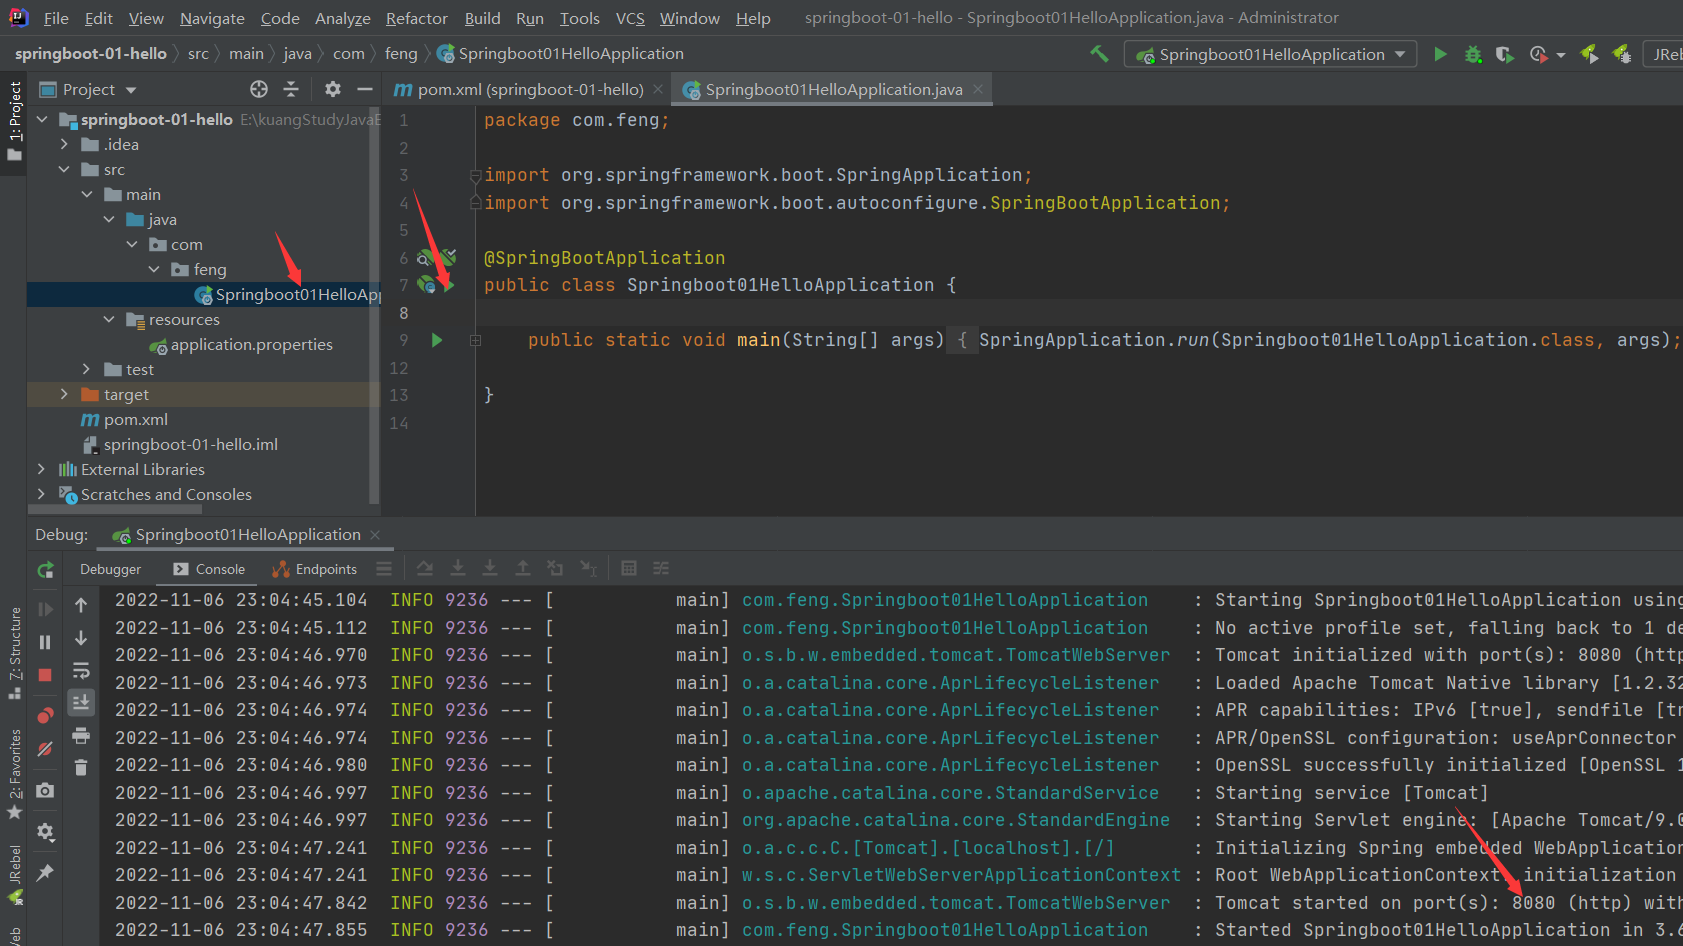
点击运行
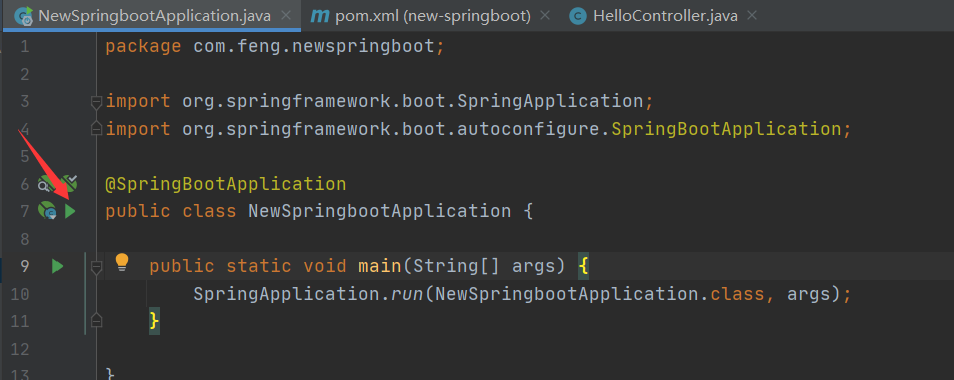
运行出现这个界面,则代表配置成功
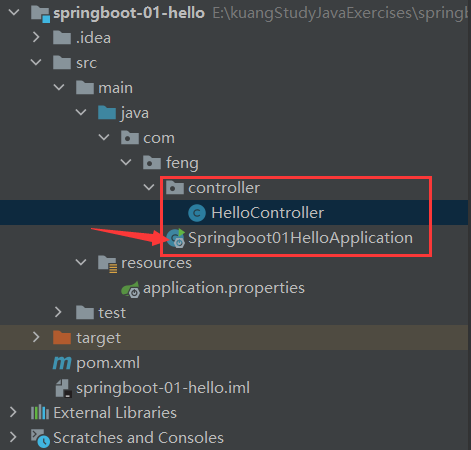
建包(必须在这个application的同级目录下建包!!!)
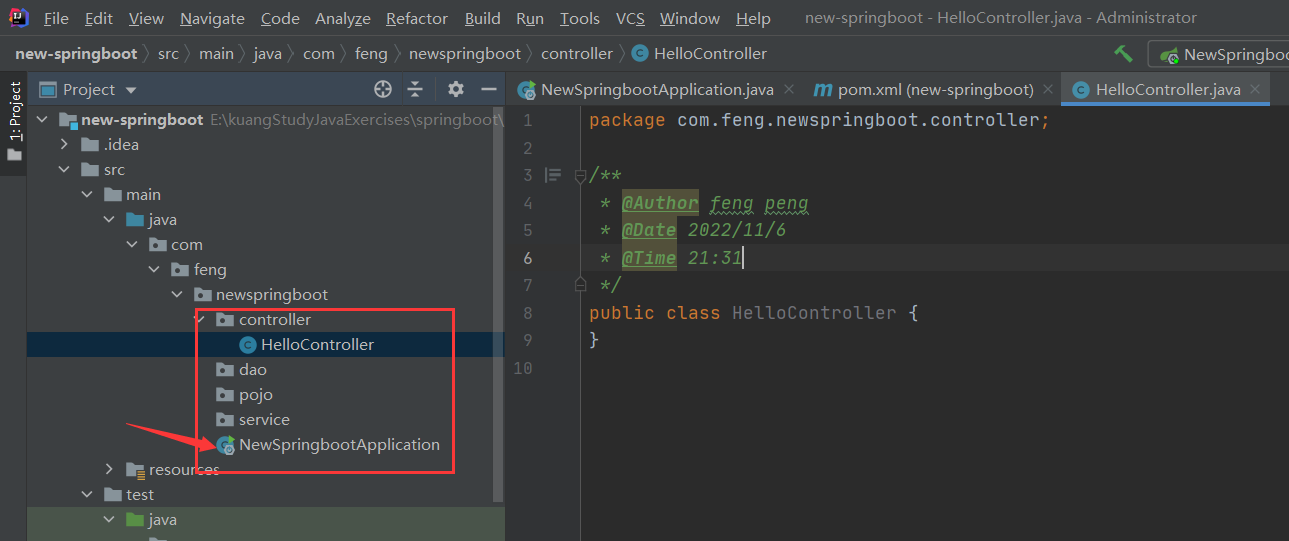
HelloController类
package com.feng.newspringboot.controller;
import org.springframework.web.bind.annotation.RequestMapping;
import org.springframework.web.bind.annotation.RestController;
/**
* @Author feng peng
* @Date 2022/11/6
* @Time 21:31
*/
//本身就是Spring的一个组件
//自动装配:原理!
@RestController
public class HelloController {
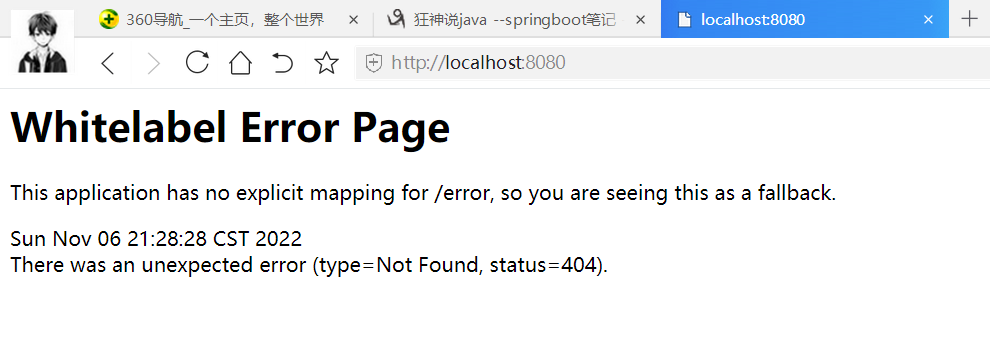
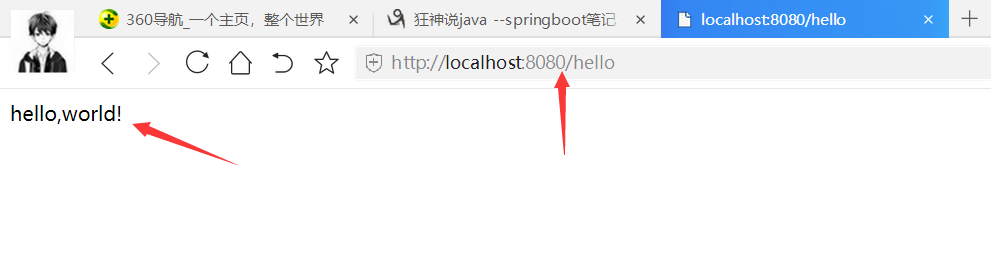
//接口:http://localhost:8080/hello
@RequestMapping("/hello")
public String hello(){
//调用业务,接收前端的参数!
return "hello,world!";
}
}
运行结果
项目打包
pom.xml
<build>
    <!--打jar包插件-->
    <plugins>
        <plugin>
            <groupId>org.springframework.boot</groupId>
            <artifactId>spring-boot-maven-plugin</artifactId>
        </plugin>
    </plugins>
</build>
双击package
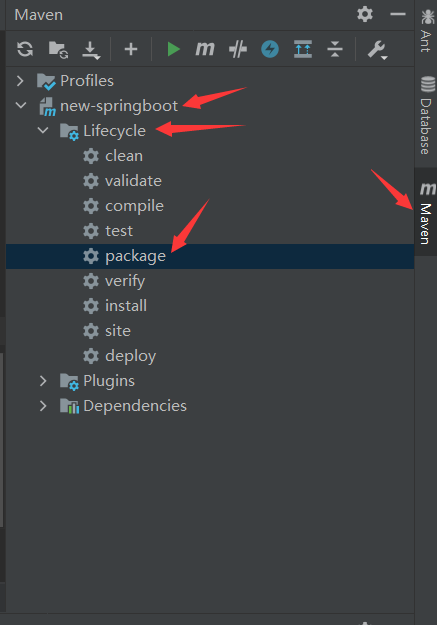
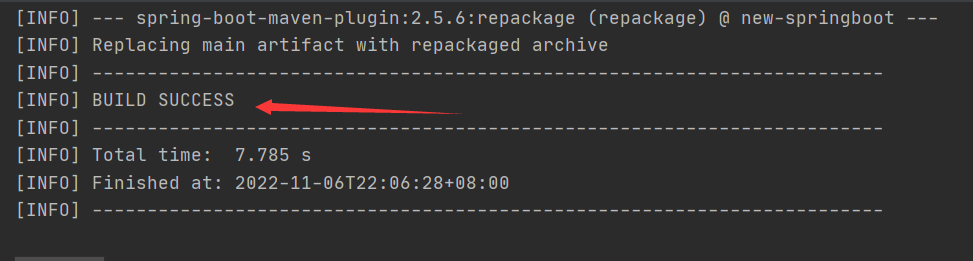
运行成功
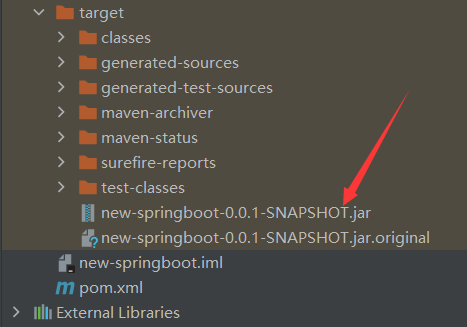
打包后的jar包
运行jar包

shift+ 鼠标右键 ,选择打开powerShell窗口(Tab键自动补全), 执行jar包。
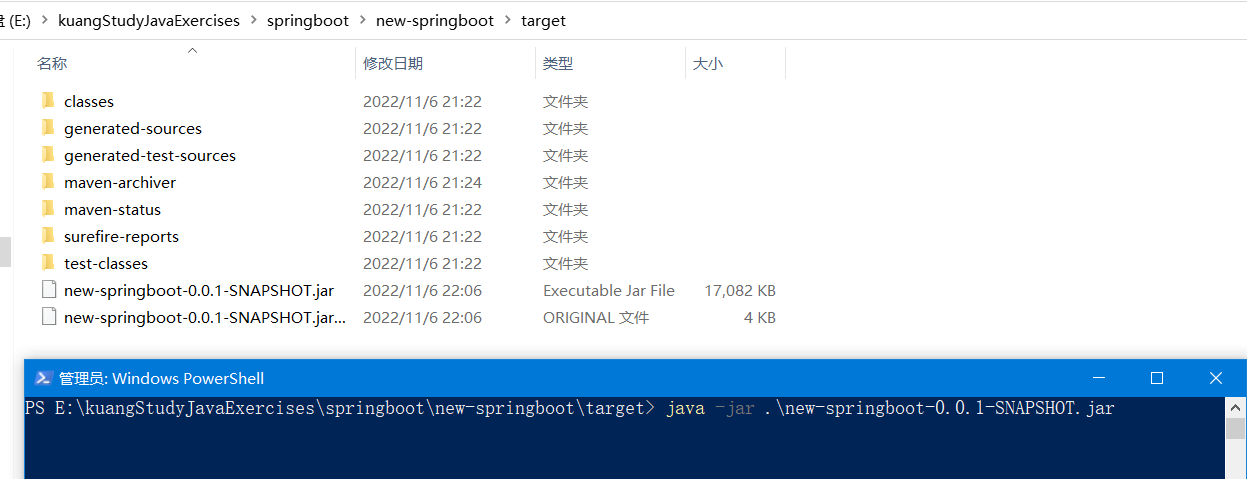
刷新hello页面,依旧可以执行(记得关闭IDEA中的程序,不然会报端口占用)

1.3 新建springboot项目流程

删除多余的文件后,记得修改setting中maven位置的相关配置
pom中添加web依赖
<dependency>
    <groupId>org.springframework.boot</groupId>
    <artifactId>spring-boot-starter-web</artifactId>
</dependency>
maven reload ,如果报错,降低pom.xml中的parent的版本,重新reload。
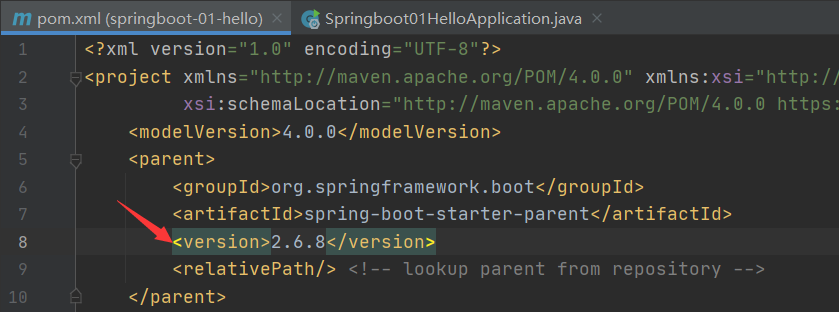
如果version中报红。
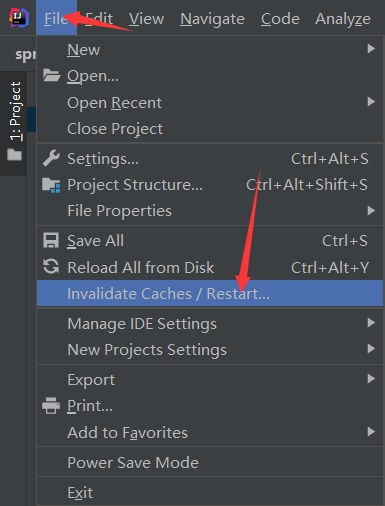
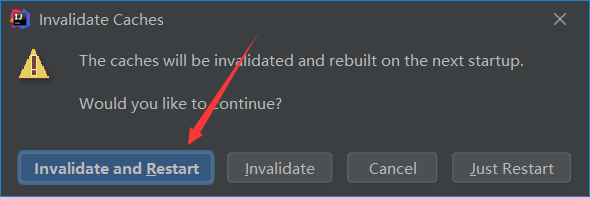
解决方案 (这相当于把IDEA清除缓存重启了):
项目测试
这里项目就配置成功了!!!
建包(必须在同级目录下)
HelloController类
package com.feng.controller;

import org.springframework.stereotype.Controller;
import org.springframework.web.bind.annotation.GetMapping;
import org.springframework.web.bind.annotation.RequestMapping;
import org.springframework.web.bind.annotation.ResponseBody;

/**
 * @Author feng peng
 * @Date 2022/11/6
 * @Time 23:07
 */
@Controller
@RequestMapping("/hello")
public class HelloController {

    @GetMapping("/hello")
    @ResponseBody
    public String hello(){
        return "hello";
    }
}
运行程序

运行成功!!!
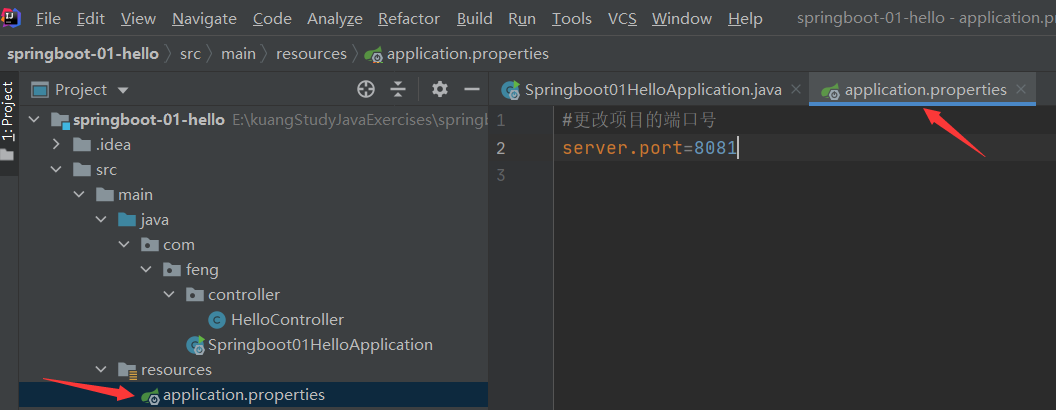
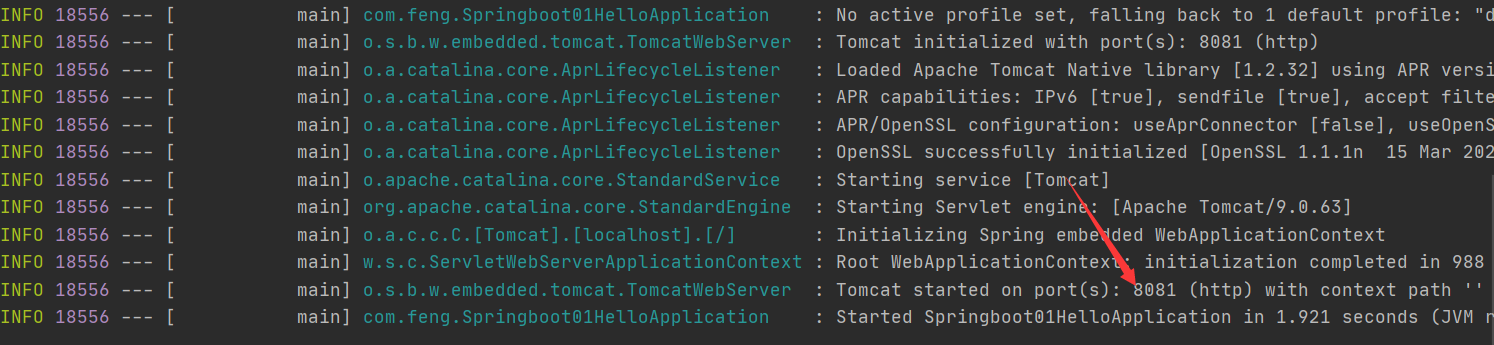
修改项目的端口号
2 原理初探
自动配置
pom.xml
- spring-boot-dependencies:核心依赖在父工程中!
- 我们在写或者引入一些Springboot依赖的时候,不需要指定版本,就因为有这些版本仓库
启动器
<dependency>
    <groupId>org.springframework.boot</groupId>
    <artifactId>spring-boot-starter</artifactId>
</dependency>
- 启动器:说白了就是Springboot的启动场景;
- 比如spring-boot-starter-web,他就会帮我们自动导入web环境所有的依赖!
- springboot会将所有的功能场景,都变成一个个的启动器
- 我们要使用什么功能,就只需要找到对应的启动器就可以了
starter
主程序
//@SpringBootApplication : 标注这个类是一个springboot的应用:启动类下的所有资源被导入
@SpringBootApplication
public class Springboot01HelloApplication {

    public static void main(String[] args) {
        //将springboot应用启动
        SpringApplication.run(Springboot01HelloApplication.class, args);
    }

}
-
注解
-
@SpringBootConfiguration:springboot的配置
	@Configuration:spring配置类
	@Component:说明这也是一个spring的组件

@EnableAutoConfiguration:自动配置
    @AutoConfigurationPackage:自动配置包
    	@Import({Registrar.class}):自动配置`包注册`
    @Import({AutoConfigurationImportSelector.class}):自动配置导入选择

//获取所有的配置
List<String> configurations = this.getCandidateConfigurations(annotationMetadata, attributes);
获取候选的配置
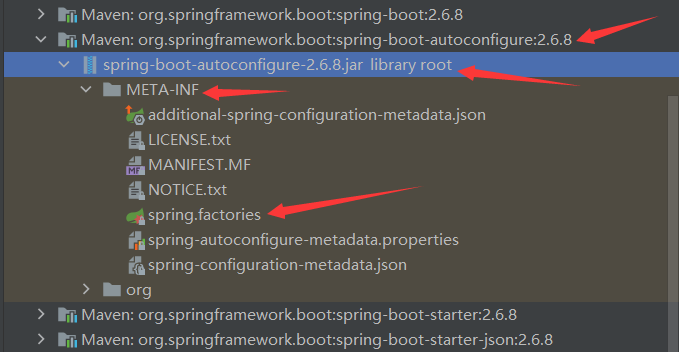
protected List<String> getCandidateConfigurations(AnnotationMetadata metadata, AnnotationAttributes attributes) {
    List<String> configurations = SpringFactoriesLoader.loadFactoryNames(this.getSpringFactoriesLoaderFactoryClass(), this.getBeanClassLoader());
    Assert.notEmpty(configurations, "No auto configuration classes found in META-INF/spring.factories. If you are using a custom packaging, make sure that file is correct.");
    return configurations;
}
META-INF/spring.factories:自动配置的核心文件
Properties properties = PropertiesLoaderUtils.loadProperties(resource);
所有资源加载到配置类中!
-
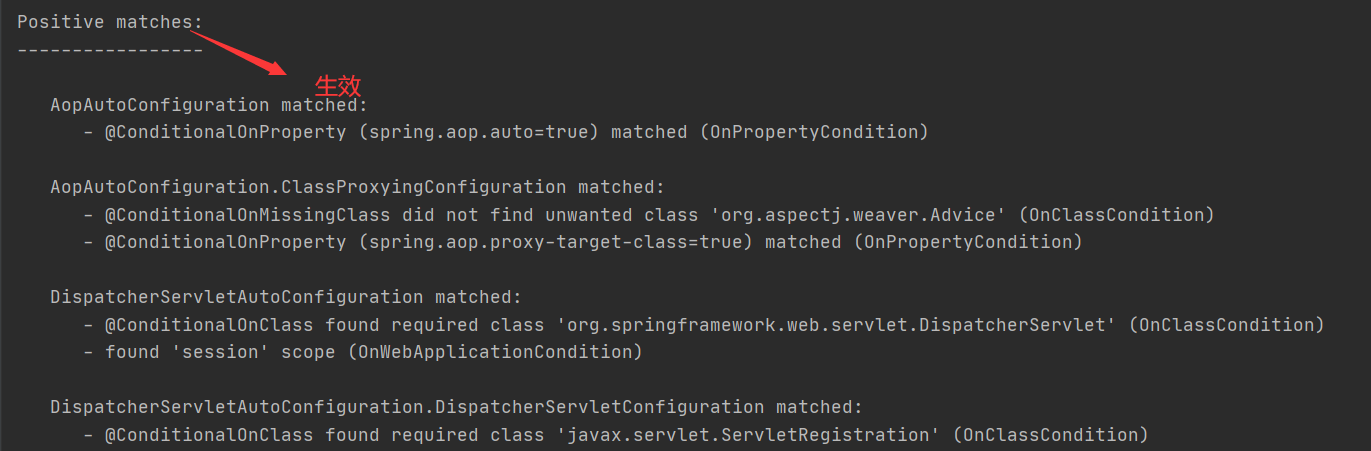
结论:springboot所有自动配置都是在启动的时候扫描并加载:spring.factories所有的自动配置类都在这里面,但是不一定生效,要判断条件是否成立,只要导入了对应的start,就有对应的启动器了,有了启动器,我们自动装配就会生效,然后就配置成功!
1.springboot在启动的时候,从类路径下/META-INF/spring.factories获取指定的值;
2.将这些自动配置的类导入容器,自动配置就会生效,帮我们进行自动配置!
3.以前我们需要自动配置的东西,现在springboot帮我们做了!
4.整合javaEE,解决方案和自动配置的东西都在spring-boot-autoconfigure-2.6.8.jar这个包下
5.它会把所有需要导入的组件,以类名的方式返回,这些组件就会被添加到容器;
6.容器中也会存在非常多的xxxAutoConfiguration的文件(@Bean),就是这些类给容器中导入了这个场景需要的所有组件;并自动配置,@Configuration,JavaConfig!
7.有了自动配置类,免去了我们手动编写配置文件的工作!
分析源码流程
1.pom.xml
父依赖
其中它主要是依赖一个父项目,主要是管理项目的资源过滤及插件!
<parent>
    <groupId>org.springframework.boot</groupId>
    <artifactId>spring-boot-starter-parent</artifactId>
    <version>2.2.5.RELEASE</version>
    <relativePath/> <!-- lookup parent from repository -->
</parent>
点进去,发现还有一个父依赖
<parent>
   <groupId>org.springframework.boot</groupId>
   <artifactId>spring-boot-dependencies</artifactId>
   <version>2.2.5.RELEASE</version>
   <relativePath>../../spring-boot-dependencies</relativePath>
</parent>
这里才是真正管理SpringBoot应用里面所有依赖版本的地方,SpringBoot的版本控制中心;
以后我们导入依赖默认是不需要写版本;但是如果导入的包没有在依赖中管理着就需要手动配置版本了;
启动器 spring-boot-starter
<dependency>
    <groupId>org.springframework.boot</groupId>
    <artifactId>spring-boot-starter-web</artifactId>
</dependency>
springboot-boot-starter-xxx:就是spring-boot的场景启动器
spring-boot-starter-web:帮我们导入了web模块正常运行所依赖的组件;
SpringBoot将所有的功能场景都抽取出来,做成一个个的starter (启动器),只需要在项目中引入这些starter即可,所有相关的依赖都会导入进来 , 我们要用什么功能就导入什么样的场景启动器即可 ;我们未来也可以自己自定义 starter;
2.主启动类
分析完了 pom.xml 来看看这个启动类
默认的主启动类
//@SpringBootApplication 来标注一个主程序类
//说明这是一个Spring Boot应用
@SpringBootApplication
public class SpringbootApplication {

   public static void main(String[] args) {
     //以为是启动了一个方法,没想到启动了一个服务
      SpringApplication.run(SpringbootApplication.class, args);
   }

}
但是一个简单的启动类并不简单!我们来分析一下这些注解都干了什么
@SpringBootApplication
作用:标注在某个类上说明这个类是SpringBoot的主配置类 , SpringBoot就应该运行这个类的main方法来启动SpringBoot应用;
进入这个注解:可以看到上面还有很多其他注解!
@SpringBootConfiguration
@EnableAutoConfiguration
@ComponentScan(
    excludeFilters = {@Filter(
    type = FilterType.CUSTOM,
    classes = {TypeExcludeFilter.class}
), @Filter(
    type = FilterType.CUSTOM,
    classes = {AutoConfigurationExcludeFilter.class}
)}
)
public @interface SpringBootApplication {
    // ......
}
@ComponentScan
这个注解在Spring中很重要 ,它对应XML配置中的元素。
作用:自动扫描并加载符合条件的组件或者bean , 将这个bean定义加载到IOC容器中
@SpringBootConfiguration
作用:SpringBoot的配置类 ,标注在某个类上 , 表示这是一个SpringBoot的配置类;
我们继续进去这个注解查看
// 点进去得到下面的 @Component
@Configuration
public @interface SpringBootConfiguration {}

@Component
public @interface Configuration {}
这里的 @Configuration,说明这是一个配置类 ,配置类就是对应Spring的xml 配置文件;
里面的 @Component 这就说明,启动类本身也是Spring中的一个组件而已,负责启动应用!
我们回到 SpringBootApplication 注解中继续看。
@EnableAutoConfiguration
@EnableAutoConfiguration :开启自动配置功能
以前我们需要自己配置的东西,而现在SpringBoot可以自动帮我们配置 ;@EnableAutoConfiguration告诉SpringBoot开启自动配置功能,这样自动配置才能生效;
点进注解接续查看:
@AutoConfigurationPackage :自动配置包
@Import({Registrar.class})
public @interface AutoConfigurationPackage {
}
@import :Spring底层注解@import , 给容器中导入一个组件
Registrar.class 作用:将主启动类的所在包及包下面所有子包里面的所有组件扫描到Spring容器 ;
这个分析完了,退到上一步,继续看
@Import({AutoConfigurationImportSelector.class}) :给容器导入组件 ;
AutoConfigurationImportSelector :自动配置导入选择器,那么它会导入哪些组件的选择器呢?我们点击去这个类看源码:
1、这个类中有一个这样的方法
// 获得候选的配置
protected List<String> getCandidateConfigurations(AnnotationMetadata metadata, AnnotationAttributes attributes) {
    //这里的getSpringFactoriesLoaderFactoryClass()方法
    //返回的就是我们最开始看的启动自动导入配置文件的注解类;EnableAutoConfiguration
    List<String> configurations = SpringFactoriesLoader.loadFactoryNames(this.getSpringFactoriesLoaderFactoryClass(), this.getBeanClassLoader());
    Assert.notEmpty(configurations, "No auto configuration classes found in META-INF/spring.factories. If you are using a custom packaging, make sure that file is correct.");
    return configurations;
}
2、这个方法又调用了 SpringFactoriesLoader 类的静态方法!我们进入SpringFactoriesLoader类loadFactoryNames() 方法
public static List<String> loadFactoryNames(Class<?> factoryClass, @Nullable ClassLoader classLoader) {
    String factoryClassName = factoryClass.getName();
    //这里它又调用了 loadSpringFactories 方法
    return (List)loadSpringFactories(classLoader).getOrDefault(factoryClassName, Collections.emptyList());
}
3、我们继续点击查看 loadSpringFactories 方法
private static Map<String, List<String>> loadSpringFactories(@Nullable ClassLoader classLoader) {
    //获得classLoader , 我们返回可以看到这里得到的就是EnableAutoConfiguration标注的类本身
    MultiValueMap<String, String> result = (MultiValueMap)cache.get(classLoader);
    if (result != null) {
        return result;
    } else {
        try {
            //去获取一个资源 "META-INF/spring.factories"
            Enumeration<URL> urls = classLoader != null ? classLoader.getResources("META-INF/spring.factories") : ClassLoader.getSystemResources("META-INF/spring.factories");
            LinkedMultiValueMap result = new LinkedMultiValueMap();

            //将读取到的资源遍历,封装成为一个Properties
            while(urls.hasMoreElements()) {
                URL url = (URL)urls.nextElement();
                UrlResource resource = new UrlResource(url);
                Properties properties = PropertiesLoaderUtils.loadProperties(resource);
                Iterator var6 = properties.entrySet().iterator();

                while(var6.hasNext()) {
                    Entry<?, ?> entry = (Entry)var6.next();
                    String factoryClassName = ((String)entry.getKey()).trim();
                    String[] var9 = StringUtils.commaDelimitedListToStringArray((String)entry.getValue());
                    int var10 = var9.length;

                    for(int var11 = 0; var11 < var10; ++var11) {
                        String factoryName = var9[var11];
                        result.add(factoryClassName, factoryName.trim());
                    }
                }
            }

            cache.put(classLoader, result);
            return result;
        } catch (IOException var13) {
            throw new IllegalArgumentException("Unable to load factories from location [META-INF/spring.factories]", var13);
        }
    }
}
4、发现一个多次出现的文件:spring.factories,全局搜索它
spring.factories
我们根据源头打开spring.factories , 看到了很多自动配置的文件;这就是自动配置根源所在!
WebMvcAutoConfiguration
我们在上面的自动配置类随便找一个打开看看,比如 :WebMvcAutoConfiguration
可以看到这些一个个的都是JavaConfig配置类,而且都注入了一些Bean,可以找一些自己认识的类,看着熟悉一下!
所以,自动配置真正实现是从classpath中搜寻所有的META-INF/spring.factories配置文件 ,并将其中对应的 org.springframework.boot.autoconfigure. 包下的配置项,通过反射实例化为对应标注了 @Configuration的JavaConfig形式的IOC容器配置类 , 然后将这些都汇总成为一个实例并加载到IOC容器中。
结论:
- SpringBoot在启动的时候从类路径下的META-INF/spring.factories中获取EnableAutoConfiguration指定的值
- 将这些值作为自动配置类导入容器 , 自动配置类就生效 , 帮我们进行自动配置工作;
- 整个J2EE的整体解决方案和自动配置都在springboot-autoconfigure的jar包中;
- 它会给容器中导入非常多的自动配置类 (xxxAutoConfiguration), 就是给容器中导入这个场景需要的所有组件 , 并配置好这些组件 ;
- 有了自动配置类 , 免去了我们手动编写配置注入功能组件等的工作;
SpringApplication
不简单的方法
我最初以为就是运行了一个main方法,没想到却开启了一个服务;
@SpringBootApplication
public class SpringbootApplication {
    public static void main(String[] args) {
        SpringApplication.run(SpringbootApplication.class, args);
    }
}
SpringApplication.run分析
分析该方法主要分两部分,一部分是SpringApplication的实例化,二是run方法的执行;
SpringApplication
这个类主要做了以下四件事情:
1、推断应用的类型是普通的项目还是Web项目
2、查找并加载所有可用初始化器 , 设置到initializers属性中
3、找出所有的应用程序监听器,设置到listeners属性中
4、推断并设置main方法的定义类,找到运行的主类
查看构造器:
public SpringApplication(ResourceLoader resourceLoader, Class... primarySources) {
    // ......
    this.webApplicationType = WebApplicationType.deduceFromClasspath();
    this.setInitializers(this.getSpringFactoriesInstances();
    this.setListeners(this.getSpringFactoriesInstances(ApplicationListener.class));
    this.mainApplicationClass = this.deduceMainApplicationClass();
}
run方法流程分析
3 yaml语法
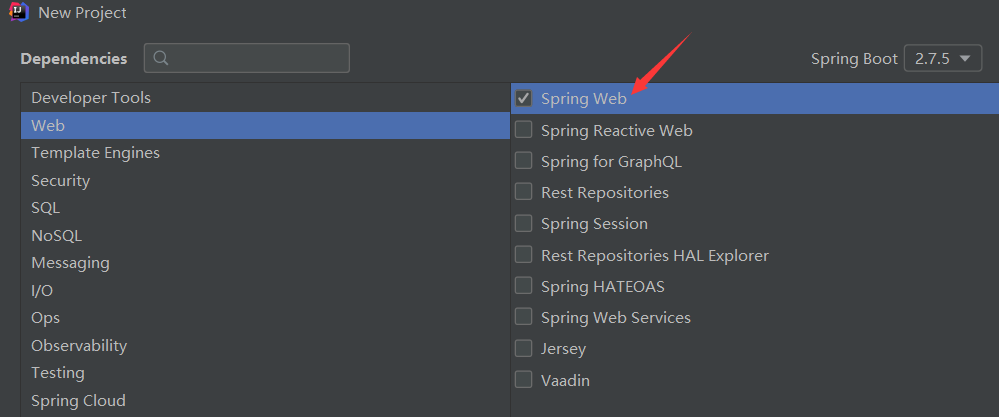
新建springboot项目,并添加web框架
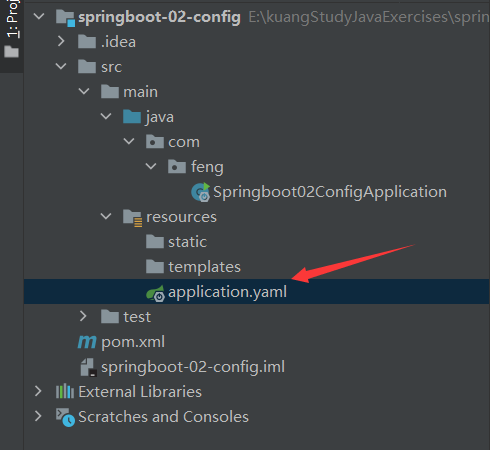
删除application.properties
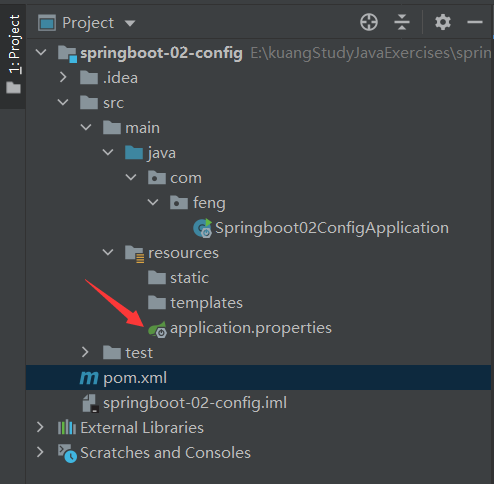
新建application.yaml
配置文件
SpringBoot使用一个全局的配置文件 , 配置文件名称是固定的
-
application.properties
-
- 语法结构 :key=value
-
application.yml
-
- 语法结构 :key:空格 value
配置文件的作用 :修改SpringBoot自动配置的默认值,因为SpringBoot在底层都给我们自动配置好了;
3.1 yaml概述
YAML是 "YAML Ain't a Markup Language" (YAML不是一种标记语言)的递归缩写。在开发的这种语言时,YAML 的意思其实是:"Yet Another Markup Language"(仍是一种标记语言)
这种语言以数据作为中心,而不是以标记语言为重点!
以前的配置文件,大多数都是使用xml来配置;比如一个简单的端口配置,我们来对比下yaml和xml
传统xml配置:
<server>
    <port>8081<port>
</server>
yaml配置:
server:
  prot: 8080
3.2 yaml基础语法
application.yaml
# k-v
# 对空格的要求十分高!
# 普通的key-value

# 注入到我们的配置类中!

name: fengpeng

# 对象
student:
  name: fengpeng
  age: 3

# 行内写法
person: {name: fengpeng,age: 3}

# 数组
pets:
  - cat
  - dog
  - pig

pets1: [cat,dog,pig]
yaml可以直接给实体类赋值
项目结构
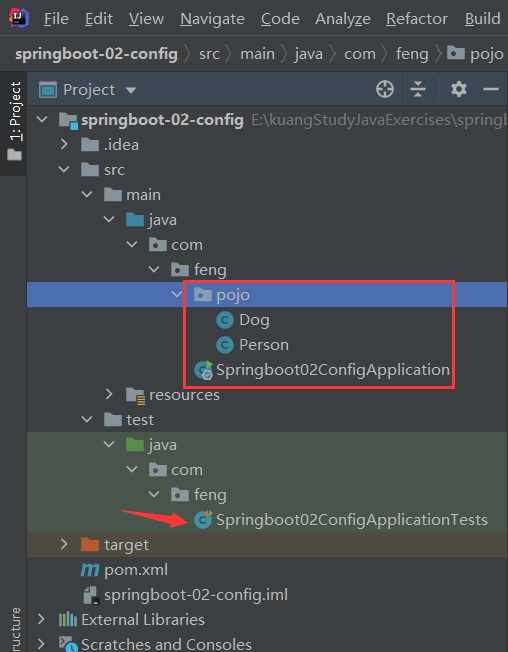
Dog 类
package com.feng.pojo;

import org.springframework.beans.factory.annotation.Value;
import org.springframework.stereotype.Component;

/**
 * @Author feng peng
 * @Date 2022/11/8
 * @Time 21:36
 */

@Component
public class Dog {
    @Value("旺财")
    private String name;
    @Value("3")
    private Integer age;

    public Dog() {
    }

    public Dog(String name, Integer age) {
        this.name = name;
        this.age = age;
    }

    public String getName() {
        return name;
    }

    public void setName(String name) {
        this.name = name;
    }

    public Integer getAge() {
        return age;
    }

    public void setAge(Integer age) {
        this.age = age;
    }

    @Override
    public String toString() {
        return "Dog{" +
                "name='" + name + '\'' +
                ", age=" + age +
                '}';
    }
}
Person类
package com.feng.pojo;

import org.springframework.stereotype.Component;

import java.util.Date;
import java.util.List;
import java.util.Map;

/**
 * @Author feng peng
 * @Date 2022/11/8
 * @Time 21:39
 */
@Component
public class Person {
    private String name;
    private Integer age;
    private Boolean happy;
    private Date birth;
    private Map<String ,Object> maps;
    private List<Object> lists;
    private Dog dog;

    public Person() {
    }

    public Person(String name, Integer age, Boolean happy, Date birth, Map<String, Object> maps, List<Object> lists, Dog dog) {
        this.name = name;
        this.age = age;
        this.happy = happy;
        this.birth = birth;
        this.maps = maps;
        this.lists = lists;
        this.dog = dog;
    }

    public String getName() {
        return name;
    }

    public void setName(String name) {
        this.name = name;
    }

    public Integer getAge() {
        return age;
    }

    public void setAge(Integer age) {
        this.age = age;
    }

    public Boolean getHappy() {
        return happy;
    }

    public void setHappy(Boolean happy) {
        this.happy = happy;
    }

    public Date getBirth() {
        return birth;
    }

    public void setBirth(Date birth) {
        this.birth = birth;
    }

    public Map<String, Object> getMaps() {
        return maps;
    }

    public void setMaps(Map<String, Object> maps) {
        this.maps = maps;
    }

    public List<Object> getLists() {
        return lists;
    }

    public void setLists(List<Object> lists) {
        this.lists = lists;
    }

    public Dog getDog() {
        return dog;
    }

    public void setDog(Dog dog) {
        this.dog = dog;
    }

    @Override
    public String toString() {
        return "Person{" +
                "name='" + name + '\'' +
                ", age=" + age +
                ", happy=" + happy +
                ", birth=" + birth +
                ", maps=" + maps +
                ", lists=" + lists +
                ", dog=" + dog +
                '}';
    }
}
测试类
Springboot02ConfigApplicationTests
package com.feng;

import com.feng.pojo.Dog;
import org.junit.jupiter.api.Test;
import org.springframework.beans.factory.annotation.Autowired;
import org.springframework.boot.test.context.SpringBootTest;

@SpringBootTest
class Springboot02ConfigApplicationTests {

    @Autowired
    private Dog dog;
    @Test
    void contextLoads() {
        System.out.println(dog);
    }

}
测试结果
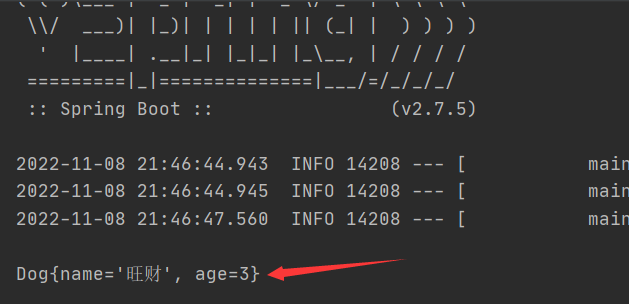
修改Dog类
@Component
public class Dog {
    private String name;
    private Integer age;
}
配置application.yaml
person:
  name: fengpeng
  age: 3
  happy: false
  birth: 1998/5/14
  maps: {k1: v1,k2: v2}
  list:
    - code
    - music
    - games
  dog:
    name: 旺财
    age: 3
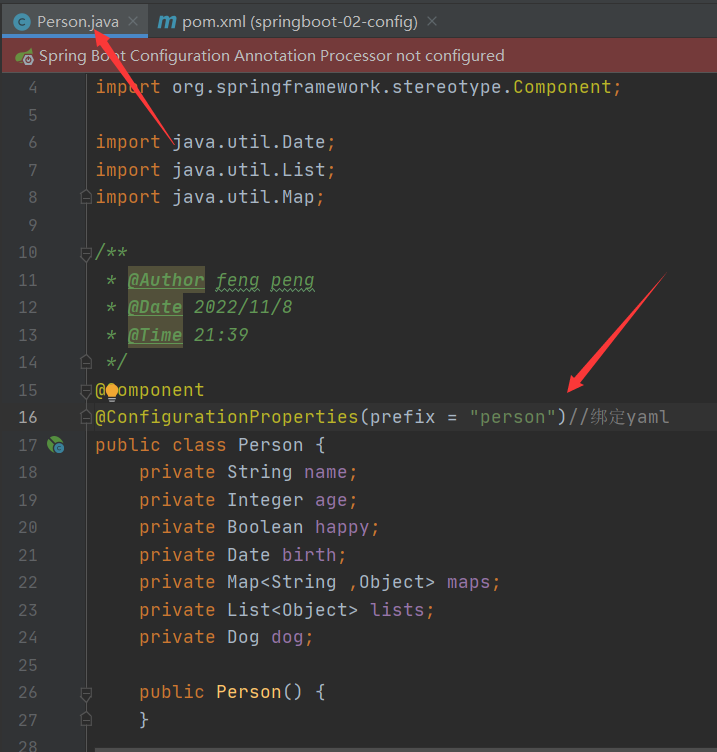
Person类导入注解@ConfigurationProperties
@ConfigurationProperties作用:
将配置文件中配置的每一个属性的值,映射到这个组件中;
告诉SpringBoot将本类中的所有属性和配置文件中相关的配置进行绑定
参数 prefix = “person” : 将配置文件中的person下面的所有属性一一对应

绑定yaml文件
测试类Springboot02ConfigApplicationTests
@SpringBootTest
class Springboot02ConfigApplicationTests {

    @Autowired
    private Person person;
    @Test
    void contextLoads() {
        System.out.println(person);
    }

}
测试结果

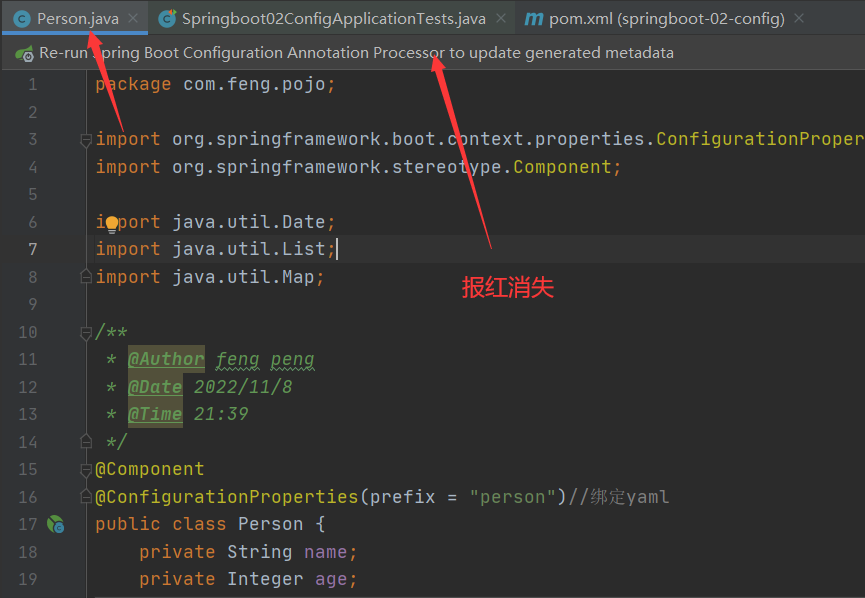
添加依赖
<dependency>
    <groupId>org.springframework.boot</groupId>
    <artifactId>spring-boot-configuration-processor</artifactId>
    <optional>true</optional>
</dependency>
配置文件占位符
配置文件还可以编写占位符生成随机数
person:
    name: qinjiang${random.uuid} # 随机uuid
    age: ${random.int}  # 随机int
    happy: false
    birth: 2000/01/01
    maps: {k1: v1,k2: v2}
    lists:
      - code
      - girl
      - music
    dog:
      name: ${person.hello:other}_旺财
      age: 1
3.3 松散绑定
这个什么意思呢? 比如我的yml中写的last-name,这个和lastName是一样的, - 后面跟着的字母默认是大写的。这就是松散绑定。可以测试一下
application.yaml
dog:
  first-name: 阿黄
  age: 3
Dog类
@Component
@ConfigurationProperties(prefix = "dog")
public class Dog {
    private String firstName;
    private Integer age;
}
测试类
@SpringBootTest
class Springboot02ConfigApplicationTests {

    @Autowired
    private Dog dog;
    @Test
    void contextLoads() {
        System.out.println(dog);
    }

}
测试结果

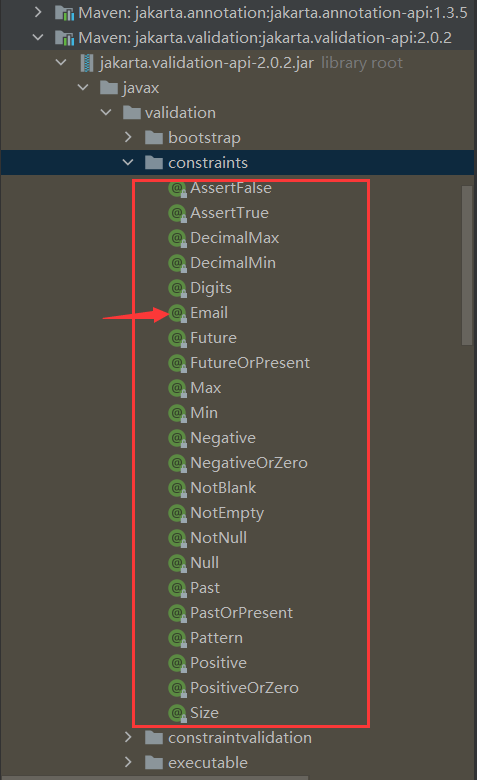
3.4 JSR303数据校验
这个就是我们可以在字段是增加一层过滤器验证 , 可以保证数据的合法性。
Person类
package com.feng.pojo;

import org.springframework.boot.context.properties.ConfigurationProperties;
import org.springframework.stereotype.Component;
import org.springframework.validation.annotation.Validated;

import javax.validation.constraints.Email;
import java.util.Date;
import java.util.List;
import java.util.Map;

/**
 * @Author feng peng
 * @Date 2022/11/8
 * @Time 21:39
 */
@Component
@ConfigurationProperties(prefix = "person")//绑定yaml
@Validated //数据校验
public class Person {

    @Email()//必须是邮箱格式
    private String name;
    private Integer age;
    private Boolean happy;
    private Date birth;
    private Map<String ,Object> maps;
    private List<Object> lists;
    private Dog dog;
}
application.yaml
person:
  name: fengpeng
  age: 3
  happy: false
  birth: 1998/5/14
  maps: {k1: v1,k2: v2}
  lists:
    - code
    - music
    - games
  dog:
    name: 旺财
    age: 3


dog:
  first-name: 阿黄
  age: 3
测试类
@SpringBootTest
class Springboot02ConfigApplicationTests {

    @Autowired
    private Person person;
    @Test
    void contextLoads() {
        System.out.println(person);
    }

}
测试结果

4 环境配置
配置文件application.yaml位置
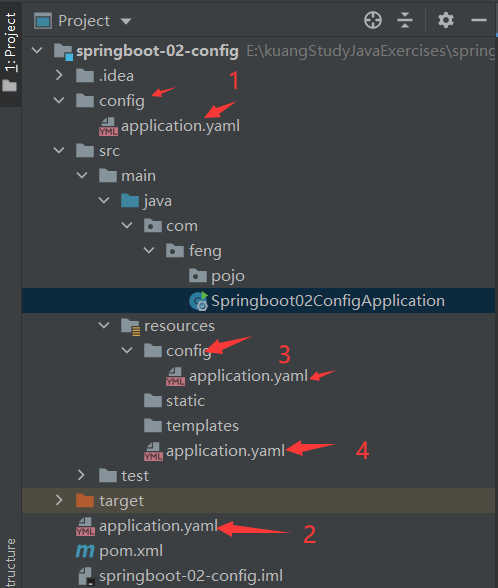
测试优先级
通过如下在每个yaml中,配置端口号,然后执行程序,查看console中输出的端口号得到优先级(1->2->3->4)
server:
  port: 8081
测试优先级


运行测试

结论:走默认配置文件
修改默认配置文件
运行结果

使用yaml多文件环境配置
application.yml
server:
  port: 8081

---
server:
  port: 8082
spring:
  profiles: dev

---
server:
  port: 8083
spring:
  profiles: test
运行走默认配置8081
指定文件
application.yml
server:
  port: 8081
spring:
  profiles:
    active: dev
---
server:
  port: 8082
spring:
  profiles: dev

---
server:
  port: 8083
spring:
  profiles: test
运行结果

5 自动配置原理
application.yml
# 在我们这配置文件中能配置的东西,都存在一个固有的规律
# xxxAutoConfiguration: 默认值    xxxProperties 和 配置文件的绑定,我们就可以使用自定义的配置了!
server:
  port:
精髓:
1、SpringBoot启动会加载大量的自动配置类
2、我们看我们需要的功能有没有在SpringBoot默认写好的自动配置类当中;
3、我们再来看这个自动配置类中到底配置了哪些组件;(只要我们要用的组件存在在其中,我们就不需要再手动配置了)
4、给容器中自动配置类添加组件的时候,会从properties类中获取某些属性。我们只需要在配置文件中指定这些属性的值即可;
xxxxAutoConfigurartion:自动配置类;给容器中添加组件
xxxxProperties:封装配置文件中相关属性;
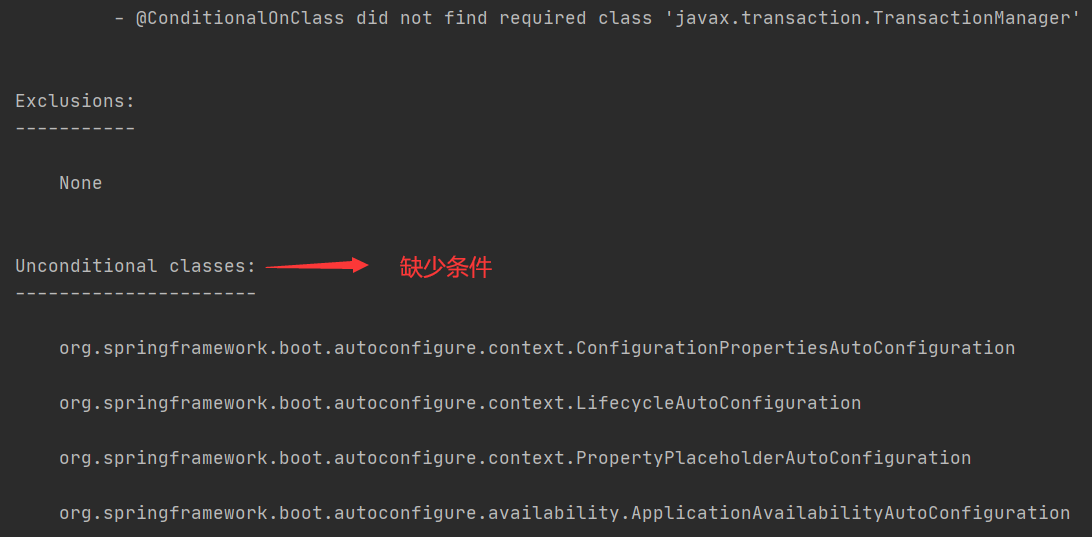
查看自动配置类是否生效
application.yml
# 可以通过 debug=true来查看,哪些自动配置类生效,哪些没有生效!
debug: true

6 SpringBoot Web开发
jar: webapp!
自动装配
springboot到底帮我们配置了什么?我们能不能进行修改?能修改哪些东西?能不能扩展?
- xxxAutoConfiguration..向容器中自动配置组件
- xxxxProperties:自动配置类,装配配置文件中自定义的一些内容!
要解决的问题:
- 导入静态资源...
- 首页
- jsp,模板引擎Thymeleaf
- 装配扩展SpringMVC
- 增删改查
- 拦截器
- 国际化!
6.1 静态资源
新建springboot项目,添加web框架
项目结构

HelloController类
package com.feng.controller;
import org.springframework.web.bind.annotation.GetMapping;
import org.springframework.web.bind.annotation.RestController;

/**
 * @Author feng peng
 * @Date 2022/11/9
 * @Time 22:18
 */
@RestController
public class HelloController {
    @GetMapping("/hello")
    public String hello(){
        return "hello,world";
    }
}
运行测试
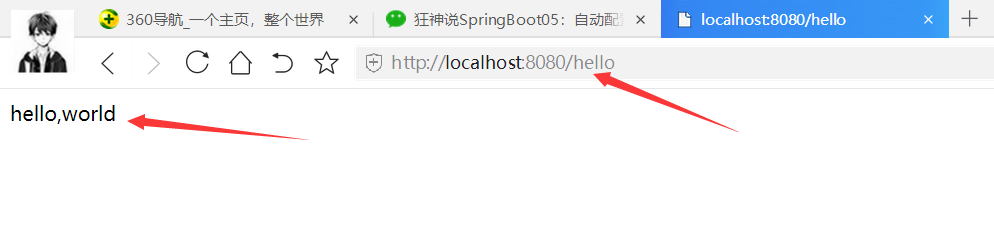
测试成功,表示tomcat能够正常运行!
我们先来聊聊这个静态资源映射规则:
SpringBoot中,SpringMVC的web配置都在 WebMvcAutoConfiguration 这个配置类里面;
我们可以去看看 WebMvcAutoConfigurationAdapter 中有很多配置方法;
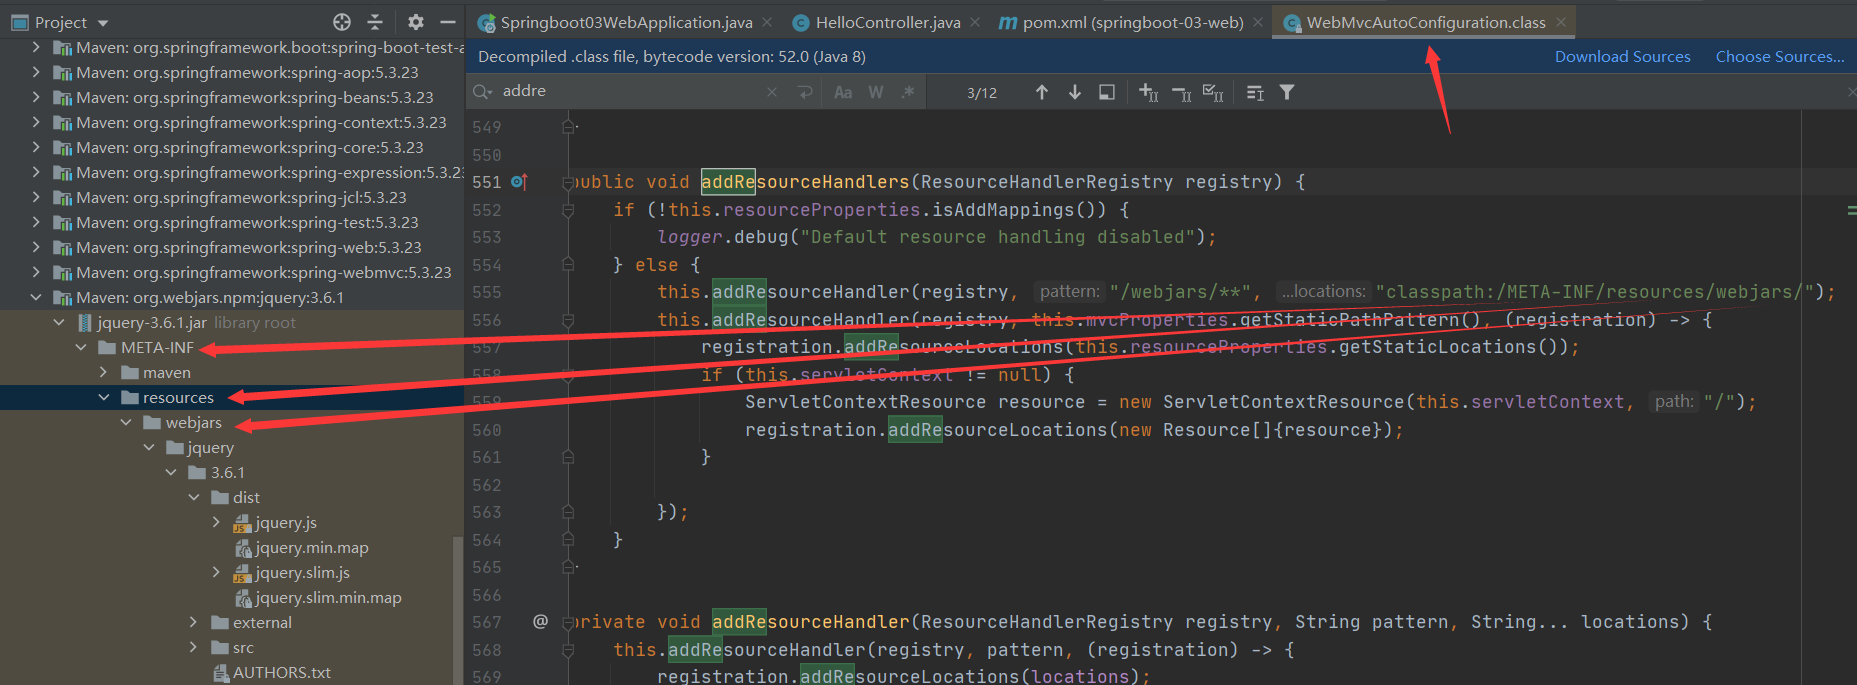
有一个方法:addResourceHandlers 添加资源处理
@Override
public void addResourceHandlers(ResourceHandlerRegistry registry) {
    if (!this.resourceProperties.isAddMappings()) {
        // 已禁用默认资源处理
        logger.debug("Default resource handling disabled");
        return;
    }
    // 缓存控制
    Duration cachePeriod = this.resourceProperties.getCache().getPeriod();
    CacheControl cacheControl = this.resourceProperties.getCache().getCachecontrol().toHttpCacheControl();
    // webjars 配置
    if (!registry.hasMappingForPattern("/webjars/**")) {
        customizeResourceHandlerRegistration(registry.addResourceHandler("/webjars/**")
                                             .addResourceLocations("classpath:/META-INF/resources/webjars/")
                                             .setCachePeriod(getSeconds(cachePeriod)).setCacheControl(cacheControl));
    }
    // 静态资源配置
    String staticPathPattern = this.mvcProperties.getStaticPathPattern();
    if (!registry.hasMappingForPattern(staticPathPattern)) {
        customizeResourceHandlerRegistration(registry.addResourceHandler(staticPathPattern)
                                             .addResourceLocations(getResourceLocations(this.resourceProperties.getStaticLocations()))
                                             .setCachePeriod(getSeconds(cachePeriod)).setCacheControl(cacheControl));
    }
}
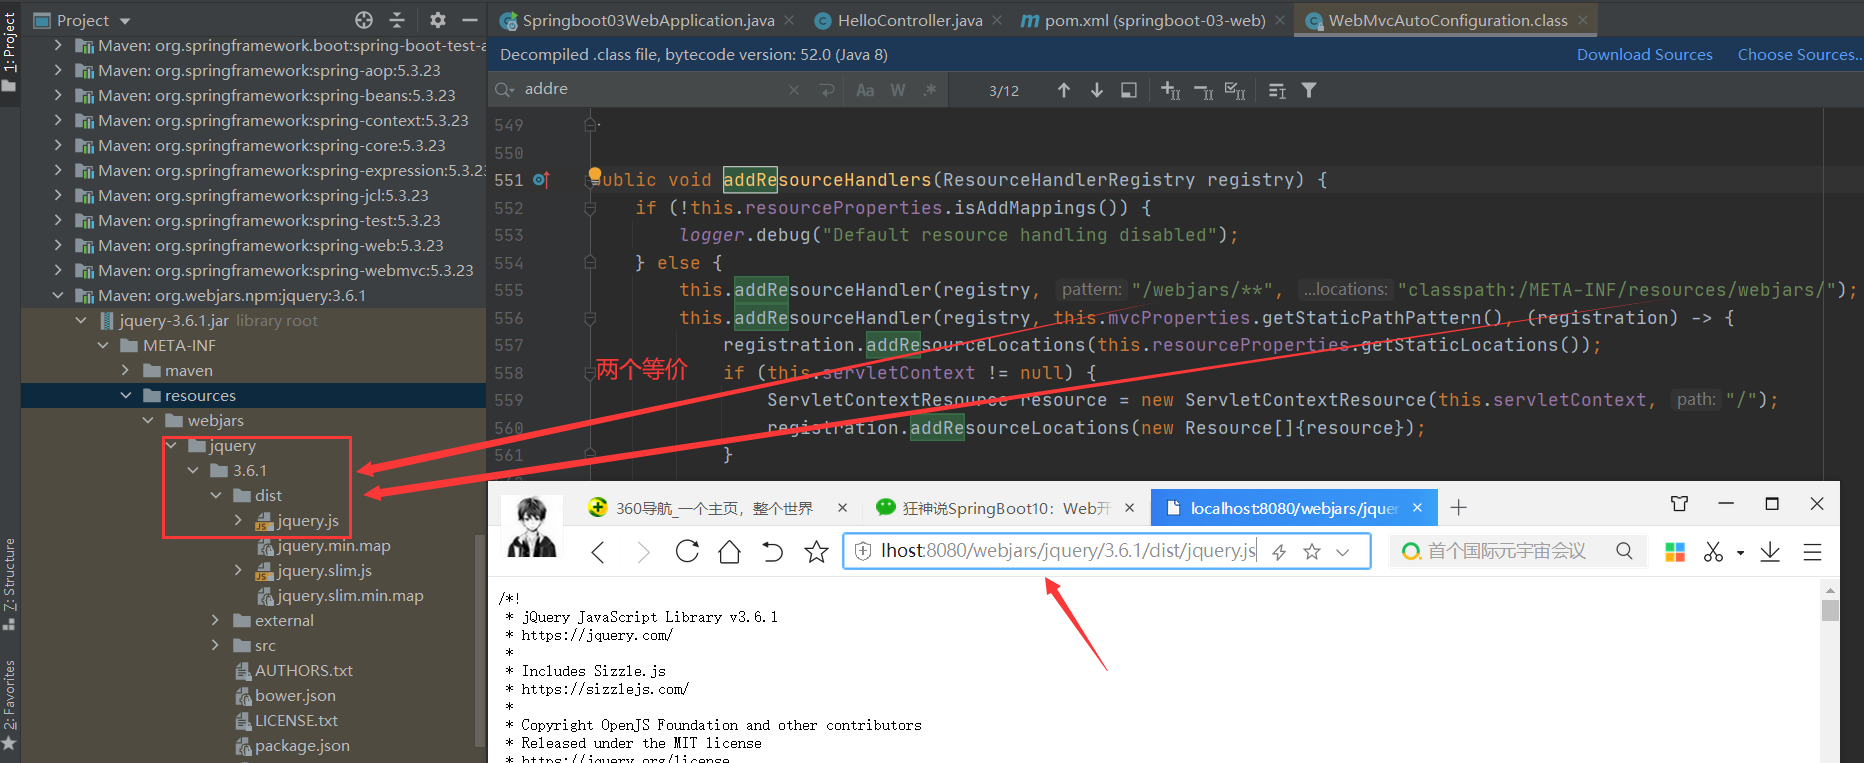
读一下源代码:比如所有的 /webjars/** , 都需要去 classpath:/META-INF/resources/webjars/ 找对应的资源;
什么是webjars 呢?
Webjars本质就是以jar包的方式引入我们的静态资源 , 我们以前要导入一个静态资源文件,直接导入即可。
使用SpringBoot需要使用Webjars,我们可以去搜索一下:
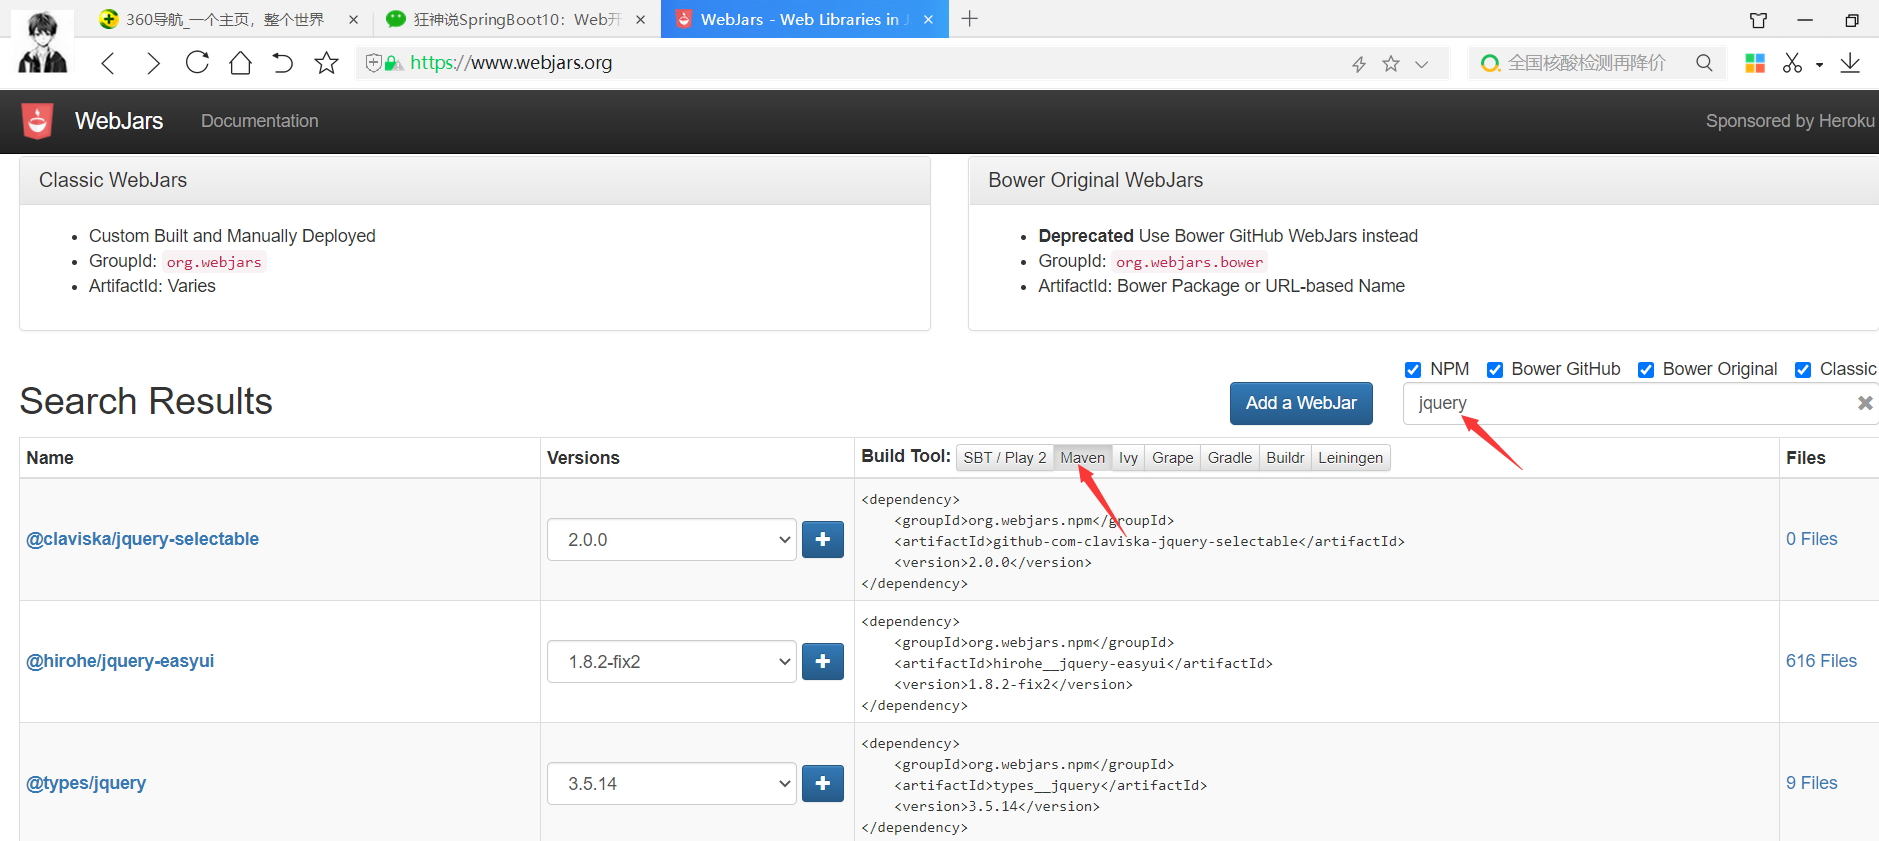
要使用jQuery,我们只要要引入jQuery对应版本的pom依赖即可!

<dependency>
    <groupId>org.webjars.npm</groupId>
    <artifactId>jquery</artifactId>
    <version>3.6.1</version>
</dependency>
导入完毕,查看webjars目录结构,并访问Jquery.js文件!
运行程序
第二种静态资源映射规则
那我们项目中要是使用自己的静态资源该怎么导入呢?我们看下一行代码;
我们去找staticPathPattern发现第二种映射规则 :/** , 访问当前的项目任意资源,它会去找 resourceProperties 这个类,我们可以点进去看一下分析:

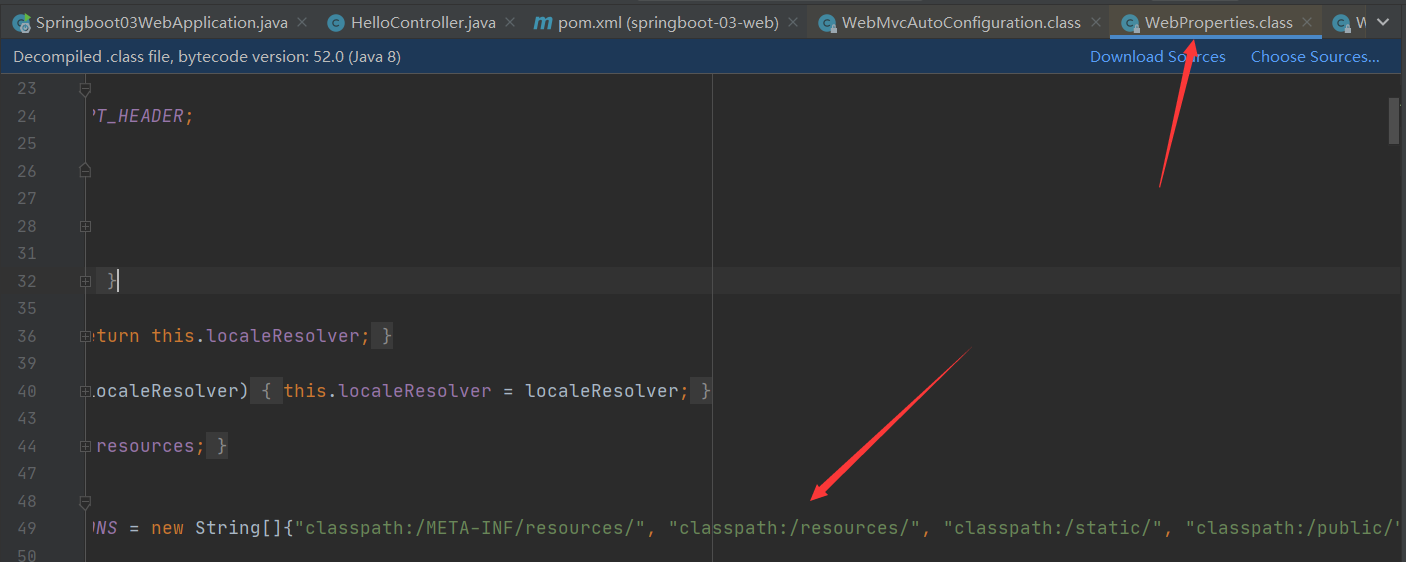
// 进入方法
public String[] getStaticLocations() {
return this.staticLocations;
}
// 找到对应的值
private String[] staticLocations = CLASSPATH_RESOURCE_LOCATIONS;
// 找到路径
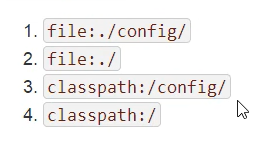
private static final String[] CLASSPATH_RESOURCE_LOCATIONS = {
"classpath:/META-INF/resources/",
"classpath:/resources/",
"classpath:/static/",
"classpath:/public/"
};
ResourceProperties 可以设置和我们静态资源有关的参数;这里面指向了它会去寻找资源的文件夹,即上面数组的内容。
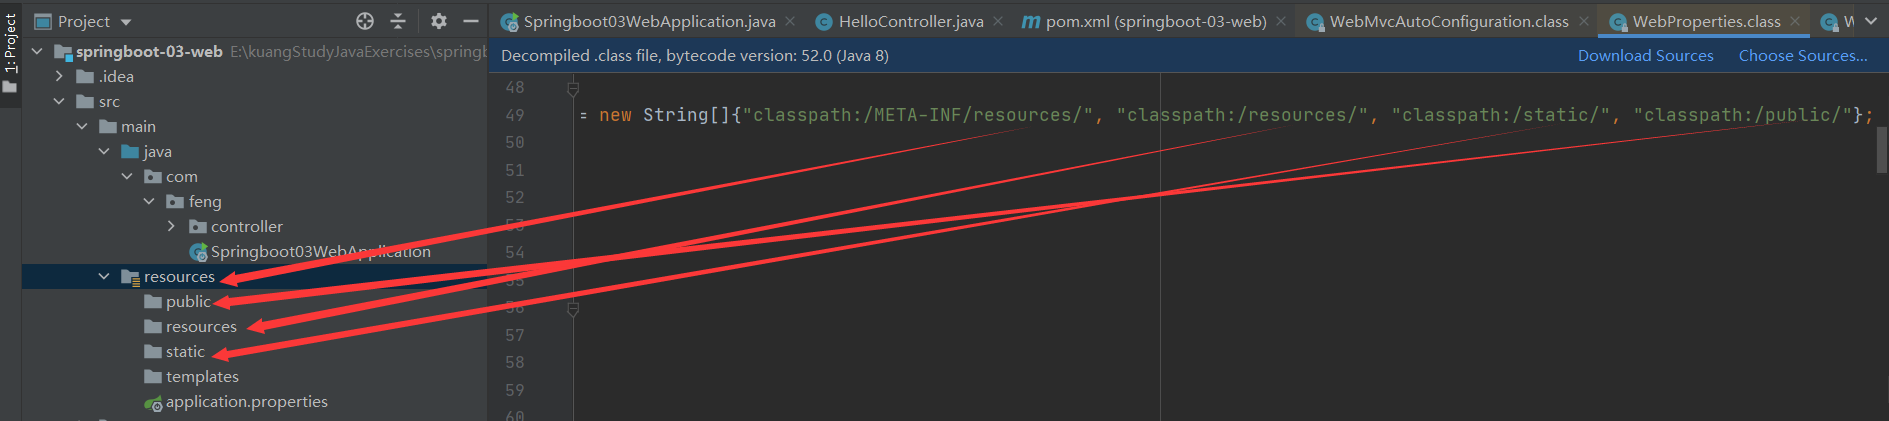
所以得出结论,以下四个目录存放的静态资源可以被我们识别:
"classpath:/META-INF/resources/"
"classpath:/resources/"
"classpath:/static/"
"classpath:/public/"
测试(任意一个目录下,新建一个资源文件)

测试

测试结果:访问 http://localhost:8080/1.js , 他就会去这些文件夹中寻找对应的静态资源文件;
优先级:resources>static>public
自定义静态资源路径
我们也可以自己通过配置文件来指定一下,哪些文件夹是需要我们放静态资源文件的,在application.properties中配置;
spring.resources.static-locations=classpath:/coding/,classpath:/feng/
一旦自己定义了静态文件夹的路径,原来的自动配置就都会失效了!
总结:
1.在Springboot,我们可以使用以下方式处理静态资源
- webjars
localhost:8080/webjars/ - public , static, /**, resources
localhost:8080/
2.优先级:resources>static(默认)>public
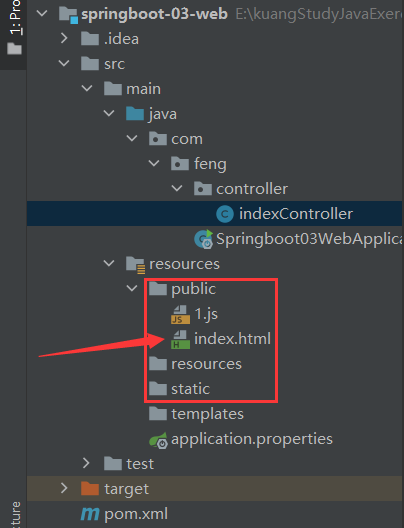
6.2 首页
首页存放的位置
6.3 thymeleaf
pom.xml导入依赖
<!--Thymeleaf ,我们都是基于3.x开发-->
<dependency>
    <groupId>org.thymeleaf</groupId>
    <artifactId>thymeleaf-spring5</artifactId>
</dependency>
<dependency>
    <groupId>org.thymeleaf.extras</groupId>
    <artifactId>thymeleaf-extras-java8time</artifactId>
</dependency>

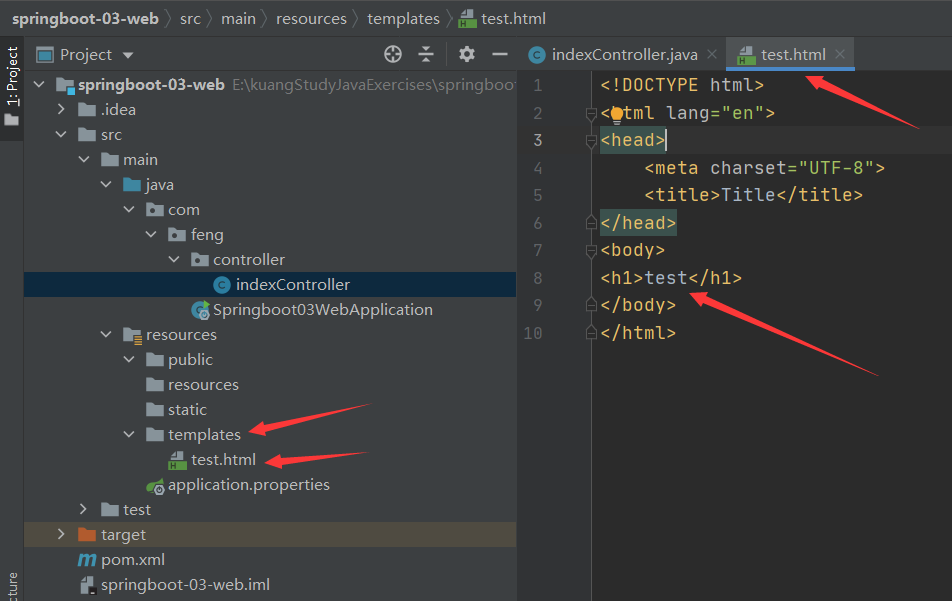
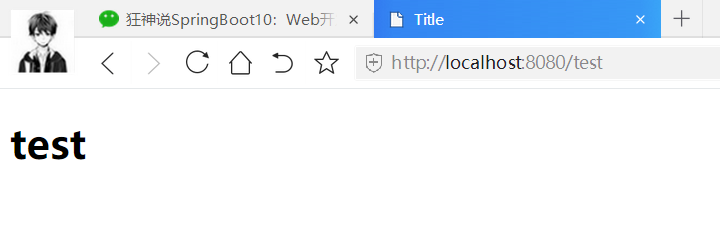
新建页面test.html
测试
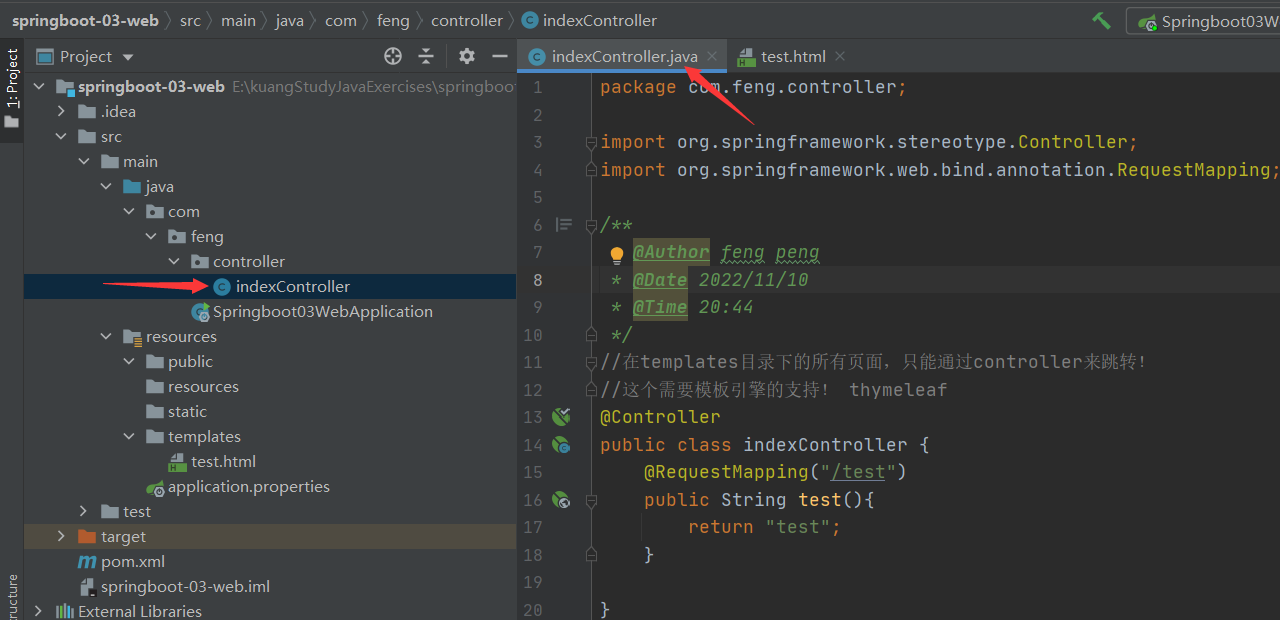
indexController类
package com.feng.controller;

import org.springframework.stereotype.Controller;
import org.springframework.web.bind.annotation.RequestMapping;

/**
 * @Author feng peng
 * @Date 2022/11/10
 * @Time 20:44
 */
//在templates目录下的所有页面,只能通过controller来跳转!
//这个需要模板引擎的支持! thymeleaf
@Controller
public class indexController {
    @RequestMapping("/test")
    public String test(){
        return "test";
    }

}
测试结果
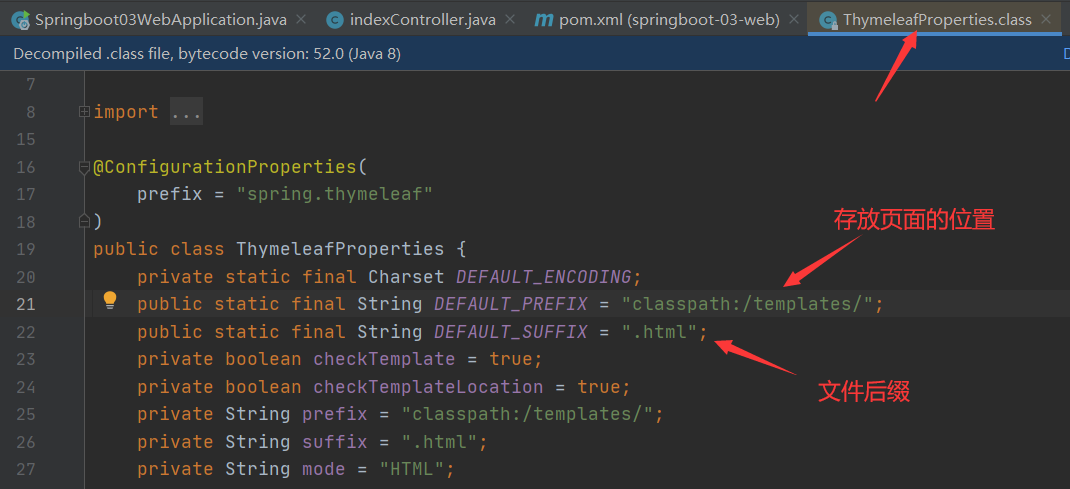
结论:
只要需要使用thymeleaf,只需要导入对应的依赖就可以了!我们将html放在我们的templates目录下即可!
public class ThymeleafProperties {
    private static final Charset DEFAULT_ENCODING;
    public static final String DEFAULT_PREFIX = "classpath:/templates/";
    public static final String DEFAULT_SUFFIX = ".html";
使用测试
项目结构
indexController类
package com.feng.controller;
import org.springframework.stereotype.Controller;
import org.springframework.ui.Model;
import org.springframework.web.bind.annotation.RequestMapping;
/**
* @Author feng peng
* @Date 2022/11/10
* @Time 20:44
*/
//在templates目录下的所有页面,只能通过controller来跳转!
//这个需要模板引擎的支持! thymeleaf
@Controller
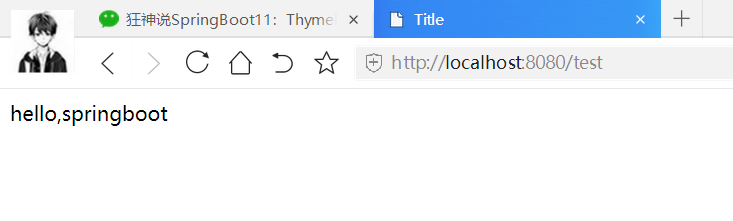
public class indexController {
@RequestMapping("/test")
public String test(Model model){
model.addAttribute("msg","hello,springboot");
return "test";
}
}
我们要使用thymeleaf,需要在html文件中导入命名空间的约束,方便提示。
xmlns:th="http://www.thymeleaf.org"
test.html
<!DOCTYPE html>
<html lang="en" xmlns:th="http://www.thymeleaf.org">
<head>
    <meta charset="UTF-8">
    <title>Title</title>
</head>
<body>
<!--所有的html元素都可以被thymeleaf替换接管: th:元素名-->
<div th:text="${msg}"></div>
</body>
</html>
测试结果
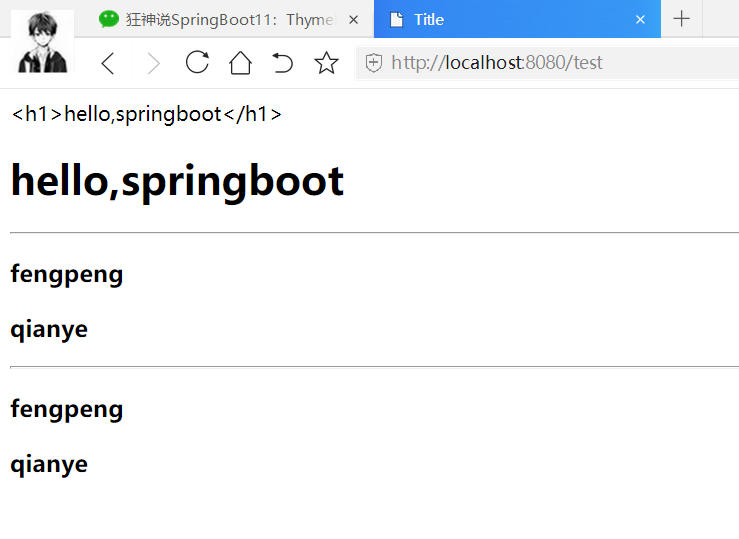
6.4 thymeleaf 语法
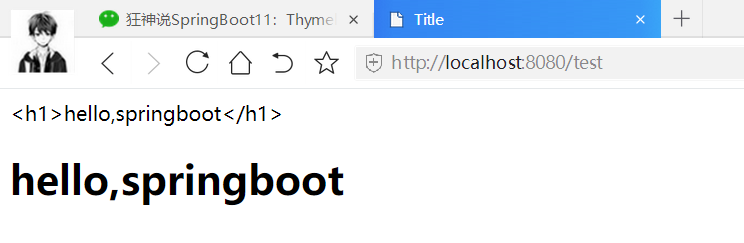
@Controller
public class indexController {
    @RequestMapping("/test")
    public String test(Model model){
        model.addAttribute("msg","<h1>hello,springboot</h1>");
        return "test";
    }

}
<!DOCTYPE html>
<html lang="en" xmlns:th="http://www.thymeleaf.org">
<head>
    <meta charset="UTF-8">
    <title>Title</title>
</head>
<body>
<!--所有的html元素都可以被thymeleaf替换接管: th:元素名-->
<div th:text="${msg}"></div>
<div th:utext="${msg}"></div>
</body>
</html>
测试结果
package com.feng.controller;

import org.springframework.stereotype.Controller;
import org.springframework.ui.Model;
import org.springframework.web.bind.annotation.RequestMapping;

import java.util.Arrays;

/**
 * @Author feng peng
 * @Date 2022/11/10
 * @Time 20:44
 */
//在templates目录下的所有页面,只能通过controller来跳转!
//这个需要模板引擎的支持! thymeleaf
@Controller
public class indexController {
    @RequestMapping("/test")
    public String test(Model model){
        model.addAttribute("msg","<h1>hello,springboot</h1>");
        /* Arrays.asList  数组转换为集合 */
        model.addAttribute("users", Arrays.asList("fengpeng","qianye"));
        return "test";
    }

}
<!DOCTYPE html>
<html lang="en" xmlns:th="http://www.thymeleaf.org">
<head>
    <meta charset="UTF-8">
    <title>Title</title>
</head>
<body>
<!--所有的html元素都可以被thymeleaf替换接管: th:元素名-->
<div th:text="${msg}"></div>
<div th:utext="${msg}"></div>

<hr>
<!--each循环遍历, user:${users} 代表从users中循环取值, 每一个值为user   th:text="${user} 输出每一个值-->
<h3 th:each="user:${users}" th:text="${user}"></h3>
<hr>
<!--第二种写法-->
<h3 th:each="user:${users}">[[ ${user} ]]</h3>


</body>
</html>
测试结果
7 MVC自动配置原理
在进行项目编写前,我们还需要知道一个东西,就是SpringBoot对我们的SpringMVC还做了哪些配置,包括如何扩展,如何定制。
只有把这些都搞清楚了,我们在之后使用才会更加得心应手。途径一:源码分析,途径二:官方文档!
Spring MVC Auto-configuration
// Spring Boot为Spring MVC提供了自动配置,它可以很好地与大多数应用程序一起工作。
Spring Boot provides auto-configuration for Spring MVC that works well with most applications.
// 自动配置在Spring默认设置的基础上添加了以下功能:
The auto-configuration adds the following features on top of Spring’s defaults:
// 包含视图解析器
Inclusion of ContentNegotiatingViewResolver and BeanNameViewResolver beans.
// 支持静态资源文件夹的路径,以及webjars
Support for serving static resources, including support for WebJars
// 自动注册了Converter:
// 转换器,这就是我们网页提交数据到后台自动封装成为对象的东西,比如把"1"字符串自动转换为int类型
// Formatter:【格式化器,比如页面给我们了一个2019-8-10,它会给我们自动格式化为Date对象】
Automatic registration of Converter, GenericConverter, and Formatter beans.
// HttpMessageConverters
// SpringMVC用来转换Http请求和响应的的,比如我们要把一个User对象转换为JSON字符串,可以去看官网文档解释;
Support for HttpMessageConverters (covered later in this document).
// 定义错误代码生成规则的
Automatic registration of MessageCodesResolver (covered later in this document).
// 首页定制
Static index.html support.
// 图标定制
Custom Favicon support (covered later in this document).
// 初始化数据绑定器:帮我们把请求数据绑定到JavaBean中!
Automatic use of a ConfigurableWebBindingInitializer bean (covered later in this document).

/*
如果您希望保留Spring Boot MVC功能,并且希望添加其他MVC配置(拦截器、格式化程序、视图控制器和其他功能),则可以添加自己
的@configuration类,类型为webmvcconfiguer,但不添加@EnableWebMvc。如果希望提供
RequestMappingHandlerMapping、RequestMappingHandlerAdapter或ExceptionHandlerExceptionResolver的自定义
实例,则可以声明WebMVCregistrationAdapter实例来提供此类组件。
*/
If you want to keep Spring Boot MVC features and you want to add additional MVC configuration
(interceptors, formatters, view controllers, and other features), you can add your own
@Configuration class of type WebMvcConfigurer but without @EnableWebMvc. If you wish to provide
custom instances of RequestMappingHandlerMapping, RequestMappingHandlerAdapter, or
ExceptionHandlerExceptionResolver, you can declare a WebMvcRegistrationsAdapter instance to provide such components.

// 如果您想完全控制Spring MVC,可以添加自己的@Configuration,并用@EnableWebMvc进行注释。
If you want to take complete control of Spring MVC, you can add your own @Configuration annotated with @EnableWebMvc.
我们来仔细对照,看一下它怎么实现的,它告诉我们SpringBoot已经帮我们自动配置好了SpringMVC,然后自动配置了哪些东西呢?
ContentNegotiatingViewResolver 内容协商视图解析器
自动配置了ViewResolver,就是我们之前学习的SpringMVC的视图解析器;
即根据方法的返回值取得视图对象(View),然后由视图对象决定如何渲染(转发,重定向)。
我们去看看这里的源码:我们找到 WebMvcAutoConfiguration , 然后搜索ContentNegotiatingViewResolver。找到如下方法!
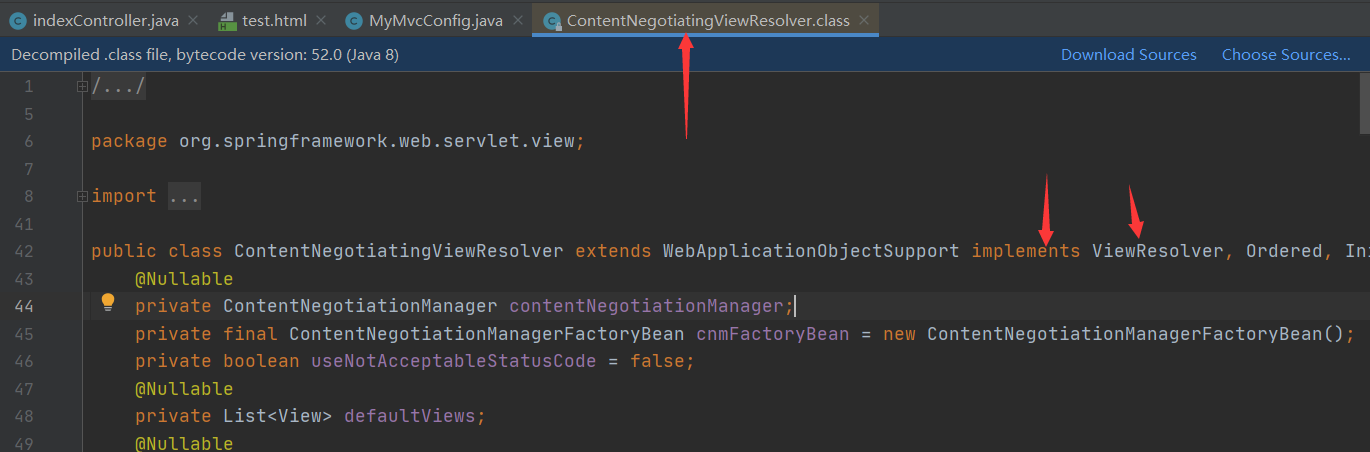
@Bean
@ConditionalOnBean(ViewResolver.class)
@ConditionalOnMissingBean(name = "viewResolver", value = ContentNegotiatingViewResolver.class)
public ContentNegotiatingViewResolver viewResolver(BeanFactory beanFactory) {
    ContentNegotiatingViewResolver resolver = new ContentNegotiatingViewResolver();
    resolver.setContentNegotiationManager(beanFactory.getBean(ContentNegotiationManager.class));
    // ContentNegotiatingViewResolver使用所有其他视图解析器来定位视图,因此它应该具有较高的优先级
    resolver.setOrder(Ordered.HIGHEST_PRECEDENCE);
    return resolver;
}
我们可以点进这类看看!找到对应的解析视图的代码;
@Nullable// 注解说明:@Nullable 即参数可为null
public View resolveViewName(String viewName, Locale locale) throws Exception {
    RequestAttributes attrs = RequestContextHolder.getRequestAttributes();
    Assert.state(attrs instanceof ServletRequestAttributes, "No current ServletRequestAttributes");
    List<MediaType> requestedMediaTypes = this.getMediaTypes(((ServletRequestAttributes)attrs).getRequest());
    if (requestedMediaTypes != null)
        // 获取候选的视图对象
        List<View> candidateViews = this.getCandidateViews(viewName, locale, requestedMediaTypes);
     	// 选择一个最适合的视图对象,然后把这个对象返回
        View bestView = this.getBestView(candidateViews, requestedMediaTypes, attrs);
        if (bestView != null) {
            return bestView;
        }
    }
getCandidateViews中看到他是把所有的视图解析器拿来,进行while循环,挨个解析!
Iterator var5 = this.viewResolvers.iterator();
private List<View> getCandidateViews(String viewName, Locale locale, List<MediaType> requestedMediaTypes) throws Exception {
    List<View> candidateViews = new ArrayList();
    if (this.viewResolvers != null) {
        Assert.state(this.contentNegotiationManager != null, "No ContentNegotiationManager set");
        Iterator var5 = this.viewResolvers.iterator();

        while(var5.hasNext()) {
            ViewResolver viewResolver = (ViewResolver)var5.next();
            View view = viewResolver.resolveViewName(viewName, locale);
            if (view != null) {
                candidateViews.add(view);
            }
所以得出结论:ContentNegotiatingViewResolver 这个视图解析器就是用来组合所有的视图解析器的
我们再去研究下他的组合逻辑,看到有个属性viewResolvers,看看它是在哪里进行赋值的!
protected void initServletContext(ServletContext servletContext) {
    // 这里它是从beanFactory工具中获取容器中的所有视图解析器
    // ViewRescolver.class 把所有的视图解析器来组合的
    Collection<ViewResolver> matchingBeans = BeanFactoryUtils.beansOfTypeIncludingAncestors(this.obtainApplicationContext(), ViewResolver.class).values();
    ViewResolver viewResolver;
    if (this.viewResolvers == null) {
        this.viewResolvers = new ArrayList(matchingBeans.size());
    }
    // ...............
}
既然它是在容器中去找视图解析器,我们是否可以猜想,我们就可以去实现一个视图解析器了呢?
我们可以自己给容器中去添加一个视图解析器;这个类就会帮我们自动的将它组合进来;我们去实现一下
7.1 自定义视图解析器
1.我们在我们的主程序中去写一个视图解析器来试试;
项目结构
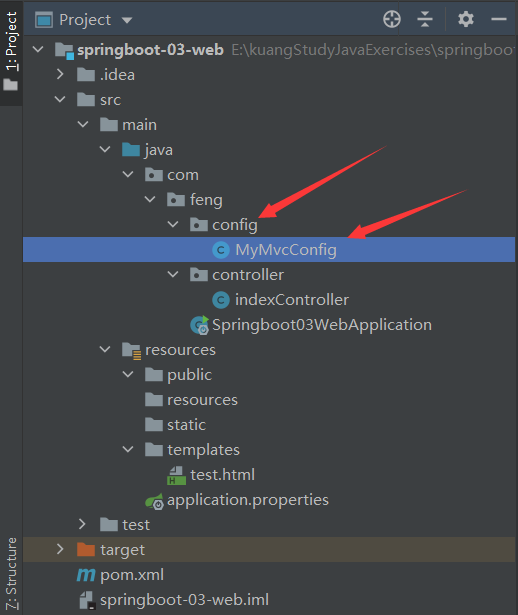
MyMvcConfig类
package com.feng.config;

import org.springframework.context.annotation.Bean;
import org.springframework.context.annotation.Configuration;
import org.springframework.web.servlet.View;
import org.springframework.web.servlet.ViewResolver;
import org.springframework.web.servlet.config.annotation.WebMvcConfigurer;

import java.util.Locale;

/**
 * @Author feng peng
 * @Date 2022/11/10
 * @Time 22:06
 */
//扩展 springmvc
@Configuration
public class MyMvcConfig implements WebMvcConfigurer {
    //public interface ViewResolver 实现了视图解析器接口的类, 我们就可以把它看做视图解析器


    @Bean
    public ViewResolver myViewResolver(){
        return new MyViewResolver();
    }
    //自定义了一个自己的视图解析器MyViewResolver
    public static class MyViewResolver implements ViewResolver{

        @Override
        public View resolveViewName(String viewName, Locale locale) throws Exception {
            return null;
        }
    }
}
2.怎么看我们自己写的视图解析器有没有起作用呢?
我们给 DispatcherServlet 中的 doDispatch方法 加个断点进行调试一下,因为所有的请求都会走到这个方法中
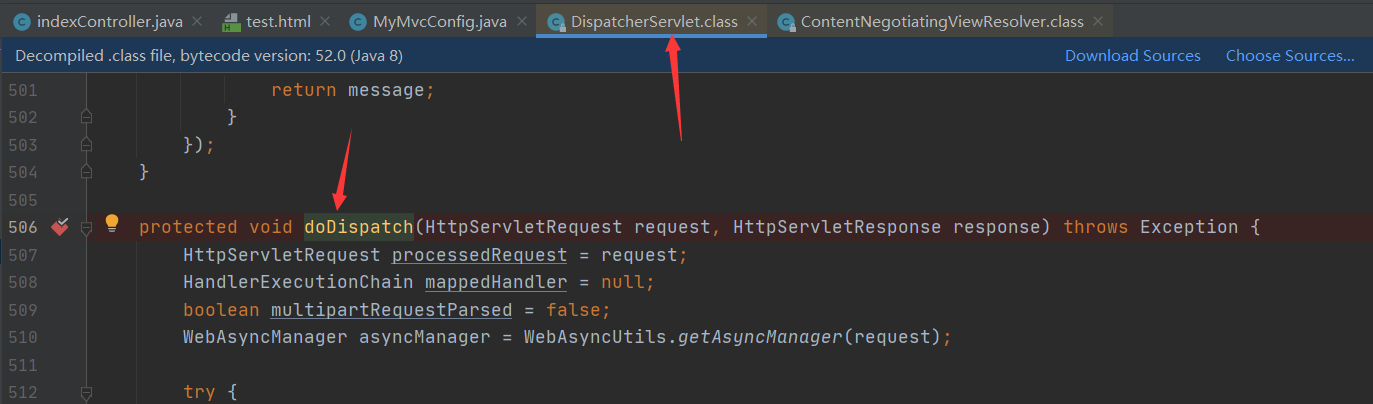
debug运行程序

进入断点位置

结论:
如果,你想diy一些定制化的功能,只要写这个组件,然后将它交给springboot,springboot就会帮我们自动装配!
所以说,我们如果想要使用自己定制化的东西,我们只需要给容器中添加这个组件就好了!剩下的事情SpringBoot就会帮我们做了!
7.2 转换器和格式化器
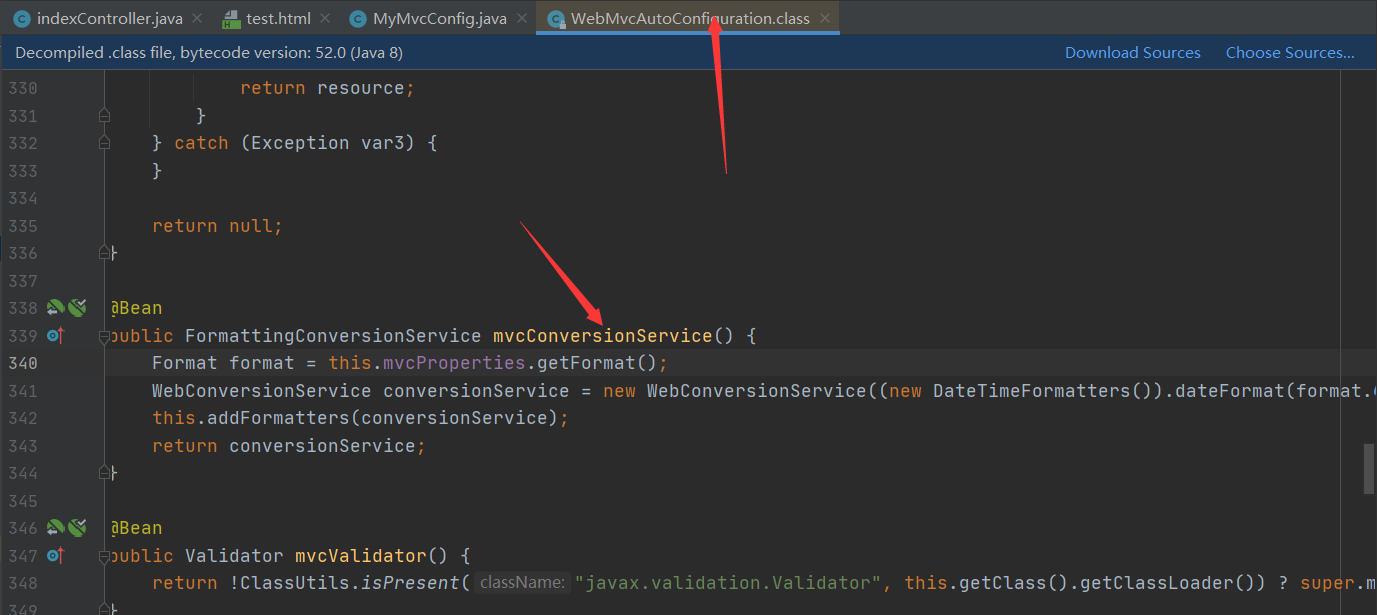
找到格式化转换器:
@Bean
@Override
public FormattingConversionService mvcConversionService() {
    // 拿到配置文件中的格式化规则
    WebConversionService conversionService =
        new WebConversionService(this.mvcProperties.getDateFormat());
    addFormatters(conversionService);
    return conversionService;
}
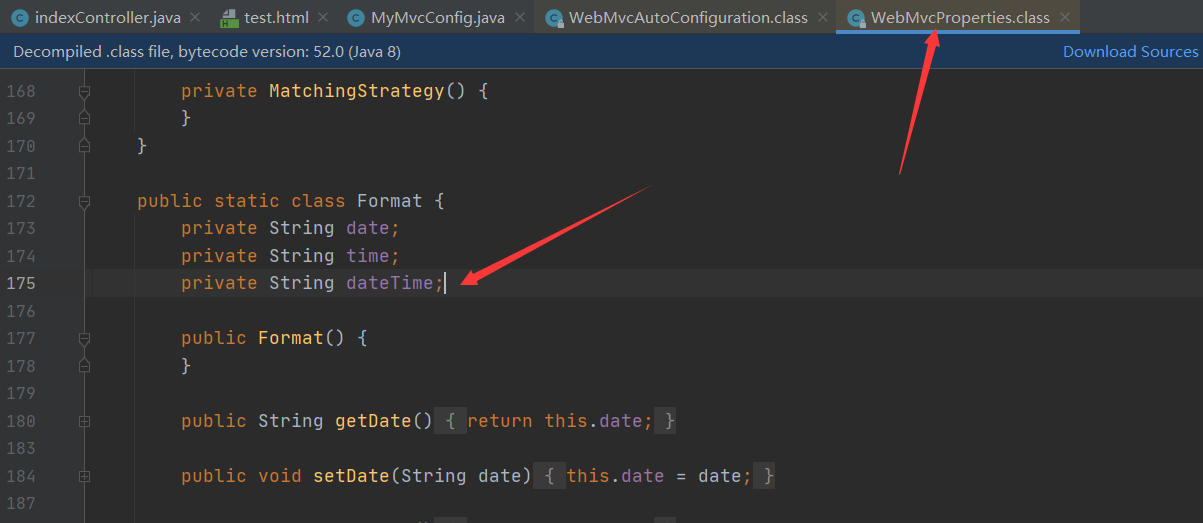
点击去:
public String getDateFormat() {
    return this.dateFormat;
}

/**
* Date format to use. For instance, `dd/MM/yyyy`. 默认的
 */
private String dateFormat;
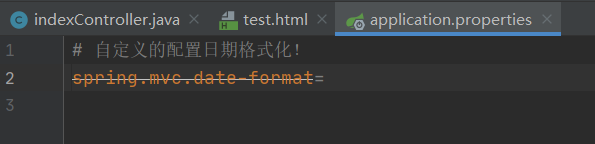
可以看到在我们的Properties文件中,我们可以进行自动配置它!
如果配置了自己的格式化方式,就会注册到Bean中生效,我们可以在配置文件中配置日期格式化的规则:
7.3 修改SpringBoot的默认配置
这么多的自动配置,原理都是一样的,通过这个WebMVC的自动配置原理分析,我们要学会一种学习方式,通过源码探究,得出结论;这个结论一定是属于自己的,而且一通百通。
SpringBoot的底层,大量用到了这些设计细节思想,所以,没事需要多阅读源码!得出结论;
SpringBoot在自动配置很多组件的时候,先看容器中有没有用户自己配置的(如果用户自己配置@bean),如果有就用用户配置的,如果没有就用自动配置的;
如果有些组件可以存在多个,比如我们的视图解析器,就将用户配置的和自己默认的组合起来!
扩展使用SpringMVC 官方文档如下:
If you want to keep Spring Boot MVC features and you want to add additional MVC configuration (interceptors, formatters, view controllers, and other features), you can add your own @Configuration class of type WebMvcConfigurer but without @EnableWebMvc. If you wish to provide custom instances of RequestMappingHandlerMapping, RequestMappingHandlerAdapter, or ExceptionHandlerExceptionResolver, you can declare a WebMvcRegistrationsAdapter instance to provide such components.
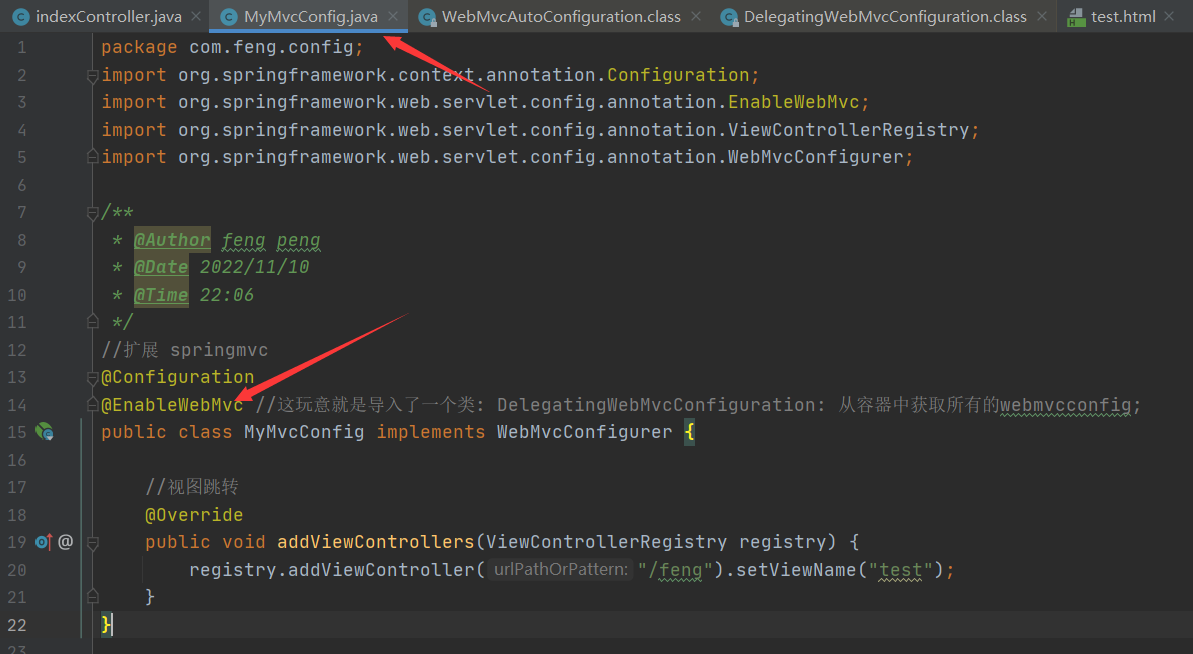
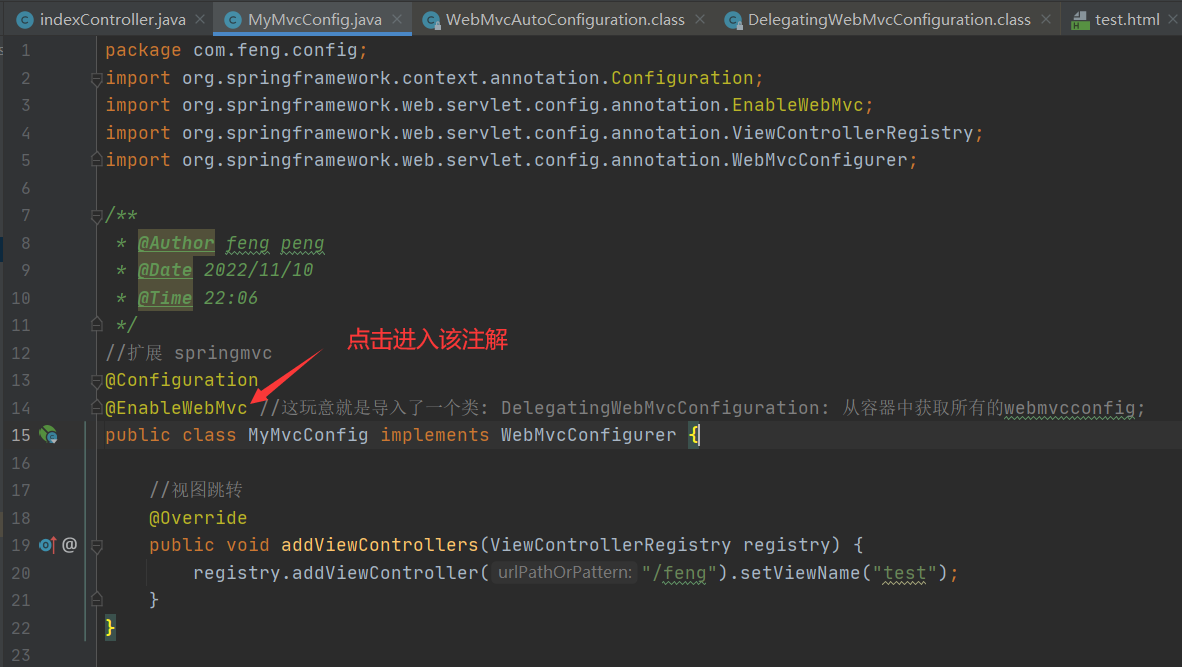
我们要做的就是编写一个@Configuration注解类,并且类型要为WebMvcConfigurer,还不能标注@EnableWebMvc注解;我们去自己写一个;我们新建一个包叫config,写一个类MyMvcConfig;
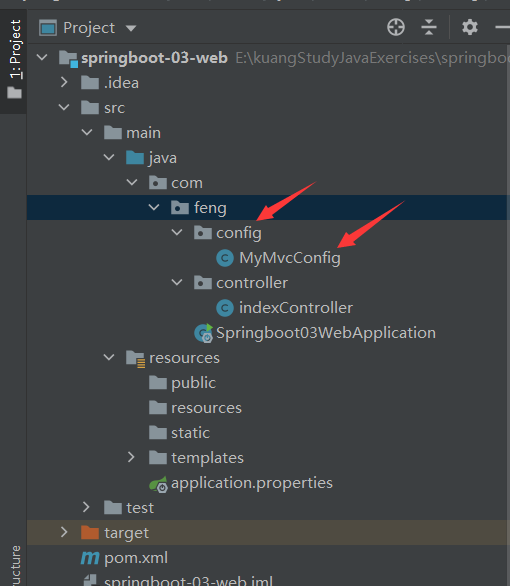
MyMvcConfig类
package com.feng.config;
import org.springframework.context.annotation.Configuration;
import org.springframework.web.servlet.config.annotation.ViewControllerRegistry;
import org.springframework.web.servlet.config.annotation.WebMvcConfigurer;

/**
 * @Author feng peng
 * @Date 2022/11/10
 * @Time 22:06
 */
//扩展 springmvc
@Configuration
public class MyMvcConfig implements WebMvcConfigurer {

    //视图跳转
    @Override
    public void addViewControllers(ViewControllerRegistry registry) {
        registry.addViewController("/feng").setViewName("test");
    }
}
测试
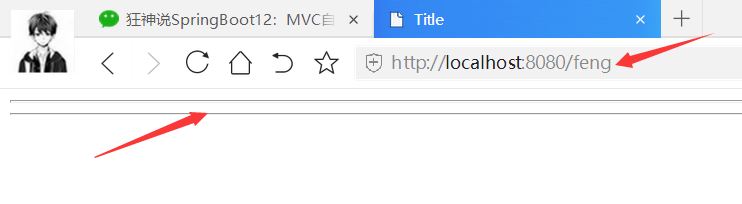
确实也跳转过来了!所以说,我们要扩展SpringMVC,官方就推荐我们这么去使用,既保SpringBoot留所有的自动配置,也能用我们扩展的配置!
我们可以去分析一下原理:
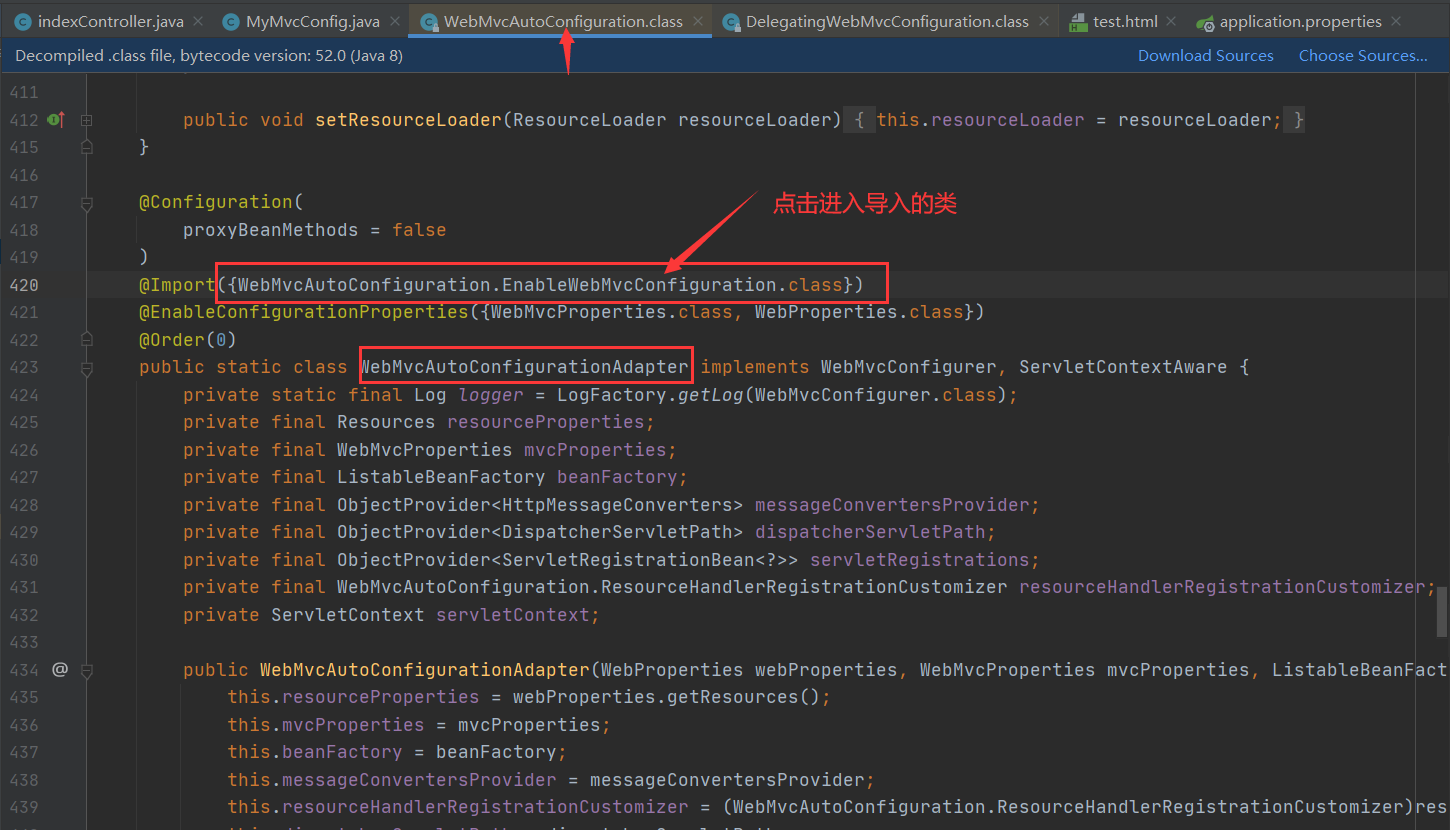
1、WebMvcAutoConfiguration 是 SpringMVC的自动配置类,里面有一个类WebMvcAutoConfigurationAdapter
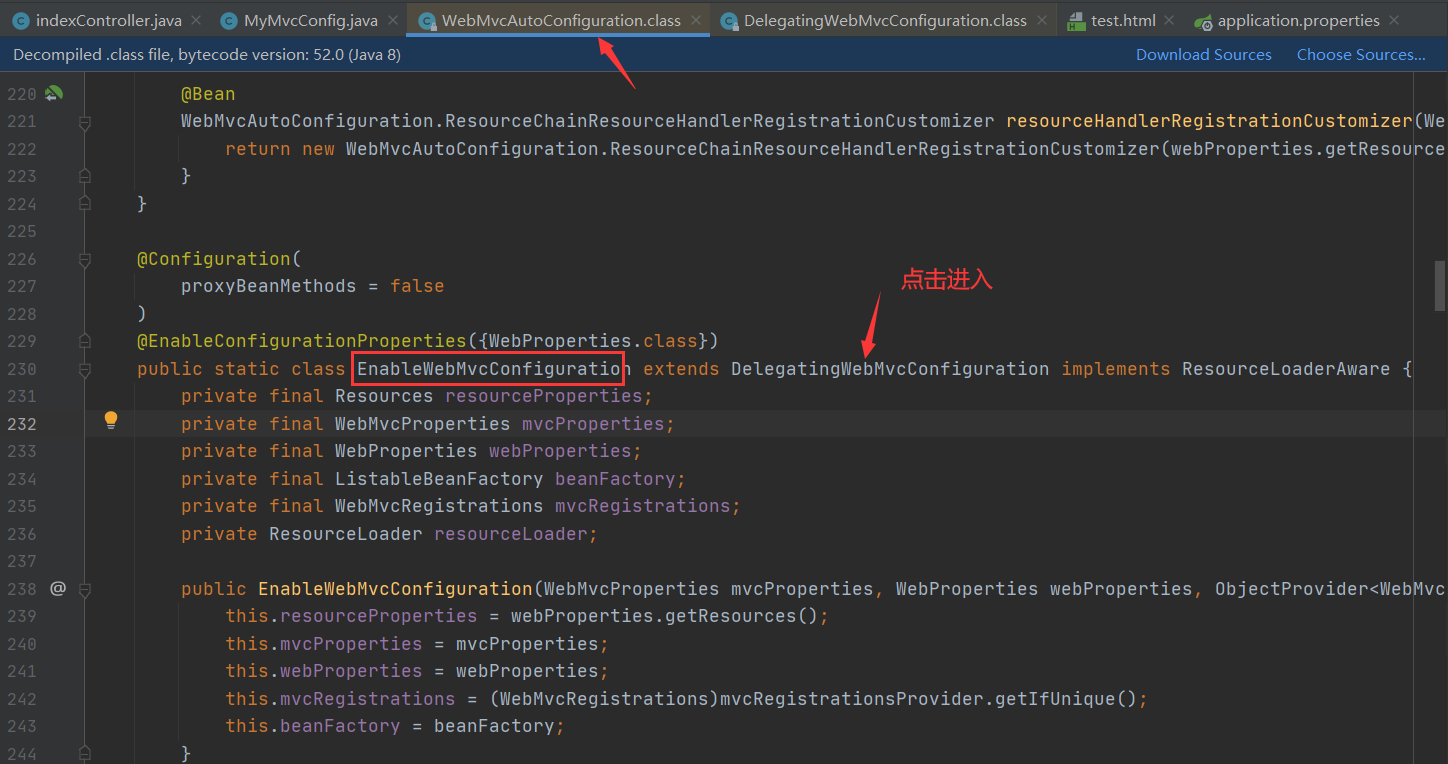
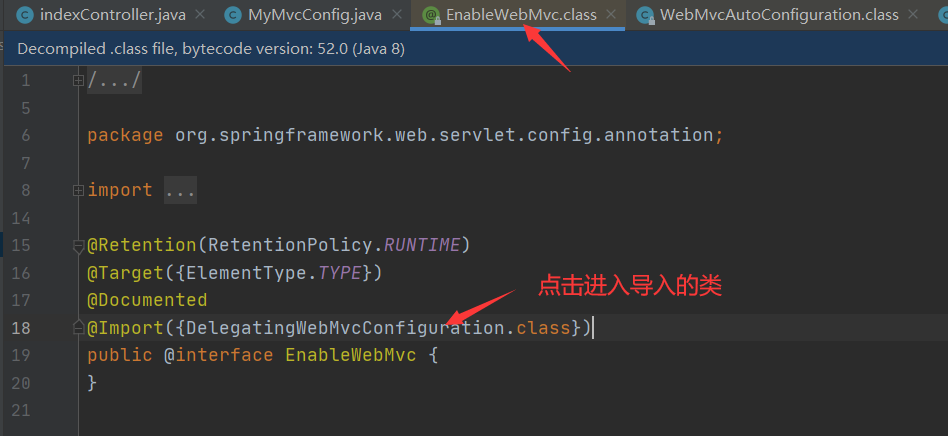
2、这个类上有一个注解,在做其他自动配置时会导入:@Import(EnableWebMvcConfiguration.class)
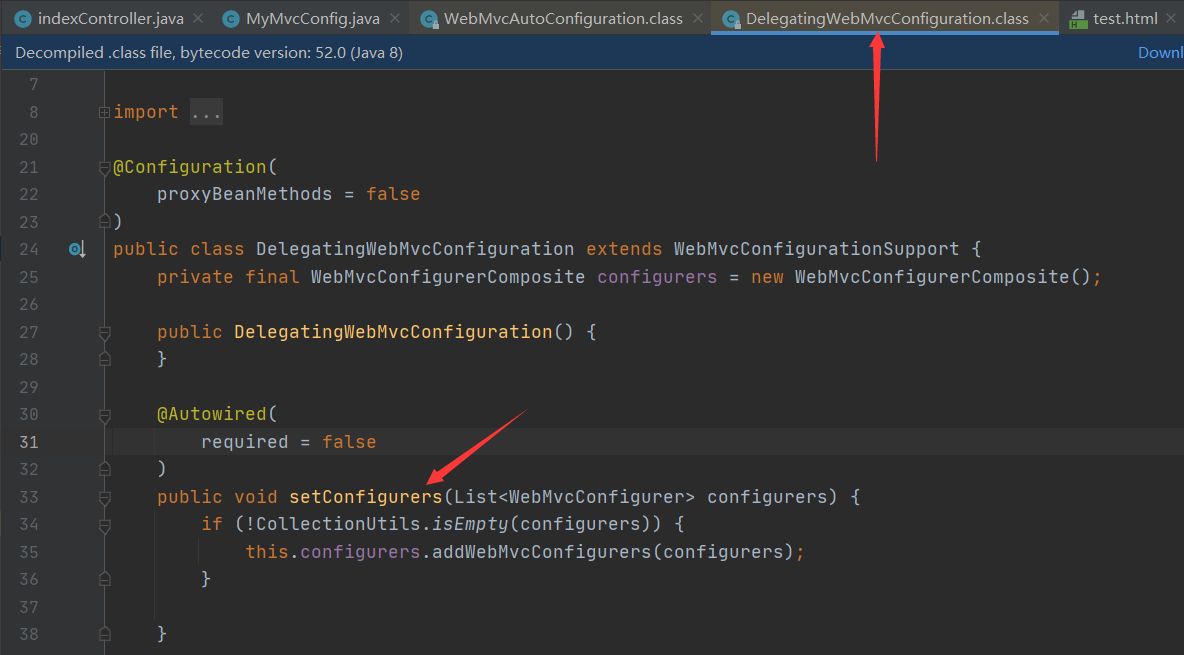
3、我们点进EnableWebMvcConfiguration这个类看一下,它继承了一个父类:DelegatingWebMvcConfiguration
这个父类中有这样一段代码:
public class DelegatingWebMvcConfiguration extends WebMvcConfigurationSupport {
    private final WebMvcConfigurerComposite configurers = new WebMvcConfigurerComposite();

  // 从容器中获取所有的webmvcConfigurer
    @Autowired(required = false)
    public void setConfigurers(List<WebMvcConfigurer> configurers) {
        if (!CollectionUtils.isEmpty(configurers)) {
            this.configurers.addWebMvcConfigurers(configurers);
        }
    }
}
找到对应的位置
为什么官方说不能加@EnableWebMvc 这个注解

原因
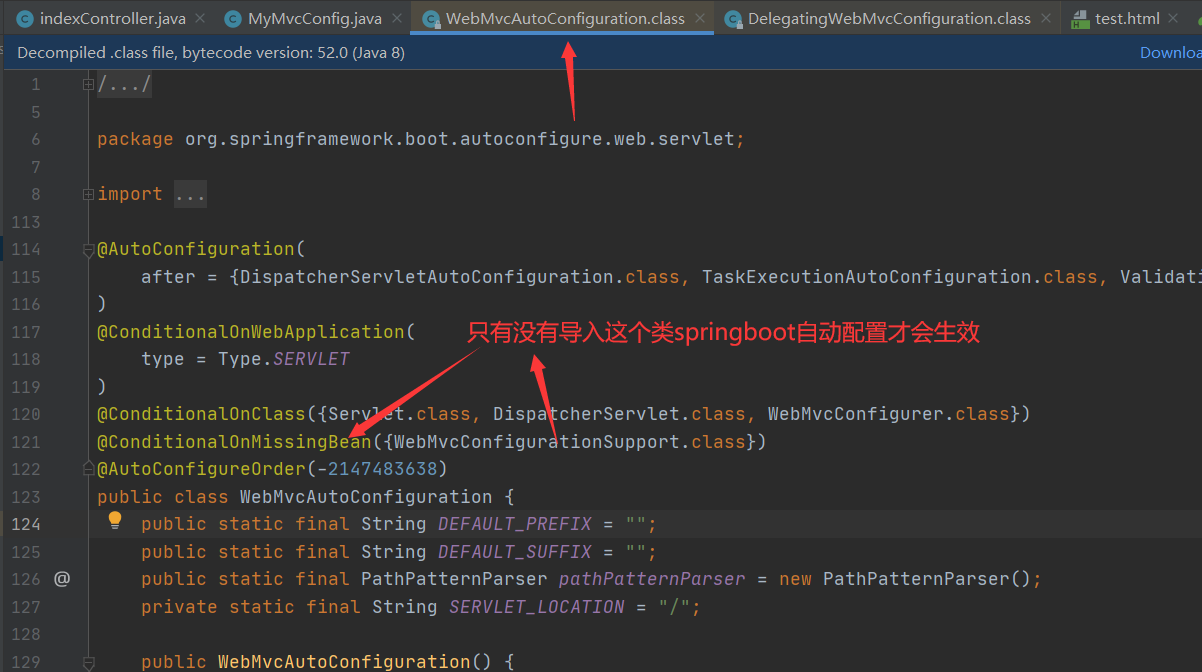
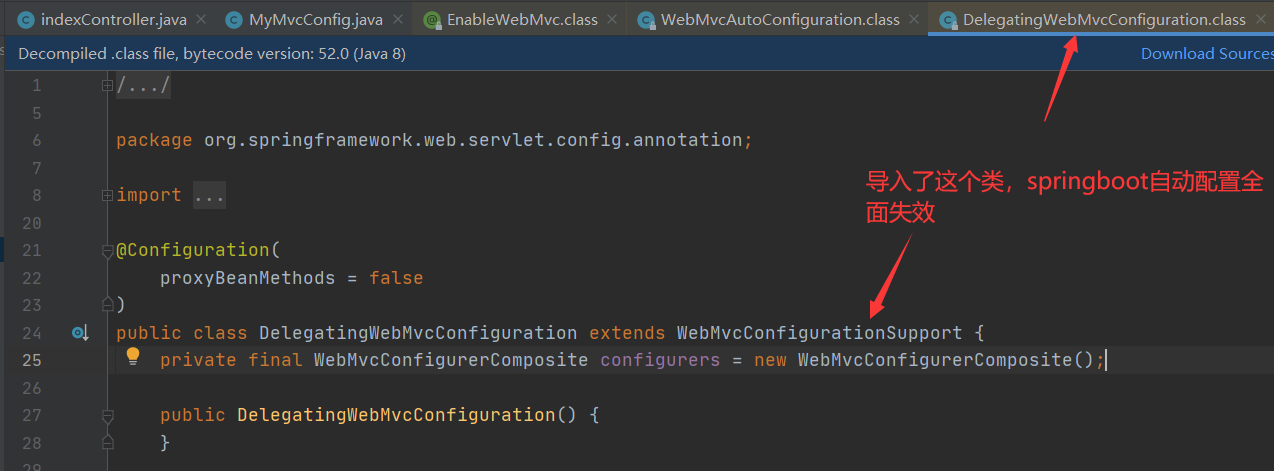
在springboot中,有非常多的xxxConfiguration帮助我们进行扩展配置,只要看见了这个东西,我们就要注意了!
8 员工管理系统
8.1 引入静态资源
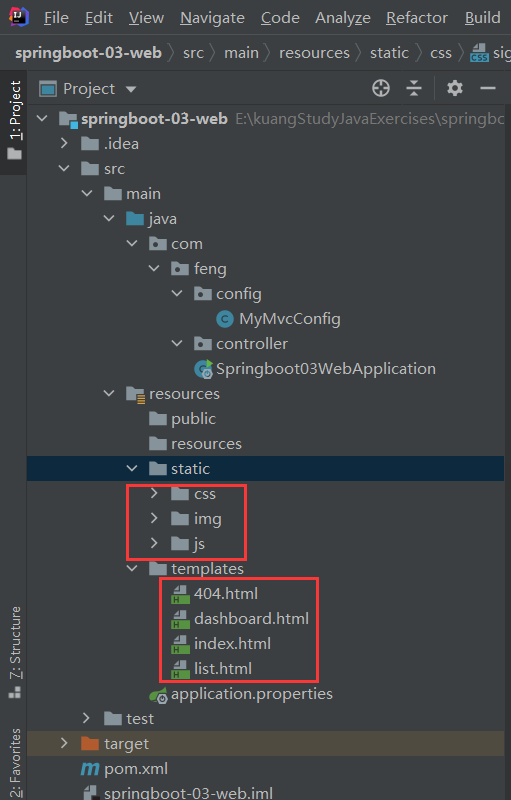
8.2 项目搭建
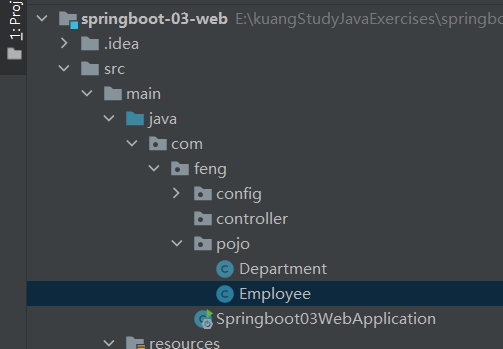
Department类
public class Department {
    private Integer id;
    private String departmentName;
}
Employee类
//员工表
public class Employee {
    private Integer id;
    private String lastName;
    private String email;
    private Integer gender; //0 :女   1: 男

    private Department department;
    private Date birth;
}
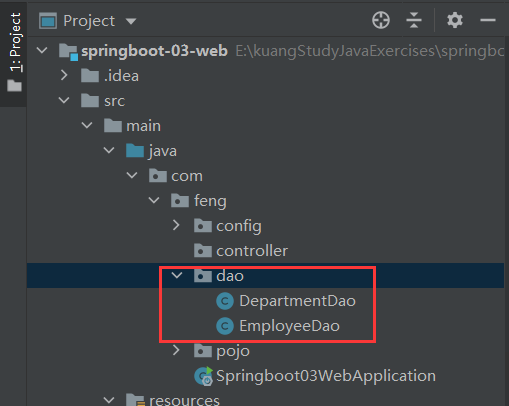
DepartmentDao类
package com.feng.dao;

import com.feng.pojo.Department;
import org.springframework.stereotype.Repository;

import java.util.Collection;
import java.util.HashMap;
import java.util.Map;

/**
 * @Author feng peng
 * @Date 2022/11/12
 * @Time 15:32
 */
//部门dao
@Repository
public class DepartmentDao {
    //模拟数据库中的数据
    private static Map<Integer, Department> departments = null;
    static {
        departments = new HashMap<Integer, Department>();//创建一个部门表

        departments.put(101,new Department(101,"教学部"));
        departments.put(102,new Department(102,"市场部"));
        departments.put(103,new Department(103,"教研部"));
        departments.put(104,new Department(104,"运营部"));
        departments.put(105,new Department(105,"后勤部"));
    }

    //获取所有部门信息
    public Collection<Department> getDepartments(){
        return departments.values();
    }

    //通过id得到部门
    public Department getDepartmentById(Integer id){
        return departments.get(id);
    }

}
EmployeeDao类
package com.feng.dao;

import com.feng.pojo.Department;
import com.feng.pojo.Employee;
import org.springframework.beans.factory.annotation.Autowired;
import org.springframework.stereotype.Repository;

import java.util.Collection;
import java.util.HashMap;
import java.util.Map;
import java.util.Objects;

/**
 * @Author feng peng
 * @Date 2022/11/12
 * @Time 15:41
 */
//员工Dao
@Repository
public class EmployeeDao {
    //模拟数据库中的数据
    private static Map<Integer, Employee> employees = null;
    //员工有所属的部门
    @Autowired
    private DepartmentDao departmentDao;
    static {
        employees = new HashMap<Integer, Employee>();

        employees.put(1001,new Employee(1001,"AA","A123456@qq.com",0,new Department(101,"教学部")));
        employees.put(1002,new Employee(1002,"BB","B123456@qq.com",1,new Department(102,"市场部")));
        employees.put(1003,new Employee(1003,"CC","C123456@qq.com",0,new Department(103,"教研部")));
        employees.put(1004,new Employee(1004,"DD","D123456@qq.com",1,new Department(104,"运营部")));
        employees.put(1005,new Employee(1005,"EE","E123456@qq.com",0,new Department(105,"后勤部")));
    }

    //主键自增!
    private static Integer initId = 1006;
    //增加一个员工
    public void save(Employee employee){
        if(Objects.isNull(employee.getId())){
            employee.setId(initId++);
        }
        employee.setDepartment(departmentDao.getDepartmentById(employee.getDepartment().getId()));
        employees.put(employee.getId(),employee);
    }

    //查询全部员工
    public Collection<Employee> getAll(){
        return employees.values();
    }

    //通过id查询员工
    public Employee getEmployeeById(Integer id){
        return employees.get(id);
    }

    //删除员工通过id
    public void delete(Integer id){
        employees.remove(id);
    }
}
基础环境搭建完毕!
8.3 首页
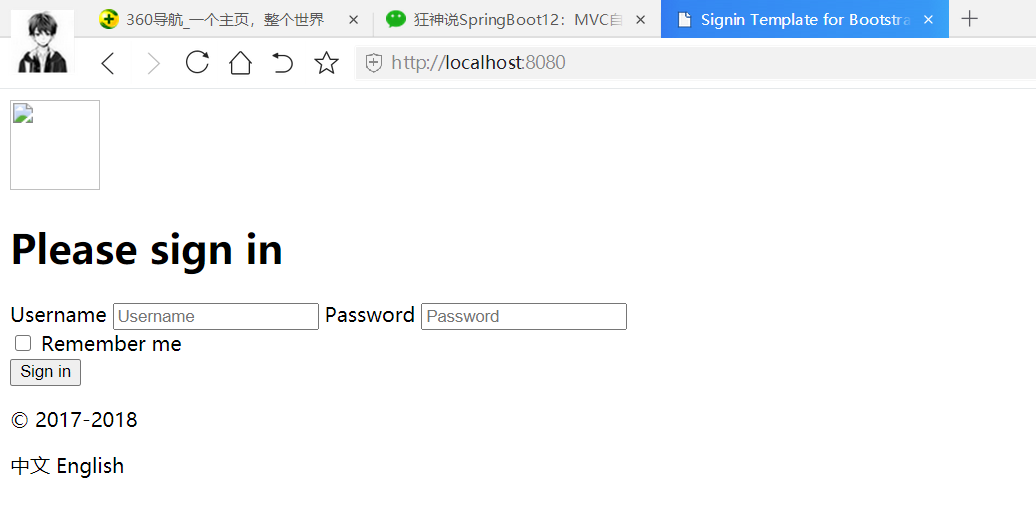
第一种方式
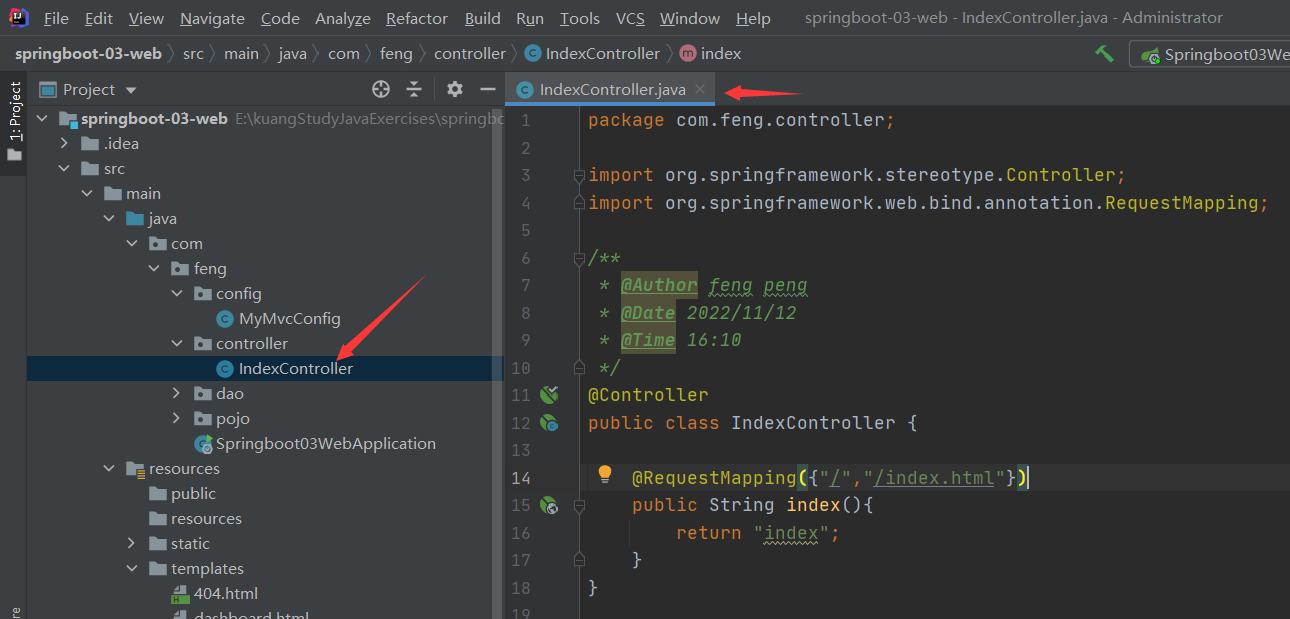
运行项目,测试
第二种方式
删除IndexController类
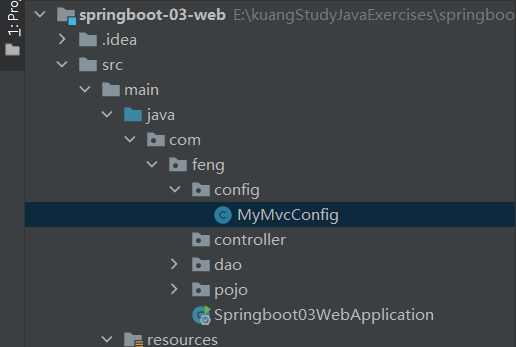
MyMvcConfig类
package com.feng.config;
import org.springframework.context.annotation.Configuration;
import org.springframework.web.servlet.config.annotation.ViewControllerRegistry;
import org.springframework.web.servlet.config.annotation.WebMvcConfigurer;

/**
 * @Author feng peng
 * @Date 2022/11/10
 * @Time 22:06
 */
@Configuration
public class MyMvcConfig implements WebMvcConfigurer {
    @Override
    public void addViewControllers(ViewControllerRegistry registry) {
        registry.addViewController("/").setViewName("index");
        registry.addViewController("/index.html").setViewName("index");
    }
}
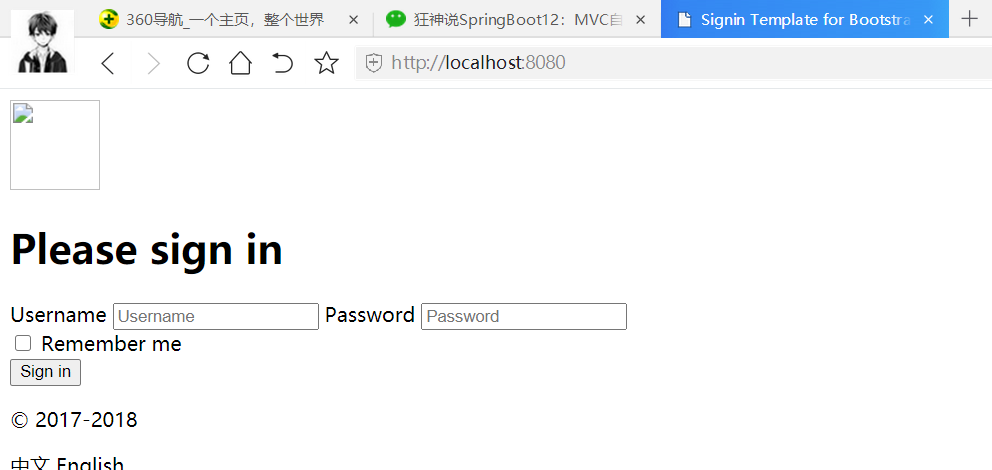
运行测试
引入thymeleaf
关闭thymeleaf缓存

运行测试
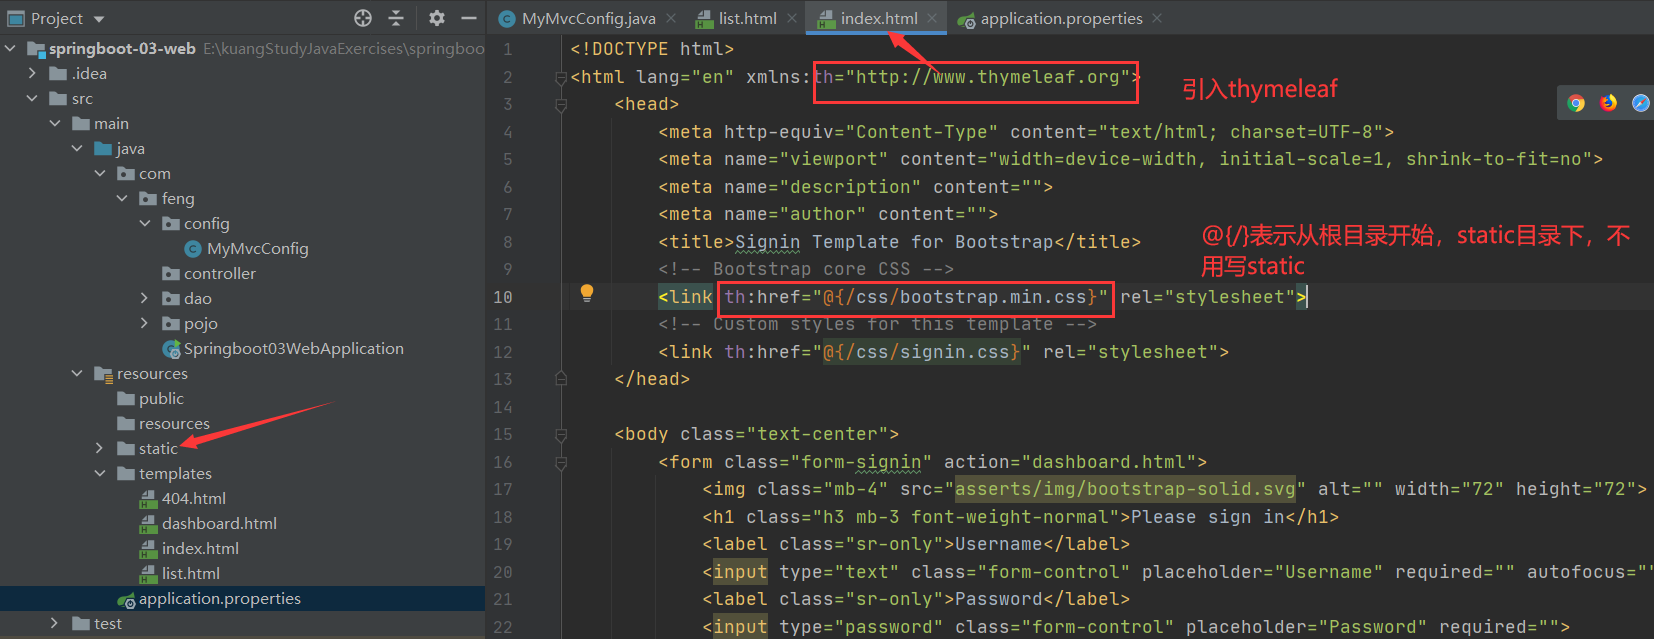
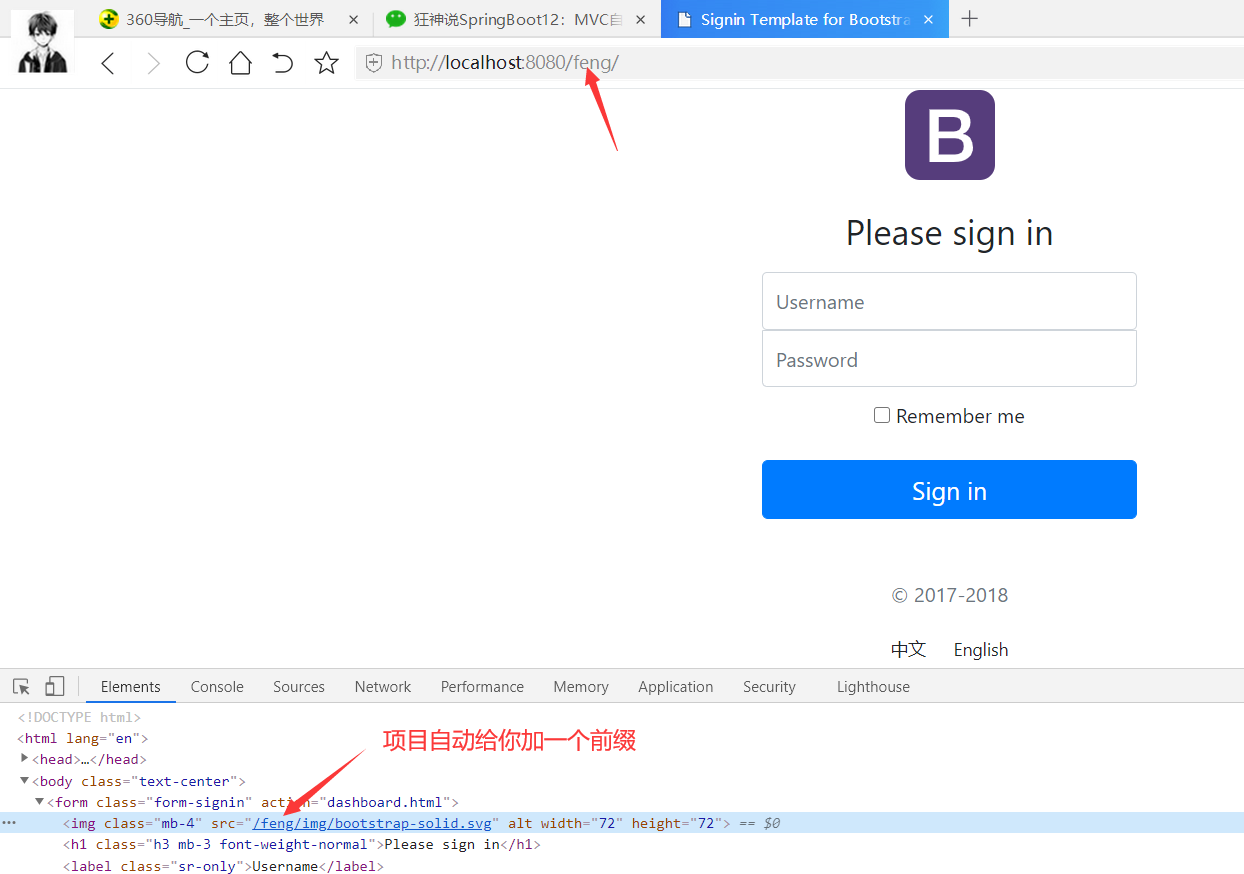
使用@{/}的好处

项目路径加了一个前缀/feng
总结:首页配置
1.注意点,所有页面的静态资源都需要使用thymeleaf接管;
2.url : @{}
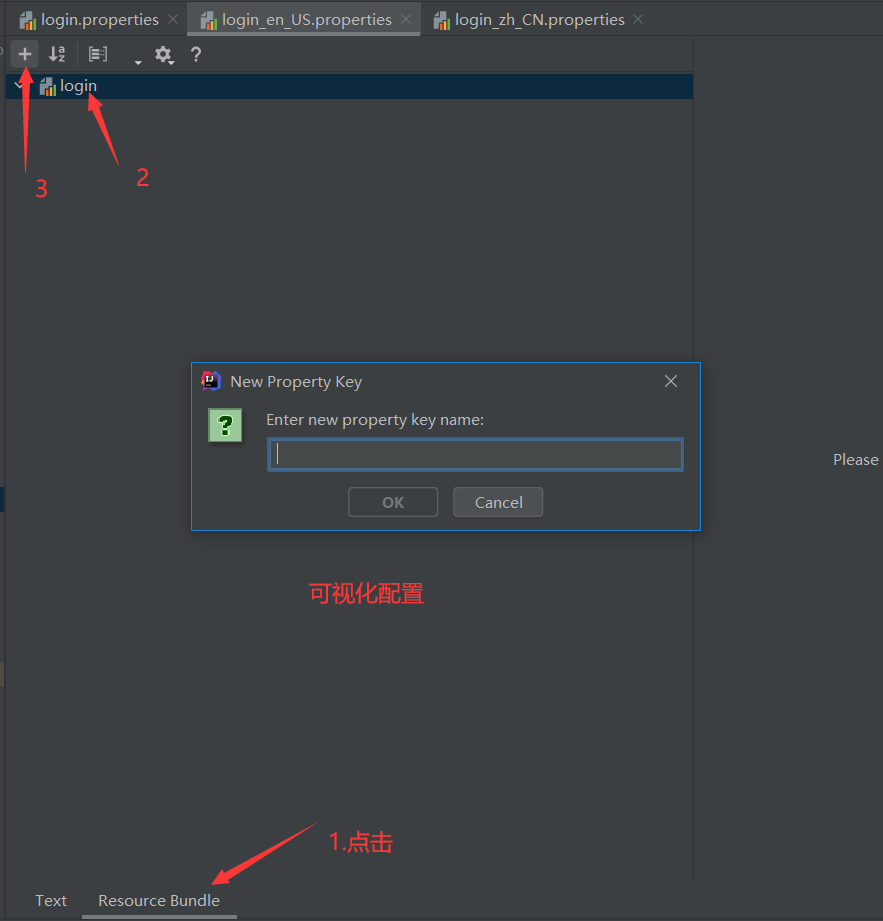
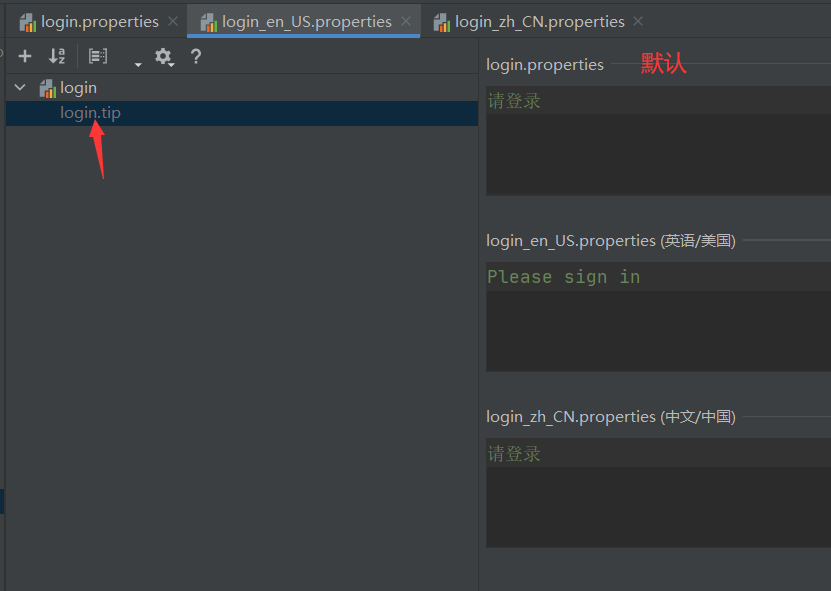
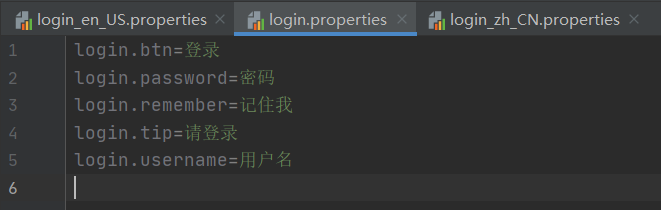
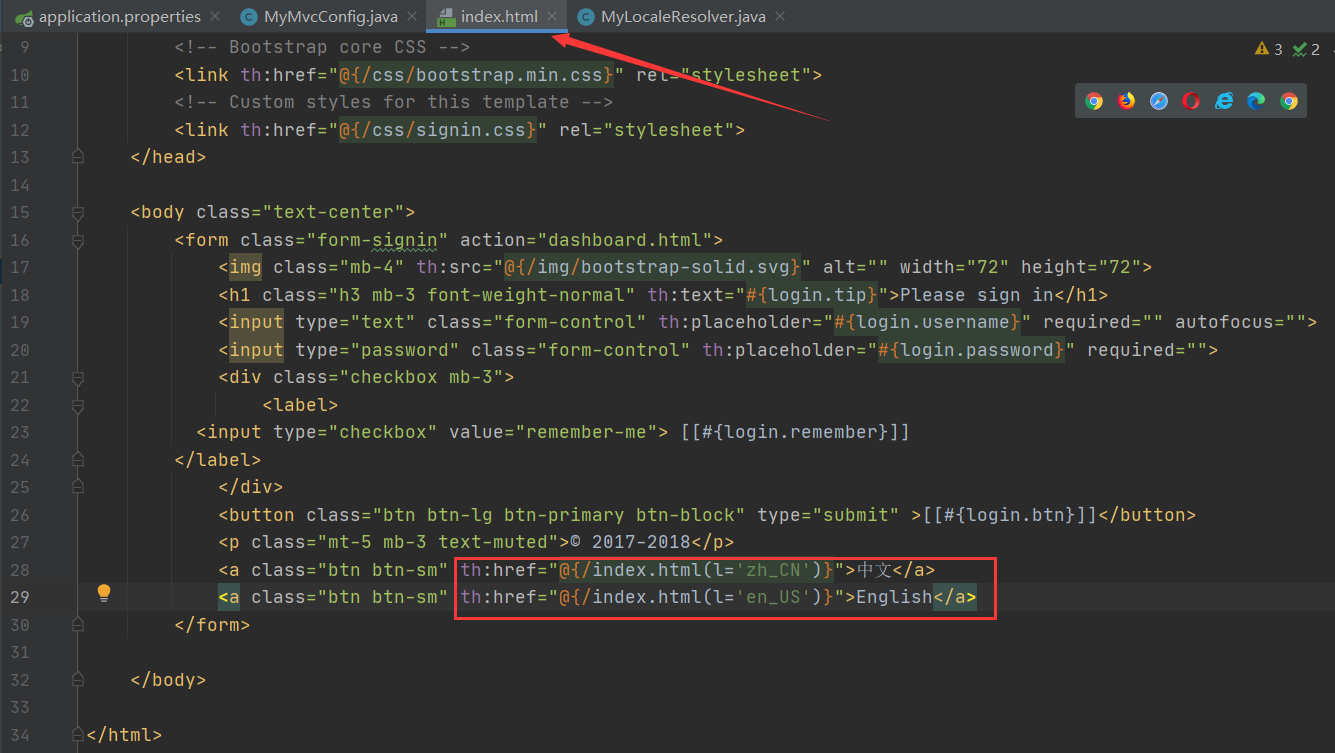
8.4 国际化
确认编码
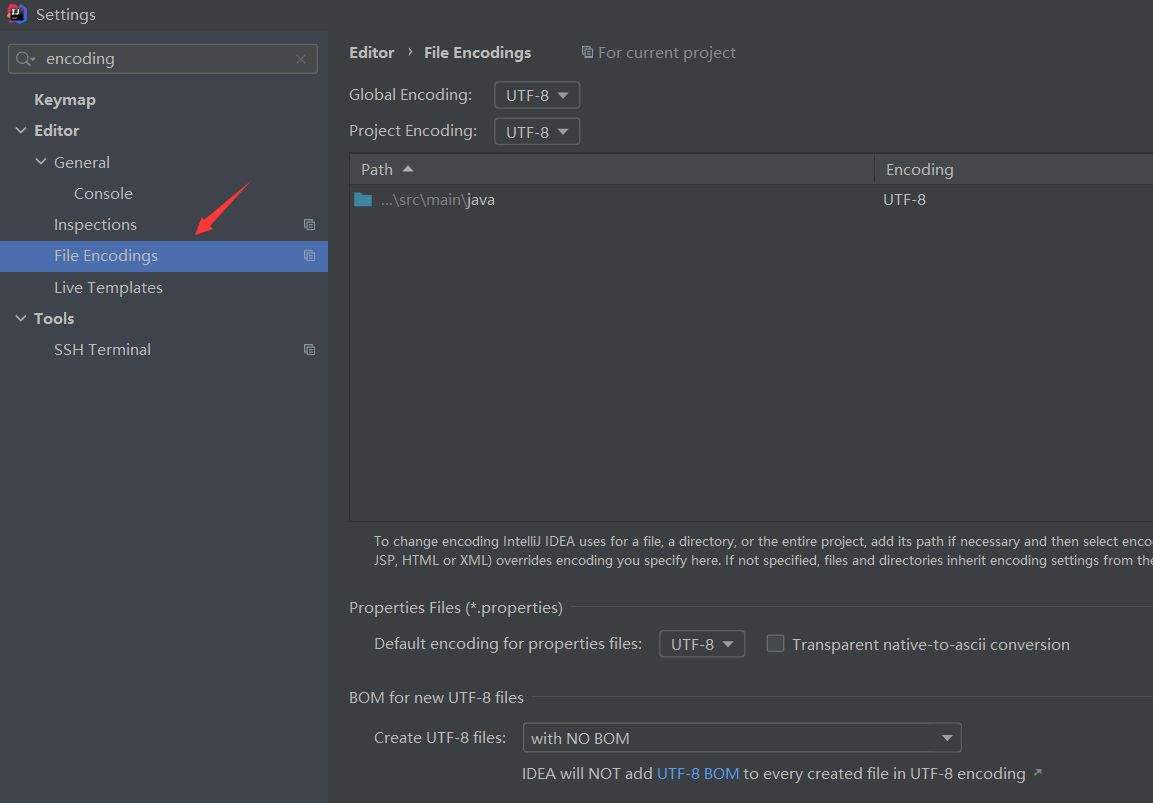

点击OK


thymeleaf官方文档
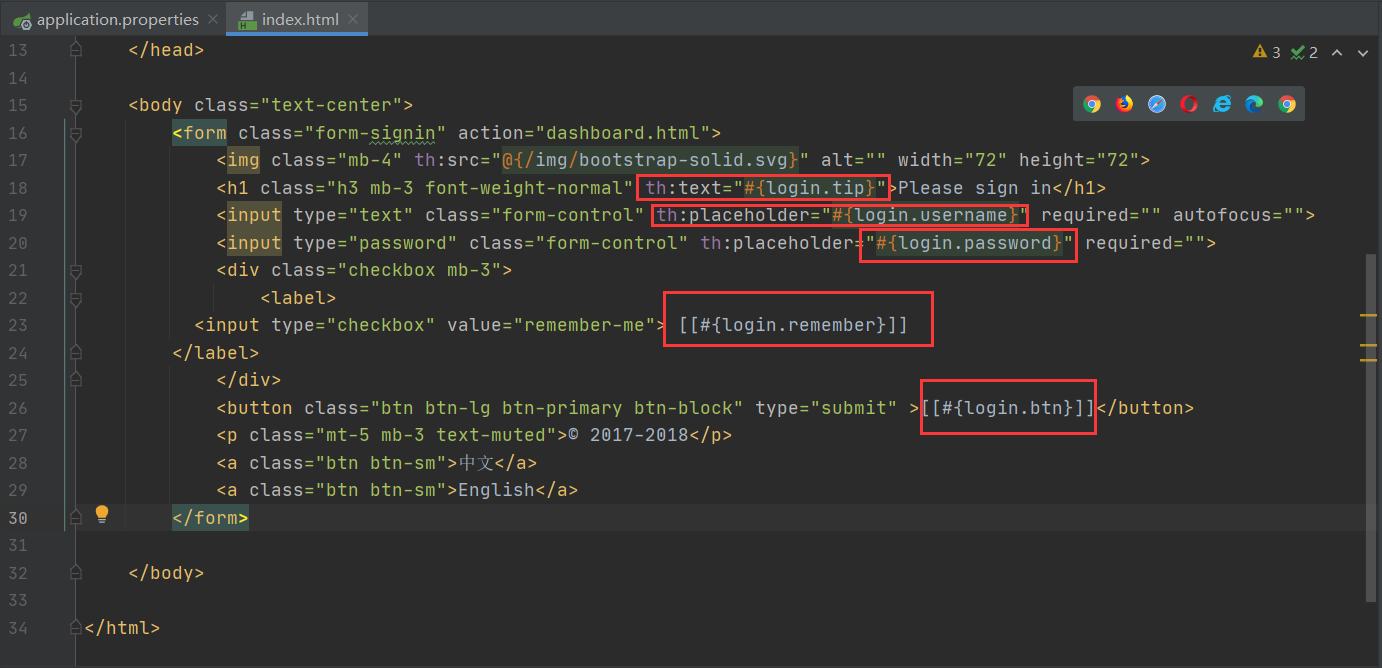
修改前端页面
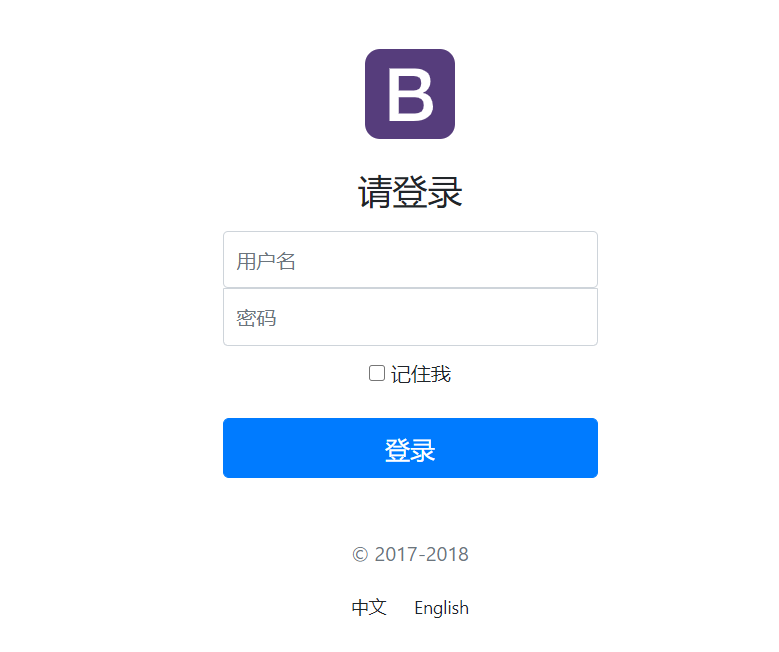
测试
设置中英文切换
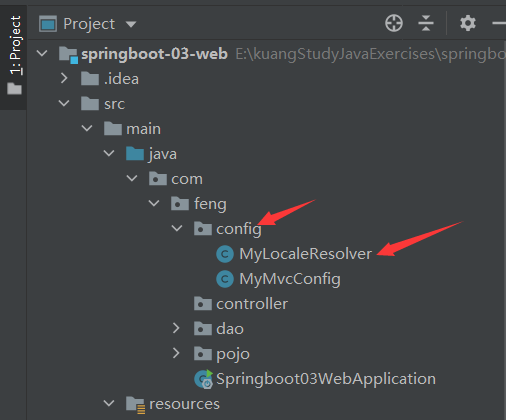
MyLocaleResolver 类
package com.feng.config;

import org.springframework.web.servlet.LocaleResolver;
import org.thymeleaf.util.StringUtils;

import javax.servlet.http.HttpServletRequest;
import javax.servlet.http.HttpServletResponse;
import java.util.Locale;

/**
 * @Author feng peng
 * @Date 2022/11/12
 * @Time 18:05
 */
public class MyLocaleResolver implements LocaleResolver {

    //解析请求
    @Override
    public Locale resolveLocale(HttpServletRequest request) {
        //获取请求中的语言参数
        String language = request.getParameter("l");
        Locale locale = Locale.getDefault();//如果没有就使用默认的

        //如果请求的链接携带了国际化的参数
        if(!StringUtils.isEmpty(language)){
            //zh_CN
            String[] split = language.split("_");
            //国家,地区
            locale = new Locale(split[0], split[1]);
        }
        return locale;
    }

    @Override
    public void setLocale(HttpServletRequest request, HttpServletResponse response, Locale locale) {

    }
}
MyMvcConfig类
@Configuration
public class MyMvcConfig implements WebMvcConfigurer {
    @Override
    public void addViewControllers(ViewControllerRegistry registry) {
        registry.addViewController("/").setViewName("index");
        registry.addViewController("/index.html").setViewName("index");
    }

    //自定义的国际化组件就生效了!
    @Bean
    public LocaleResolver localeResolver(){
        return new MyLocaleResolver();
    }
}
运行测试
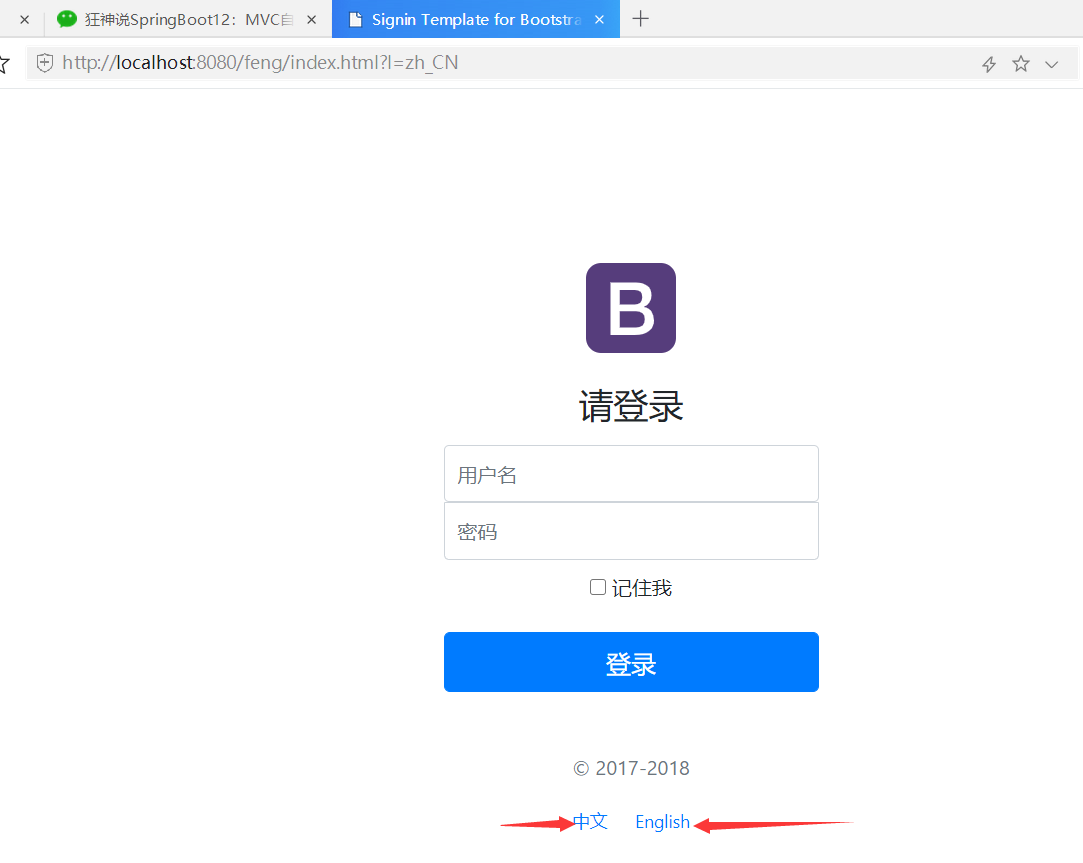
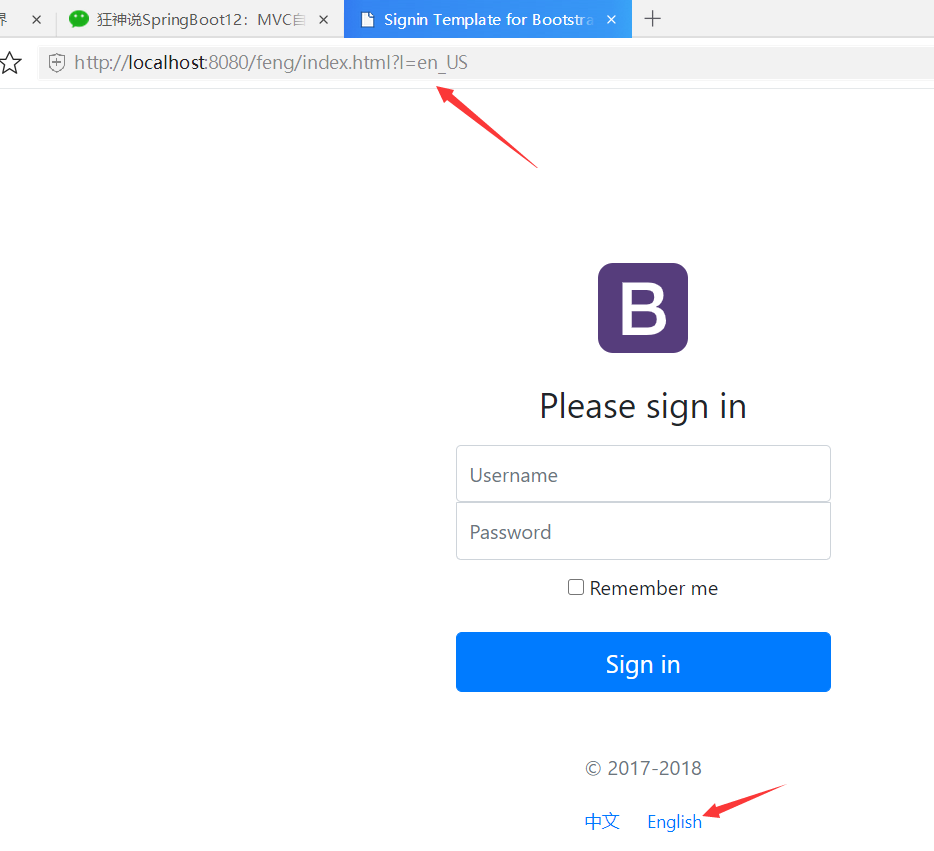
页面国际化:
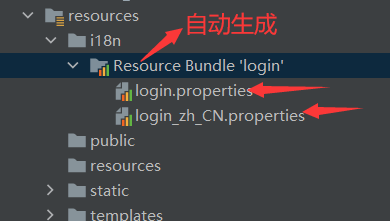
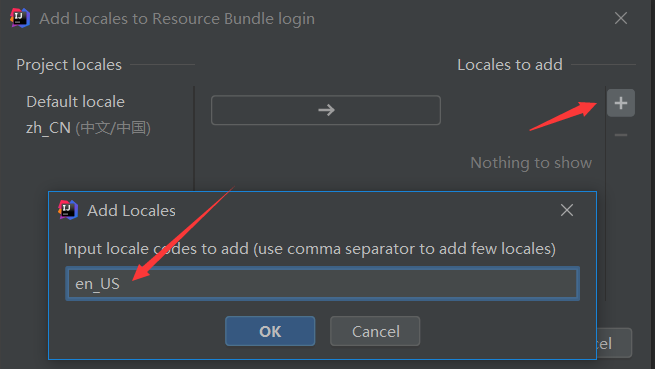
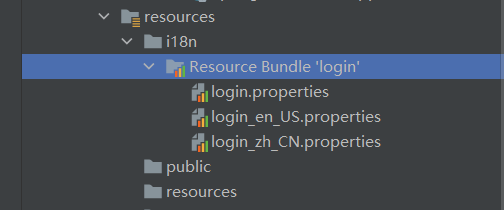
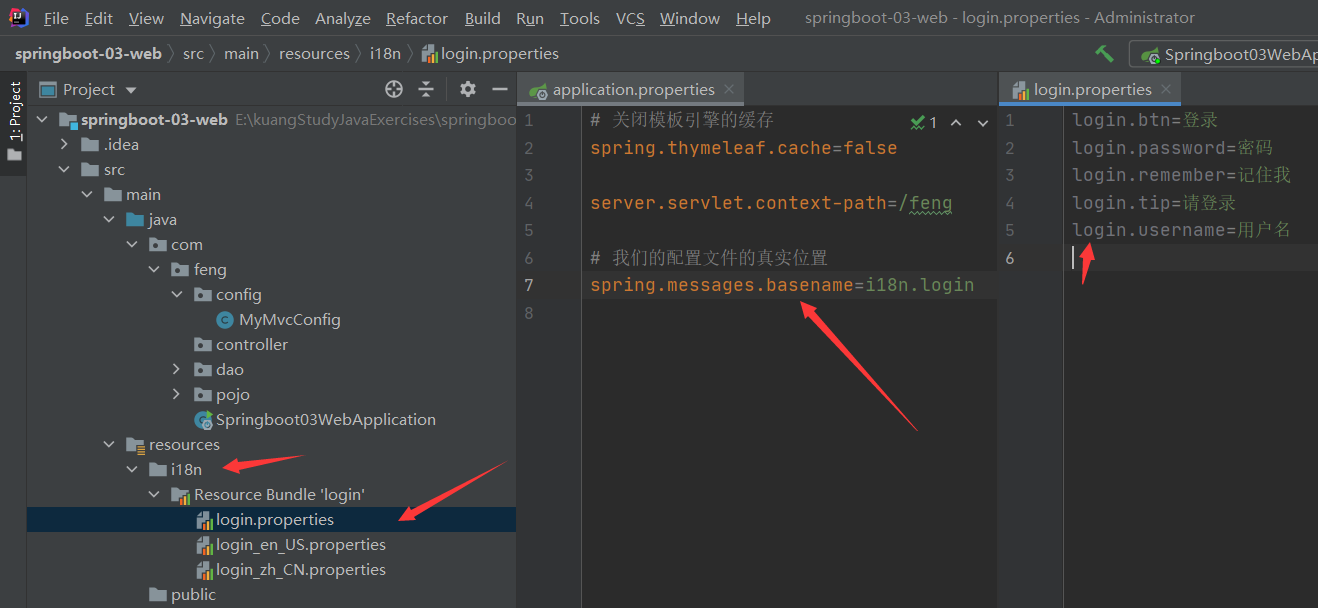
1.我们需要配置i18n文件
2.我们如果需要在项目中进行按钮自动切换,我们需要自定义一个组件LocaleResolver
3.记得将自己写的组件配置到spring容器 @Bean
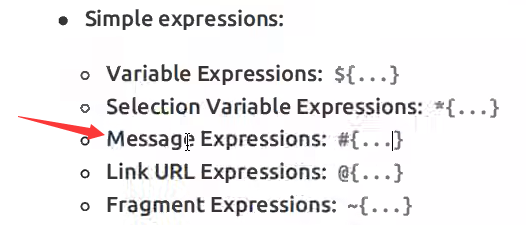
4.#{}
8.5 登录功能
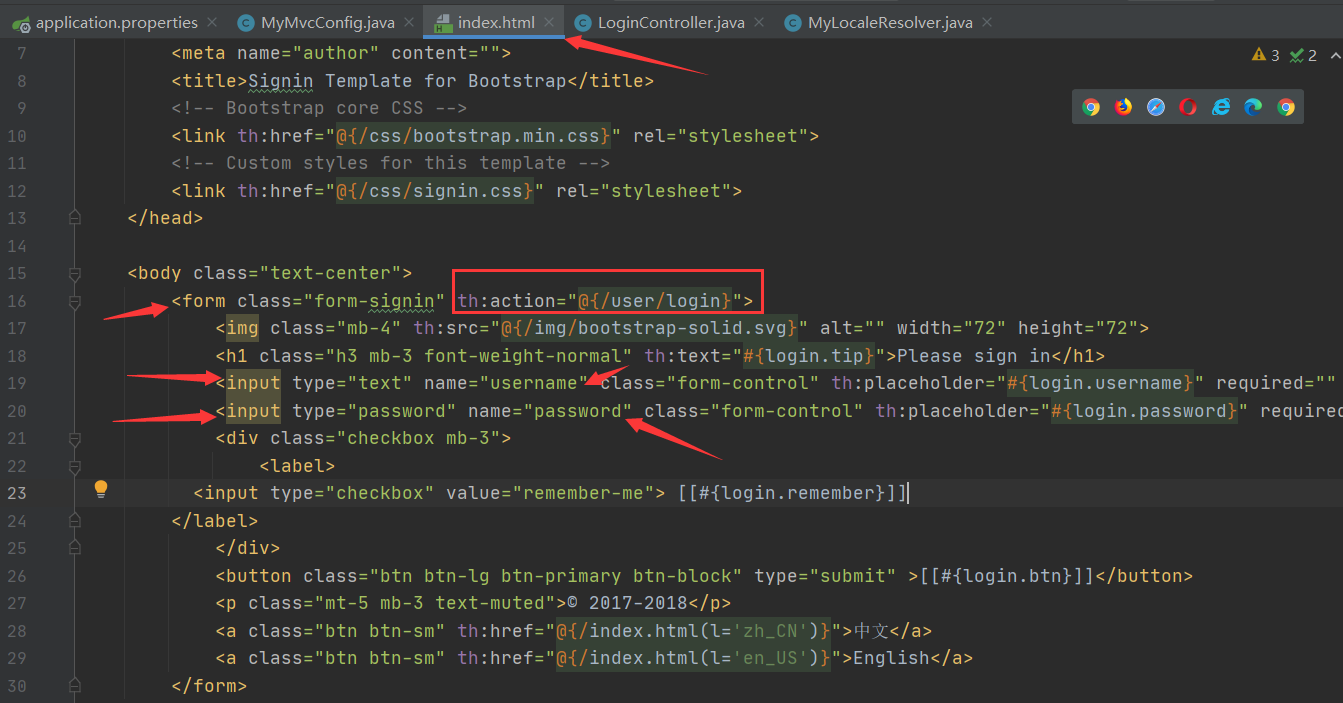

LoginController类
package com.feng.controller;
import org.springframework.stereotype.Controller;
import org.springframework.web.bind.annotation.RequestMapping;
import org.springframework.web.bind.annotation.ResponseBody;
/**
* @Author feng peng
* @Date 2022/11/12
* @Time 21:57
*/
@Controller
public class LoginController {
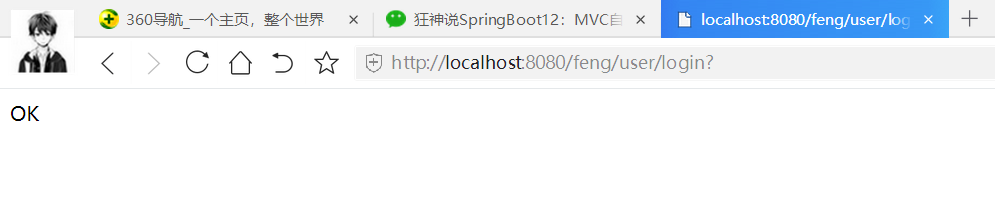
@RequestMapping("/user/login")
@ResponseBody
public String login(){
return "OK";
}
}
先测试是否能够进入方法
运行测试
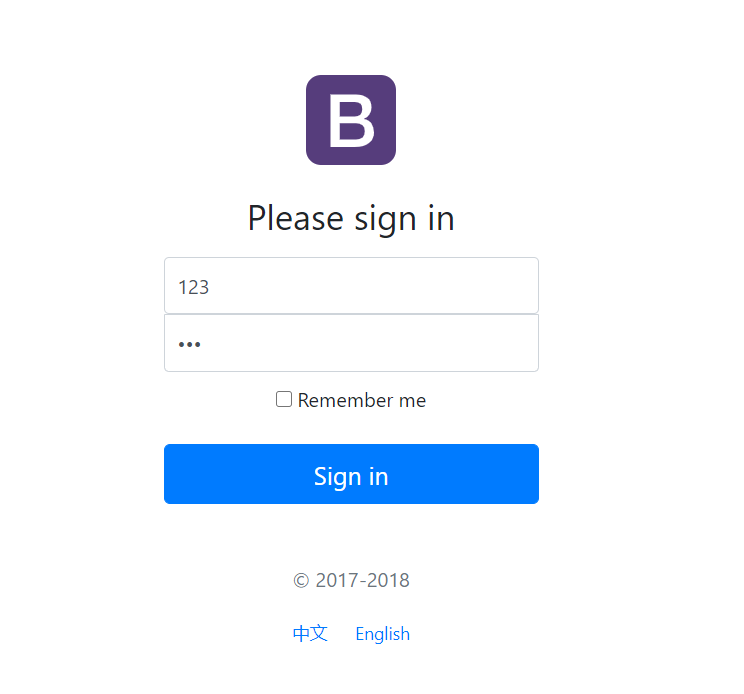
测试成功
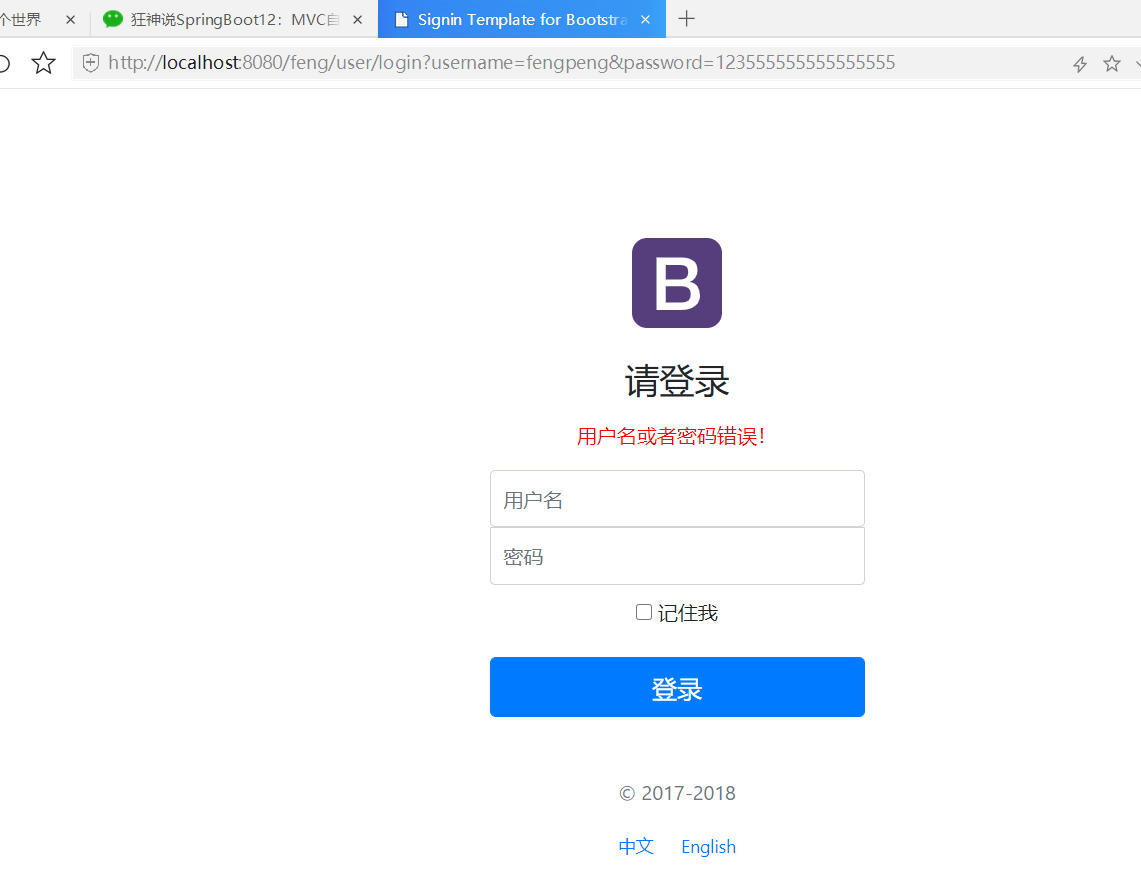
设置错误提示

LoginController类
package com.feng.controller;
import org.springframework.stereotype.Controller;
import org.springframework.ui.Model;
import org.springframework.web.bind.annotation.RequestMapping;
import org.springframework.web.bind.annotation.RequestParam;
import org.thymeleaf.util.StringUtils;
/**
* @Author feng peng
* @Date 2022/11/12
* @Time 21:57
*/
@Controller
public class LoginController {
@RequestMapping("/user/login")
public String login(@RequestParam("username") String username,
@RequestParam("password") String password,
Model model){
//具体的业务:
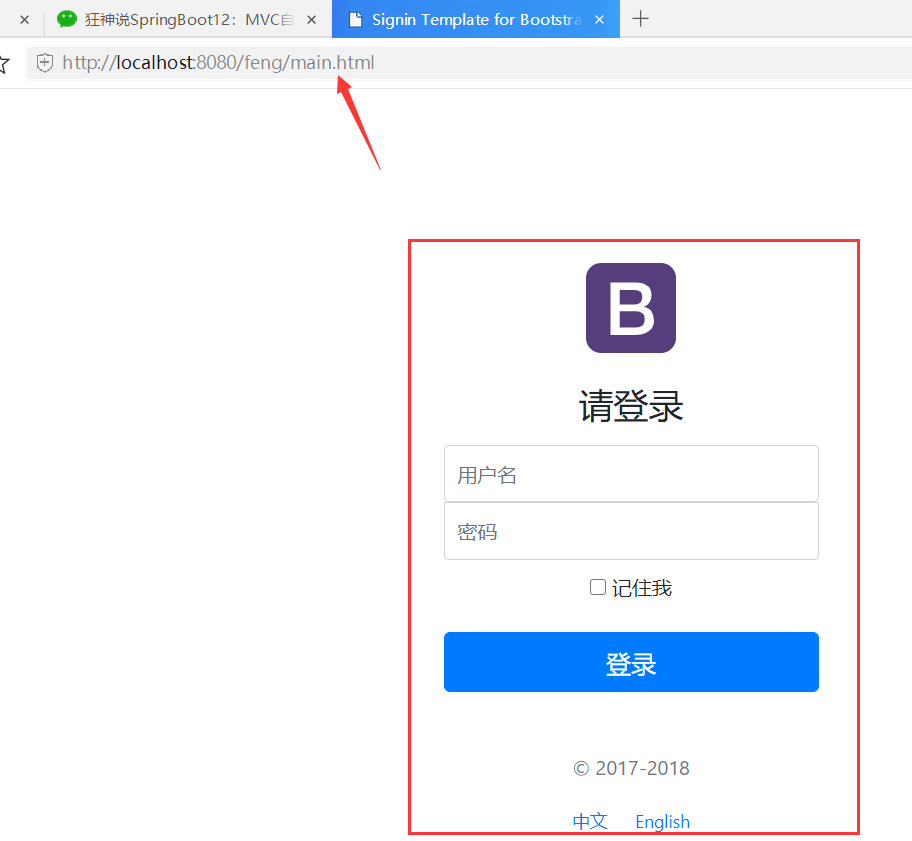
if(!StringUtils.isEmpty(username) && "123456".equals(password)){
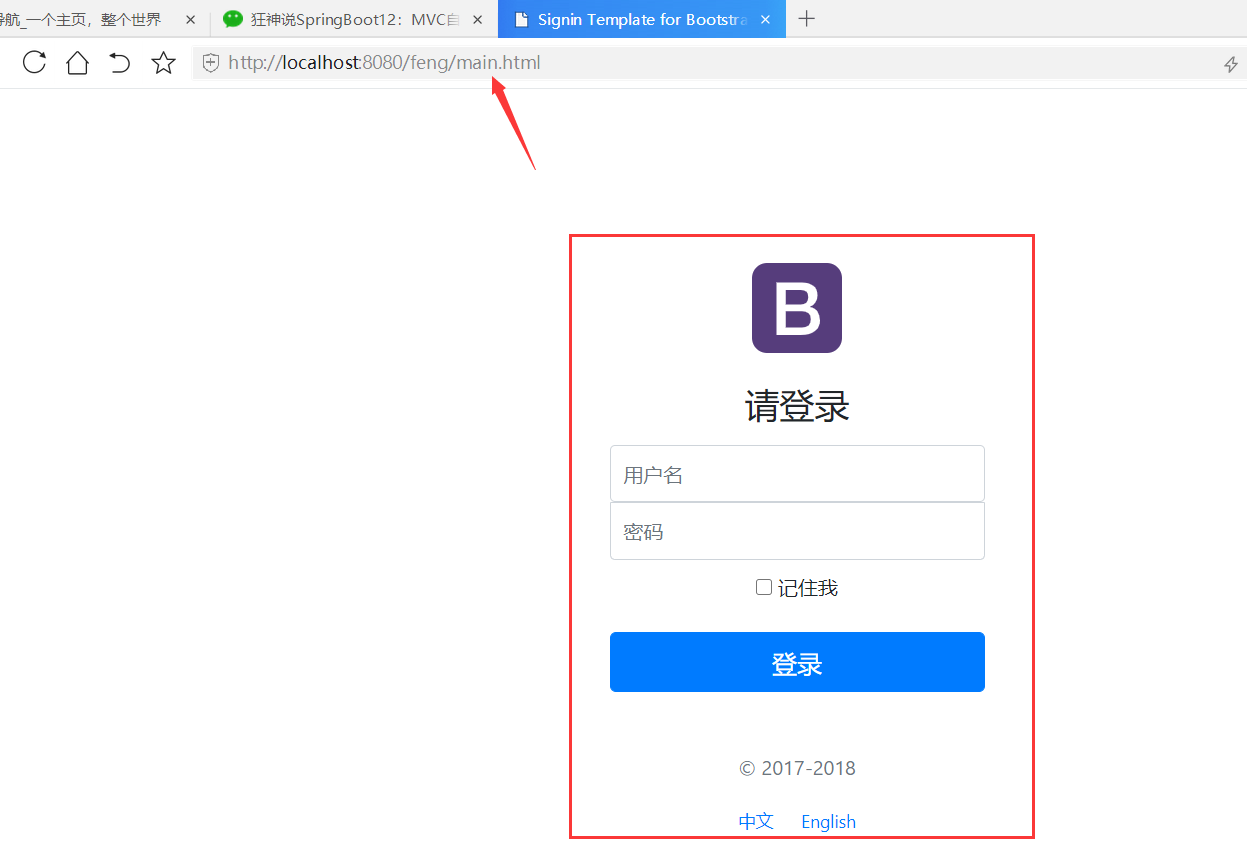
return "redirect:/main.html";
}else {
//告诉用户,你登录失败了!
model.addAttribute("msg","用户名或者密码错误!");
return "index";
}
}
}
MyMvcConfig类
@Configuration
public class MyMvcConfig implements WebMvcConfigurer {
    @Override
    public void addViewControllers(ViewControllerRegistry registry) {
        registry.addViewController("/").setViewName("index");
        registry.addViewController("/index.html").setViewName("index");
        //设置main.html
        registry.addViewController("/main.html").setViewName("dashboard");
    }

    //自定义的国际化组件就生效了!
    @Bean
    public LocaleResolver localeResolver(){
        return new MyLocaleResolver();
    }
}
测试
密码错误
密码正确
8.6 登录拦截器
LoginController类
@Controller
public class LoginController {
    @RequestMapping("/user/login")
    public String login(@RequestParam("username") String username,
                        @RequestParam("password") String password,
                        Model model, HttpSession session){

        //具体的业务:
        if(!StringUtils.isEmpty(username) && "123456".equals(password)){
            //登录成功后设置session
            session.setAttribute("loginUser",username);
            return "redirect:/main.html";
        }else {
            //告诉用户,你登录失败了!
            model.addAttribute("msg","用户名或者密码错误!");
            return "index";
        }
    }

}
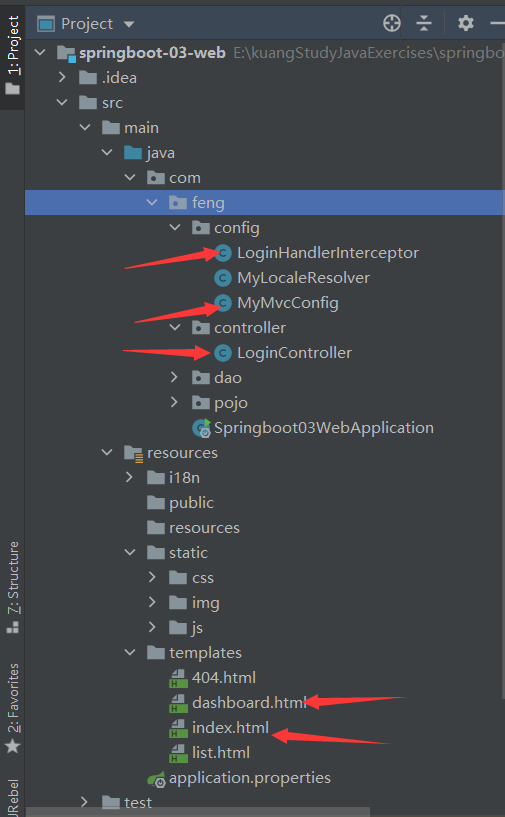
LoginHandlerInterceptor类
package com.feng.config;
import org.springframework.web.servlet.HandlerInterceptor;
import javax.servlet.http.HttpServletRequest;
import javax.servlet.http.HttpServletResponse;
import java.util.Objects;
/**
* @Author feng peng
* @Date 2022/11/12
* @Time 22:41
*/
public class LoginHandlerInterceptor implements HandlerInterceptor {
@Override
public boolean preHandle(HttpServletRequest request, HttpServletResponse response, Object handler) throws Exception {
//登录成功之后,应该有用户的session;
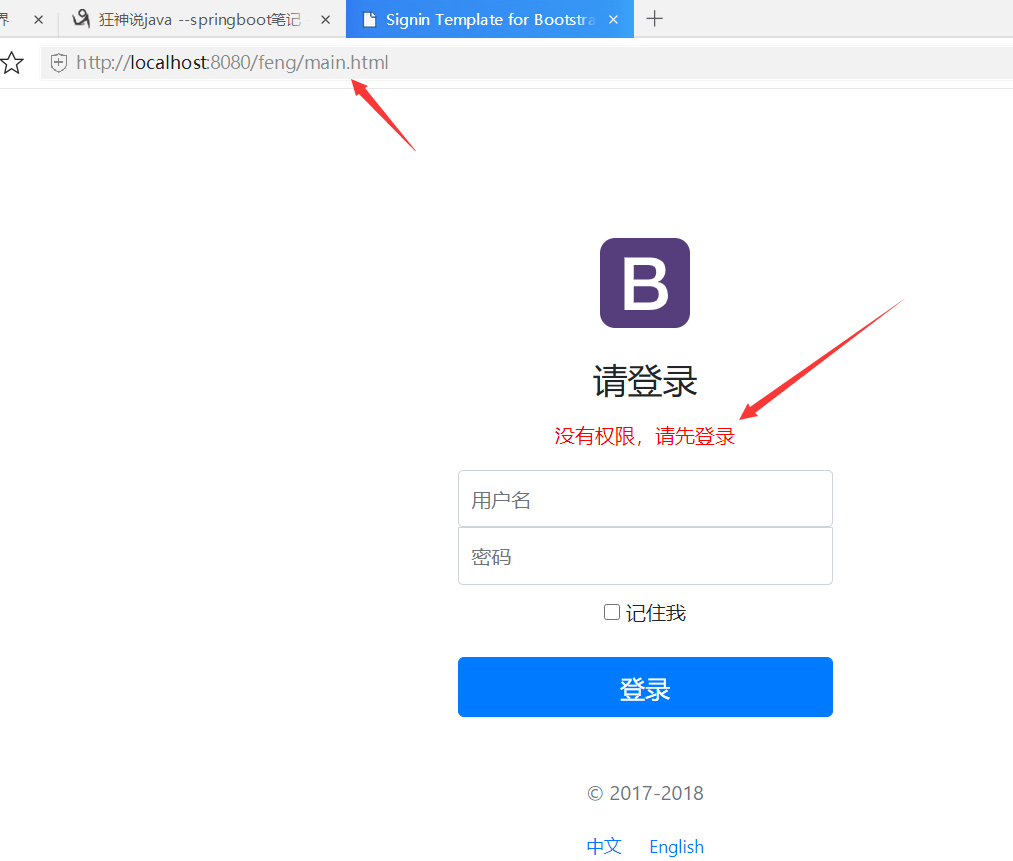
Object loginUser = request.getSession().getAttribute("loginUser");
if(Objects.isNull(loginUser)){ //没有登录
request.setAttribute("msg","没有权限,请先登录");
request.getRequestDispatcher("/index.html").forward(request,response);
return false;
}else {
return true;
}
}
}
将自定义的拦截器注册到spring容器中
MyMvcConfig类
@Configuration
public class MyMvcConfig implements WebMvcConfigurer {
    @Override
    public void addViewControllers(ViewControllerRegistry registry) {
        registry.addViewController("/").setViewName("index");
        registry.addViewController("/index.html").setViewName("index");
        registry.addViewController("/main.html").setViewName("dashboard");
    }

    //自定义的国际化组件就生效了!
    @Bean
    public LocaleResolver localeResolver(){
        return new MyLocaleResolver();
    }

    @Override
    public void addInterceptors(InterceptorRegistry registry) {
        registry.addInterceptor(new LoginHandlerInterceptor())
                .addPathPatterns("/**")/*拦截所有请求*/
                .excludePathPatterns("/index.html","/","/user/login","/css/**","/js/**","/img/**");
                /*排除哪些请求*/
    }
}
运行测试
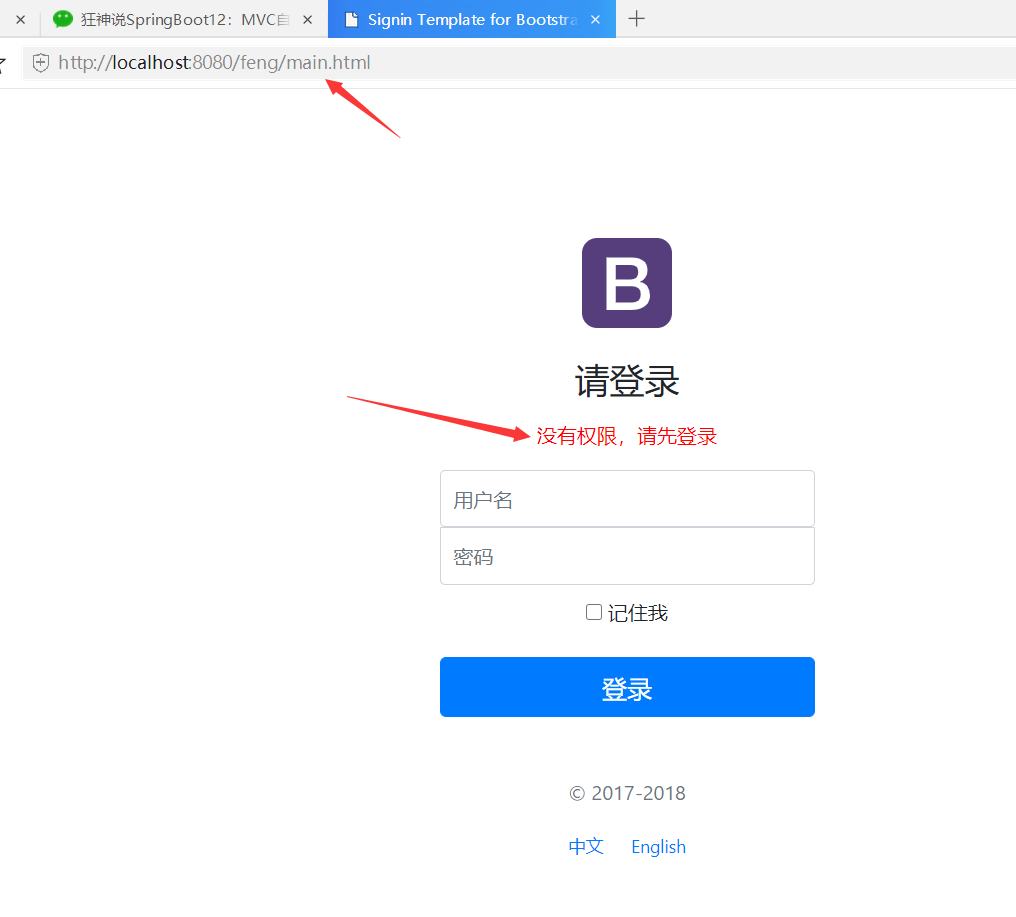
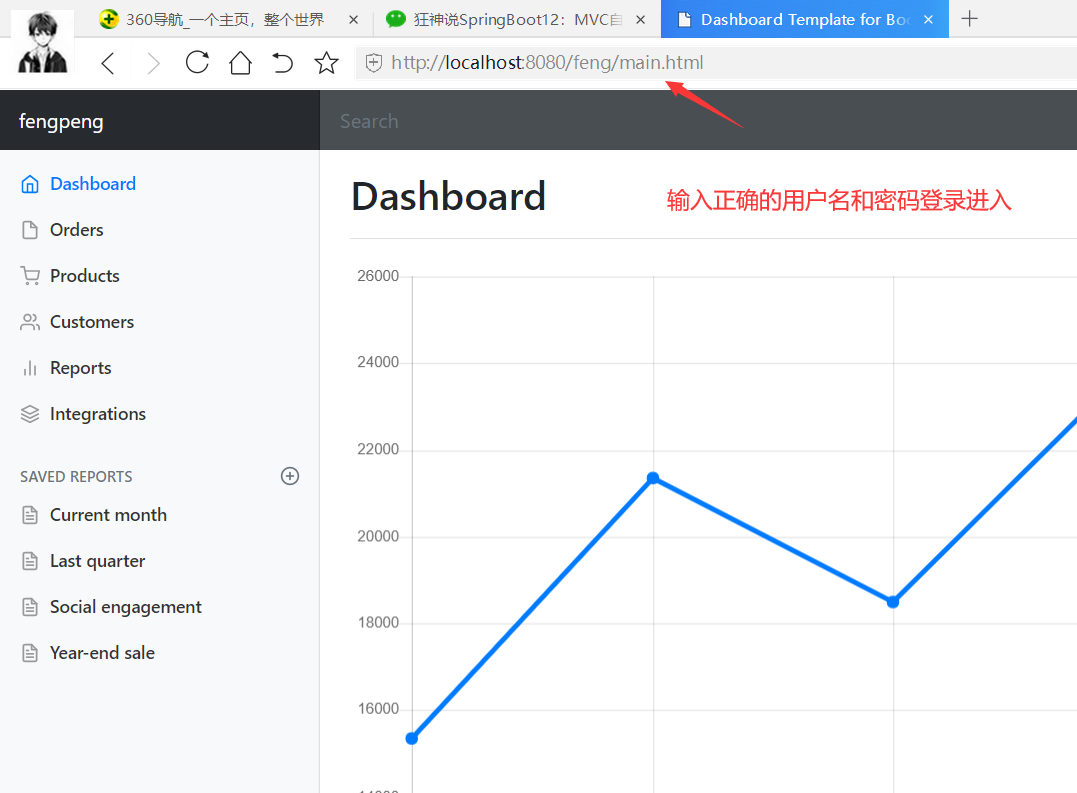
返回登录界面,不输入用户名和密码,直接在URL中输入main.html,仍然可以登录进入(有session)
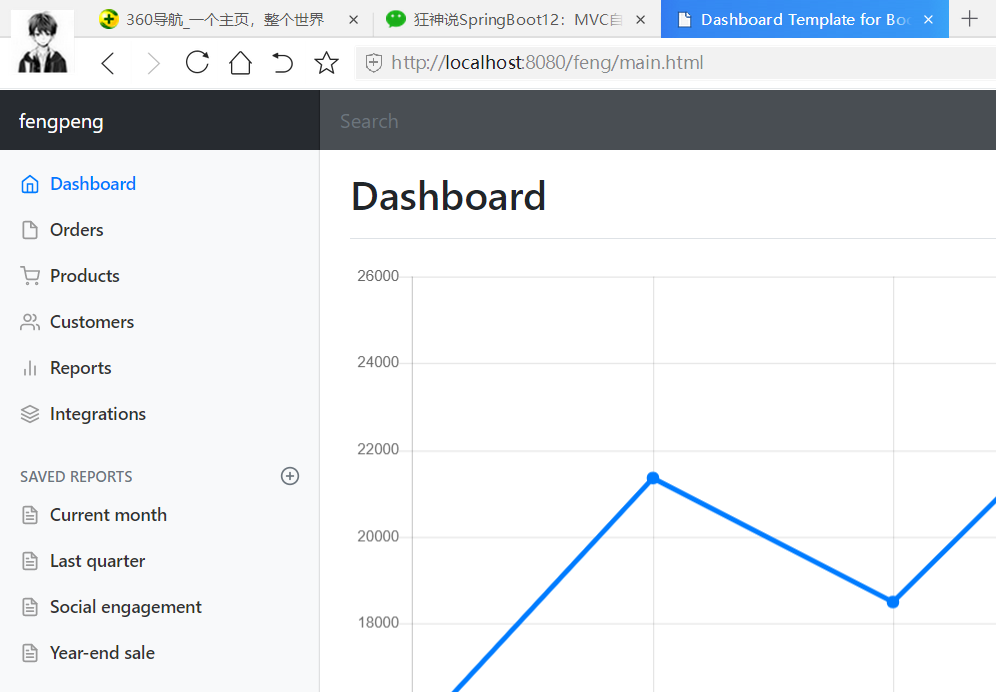
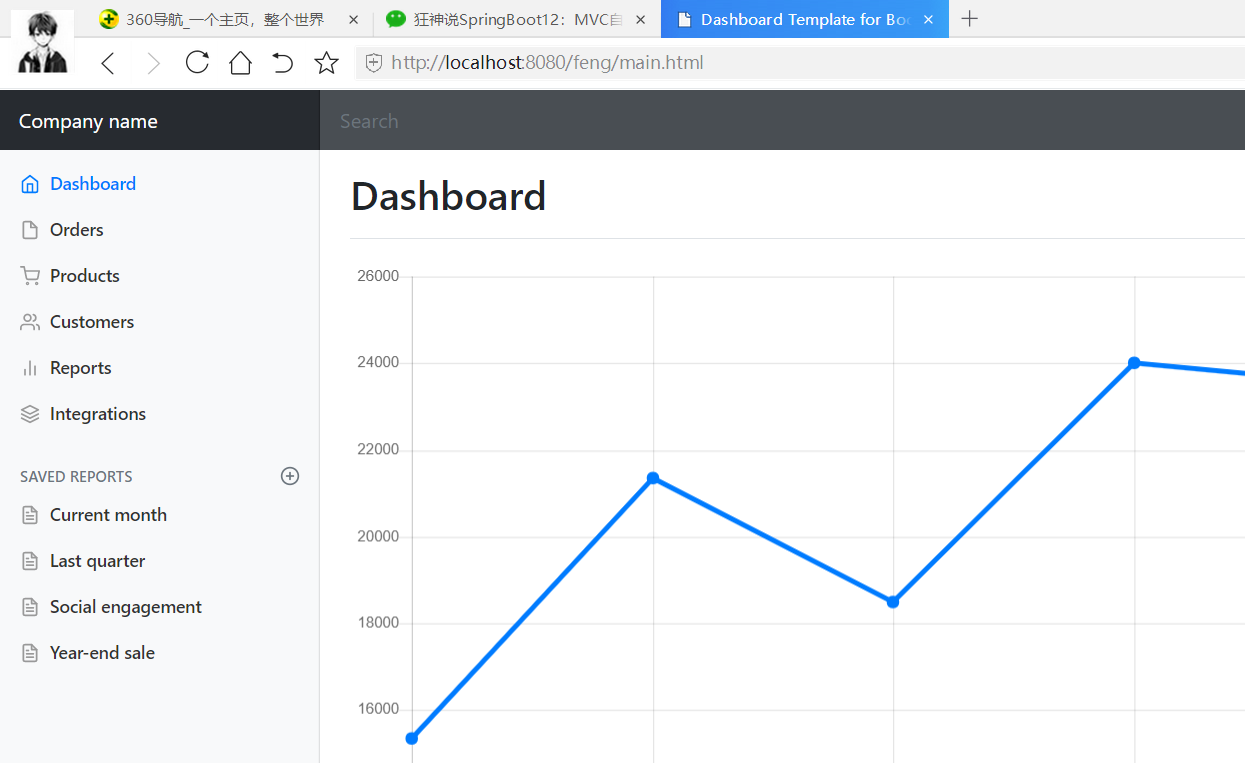
修改主页的公司名

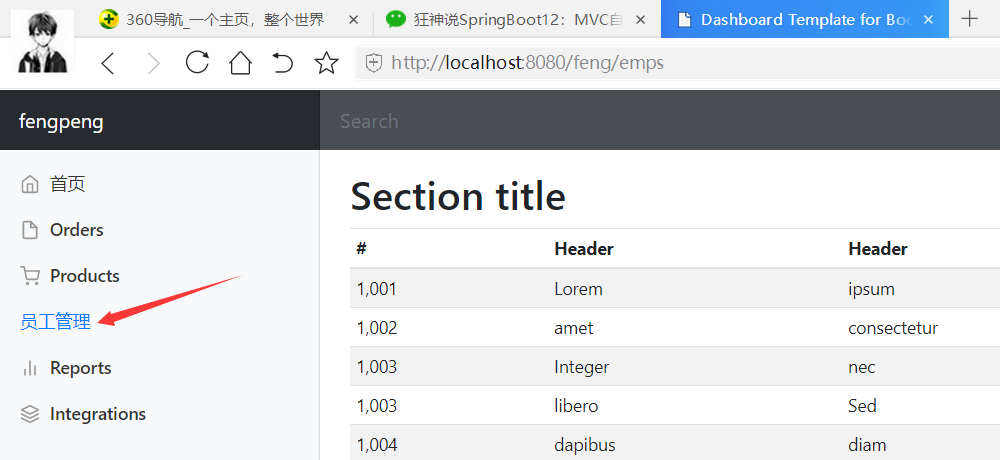
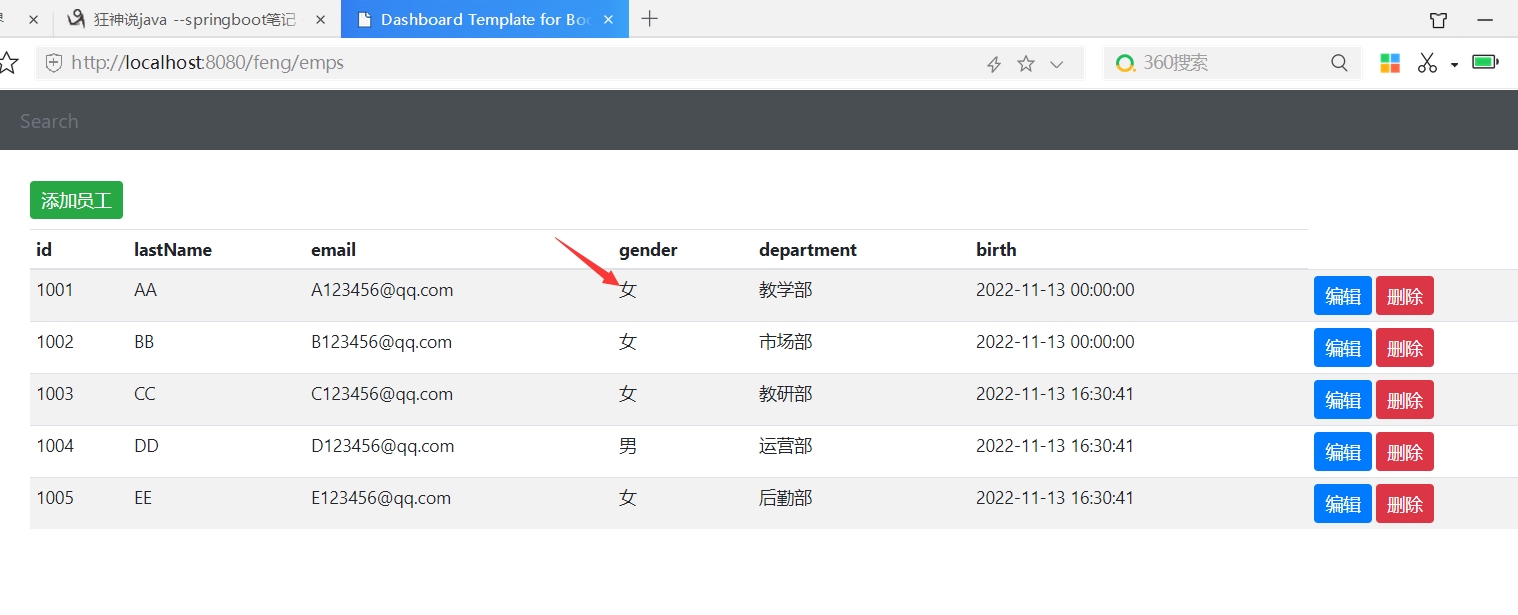
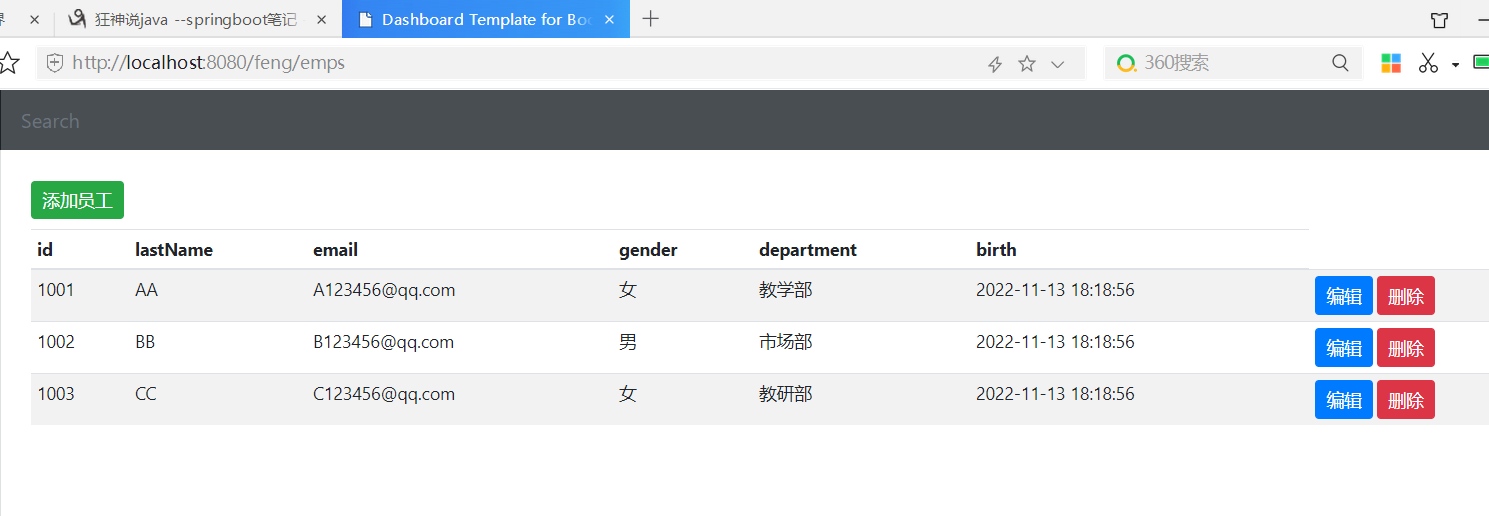
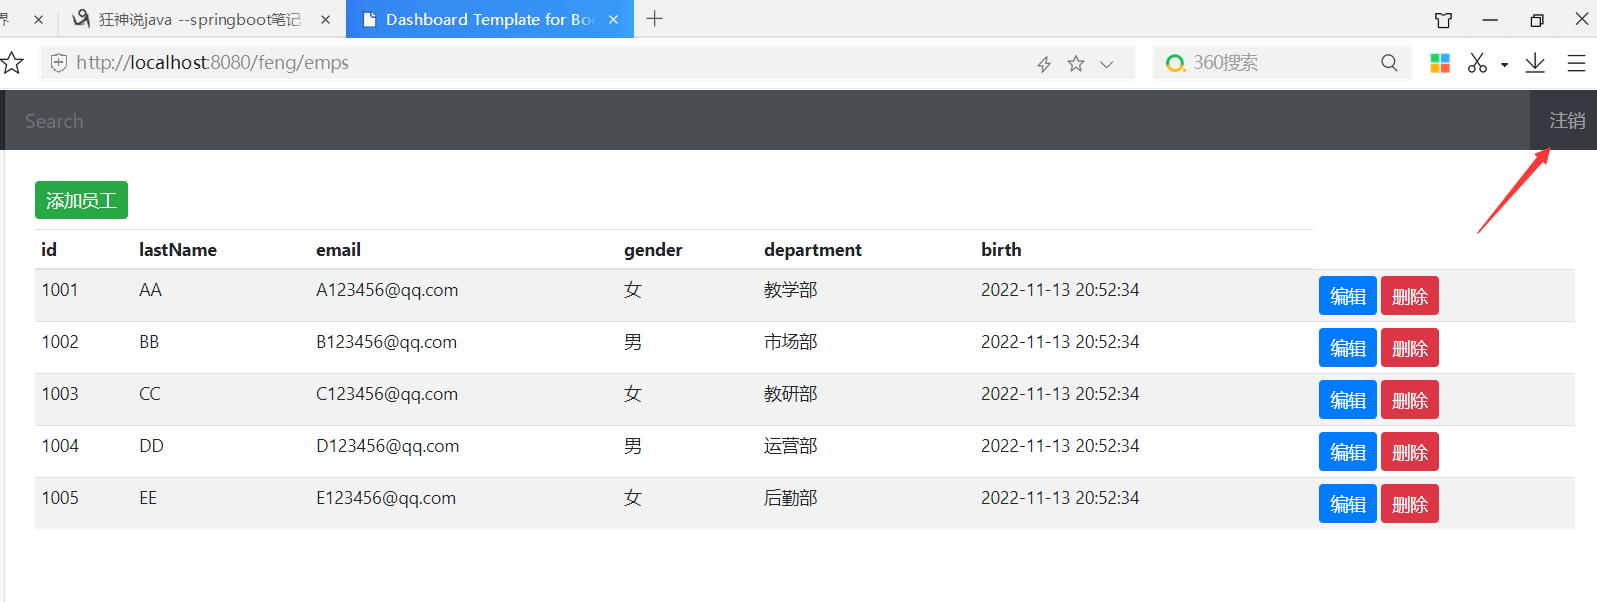
8.7 展示员工列表
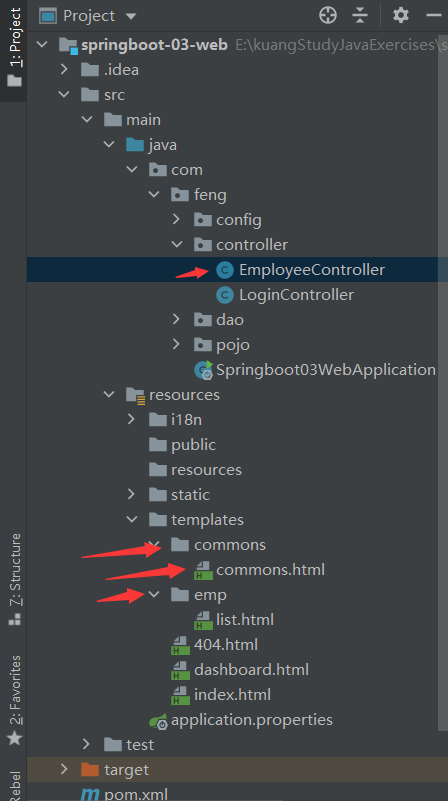
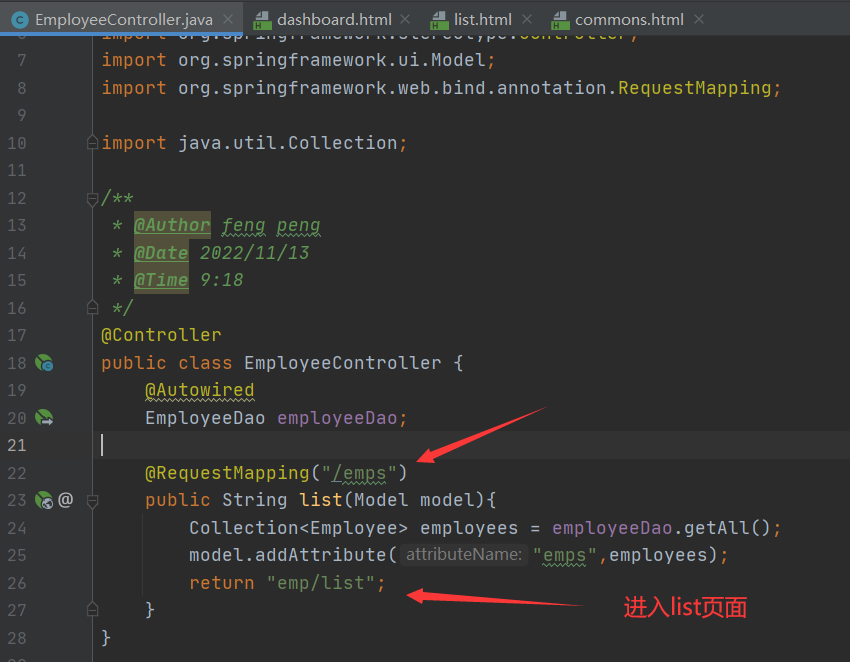
EmployeeController类
package com.feng.controller;
import com.feng.dao.EmployeeDao;
import com.feng.pojo.Employee;
import org.springframework.beans.factory.annotation.Autowired;
import org.springframework.stereotype.Controller;
import org.springframework.ui.Model;
import org.springframework.web.bind.annotation.RequestMapping;
import java.util.Collection;
/**
* @Author feng peng
* @Date 2022/11/13
* @Time 9:18
*/
@Controller
public class EmployeeController {
@Autowired
EmployeeDao employeeDao;
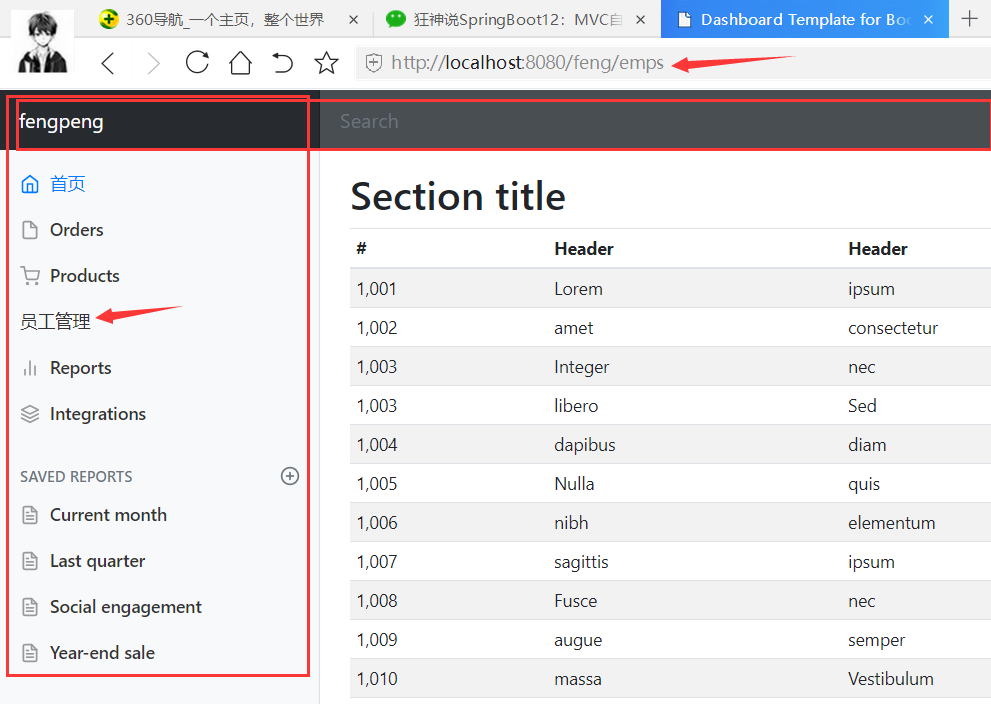
@RequestMapping("/emps")
public String list(Model model){
Collection<Employee> employees = employeeDao.getAll();
model.addAttribute("emps",employees);
return "emp/list";
}
}
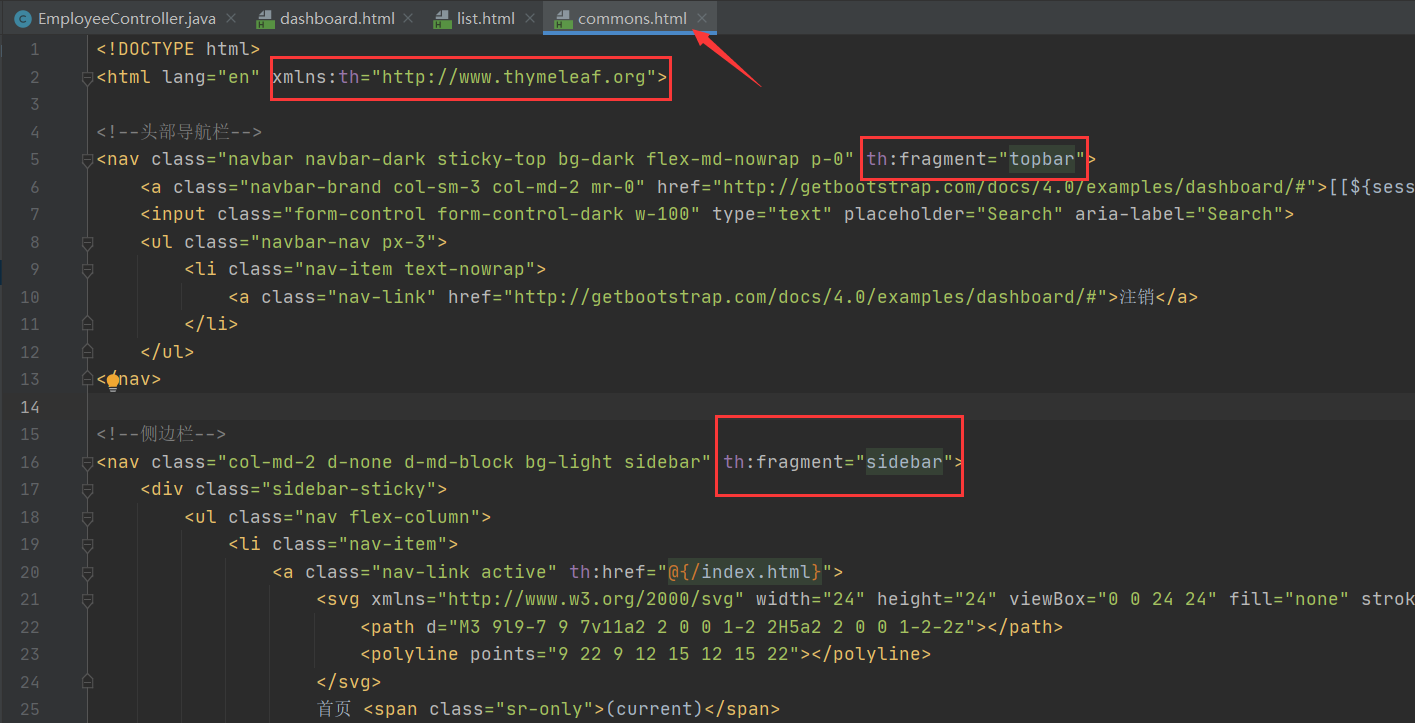
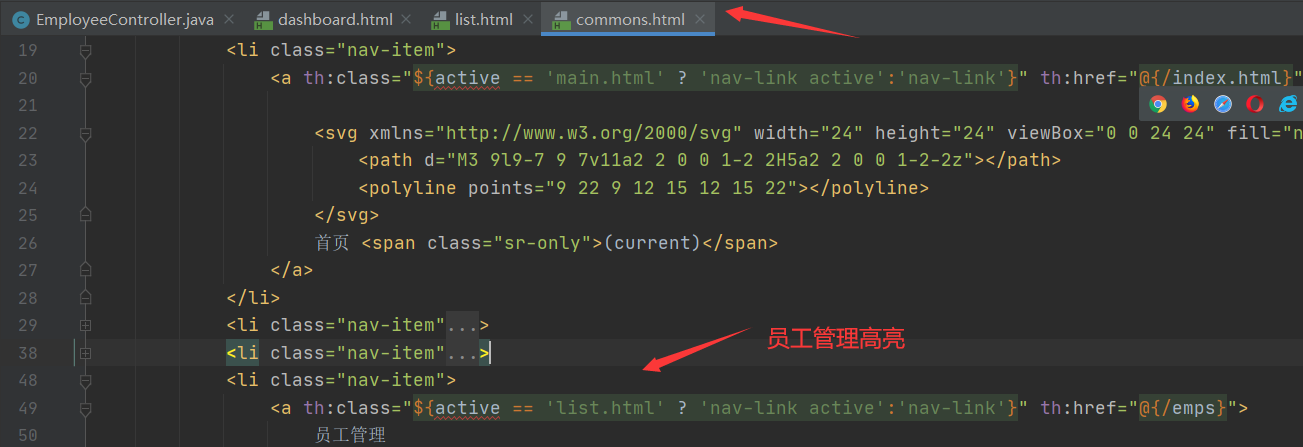
将头部导航栏,侧边栏抽取出来,放入commons.html
<!DOCTYPE html>
<html lang="en" xmlns:th="http://www.thymeleaf.org">
<!--头部导航栏-->
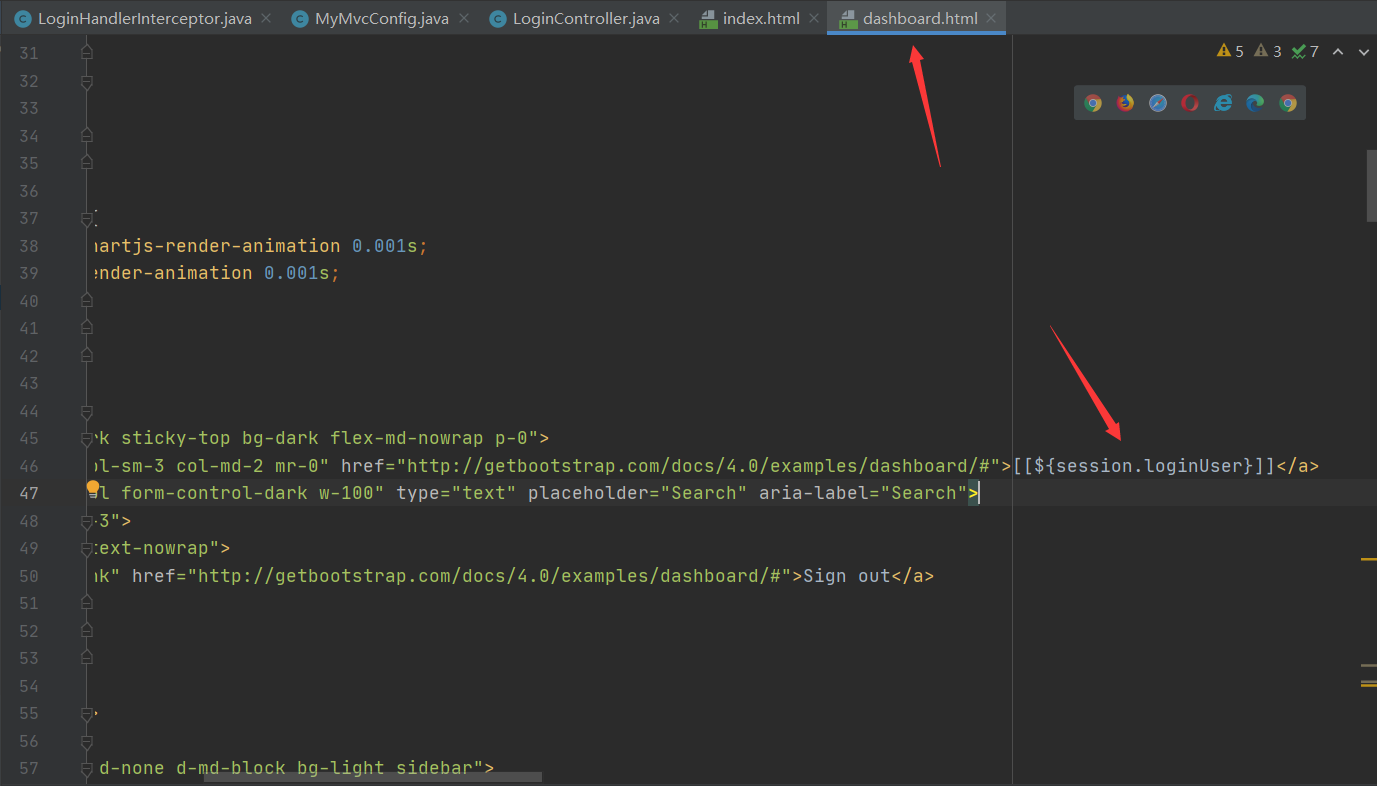
<nav class="navbar navbar-dark sticky-top bg-dark flex-md-nowrap p-0" th:fragment="topbar">
<a class="navbar-brand col-sm-3 col-md-2 mr-0" href="http://getbootstrap.com/docs/4.0/examples/dashboard/#">[[${session.loginUser}]]</a>
<input class="form-control form-control-dark w-100" type="text" placeholder="Search" aria-label="Search">
<ul class="navbar-nav px-3">
<li class="nav-item text-nowrap">
<a class="nav-link" href="http://getbootstrap.com/docs/4.0/examples/dashboard/#">注销</a>
</li>
</ul>
</nav>
<!--侧边栏-->
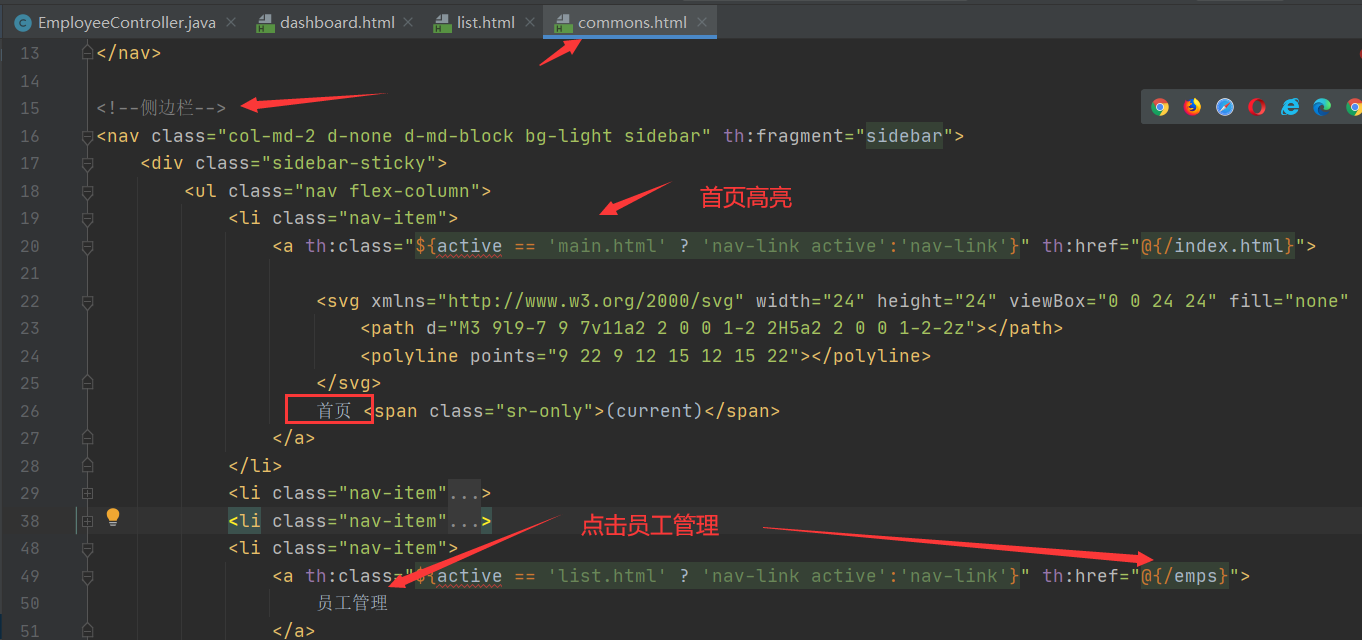
<nav class="col-md-2 d-none d-md-block bg-light sidebar" th:fragment="sidebar">
<div class="sidebar-sticky">
<ul class="nav flex-column">
<li class="nav-item">
<a class="nav-link active" th:href="@{/index.html}">
<svg xmlns="http://www.w3.org/2000/svg" width="24" height="24" viewBox="0 0 24 24" fill="none" stroke="currentColor" stroke-width="2" stroke-linecap="round" stroke-linejoin="round" class="feather feather-home">
<path d="M3 9l9-7 9 7v11a2 2 0 0 1-2 2H5a2 2 0 0 1-2-2z"></path>
<polyline points="9 22 9 12 15 12 15 22"></polyline>
</svg>
首页 <span class="sr-only">(current)</span>
</a>
</li>
<li class="nav-item">
<a class="nav-link" href="http://getbootstrap.com/docs/4.0/examples/dashboard/#">
<svg xmlns="http://www.w3.org/2000/svg" width="24" height="24" viewBox="0 0 24 24" fill="none" stroke="currentColor" stroke-width="2" stroke-linecap="round" stroke-linejoin="round" class="feather feather-file">
<path d="M13 2H6a2 2 0 0 0-2 2v16a2 2 0 0 0 2 2h12a2 2 0 0 0 2-2V9z"></path>
<polyline points="13 2 13 9 20 9"></polyline>
</svg>
Orders
</a>
</li>
<li class="nav-item">
<a class="nav-link" href="http://getbootstrap.com/docs/4.0/examples/dashboard/#">
<svg xmlns="http://www.w3.org/2000/svg" width="24" height="24" viewBox="0 0 24 24" fill="none" stroke="currentColor" stroke-width="2" stroke-linecap="round" stroke-linejoin="round" class="feather feather-shopping-cart">
<circle cx="9" cy="21" r="1"></circle>
<circle cx="20" cy="21" r="1"></circle>
<path d="M1 1h4l2.68 13.39a2 2 0 0 0 2 1.61h9.72a2 2 0 0 0 2-1.61L23 6H6"></path>
</svg>
Products
</a>
</li>
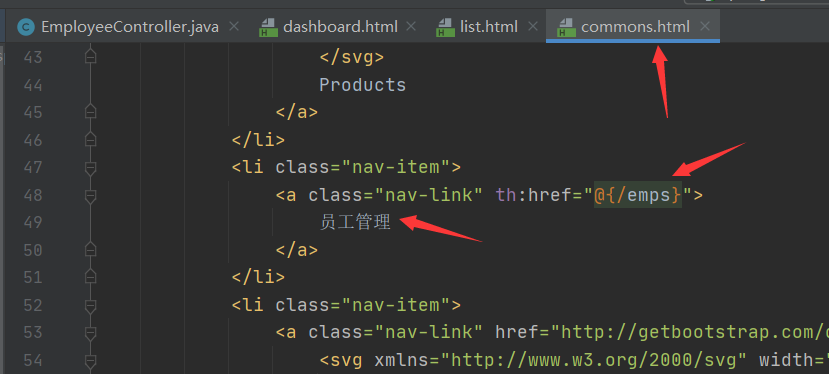
<li class="nav-item">
<a class="nav-link" th:href="@{/emps}">
员工管理
</a>
</li>
<li class="nav-item">
<a class="nav-link" href="http://getbootstrap.com/docs/4.0/examples/dashboard/#">
<svg xmlns="http://www.w3.org/2000/svg" width="24" height="24" viewBox="0 0 24 24" fill="none" stroke="currentColor" stroke-width="2" stroke-linecap="round" stroke-linejoin="round" class="feather feather-bar-chart-2">
<line x1="18" y1="20" x2="18" y2="10"></line>
<line x1="12" y1="20" x2="12" y2="4"></line>
<line x1="6" y1="20" x2="6" y2="14"></line>
</svg>
Reports
</a>
</li>
<li class="nav-item">
<a class="nav-link" href="http://getbootstrap.com/docs/4.0/examples/dashboard/#">
<svg xmlns="http://www.w3.org/2000/svg" width="24" height="24" viewBox="0 0 24 24" fill="none" stroke="currentColor" stroke-width="2" stroke-linecap="round" stroke-linejoin="round" class="feather feather-layers">
<polygon points="12 2 2 7 12 12 22 7 12 2"></polygon>
<polyline points="2 17 12 22 22 17"></polyline>
<polyline points="2 12 12 17 22 12"></polyline>
</svg>
Integrations
</a>
</li>
</ul>
<h6 class="sidebar-heading d-flex justify-content-between align-items-center px-3 mt-4 mb-1 text-muted">
<span>Saved reports</span>
<a class="d-flex align-items-center text-muted" href="http://getbootstrap.com/docs/4.0/examples/dashboard/#">
<svg xmlns="http://www.w3.org/2000/svg" width="24" height="24" viewBox="0 0 24 24" fill="none" stroke="currentColor" stroke-width="2" stroke-linecap="round" stroke-linejoin="round" class="feather feather-plus-circle"><circle cx="12" cy="12" r="10"></circle><line x1="12" y1="8" x2="12" y2="16"></line><line x1="8" y1="12" x2="16" y2="12"></line></svg>
</a>
</h6>
<ul class="nav flex-column mb-2">
<li class="nav-item">
<a class="nav-link" href="http://getbootstrap.com/docs/4.0/examples/dashboard/#">
<svg xmlns="http://www.w3.org/2000/svg" width="24" height="24" viewBox="0 0 24 24" fill="none" stroke="currentColor" stroke-width="2" stroke-linecap="round" stroke-linejoin="round" class="feather feather-file-text">
<path d="M14 2H6a2 2 0 0 0-2 2v16a2 2 0 0 0 2 2h12a2 2 0 0 0 2-2V8z"></path>
<polyline points="14 2 14 8 20 8"></polyline>
<line x1="16" y1="13" x2="8" y2="13"></line>
<line x1="16" y1="17" x2="8" y2="17"></line>
<polyline points="10 9 9 9 8 9"></polyline>
</svg>
Current month
</a>
</li>
<li class="nav-item">
<a class="nav-link" href="http://getbootstrap.com/docs/4.0/examples/dashboard/#">
<svg xmlns="http://www.w3.org/2000/svg" width="24" height="24" viewBox="0 0 24 24" fill="none" stroke="currentColor" stroke-width="2" stroke-linecap="round" stroke-linejoin="round" class="feather feather-file-text">
<path d="M14 2H6a2 2 0 0 0-2 2v16a2 2 0 0 0 2 2h12a2 2 0 0 0 2-2V8z"></path>
<polyline points="14 2 14 8 20 8"></polyline>
<line x1="16" y1="13" x2="8" y2="13"></line>
<line x1="16" y1="17" x2="8" y2="17"></line>
<polyline points="10 9 9 9 8 9"></polyline>
</svg>
Last quarter
</a>
</li>
<li class="nav-item">
<a class="nav-link" href="http://getbootstrap.com/docs/4.0/examples/dashboard/#">
<svg xmlns="http://www.w3.org/2000/svg" width="24" height="24" viewBox="0 0 24 24" fill="none" stroke="currentColor" stroke-width="2" stroke-linecap="round" stroke-linejoin="round" class="feather feather-file-text">
<path d="M14 2H6a2 2 0 0 0-2 2v16a2 2 0 0 0 2 2h12a2 2 0 0 0 2-2V8z"></path>
<polyline points="14 2 14 8 20 8"></polyline>
<line x1="16" y1="13" x2="8" y2="13"></line>
<line x1="16" y1="17" x2="8" y2="17"></line>
<polyline points="10 9 9 9 8 9"></polyline>
</svg>
Social engagement
</a>
</li>
<li class="nav-item">
<a class="nav-link" href="http://getbootstrap.com/docs/4.0/examples/dashboard/#">
<svg xmlns="http://www.w3.org/2000/svg" width="24" height="24" viewBox="0 0 24 24" fill="none" stroke="currentColor" stroke-width="2" stroke-linecap="round" stroke-linejoin="round" class="feather feather-file-text">
<path d="M14 2H6a2 2 0 0 0-2 2v16a2 2 0 0 0 2 2h12a2 2 0 0 0 2-2V8z"></path>
<polyline points="14 2 14 8 20 8"></polyline>
<line x1="16" y1="13" x2="8" y2="13"></line>
<line x1="16" y1="17" x2="8" y2="17"></line>
<polyline points="10 9 9 9 8 9"></polyline>
</svg>
Year-end sale
</a>
</li>
</ul>
</div>
</nav>
</html>
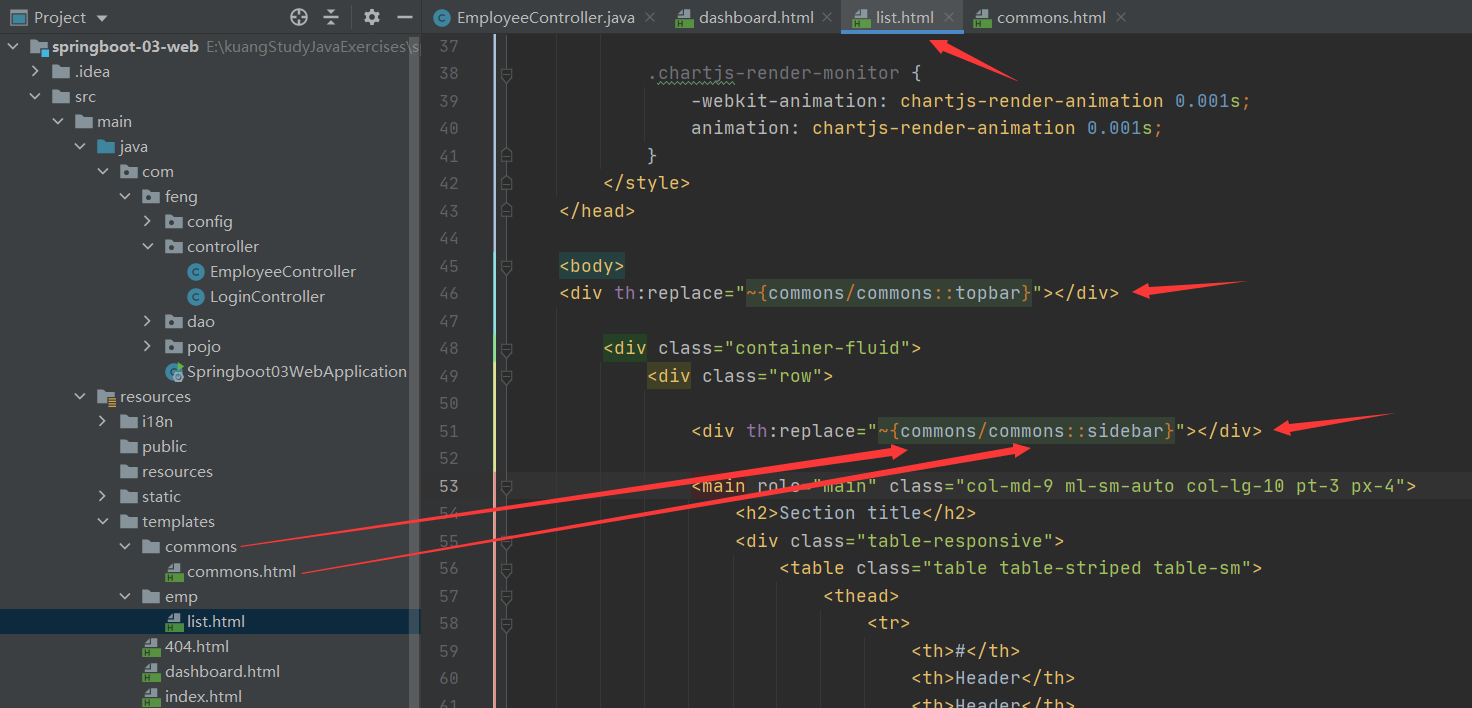
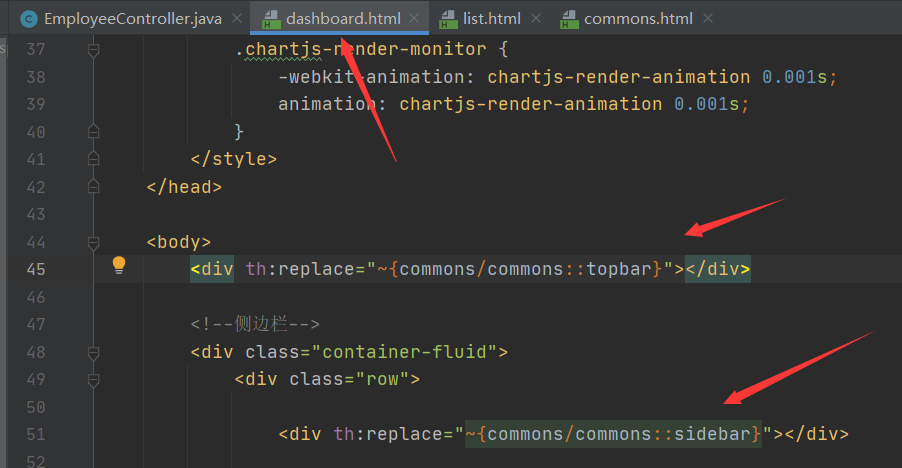
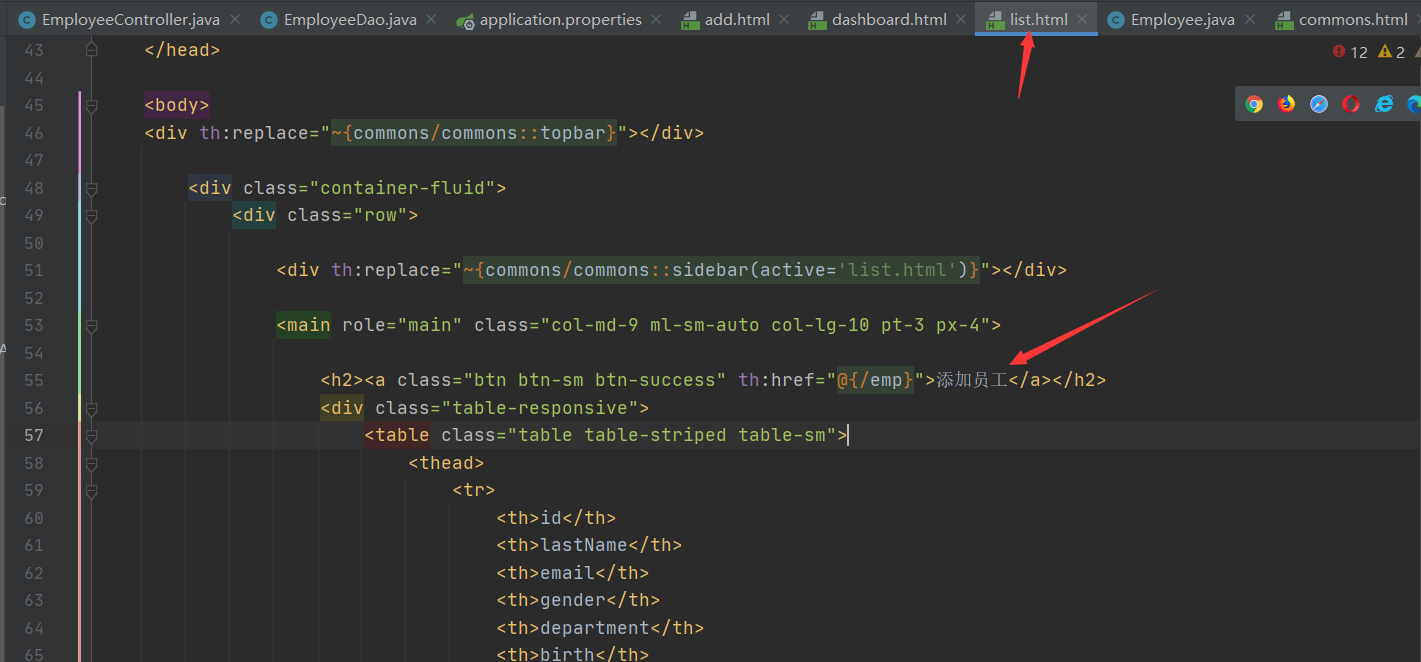
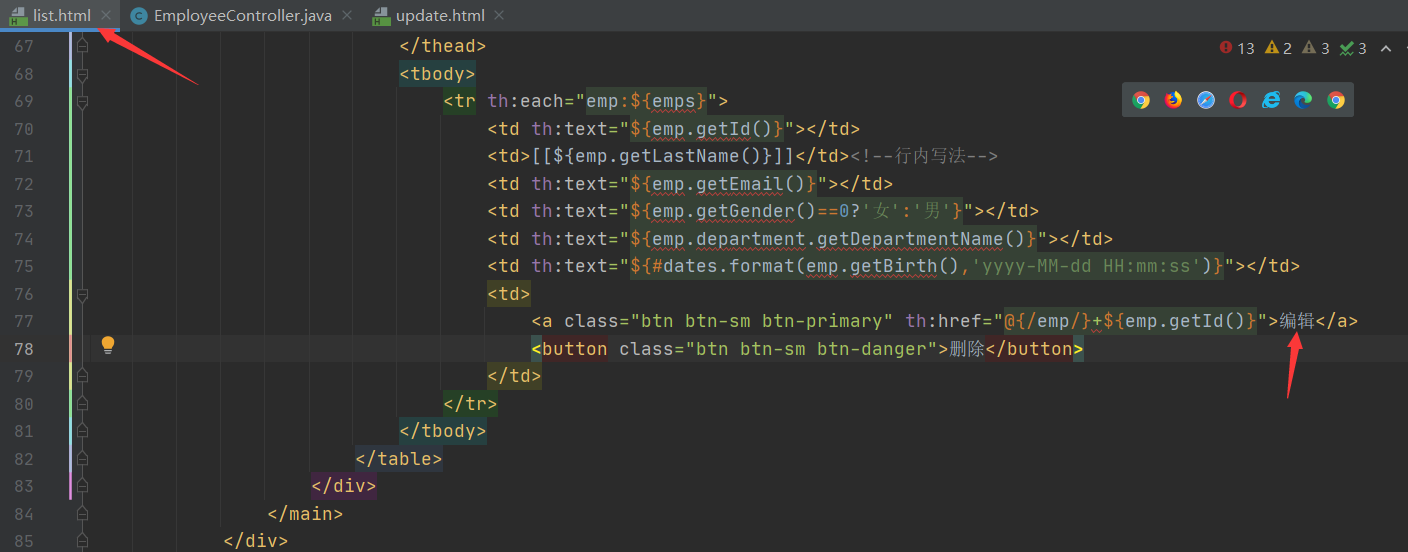
list.html 和dashboard.html页面直接引用
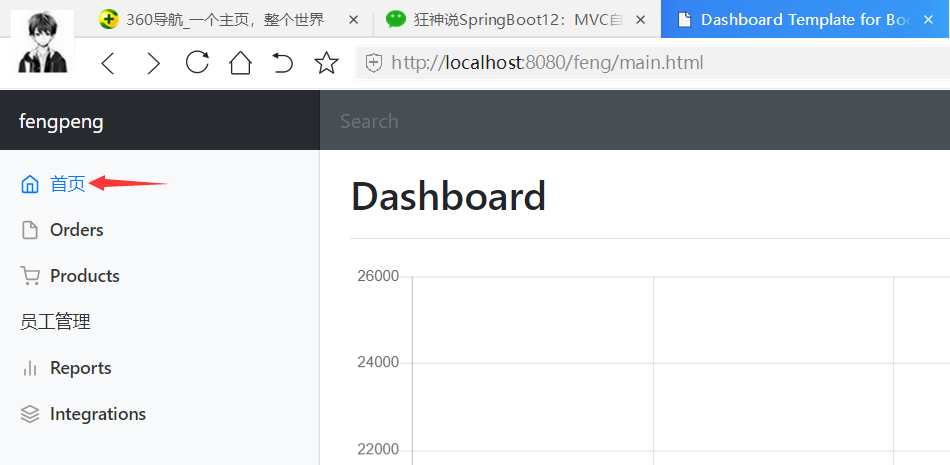
运行测试
设置选中高亮
测试效果
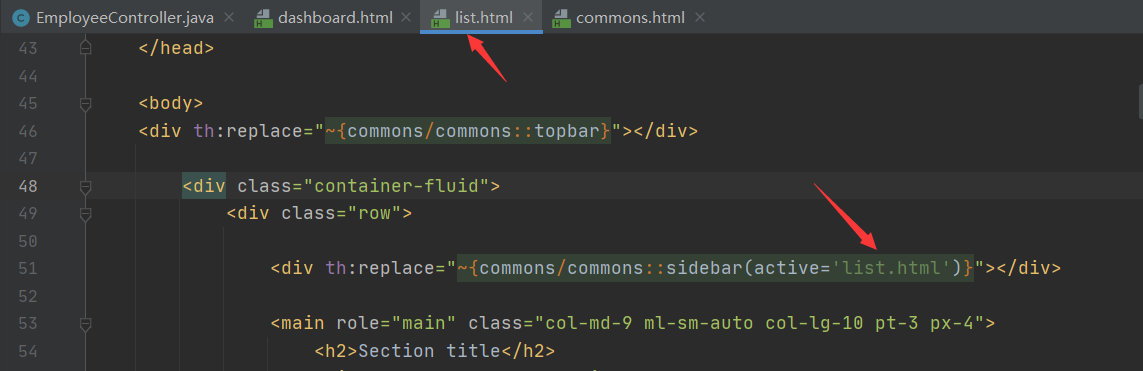
list.html
<div class="container-fluid">
   <div class="row">

      <div th:replace="~{commons/commons::sidebar(active='list.html')}"></div>

      <main role="main" class="col-md-9 ml-sm-auto col-lg-10 pt-3 px-4">
         <h2>Section title</h2>
         <div class="table-responsive">
            <table class="table table-striped table-sm">
               <thead>
                  <tr>
                     <th>id</th>
                     <th>lastName</th>
                     <th>email</th>
                     <th>gender</th>
                     <th>department</th>
                     <th>birth</th>
                  </tr>
               </thead>
               <tbody>
                  <tr th:each="emp:${emps}">
                     <td th:text="${emp.getId()}"></td>
                     <td>[[${emp.getLastName()}]]</td><!--行内写法-->
                     <td th:text="${emp.getEmail()}"></td>
                     <td th:text="${emp.getGender()==0?'女':'男'}"></td>
                     <td th:text="${emp.department.getDepartmentName()}"></td>
                     <td th:text="${#dates.format(emp.getBirth(),'yyyy-MM-dd HH:mm:ss')}"></td>
                     <td>
                        <button class="btn btn-sm btn-primary">编辑</button>
                        <button class="btn btn-sm btn-danger">删除</button>
                     </td>
                  </tr>
               </tbody>
            </table>
         </div>
      </main>
   </div>
</div>
测试效果

8.8 添加员工
list.html
<main role="main" class="col-md-9 ml-sm-auto col-lg-10 pt-3 px-4">

   <h2><a class="btn btn-sm btn-success" th:href="@{/emp}">添加员工</a></h2>
   <div class="table-responsive">
以get的方式提交
EmployeeController类
@GetMapping("/emp")
public String toAddPage(Model model){
    //查出所有部门的信息
    Collection<Department> departments = departmentDao.getDepartments();
    model.addAttribute("departments",departments);
    return "emp/add";
}

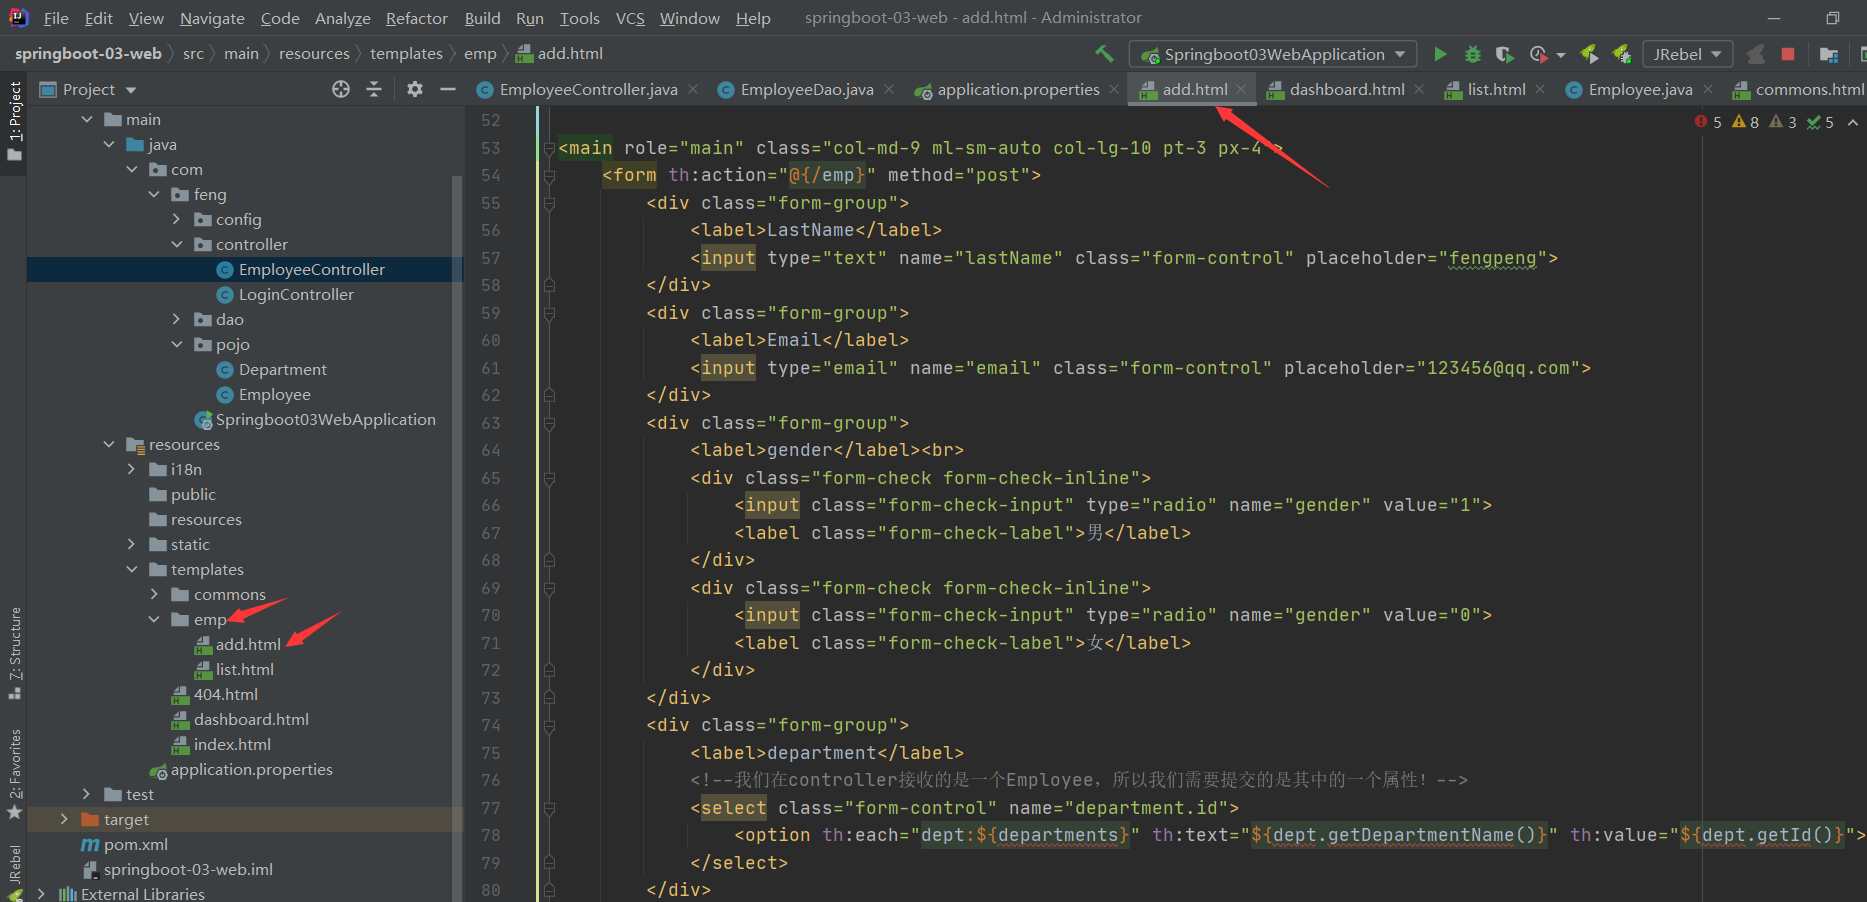
add.html
<body>
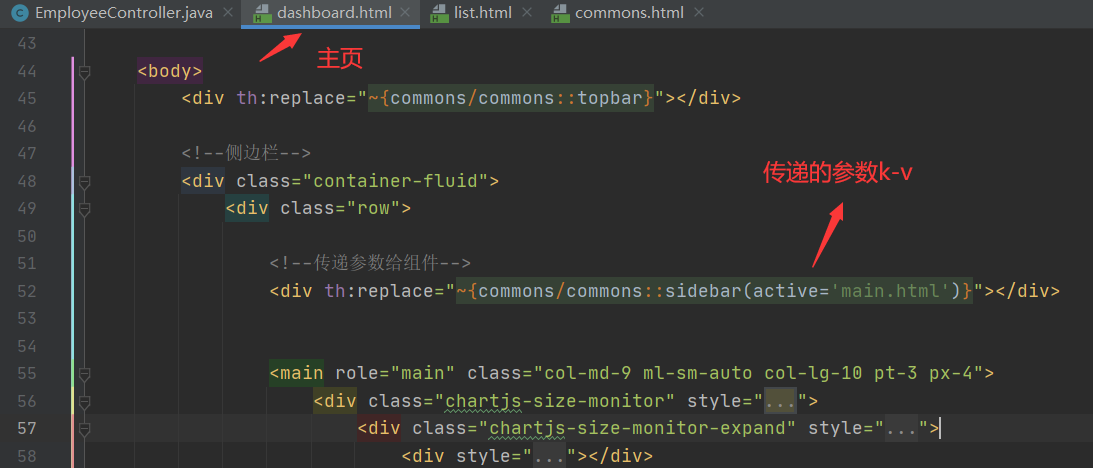
<div th:replace="~{commons/commons::topbar}"></div>
<div class="container-fluid">
<div class="row">
<div th:replace="~{commons/commons::sidebar(active='list.html')}"></div>
<main role="main" class="col-md-9 ml-sm-auto col-lg-10 pt-3 px-4">
<form th:action="@{/emp}" method="post">
<div class="form-group">
<label>LastName</label>
<input type="text" name="lastName" class="form-control" placeholder="fengpeng">
</div>
<div class="form-group">
<label>Email</label>
<input type="email" name="email" class="form-control" placeholder="123456@qq.com">
</div>
<div class="form-group">
<label>gender</label><br>
<div class="form-check form-check-inline">
<input class="form-check-input" type="radio" name="gender" value="1">
<label class="form-check-label">男</label>
</div>
<div class="form-check form-check-inline">
<input class="form-check-input" type="radio" name="gender" value="0">
<label class="form-check-label">女</label>
</div>
</div>
<div class="form-group">
<label>department</label>
<!--我们在controller接收的是一个Employee,所以我们需要提交的是其中的一个属性!-->
<select class="form-control" name="department.id">
<option th:each="dept:${departments}" th:text="${dept.getDepartmentName()}" th:value="${dept.getId()}"></option>
</select>
</div>
<div class="form-group">
<label>Birth</label>
<input type="text" name="birth" class="form-control" placeholder="feng">
</div>
<button type="submit" class="btn btn-primary">添加</button>
</form>
</main>
</div>
</div>
restful风格,以post的方式提交表单

EmployeeController类
@PostMapping("/emp")
public String addEmp(Employee employee){
    System.out.println("save=>" +employee);
    employeeDao.save(employee);//调用底层业务方法保存员工信息
    return "redirect:/emps";
}
修改时间日期格式(默认以 / 间隔)
application.properties
# 时间日期格式化!
spring.mvc.date-format=yyyy-MM-dd
运行测试
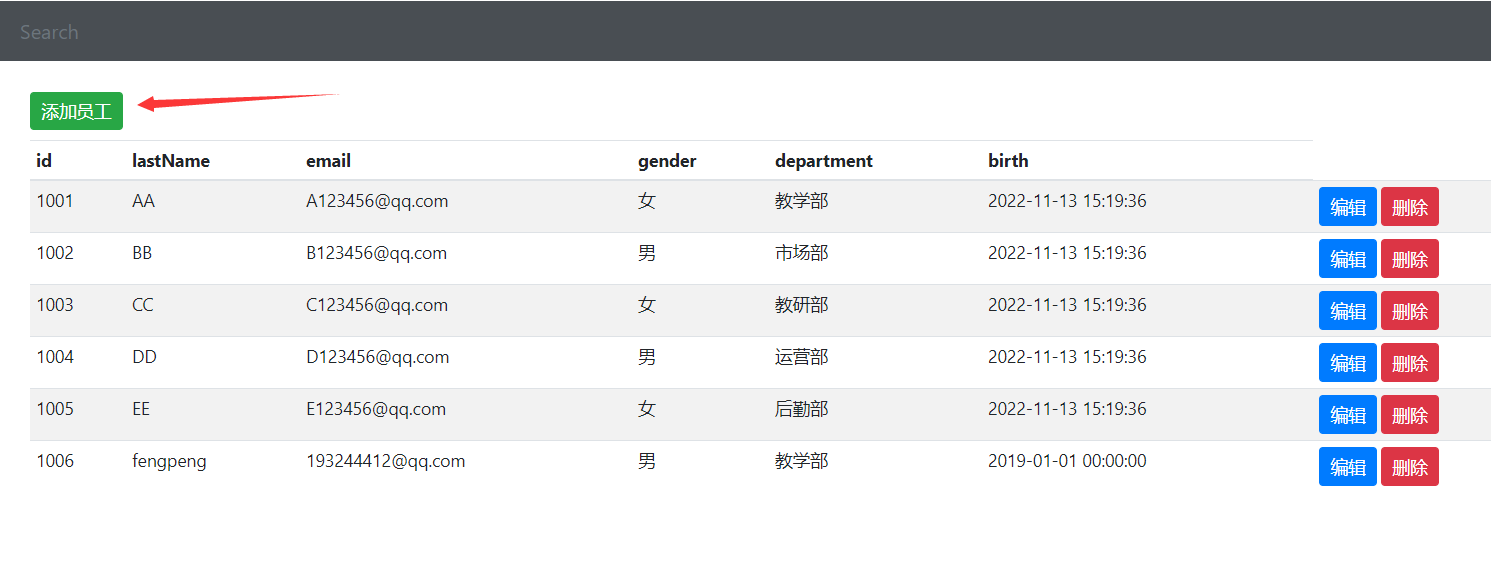
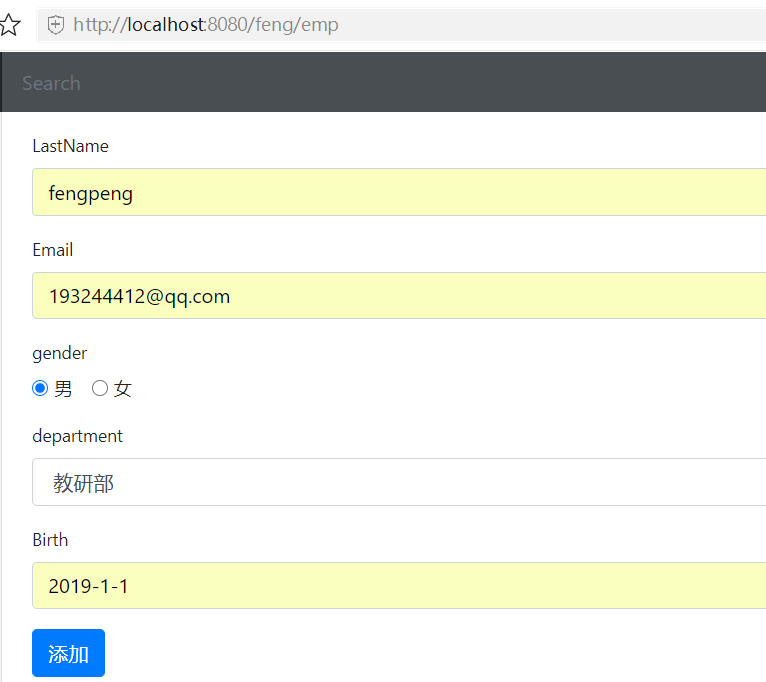
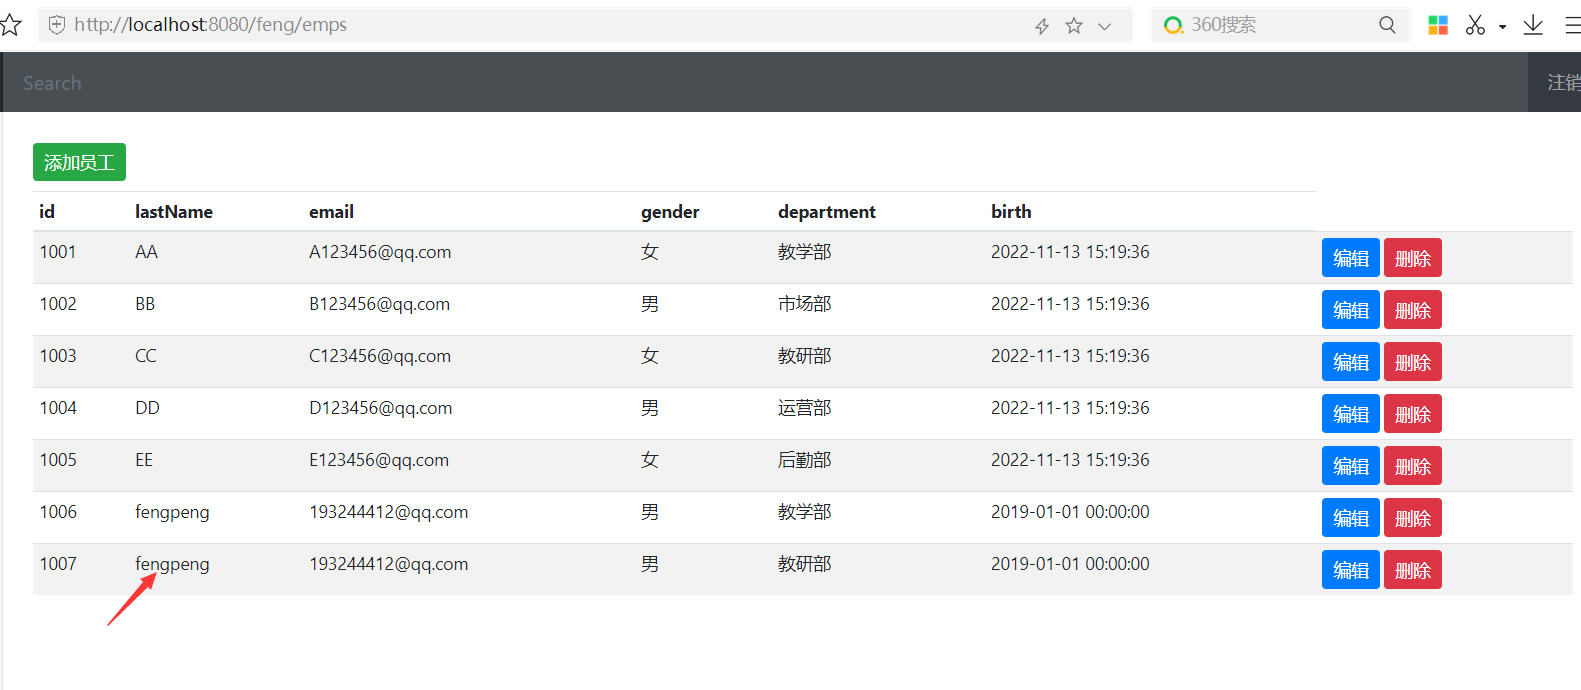
员工添加成功!
8.9 修改员工信息
EmployeeController类
//去员工的修改页面
@GetMapping("/emp/{id}")
public String toUpdateEmp(@PathVariable("id") Integer id,Model model){
    //查出原来的数据
    Employee employee = employeeDao.getEmployeeById(id);
    model.addAttribute("emp",employee);

    Collection<Department> departments = departmentDao.getDepartments();
    model.addAttribute("departments",departments);
    return "emp/update";
}
update.html
<div th:replace="~{commons/commons::topbar}"></div>

   <div class="container-fluid">
      <div class="row">

         <div th:replace="~{commons/commons::sidebar(active='list.html')}"></div>

         <main role="main" class="col-md-9 ml-sm-auto col-lg-10 pt-3 px-4">
            <form th:action="@{/updateEmp}" method="post">
               <input type="hidden" name="id" th:value="${emp.getId()}">
               <div class="form-group">
                  <label>LastName</label>
                  <input th:value="${emp.getLastName()}" type="text" name="lastName" class="form-control" placeholder="fengpeng">
               </div>
               <div class="form-group">
                  <label>Email</label>
                  <input th:value="${emp.getEmail()}" type="email" name="email" class="form-control" placeholder="123456@qq.com">
               </div>
               <div class="form-group">
                  <label>gender</label><br>
                  <div class="form-check form-check-inline">
                     <input th:checked="${emp.getGender()==1}" class="form-check-input" type="radio" name="gender" value="1">
                     <label class="form-check-label">男</label>
                  </div>
                  <div class="form-check form-check-inline">
                     <input th:checked="${emp.getGender()==0}" class="form-check-input" type="radio" name="gender" value="0">
                     <label class="form-check-label">女</label>
                  </div>
               </div>
               <div class="form-group">
                  <label>department</label>
                  <!--我们在controller接收的是一个Employee,所以我们需要提交的是其中的一个属性!-->
                  <select class="form-control" name="department.id">
                     <option th:selected="${dept.getId()==emp.getDepartment().getId()}" th:each="dept:${departments}" th:text="${dept.getDepartmentName()}"
                           th:value="${dept.getId()}"></option>
                  </select>
               </div>
               <div class="form-group">
                  <label>Birth</label>
                  <input th:value="${#dates.format(emp.getBirth(),'yyyy-MM-dd HH:mm:ss')}" type="text" name="birth" class="form-control" placeholder="feng">
               </div>
               <button type="submit" class="btn btn-primary">修改</button>
            </form>

         </main>
      </div>
   </div>
EmployeeController类
@PostMapping("/updateEmp")
public String updateEmp(Employee employee){
    employeeDao.save(employee);
    return "redirect:/emps";

}
测试
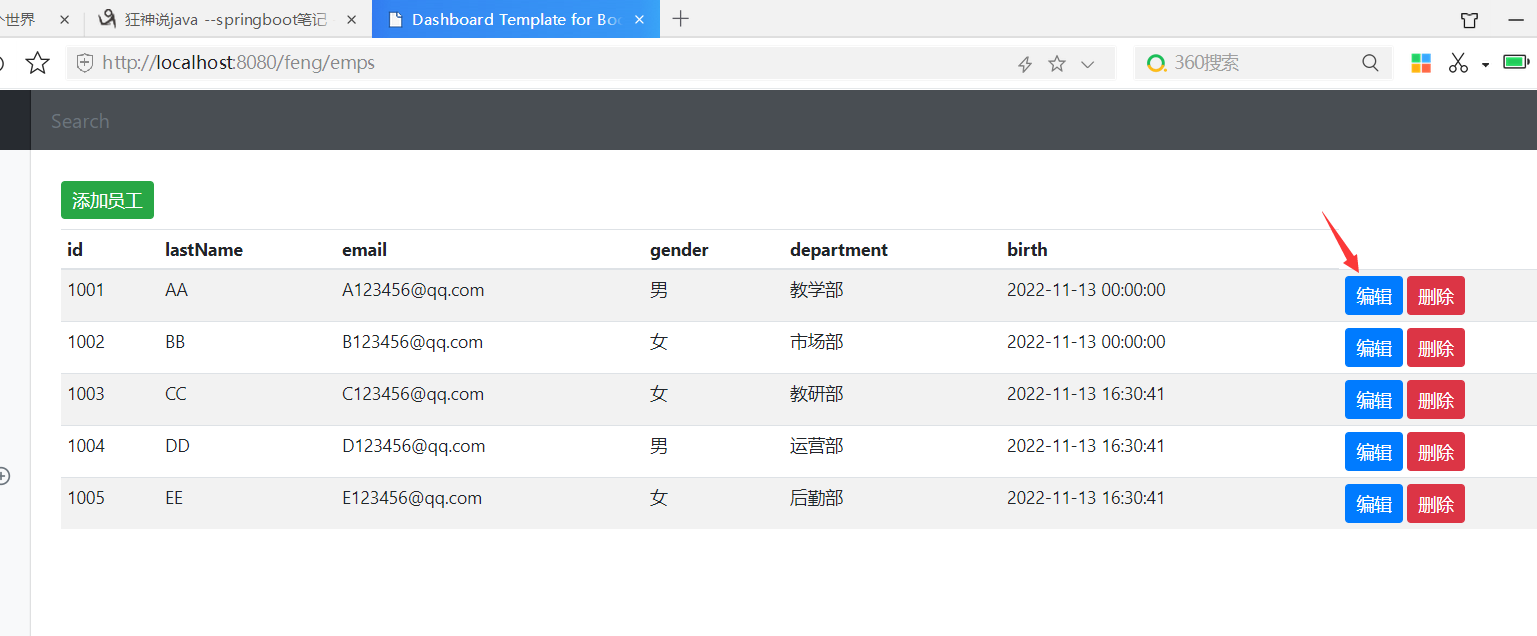
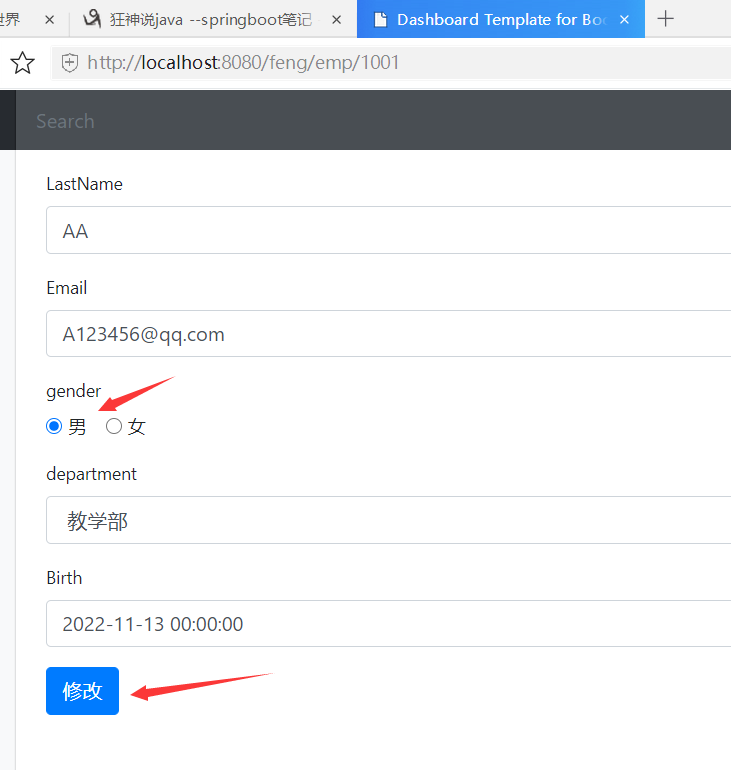
修改成功!
8.10 删除员工
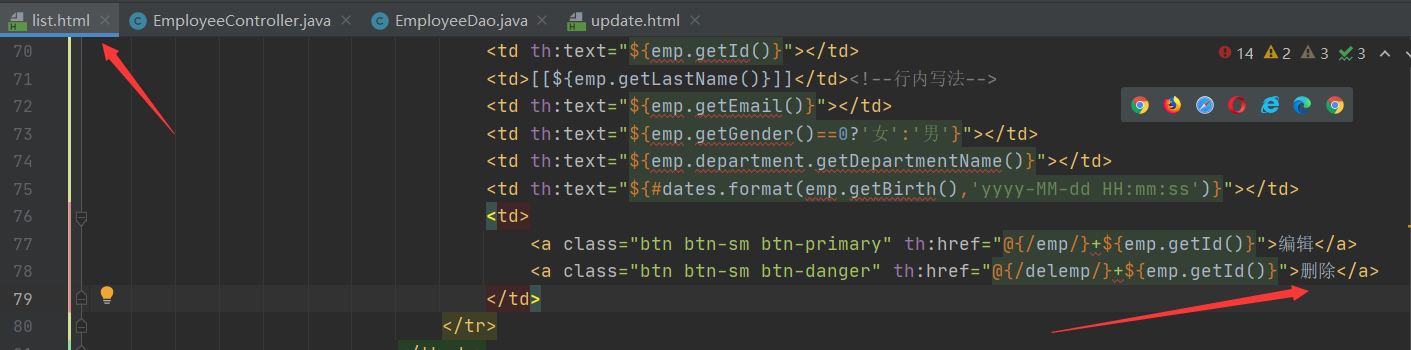
EmployeeController类
//删除员工
@GetMapping("/delemp/{id}")
public String deleteEmp(@PathVariable("id") int id){
    employeeDao.delete(id);
    return "redirect:/emps";
}
测试运行
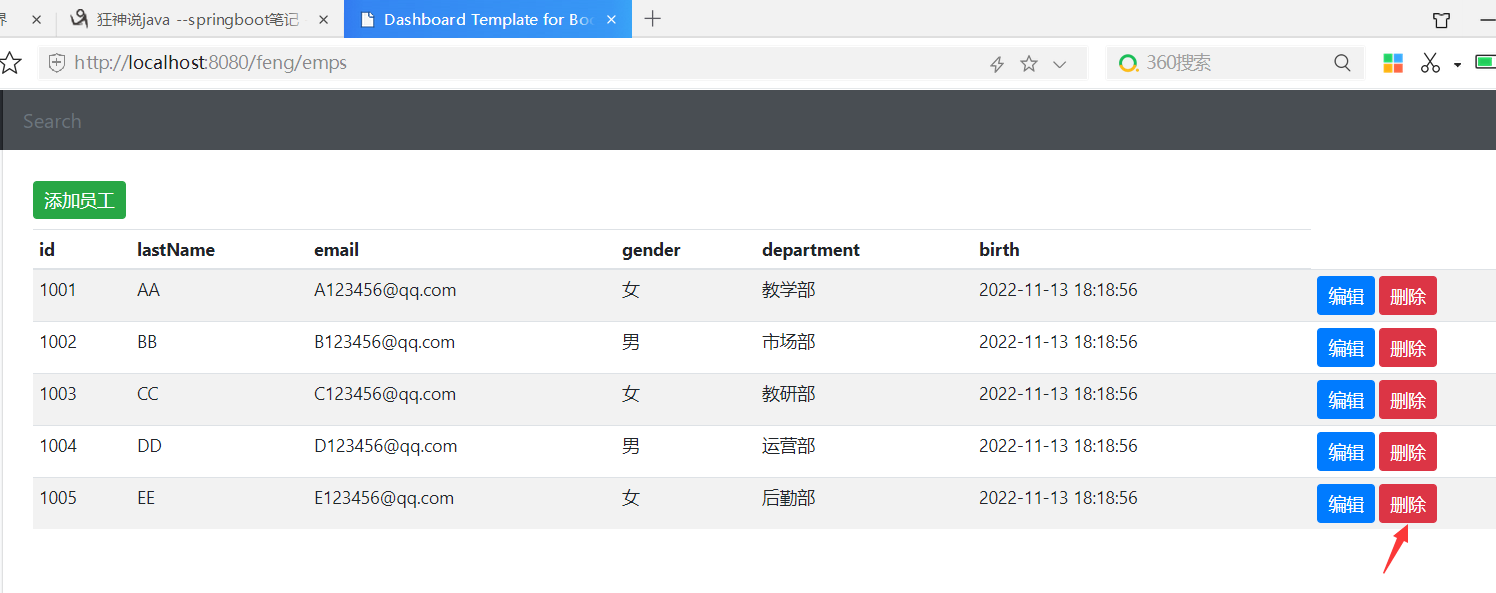
删除成功!
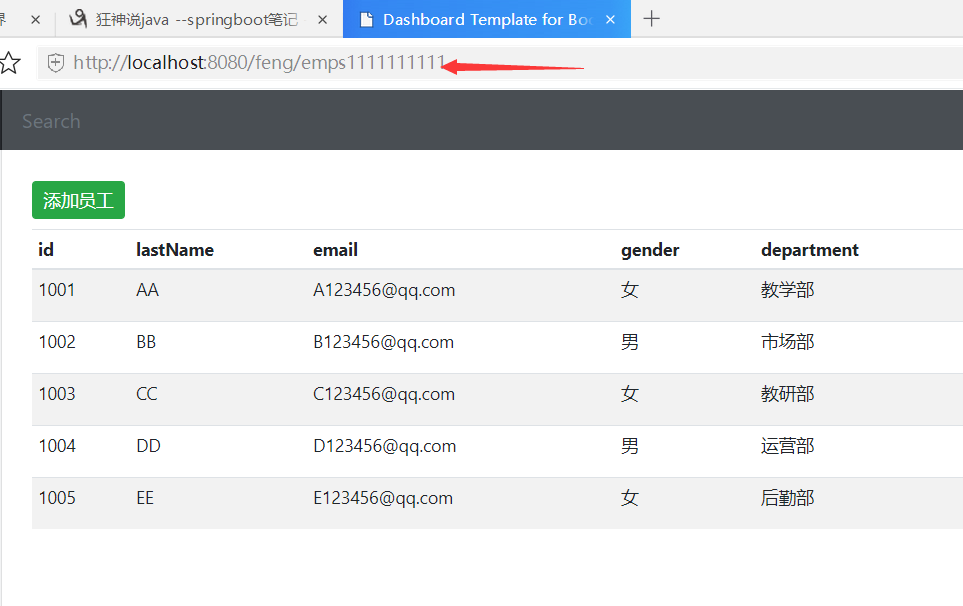
9 404和注销
9.1 404
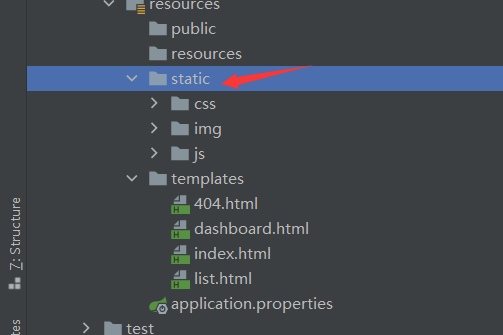
templates下新建error目录,error目录下添加404.html,springboot自动实现404跳转。
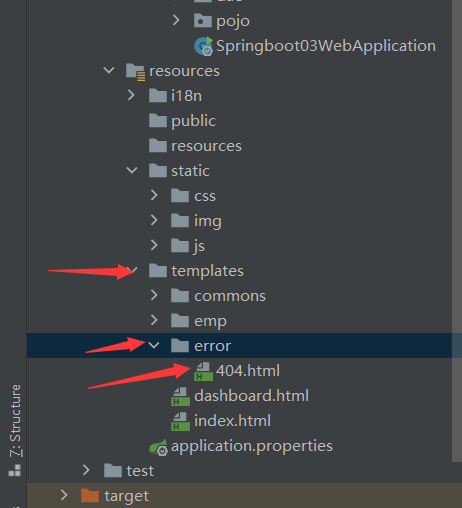
运行测试

9.2 注销
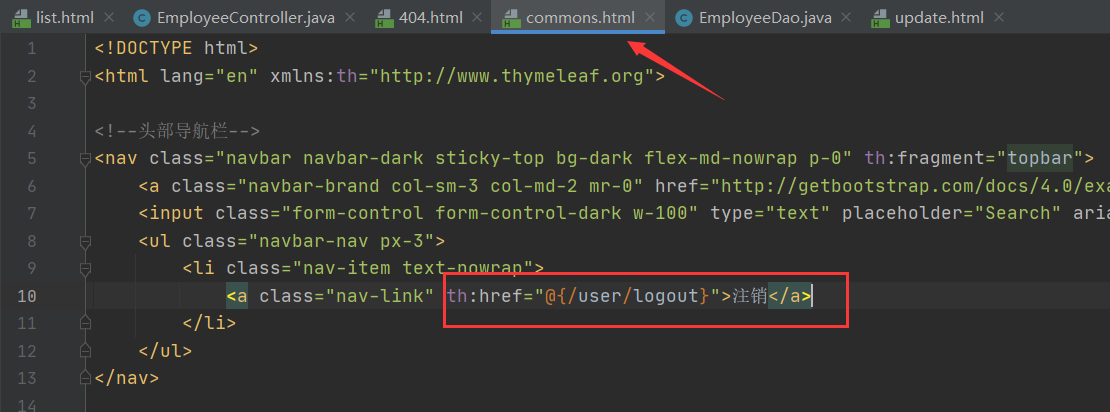
EmployeeController类
@RequestMapping("/user/logout")
public String logout(HttpSession session){
    session.invalidate();//无效
    return "redirect:/index.html";
}
运行测试
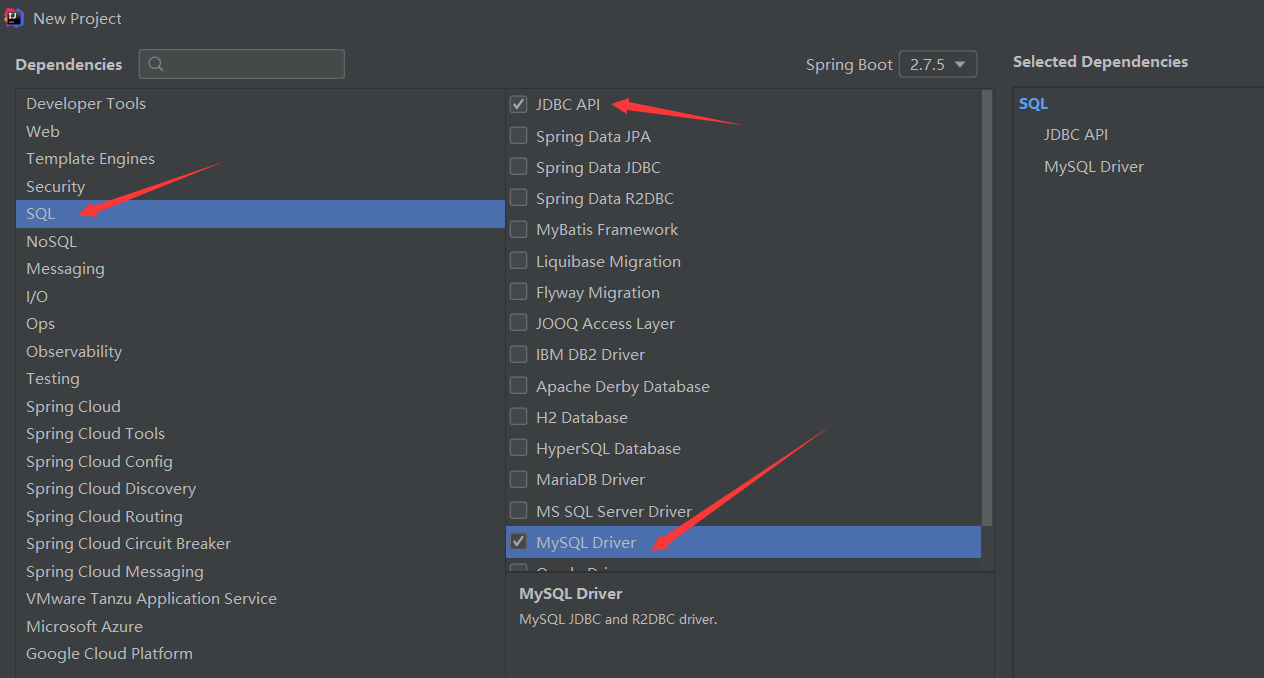
10 整合JDBC
10.1 新建springboot项目
修改maven相关配置
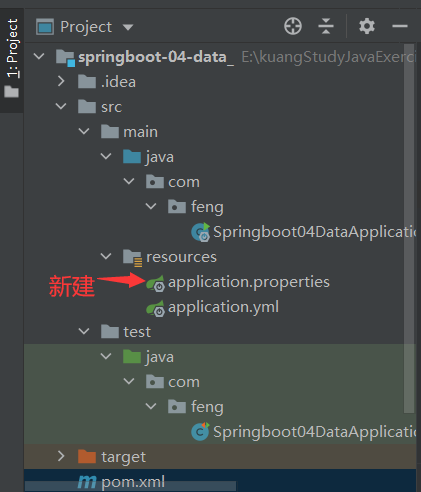
application.yml
spring:
  datasource:
    driver-class-name: com.mysql.cj.jdbc.Driver
    username: root
    password: fp
    # 假如时区报错了,就增加一个时区的配置就OK
    url: jdbc:mysql://localhost:3306/mybatis?useUnicode=true&characterEncoding=utf-8&serverTimezone=UTC
如果这里驱动driver-class-name报红,去删除pom 中的mysql依赖的
        <dependency>
            <groupId>com.mysql</groupId>
            <artifactId>mysql-connector-j</artifactId>
<!--            <scope>runtime</scope>-->
        </dependency>
如果还不行,就重新建项目,然后再删除。
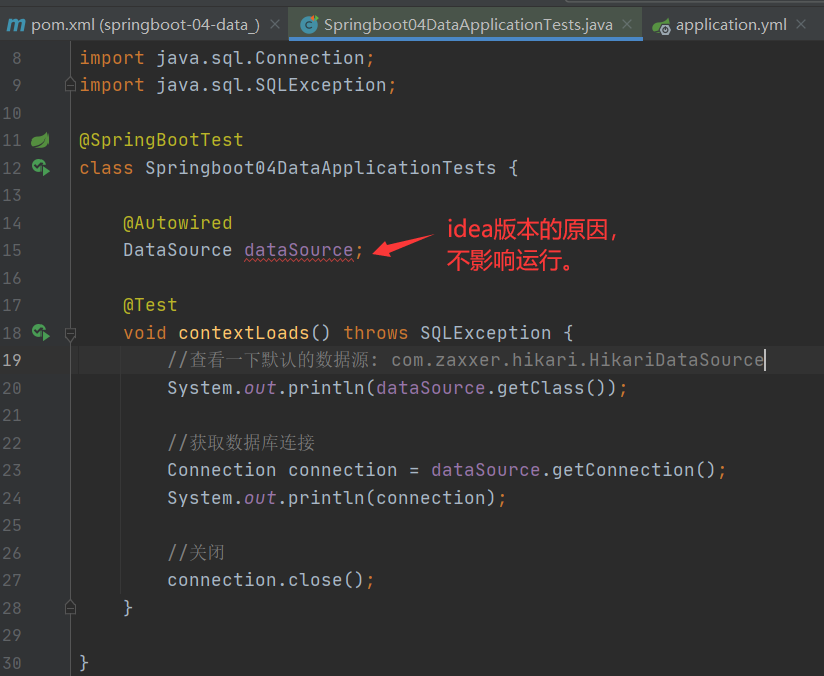
Springboot04DataApplicationTests测试类
package com.feng;
import org.junit.jupiter.api.Test;
import org.springframework.beans.factory.annotation.Autowired;
import org.springframework.boot.test.context.SpringBootTest;
import javax.sql.DataSource;
import java.sql.Connection;
import java.sql.SQLException;
@SpringBootTest
class Springboot04DataApplicationTests {
@Autowired
DataSource dataSource;
@Test
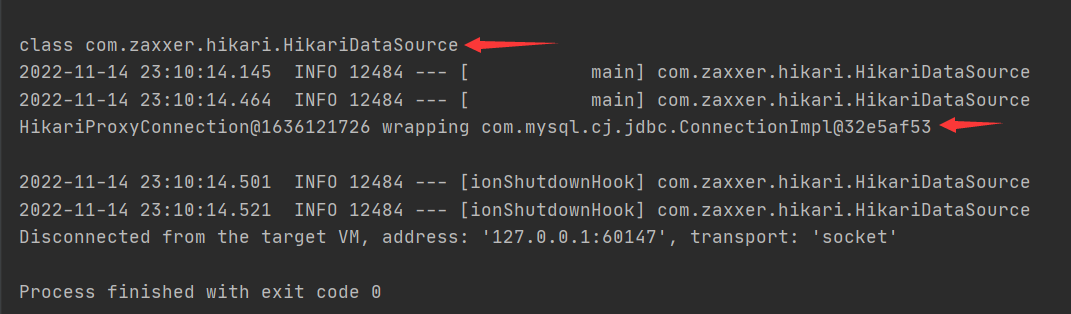
void contextLoads() throws SQLException {
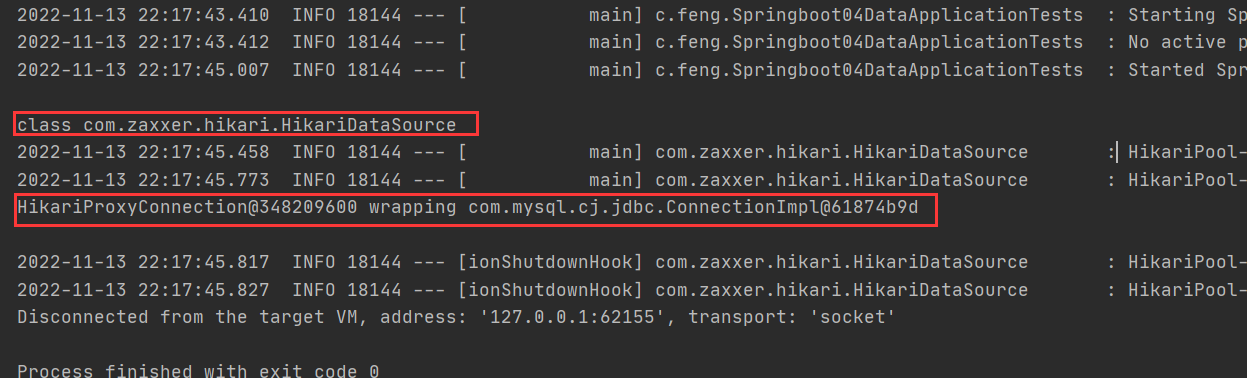
//查看一下默认的数据源: com.zaxxer.hikari.HikariDataSource
System.out.println(dataSource.getClass());
//获取数据库连接
Connection connection = dataSource.getConnection();
System.out.println(connection);
//关闭
connection.close();
}
}
运行测试
10.2 JDBC测试
pom.xml
<!--web-->
<dependency>
    <groupId>org.springframework.boot</groupId>
    <artifactId>spring-boot-starter-web</artifactId>
</dependency>
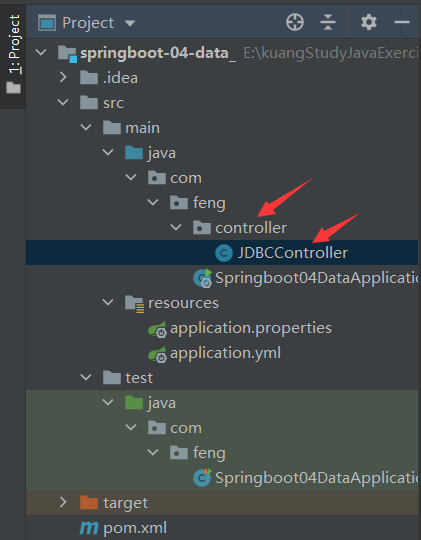
JDBCController类
package com.feng.controller;
import org.springframework.beans.factory.annotation.Autowired;
import org.springframework.jdbc.core.JdbcTemplate;
import org.springframework.web.bind.annotation.GetMapping;
import org.springframework.web.bind.annotation.RestController;
import java.util.List;
import java.util.Map;
/**
* @Author feng peng
* @Date 2022/11/13
* @Time 22:31
*/
@RestController
public class JDBCController {
@Autowired
JdbcTemplate jdbcTemplate;
//查询数据库的所有信息
// 没有实体类,数据库中的东西,怎么获取? Map
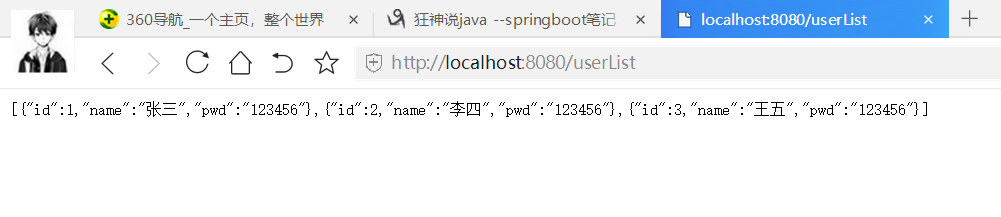
@GetMapping("/userList")
public List<Map<String ,Object>> userList(){
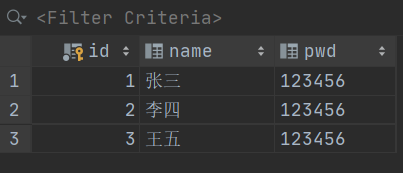
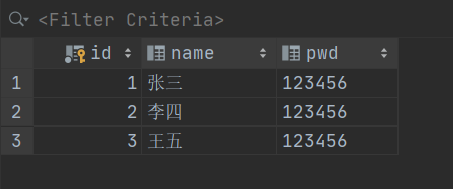
String sql = "select * from mybatis.users";
List<Map<String, Object>> list_maps = jdbcTemplate.queryForList(sql);
return list_maps;
}
}
运行Springboot04DataApplication
使用JdbcTemplate实现crud
JDBCController类
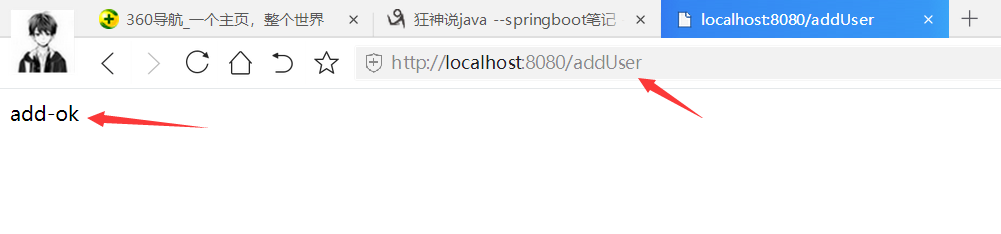
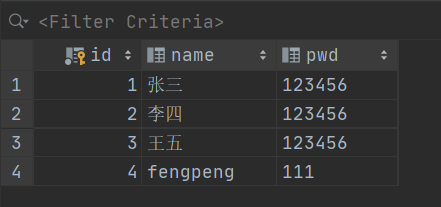
@GetMapping("/addUser")
public String addUser(){
String sql = "insert into mybatis.users (id,name,pwd) values (4,'fengpeng','111')";
jdbcTemplate.update(sql);
return "add-ok";
}
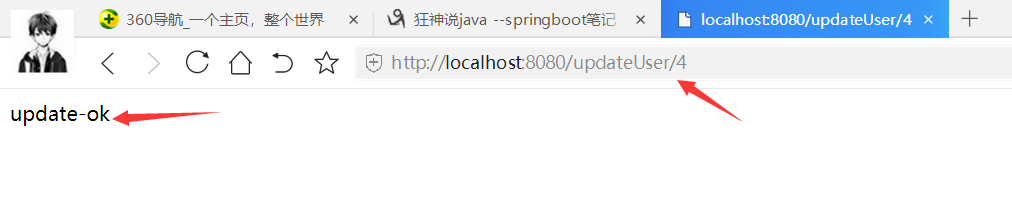
@GetMapping("/updateUser/{id}")
public String updateUser(@PathVariable("id") int id){
String sql = "update mybatis.users set name = ? ,pwd = ? where id=" +id;
//封装
Object[] objects = new Object[2];
objects[0] = "feng2";
objects[1] = "zzzzz";
jdbcTemplate.update(sql,objects);
return "update-ok";
}
@GetMapping("/deleteUser/{id}")
public String deleteUser(@PathVariable("id") int id){
String sql = "delete from mybatis.users where id= ?";
jdbcTemplate.update(sql,id);
return "delete-ok";
}
运行测试


11 整合Druid数据源
11.1 简介
Java程序很大一部分要操作数据库,为了提高性能操作数据库的时候,又不得不使用数据库连接池。
Druid 是阿里巴巴开源平台上一个数据库连接池实现,结合了 C3P0、DBCP 等 DB 池的优点,同时加入了日志监控。
Druid 可以很好的监控 DB 池连接和 SQL 的执行情况,天生就是针对监控而生的 DB 连接池。
Druid已经在阿里巴巴部署了超过600个应用,经过一年多生产环境大规模部署的严苛考验。
Spring Boot 2.0 以上默认使用 Hikari 数据源,可以说 Hikari 与 Driud 都是当前 Java Web 上最优秀的数据源,我们来重点介绍 Spring Boot 如何集成 Druid 数据源,如何实现数据库监控。
com.alibaba.druid.pool.DruidDataSource 基本配置参数如下:
11.2 配置数据源
添加上 Druid 数据源依赖。
<dependency>
    <groupId>com.alibaba</groupId>
    <artifactId>druid</artifactId>
    <version>1.2.8</version>
</dependency>
application.yml
spring:
  datasource:
    driver-class-name: com.mysql.cj.jdbc.Driver
    username: root
    password: fp
    # 假如时区报错了,就增加一个时区的配置就OK
    url: jdbc:mysql://localhost:3306/mybatis?useUnicode=true&characterEncoding=utf-8&serverTimezone=UTC
    type: com.alibaba.druid.pool.DruidDataSource # 自定义数据源
测试
Springboot04DataApplicationTests
@SpringBootTest
class Springboot04DataApplicationTests {

    @Autowired
    DataSource dataSource;

    @Test
    void contextLoads() throws SQLException {
        //查看一下默认的数据源: com.zaxxer.hikari.HikariDataSource
        System.out.println(dataSource.getClass());

        //获取数据库连接
        Connection connection = dataSource.getConnection();
        System.out.println(connection);

        // xxxx Template: SpringBoot已经配置好模板bean,拿来即用 CRUD

        //关闭
        connection.close();
    }

}

切换成功!既然切换成功,就可以设置数据源连接初始化大小、最大连接数、等待时间、最小连接数 等设置项;可以查看源码
application.yml
spring:
datasource:
driver-class-name: com.mysql.cj.jdbc.Driver
username: root
password: fp
# 假如时区报错了,就增加一个时区的配置就OK
url: jdbc:mysql://localhost:3306/mybatis?useUnicode=true&characterEncoding=utf-8&serverTimezone=UTC
type: com.alibaba.druid.pool.DruidDataSource
#Spring Boot 默认是不注入这些属性值的,需要自己绑定
#druid 数据源专有配置
initialSize: 5
minIdle: 5
maxActive: 20
maxWait: 60000
timeBetweenEvictionRunsMillis: 60000
minEvictableIdleTimeMillis: 300000
validationQuery: SELECT 1 FROM DUAL
testWhileIdle: true
testOnBorrow: false
testOnReturn: false
poolPreparedStatements: true
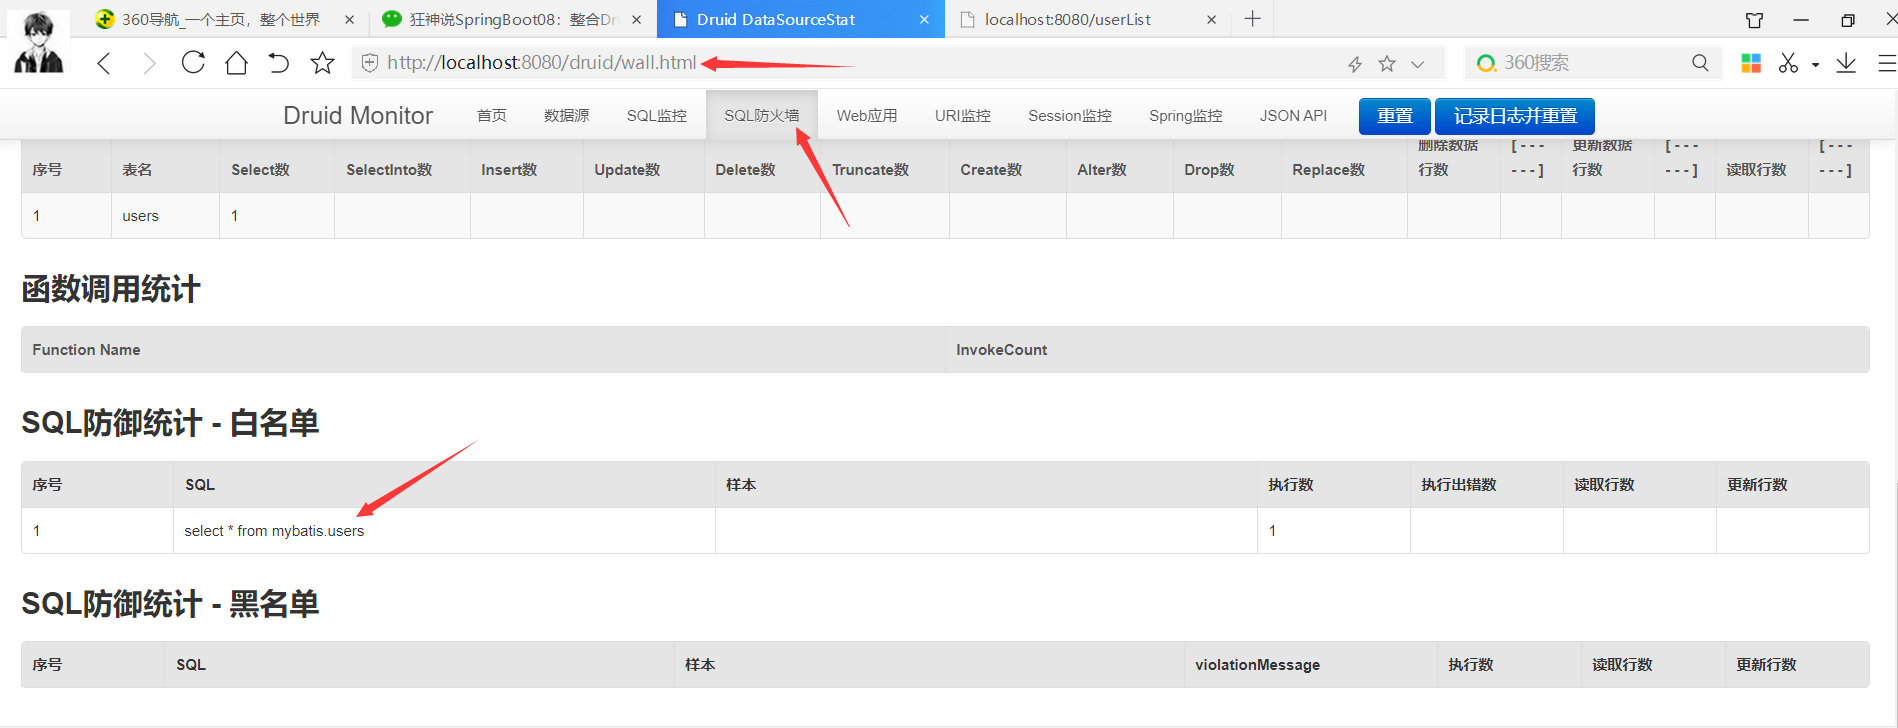
#配置监控统计拦截的filters,stat:监控统计、log4j:日志记录、wall:防御sql注入
#如果允许时报错 java.lang.ClassNotFoundException: org.apache.log4j.Priority
#则导入 log4j 依赖即可,Maven 地址:https://mvnrepository.com/artifact/log4j/log4j
filters: stat,wall,log4j
maxPoolPreparedStatementPerConnectionSize: 20
useGlobalDataSourceStat: true
connectionProperties: druid.stat.mergeSql=true;druid.stat.slowSqlMillis=500
导入Log4j 的依赖
<dependency>
    <groupId>log4j</groupId>
    <artifactId>log4j</artifactId>
    <version>1.2.17</version>
</dependency>
现在需要程序员自己为 DruidDataSource 绑定全局配置文件中的参数,再添加到容器中,而不再使用 Spring Boot 的自动生成了;我们需要 自己添加 DruidDataSource 组件到容器中,并绑定属性;
配置Druid数据源监控
Druid 数据源具有监控的功能,并提供了一个 web 界面方便用户查看,类似安装 路由器 时,人家也提供了一个默认的 web 页面。
所以第一步需要设置 Druid 的后台管理页面,比如 登录账号、密码 等;配置后台管理;
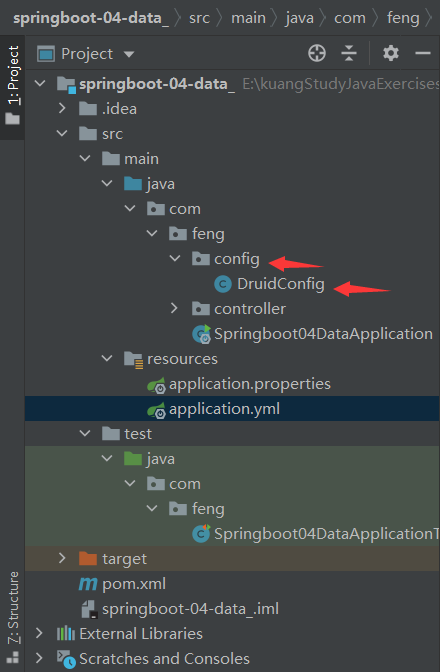
DruidConfig类
package com.feng.config;

import com.alibaba.druid.pool.DruidDataSource;
import com.alibaba.druid.support.http.StatViewServlet;
import org.springframework.boot.context.properties.ConfigurationProperties;
import org.springframework.boot.web.servlet.ServletRegistrationBean;
import org.springframework.context.annotation.Bean;
import org.springframework.context.annotation.Configuration;

import javax.sql.DataSource;
import java.util.HashMap;

/**
 * @Author feng peng
 * @Date 2022/11/14
 * @Time 21:47
 */
@Configuration
public class DruidConfig {


    /*
       将自定义的 Druid数据源添加到容器中,不再让 Spring Boot 自动创建
       绑定全局配置文件中的 druid 数据源属性到 com.alibaba.druid.pool.DruidDataSource从而让它们生效
       @ConfigurationProperties(prefix = "spring.datasource"):作用就是将 全局配置文件中
       前缀为 spring.datasource的属性值注入到 com.alibaba.druid.pool.DruidDataSource 的同名参数中
     */
    /*根据application.yml的前缀绑定*/
    @ConfigurationProperties(prefix = "spring.datasource")
    @Bean
    public DataSource druidDataSource(){
        return new DruidDataSource();
    }

    //后台监控: web.xml,ServletRegistrationBean
    //因为SpringBoot 内置了servlet容器,所以没有web.xml , 替代方法:ServletRegistrationBean
    @Bean
    public ServletRegistrationBean statViewServlet(){
        ServletRegistrationBean<StatViewServlet> bean = new ServletRegistrationBean<>(new StatViewServlet(), "/druid/*");

        //后台需要有人登录,账号密码配置
        HashMap<String, String> initParameters = new HashMap<>();

        //增加配置
        initParameters.put("loginUsername","admin"); //登录key 是固定的 loginUsername loginPassword
        initParameters.put("loginPassword","123456");

        //允许谁可以访问
        initParameters.put("allow","");

        //禁止谁能访问 initParameters.put("fengpeng","192.168.11.123");

        bean.setInitParameters(initParameters); //设置初始化参数
        return bean;
    }
}
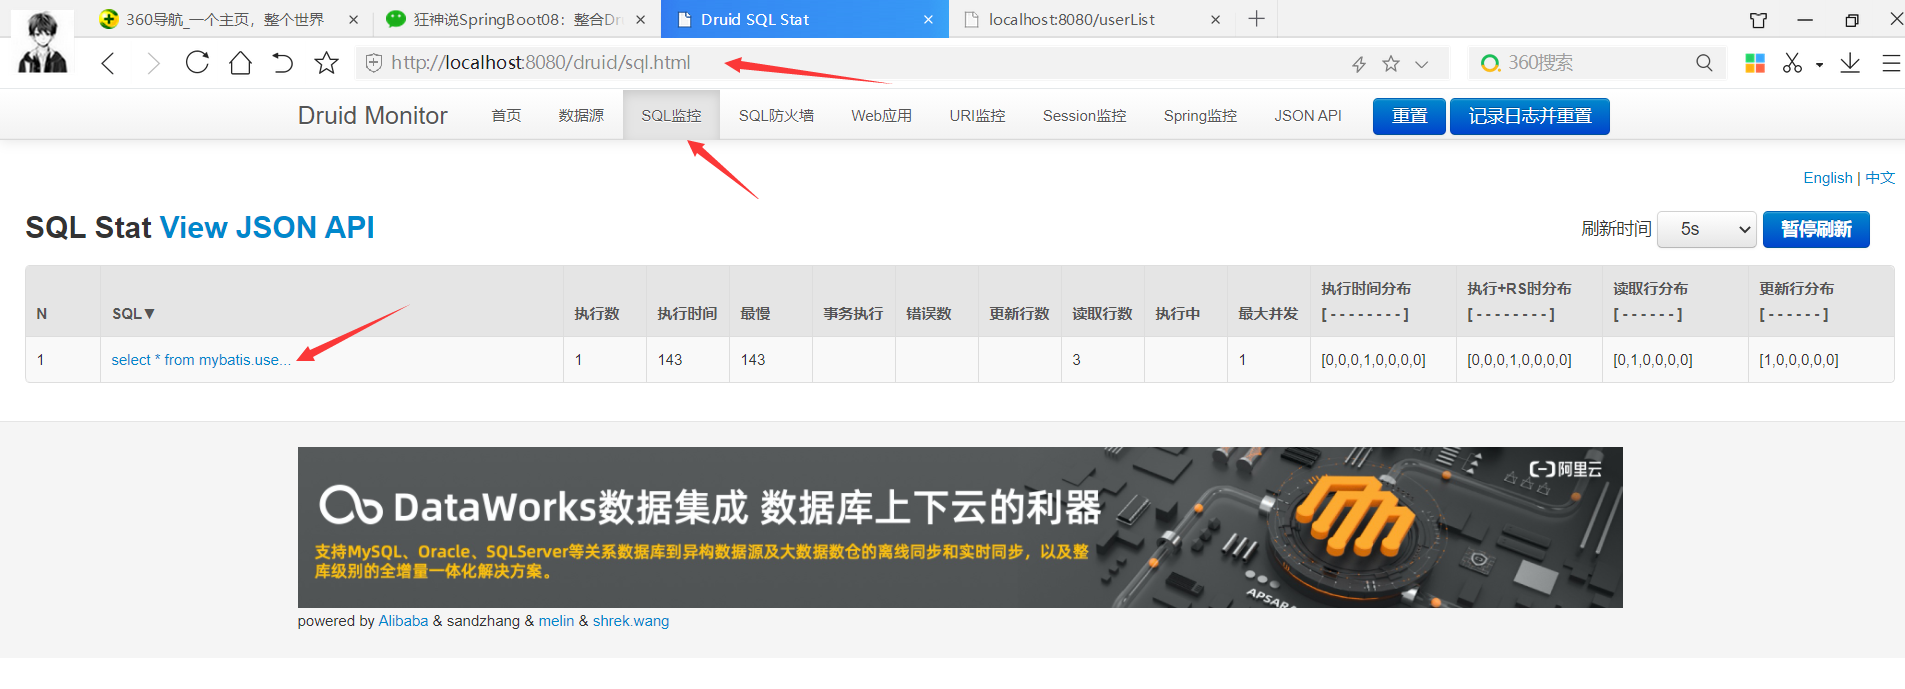
配置完成后,运行测试,我们可以选择访问 :http://localhost:8080/druid/login.html
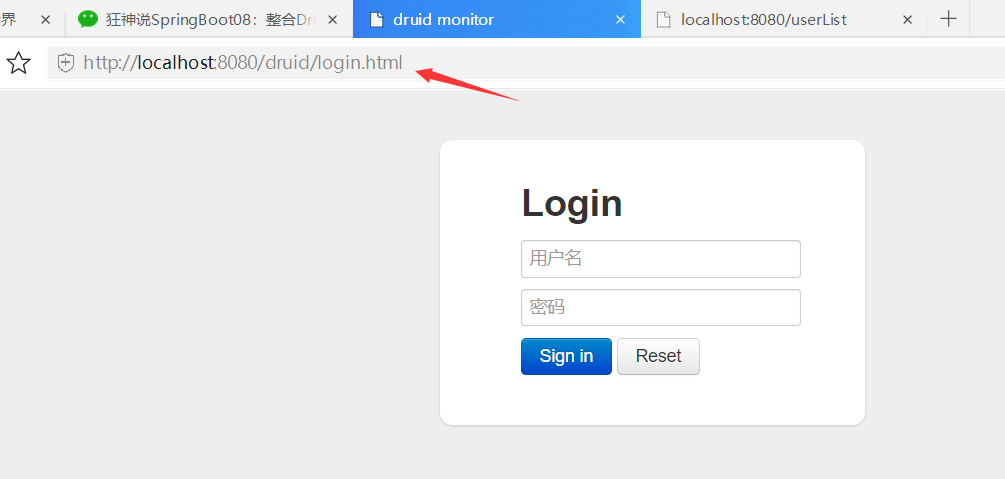
输入之前配置的用户名admin和密码123456进入
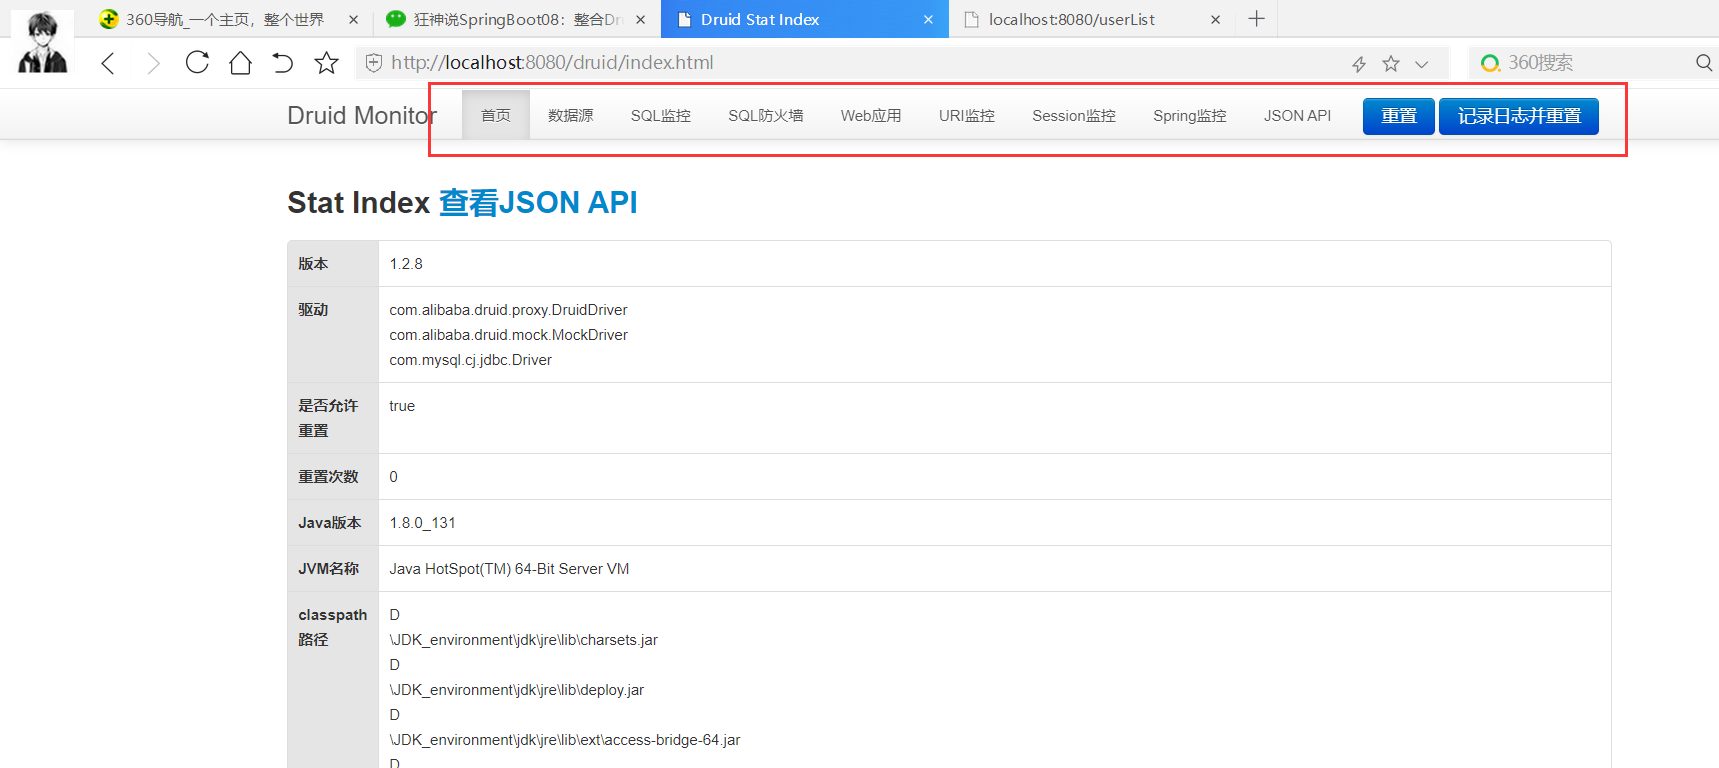
运行sql

监控到了刚才运行的sql
配置 Druid web 监控 filter 过滤器
DruidConfig类
// filter
@Bean
public FilterRegistrationBean webStatFilter(){
    FilterRegistrationBean bean = new FilterRegistrationBean();
    bean.setFilter(new WebStatFilter());
    //可以过滤哪些请求呢?
    Map<String, String> initParameters = new HashMap<>();
    /*点到new WebStatFilter()中 : public static final String PARAM_NAME_EXCLUSIONS = "exclusions";*/
    //这些东西不进行统计~
    initParameters.put("exclusions","*.js,*.css,/druid/*");
    /*点到bean.setInitParameters()方法里面去看: public void setInitParameters(Map<String, String> initParameters)
    从而得知需要一个Map<String, String> initParameters 所以上面就new一个initParameters*/
    bean.setInitParameters(initParameters);
    return bean;
}
12 整合Mybatis
12.1 新建项目

导入依赖
<dependency>
    <groupId>org.mybatis.spring.boot</groupId>
    <artifactId>mybatis-spring-boot-starter</artifactId>
    <version>2.2.2</version>
</dependency>
修改maven配置,编码信息
将这个地方的scope注释,不然配置数据库驱动会出问题
<dependency>
    <groupId>com.mysql</groupId>
    <artifactId>mysql-connector-j</artifactId>
	<!--<scope>runtime</scope>-->
</dependency>
配置数据源信息
application.yml
spring:
  datasource:
    username: root
    password: fp
    driver-class-name: com.mysql.cj.jdbc.Driver
    url: jdbc:mysql://localhost:3306/mybatis?useUnicode=true&characterEncoding=utf-8&serverTimezone=UTC
测试类Spring05MybatisApplicationTests
package com.feng;

import org.junit.jupiter.api.Test;
import org.springframework.beans.factory.annotation.Autowired;
import org.springframework.boot.test.context.SpringBootTest;

import javax.sql.DataSource;
import java.sql.SQLException;

@SpringBootTest
class Spring05MybatisApplicationTests {

    @Autowired
    DataSource dataSource;
    @Test
    void contextLoads() throws SQLException {
        System.out.println(dataSource.getClass());
        System.out.println(dataSource.getConnection());
    }

}
运行测试
数据源配置成功!
12.2 基础搭建
项目结构

User类
package com.feng.pojo;

/**
 * @Author feng peng
 * @Date 2022/11/14
 * @Time 23:16
 */
public class User {
    private int id;
    private String name;
    private String pwd;

    public User() {
    }

    public User(int id, String name, String pwd) {
        this.id = id;
        this.name = name;
        this.pwd = pwd;
    }

    public int getId() {
        return id;
    }

    public void setId(int id) {
        this.id = id;
    }

    public String getName() {
        return name;
    }

    public void setName(String name) {
        this.name = name;
    }

    public String getPwd() {
        return pwd;
    }

    public void setPwd(String pwd) {
        this.pwd = pwd;
    }

    @Override
    public String toString() {
        return "User{" +
                "id=" + id +
                ", name='" + name + '\'' +
                ", pwd='" + pwd + '\'' +
                '}';
    }
}
UserMapper接口
package com.feng.mapper;

import com.feng.pojo.User;
import org.apache.ibatis.annotations.Mapper;
import org.springframework.stereotype.Repository;

import java.util.List;

/**
 * @Author feng peng
 * @Date 2022/11/14
 * @Time 23:17
 */
//这个注解表示了这是一个 mybatis的mapper类; Dao层
@Mapper
@Repository
public interface UserMapper {

    List<User> queryUserList();

    User queryUserById(int id);

    int addUser(User user);

    int updateUser(User user);

    int deleteUser(int id);
}
resources/mybatis/mapper/UserMapper.xml
<?xml version="1.0" encoding="UTF-8" ?>
<!DOCTYPE mapper
        PUBLIC "-//mybatis.org//DTD Mapper 3.0//EN"
        "http://mybatis.org/dtd/mybatis-3-mapper.dtd">
<!--namespace=绑定一个对应的Dao/Mapper接口-->
<mapper namespace="com.feng.mapper.UserMapper">

    <select id="queryUserList" resultType="user">
        select *
        from mybatis.users
    </select>

    <select id="queryUserById" parameterType="int" resultType="user">
        select * from mybatis.users where id = #{id}
    </select>

    <insert id="addUser" parameterType="user">
        insert into mybatis.users(id, name, pwd)
        values (#{id},#{name},#{pwd})
    </insert>

    <update id="updateUser" parameterType="user">
        update mybatis.users set name = #{name},pwd = #{pwd}
        where id = #{id}
    </update>

    <delete id="deleteUser" parameterType="int">
        delete from mybatis.users where id = #{id}
    </delete>

</mapper>
application.yml
spring:
  datasource:
    username: root
    password: fp
    driver-class-name: com.mysql.cj.jdbc.Driver
    url: jdbc:mysql://localhost:3306/mybatis?useUnicode=true&characterEncoding=utf-8&serverTimezone=UTC

#整合mybatis   classpath代表resource,后面没有/
mybatis:
  type-aliases-package: com.feng.pojo
  mapper-locations: classpath:mybatis/mapper/*.xml
UserController类
package com.feng.controller;

import com.feng.mapper.UserMapper;
import com.feng.pojo.User;
import org.springframework.beans.factory.annotation.Autowired;
import org.springframework.web.bind.annotation.GetMapping;
import org.springframework.web.bind.annotation.RestController;

import java.util.List;

/**
 * @Author feng peng
 * @Date 2022/11/15
 * @Time 21:42
 */
@RestController
public class UserController {

    @Autowired
    private UserMapper userMapper;

    @GetMapping("/queryUserList")  //url都是get请求
    public List<User> queryUserList(){
        List<User> userList = userMapper.queryUserList();
        for (User user : userList) {
            System.out.println(user);
        }
        return userList;
    }
}
运行测试

mybatis整合完成!
13 SpringSecurity(安全)
在web开发中,安全第一位!过滤器,拦截器~
功能性需求:否
做网站:安全应该在什么时候考虑?设计之初!
- 漏洞,隐私泄露~
- 架构一旦确定~
shiro, SpringSecurity :很像~除了类不一样,名字不一样;
认证,授权(vip1,vip2,vip3)
- 功能权限
- 访问权限
- 菜单权限
- ...拦截器,过滤器:大量的原生代码~冗余
13.1 新建项目
添加web依赖
删除多余文件
修改maven地址
修改编码
导入thymeleaf依赖
<!--Thymeleaf ,我们都是基于3.x开发-->
<dependency>
    <groupId>org.thymeleaf</groupId>
    <artifactId>thymeleaf-spring5</artifactId>
</dependency>
<dependency>
    <groupId>org.thymeleaf.extras</groupId>
    <artifactId>thymeleaf-extras-java8time</artifactId>
</dependency>
导入资源模板
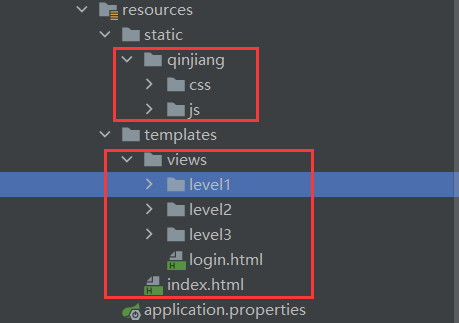
application.yml
spring:
  thymeleaf:
    cache: false
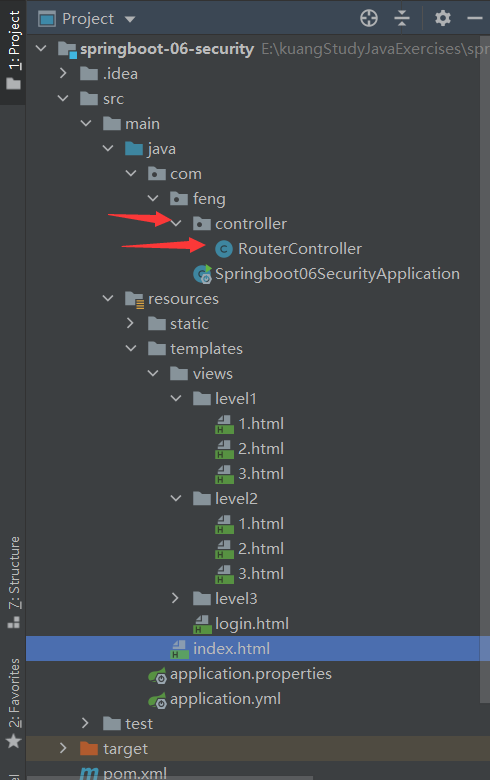
RouterController类
package com.feng.controller;

import org.springframework.stereotype.Controller;
import org.springframework.web.bind.annotation.PathVariable;
import org.springframework.web.bind.annotation.RequestMapping;

/**
 * @Author feng peng
 * @Date 2022/11/15
 * @Time 22:58
 */
@Controller
public class RouterController {

    @RequestMapping({"/","/index"})
    public String index(){
        return "index";
    }

    @RequestMapping("/toLogin")
    public String toLogin(){
        return "views/login";
    }

    @RequestMapping("/level1/{id}")
    public String level1(@PathVariable("id") int id){
        return "views/level1/"+id;
    }

    @RequestMapping("/level2/{id}")
    public String level2(@PathVariable("id") int id){
        return "views/level2/"+id;
    }

    @RequestMapping("/level3/{id}")
    public String level3(@PathVariable("id") int id){
        return "views/level3/"+id;
    }


}
运行测试
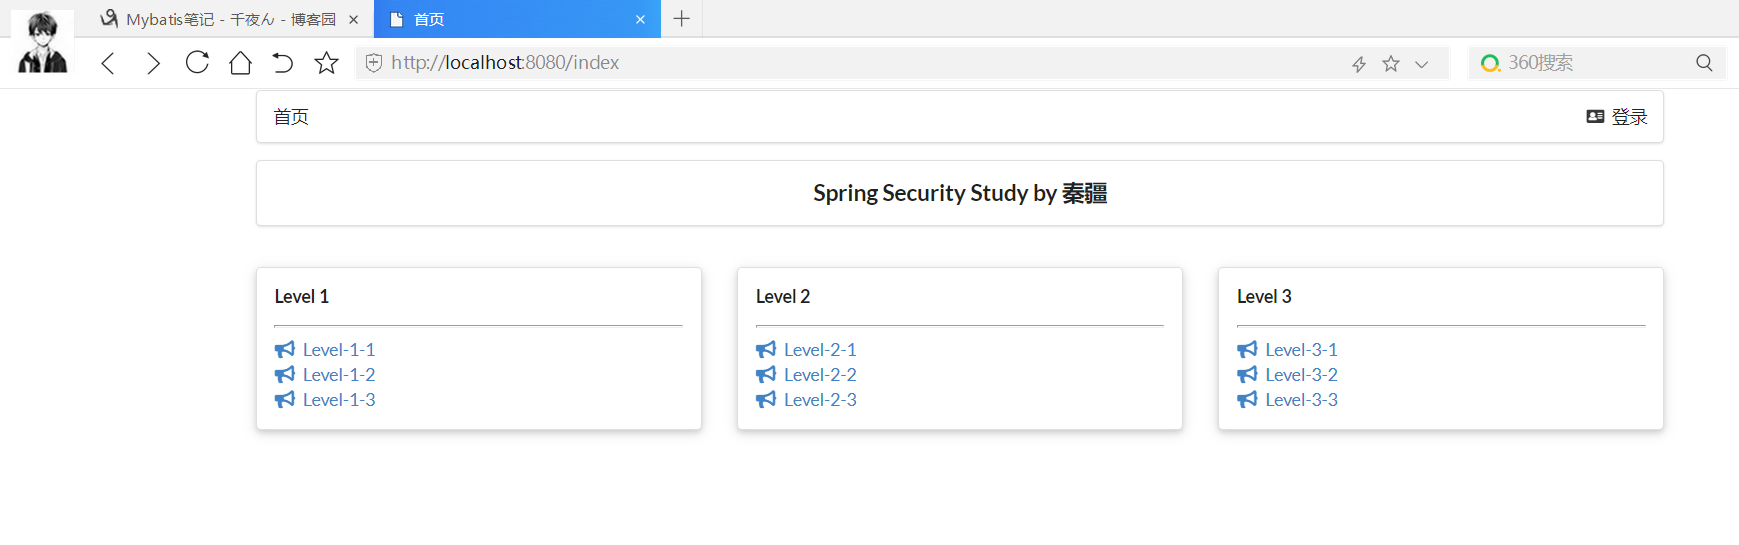
点击任意一个Level,进入
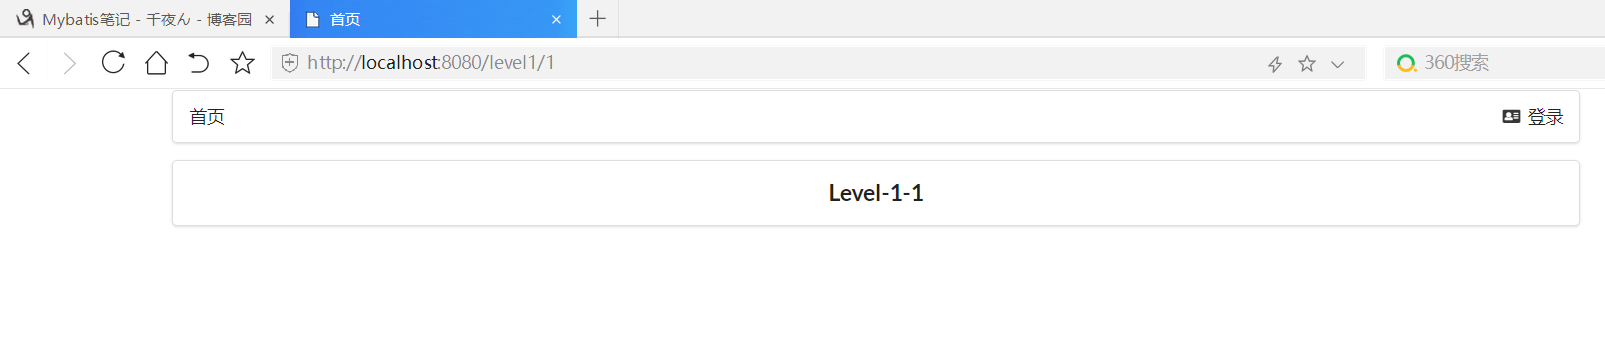
点击登录
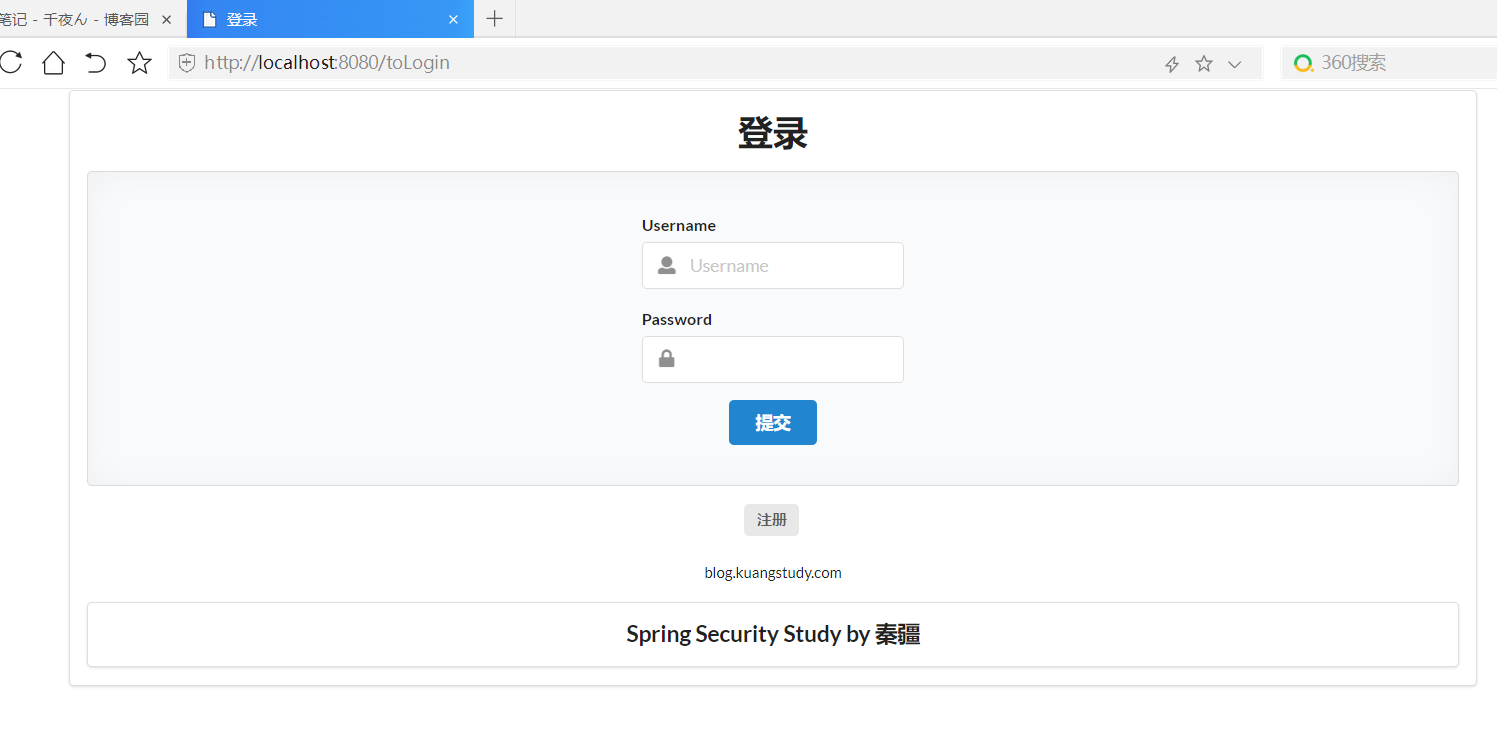
基础环境搭建成功!
13.2 认识SpringSecurity
Spring Security 是针对Spring项目的安全框架,也是Spring Boot底层安全模块默认的技术选型,他可以实现强大的Web安全控制,对于安全控制,我们仅需要引入 spring-boot-starter-security 模块,进行少量的配置,即可实现强大的安全管理!
记住几个类:
- WebSecurityConfigurerAdapter:自定义Security策略
- AuthenticationManagerBuilder:自定义认证策略
- @EnableWebSecurity:开启WebSecurity模式
Spring Security的两个主要目标是 “认证” 和 “授权”(访问控制)。
“认证”(Authentication)
身份验证是关于验证您的凭据,如用户名/用户ID和密码,以验证您的身份。
身份验证通常通过用户名和密码完成,有时与身份验证因素结合使用。
“授权” (Authorization)
授权发生在系统成功验证您的身份后,最终会授予您访问资源(如信息,文件,数据库,资金,位置,几乎任何内容)的完全权限。
这个概念是通用的,而不是只在Spring Security 中存在。
13.3 用户认证和授权
项目结构
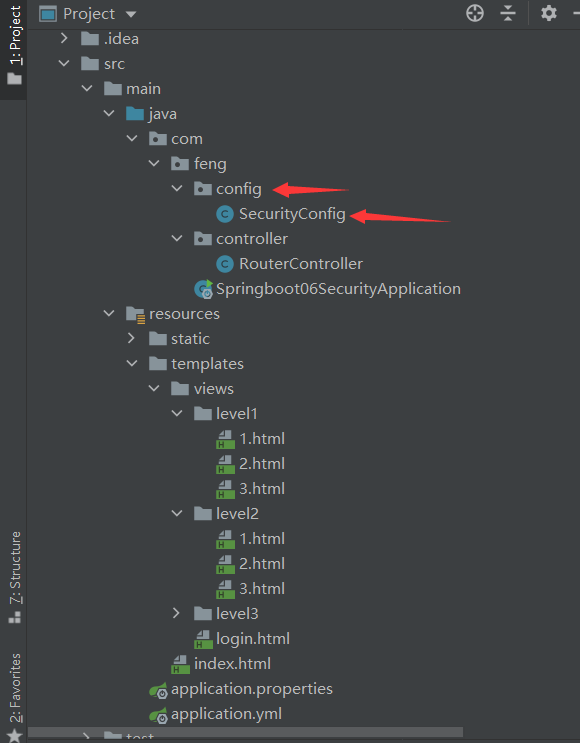
SecurityConfig类
package com.feng.config;

import org.springframework.security.config.annotation.web.builders.HttpSecurity;
import org.springframework.security.config.annotation.web.configuration.EnableWebSecurity;
import org.springframework.security.config.annotation.web.configuration.WebSecurityConfigurerAdapter;

/**
 * @Author feng peng
 * @Date 2022/11/16
 * @Time 21:31
 */

@EnableWebSecurity
public class SecurityConfig extends WebSecurityConfigurerAdapter {

    //授权
    @Override
    protected void configure(HttpSecurity http) throws Exception {
        //首页所有人可以访问, 功能页只有对应有权限的人才能访问
        //请求授权的规则~
        http.authorizeRequests()
                .antMatchers("/").permitAll()
                .antMatchers("/level1/**").hasRole("vip1")
                .antMatchers("/level2/**").hasRole("vip2")
                .antMatchers("/level3/**").hasRole("vip3");

        //没有权限默认会到登录页面,需要开启登录的页面
        http.formLogin();
    }
}
运行测试
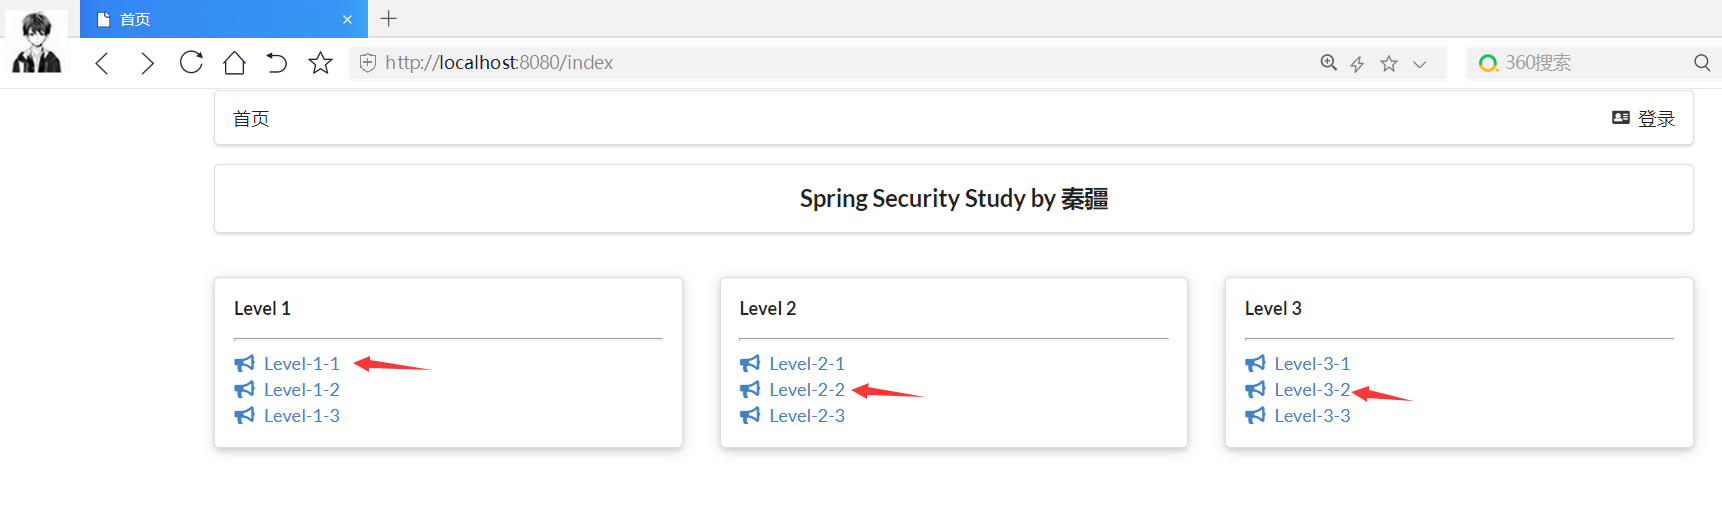
任意点击一个,都进入到登录页面
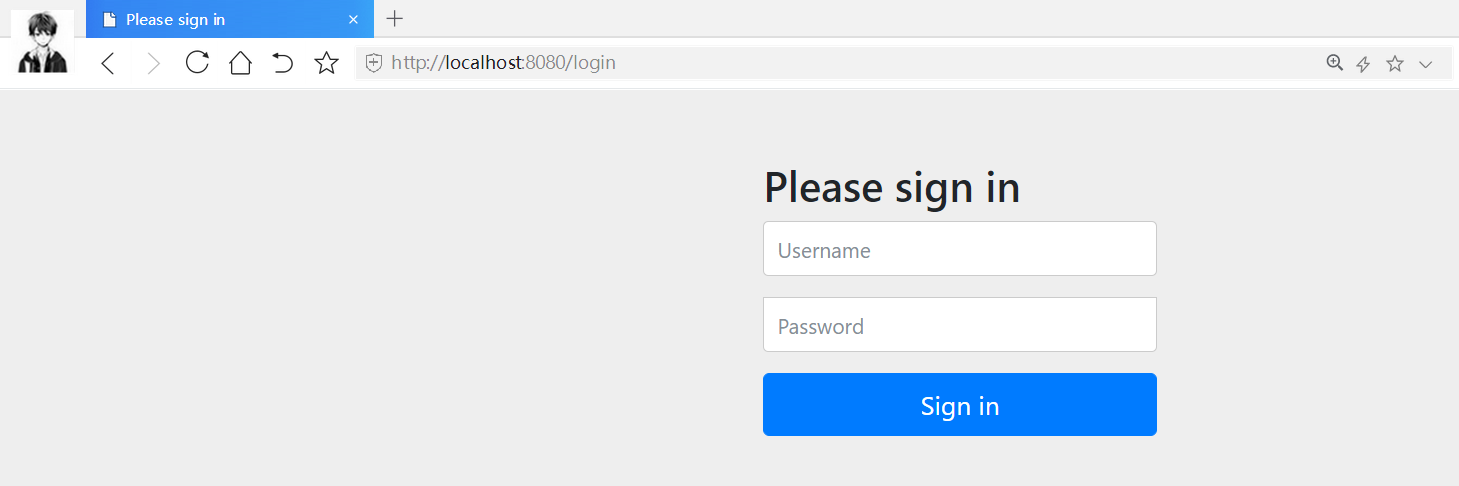
进行认证
SecurityConfig类
package com.feng.config;

import org.springframework.security.config.annotation.authentication.builders.AuthenticationManagerBuilder;
import org.springframework.security.config.annotation.web.builders.HttpSecurity;
import org.springframework.security.config.annotation.web.configuration.EnableWebSecurity;
import org.springframework.security.config.annotation.web.configuration.WebSecurityConfigurerAdapter;
import org.springframework.security.crypto.bcrypt.BCryptPasswordEncoder;

/**
 * @Author feng peng
 * @Date 2022/11/16
 * @Time 21:31
 */

@EnableWebSecurity
public class SecurityConfig extends WebSecurityConfigurerAdapter {

    //授权
    @Override
    protected void configure(HttpSecurity http) throws Exception {
        //首页所有人可以访问, 功能页只有对应有权限的人才能访问
        //请求授权的规则~
        http.authorizeRequests()
                .antMatchers("/").permitAll()
                .antMatchers("/level1/**").hasRole("vip1")
                .antMatchers("/level2/**").hasRole("vip2")
                .antMatchers("/level3/**").hasRole("vip3");

        //没有权限默认会到登录页面,需要开启登录的页面
        http.formLogin();
    }

    //认证 springboot 2.1.x 可以直接使用~
    //密码编码:PasswordEncoder
    //在Spring Security 5.0+ 新增了很多的加密方法~
    @Override
    protected void configure(AuthenticationManagerBuilder auth) throws Exception {
        //这些数据正常应该从数据库中读
        auth.inMemoryAuthentication().passwordEncoder(new BCryptPasswordEncoder())
                .withUser("fengpeng").password(new BCryptPasswordEncoder().encode("123456")).roles("vip2","vip3")
                .and()
                .withUser("root").password(new BCryptPasswordEncoder().encode("123456")).roles("vip1","vip2","vip3")
                .and()
                .withUser("guest").password(new BCryptPasswordEncoder().encode("123456")).roles("vip1");

    }
}
运行测试
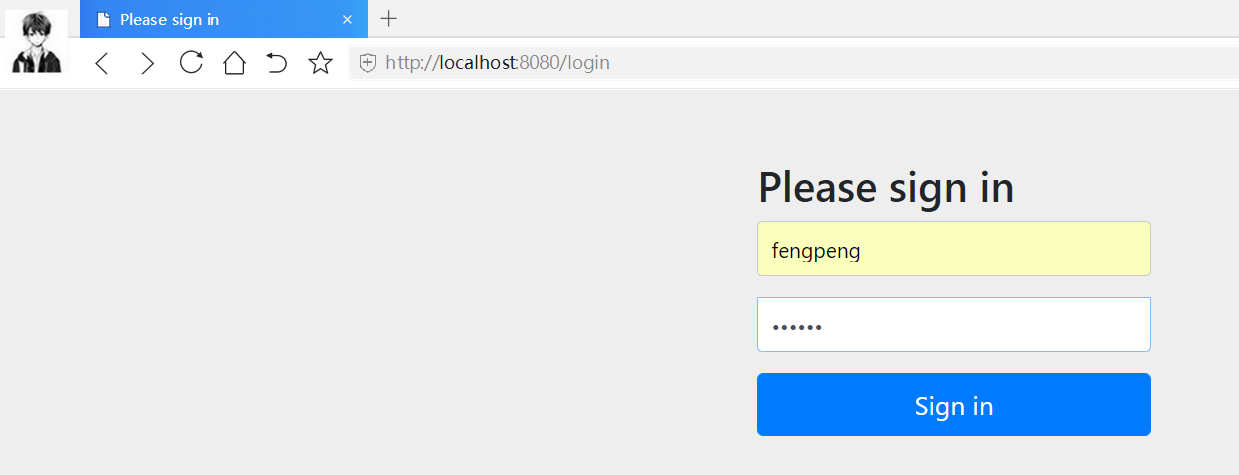
只拥有vip2, vip3权限
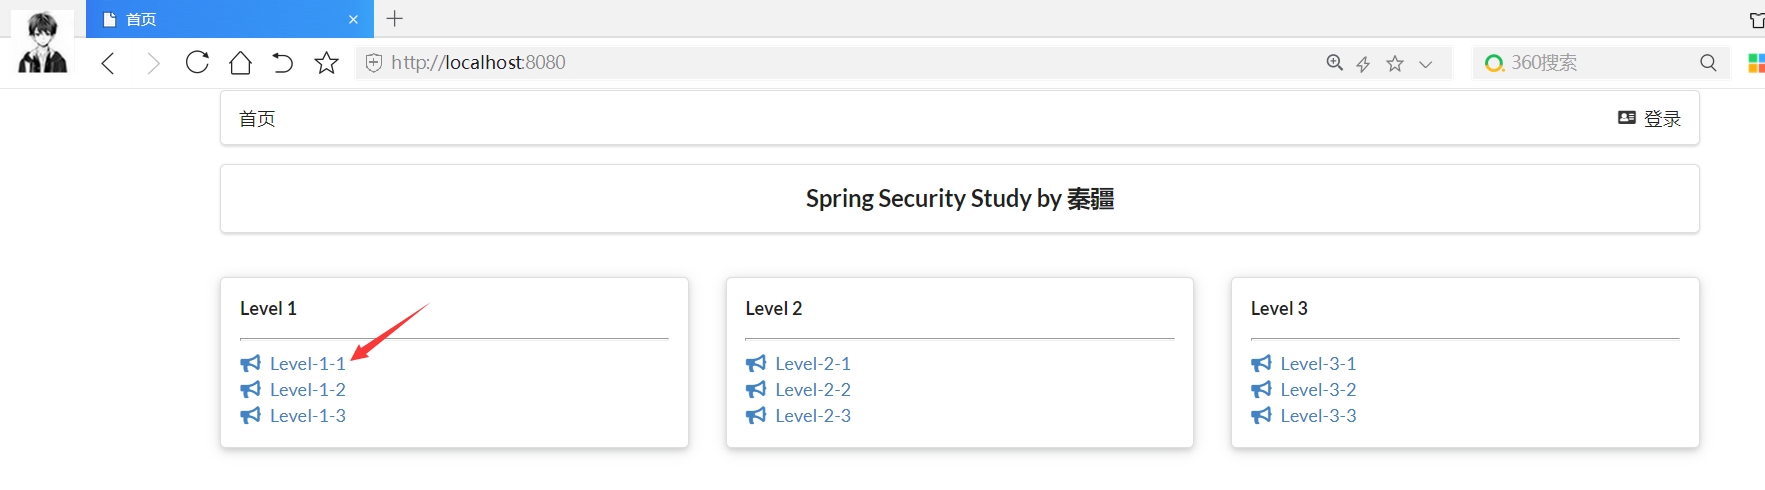
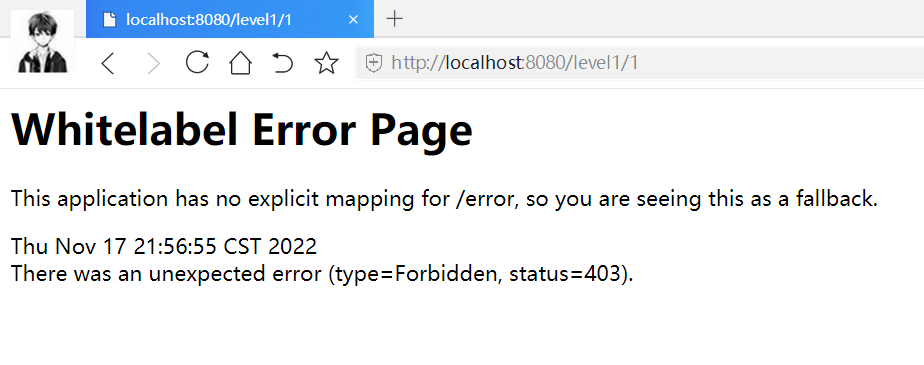
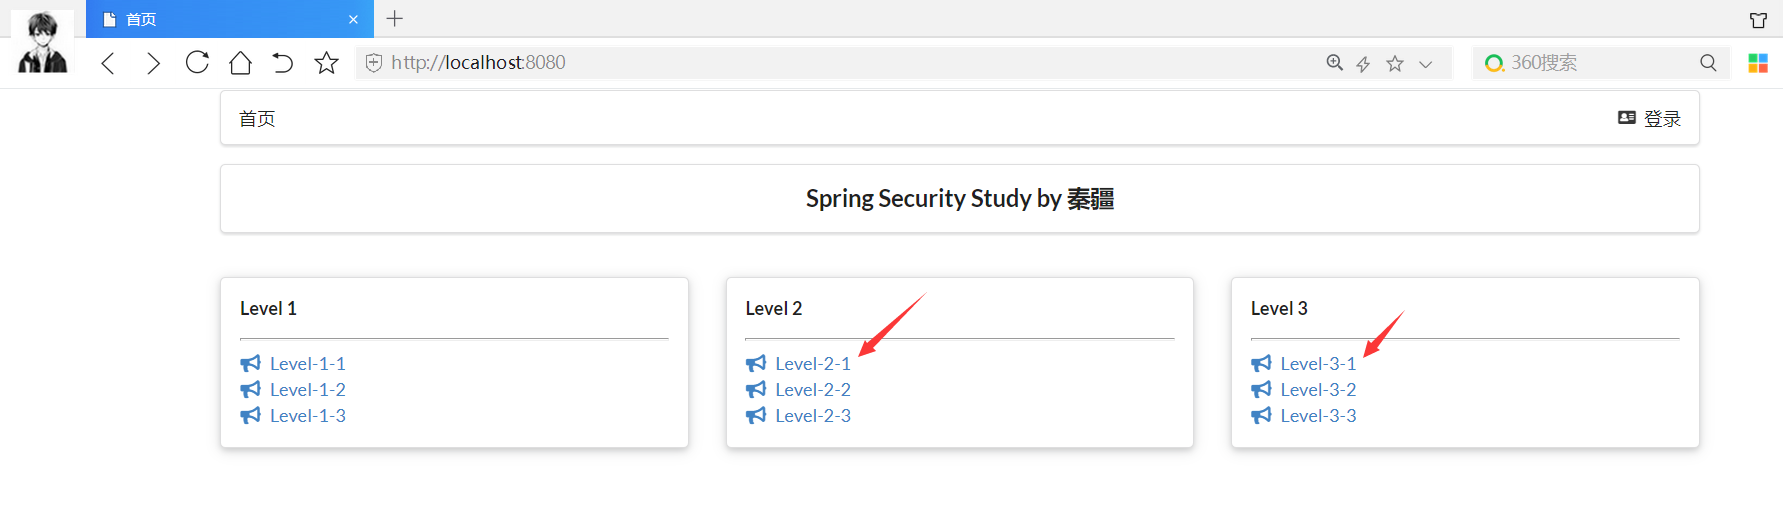

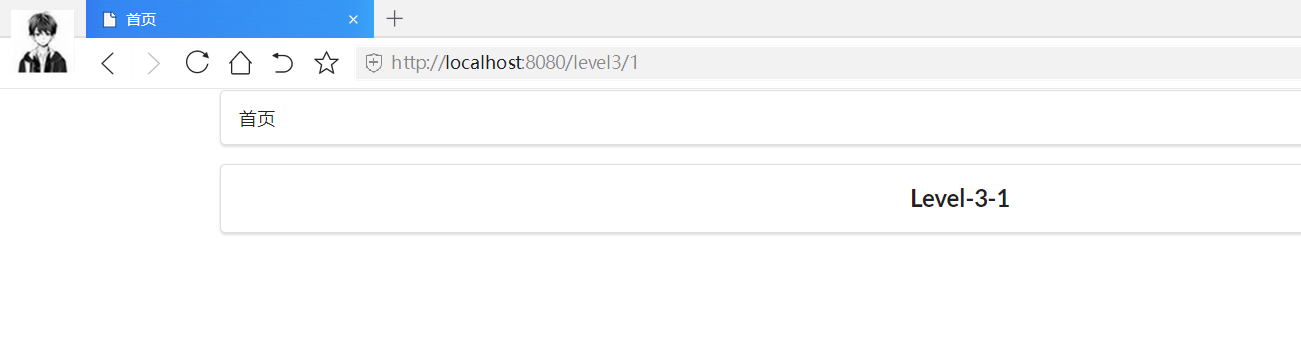
另外root和guest的运行效果类似!
13.4 注销及权限控制
注销功能
index.html
<div class="ui segment" id="index-header-nav" th:fragment="nav-menu">
    <div class="ui secondary menu">
        <a class="item"  th:href="@{/index}">首页</a>

        <!--登录注销-->
        <div class="right menu">
            <!--未登录-->
            <a class="item" th:href="@{/toLogin}">
                <i class="address card icon"></i> 登录
            </a>

            <!--注销-->
            <a class="item" th:href="@{/logout}">
                <i class="sign-out icon"></i> 注销
            </a>
            <!--已登录
            <a th:href="@{/usr/toUserCenter}">
                <i class="address card icon"></i> admin
            </a>
            -->
        </div>
    </div>
</div>
SecurityConfig类
@EnableWebSecurity
public class SecurityConfig extends WebSecurityConfigurerAdapter {

    //授权
    @Override
    protected void configure(HttpSecurity http) throws Exception {
        //首页所有人可以访问, 功能页只有对应有权限的人才能访问
        //请求授权的规则~
        http.authorizeRequests()
                .antMatchers("/").permitAll()
                .antMatchers("/level1/**").hasRole("vip1")
                .antMatchers("/level2/**").hasRole("vip2")
                .antMatchers("/level3/**").hasRole("vip3");

        //没有权限默认会到登录页面,需要开启登录的页面
        http.formLogin();

        //注销. 开启了注销功能,跳到首页
        http.logout().logoutSuccessUrl("/");
    }

    //认证 springboot 2.1.x 可以直接使用~
    //密码编码:PasswordEncoder
    //在Spring Security 5.0+ 新增了很多的加密方法~
    @Override
    protected void configure(AuthenticationManagerBuilder auth) throws Exception {
        //这些数据正常应该从数据库中读
        auth.inMemoryAuthentication().passwordEncoder(new BCryptPasswordEncoder())
                .withUser("fengpeng").password(new BCryptPasswordEncoder().encode("123456")).roles("vip2","vip3")
                .and()
                .withUser("root").password(new BCryptPasswordEncoder().encode("123456")).roles("vip1","vip2","vip3")
                .and()
                .withUser("guest").password(new BCryptPasswordEncoder().encode("123456")).roles("vip1");

    }
}
运行测试
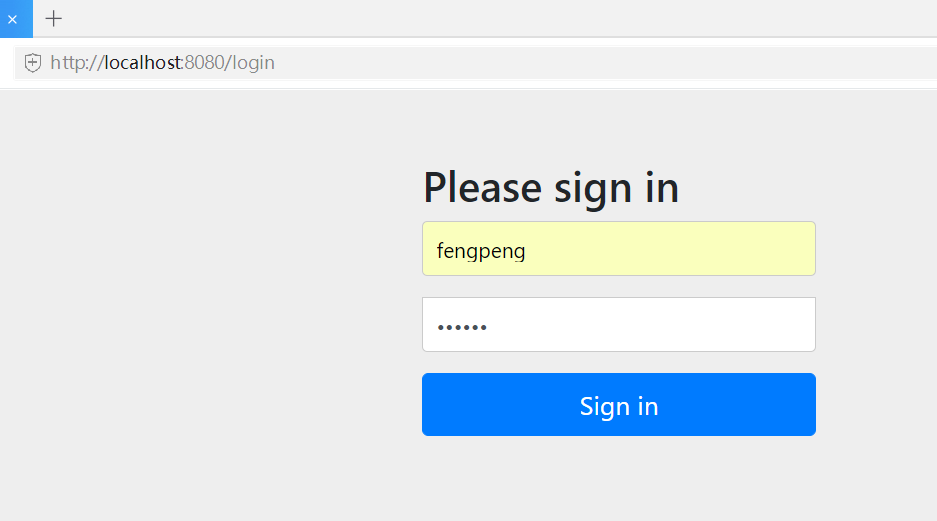
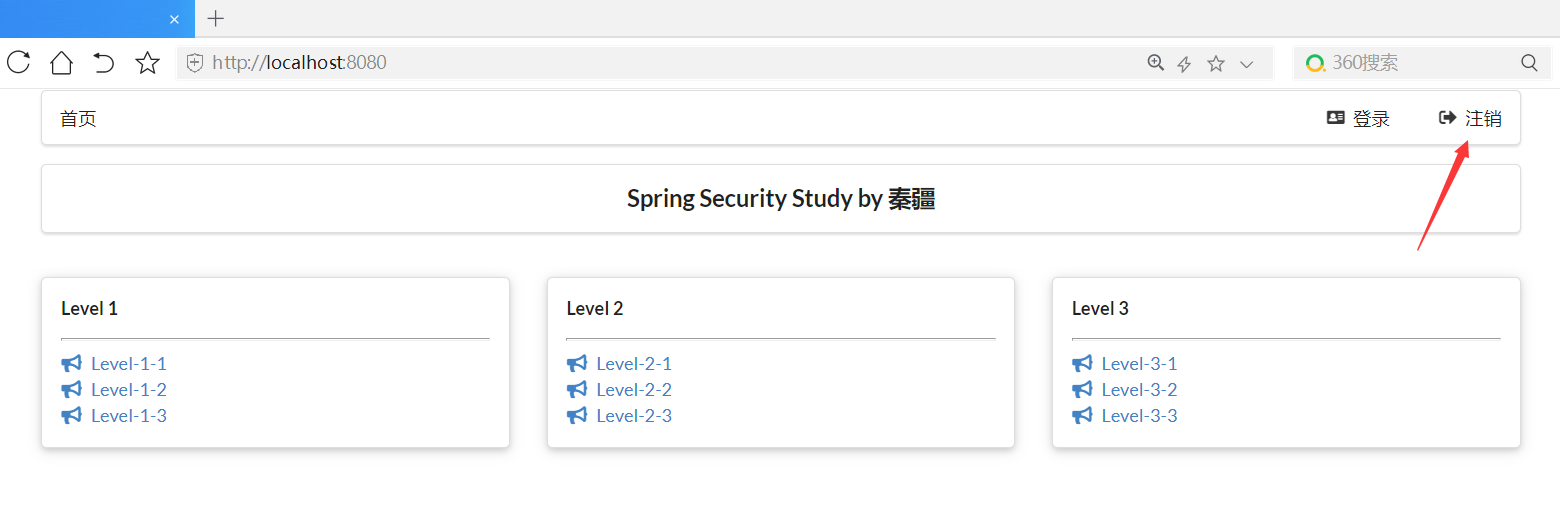
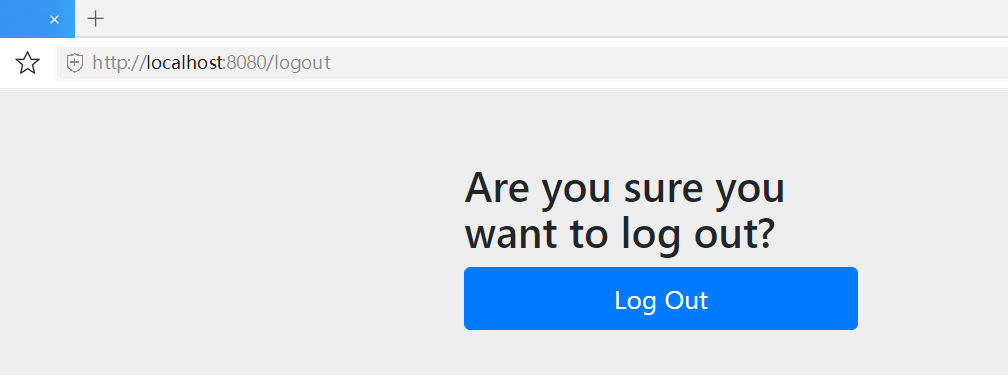
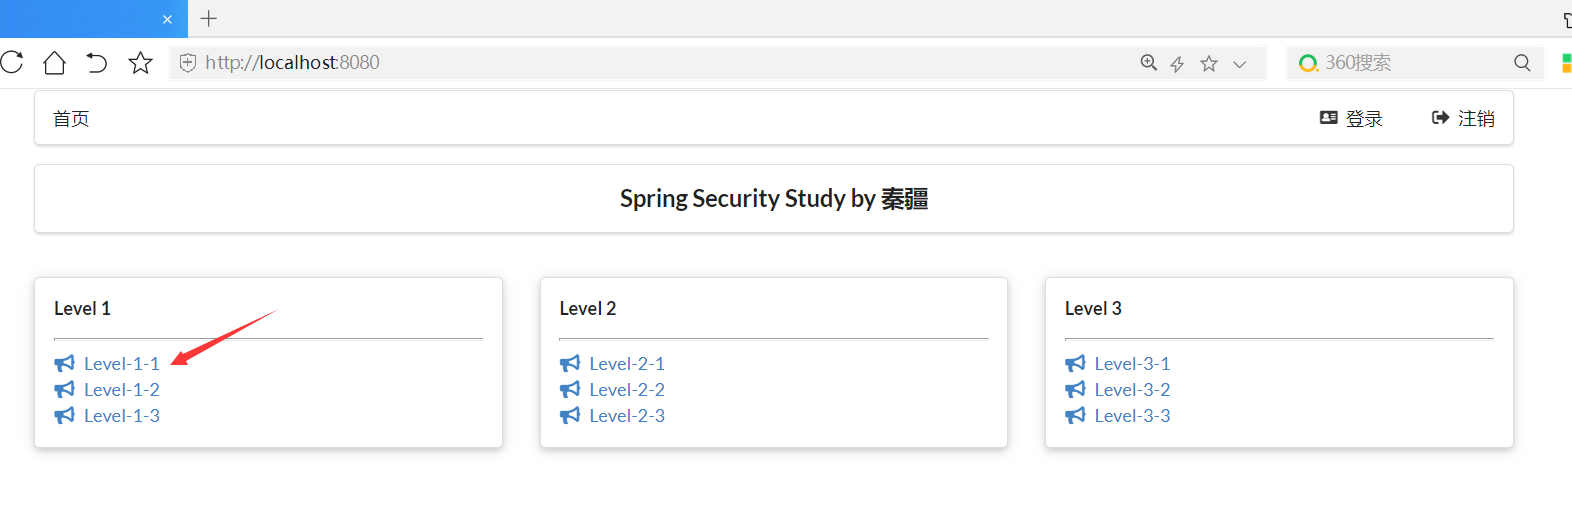
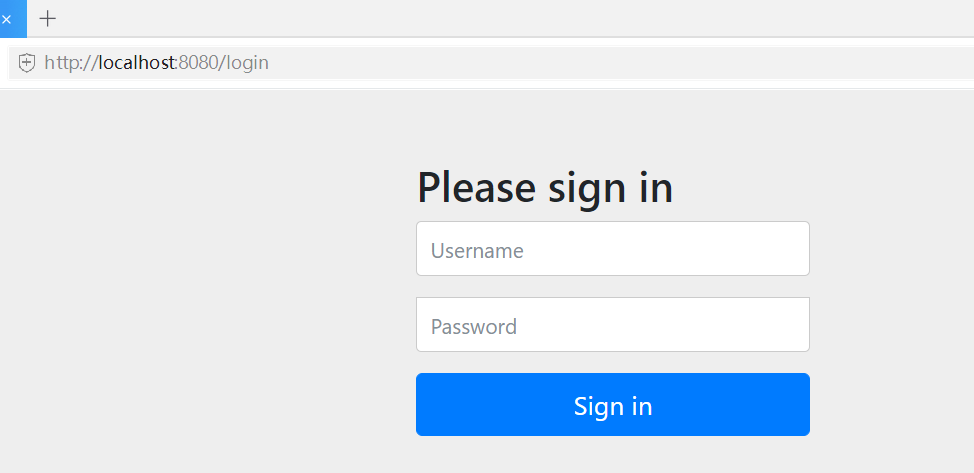
权限控制
index.html
    <div class="ui segment" id="index-header-nav" th:fragment="nav-menu">
        <div class="ui secondary menu">
            <a class="item"  th:href="@{/index}">首页</a>

            <!--登录注销-->
            <div class="right menu">

                <!--如果未登录-->
                <div sec:authorize="!isAuthenticated()">
                    <a class="item" th:href="@{/toLogin}">
                        <i class="address card icon"></i> 登录
                    </a>
                </div>

                <!--如果登录:用户名,注销-->
                <div sec:authorize="isAuthenticated()">
                    <a class="item">
                        用户名:<span sec:authentication="name"></span>
                        角色:<span sec:authentication="authorities"></span>
                    </a>
                </div>
                <div sec:authorize="isAuthenticated()">
                    <a class="item" th:href="@{/logout}">
                        <i class="sign-out icon"></i> 注销
                    </a>
                </div>
                <!--已登录
                <a th:href="@{/usr/toUserCenter}">
                    <i class="address card icon"></i> admin
                </a>
                -->
            </div>
        </div>
    </div>

    <div class="ui segment" style="text-align: center">
        <h3>Spring Security Study by 秦疆</h3>
    </div>

    <div>
        <br>
        <div class="ui three column stackable grid">
            <!--菜单根据用户的角色动态的实现~ -->
            <div class="column" sec:authorize="hasRole('vip1')">
                <div class="ui raised segment">
                    <div class="ui">
                        <div class="content">
                            <h5 class="content">Level 1</h5>
                            <hr>
                            <div><a th:href="@{/level1/1}"><i class="bullhorn icon"></i> Level-1-1</a></div>
                            <div><a th:href="@{/level1/2}"><i class="bullhorn icon"></i> Level-1-2</a></div>
                            <div><a th:href="@{/level1/3}"><i class="bullhorn icon"></i> Level-1-3</a></div>
                        </div>
                    </div>
                </div>
            </div>
			 <!--菜单根据用户的角色动态的实现~ -->
            <div class="column" sec:authorize="hasRole('vip2')">
                <div class="ui raised segment">
                    <div class="ui">
                        <div class="content">
                            <h5 class="content">Level 2</h5>
                            <hr>
                            <div><a th:href="@{/level2/1}"><i class="bullhorn icon"></i> Level-2-1</a></div>
                            <div><a th:href="@{/level2/2}"><i class="bullhorn icon"></i> Level-2-2</a></div>
                            <div><a th:href="@{/level2/3}"><i class="bullhorn icon"></i> Level-2-3</a></div>
                        </div>
                    </div>
                </div>
            </div>

			 <!--菜单根据用户的角色动态的实现~ -->
            <div class="column" sec:authorize="hasRole('vip3')">
                <div class="ui raised segment">
                    <div class="ui">
                        <div class="content">
                            <h5 class="content">Level 3</h5>
                            <hr>
                            <div><a th:href="@{/level3/1}"><i class="bullhorn icon"></i> Level-3-1</a></div>
                            <div><a th:href="@{/level3/2}"><i class="bullhorn icon"></i> Level-3-2</a></div>
                            <div><a th:href="@{/level3/3}"><i class="bullhorn icon"></i> Level-3-3</a></div>
                        </div>
                    </div>
                </div>
            </div>

        </div>
    </div>

</div>
SecurityConfig类
@EnableWebSecurity
public class SecurityConfig extends WebSecurityConfigurerAdapter {

    //授权
    @Override
    protected void configure(HttpSecurity http) throws Exception {
        //首页所有人可以访问, 功能页只有对应有权限的人才能访问
        //请求授权的规则~
        http.authorizeRequests()
                .antMatchers("/").permitAll()
                .antMatchers("/level1/**").hasRole("vip1")
                .antMatchers("/level2/**").hasRole("vip2")
                .antMatchers("/level3/**").hasRole("vip3");

        //没有权限默认会到登录页面,需要开启登录的页面
        http.formLogin();

        //注销. 开启了注销功能,跳到首页
        //防止网站攻击: get ,post
        http.csrf().disable();//关闭csrf功能,登录失败可能存在的原因~
        http.logout().logoutSuccessUrl("/");
    }

    //认证 springboot 2.1.x 可以直接使用~
    //密码编码:PasswordEncoder
    //在Spring Security 5.0+ 新增了很多的加密方法~
    @Override
    protected void configure(AuthenticationManagerBuilder auth) throws Exception {
        //这些数据正常应该从数据库中读
        auth.inMemoryAuthentication().passwordEncoder(new BCryptPasswordEncoder())
                .withUser("fengpeng").password(new BCryptPasswordEncoder().encode("123456")).roles("vip2","vip3")
                .and()
                .withUser("root").password(new BCryptPasswordEncoder().encode("123456")).roles("vip1","vip2","vip3")
                .and()
                .withUser("guest").password(new BCryptPasswordEncoder().encode("123456")).roles("vip1");

    }
}
运行测试

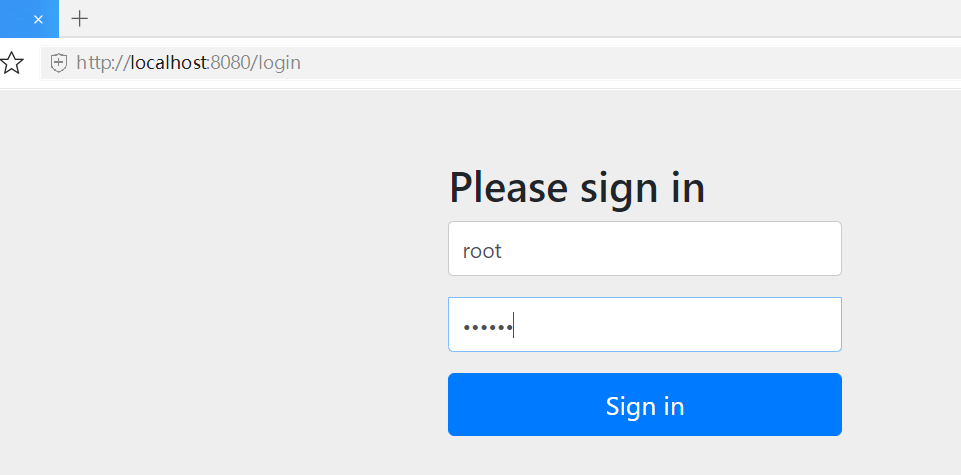
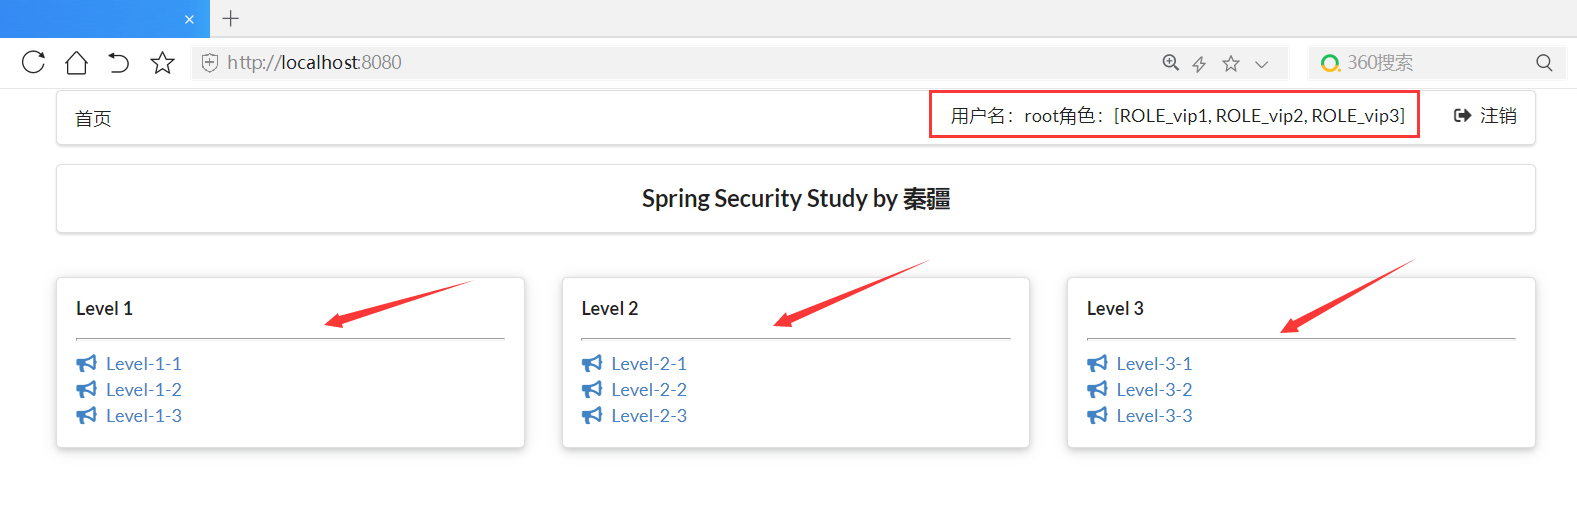
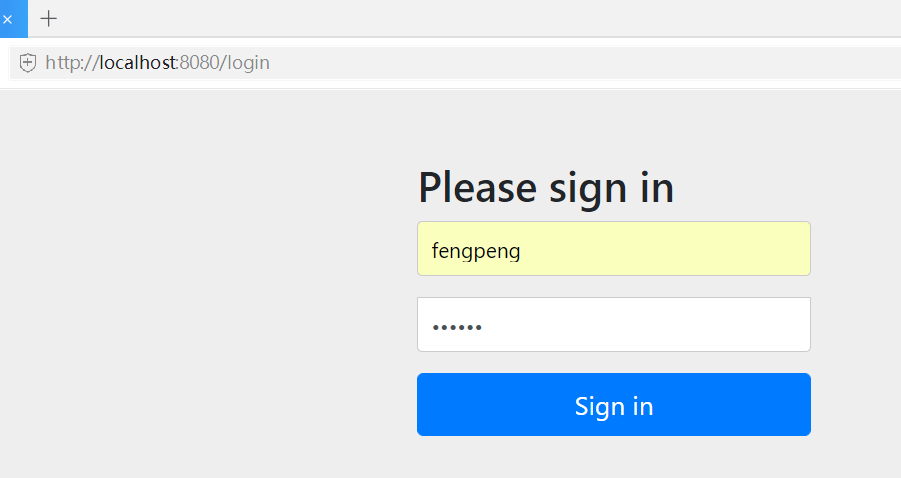
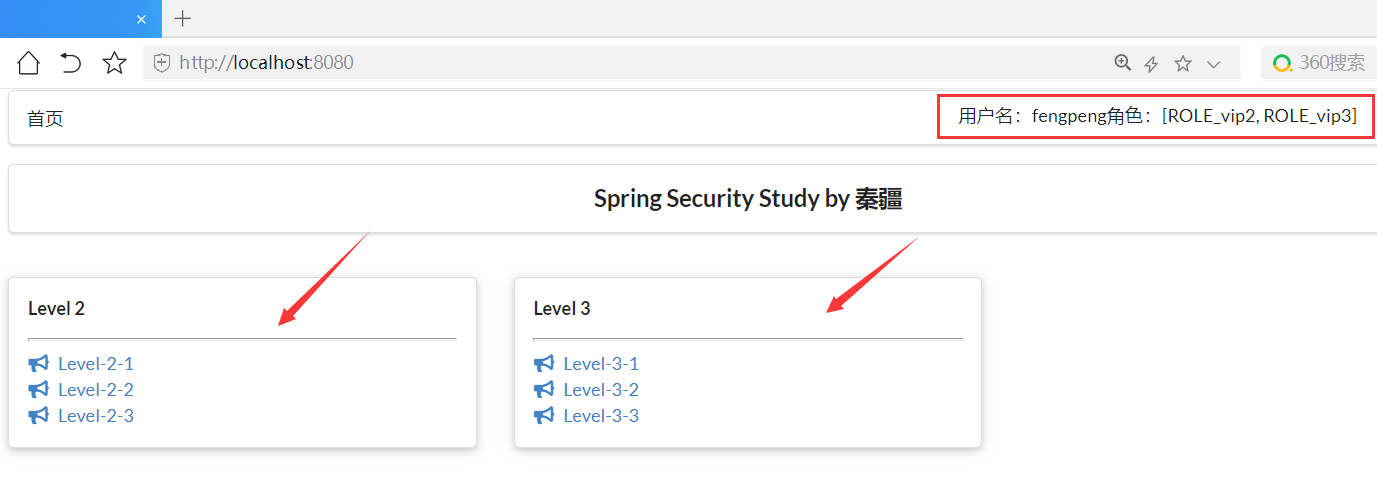
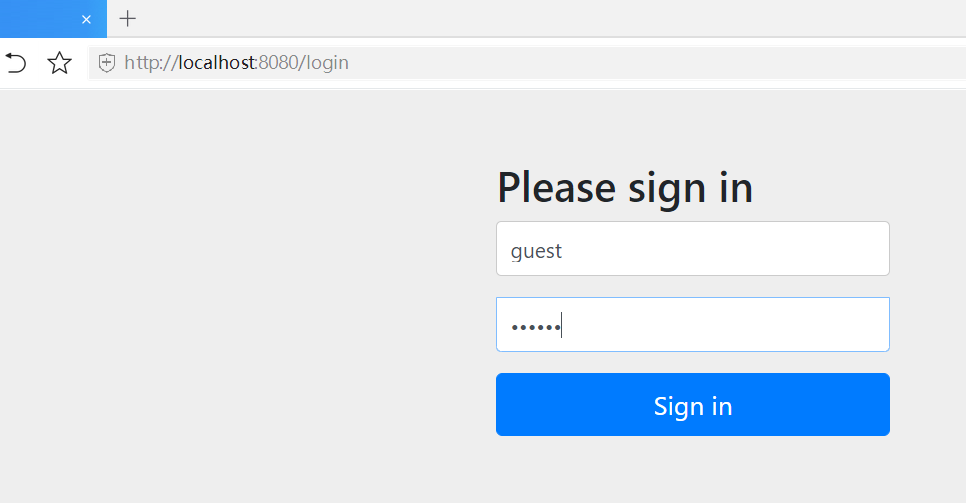
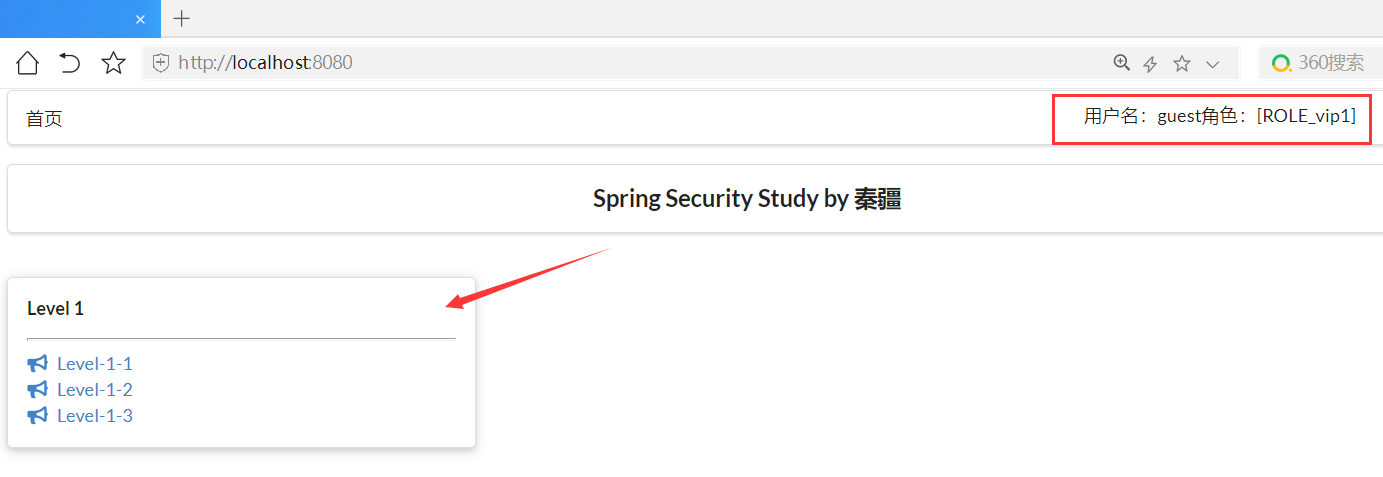
13.5 记住我及首页定制
开启记住我功能
SecurityConfig类
@EnableWebSecurity
public class SecurityConfig extends WebSecurityConfigurerAdapter {

    //授权
    @Override
    protected void configure(HttpSecurity http) throws Exception {
        //首页所有人可以访问, 功能页只有对应有权限的人才能访问
        //请求授权的规则~
        http.authorizeRequests()
                .antMatchers("/").permitAll()
                .antMatchers("/level1/**").hasRole("vip1")
                .antMatchers("/level2/**").hasRole("vip2")
                .antMatchers("/level3/**").hasRole("vip3");

        //没有权限默认会到登录页面,需要开启登录的页面
        http.formLogin();

        //注销. 开启了注销功能,跳到首页
        //防止网站攻击: get ,post
//        http.csrf().disable();//关闭csrf功能,登录失败可能存在的原因~
        http.logout().logoutSuccessUrl("/");

        //开启记住我功能  cookie,默认保存两周
        http.rememberMe();
    }

    //认证 springboot 2.1.x 可以直接使用~
    //密码编码:PasswordEncoder
    //在Spring Security 5.0+ 新增了很多的加密方法~
    @Override
    protected void configure(AuthenticationManagerBuilder auth) throws Exception {
        //这些数据正常应该从数据库中读
        auth.inMemoryAuthentication().passwordEncoder(new BCryptPasswordEncoder())
                .withUser("fengpeng").password(new BCryptPasswordEncoder().encode("123456")).roles("vip2","vip3")
                .and()
                .withUser("root").password(new BCryptPasswordEncoder().encode("123456")).roles("vip1","vip2","vip3")
                .and()
                .withUser("guest").password(new BCryptPasswordEncoder().encode("123456")).roles("vip1");

    }
}
运行测试
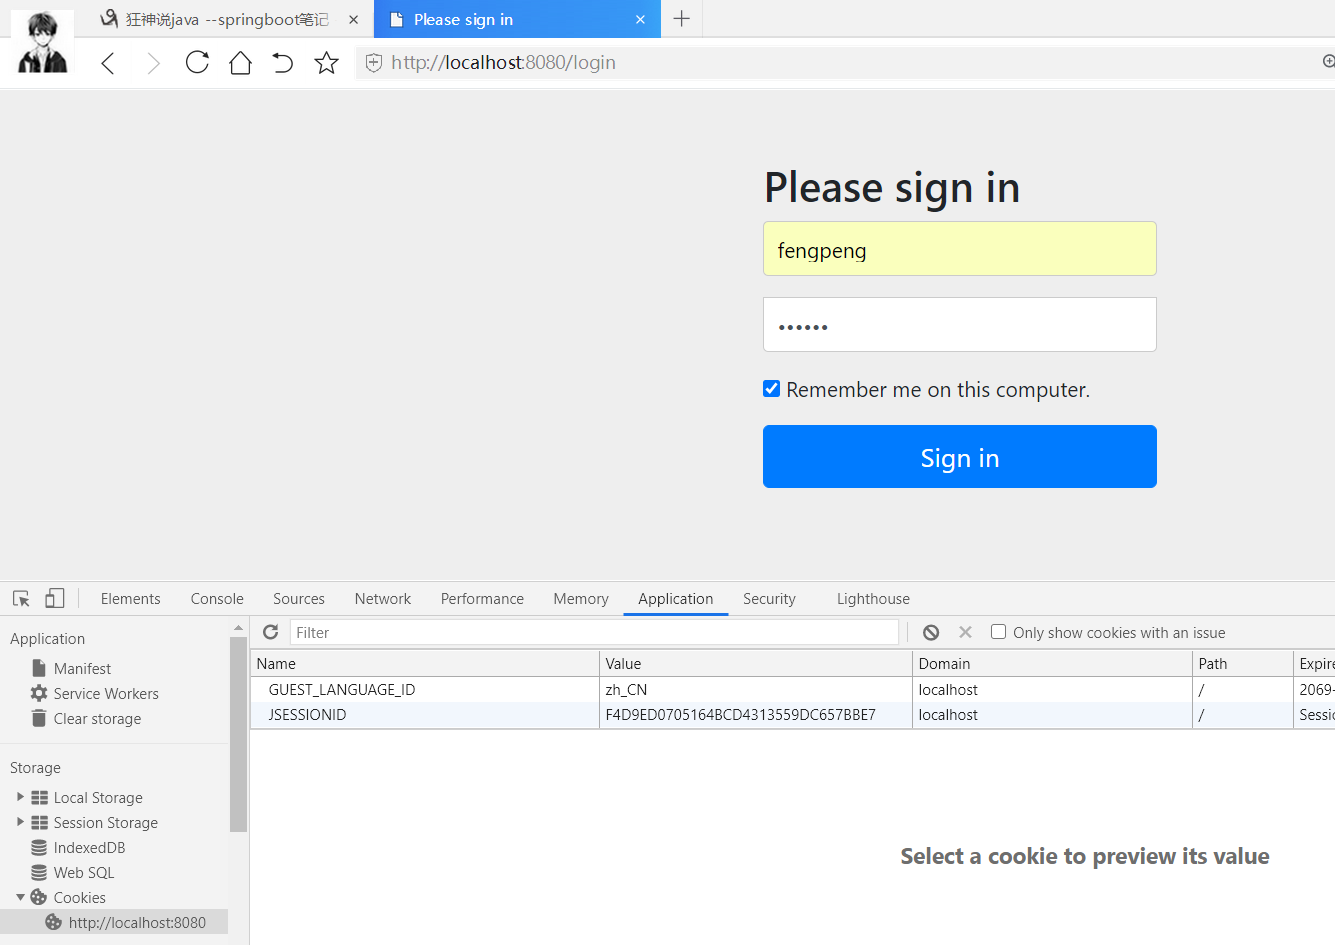
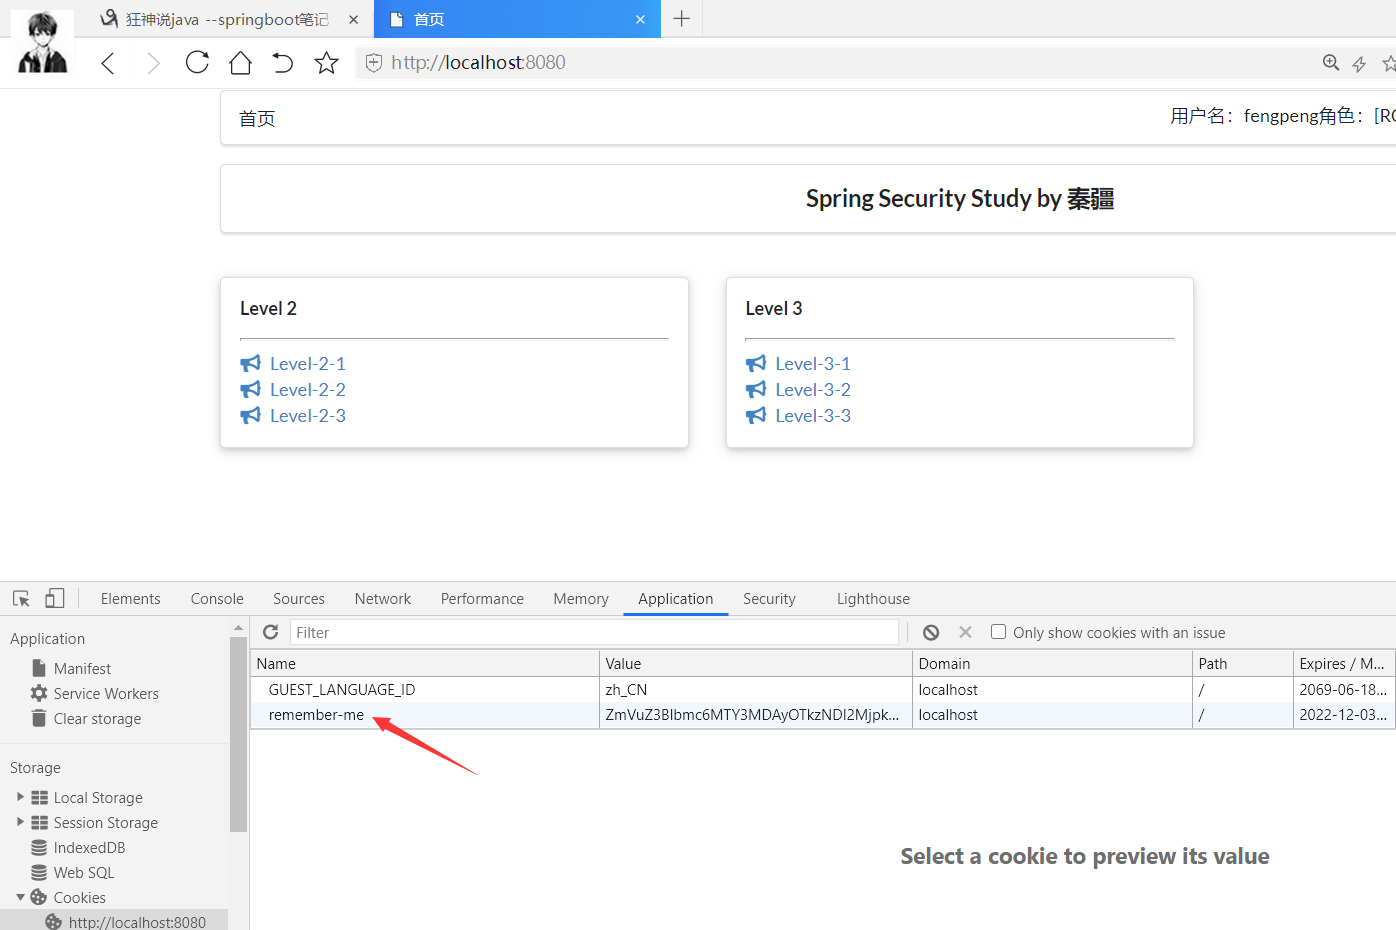
360极速浏览器每次关闭会自动把cookie清除了,其他浏览器不会。
首页定制
login.html
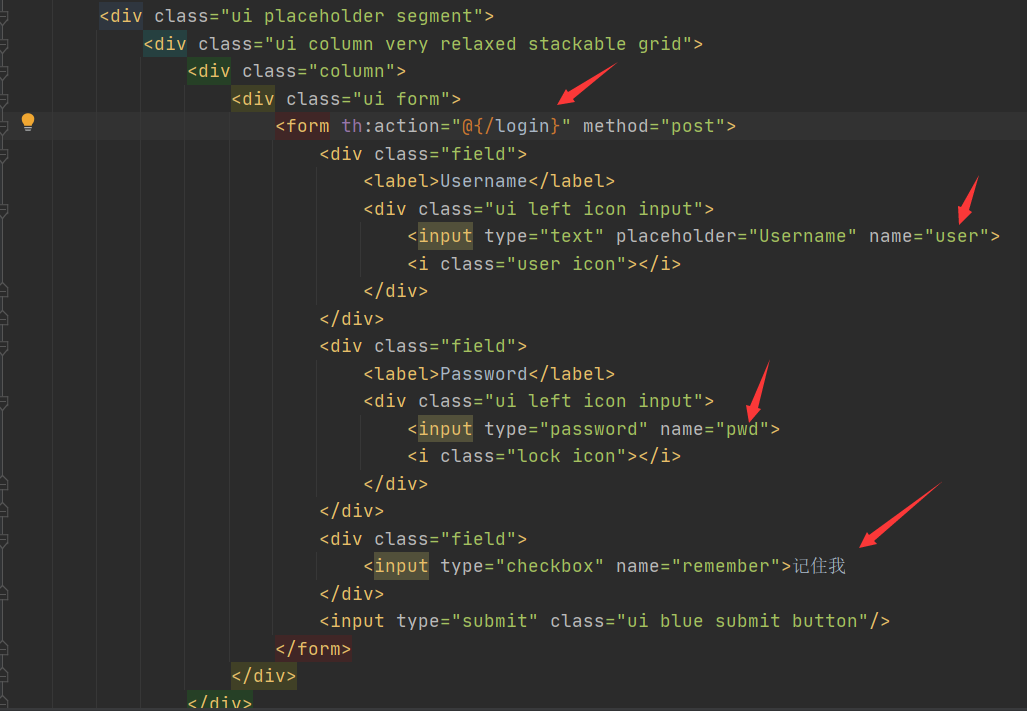
SecurityConfig类
    //授权
    @Override
    protected void configure(HttpSecurity http) throws Exception {
        //首页所有人可以访问, 功能页只有对应有权限的人才能访问
        //请求授权的规则~
        http.authorizeRequests()
                .antMatchers("/").permitAll()
                .antMatchers("/level1/**").hasRole("vip1")
                .antMatchers("/level2/**").hasRole("vip2")
                .antMatchers("/level3/**").hasRole("vip3");

        //没有权限默认会到登录页面,需要开启登录的页面
        // /login
        // 定制登录页  loginPage("/toLogin");
        http.formLogin().loginPage("/toLogin")//实际走的地址
                .loginProcessingUrl("/login")//根据前端写的地址
                .usernameParameter("user")
                .passwordParameter("pwd");//默认前端接收的是username,password,如果参数名不是默认的,这个地方就需要重新设置

        //注销. 开启了注销功能,跳到首页
        //防止网站攻击: get ,post
        http.csrf().disable();//关闭csrf功能,登录失败可能存在的原因~
        http.logout().logoutSuccessUrl("/");

        //开启记住我功能  cookie,默认保存两周
//        http.rememberMe();

        //自定义接收前端的参数
        http.rememberMe().rememberMeParameter("remember");
    }
运行测试

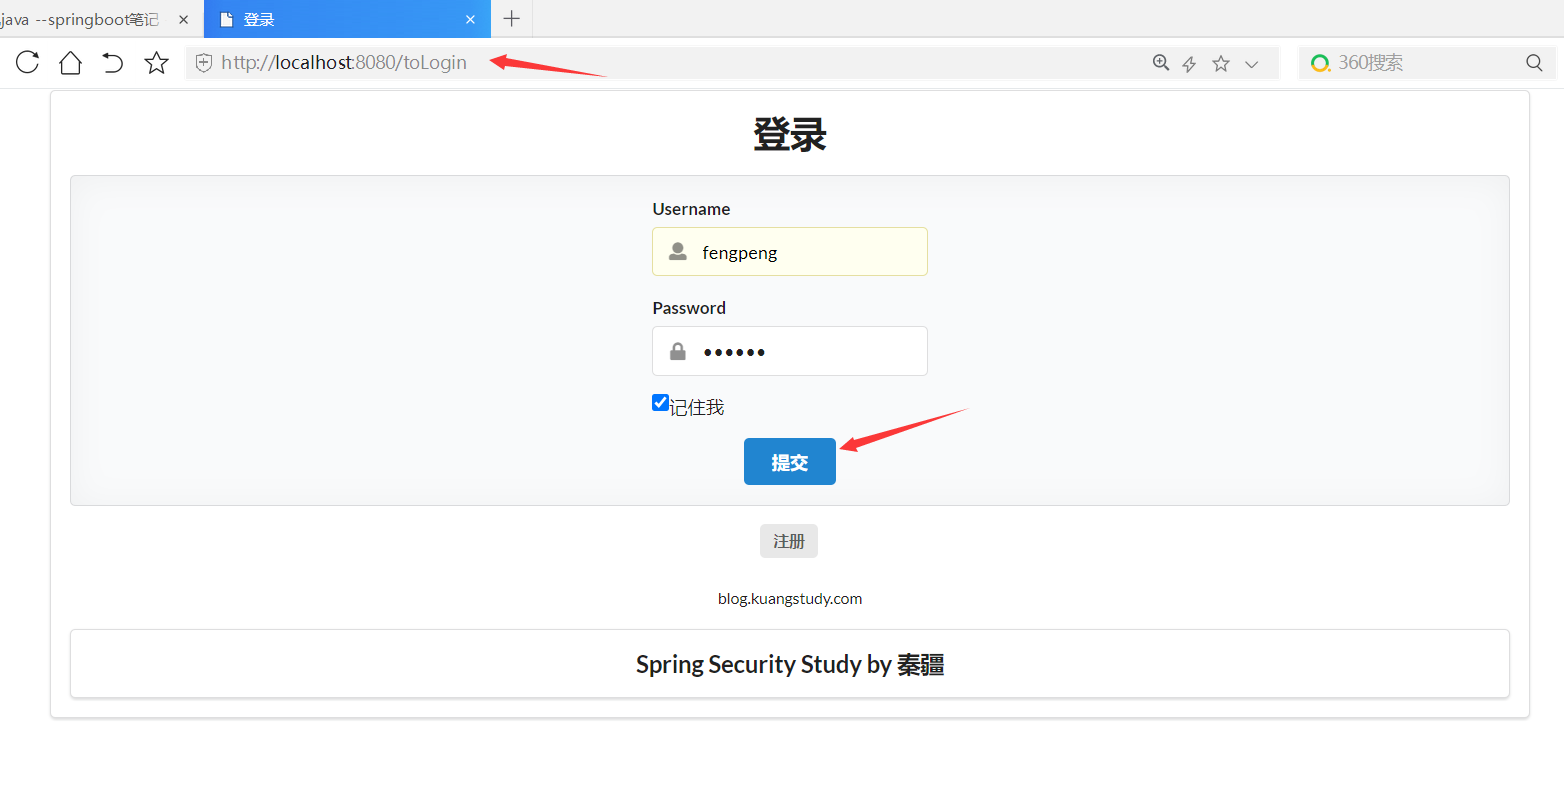
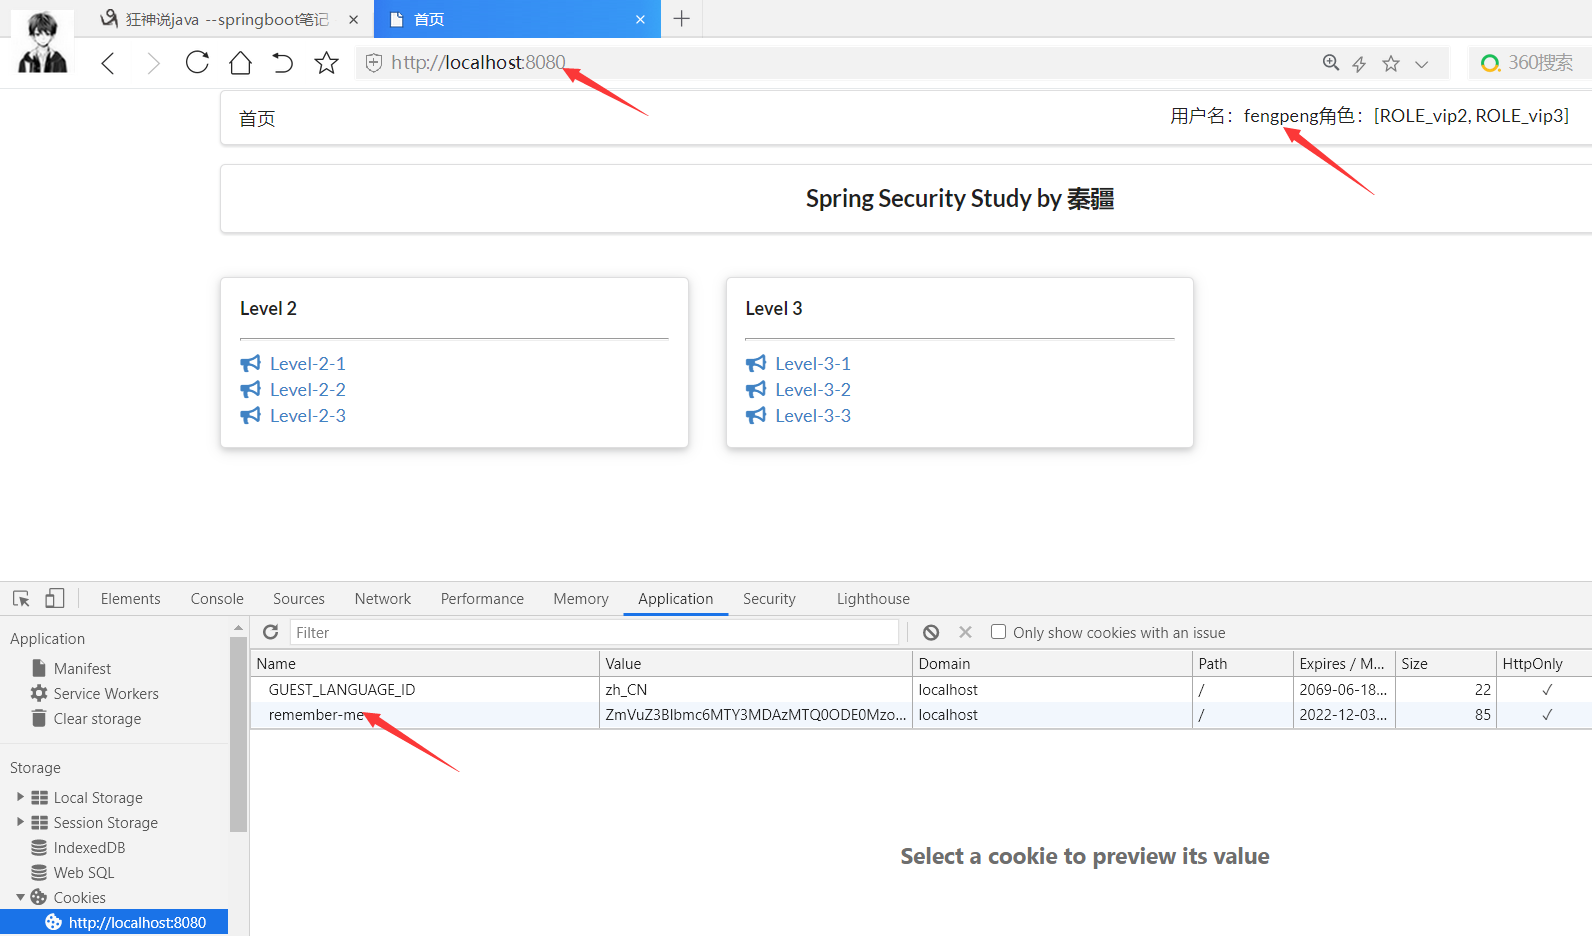


点击注销会清除cookie
14 Shiro
14.1 新建maven项目
配置maven
修改编码
导入依赖
    <dependencies>
        <dependency>
            <groupId>org.apache.shiro</groupId>
            <artifactId>shiro-core</artifactId>
            <version>1.10.0</version>
        </dependency>

        <dependency>
            <groupId>org.slf4j</groupId>
            <artifactId>jcl-over-slf4j</artifactId>
            <version>1.7.21</version>
        </dependency>
        <dependency>
            <groupId>org.slf4j</groupId>
            <artifactId>slf4j-log4j12</artifactId>
            <version>1.7.21</version>
        </dependency>
        <dependency>
            <groupId>log4j</groupId>
            <artifactId>log4j</artifactId>
            <version>1.2.17</version>
        </dependency>
    </dependencies>
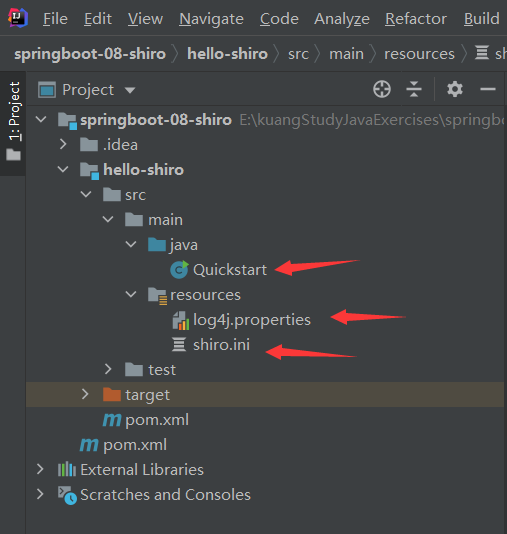
log4j.properties
log4j.rootLogger=INFO,stdout

log4j.appender.stdout=org.apache.log4j.ConsoleAppender
log4j.appender.stdout.layout=org.apache.log4j.PatternLayout
log4j.appender.stdout.layout.ConversionPattern=%d %p [%c] - %m %n

#General Apache libraries
log4j.logger.org.apache=WARN

#Spring
log4j.logger.org.springframework=WARN

#Default Shiro Logging
log4j.logger.org.apache.shiro=INFO

#Disable verbose Logging
log4j.logger.org.apache.shiro.util.ThreadContext=WARN
log4j.logger.org.apache.shiro.cache.ehcache.EhCache=WARN
shiro.ini(需要下载ini插件)
[users]
# user 'root' with password 'secret' and the 'admin' role
root = secret, admin
# user 'guest' with the password 'guest' and the 'guest' role
guest = guest, guest
# user 'presidentskroob' with password '12345' ("That's the same combination on
# my luggage!!!" ;)), and role 'president'
presidentskroob = 12345, president
# user 'darkhelmet' with password 'ludicrousspeed' and roles 'darklord' and 'schwartz'
darkhelmet = ludicrousspeed, darklord, schwartz
# user 'lonestarr' with password 'vespa' and roles 'goodguy' and 'schwartz'
lonestarr = vespa, goodguy, schwartz

# -----------------------------------------------------------------------------
# Roles with assigned permissions
#
# Each line conforms to the format defined in the
# org.apache.shiro.realm.text.TextConfigurationRealm#setRoleDefinitions JavaDoc
# -----------------------------------------------------------------------------
[roles]
# 'admin' role has all permissions, indicated by the wildcard '*'
admin = *
# The 'schwartz' role can do anything (*) with any lightsaber:
schwartz = lightsaber:*
# The 'goodguy' role is allowed to 'drive' (action) the winnebago (type) with
# license plate 'eagle5' (instance specific id)
goodguy = winnebago:drive:eagle5
Quickstart类
/**
 * @Author feng peng
 * @Date 2022/11/19
 * @Time 10:28
 */
import org.apache.shiro.SecurityUtils;
import org.apache.shiro.authc.*;
import org.apache.shiro.config.IniSecurityManagerFactory;
import org.apache.shiro.mgt.SecurityManager;
import org.apache.shiro.session.Session;
import org.apache.shiro.subject.Subject;
import org.apache.shiro.util.Factory;
import org.slf4j.Logger;
import org.slf4j.LoggerFactory;


/**
 * Simple Quickstart application showing how to use Shiro's API.
 *
 * @since 0.9 RC2
 */
public class Quickstart {

    private static final transient Logger log = LoggerFactory.getLogger(Quickstart.class);


    public static void main(String[] args) {

        // The easiest way to create a Shiro SecurityManager with configured
        // realms, users, roles and permissions is to use the simple INI config.
        // We'll do that by using a factory that can ingest a .ini file and
        // return a SecurityManager instance:

        // Use the shiro.ini file at the root of the classpath
        // (file: and url: prefixes load from files and urls respectively):
        Factory<SecurityManager> factory = new IniSecurityManagerFactory("classpath:shiro.ini");
        SecurityManager securityManager = factory.getInstance();

        // for this simple example quickstart, make the SecurityManager
        // accessible as a JVM singleton.  Most applications wouldn't do this
        // and instead rely on their container configuration or web.xml for
        // webapps.  That is outside the scope of this simple quickstart, so
        // we'll just do the bare minimum so you can continue to get a feel
        // for things.
        SecurityUtils.setSecurityManager(securityManager);

        // Now that a simple Shiro environment is set up, let's see what you can do:

        // get the currently executing user:
        Subject currentUser = SecurityUtils.getSubject();

        // Do some stuff with a Session (no need for a web or EJB container!!!)
        Session session = currentUser.getSession();
        session.setAttribute("someKey", "aValue");
        String value = (String) session.getAttribute("someKey");
        if (value.equals("aValue")) {
            log.info("Retrieved the correct value! [" + value + "]");
        }

        // let's login the current user so we can check against roles and permissions:
        if (!currentUser.isAuthenticated()) {
            UsernamePasswordToken token = new UsernamePasswordToken("lonestarr", "vespa");
            token.setRememberMe(true);
            try {
                currentUser.login(token);
            } catch (UnknownAccountException uae) {
                log.info("There is no user with username of " + token.getPrincipal());
            } catch (IncorrectCredentialsException ice) {
                log.info("Password for account " + token.getPrincipal() + " was incorrect!");
            } catch (LockedAccountException lae) {
                log.info("The account for username " + token.getPrincipal() + " is locked.  " +
                        "Please contact your administrator to unlock it.");
            }
            // ... catch more exceptions here (maybe custom ones specific to your application?
            catch (AuthenticationException ae) {
                //unexpected condition?  error?
            }
        }

        //say who they are:
        //print their identifying principal (in this case, a username):
        log.info("User [" + currentUser.getPrincipal() + "] logged in successfully.");

        //test a role:
        if (currentUser.hasRole("schwartz")) {
            log.info("May the Schwartz be with you!");
        } else {
            log.info("Hello, mere mortal.");
        }

        //test a typed permission (not instance-level)
        if (currentUser.isPermitted("lightsaber:wield")) {
            log.info("You may use a lightsaber ring.  Use it wisely.");
        } else {
            log.info("Sorry, lightsaber rings are for schwartz masters only.");
        }

        //a (very powerful) Instance Level permission:
        if (currentUser.isPermitted("winnebago:drive:eagle5")) {
            log.info("You are permitted to 'drive' the winnebago with license plate (id) 'eagle5'.  " +
                    "Here are the keys - have fun!");
        } else {
            log.info("Sorry, you aren't allowed to drive the 'eagle5' winnebago!");
        }

        //all done - log out!
        currentUser.logout();

        System.exit(0);
    }
}
运行测试

官方用的是commons-logging
我们这里用的是log4j
14.2 Shiro的Subject分析
Quickstart类
public class Quickstart {

    private static final transient Logger log = LoggerFactory.getLogger(Quickstart.class);


    public static void main(String[] args) {

        Factory<SecurityManager> factory = new IniSecurityManagerFactory("classpath:shiro.ini");
        SecurityManager securityManager = factory.getInstance();
        SecurityUtils.setSecurityManager(securityManager);


        // get the currently executing user:
        // 获取当前的用户对象Subject
        Subject currentUser = SecurityUtils.getSubject();

        // 通过当前用户拿到 Session
        Session session = currentUser.getSession();
        session.setAttribute("someKey", "aValue");
        String value = (String) session.getAttribute("someKey");
        if (value.equals("aValue")) {
            log.info("Subject=>session[" + value + "]");
        }

        // 判断当前的用户是否被认证~
        if (!currentUser.isAuthenticated()) {
            //Token: 令牌,没有获取,随机
            UsernamePasswordToken token = new UsernamePasswordToken("lonestarr", "vespa");
            token.setRememberMe(true);//设置记住我
            try {
                currentUser.login(token);// 执行登录操作~
            } catch (UnknownAccountException uae) {
                log.info("There is no user with username of " + token.getPrincipal());
            } catch (IncorrectCredentialsException ice) {
                log.info("Password for account " + token.getPrincipal() + " was incorrect!");
            } catch (LockedAccountException lae) {
                log.info("The account for username " + token.getPrincipal() + " is locked.  " +
                        "Please contact your administrator to unlock it.");
            }
            // ... catch more exceptions here (maybe custom ones specific to your application?
            catch (AuthenticationException ae) {
                //unexpected condition?  error?
            }
        }

        //say who they are:
        //print their identifying principal (in this case, a username):
        log.info("User [" + currentUser.getPrincipal() + "] logged in successfully.");

        //test a role:
        if (currentUser.hasRole("schwartz")) {
            log.info("May the Schwartz be with you!");
        } else {
            log.info("Hello, mere mortal.");
        }

        //粗粒度
        //test a typed permission (not instance-level)
        if (currentUser.isPermitted("lightsaber:wield")) {
            log.info("You may use a lightsaber ring.  Use it wisely.");
        } else {
            log.info("Sorry, lightsaber rings are for schwartz masters only.");
        }

        //细粒度
        //a (very powerful) Instance Level permission:
        if (currentUser.isPermitted("winnebago:drive:eagle5")) {
            log.info("You are permitted to 'drive' the winnebago with license plate (id) 'eagle5'.  " +
                    "Here are the keys - have fun!");
        } else {
            log.info("Sorry, you aren't allowed to drive the 'eagle5' winnebago!");
        }

        //注销
        //all done - log out!
        currentUser.logout();

        //结束!
        System.exit(0);
    }
}
通过Quickstart,我们可以得出
Subject currentUser = SecurityUtils.getSubject();
Session session = currentUser.getSession();
currentUser.isAuthenticated()
currentUser.getPrincipal()
currentUser.hasRole("schwartz")
currentUser.isPermitted("lightsaber:wield")
currentUser.logout();
Spring Security~ 都有!
14.3 SpringBoot整合Shiro环境搭建
新建springboot项目,添加web依赖
修改maven地址,修改编码,删除多余文件
导入thymeleaf依赖,删除pom中依赖的scope
基本环境搭建
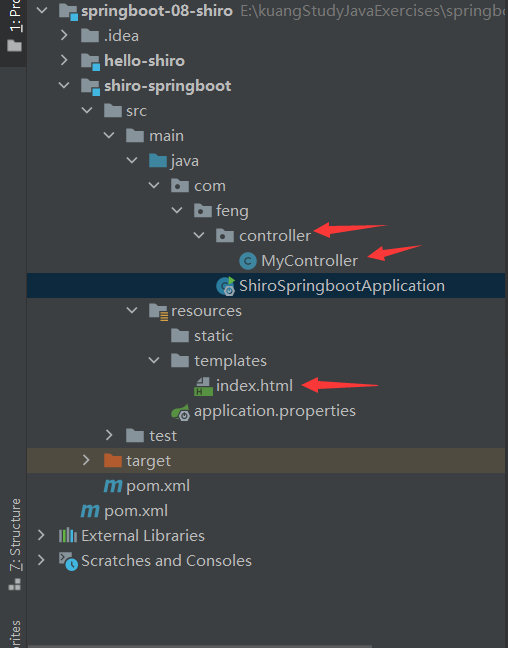
pom.xml
<dependencies>

    <!--
    Subject     用户
    SecurityManager 管理所有用户
    Realm   连接数据
    -->

    <!--shiro整合spring的包-->
    <dependency>
        <groupId>org.apache.shiro</groupId>
        <artifactId>shiro-spring</artifactId>
        <version>1.8.0</version>
    </dependency>


    <dependency>
        <groupId>org.springframework.boot</groupId>
        <artifactId>spring-boot-starter-web</artifactId>
    </dependency>
    <!--Thymeleaf ,我们都是基于3.x开发-->
    <dependency>
        <groupId>org.thymeleaf</groupId>
        <artifactId>thymeleaf-spring5</artifactId>
    </dependency>
    <dependency>
        <groupId>org.thymeleaf.extras</groupId>
        <artifactId>thymeleaf-extras-java8time</artifactId>
    </dependency>

    <dependency>
        <groupId>org.springframework.boot</groupId>
        <artifactId>spring-boot-starter-test</artifactId>
    </dependency>
</dependencies>
MyController类
@Controller
public class MyController {

    @RequestMapping({"/","/index"})
    public String index(Model model){
        model.addAttribute("msg","hello,Shiro");
        return "index";
    }
}
index.html
<!DOCTYPE html>
<html lang="en" xmlns:th="http://www.thymeleaf.org">
<head>
    <meta charset="UTF-8">
    <title>Title</title>
</head>
<body>

<h1>首页</h1>
<p th:text="${msg}"></p>
</body>
</html>
运行测试
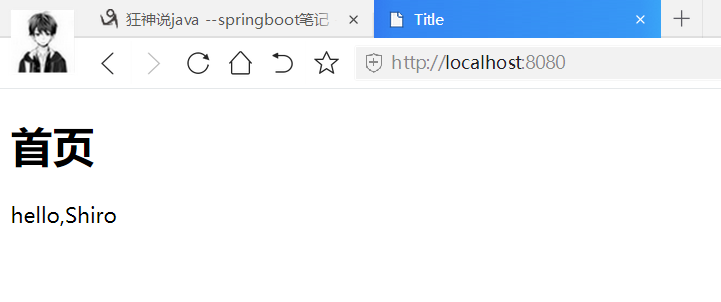
基本环境搭建完成!
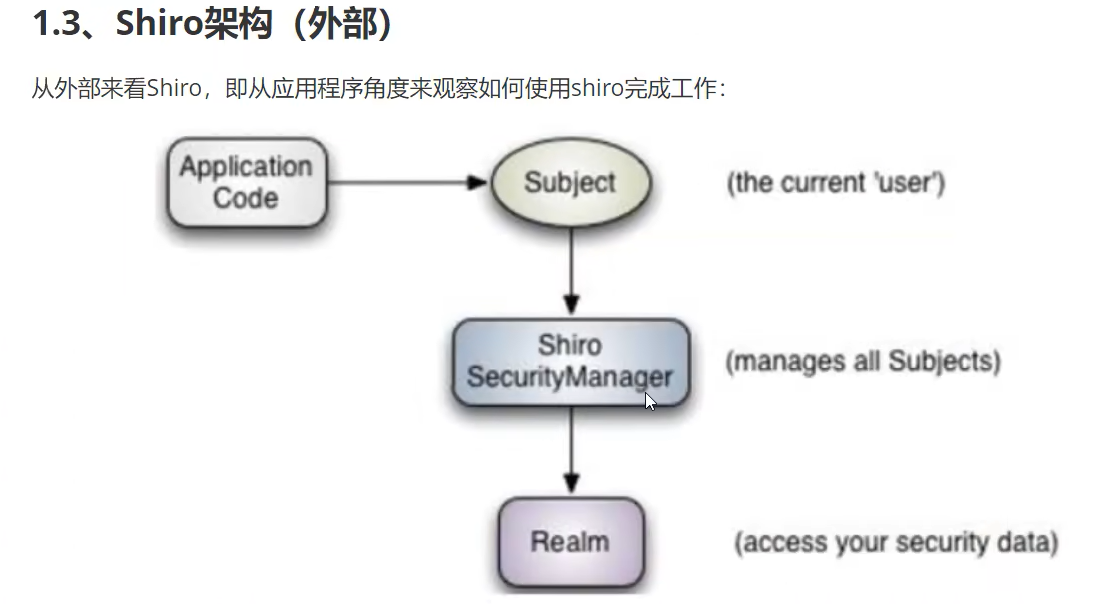
项目结构
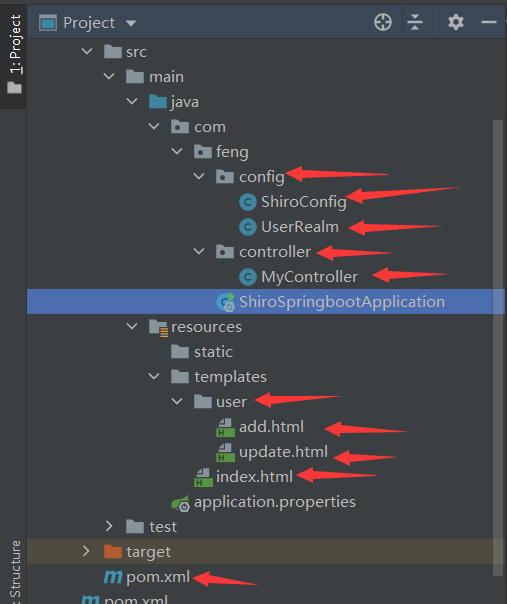
UserRealm类
package com.feng.config;

import org.apache.shiro.authc.AuthenticationException;
import org.apache.shiro.authc.AuthenticationInfo;
import org.apache.shiro.authc.AuthenticationToken;
import org.apache.shiro.authz.AuthorizationInfo;
import org.apache.shiro.realm.AuthorizingRealm;
import org.apache.shiro.subject.PrincipalCollection;

/**
 * @Author feng peng
 * @Date 2022/11/19
 * @Time 16:37
 */

//自定义的 UserRealm   extends AuthorizingRealm
public class UserRealm extends AuthorizingRealm {

    //授权
    @Override
    protected AuthorizationInfo doGetAuthorizationInfo(PrincipalCollection principalCollection) {
        System.out.println("执行了=>授权doGetAuthorizationInfo");
        return null;
    }

    //认证
    @Override
    protected AuthenticationInfo doGetAuthenticationInfo(AuthenticationToken authenticationToken) throws AuthenticationException {
        System.out.println("执行了=>认证doGetAuthorizationInfo");
        return null;
    }
}
ShiroConfig类
package com.feng.config;

import org.apache.shiro.spring.web.ShiroFilterFactoryBean;
import org.apache.shiro.web.mgt.DefaultWebSecurityManager;
import org.springframework.beans.factory.annotation.Qualifier;
import org.springframework.context.annotation.Bean;
import org.springframework.context.annotation.Configuration;

/**
 * @Author feng peng
 * @Date 2022/11/19
 * @Time 16:33
 */

@Configuration
public class ShiroConfig {

    //ShiroFilterFactoryBean  : 第三步
    @Bean
    public ShiroFilterFactoryBean getShiroFilterFactoryBean(@Qualifier("securityManager") DefaultWebSecurityManager defaultWebSecurityManager){
        ShiroFilterFactoryBean bean = new ShiroFilterFactoryBean();
        //设置安全管理器
        bean.setSecurityManager(defaultWebSecurityManager);
        return bean;
    }

    //DefaultWebSecurityManager : 第二步
    //@Bean(name = "securityManager") 指定id名为securityManager
    @Bean(name = "securityManager")//@Qualifier("userRealm")形参userRealm会先使用Autowired规则寻找,找不到则遵循Qualifier注解,这里不能使用@Resource
    public DefaultWebSecurityManager getDefaultWebSecurityManager(@Qualifier("userRealm") UserRealm userRealm){
        DefaultWebSecurityManager securityManager = new DefaultWebSecurityManager();
        // 关联UserRealm
        securityManager.setRealm(userRealm);
        return securityManager;
    }

    //创建 realm 对象 , 需要自定义类: 第一步
    @Bean   //放入spring中, id = userRealm , class = UserRealm
    public UserRealm userRealm(){
        return new UserRealm();
    }

}
MyController类
@Controller
public class MyController {

    @RequestMapping({"/","/index"})
    public String index(Model model){
        model.addAttribute("msg","hello,Shiro");
        return "index";
    }

    @RequestMapping("/user/add")
    public String add(){
        return "user/add";
    }

    @RequestMapping("/user/update")
    public String update(){
        return "user/update";
    }
}
add.html
<!DOCTYPE html>
<html lang="en">
<head>
    <meta charset="UTF-8">
    <title>Title</title>
</head>
<body>


<h1>add</h1>
</body>
</html>
update.html
<!DOCTYPE html>
<html lang="en">
<head>
    <meta charset="UTF-8">
    <title>Title</title>
</head>
<body>

<h1>update</h1>
</body>
</html>
index.html
<!DOCTYPE html>
<html lang="en" xmlns:th="http://www.thymeleaf.org">
<head>
    <meta charset="UTF-8">
    <title>Title</title>
</head>
<body>

<h1>首页</h1>
<p th:text="${msg}"></p>

<hr>
<a th:href="@{/user/add}">add </a> | <a th:href="@{/user/update}">update</a>
</body>
</html>
运行测试

基础环境搭建成功!
14.4 shiro登录拦截

ShiroConfig类
@Configuration
public class ShiroConfig {

    //ShiroFilterFactoryBean  : 第三步
    @Bean
    public ShiroFilterFactoryBean getShiroFilterFactoryBean(@Qualifier("securityManager") DefaultWebSecurityManager defaultWebSecurityManager){
        ShiroFilterFactoryBean bean = new ShiroFilterFactoryBean();
        //设置安全管理器
        bean.setSecurityManager(defaultWebSecurityManager);

        //添加shiro的内置过滤器
        /*
        *  anon: 无需认证就可以访问
        * authc: 必须认证了才能访问
        * user: 必须拥有  记住我 功能才能用
        * perms: 拥有对某个资源的权限才能访问;
        * role: 拥有某个角色权限才能访问
        *
        * */

        //拦截
        Map<String , String> filterMap = new LinkedHashMap<>();
//        filterMap.put("/user/add","authc");
//        filterMap.put("/user/update","authc");
        filterMap.put("/user/*","authc");//设置通配符


        bean.setFilterChainDefinitionMap(filterMap);

        //设置登录的请求
        bean.setLoginUrl("/toLogin");
        return bean;
    }

    //DefaultWebSecurityManager : 第二步
    //@Bean(name = "securityManager") 指定id名为securityManager
    @Bean(name = "securityManager")//@Qualifier("userRealm")形参userRealm会先使用Autowired规则寻找,找不到则遵循Qualifier注解,这里不能使用@Resource
    public DefaultWebSecurityManager getDefaultWebSecurityManager(@Qualifier("userRealm") UserRealm userRealm){
        DefaultWebSecurityManager securityManager = new DefaultWebSecurityManager();
        // 关联UserRealm
        securityManager.setRealm(userRealm);
        return securityManager;
    }

    //创建 realm 对象 , 需要自定义类: 第一步
    @Bean   //放入spring中, id = userRealm , class = UserRealm
    public UserRealm userRealm(){
        return new UserRealm();
    }

}
MyController类
@Controller
public class MyController {

    @RequestMapping({"/","/index"})
    public String index(Model model){
        model.addAttribute("msg","hello,Shiro");
        return "index";
    }

    @RequestMapping("/user/add")
    public String add(){
        return "user/add";
    }

    @RequestMapping("/user/update")
    public String update(){
        return "user/update";
    }

    @RequestMapping("/toLogin")
    public String toLogin(){
        return "login";
    }
}
login.html
<!DOCTYPE html>
<html lang="en">
<head>
    <meta charset="UTF-8">
    <title>Title</title>
</head>
<body>
<h1>登录</h1>
<hr>

<form action="">
    <p>用户名: <input type="text" name="username"></p>
    <p>密码: <input type="password" name="password"></p>
    <p><input type="submit"></p>
</form>

</body>
</html>
运行测试
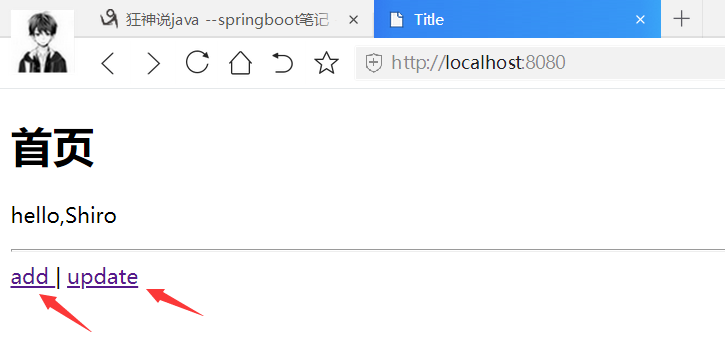
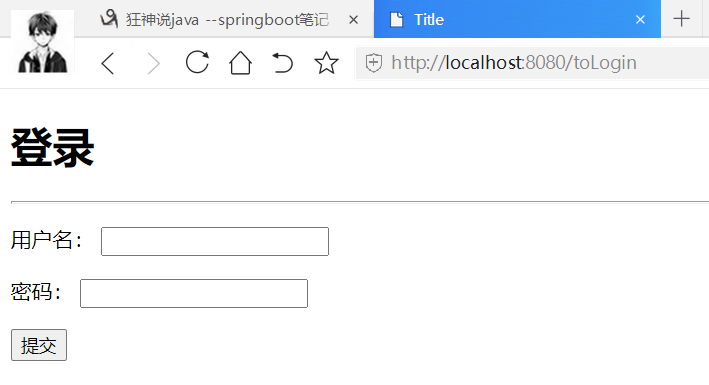
14.5 shiro实现用户认证
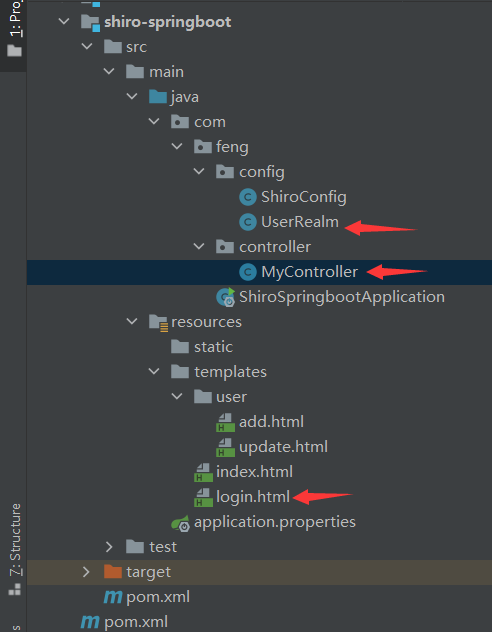
MyController
@Controller
public class MyController {

    @RequestMapping({"/","/index"})
    public String index(Model model){
        model.addAttribute("msg","hello,Shiro");
        return "index";
    }

    @RequestMapping("/user/add")
    public String add(){
        return "user/add";
    }

    @RequestMapping("/user/update")
    public String update(){
        return "user/update";
    }

    @RequestMapping("/toLogin")
    public String toLogin(){
        return "login";
    }

    @RequestMapping("/login")
    public String login(String username,String password,Model model){
        //获取当前的用户
        Subject subject = SecurityUtils.getSubject();
        //封装用户的登录数据
        UsernamePasswordToken token = new UsernamePasswordToken(username, password);

        try {
            subject.login(token);//执行登录的方法,如果没有异常就说明OK了
            return "index";
        } catch (UnknownAccountException e) {//用户名不存在
            model.addAttribute("msg","用户名错误");
            return "login";
        }catch (IncorrectCredentialsException e){//密码不存在
            model.addAttribute("msg","密码错误");
            return "login";
        }
    }
}
UserRealm类
//自定义的 UserRealm   extends AuthorizingRealm
public class UserRealm extends AuthorizingRealm {

    //授权
    @Override
    protected AuthorizationInfo doGetAuthorizationInfo(PrincipalCollection principalCollection) {
        System.out.println("执行了=>授权doGetAuthorizationInfo");
        return null;
    }

    //认证
    @Override
    protected AuthenticationInfo doGetAuthenticationInfo(AuthenticationToken token) throws AuthenticationException {
        System.out.println("执行了=>认证doGetAuthorizationInfo");

        //用户名, 密码~ 数据中取
        String name = "root";
        String password = "123456";
        UsernamePasswordToken userToken = (UsernamePasswordToken)token;

        if(!userToken.getUsername().equals(name)){
            return null;//抛出异常  UnknownAccountException
        }

        //密码认证,shiro做~
        return new SimpleAuthenticationInfo("",password,"");
    }
}
login.html
<!DOCTYPE html>
<html lang="en" xmlns:th="http://www.thymeleaf.org">
<head>
    <meta charset="UTF-8">
    <title>Title</title>
</head>
<body>
<h1>登录</h1>
<hr>
<p th:text="${msg}" style="color: red"></p>
<form th:action="@{/login}">
    <p>用户名: <input type="text" name="username"></p>
    <p>密码: <input type="password" name="password"></p>
    <p><input type="submit"></p>
</form>

</body>
</html>
运行测试
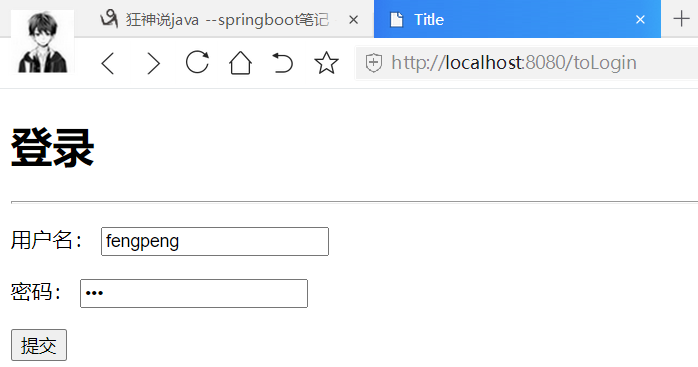
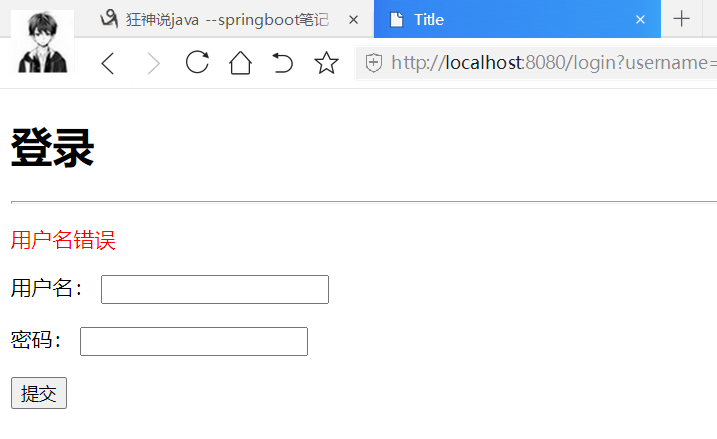
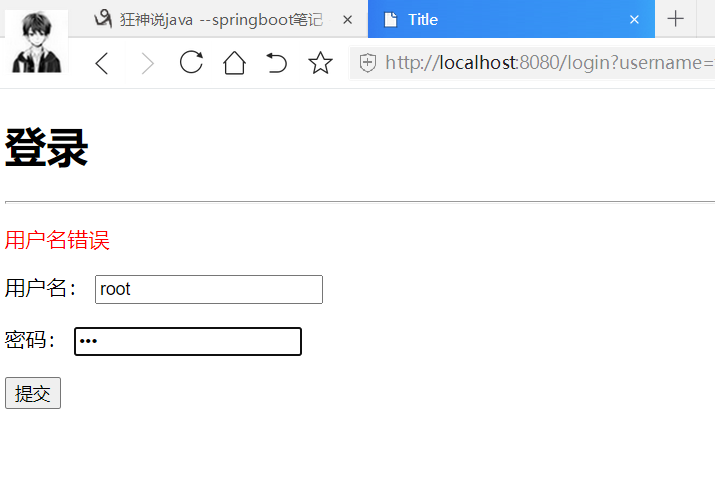
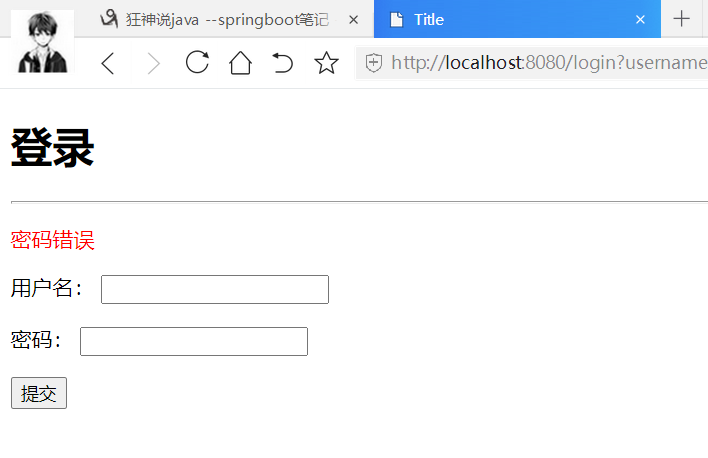
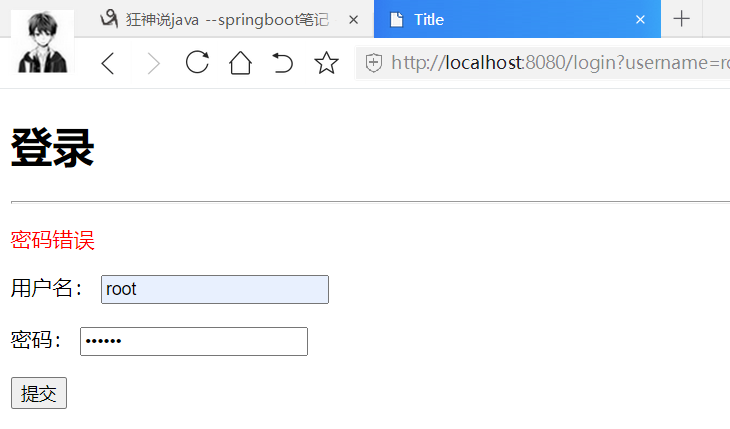
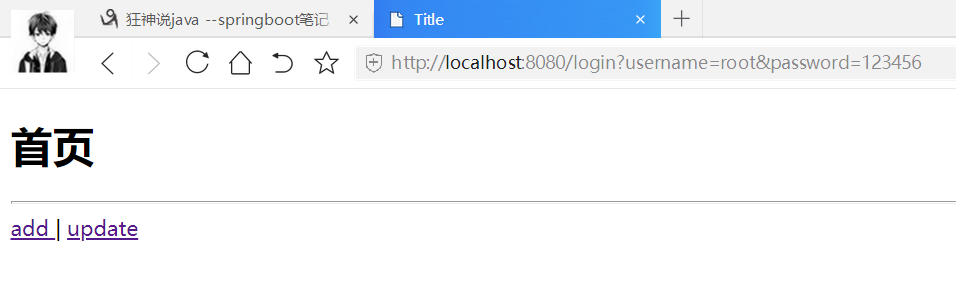
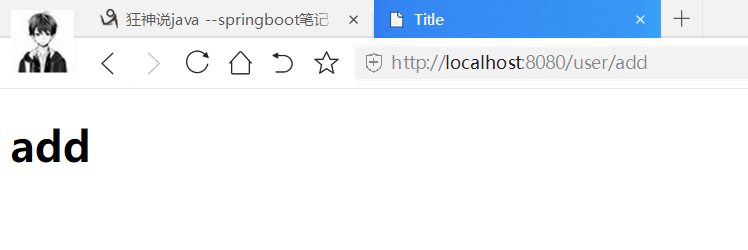
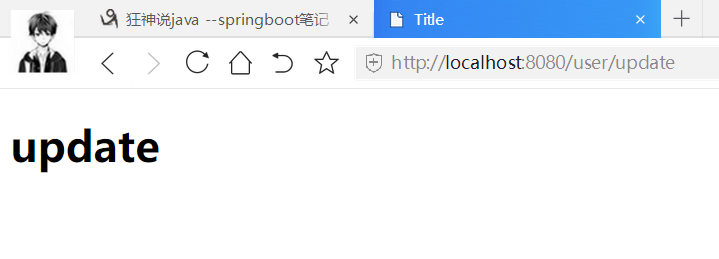
14.6 Shiro整合Mybatis
pom.xml
<dependencies>

    <!--
    Subject     用户
    SecurityManager 管理所有用户
    Realm   连接数据
    -->

    <dependency>
        <groupId>log4j</groupId>
        <artifactId>log4j</artifactId>
        <version>1.2.17</version>
    </dependency>
    <dependency>
        <groupId>com.mysql</groupId>
        <artifactId>mysql-connector-j</artifactId>
        <version>8.0.31</version>
    </dependency>
    <dependency>
        <groupId>com.alibaba</groupId>
        <artifactId>druid</artifactId>
        <version>1.2.8</version>
    </dependency>
    <!--引入 mybatis, 这是Mybatis官方提供的适配 Spring Boot的, 而不是Spring Boot自己的-->
    <dependency>
        <groupId>org.mybatis.spring.boot</groupId>
        <artifactId>mybatis-spring-boot-starter</artifactId>
        <version>2.2.2</version>
    </dependency>

    <!--shiro整合spring的包-->
    <dependency>
        <groupId>org.apache.shiro</groupId>
        <artifactId>shiro-spring</artifactId>
        <version>1.8.0</version>
    </dependency>


    <dependency>
        <groupId>org.springframework.boot</groupId>
        <artifactId>spring-boot-starter-web</artifactId>
    </dependency>
    <!--Thymeleaf ,我们都是基于3.x开发-->
    <dependency>
        <groupId>org.thymeleaf</groupId>
        <artifactId>thymeleaf-spring5</artifactId>
    </dependency>
    <dependency>
        <groupId>org.thymeleaf.extras</groupId>
        <artifactId>thymeleaf-extras-java8time</artifactId>
    </dependency>

    <dependency>
        <groupId>org.springframework.boot</groupId>
        <artifactId>spring-boot-starter-test</artifactId>
    </dependency>
</dependencies>
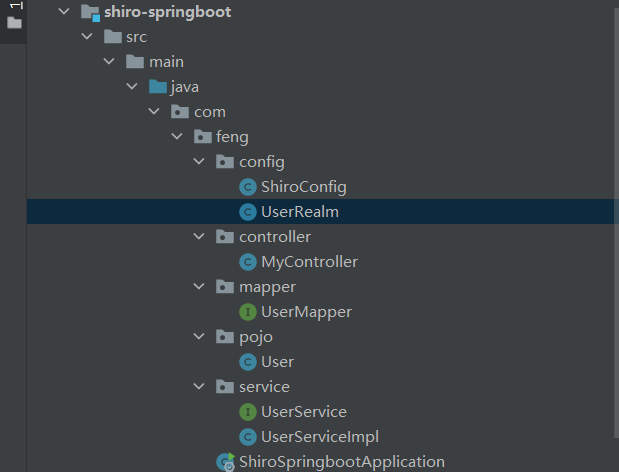
User
public class User {
    private int id;
    private String name;
    private String pwd;
}
UserMapper
package com.feng.mapper;

import com.feng.pojo.User;
import org.apache.ibatis.annotations.Mapper;
import org.springframework.stereotype.Component;

/**
 * @Author feng peng
 * @Date 2022/11/19
 * @Time 22:10
 */
@Component
@Mapper
public interface UserMapper {
    public User queryUserByName(String name);
}
UserService
public interface UserService {
    public User queryUserByName(String name);
}
UserServiceImpl
@Service
public class UserServiceImpl implements UserService{

    @Autowired
    UserMapper userMapper;

    @Override
    public User queryUserByName(String name) {
        return userMapper.queryUserByName(name);
    }
}
UserService和UserServiceImpl使用注解注入,注意点
https://www.cnblogs.com/kingclvry/p/13170926.html
UserRealm
//自定义的 UserRealm   extends AuthorizingRealm
public class UserRealm extends AuthorizingRealm {

    @Autowired
    UserService userService;

    //授权
    @Override
    protected AuthorizationInfo doGetAuthorizationInfo(PrincipalCollection principalCollection) {
        System.out.println("执行了=>授权doGetAuthorizationInfo");
        return null;
    }

    //认证
    @Override
    protected AuthenticationInfo doGetAuthenticationInfo(AuthenticationToken token) throws AuthenticationException {
        System.out.println("执行了=>认证doGetAuthorizationInfo");

        UsernamePasswordToken userToken = (UsernamePasswordToken)token;
        //连接真实的数据库
        User user = userService.queryUserByName(userToken.getUsername());
        if(Objects.isNull(user)){
            return null;//抛出异常  UnknownAccountException
        }

        //可以加密: MD5             MD5盐值加密
        //密码认证,shiro做~ ,加密了
        return new SimpleAuthenticationInfo("",user.getPwd(),"");
    }
}
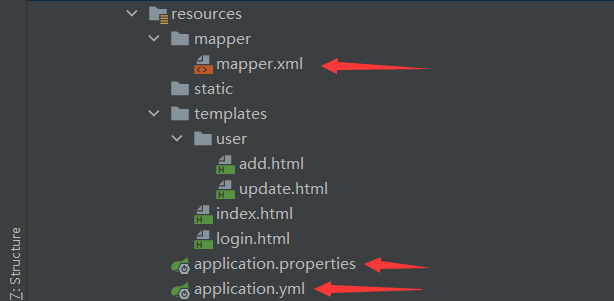
mapper.xml
<?xml version="1.0" encoding="UTF-8" ?>
<!DOCTYPE mapper
        PUBLIC "-//mybatis.org//DTD Mapper 3.0//EN"
        "http://mybatis.org/dtd/mybatis-3-mapper.dtd">
<!--namespace=绑定一个对应的Dao/Mapper接口-->
<mapper namespace="com.feng.mapper.UserMapper">
    <select id="queryUserByName" parameterType="String" resultType="user">
        select *
        from mybatis.users where name = #{name};
    </select>
</mapper>
application.properties
mybatis.type-aliases-package=com.feng.pojo
mybatis.mapper-locations=classpath:mapper/*.xml
application.yml
spring:
  datasource:
    driver-class-name: com.mysql.cj.jdbc.Driver
    username: root
    password: fp
    # 假如时区报错了,就增加一个时区的配置就OK
    url: jdbc:mysql://localhost:3306/mybatis?useUnicode=true&characterEncoding=utf-8&serverTimezone=UTC
    type: com.alibaba.druid.pool.DruidDataSource

    #Spring Boot 默认是不注入这些属性值的,需要自己绑定
    #druid 数据源专有配置
    initialSize: 5
    minIdle: 5
    maxActive: 20
    maxWait: 60000
    timeBetweenEvictionRunsMillis: 60000
    minEvictableIdleTimeMillis: 300000
    validationQuery: SELECT 1 FROM DUAL
    testWhileIdle: true
    testOnBorrow: false
    testOnReturn: false
    poolPreparedStatements: true

    #配置监控统计拦截的filters,stat:监控统计、log4j:日志记录、wall:防御sql注入
    #如果允许时报错  java.lang.ClassNotFoundException: org.apache.log4j.Priority
    #则导入 log4j 依赖即可,Maven 地址:https://mvnrepository.com/artifact/log4j/log4j
    filters: stat,wall,log4j
    maxPoolPreparedStatementPerConnectionSize: 20
    useGlobalDataSourceStat: true
    connectionProperties: druid.stat.mergeSql=true;druid.stat.slowSqlMillis=500
运行测试
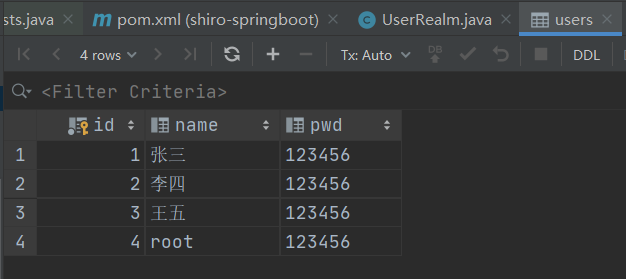
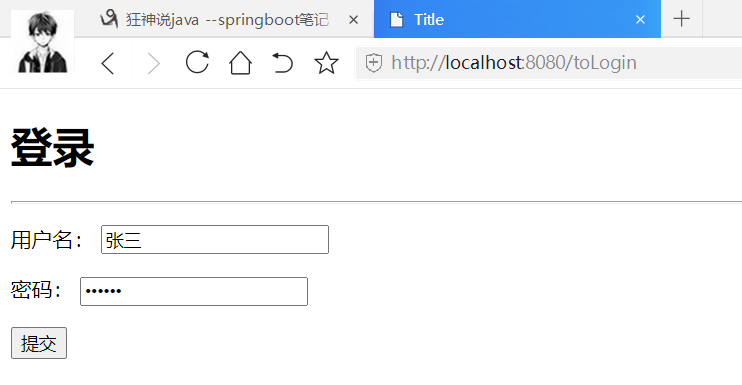
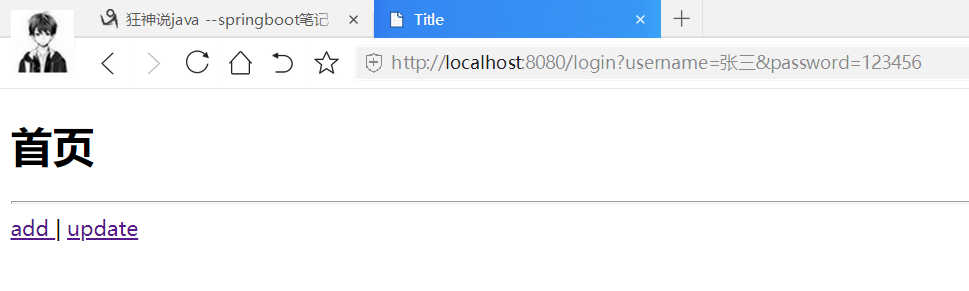

14.7 Shiro请求授权实现
数据库中user表添加一个授权字段
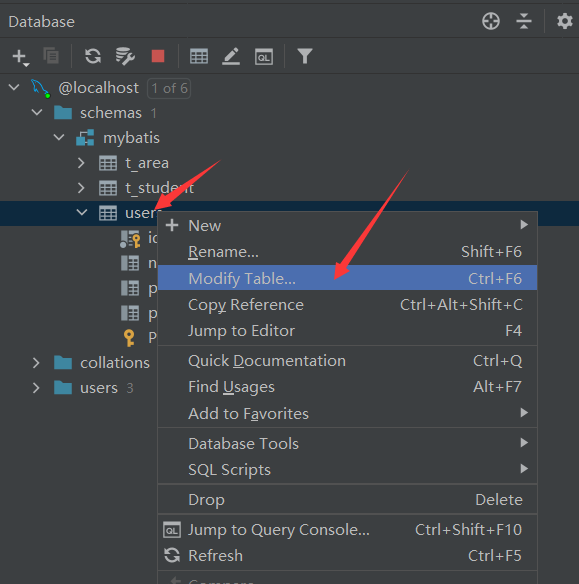
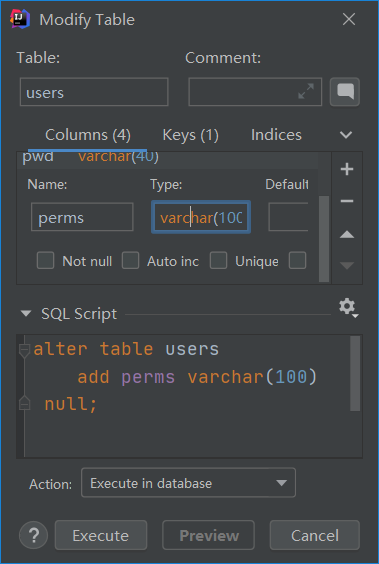
pojo/User
public class User {
    private int id;
    private String name;
    private String pwd;
    private String perms;
}
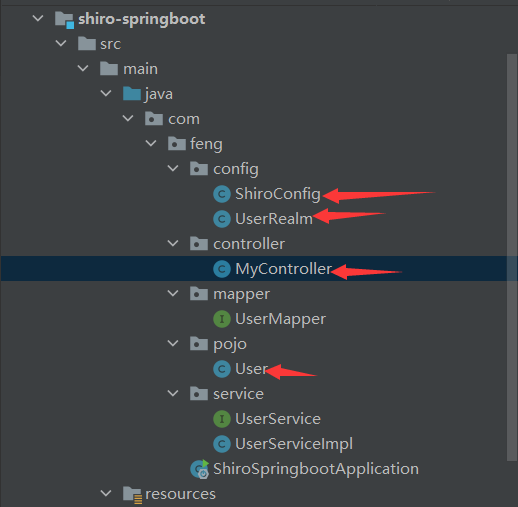
MyController
@RequestMapping("/noauth")
@ResponseBody
public String unauthorized(){
    return "未经授权无法访问此页面";
}
ShiroConfig
@Configuration
public class ShiroConfig {

    //ShiroFilterFactoryBean  : 第三步
    @Bean
    public ShiroFilterFactoryBean getShiroFilterFactoryBean(@Qualifier("securityManager") DefaultWebSecurityManager defaultWebSecurityManager){
        ShiroFilterFactoryBean bean = new ShiroFilterFactoryBean();
        //设置安全管理器
        bean.setSecurityManager(defaultWebSecurityManager);

        //添加shiro的内置过滤器
        /*
        *  anon: 无需认证就可以访问
        * authc: 必须认证了才能访问
        * user: 必须拥有  记住我 功能才能用
        * perms: 拥有对某个资源的权限才能访问;
        * role: 拥有某个角色权限才能访问
        *
        * */

        //拦截
        Map<String , String> filterMap = new LinkedHashMap<>();

        //授权,正常的情况下,没有授权会跳转到未授权页面
        filterMap.put("/user/add","perms[user:add]");
        filterMap.put("/user/update","perms[user:update]");


//        filterMap.put("/user/add","authc");
//        filterMap.put("/user/update","authc");
        filterMap.put("/user/*","authc");//设置通配符


        bean.setFilterChainDefinitionMap(filterMap);

        //设置登录的请求
        bean.setLoginUrl("/toLogin");
        //未授权页面
        bean.setUnauthorizedUrl("/noauth");
        return bean;
    }
UserRealm
//自定义的 UserRealm   extends AuthorizingRealm
public class UserRealm extends AuthorizingRealm {

    @Autowired
    UserService userService;

    //授权
    @Override
    protected AuthorizationInfo doGetAuthorizationInfo(PrincipalCollection principalCollection) {
        System.out.println("执行了=>授权doGetAuthorizationInfo");
        //SimpleAuthorizationInfo
        SimpleAuthorizationInfo info = new SimpleAuthorizationInfo();

        //给所有用户添加一个add权限
        //info.addStringPermission("user:add");

        //拿到当前登录的这个对象
        Subject subject = SecurityUtils.getSubject();
        //拿到User对象
        User currentUser = (User) subject.getPrincipal();//从认证中,将放入用户资源中的user取出
        //设置当前用户的权限
        info.addStringPermission(currentUser.getPerms());

        return info;
    }

    //认证
    @Override
    protected AuthenticationInfo doGetAuthenticationInfo(AuthenticationToken token) throws AuthenticationException {
        System.out.println("执行了=>认证doGetAuthorizationInfo");

        UsernamePasswordToken userToken = (UsernamePasswordToken)token;
        //连接真实的数据库
        User user = userService.queryUserByName(userToken.getUsername());
        if(Objects.isNull(user)){
            return null;//抛出异常  UnknownAccountException
        }

        //可以加密: MD5             MD5盐值加密
        //密码认证,shiro做~ ,加密了
        return new SimpleAuthenticationInfo(user,user.getPwd(),"");
                                    //第一个参数代表当前用户的资源principal,把user放入,传到授权中
    }
}
运行测试
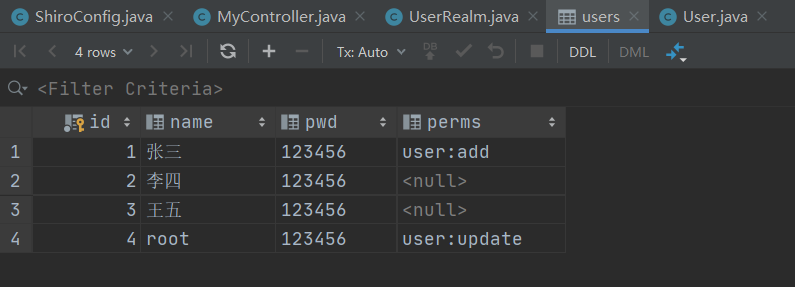
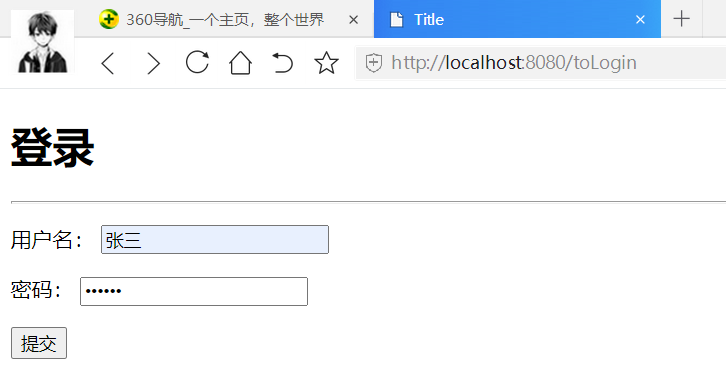
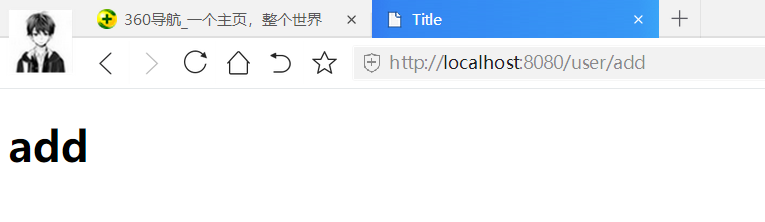
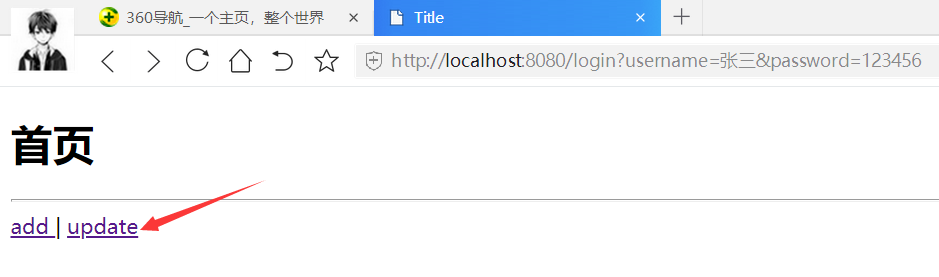
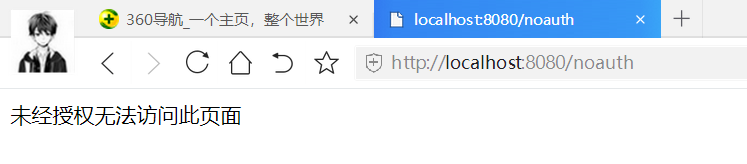

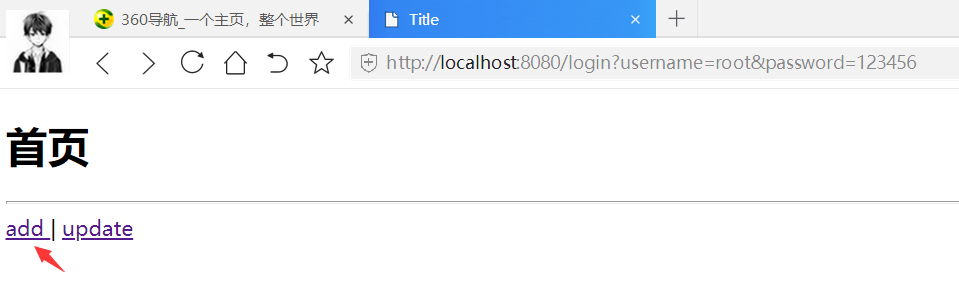
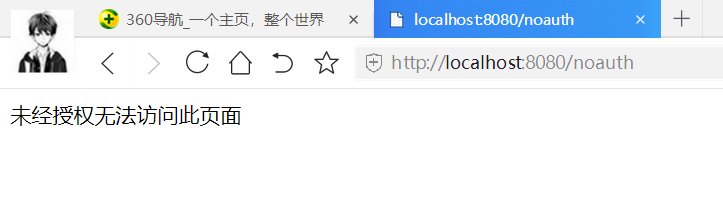
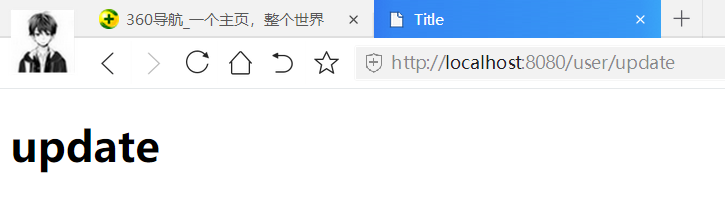
14.8 Shiro整合thymeleaf
导入依赖
<!--shiro-thymeleaf整合-->
<dependency>
    <groupId>com.github.theborakompanioni</groupId>
    <artifactId>thymeleaf-extras-shiro</artifactId>
    <version>2.0.0</version>
</dependency>
实现根据用户的权限显示对应的内容,以及注销
index.html
<!DOCTYPE html>
<html lang="en" xmlns:th="http://www.thymeleaf.org"
      xmlns:shiro="http://www.thymeleaf.org/thymeleaf-extras-shiro">
<head>
    <meta charset="UTF-8">
    <title>Title</title>
</head>
<body>

<h1>首页</h1>
<!--从session中判断值!-->
<div th:if="${session.loginUser == null}">
    <a th:href="@{/toLogin}">登录</a>
</div>
<p th:text="${msg}"></p>
<hr>

<!--注销-->
<a class="item" th:href="@{/logout}">
    <i class="sign-out icon"></i> 注销
</a>

<div shiro:hasPermission="user:add">
    <a th:href="@{/user/add}">add </a>
</div>

<div shiro:hasPermission="user:update">
    <a th:href="@{/user/update}">update</a>
</div>
</body>
</html>
UserRealm
//认证
@Override
protected AuthenticationInfo doGetAuthenticationInfo(AuthenticationToken token) throws AuthenticationException {
    System.out.println("执行了=>认证doGetAuthorizationInfo");

    UsernamePasswordToken userToken = (UsernamePasswordToken)token;
    //连接真实的数据库
    User user = userService.queryUserByName(userToken.getUsername());
    if(Objects.isNull(user)){//没有这个人
        return null;//抛出异常  UnknownAccountException
    }

    /*用于前端权限显示判断*/
    Subject currentSubject = SecurityUtils.getSubject();
    Session session = currentSubject.getSession();
    session.setAttribute("loginUser",user);

    //可以加密: MD5             MD5盐值加密
    //密码认证,shiro做~ ,加密了
    return new SimpleAuthenticationInfo(user,user.getPwd(),"");
                                //第一个参数代表当前用户的资源principal,把user放入,传到授权中
}
MyController
@RequestMapping("/logout")
public String logout(){
    //获取当前的用户
    Subject subject = SecurityUtils.getSubject();
    subject.logout();
    return "redirect:/index";
}
这个地方使用return "redirect:/index.html";报404错误,下来思考原因。
运行测试
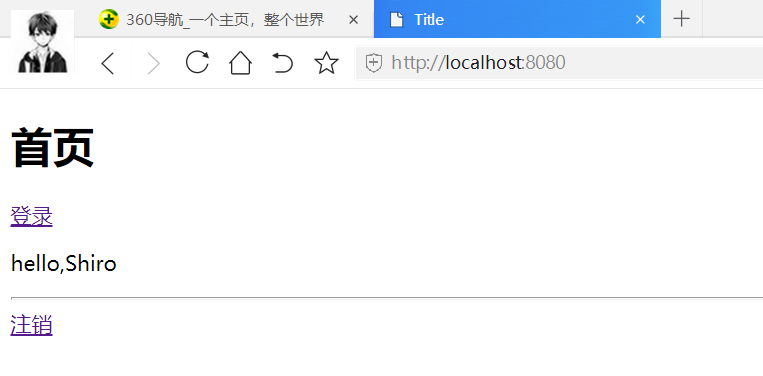
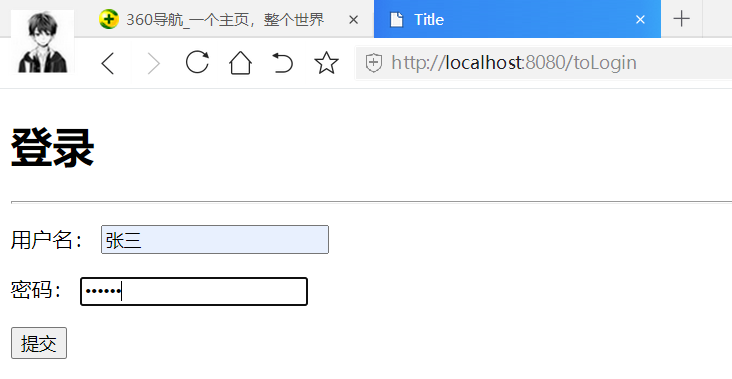
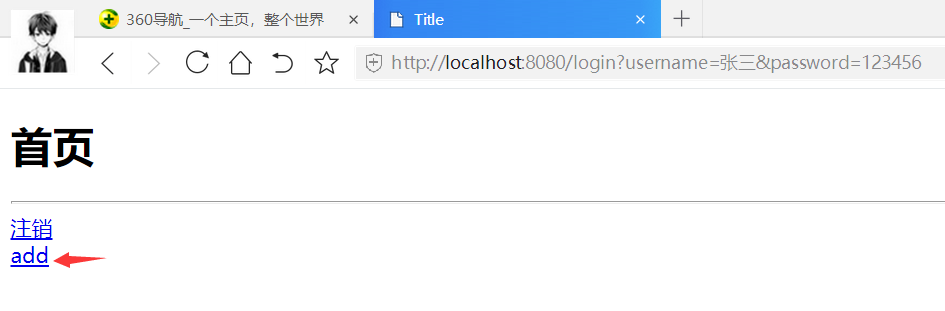
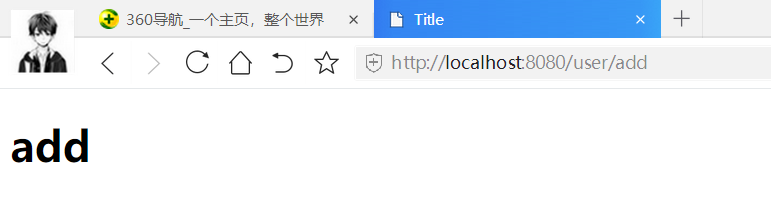
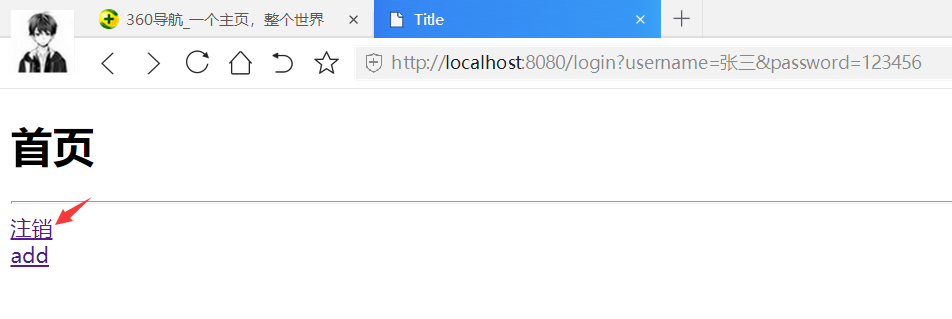

15 Swagger
学习目标:
- 了解Swagger的作用和概念
- 了解前后端分离
- 在SpringBoot中集成Swagger
15.1 简介
前后端分离
Vue+SpringBoot
后端时代:前端只用管理静态页面;html==>后端。模板引擎JSP=>后端是主力
前后端分离式时代:
- 后端:后端控制层,服务层,数据访问层【后端团队】
- 前端:前端控制层,视图层【前端团队】
- 伪造后端数据,json。已经存在了,不需要后端,前端工程依旧可以跑起来
- 前后端如何交互? => API
- 前后端相对独立,松耦合;
- 前后端甚至可以部署在不同的服务器上;
产生一个问题:
- 前后端集成联调,前端人员和后端人员无法做到"及时协商,尽早解决",最终导致问题集中爆发;
解决方案:
- 首先制定schema【计划的提纲】,实时更新最新的API,降低集成的风险;
- 早些年:制定word计划文档;
- 前后端分离:
- 前端测试后端接口:postman
- 后端提供接口,需要实时更新最新的消息及改动!
Swagger
- 号称世界上最流行的Api框架;
- RestFul Api 文档在线自动生成工具=>Api文档与API定义同步更新
- 直接运行,可以在线测试API接口;
- 支持多种语言:(Java,Php...)
在项目使用Swagger需要springfox;
- swagger2
- ui
15.2 SpringBoot集成Swagger
新建springboot项目,添加web依赖
删除多余文件,配置maven地址,编码
编写一个Hello工程(RestController),测试
使用Controller报错:
整合Springboot,在controller响应index.html页面的时候报错
springboot 默认不支持模板,添加上thymeleaf依赖后 就可以了。
https://blog.csdn.net/yangcheney/article/details/106605599
导入依赖
<dependency>
    <groupId>io.springfox</groupId>
    <artifactId>springfox-swagger2</artifactId>
    <version>2.9.2</version>
</dependency>
<dependency>
    <groupId>io.springfox</groupId>
    <artifactId>springfox-swagger-ui</artifactId>
    <version>2.9.2</version>
</dependency>
配置Swagger ==>Config
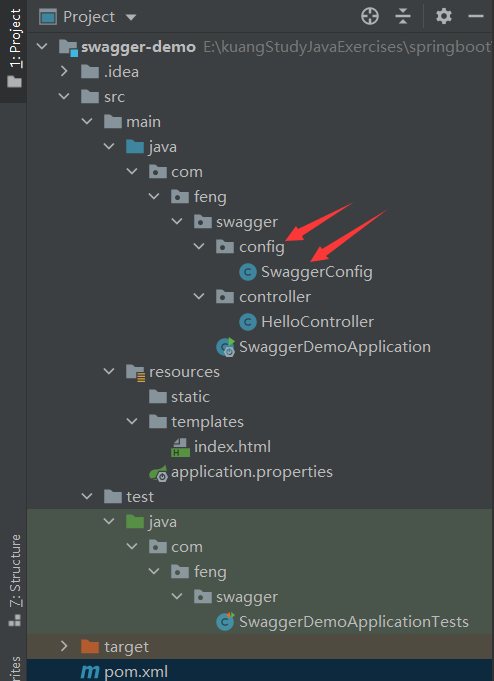
SwaggerConfig
package com.feng.swagger.config;

import org.springframework.context.annotation.Configuration;
import springfox.documentation.swagger2.annotations.EnableSwagger2;

/**
 * @Author feng peng
 * @Date 2022/11/20
 * @Time 16:52
 */
@Configuration
@EnableSwagger2  //开启Swagger2
public class SwaggerConfig {
}
运行测试,如果报空指针异常,降低springboot版本(2.5.6)
访问http://localhost:8080/swagger-ui.html
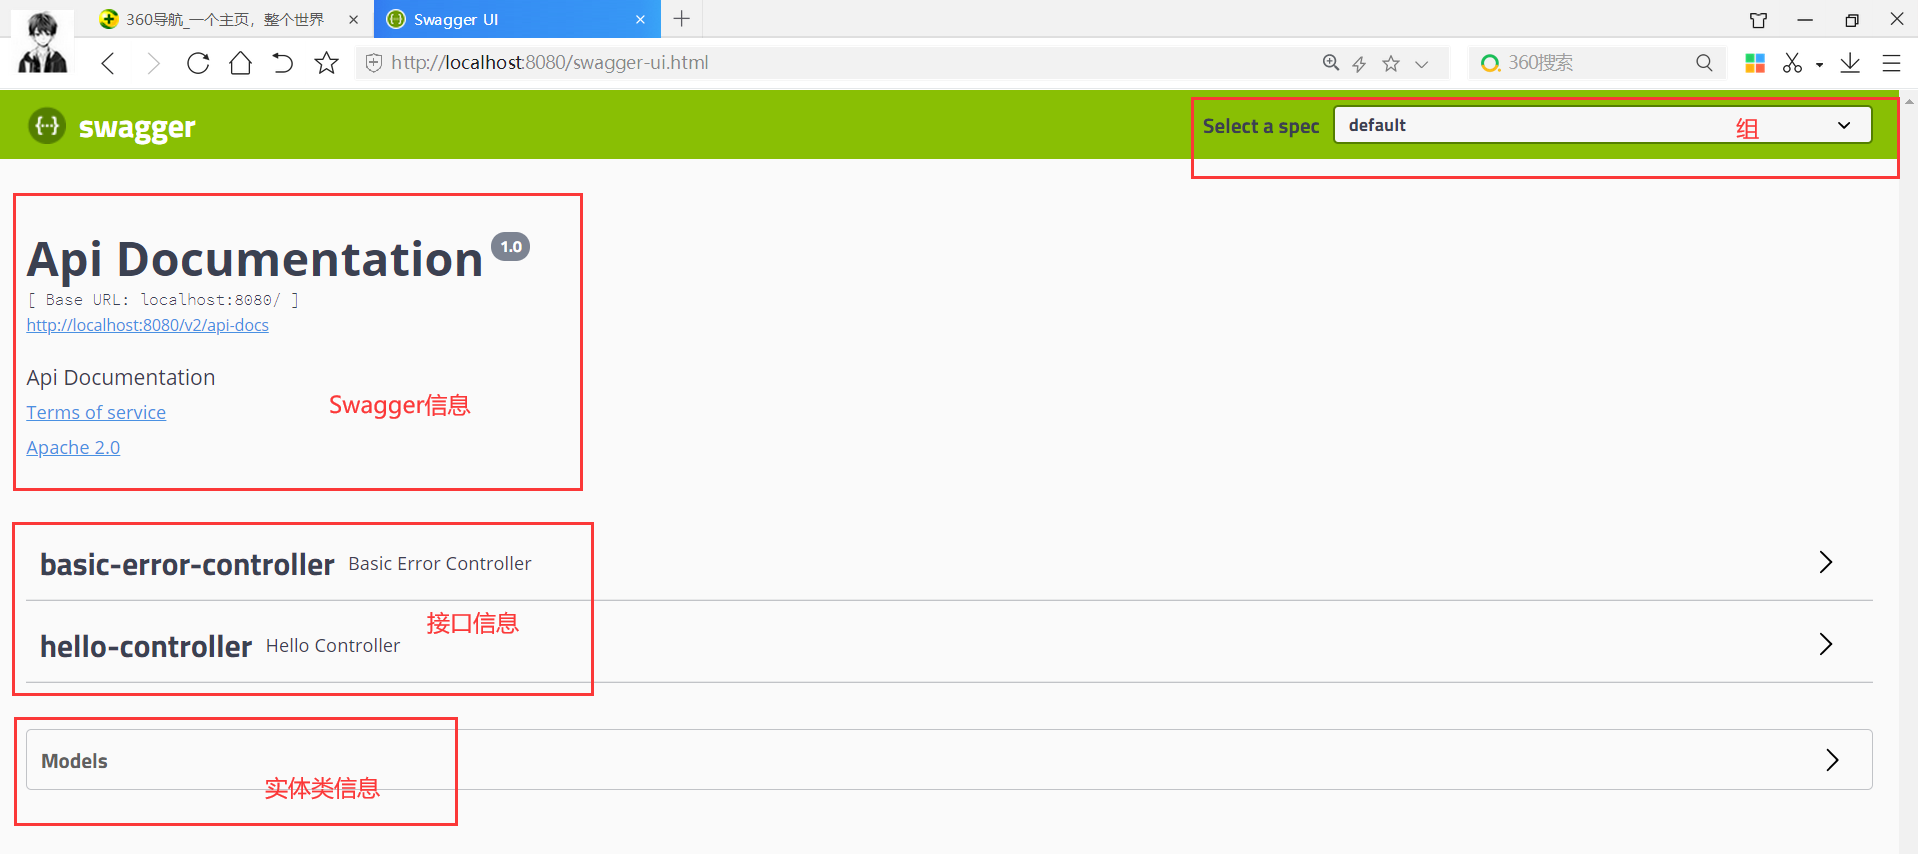
15.3 配置Swagger
Swagger的bean实例Docket;
SwaggerConfig类
package com.feng.swagger.config;

import org.springframework.context.annotation.Bean;
import org.springframework.context.annotation.Configuration;
import springfox.documentation.service.ApiInfo;
import springfox.documentation.service.Contact;
import springfox.documentation.spi.DocumentationType;
import springfox.documentation.spring.web.plugins.Docket;
import springfox.documentation.swagger2.annotations.EnableSwagger2;

import java.util.ArrayList;

/**
 * @Author feng peng
 * @Date 2022/11/20
 * @Time 16:52
 */
@Configuration
@EnableSwagger2  //开启Swagger2
public class SwaggerConfig {

    //配置了Swagger的Docket的bean实例
    @Bean
    public Docket docket(){
        return new Docket(DocumentationType.SWAGGER_2)
                .apiInfo(apiInfo());
    }

    //配置Swagger信息=apiInfo
    private ApiInfo apiInfo(){
        //作者信息
        Contact contact = new Contact("fengpeng", "https://www.cnblogs.com/fengpeng123/", "193244412@qq.com");
        return new ApiInfo("feng SwaggerAPI接口文档",
                "岁月如歌",
                "v1.0",
                "https://www.cnblogs.com/fengpeng123/",
                contact,
                "Apache 2.0",
                "http://www.apache.org/licenses/LICENSE-2.0",
                new ArrayList()
        );
    }
}
运行测试
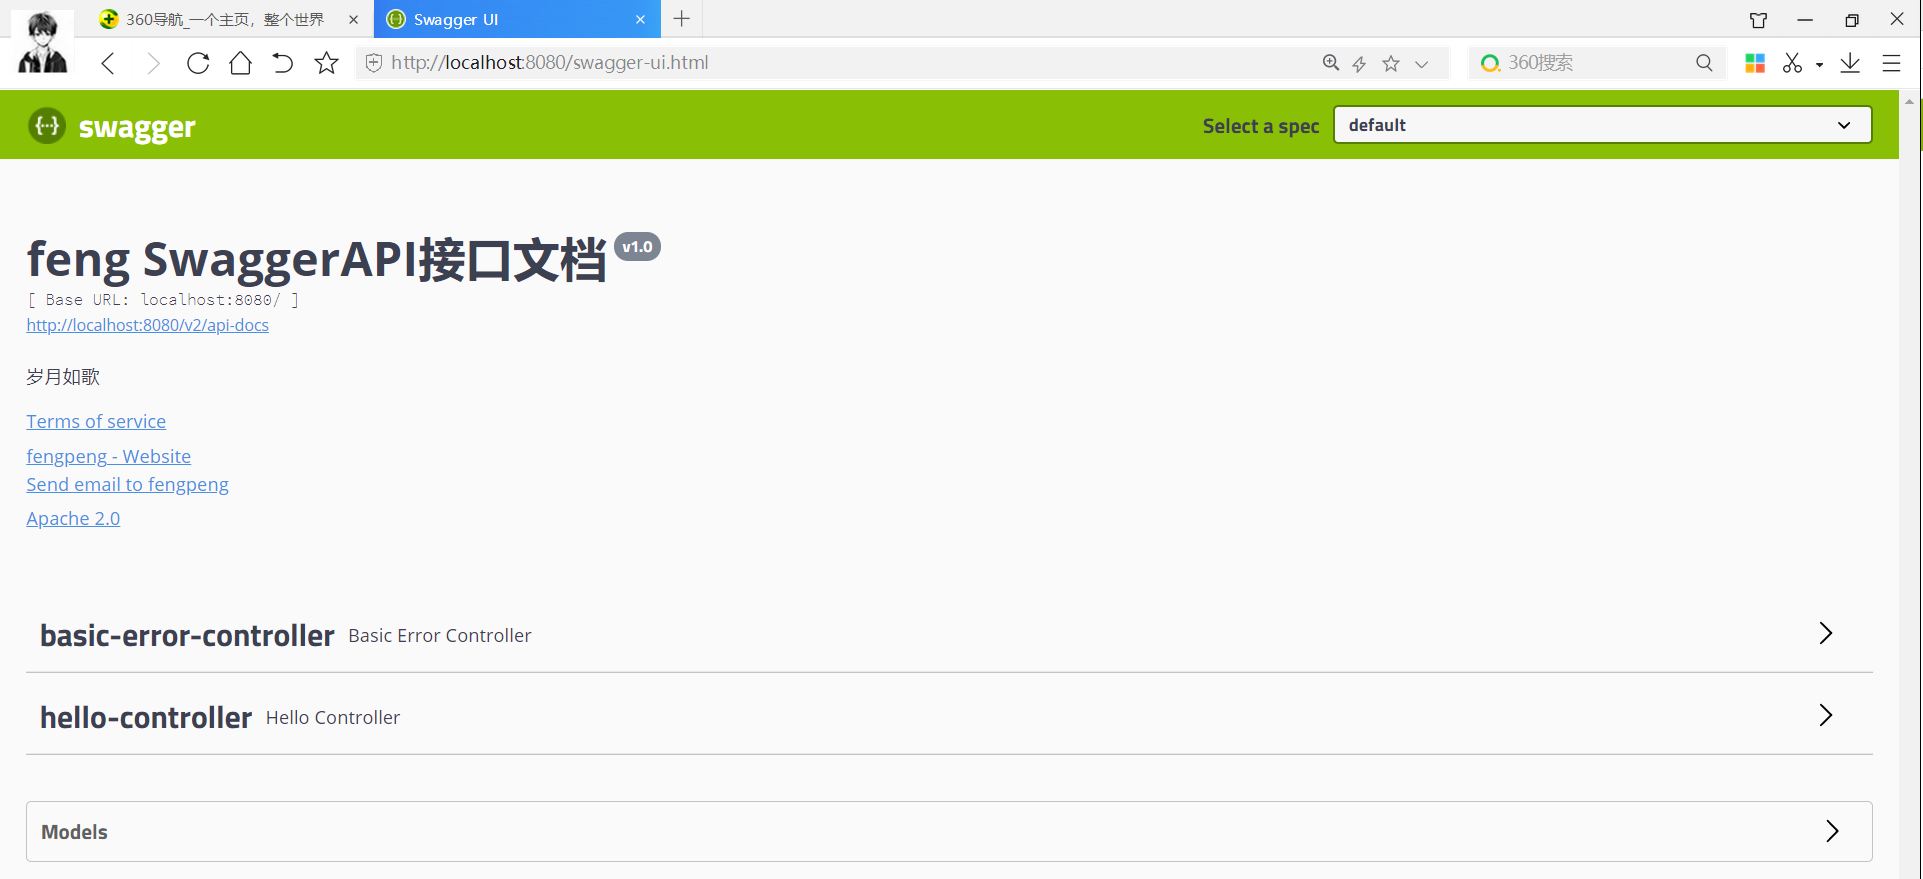
15.4 Swagger配置扫描接口
Docket.select()
SwaggerConfig类
package com.feng.swagger.config;

import org.springframework.context.annotation.Bean;
import org.springframework.context.annotation.Configuration;
import springfox.documentation.builders.PathSelectors;
import springfox.documentation.builders.RequestHandlerSelectors;
import springfox.documentation.service.ApiInfo;
import springfox.documentation.service.Contact;
import springfox.documentation.spi.DocumentationType;
import springfox.documentation.spring.web.plugins.Docket;
import springfox.documentation.swagger2.annotations.EnableSwagger2;

import java.util.ArrayList;

/**
 * @Author feng peng
 * @Date 2022/11/20
 * @Time 16:52
 */
@Configuration
@EnableSwagger2  //开启Swagger2
public class SwaggerConfig {

    //配置了Swagger的Docket的bean实例
    @Bean
    public Docket docket(){
        return new Docket(DocumentationType.SWAGGER_2)
                .apiInfo(apiInfo())
                .select()
                //RequestHandlerSelectors,配置要扫描接口的方式
                //basePackage:指定要扫描的包
                //any:扫描全部
                //none():不扫描
                //withClassAnnotation:扫描类上的注解,参数是一个注解的反射对象
                //withMethodAnnotation:扫描方法上的注解
                .apis(RequestHandlerSelectors.basePackage("com.feng.swagger.controller"))
                //paths()  过滤什么路径
                .paths(PathSelectors.ant("/feng/**"))//过滤路径为/feng下面的所有方法(这里没有,所以什么也扫描不到)
                .build();
    }

    //配置Swagger信息=apiInfo
    private ApiInfo apiInfo(){
        //作者信息
        Contact contact = new Contact("fengpeng", "https://www.cnblogs.com/fengpeng123/", "193244412@qq.com");
        return new ApiInfo("feng SwaggerAPI接口文档",
                "岁月如歌",
                "v1.0",
                "https://www.cnblogs.com/fengpeng123/",
                contact,
                "Apache 2.0",
                "http://www.apache.org/licenses/LICENSE-2.0",
                new ArrayList()
        );
    }
}
运行测试
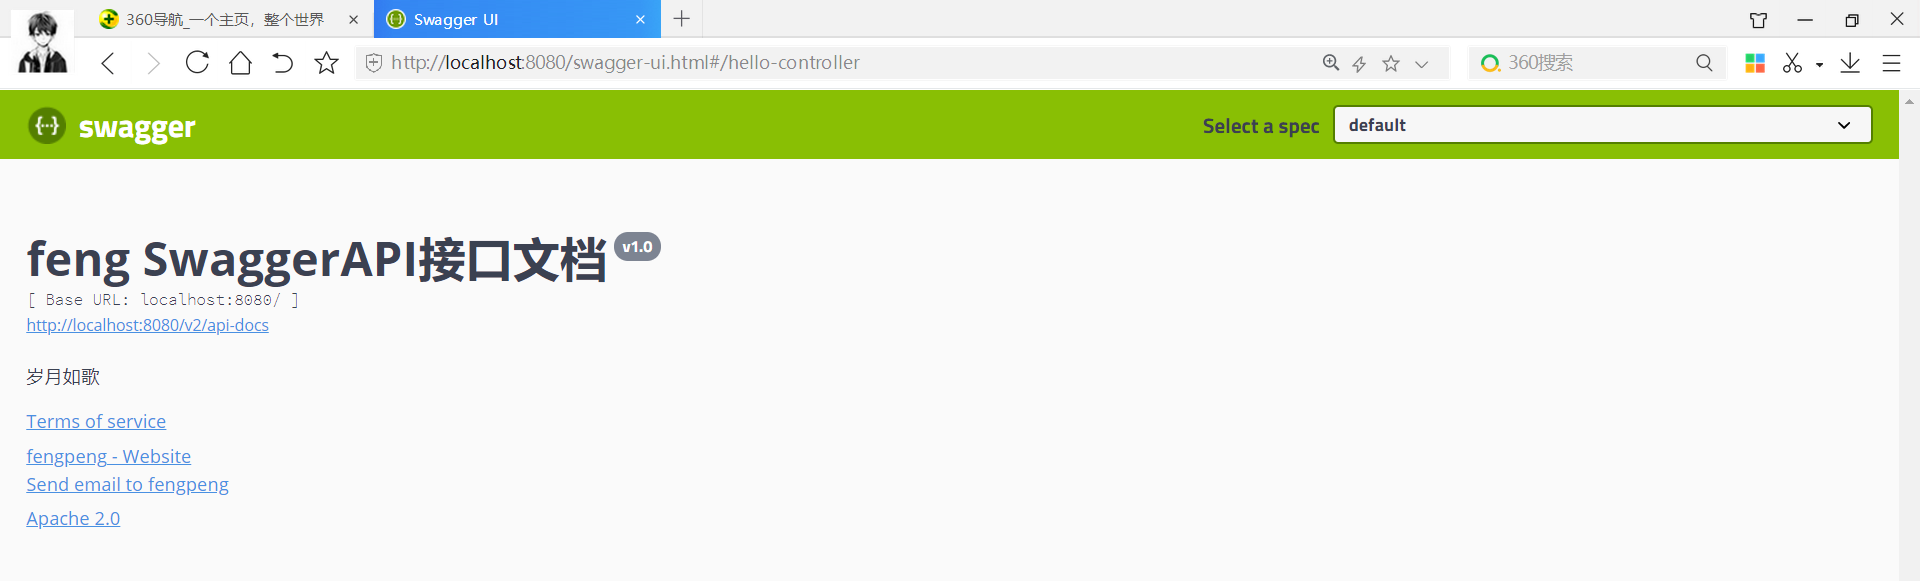
配置是否启动Swagger
SwaggerConfig
//配置了Swagger的Docket的bean实例
@Bean
public Docket docket(){
    return new Docket(DocumentationType.SWAGGER_2)
            .apiInfo(apiInfo())
            //enable是否启动swagger,如果为false(默认为true),则swagger不能在浏览器中访问
            .enable(false)
            .select()
            //RequestHandlerSelectors,配置要扫描接口的方式
            //basePackage:指定要扫描的包
            //any:扫描全部
            //none():不扫描
            //withClassAnnotation:扫描类上的注解,参数是一个注解的反射对象
            //withMethodAnnotation:扫描方法上的注解
            .apis(RequestHandlerSelectors.basePackage("com.feng.swagger.controller"))
            //paths()  过滤什么路径
            .paths(PathSelectors.ant("/feng/**"))//过滤路径为/feng下面的所有方法(这里没有,所以什么也扫描不到)
            .build();
}
运行测试
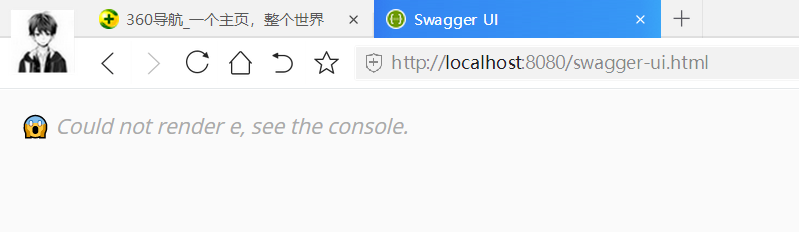
我只希望我的Swagger在生产环境中使用,在发布的时候不使用?
- 判断是不是生产环境 flag=false
- 注入enable(flag)
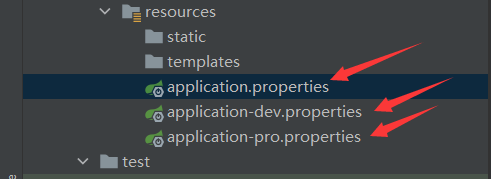
application.properties
spring.profiles.active=dev
application-dev.properties
server.port=8081
application-pro.properties
server.port=8082
SwaggerConfig
//配置了Swagger的Docket的bean实例
@Bean
public Docket docket(Environment environment){

    //设置要显示的Swagger环境
    Profiles profiles = Profiles.of("dev","test");//dev或者是test

    //通过environment.acceptsProfiles判断是否处在自己设定的环境当中
    boolean flag = environment.acceptsProfiles(profiles);

    return new Docket(DocumentationType.SWAGGER_2)
            .apiInfo(apiInfo())
            //enable是否启动swagger,如果为false(默认为true),则swagger不能在浏览器中访问
            .enable(flag)
            .select()
            //RequestHandlerSelectors,配置要扫描接口的方式
            //basePackage:指定要扫描的包
            //any:扫描全部
            //none():不扫描
            //withClassAnnotation:扫描类上的注解,参数是一个注解的反射对象
            //withMethodAnnotation:扫描方法上的注解
            .apis(RequestHandlerSelectors.basePackage("com.feng.swagger.controller"))
            //paths()  过滤什么路径
            .paths(PathSelectors.ant("/feng/**"))//过滤路径为/feng下面的所有方法(这里没有,所以什么也扫描不到)
            .build();
}
运行测试
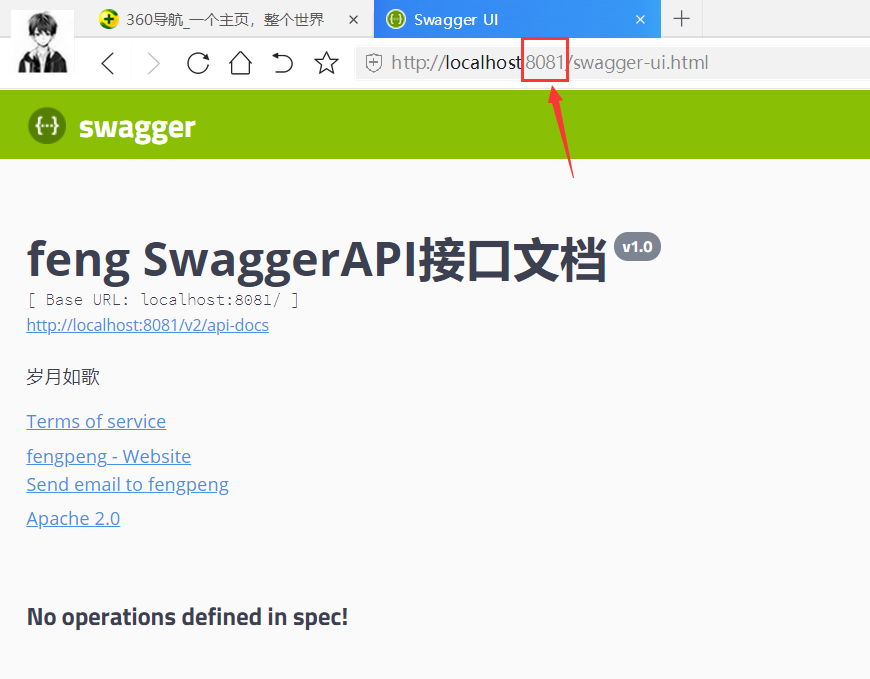
15.5 分组和接口注释
配置API文档的分组
.groupName("fengpeng")
如何配置多个分组;多个Docket实例即可
SwaggerConfig
package com.feng.swagger.config;

import org.springframework.context.annotation.Bean;
import org.springframework.context.annotation.Configuration;
import org.springframework.core.env.Environment;
import org.springframework.core.env.Profiles;
import springfox.documentation.builders.PathSelectors;
import springfox.documentation.builders.RequestHandlerSelectors;
import springfox.documentation.service.ApiInfo;
import springfox.documentation.service.Contact;
import springfox.documentation.spi.DocumentationType;
import springfox.documentation.spring.web.plugins.Docket;
import springfox.documentation.swagger2.annotations.EnableSwagger2;

import java.util.ArrayList;

/**
 * @Author feng peng
 * @Date 2022/11/20
 * @Time 16:52
 */
@Configuration
@EnableSwagger2  //开启Swagger2
public class SwaggerConfig {
    @Bean
    public Docket docket1(){
        return new Docket(DocumentationType.SWAGGER_2).groupName("A");
    }
    @Bean
    public Docket docket2(){
        return new Docket(DocumentationType.SWAGGER_2).groupName("B");
    }
    @Bean
    public Docket docket3(){
        return new Docket(DocumentationType.SWAGGER_2).groupName("C");
    }

    //配置了Swagger的Docket的bean实例
    @Bean
    public Docket docket(Environment environment){

        //设置要显示的Swagger环境
        Profiles profiles = Profiles.of("dev","test");//dev或者是test

        //通过environment.acceptsProfiles判断是否处在自己设定的环境当中
        boolean flag = environment.acceptsProfiles(profiles);

        return new Docket(DocumentationType.SWAGGER_2)
                .apiInfo(apiInfo())
                .groupName("fengpeng")
                //enable是否启动swagger,如果为false(默认为true),则swagger不能在浏览器中访问
                .enable(flag)
                .select()
                //RequestHandlerSelectors,配置要扫描接口的方式
                //basePackage:指定要扫描的包
                //any:扫描全部
                //none():不扫描
                //withClassAnnotation:扫描类上的注解,参数是一个注解的反射对象
                //withMethodAnnotation:扫描方法上的注解
                .apis(RequestHandlerSelectors.basePackage("com.feng.swagger.controller"))
                //paths()  过滤什么路径
                //.paths(PathSelectors.ant("/feng/**"))//过滤路径为/feng下面的所有方法(这里没有,所以什么也扫描不到)
                .build();
    }

    //配置Swagger信息=apiInfo
    private ApiInfo apiInfo(){
        //作者信息
        Contact contact = new Contact("fengpeng", "https://www.cnblogs.com/fengpeng123/", "193244412@qq.com");
        return new ApiInfo("feng SwaggerAPI接口文档",
                "岁月如歌",
                "v1.0",
                "https://www.cnblogs.com/fengpeng123/",
                contact,
                "Apache 2.0",
                "http://www.apache.org/licenses/LICENSE-2.0",
                new ArrayList()
        );
    }
}
运行测试
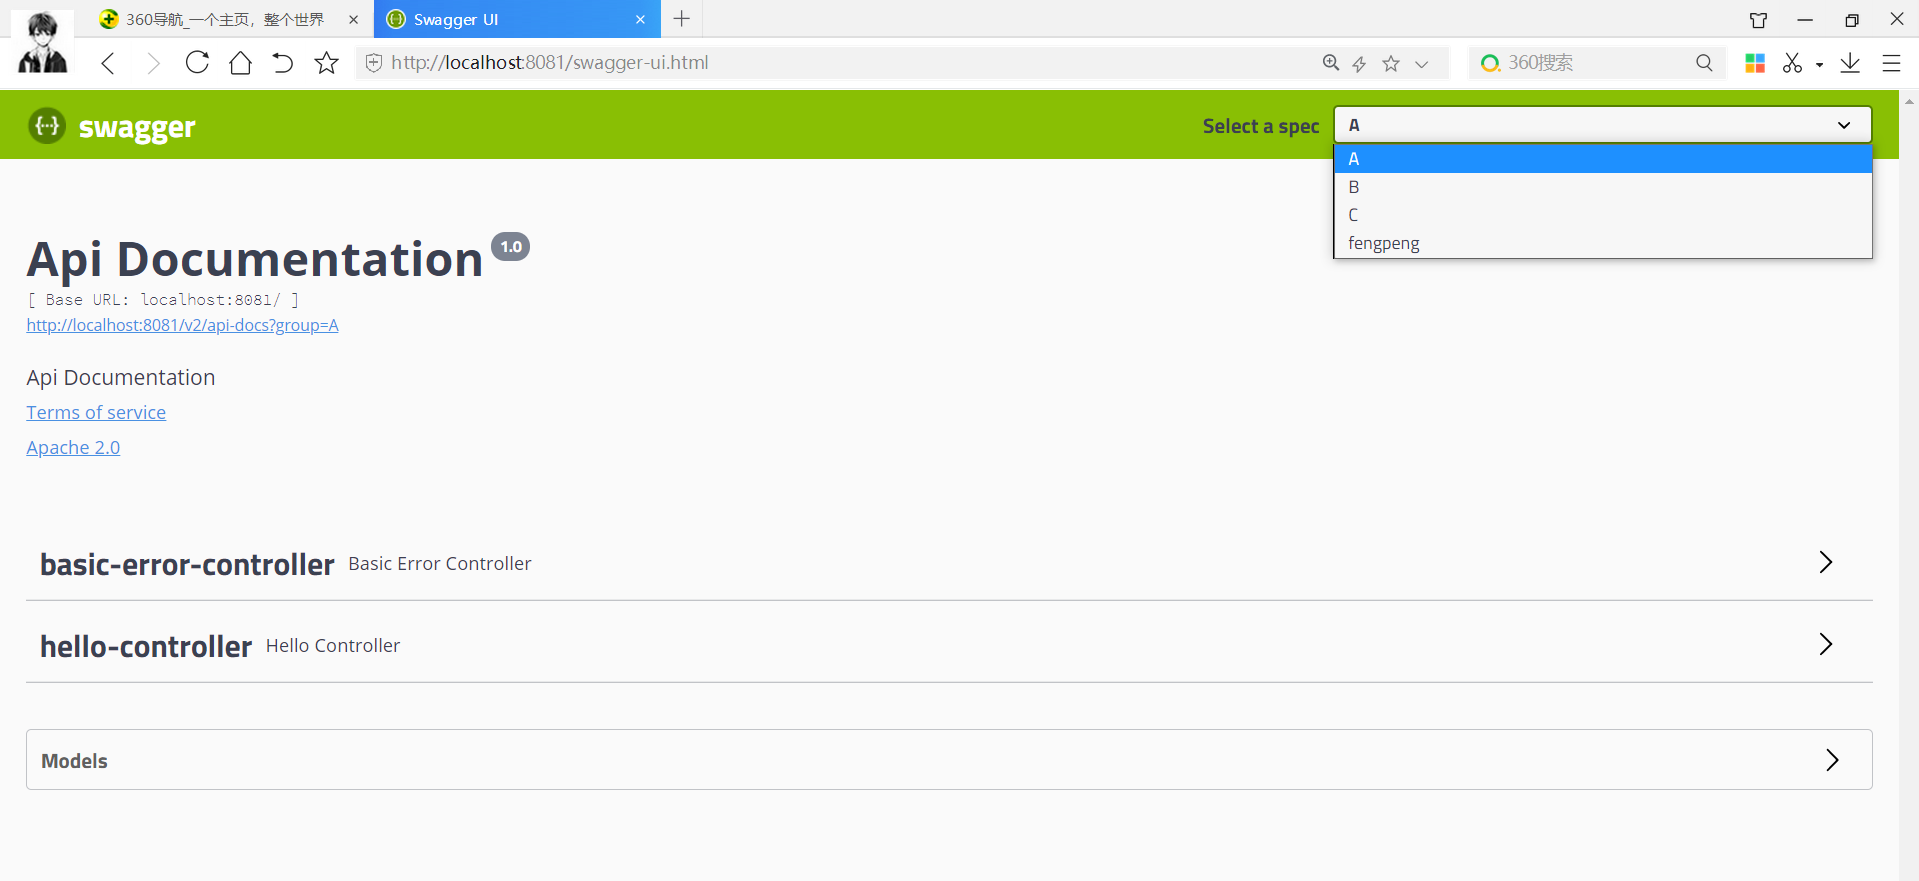
实体类配置
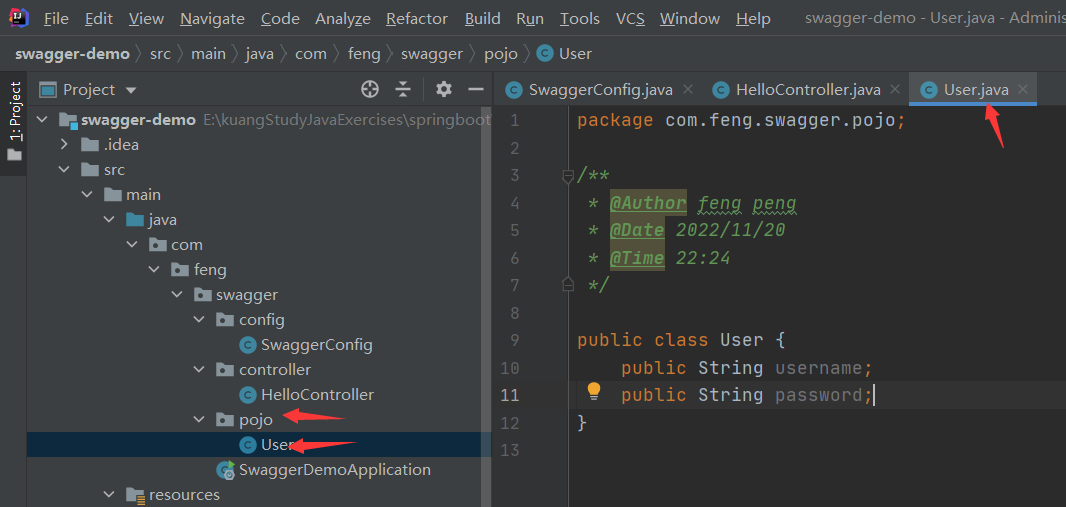
HelloController
@RestController
public class HelloController {

    @GetMapping("/hello")
    public String index(){
        return "hello";
    }

    //只要我们的接口中,返回值中存在实体类,他就会被扫描到Swagger中
    @PostMapping("/user")
    public User user(){
        return new User();
    }
}
运行测试
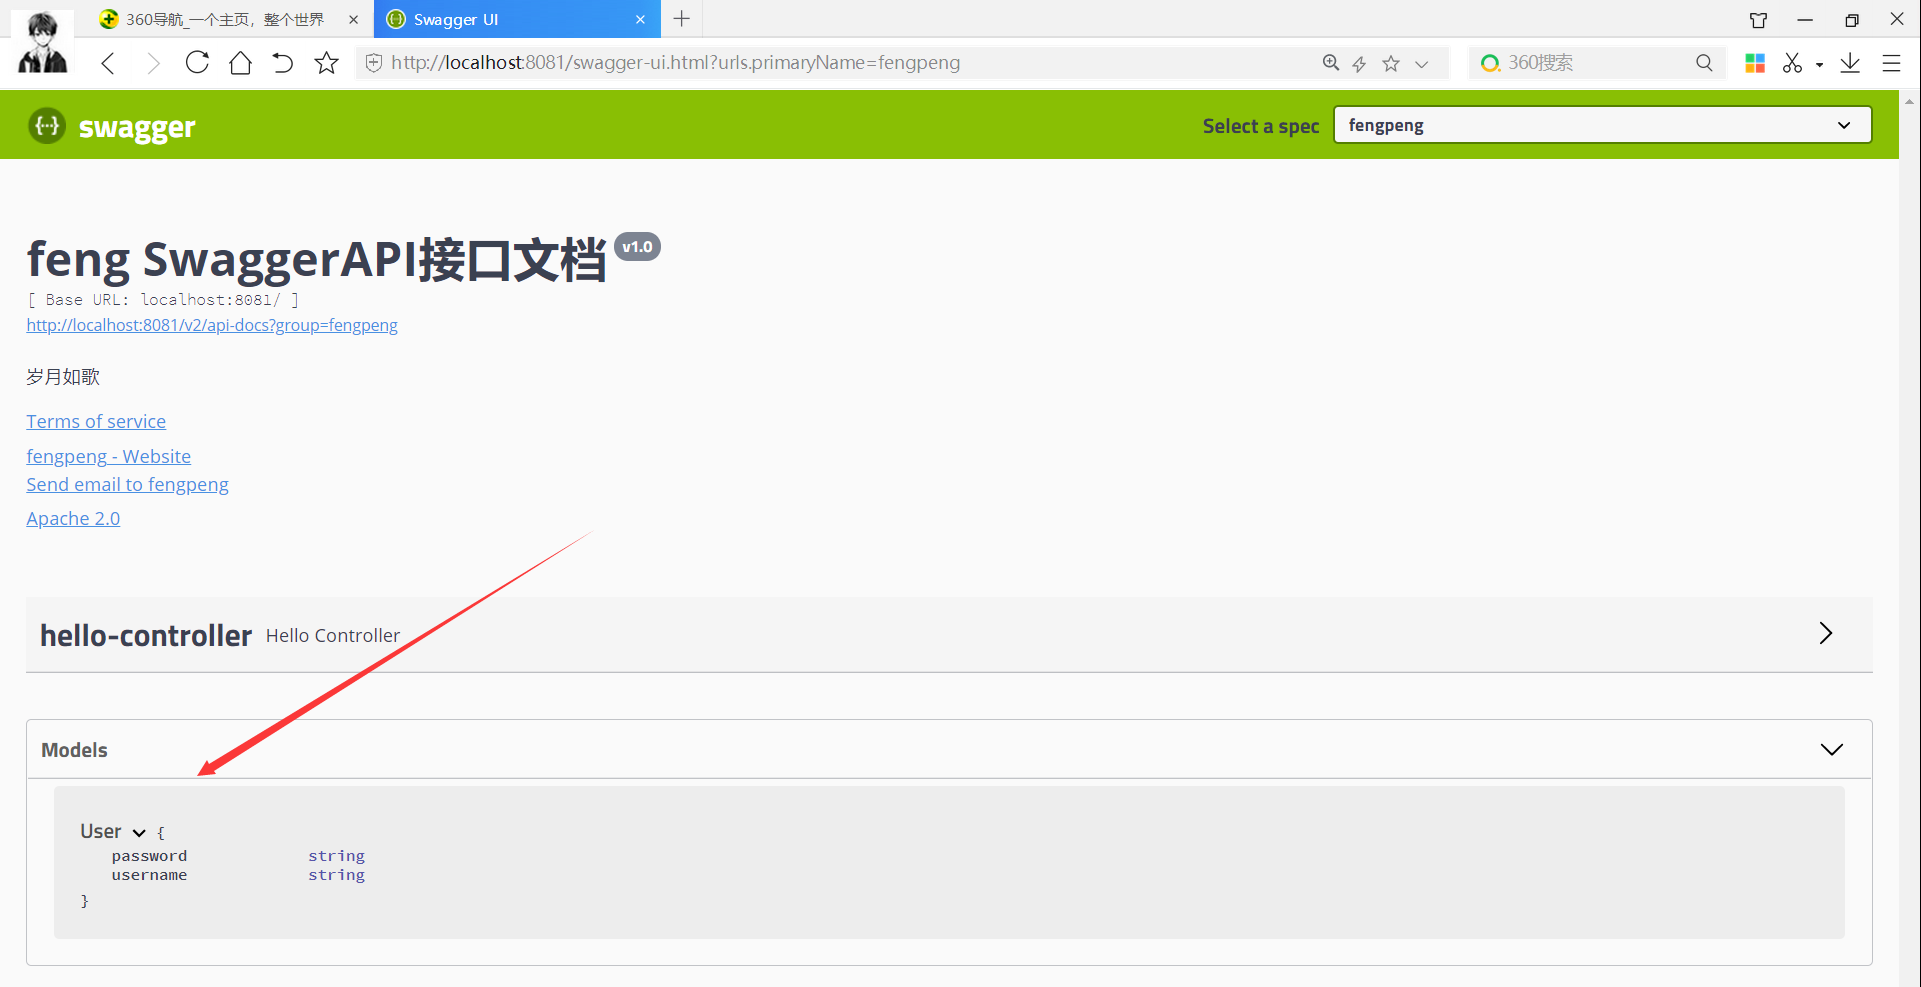
添加注解说明
User
package com.feng.swagger.pojo;

import io.swagger.annotations.Api;
import io.swagger.annotations.ApiModel;
import io.swagger.annotations.ApiModelProperty;

/**
 * @Author feng peng
 * @Date 2022/11/20
 * @Time 22:24
 */
//@Api(注释)
@ApiModel("用户实体类")
public class User {
    @ApiModelProperty("用户名")
    public String username;//可以用private  但是必须加上get,set
    @ApiModelProperty("密码")
    public String password;

}
HelloController
package com.feng.swagger.controller;


import com.feng.swagger.pojo.User;
import io.swagger.annotations.ApiOperation;
import io.swagger.annotations.ApiParam;
import org.springframework.stereotype.Controller;
import org.springframework.web.bind.annotation.GetMapping;
import org.springframework.web.bind.annotation.PostMapping;
import org.springframework.web.bind.annotation.RequestMapping;
import org.springframework.web.bind.annotation.RestController;

/**
 * @Author feng peng
 * @Date 2022/11/20
 * @Time 16:30
 */

@RestController
public class HelloController {

    @GetMapping("/hello")
    public String index(){
        return "hello";
    }

    //只要我们的接口中,返回值中存在实体类,他就会被扫描到Swagger中
    @PostMapping("/user")
    public User user(){
        return new User();
    }

    //Operation接口,不是放在类上的,是方法
    @ApiOperation("Hello控制类")
    @GetMapping("/hello2")
    public String hello2(@ApiParam("用户名") String username){
        return "hello"+username;
    }
}
运行测试
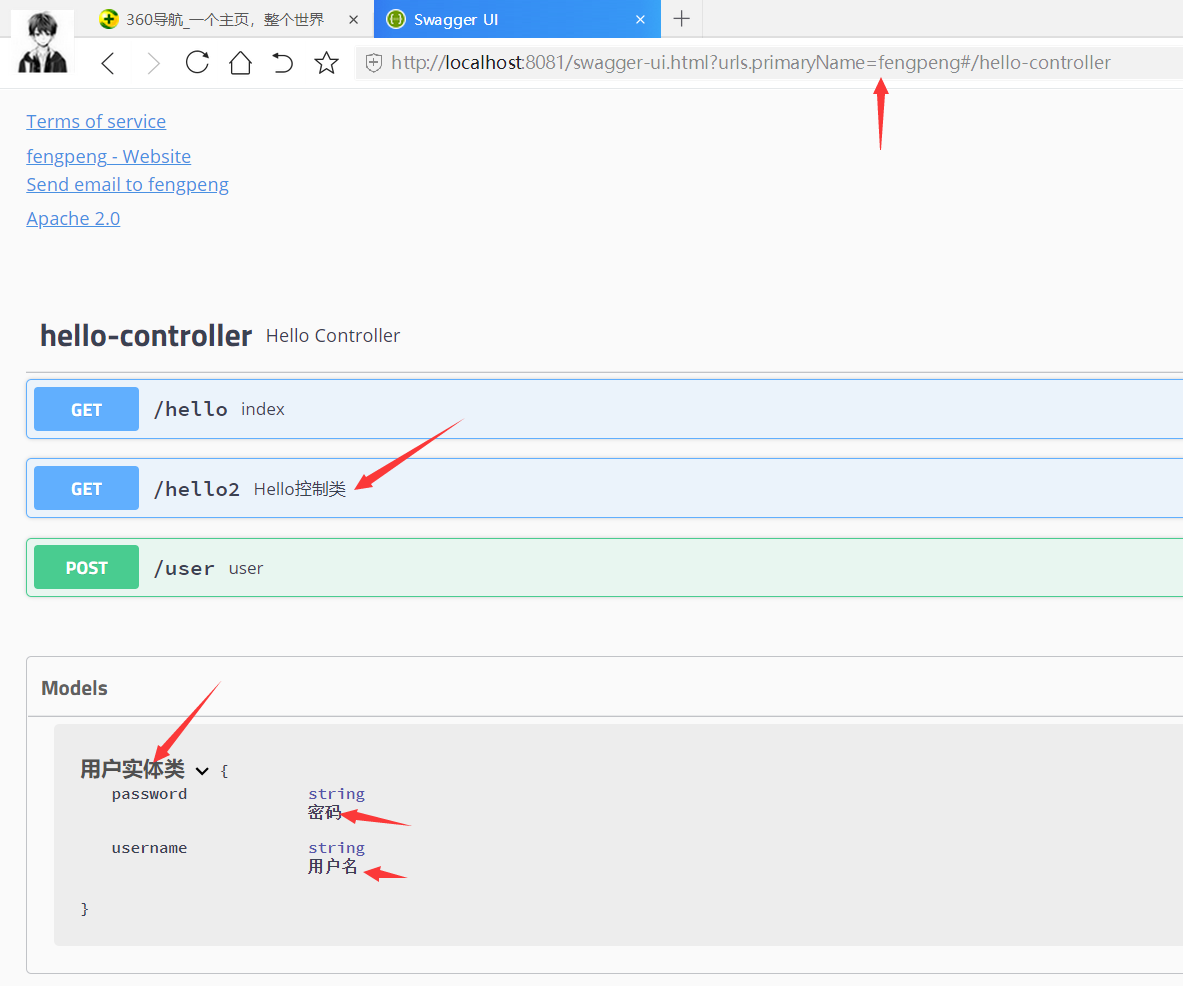
如何使用
HelloController
@ApiOperation("Post测试类")
@PostMapping("/postt")
public User postt(@ApiParam("用户名") User user){
    return user;
}
运行
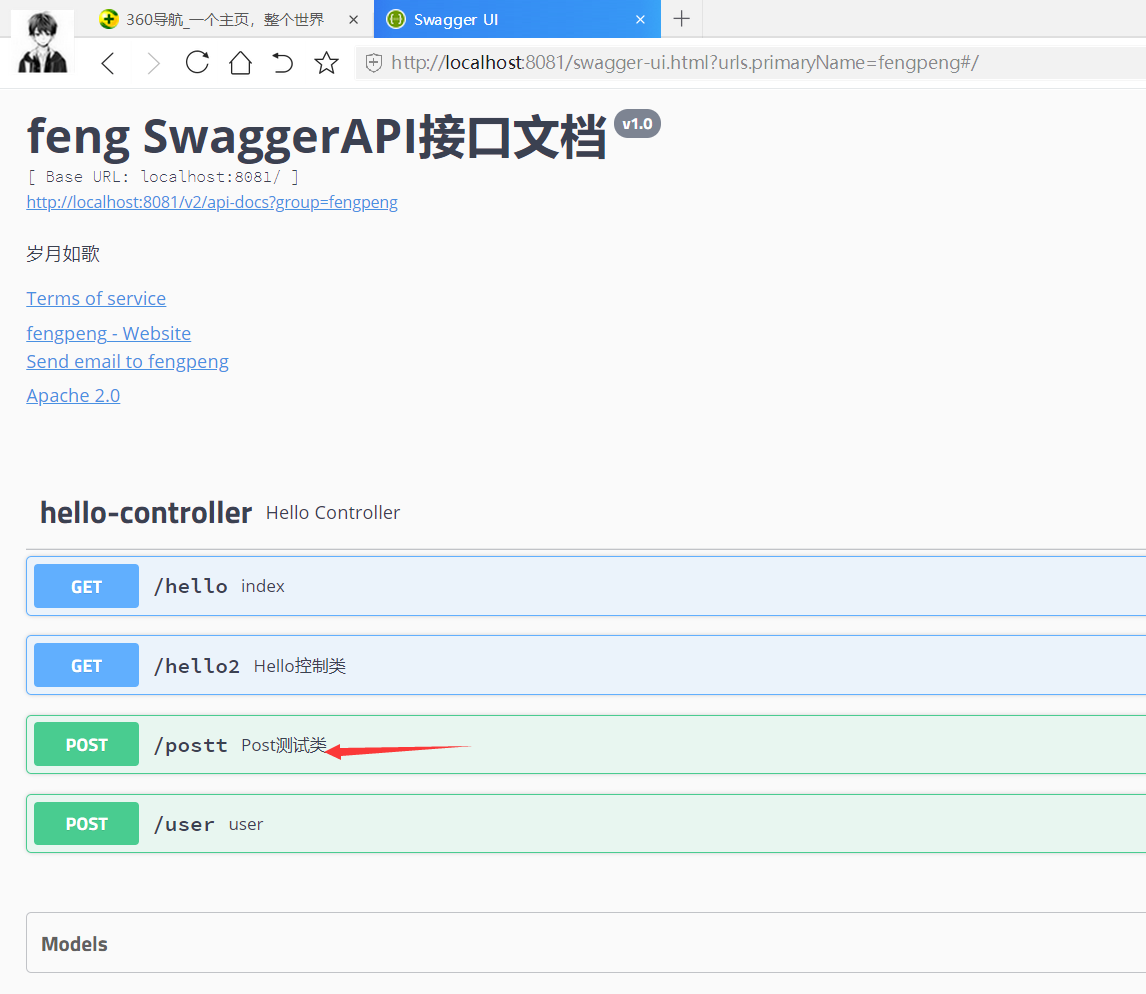
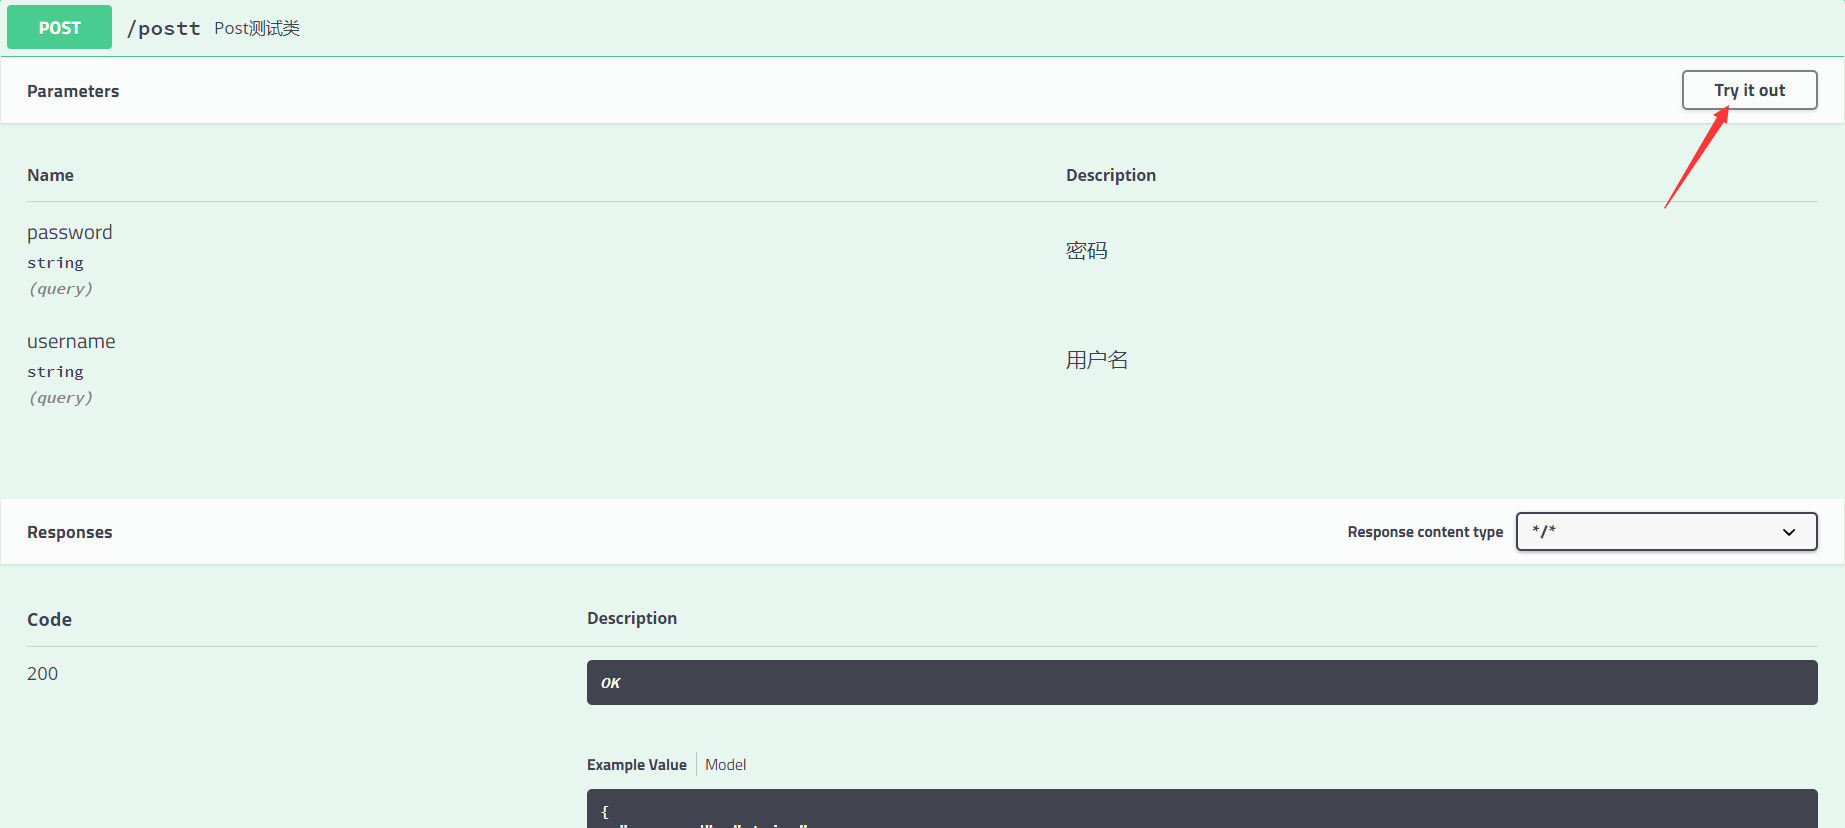
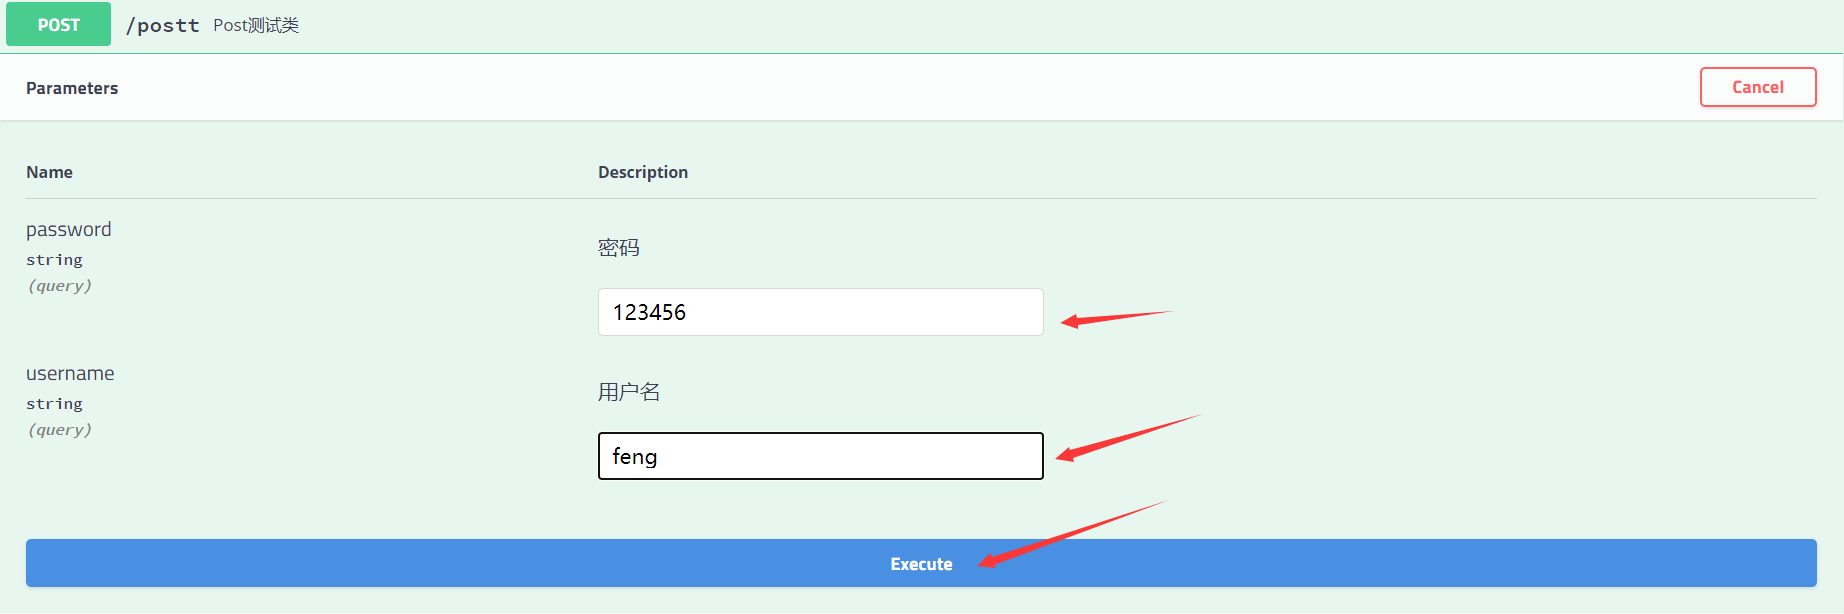
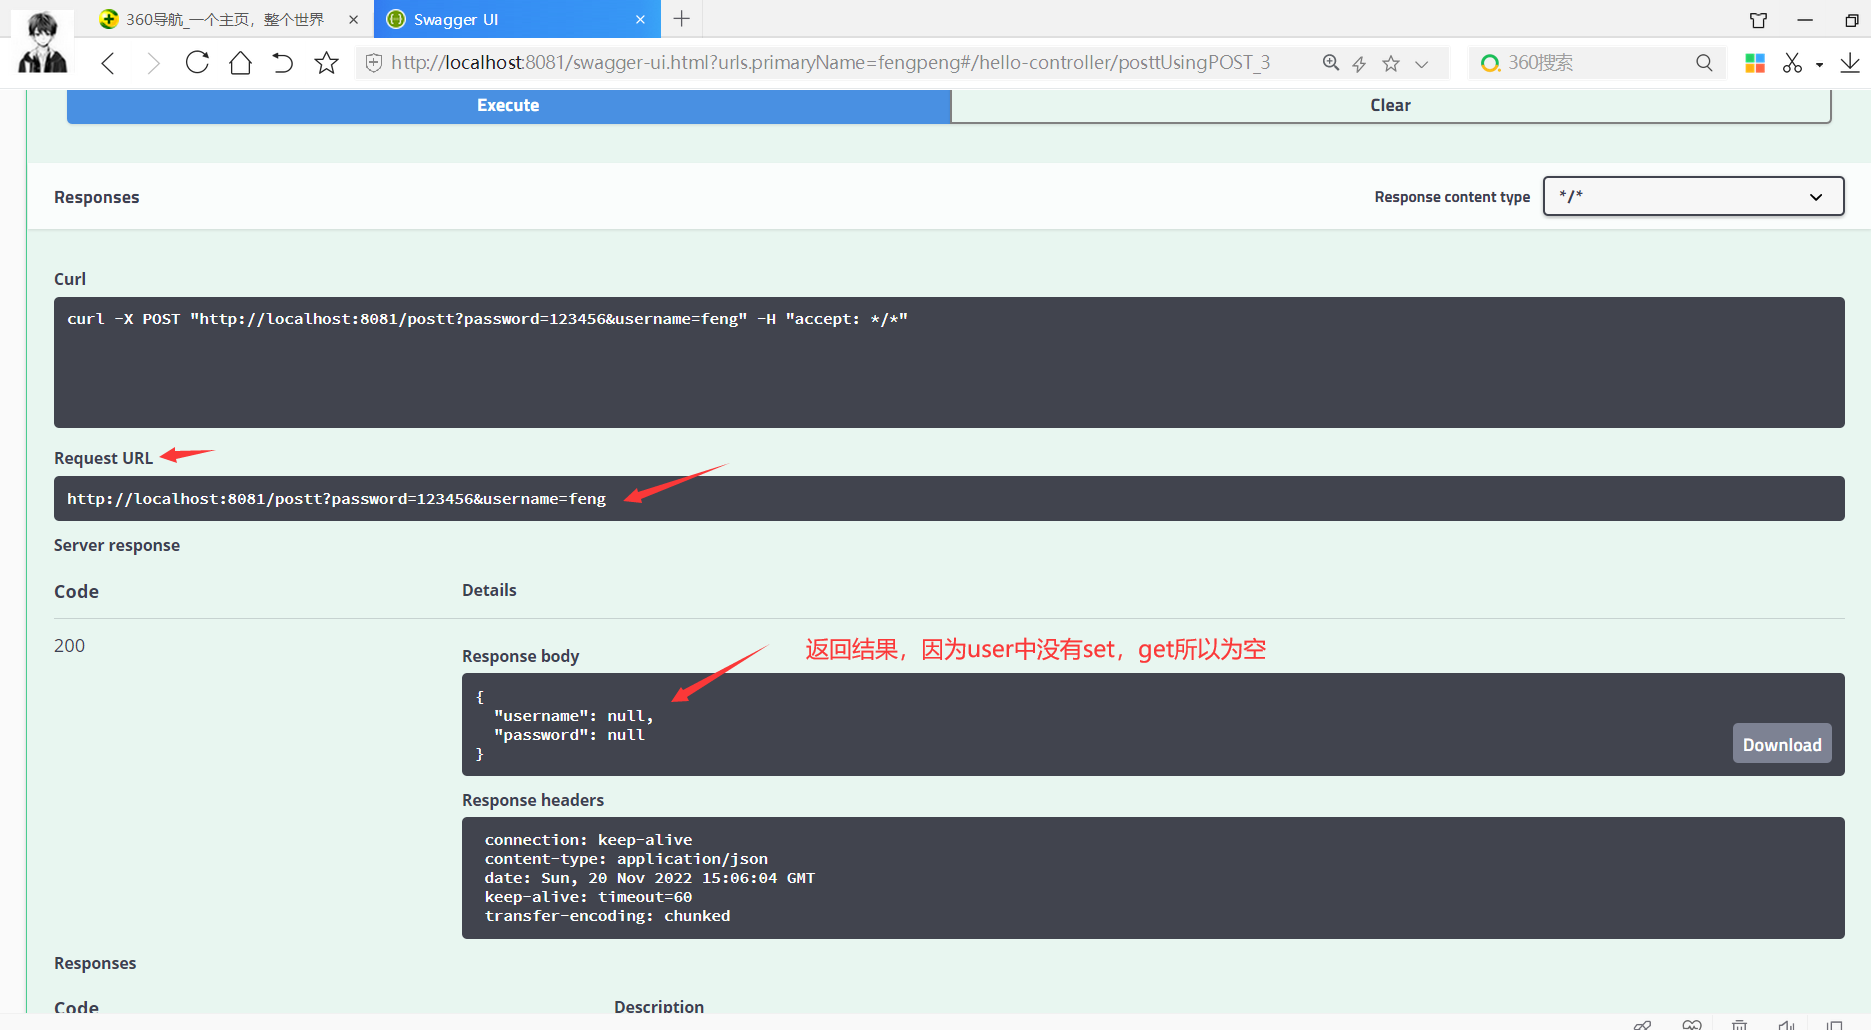
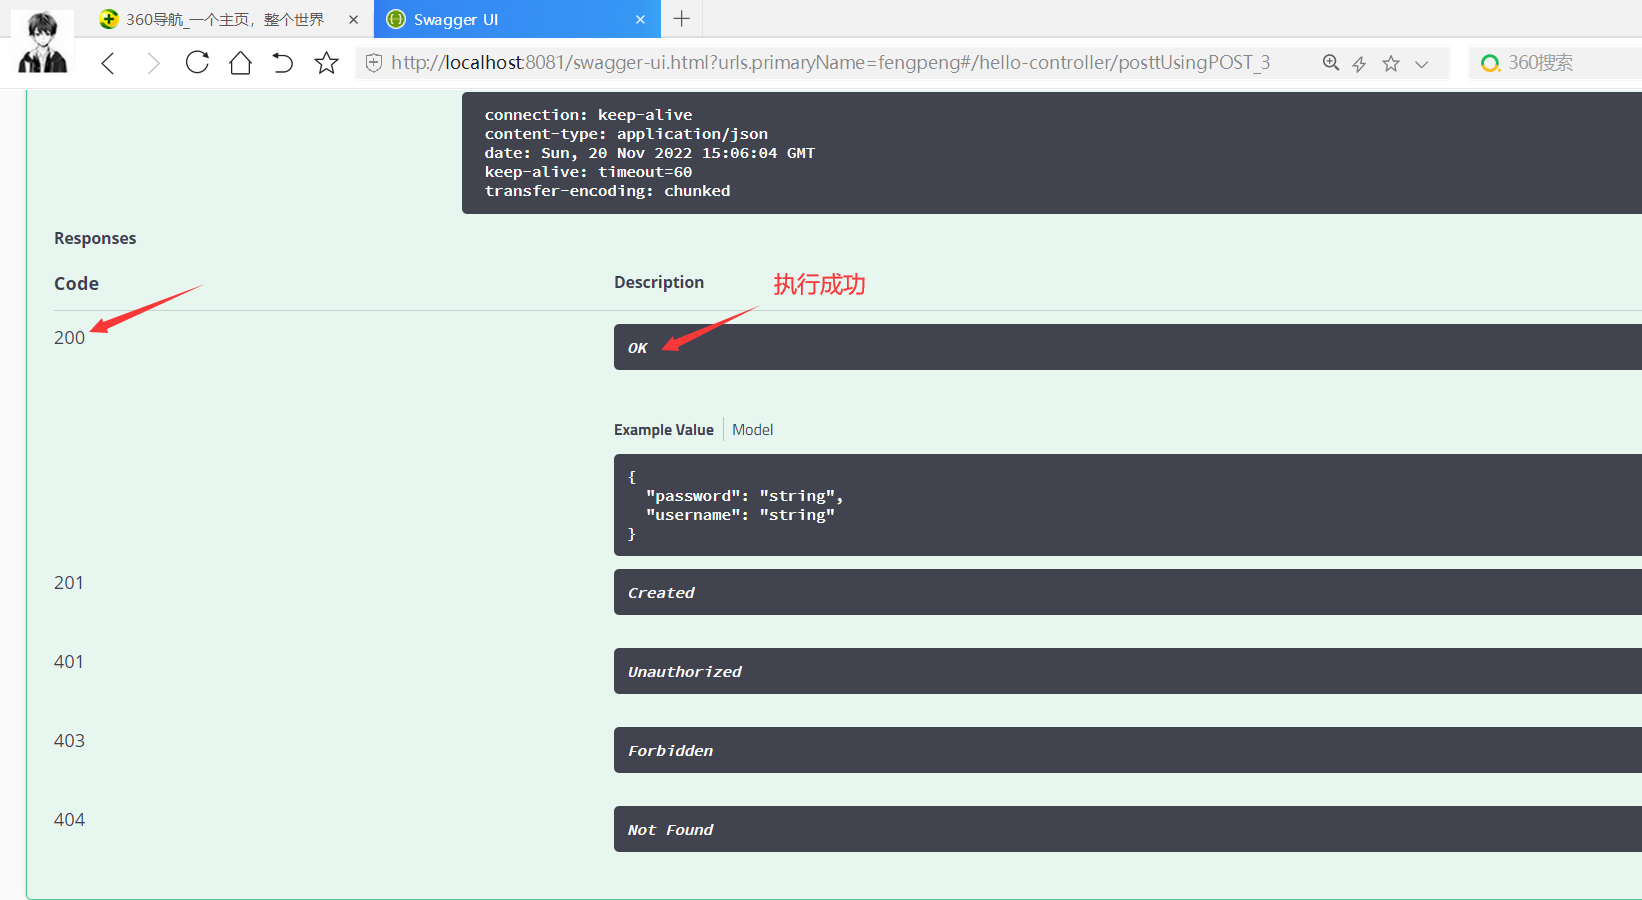
总结:
- 我们可以通过Swagger给一些比较难理解的属性或者接口,增加注释信息
- 接口文档实时更新
- 可以在线测试
Swagger是一个优秀的工具,几乎所有大公司都有使用它。
【注意点】在正式发布的时候,关闭Swagger!!!出于安全考虑。而且节省运行的内存;
16 异步任务
新建springboot项目,添加web依赖
删除多余文件,修改maven地址,修改编码
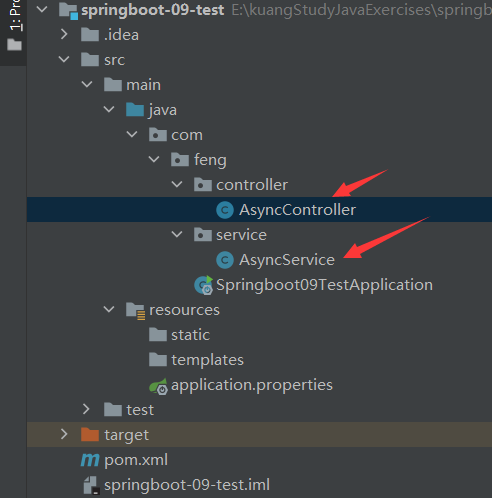
AsyncService类
@Service
public class AsyncService {
    public void hello(){
        try {
            Thread.sleep(3000);
        } catch (InterruptedException e) {
            e.printStackTrace();
        }

        System.out.println("数据正在处理。。。");
    }
}
AsyncController类
@RestController
public class AsyncController {

    @Autowired
    AsyncService asyncService;

    @RequestMapping("/hello")
    public String hello(){
        asyncService.hello();//停止3秒,转圈~
        return "OK";
    }
}
运行测试
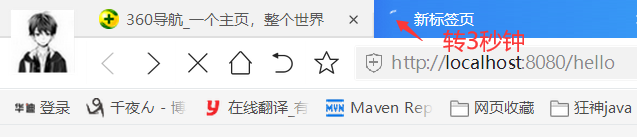
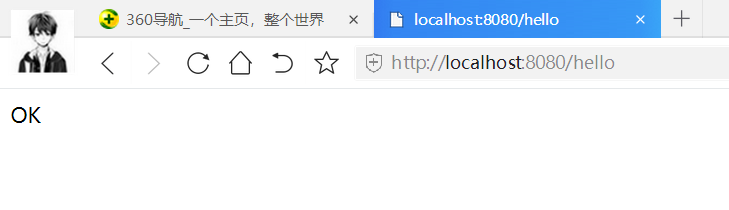
实现异步任务
AsyncService
@Service
public class AsyncService {

    //告诉Spring这是一个异步的方法
    @Async
    public void hello(){
        try {
            Thread.sleep(3000);
        } catch (InterruptedException e) {
            e.printStackTrace();
        }

        System.out.println("数据正在处理。。。");
    }
}
Springboot09TestApplication
//开启异步注解功能
@EnableAsync
@SpringBootApplication
public class Springboot09TestApplication {

    public static void main(String[] args) {
        SpringApplication.run(Springboot09TestApplication.class, args);
    }

}
运行测试
浏览器瞬间先反应
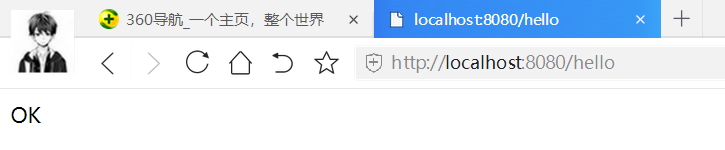
console后打印

17 邮件任务
17.1 简单邮件

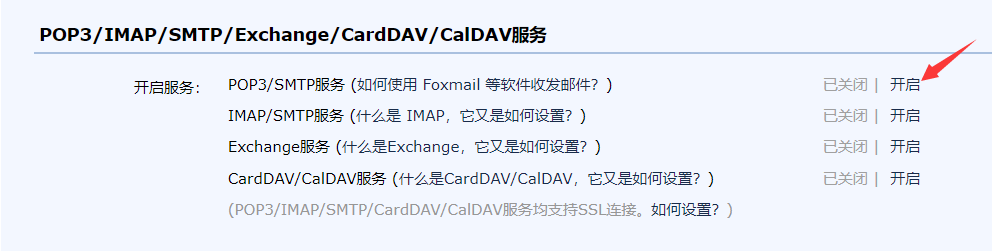


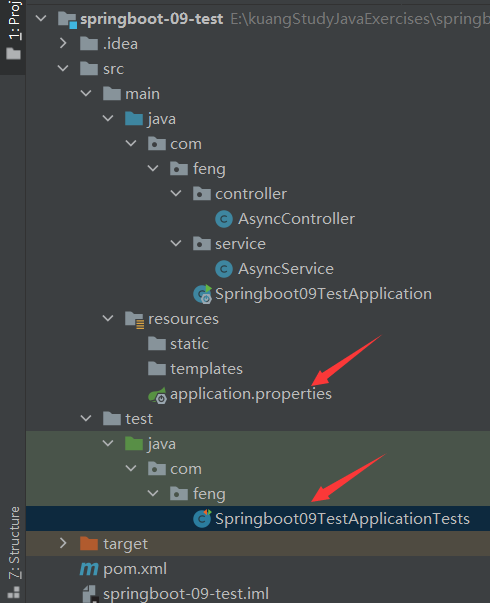
pom.xml
<!--javax.mail-->
<dependency>
    <groupId>org.springframework.boot</groupId>
    <artifactId>spring-boot-starter-mail</artifactId>
</dependency>
application.properties
spring.mail.username=193244412@qq.com
spring.mail.password=tjiewjhbclxabief
spring.mail.host=smtp.qq.com
# 开启加密验证
spring.mail.properties.mail.smtp.ssl.enable=true
Springboot09TestApplicationTests
package com.feng;

import org.junit.jupiter.api.Test;
import org.springframework.boot.test.context.SpringBootTest;
import org.springframework.mail.SimpleMailMessage;
import org.springframework.mail.javamail.JavaMailSenderImpl;

import javax.annotation.Resource;

@SpringBootTest
class Springboot09TestApplicationTests {

    @Resource
    JavaMailSenderImpl mailSender;
    @Test
    void contextLoads() {

        //一个简单的邮件~
        SimpleMailMessage mailMessage = new SimpleMailMessage();
        mailMessage.setSubject("fengpeng");
        mailMessage.setText("岁月如歌~");

        mailMessage.setTo("193244412@qq.com");
        mailMessage.setFrom("193244412@qq.com");

        mailSender.send(mailMessage);
    }

}
运行测试方法
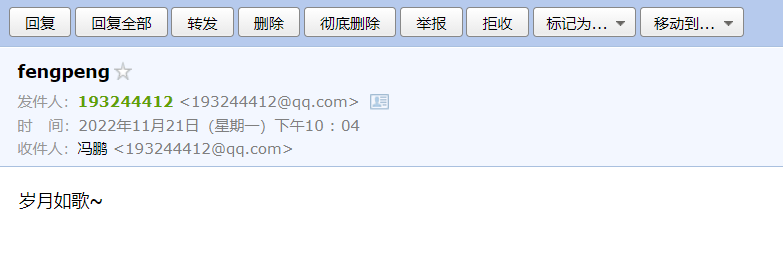
17.2 复杂邮件
Springboot09TestApplicationTests
package com.feng;

import org.junit.jupiter.api.Test;
import org.springframework.boot.test.context.SpringBootTest;
import org.springframework.mail.SimpleMailMessage;
import org.springframework.mail.javamail.JavaMailSenderImpl;
import org.springframework.mail.javamail.MimeMessageHelper;

import javax.annotation.Resource;
import javax.mail.MessagingException;
import javax.mail.internet.MimeMessage;
import java.io.File;

@SpringBootTest
class Springboot09TestApplicationTests {

    @Resource
    JavaMailSenderImpl mailSender;
    @Test
    void contextLoads() {

        //一个简单的邮件~
        SimpleMailMessage mailMessage = new SimpleMailMessage();
        mailMessage.setSubject("fengpeng");
        mailMessage.setText("岁月如歌~");

        mailMessage.setTo("193244412@qq.com");
        mailMessage.setFrom("193244412@qq.com");

        mailSender.send(mailMessage);
    }

    @Test
    void contextLoads2() throws MessagingException {

        //一个复杂的邮件~
        MimeMessage mimeMessage = mailSender.createMimeMessage();
        //组装~
        MimeMessageHelper helper = new MimeMessageHelper(mimeMessage, true);

        //正文
        helper.setSubject("fengpeng");
        helper.setText("<p style='color:red'>岁月如歌~</p>",true);

        //附件
        helper.addAttachment("1.jpg",new File("C:\\Users\\Administrator\\Desktop\\deskbg.jpg"));
        helper.addAttachment("2.jpg",new File("C:\\Users\\Administrator\\Desktop\\deskbg.jpg"));

        helper.setTo("193244412@qq.com");
        helper.setFrom("193244412@qq.com");

        mailSender.send(mimeMessage);
    }

}

运行测试方法
18 定时执行任务
TaskScheduler   //任务调度者
TaskExecutor	//任务执行者

@EnableScheduling  //开启定时功能的注解
@Scheduled  //什么时候执行~

Cron表达式
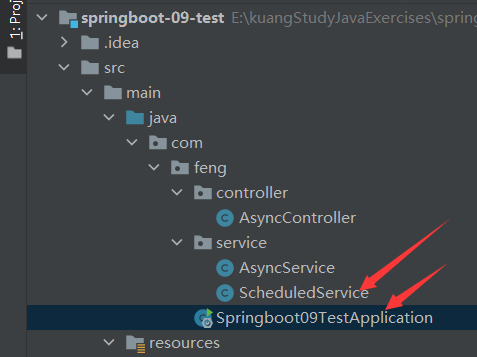
Springboot09TestApplication
package com.feng;

import org.springframework.boot.SpringApplication;
import org.springframework.boot.autoconfigure.SpringBootApplication;
import org.springframework.scheduling.annotation.EnableAsync;
import org.springframework.scheduling.annotation.EnableScheduling;

@EnableAsync //开启异步注解功能
@EnableScheduling  //开启定时功能的注解
@SpringBootApplication
public class Springboot09TestApplication {

    public static void main(String[] args) {
        SpringApplication.run(Springboot09TestApplication.class, args);
    }

}
ScheduledService
package com.feng.service;

import org.springframework.scheduling.annotation.Scheduled;
import org.springframework.stereotype.Service;

/**
 * @Author feng peng
 * @Date 2022/11/21
 * @Time 22:43
 */
@Service
public class ScheduledService {

    //在一个特定的时间执行这个方法~   Timer
    //cron表达式
    //秒 分 时 日 月 周几~(0,7都代表周日)
    @Scheduled(cron = "0 55 22 * * ?")
    public void hello(){
        System.out.println("hello,你被执行了~");
    }
}
运行测试
19 Dubbo
19.1 简介
19.2 zookeeper下载地址
https://archive.apache.org/dist/zookeeper/
右键选择以管理员运行
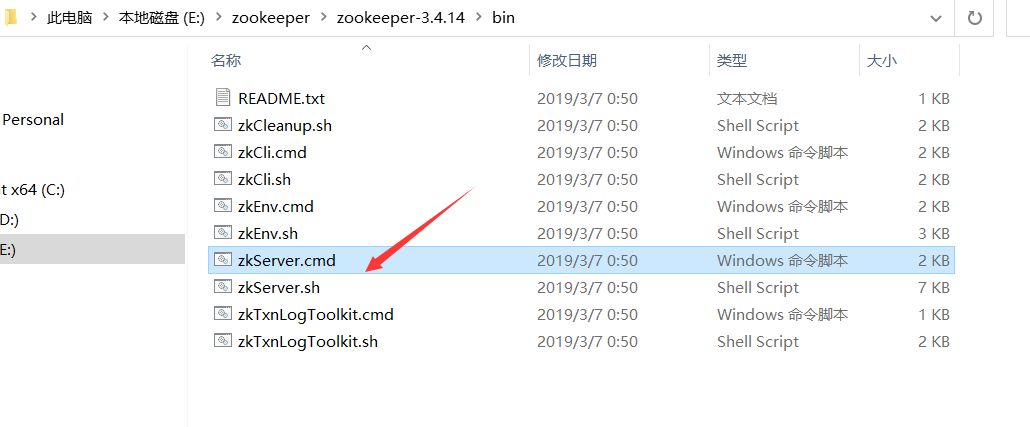
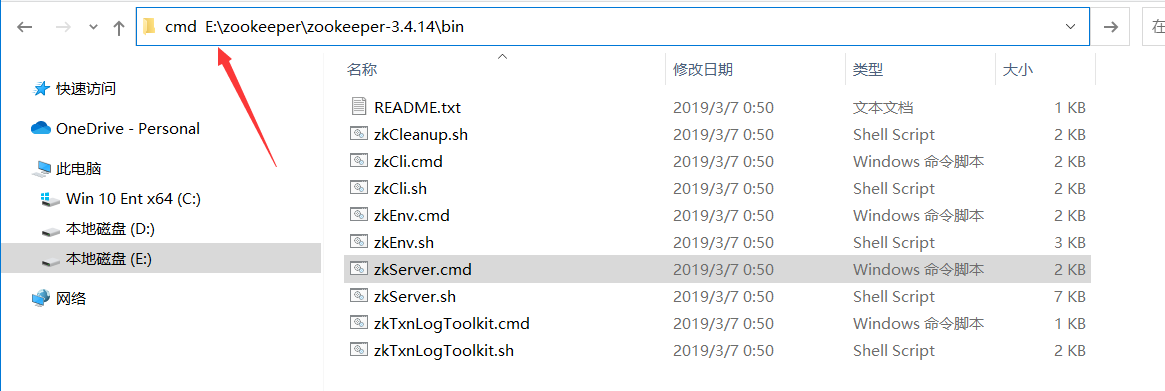
双击zkServer.cmd闪退
复制一份,修改名称为zoo.cfg
重新运行双击zkServer.cmd运行
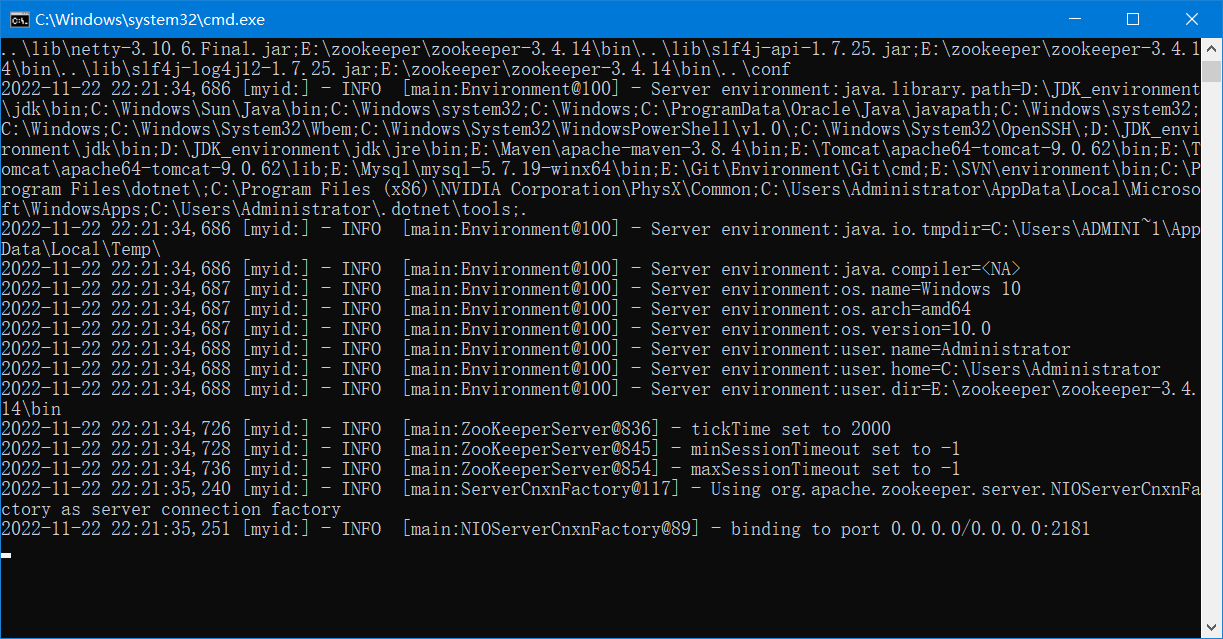
双击打开客户端(两个必须同时开启)
客户端
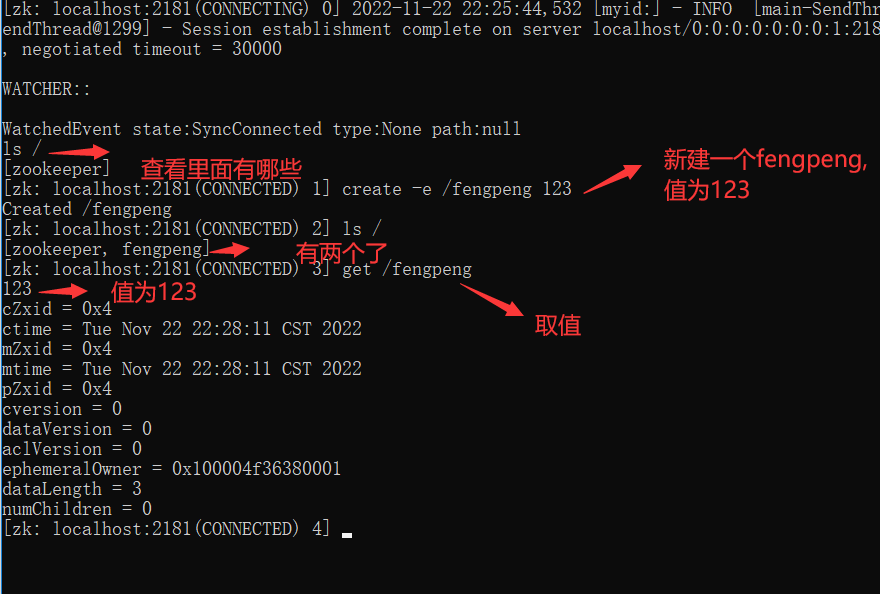
19.3 Dubbo-admin安装
下载地址:https://github.com/apache/dubbo-admin/tree/master
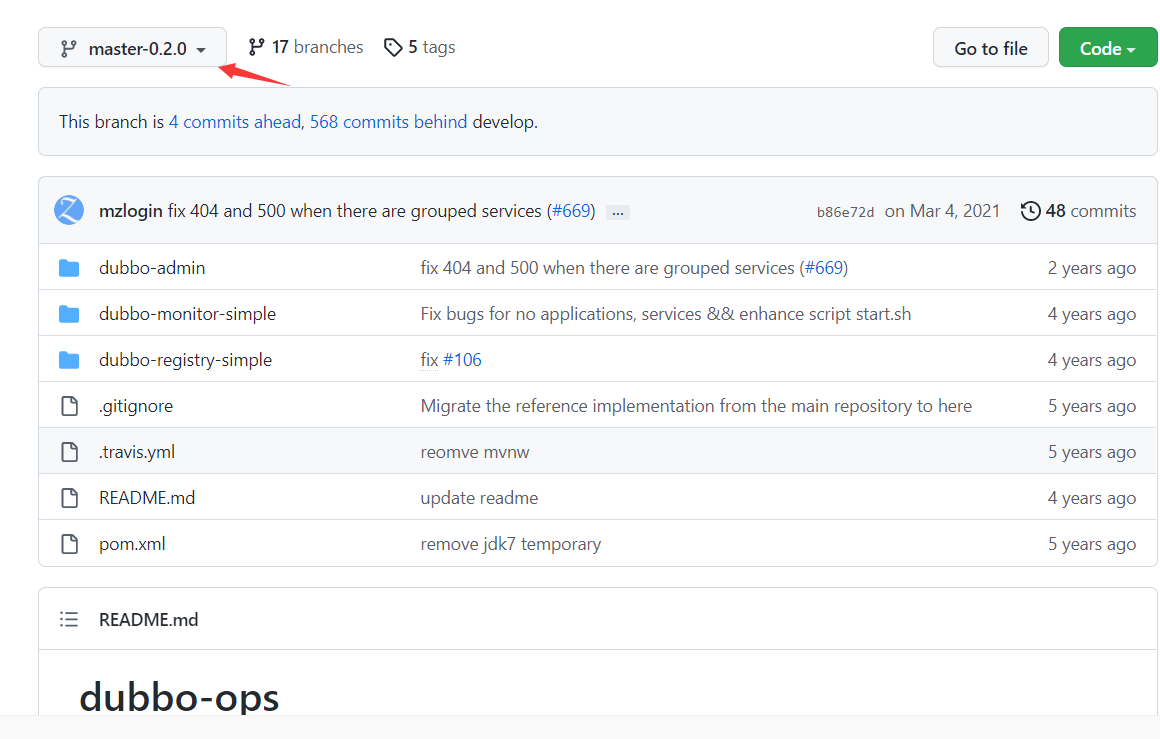
点击code,下载压缩包
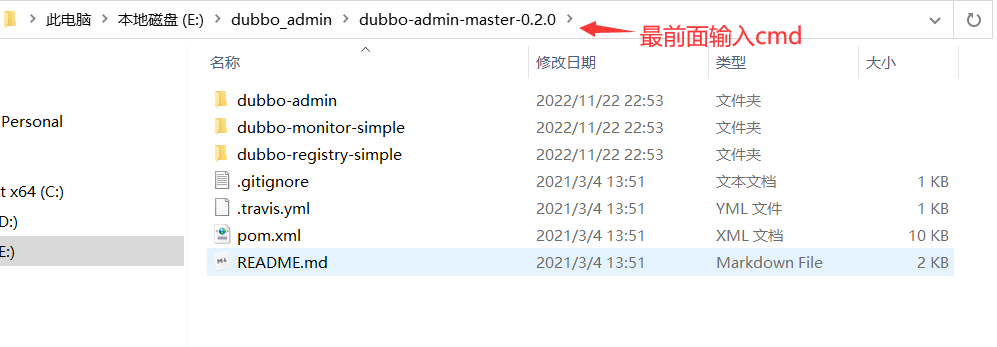

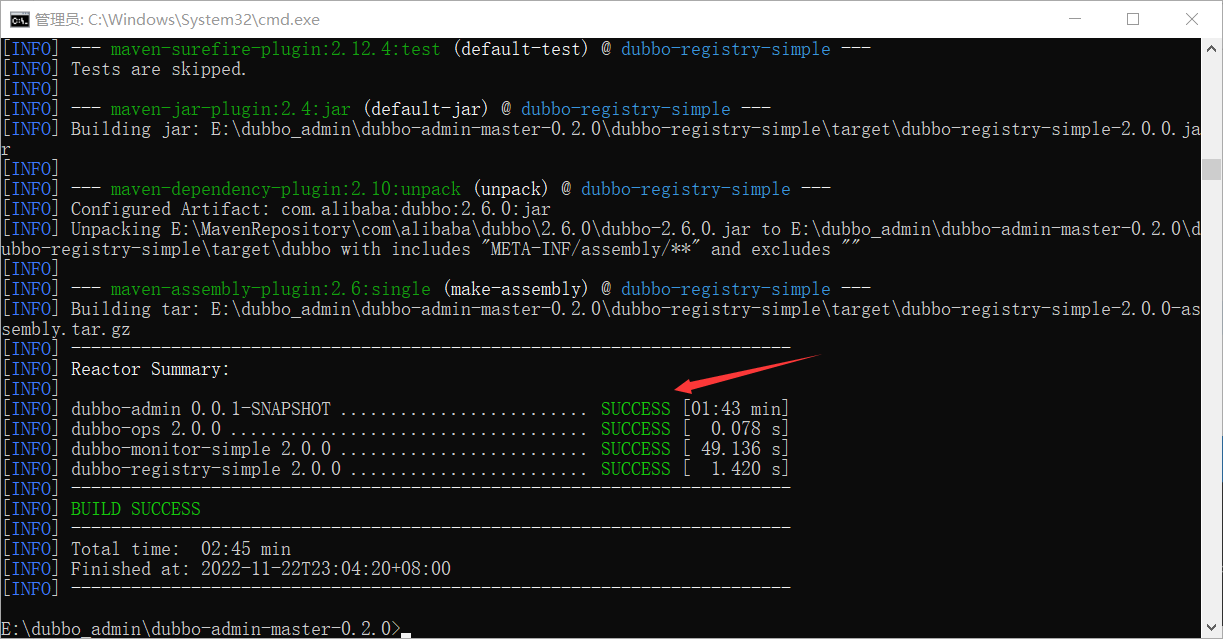
生成的jar包
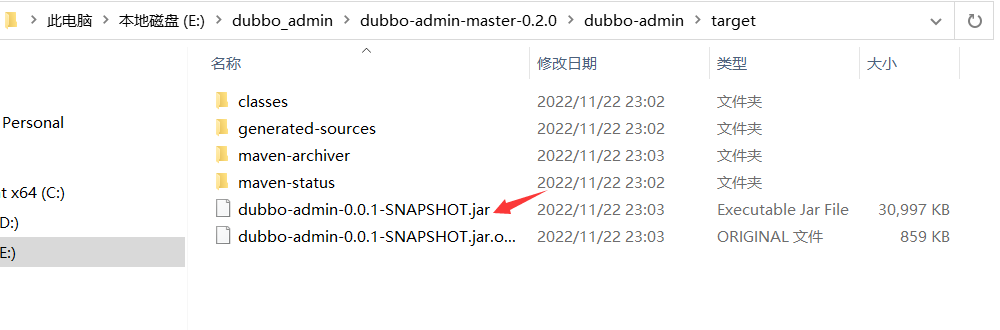
运行jar包
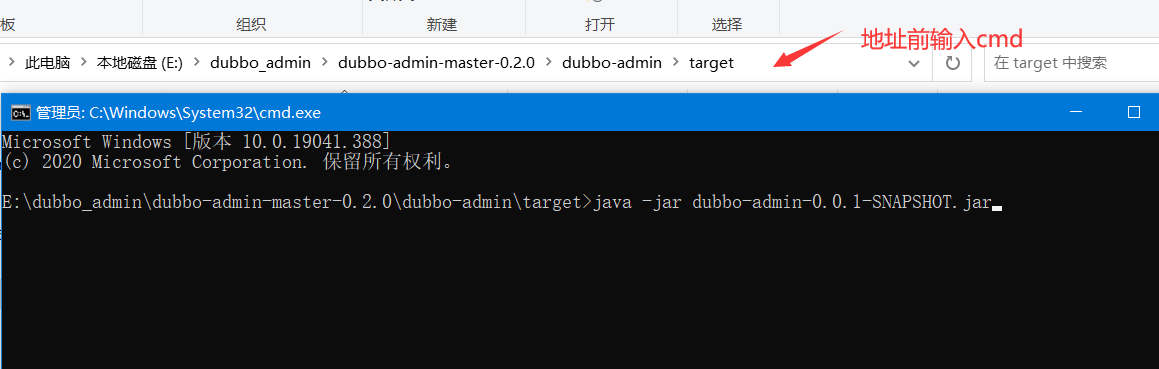
这里会报错是因为zookeeper没有打开
把jar复制到zookeeper同一目录,方便操作
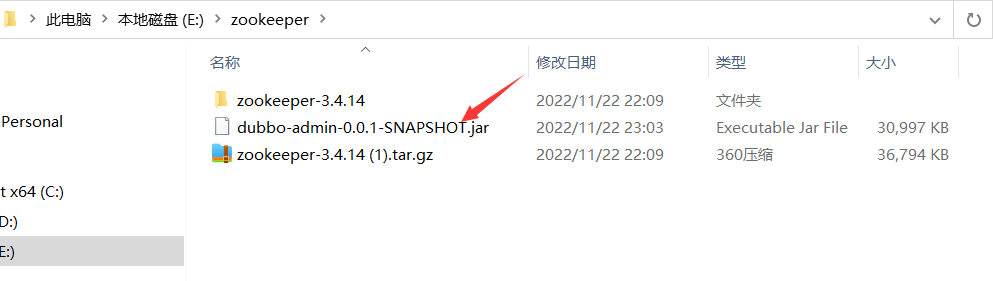
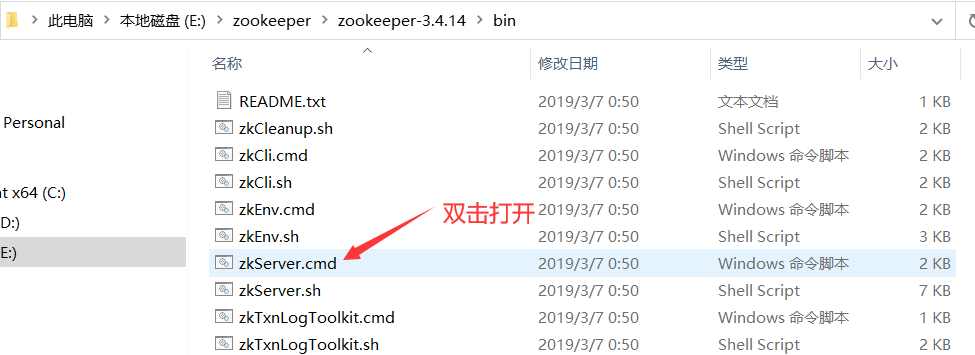
再次执行jar包
zookeeper显示绑定成功
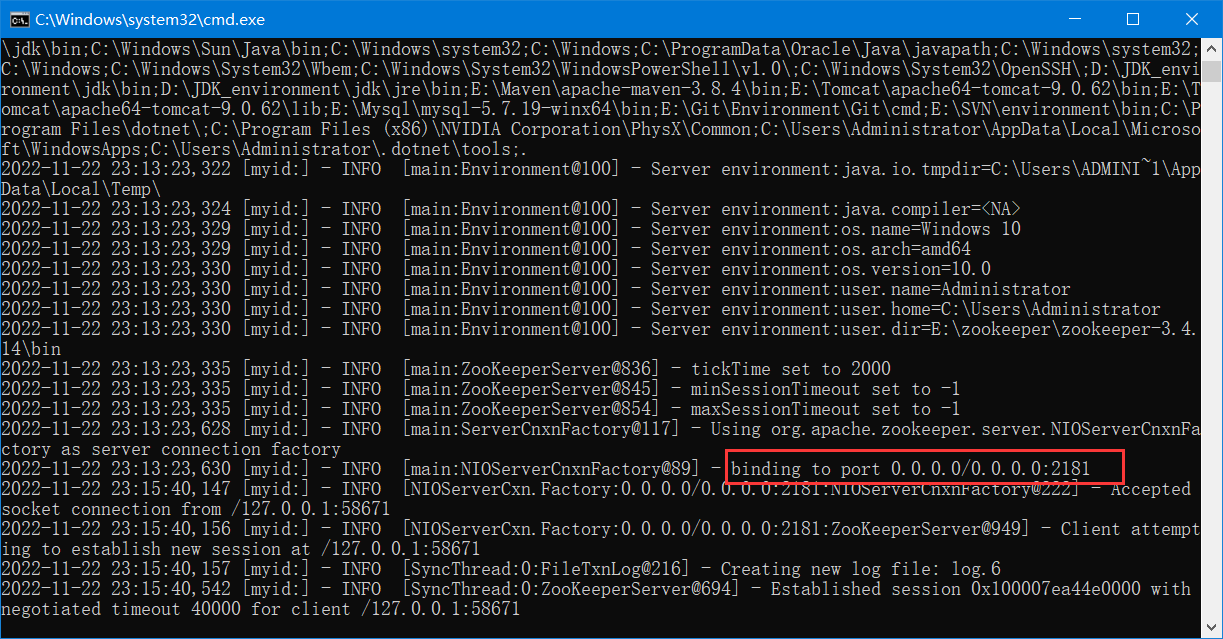
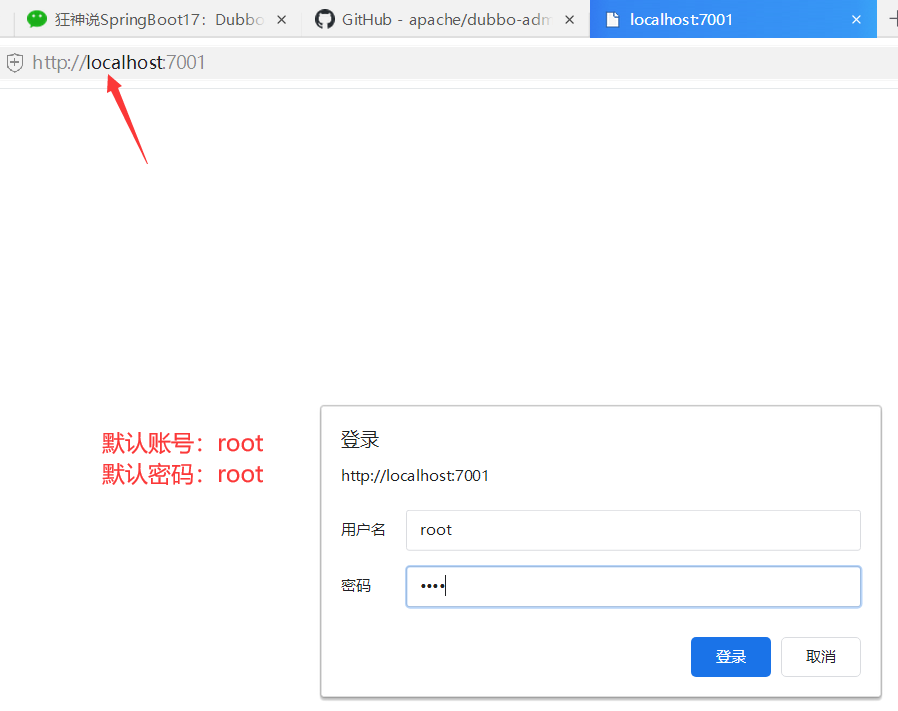
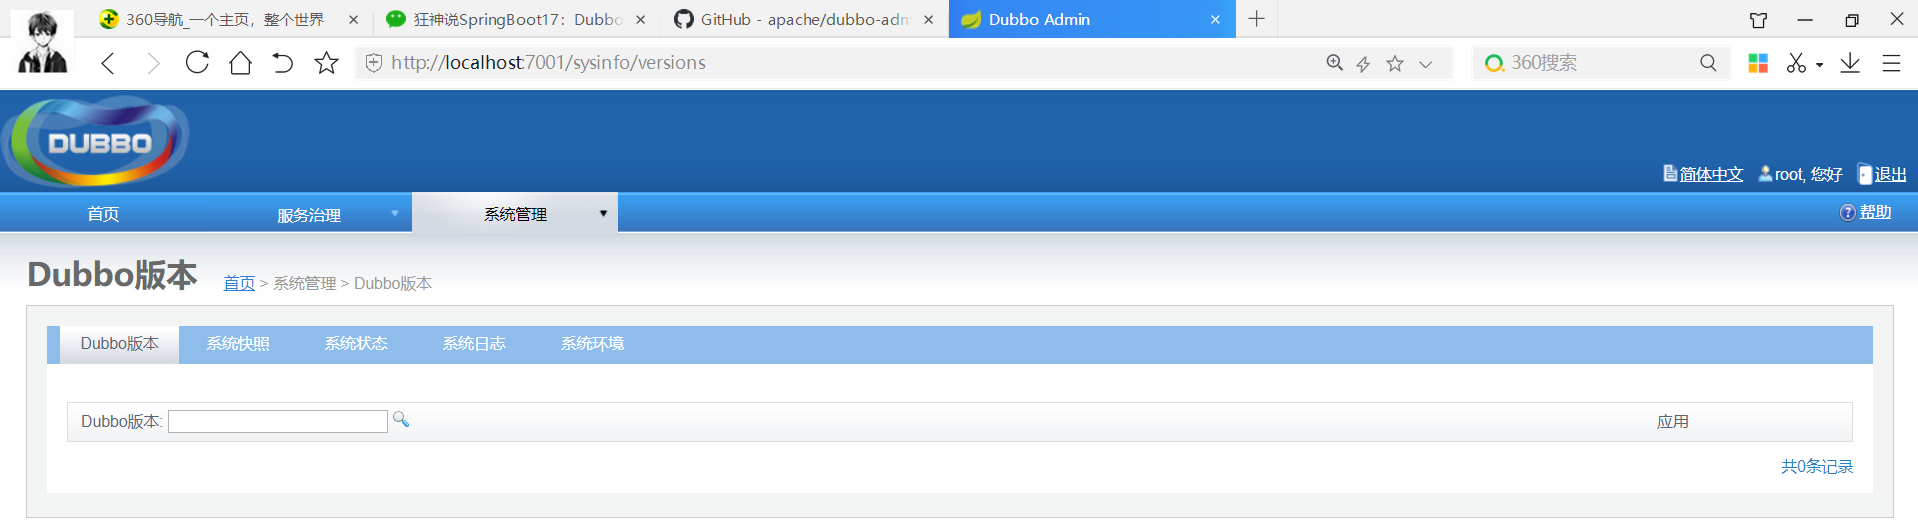
zookeeper:注册中心
dubbo-admin:是一个监控管理后台查看我们注册了哪些服务,哪些服务被消费了
Dubbo:jar包~
19.3 服务注册发现实战
新建provider-service 的springboot项目,添加web依赖
新建consumer-service 的springboot项目,添加web依赖
provider-service
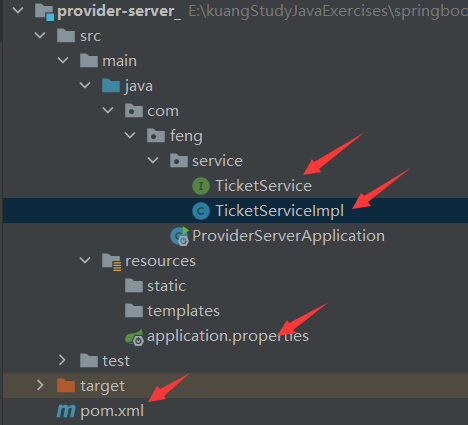
pom.xml
<dependencies>

    <!--导入依赖:Dubbo + zookeeper-->
    <dependency>
        <groupId>org.apache.dubbo</groupId>
        <artifactId>dubbo-spring-boot-starter</artifactId>
        <version>2.7.3</version>
    </dependency>

    <!--zkclient-->
    <dependency>
        <groupId>com.github.sgroschupf</groupId>
        <artifactId>zkclient</artifactId>
        <version>0.1</version>
    </dependency>
    <!-- 引入zookeeper -->
    <dependency>
        <groupId>org.apache.curator</groupId>
        <artifactId>curator-framework</artifactId>
        <version>2.12.0</version>
    </dependency>
    <dependency>
        <groupId>org.apache.curator</groupId>
        <artifactId>curator-recipes</artifactId>
        <version>2.12.0</version>
    </dependency>
    <dependency>
        <groupId>org.apache.zookeeper</groupId>
        <artifactId>zookeeper</artifactId>
        <version>3.4.14</version>
        <!--排除这个slf4j-log4j12-->
        <exclusions>
            <exclusion>
                <groupId>org.slf4j</groupId>
                <artifactId>slf4j-log4j12</artifactId>
            </exclusion>
        </exclusions>
    </dependency>
</dependencies>
application.properties
server.port=8001

# 服务应用名字
dubbo.application.name=provider-server
# 注册中心地址
dubbo.registry.address=zookeeper://127.0.0.1:2181
# 哪些服务要被注册
TicketService
package com.feng.service;

/**
 * @Author feng peng
 * @Date 2022/11/23
 * @Time 21:38
 */
public interface TicketService {
    public String getTicket();
}
TicketServiceImpl
package com.feng.service;

import org.apache.dubbo.config.annotation.Service;
import org.springframework.stereotype.Component;

/**
 * @Author feng peng
 * @Date 2022/11/23
 * @Time 21:39
 */

// zookeeper: 服务注册与发现

@Service //可以被扫描到,在项目一启动就自动注册到注册中心
@Component //使用了Dubbo后尽量不要用Service注解
public class TicketServiceImpl implements TicketService{
    @Override
    public String getTicket() {
        return "hello,java";
    }
}
双击打开服务
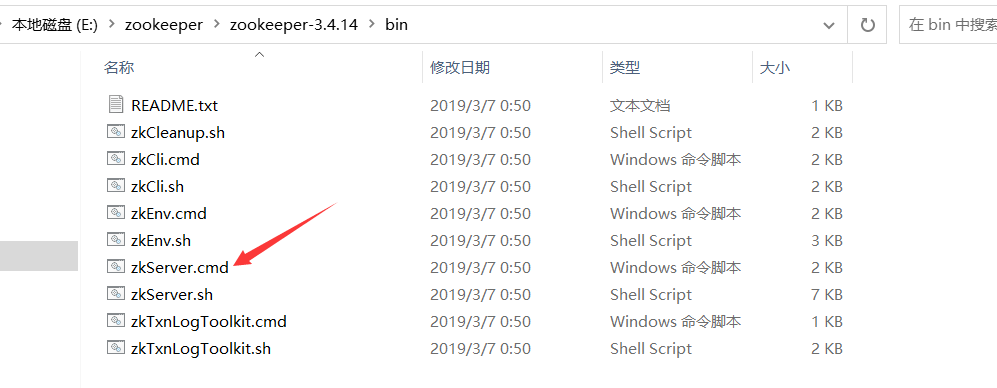
运行provider-service项目
地址前输入cmd运行jar包
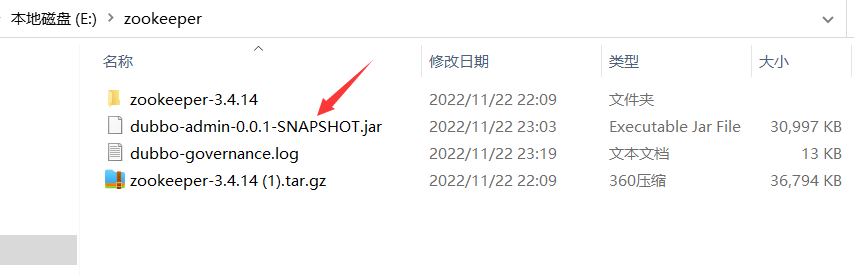
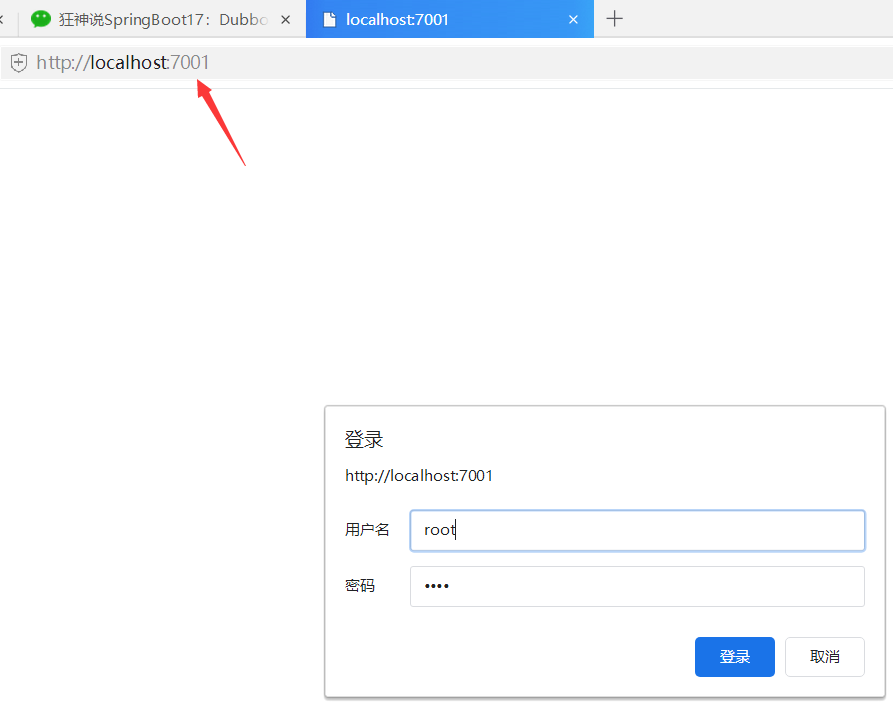
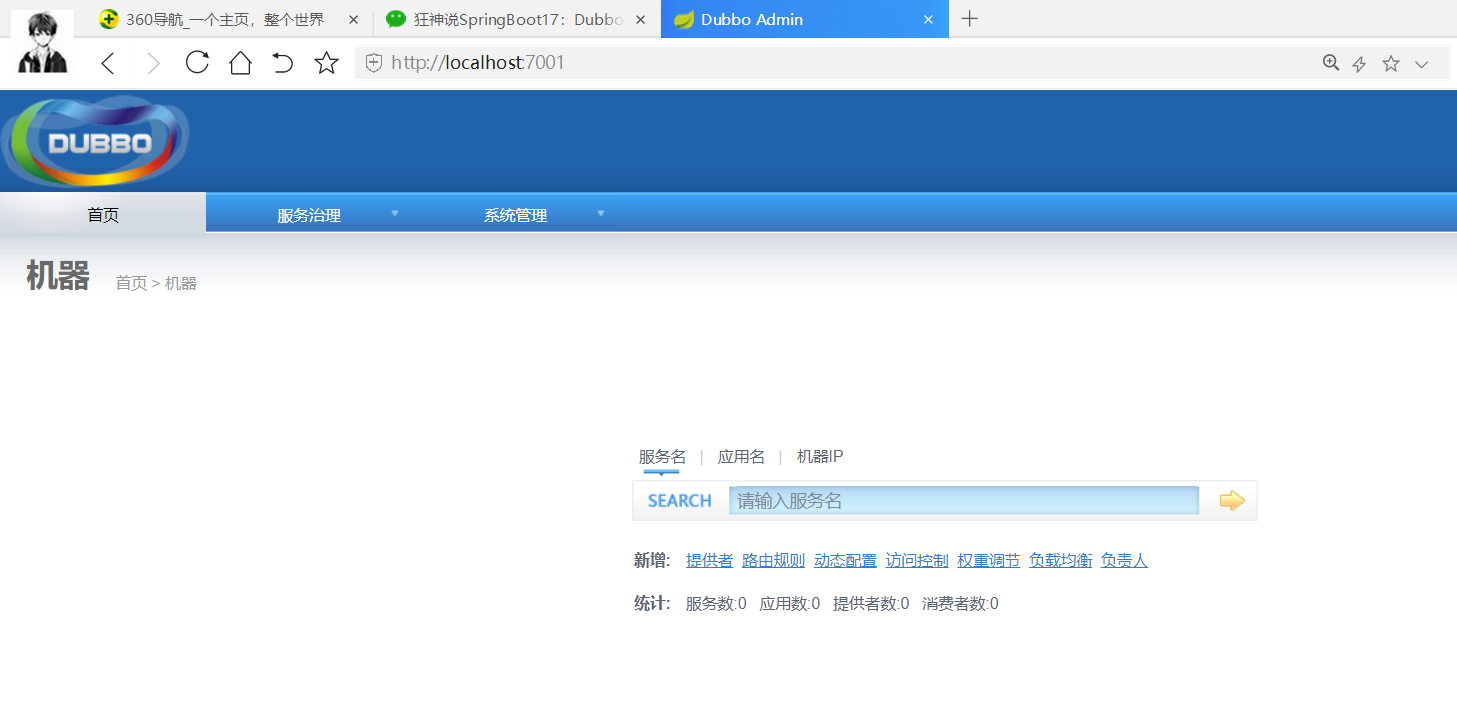
配置错误。。。。。

 浙公网安备 33010602011771号