
Creating and Installing Certificates
-
Certificates Console
To view certificate stores on your local machine use the MMC snap-in tool.
1. From the Start menu select Run and type mmc.exe. Click OK to launch the MMC console.
2. From the File menu select Add/Remove Snap-in. Click Add from the dialog and select Certificates from the Add Standalone Snap-in dialog.
Click Add, select My user account and Finish. Click Add again and select Computer account. Click Next and then Finish. Close the Add Standalone Snap-in dialog. Click OK on the Add/Remove Snap-in dialog.
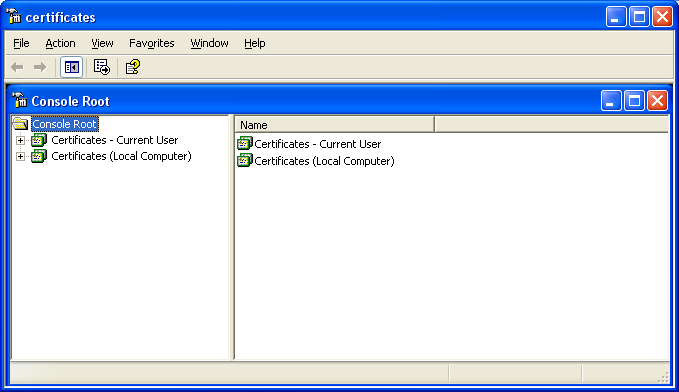
3. Save the Certificates snap-in settings to a file. From the File menu select Save. Name the file certificates.msc. You should see the console shown here:
4. To re-open this console repeat step #1 and open the certificates.msc file.
-
Importing Certificates
To import certificates do the following:
1. Expand the certificate store and the folder specified in the table above.
2. Right-click on the Certificates folder in the hierarchy and select All TasksImport
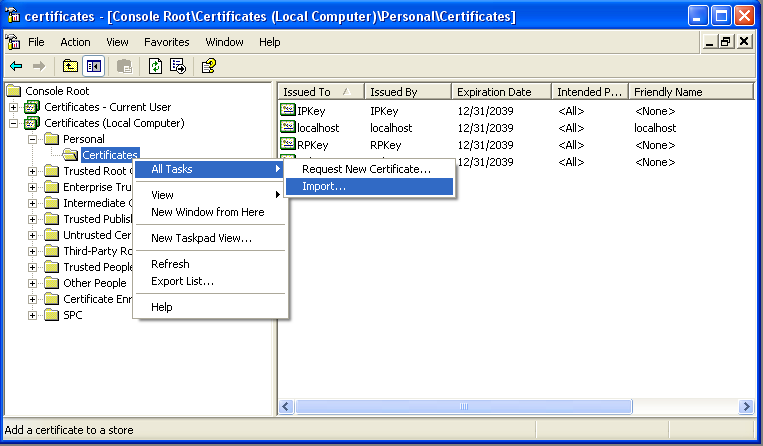
3. Follow the wizard steps. Browse for the certificate file in the \Certificates directory supplied with the sample code. When browsing for .pfx files, change the "Files of type" selection to *.pfx instead of *.cer.
Provide the password "indigo" for private key pairs and do not mark the keys as exportable.
- Generating Certificates
Samples expect you to be using the certificates provided. Still, you may want to create your own certificates for future work, or you may need to create a test certificate for SSL that matches your machine or the domain name of your default web site. These instructions explain how you can use makecert.exe to create test certificates.
1. Launch the Visual Studio command line and type the instructions in the code to follow to generate a certificate named "localhost".
Naming the certificate "localhost" allows you to use it for local testing on your machine. The SSL certificate must be named the same as the web site. You can rename "localhost" to your machine or domain name if necessary. makecert -r -pe -n CN=localhost -ss my -sr currentuser -sky exchange -sp "Microsoft RSA SChannel Cryptographic Provider" -sy 12 c:\localhost.cer The certificate will be generated in the CurrentUser store, but you will want to install it in the LocalMachine store for SSL.
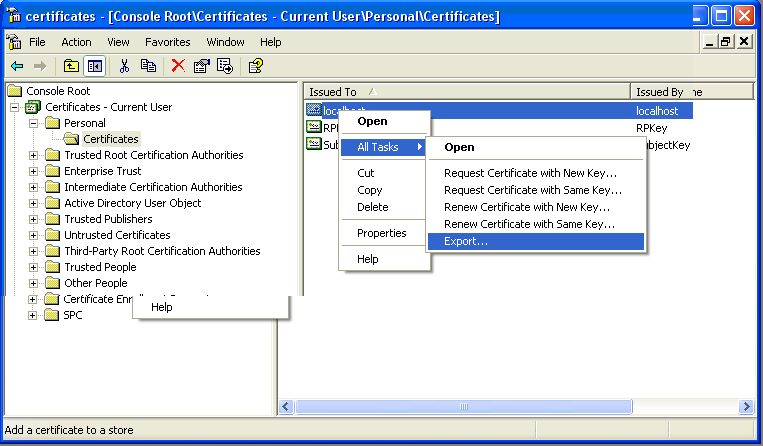
2. Since the certificate is generated to enable exporting the private key, you can export it using the Certificates console. Expand the CurrentUserPersonal store, and selecting All TasksExport
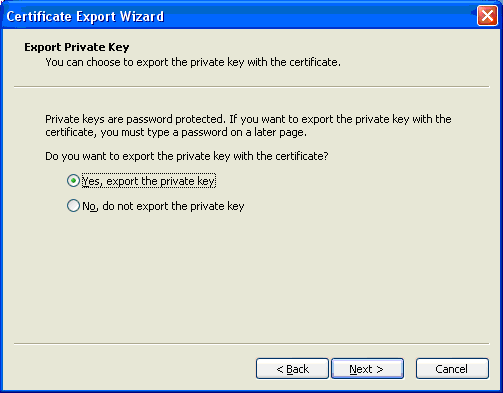
3. From the wizard, select "Yes, export the private key". Click Next.
4. Select "Delete the private key if the export is successful". Click Next.

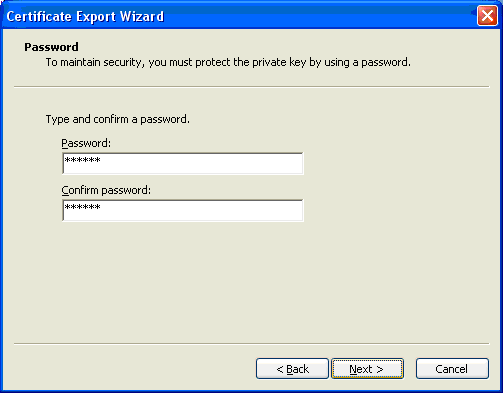
5. Provide a password to protect the key. Click Next.
6. Select a filename for the key pair with a .pfx extension

-
Installing SSL Certificates
Some samples rely on SSL-enabled web sites. This requires you to attach a certificate to your default web site in IIS. This section discusses how to install the localhost certificate provided in the even you do not have a certificate already installed. You can skip this step if you already have an SSL certificate.
1. First, import the localhost.pfx certificate as instructed in earlier sections.
2. Open the console for Internet Information Services (IIS) from Control PanelAdministrative Tools.
3. Right-click on the default web site node and select Properties.
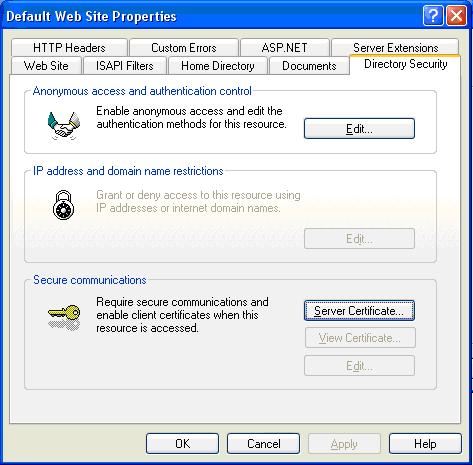
4. From the Directory Security tab select Server Certificate.
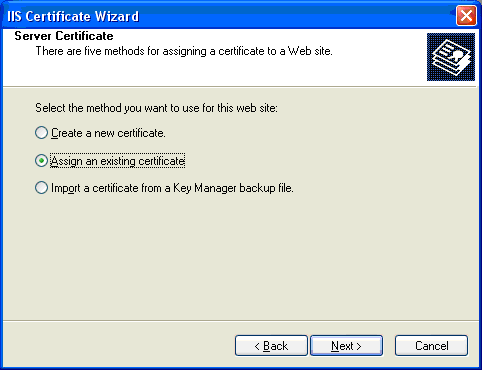
5. Select "Assign an existing certificate" and click Next.
6. Certificates installed to the LocalMachinePersonal store will be presented. Select "localhost" and continue


 浙公网安备 33010602011771号