
Linux 服务器升级 openssh9.8
2024年7月1日,openssh 发布了最新版 9.8,但是下载最新版openssh9.8,也需要将 openssl 也一并进行升级。
一、下载 openssh 最新版本与 openssl 对应版本
openssh 最新版本下载地址:https://cdn.openbsd.org/pub/OpenBSD/OpenSSH/portable/

openssl 对应版本下载地址(下载 OpenSSL 1.1.1v)
Release OpenSSL 1.1.1v · openssl/openssl · GitHub

二、 Openssl 安装
-
安装前的检查:
查看 Centos 系统版本信息
[root@localhost ~]#cat /etc/redhat-release
CentOS Linux release 7.9.2009 (Core)
查看 openssl 版本信息
[root@localhost ~]#openssl version
OpenSSL 1.0.2k-fips  26 Jan 2017
[root@localhost ~]#openssl version
OpenSSL 1.0.2k-fips  26 Jan 2017
查看 ssh 版本信息
[root@localhost ~]#ssh -V
OpenSSH_7.4p1, OpenSSL 1.0.2k-fips  26 Jan 2017
-
注意 openssh9.8p1 要求 openssl 版本大于等于 1.1.1,所以需要先安装openssl。
将 openssl-1.1.1v 解压到 /usr/local 目录下
[root@localhost ~]#ls
anaconda-ks.cfg  openssh-9.8p1.tar.gz  openssl-1.1.1v.tar.gz
[root@localhost ~]#tar xzf openssl-1.1.1v.tar.gz -C /usr/local
查看是否解压到当前目录
[root@localhost ~]#ll /usr/local/ | grep openssl
drwxrwxr-x. 19 root root 4096 Aug  1  2023 openssl-1.1.1v
创建安装目录
[root@localhost ~]#mkdir /opt/openssl
[root@localhost ~]#ll /opt/openssl/
total 0
进入 openssl-1.1.1v 目录
[root@localhost ~]#cd /usr/local/openssl-1.1.1v/
[root@localhost /usr/local/openssl-1.1.1v]#ls
ACKNOWLEDGEMENTS  AUTHORS     config          Configure     demos    e_os.h    fuzz     LICENSE  NOTES.ANDROID  NOTES.UNIX  os-dep         README.FIPS  tools  wycheproof
apps              build.info  config.com      CONTRIBUTING  doc      external  include  ms       NOTES.DJGPP    NOTES.VMS   README         ssl          util
appveyor.yml      CHANGES     Configurations  crypto        engines  FAQ       INSTALL  NEWS     NOTES.PERL     NOTES.WIN   README.ENGINE  test         VMS
预编译之前的依赖
[root@localhost /usr/local/openssl-1.1.1v]#yum -y install pam-devel zlib zlib-devel gcc make
配置编译和安装过程 “--prefix=选项配置安装目录”
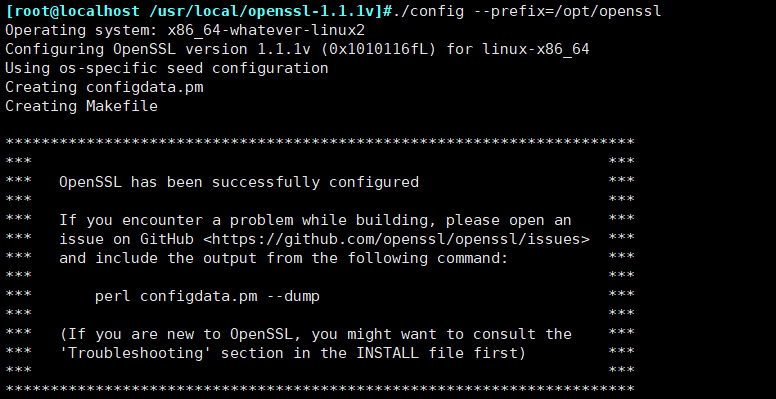
[root@localhost /usr/local/openssl-1.1.1v]#./config --prefix=/opt/openssl
Operating system: x86_64-whatever-linux2
You need Perl 5.

#解决方法
[root@localhost /usr/local/openssl-1.1.1v]#yum -y install perl

重新运行 OpenSSL 配置:
[root@localhost /usr/local/openssl-1.1.1v]#./config --prefix=/opt/openssl
构建程序所需指令和依赖
[root@localhost /usr/local/openssl-1.1.1v]#make
安装编译好的 openssl-1.1.1v
[root@localhost /usr/local/openssl-1.1.1v]#make install
注:上面的几步必须全部没有报错(error)才可以进行下一步,无报错才视为安装成功。
-
更新lib文件
检查 openssl-1.1.1v 所需要的函数库
[root@localhost /usr/local/openssl-1.1.1v]#ldd /opt/openssl/bin/openssl
    linux-vdso.so.1 =>  (0x00007ffe9a9b3000)
    libssl.so.1.1 => not found
    libcrypto.so.1.1 => not found
    libdl.so.2 => /lib64/libdl.so.2 (0x00007fa74317a000)
    libpthread.so.0 => /lib64/libpthread.so.0 (0x00007fa742f5e000)
    libc.so.6 => /lib64/libc.so.6 (0x00007fa742b90000)
    /lib64/ld-linux-x86-64.so.2 (0x00007fa74337e000)
添加 openssl-1.1.1v 的库文件路径到 ld.so.conf
[root@localhost /usr/local/openssl-1.1.1v]#echo "/opt/openssl/lib" >> /etc/ld.so.conf
更新系统函数库
[root@localhost /usr/local/openssl-1.1.1v]# ldconfig --verbose
查看旧版本的 openssl 命令路径
[root@localhost /usr/local/openssl-1.1.1v]#which openssl
/usr/bin/openssl
重名了为 openssl.old
[root@localhost /usr/local/openssl-1.1.1v]#mv /bin/openssl /bin/openssl.old
使用软连接的方式更新 openssl 命令
[root@localhost /usr/local/openssl-1.1.1v]#ln -s /opt/openssl/bin/openssl /bin/openssl
查看 openssl 版本
[root@localhost /usr/local/openssl-1.1.1v]#openssl version
OpenSSL 1.1.1v  1 Aug 2023
三、Openssh9.8 安装
-
解压下载的安装包,卸载原来包
[root@localhost ~]#tar xzf openssh-9.8p1.tar.gz
卸载 openssh 的 rpm 包
[root@localhost ~]#for i in $(rpm -qa | grep openssh);do rpm -e $i --nodeps;done
-
配置解压文件,开始编译
[root@localhost ~]#ls
anaconda-ks.cfg  openssh-9.8p1  openssh-9.8p1.tar.gz  openssl-1.1.1v.tar.gz
[root@localhost ~]#cd openssh-9.8p1
配置编译和安装过程,"--prefix=" 配置安装目录,"--sysconfdir=" 配置文件路径,"--with-ssl-dir=" openssl 的安装路径
[root@localhost ~/openssh-9.8p1]#./configure --prefix=/usr/local/openssh --sysconfdir=/etc/ssh --with-pam --with-ssl-dir=/opt/openssl --with-md5-passwords --mandir=/usr/share/man --with-zlib=/usr/local/zlib --without-hardening
构建程序所需指令和依赖关系
[root@localhost ~/openssh-9.8p1]#make
安装并编译 openssh9.8p1
[root@localhost ~/openssh-9.8p1]# make install
注:上面的几步必须全部没有报错(error)才可以进行下一步,无报错才视为安装成功。
四、修改启动 sshd,init 脚本
从源码目录下复制 sshd.init 到 /etc/init.d/
[root@localhost ~/openssh-9.8p1]#cp /root/openssh-9.8p1/contrib/redhat/sshd.init /etc/init.d/
查看并修改 sshd 的新路径,将新的 openssh 安装路径更新
[root@localhost ~/openssh-9.8p1]#cat /etc/init.d/sshd.init | grep sshd
# processname: sshd
# config: /etc/ssh/sshd_config
# pidfile: /var/run/sshd.pid
[ -f /etc/sysconfig/sshd ] && . /etc/sysconfig/sshd
prog="sshd"
SSHD=/usr/sbin/sshd
PID_FILE=/var/run/sshd.pid
    [ $RETVAL -eq 0 ] && touch /var/lock/subsys/sshd
    [ $RETVAL -eq 0 ] && rm -f /var/lock/subsys/sshd
        if [ -f /var/lock/subsys/sshd ] ; then
[root@localhost ~/openssh-9.8p1]#sed -i "s/SSHD=\/usr\/sbin\/sshd/SSHD=\/usr\/local\/openssh\/sbin\/sshd/g" /etc/init.d/sshd.init
[root@localhost ~/openssh-9.8p1]#cat /etc/init.d/sshd.init | grep sshd
# processname: sshd
# config: /etc/ssh/sshd_config
# pidfile: /var/run/sshd.pid
[ -f /etc/sysconfig/sshd ] && . /etc/sysconfig/sshd
prog="sshd"
SSHD=/usr/local/openssh/sbin/sshd
PID_FILE=/var/run/sshd.pid
[ $RETVAL -eq 0 ] && touch /var/lock/subsys/sshd
[ $RETVAL -eq 0 ] && rm -f /var/lock/subsys/sshd
if [ -f /var/lock/subsys/sshd ] ; then
查看并修改 ssh-keygen 的新路径,将新的 ssh-keygen 安装路径更新
[root@localhost ~/openssh-9.8p1]#cat -n /etc/init.d/sshd.init | grep ssh-keygen
    41        /usr/bin/ssh-keygen -A
[root@localhost ~/openssh-9.8p1]#sed -i "s#/usr/bin/ssh-keygen -A#/usr/local/openssh/bin/ssh-keygen -A#g" /etc/init.d/sshd.init
[root@localhost ~/openssh-9.8p1]#cat -n /etc/init.d/sshd.init | grep ssh-keygen
    41        /usr/local/openssh/bin/ssh-keygen -A
五、启动 openssh,并设置开机启动
复制 ssh 的相关命令
[root@localhost ~/openssh-9.8p1]#cp -arp /usr/local/openssh/bin/* /usr/bin
启动ssh服务
[root@localhost ~/openssh-9.8p1]#/etc/init.d/sshd.init
Usage: /etc/init.d/sshd.init {start|stop|restart|reload|condrestart|status}

#启动
[root@localhost ~/openssh-9.8p1]#/etc/init.d/sshd.init start
Reloading systemd: [ OK ]
Starting sshd.init (via systemctl): [ OK ]
[root@localhost ~/openssh-9.8p1]#/etc/init.d/sshd.init status
● sshd.init.service - SYSV: OpenSSH server daemon
Loaded: loaded (/etc/rc.d/init.d/sshd.init; bad; vendor preset: disabled)
Active: active (running) since Thu 2025-09-04 04:47:32 CST; 2s ago
Docs: man:systemd-sysv-generator(8)
Process: 22135 ExecStart=/etc/rc.d/init.d/sshd.init start (code=exited, status=0/SUCCESS)
Main PID: 22143 (sshd)
CGroup: /system.slice/sshd.init.service
└─22143 sshd: /usr/local/openssh/sbin/sshd [listener] 0 of 10-100 startups
Sep 04 04:47:32 localhost.localdomain systemd[1]: Starting SYSV: OpenSSH server daemon...
Sep 04 04:47:32 localhost.localdomain sshd.init[22135]: /sbin/restorecon: lstat(/etc/ssh/ssh_host_dsa_key.pub) failed: No such file or directory
Sep 04 04:47:32 localhost.localdomain sshd[22143]: Server listening on 0.0.0.0 port 22.
Sep 04 04:47:32 localhost.localdomain sshd[22143]: Server listening on :: port 22.
Sep 04 04:47:32 localhost.localdomain sshd.init[22135]: Starting sshd:[ OK ]
Sep 04 04:47:32 localhost.localdomain systemd[1]: Started SYSV: OpenSSH server daemon.
查看版本
[root@localhost ~/openssh-9.8p1]#ssh -V
OpenSSH_9.8p1, OpenSSL 1.1.1v  1 Aug 2023
添加开机启动
[root@localhost ~/openssh-9.8p1]#chmod +x /etc/rc.d/rc.local
[root@localhost ~/openssh-9.8p1]#echo "/etc/init.d/sshd.init start" >> /etc/rc.d/rc.local
报错解决
如果启动不成功,通过命令查看,是什么原因导致的
#通过 systemctl status sshd 查看 sshd 是否正常启动
[root@localhost ~/openssh-9.8p1]#systemctl status sshd
如果执行上边命令也不可以,那么需要执行:
[root@localhost ~/openssh-9.8p1]#yum install -y openssh-server
执行后,如果显示 activing 或者 dead 没有正常启动,那么需要执行命令,查看具体异常原因:
[root@localhost ~/openssh-9.8p1]#tail -f /var/log/messages
报错二:
[root@localhost ~/openssh-9.8p1]#vi /etc/ssh/sshd_config #sshd配置文件
阿里云解决方案(参考):
通过SSH客户端登录Linux实例时提示“Permission denied, please try again”错误怎么办?_云服务器 ECS(ECS)-阿里云帮助中心
博客原文:https://blog.csdn.net/weixin_48545201/article/details/140803762

 浙公网安备 33010602011771号