
docker网络及Dockerfile
1.制作镜像
使用阿里的yum源,网址:https://opsx.alibaba.com/mirror,或者mirrors.aliyun.com,点击帮助,就会有弹框出来.
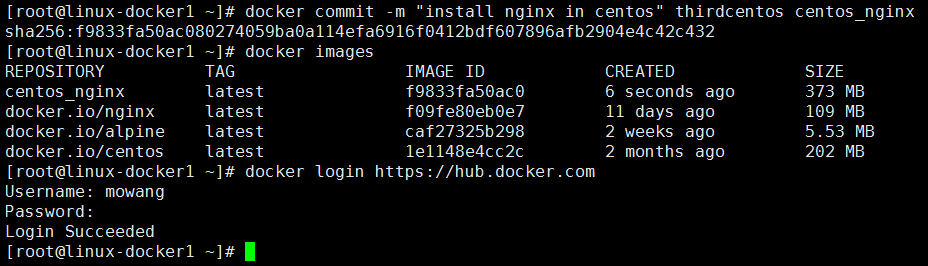
docker pull centos  # 最好有加速器,要不然下载速度太慢
docker run -it --name thirdcentos centos bash  # 发现进入容器之后,不让我删之前那些*.repo,正好说明镜像的只读特性
yum -y install wget
wget -O /etc/yum.repos.d/CentOS-Base.repo http://mirrors.aliyun.com/repo/Centos-7.repo
wget -O /etc/yum.repos.d/epel.repo http://mirrors.aliyun.com/repo/epel-7.repo
yum -y install nginx

docker commit -m "install nginx in centos" thirdcentos centos_nginx
commit参数说明-a:作者信息,-m:提交消息,-p:提交时暂停容器运行.
thirdcentos是正在运行的容器名;
centos_nginx是新镜像的名字,刚下载好的centos是202MB,安装了一个nginx然后做成镜像,大小是373MB
在https://hub.docker.com上注册一个账号,然后登陆认证
2.上传镜像到docker-hub
cat ~/.docker/config.json
docker search mowang  # 就可以找到我了--docker.io/mowang/taiyangshen
docker tag centos_nginx:latest mowang/taiyangshen:centos_with_nginx
推送到taiyangshen这个仓库里,centos_with_nginx它其实是一个标签,但我一开始没弄懂,这些步骤可以执行,但是不规范,仓库名应该是某个软件名称,如:nginx、mysql、redis等,标签的话应该打上版本号.
docker push mowang/taiyangshen:centos_with_nginx
报错:denied: requested access to the resource is denied
上网找了半天也没找到具体的解决办法,要么是让你写上自己的网站用户名,要么是让你登陆,
# 我的解决办法是:多登陆几次.
第一次推送的时候用的不是上面那条推送命令,导致直接在docker-hub里面创建了一个仓库,然后我想删了它,发现删不掉,This deletes the repository, all the images it contains, and its build settings.This cannot be undone.Please type the name of your repository to confirm deletion: centos_nginx.主要还是英文没看懂,粘贴到有道里面,翻译:请输入存储库的名称以确认删除:centos_nginx,输入之后,点击确定,然后这个仓库就被删了...
3.端口映射
docker run -d --name fourthnginx -P nginx  # -P是随机端口,不实用
在物理机上访问nginx:http://10.0.0.20:32768
docker run -d -p 80:80 --name fifthnginx nginx  # 将宿主机的80端口映射到容器的80
0.0.0.0:80->80/tcp
docker run -d -p 10.0.0.20:80:80 --name fifthnginx nginx
4.单台主机上两个容器的互联
docker run -d --name web1 -p 80:80 nginx
docker run -d --name web2 --link web1:nginx_web1 -p 81:80 nginx
docker ps
CONTAINER ID  IMAGE  COMMAND                  CREATED              STATUS              PORTS                NAMES
b6dbf5c77d01  nginx  "nginx -g 'daemon ..."   4 seconds ago        Up 2 seconds        0.0.0.0:81->80/tcp   web2
20d1687b96b7  nginx  "nginx -g 'daemon ..."   About a minute ago   Up About a minute   0.0.0.0:80->80/tcp   web1

注意:如果不是官方的nginx,则需要加全路径,并写上要执行的命令,如:-p 80:80 my_nginx nginx,前者是镜像名,后者是要执行的命令.
docker exec -it web2 sh
cat /etc/hosts
...
172.17.0.2	nginx_web1 20d1687b96b7 web1
172.17.0.3	b6dbf5c77d01

# 你会发现,nginx官方镜像没有yum、ping等命令,没法用,所以还是用centos官方镜像制作一个nginx镜像
docker run -it --name runcentos centos_nginx bash
# 在/etc/nginx/nginx.conf里加上daemon off,然后制作镜像
docker commit -m "change nginx conf"  runcentos nginx20190217
# 删除所有镜像
docker rm $(docker ps -a -q)

# 然后重复上面的操作
docker run -d --name web1 -p 80:80 nginx20190217 nginx
docker run -d --name web2 --link web1:nginx_web1 -p 81:80 nginx20190217 nginx
docker exec -it web2 sh
ping nginx_web1  # 可以ping通
5.实现跨主机互联
linux-docker1:10.0.0.20,--bip=192.168.58.1/24,容器ip为192.168.58.1,
linux-docker2:10.0.0.21,--bip=192.168.158.1/24,容器ip为192.168.158.1,
在linux-docker1上添加一条静态路由:
route add -net 192.168.158.0/24 gw 10.0.0.21
然后我这是ping不通的,实验失败
6.数据管理
docker run -it --name node --rm -v /opt/:/opt/ nginx20190217 bash
# 挂载文件,默认是rw
docker run -it --name node --rm -v /etc/hosts:/etc/hosts:ro nginx20190217 bash
用-v创建的容器,删除的时候也得加上-v,要不然数据删不了
7.使用Dokcerfile创建镜像
一般而言,Dockerfile分为4个部分:基础镜像信息;维护者信息;镜像操作指令;容器启动时执行指令
cat /root/Dockerfile

#第一行必须指定基于的基础镜像
FROM centos
#维护者信息
MAINTAINER docker_user docker_user@email.com
#相关操作
RUN rpm -ivh https://mirrors.aliyun.com/epel/7/x86_64/Packages/e/epel-release-7-11.noarch.rpm
RUN yum -y install nginx
# add file
ADD index.html /usr/share/nginx/html/index.html
RUN echo "daemon off;" >> /etc/nginx/nginx.conf
# 设置开放端口
EXPOSE 80
# 执行命令
CMD ["nginx"]

echo "<h1>this nginx image is installed by Dockerfile</h1>" >/root/docker/index.html
docker build -t mowang/nginx /root/docker/
8:搭建docker私库
cd /opt/
mkdir auth
docker run --entrypoint htpasswd registry -Bbn mowang root123 > auth/htpasswd
cat auth/htpasswd
mowang:$2y$05$Kk3MuTox9ADV96jmV0ldDe7B5gu/wFT4.9gty7/YBZAbJuL2vir2C

docker run -d -p 6000:5000 --restart=always --name selfregistry -v `pwd`/auth:/auth \
-e "REGISTRY_AUTH=htpasswd" -e "REGISTRY_AUTH_HTPASSWD_REALM=Registry Realm" \
-e "REGISTRY_AUTH_HTPASSWD_PATH=/auth/htpasswd" registry
2e9b302aa9f58148c20e73da8815f40c5dbf4400960aa50ef2392dc5dd9d8f7c
# 可以登录,但是不能登录10.0.0.20:6000,做一下信任即可,下篇博客会写到
docker login 127.0.0.1:6000
9.单机容器编排
pip install docker-compose
cat docker-compose.yml
web1:
  image: nginx
  expose:
    - 80
web2:
  image: nginx
  expose:
    - 80
haproxy:
  image: haproxy
  volumes:
    - /opt/haproxy.cfg:/usr/local/etc/haproxy/haproxy.cfg
  links:
    - web1
    - web2
  ports:
    - "7777:1080"
    - "80:80"
docker-compose中的知识点还是很多的,但讲的并不多,以后有时间会单独写一篇docker-compose的博文.

 浙公网安备 33010602011771号