
springboot生成前后端接口文档
效果:
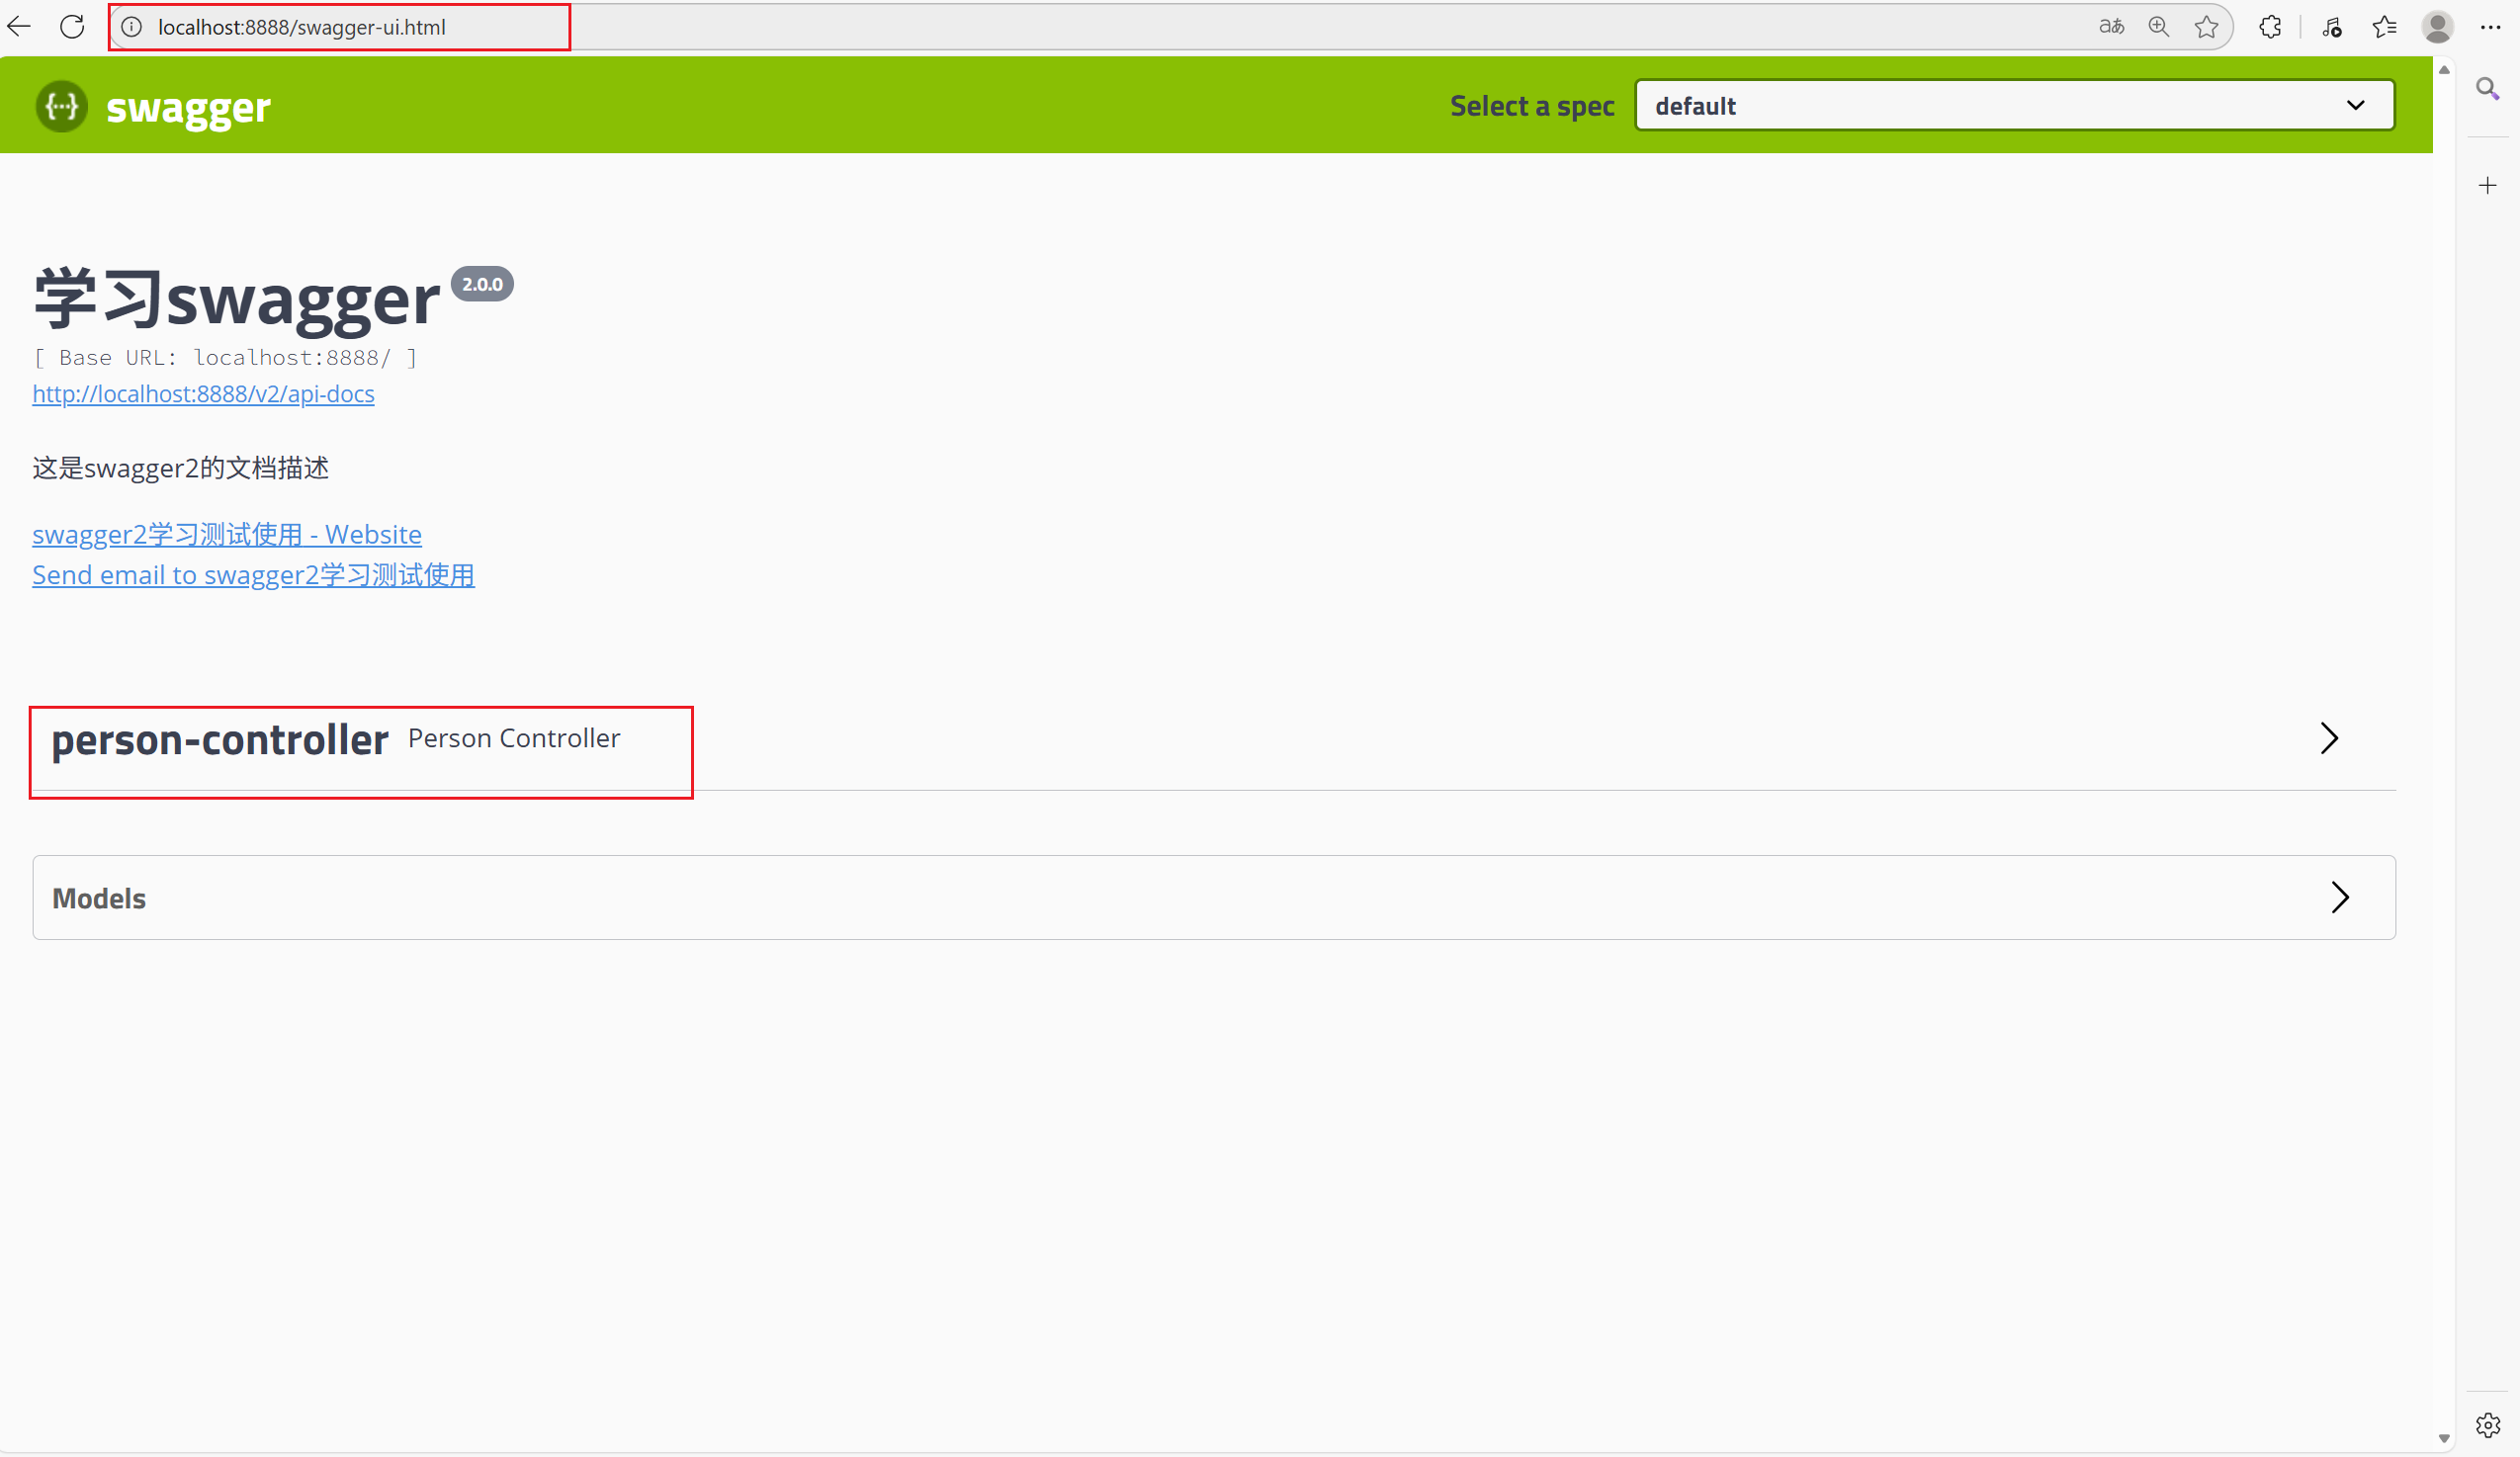
图片中是访问接口文档的路径
一、基本配置
1.pom.xml中导入依赖:(根据需要的版本导入)
<!-- swagger api文档 -->
        <dependency>
            <groupId>io.springfox</groupId>
            <artifactId>springfox-swagger2</artifactId>
            <version>2.7.0</version>
        </dependency>
        <!--swagger ui-->
        <dependency>
            <groupId>io.springfox</groupId>
            <artifactId>springfox-swagger-ui</artifactId>
            <version>2.7.0</version>
        </dependency>
2.在启动类添加注解@EnableSwagger2
package com.xq;

import org.springframework.boot.SpringApplication;
import org.springframework.boot.autoconfigure.SpringBootApplication;
import springfox.documentation.swagger2.annotations.EnableSwagger2;

@SpringBootApplication
@EnableSwagger2//开启对所有控制器的扫描
public class GYMServiceWebApplication {
    public static void main(String[] args) {
        SpringApplication.run(GYMServiceWebApplication.class, args);
    }
}
3.编写配置信息(不重要)
package com.xq.config;
import org.springframework.context.annotation.Bean;
import org.springframework.context.annotation.Configuration;
import springfox.documentation.builders.ApiInfoBuilder;
import springfox.documentation.service.ApiInfo;
import springfox.documentation.service.Contact;
import springfox.documentation.spi.DocumentationType;
import springfox.documentation.spring.web.plugins.Docket;
@Configuration
public class SwaggerConfig{
    /**
     * 创建Docket类型的对象,并使用Spring容器管理
     * Docket是Swagger中的全局配置对象
     * @return
     */
    @Bean
    public Docket getDocket() {
        return new Docket(DocumentationType.SWAGGER_2)
                .apiInfo(swaggerDemoApiInfo())
                .select()
                .build();
    }
    private ApiInfo swaggerDemoApiInfo(){
        return new ApiInfoBuilder()
                .contact(new Contact("JAVA学习社区",
                        "https://www.qq.com",
                        "eric@qq.com")) //配置文档主体内容
//文档标题
                .title("这里是Swagger的标题")
//文档描述
                .description("这里是Swagger的描述")
//文档版本
                .version("1.0.0")
                .build();
    }
}
二、自定义注解和元注解
package com.xq.annotation;


import java.lang.annotation.ElementType;
import java.lang.annotation.Retention;
import java.lang.annotation.RetentionPolicy;
import java.lang.annotation.Target;

/**
 * 编写自定义注解,一定要加上元注解信息,所谓的元注解就是我们再定义注解的时候必须携带的注解信息,参考springmvc的注解。
 * 常见的元注解:
 * @Target:描述的是当前注解需要修饰哪个目标资源.
 *      @Target(ElementType.TYPE) 描述当前注解可以修饰类或接口
 *      @Target(ElementType.FIELD) 当前注解可以修饰成员变量
 *      @Target(ElementType.METHOD)  当前注解可以修饰方法
 *      @Target(ElementType.PARAMETER) 当前注解可以修饰方法参数
 *  ......
 * @Inherited  被修饰的注解具有继承性
 * @Documented  指的是被修饰的注解可以被javadoc工具提取成文档
 * @Retention  定义注解的生命周期(保留策略)
 *      @Retention(RetentionPolicy.SOURCE) 当前注解只会存在源码中,不会被编译,更不会被运行
 *      @Retention(RetentionPplicy.CLASS)  当前注解会参与编译,但是不会参与运行
 *      @Retention(RetentionPolicy.RUNTIME)  当前注解既参与编译,有参与运行,在运行时我们会基于反射的机制获取到该注解信息
 */


@Target({ElementType.METHOD})
@Retention(RetentionPolicy.RUNTIME)
public @interface NoIncludeSwagger {
}
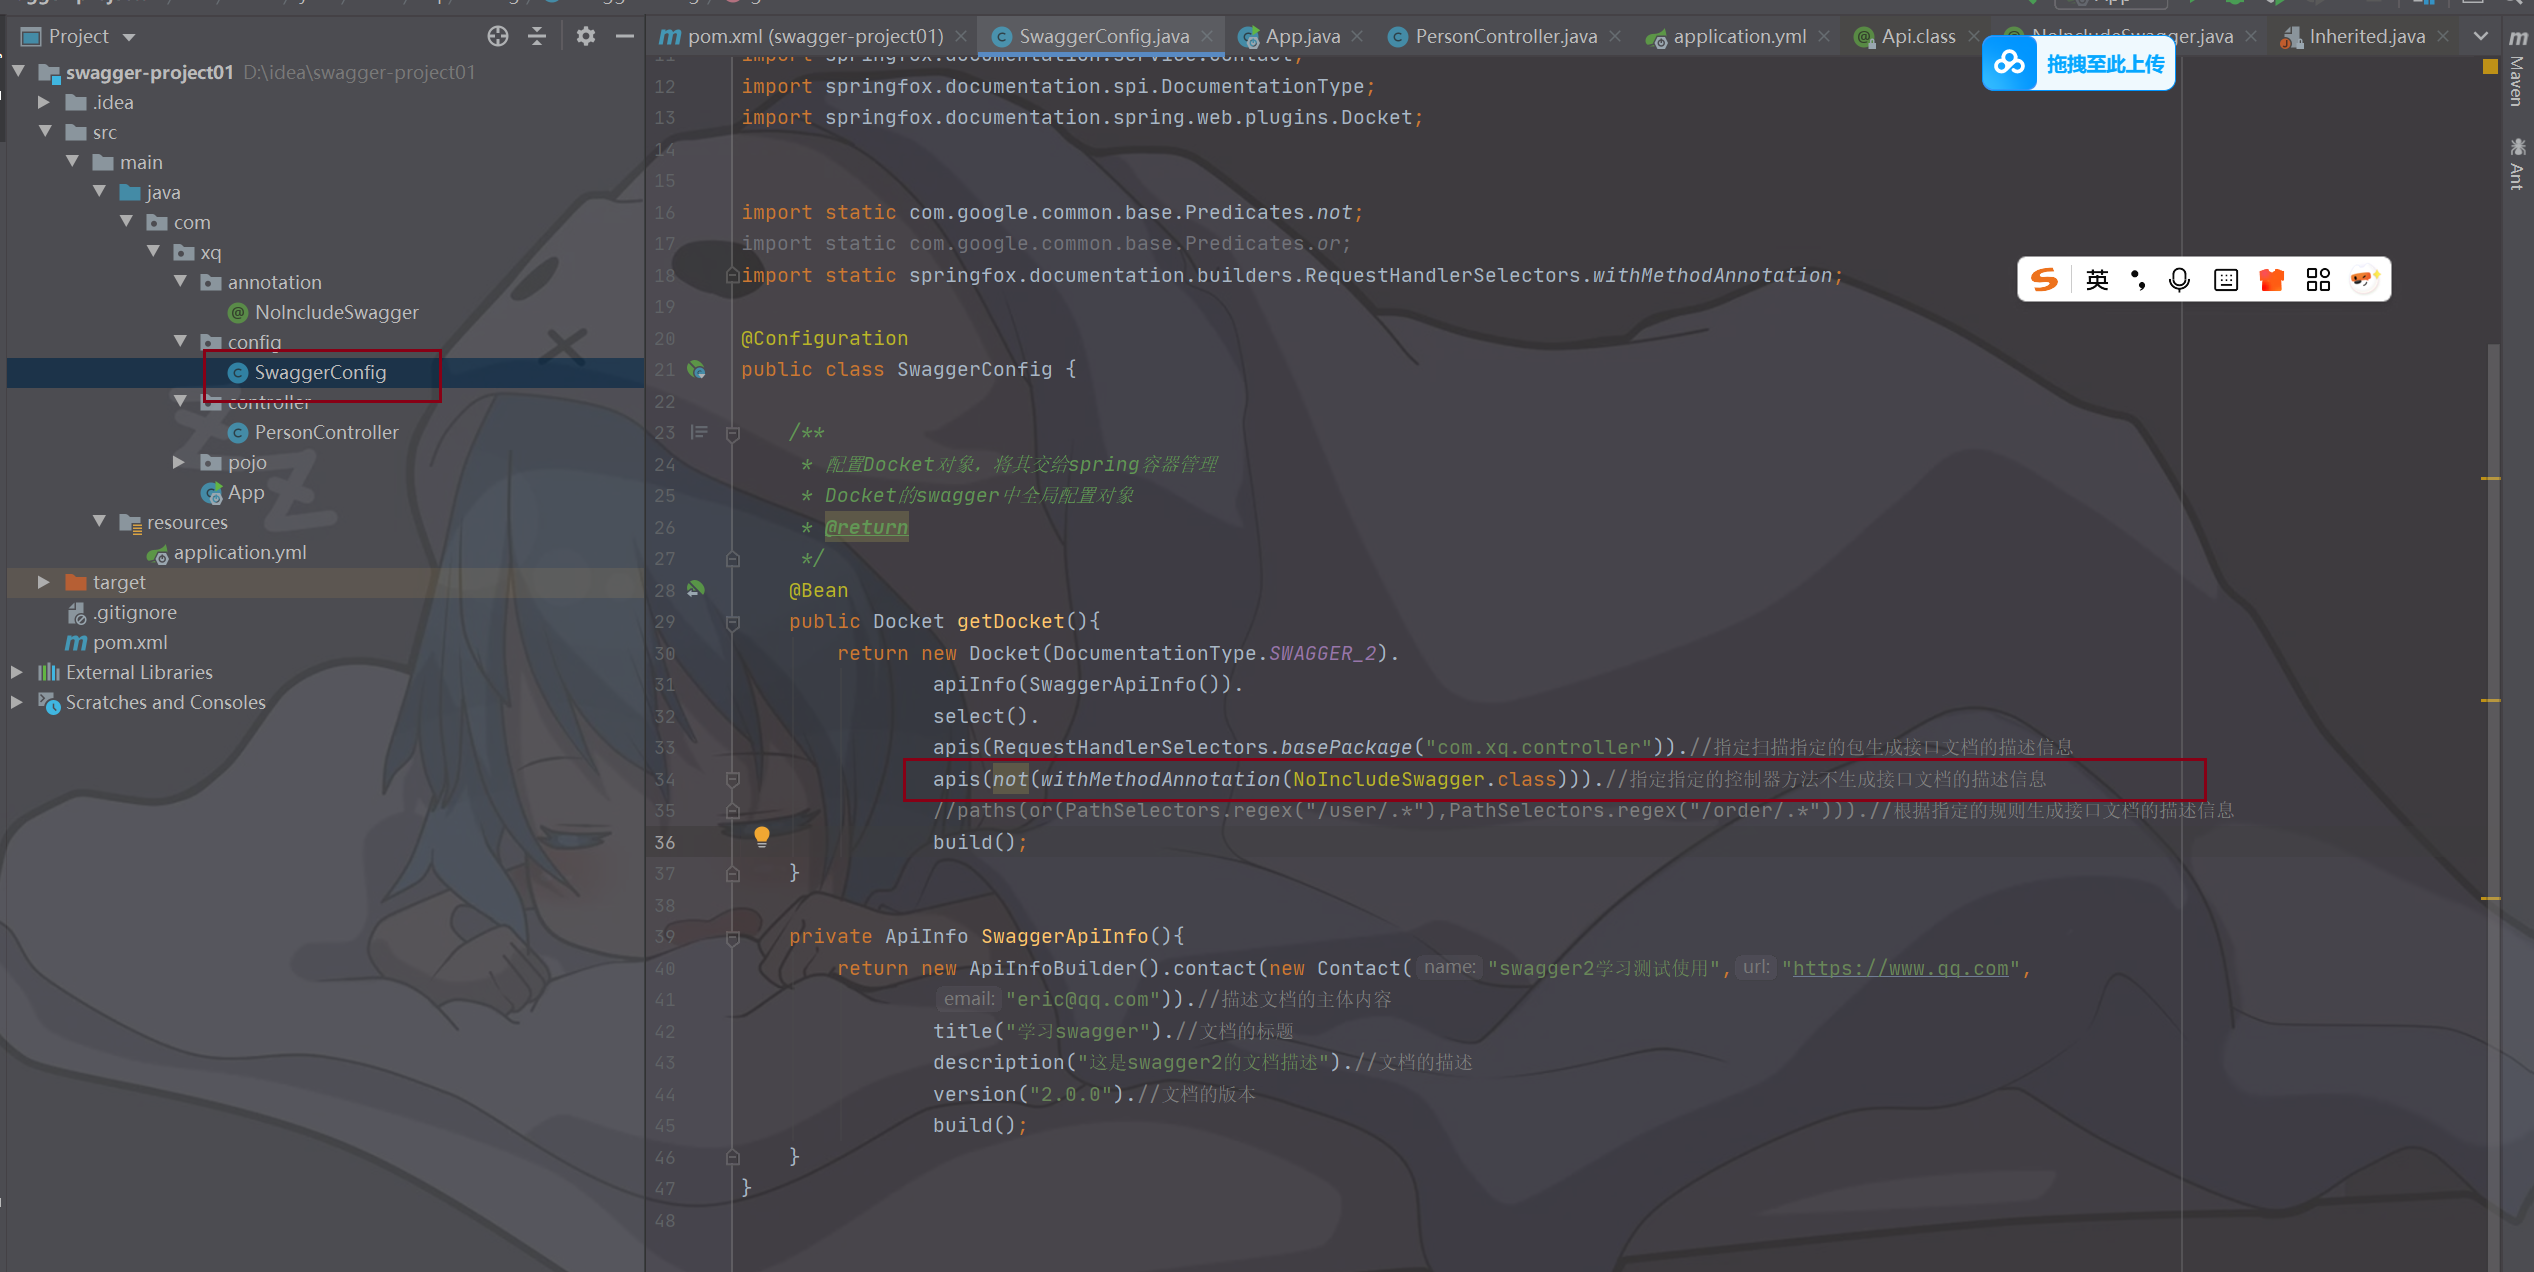
自定义注解如何起作用:(该注解的作用:不需要生成对应控制器方法的接口文档)

 浙公网安备 33010602011771号