


文章开头唠叨两句。
2019年了,而自己参加工作也两年有余了,用一个词来概括这两年多的生活,就是:“碌碌无为”。
也不能说一点收获都没有,但是很少。2019来了,我立志要打破现状,改变自己,突破自我。现在明白了只有不断的学习才能不被淘汰,只有不断的学习才能拿到更高的工资。
言归正传,在今早发现张队在元旦前的博客“年末展望:Oracle 对 JDK收费和.NET Core 给我们的机遇”,说明了以后.net core会越来越好,而我本人在2017年的时候开始接触过.net core的时候,就没有放弃过对.net core的学习,现在觉得微服务是个不错的方向,而自己也在学习这块的东西,所以写个博客记录一下自己的学习的笔记。
我采用的是java的Spring cloud + .net core。
- 先打开idea创建一个Spring boot项目,在pom文件中添加如下maven依赖:
<dependencyManagement>
        <dependencies>
            <dependency>
                <groupId>org.springframework.cloud</groupId>
                <artifactId>spring-cloud-dependencies</artifactId>
                <version>Dalston.SR3</version>
                <type>pom</type>
                <scope>import</scope>
            </dependency>
        </dependencies>
    </dependencyManagement>
    <dependencies>
        <dependency>
            <groupId>org.springframework.cloud</groupId>
            <artifactId>spring-cloud-starter-config</artifactId>
        </dependency>
        <dependency>
            <groupId>org.springframework.cloud</groupId>
            <artifactId>spring-cloud-starter-eureka-server</artifactId>
        </dependency>
    </dependencies>
下载eureka需要的jar包。
- 新建一个《application.properties》配置文件,添加如下几行配置:
server.port=8888 #客户端默认情况下会将自己注册到一个8761的端口,我们修改端口为8888 eureka.client.register-with-eureka=false #默认会把自己当作一个客户端注册到eureka服务,把他设置为false。 eureka.client.fetch-registry=false #默认去抓取注册信息,自己本身是一个eureka服务器,没必要去抓取,应该是客户端去抓取,所以把这个配置设置为false。 - 添加一个启动类。
import org.springframework.boot.autoconfigure.SpringBootApplication;
import org.springframework.boot.builder.SpringApplicationBuilder;
import org.springframework.cloud.netflix.eureka.server.EnableEurekaServer;

@SpringBootApplication
@EnableEurekaServer
public class ServerApp {
    public static void main(String[] args){
        new SpringApplicationBuilder(ServerApp.class).web(true).run(args);
    }
}
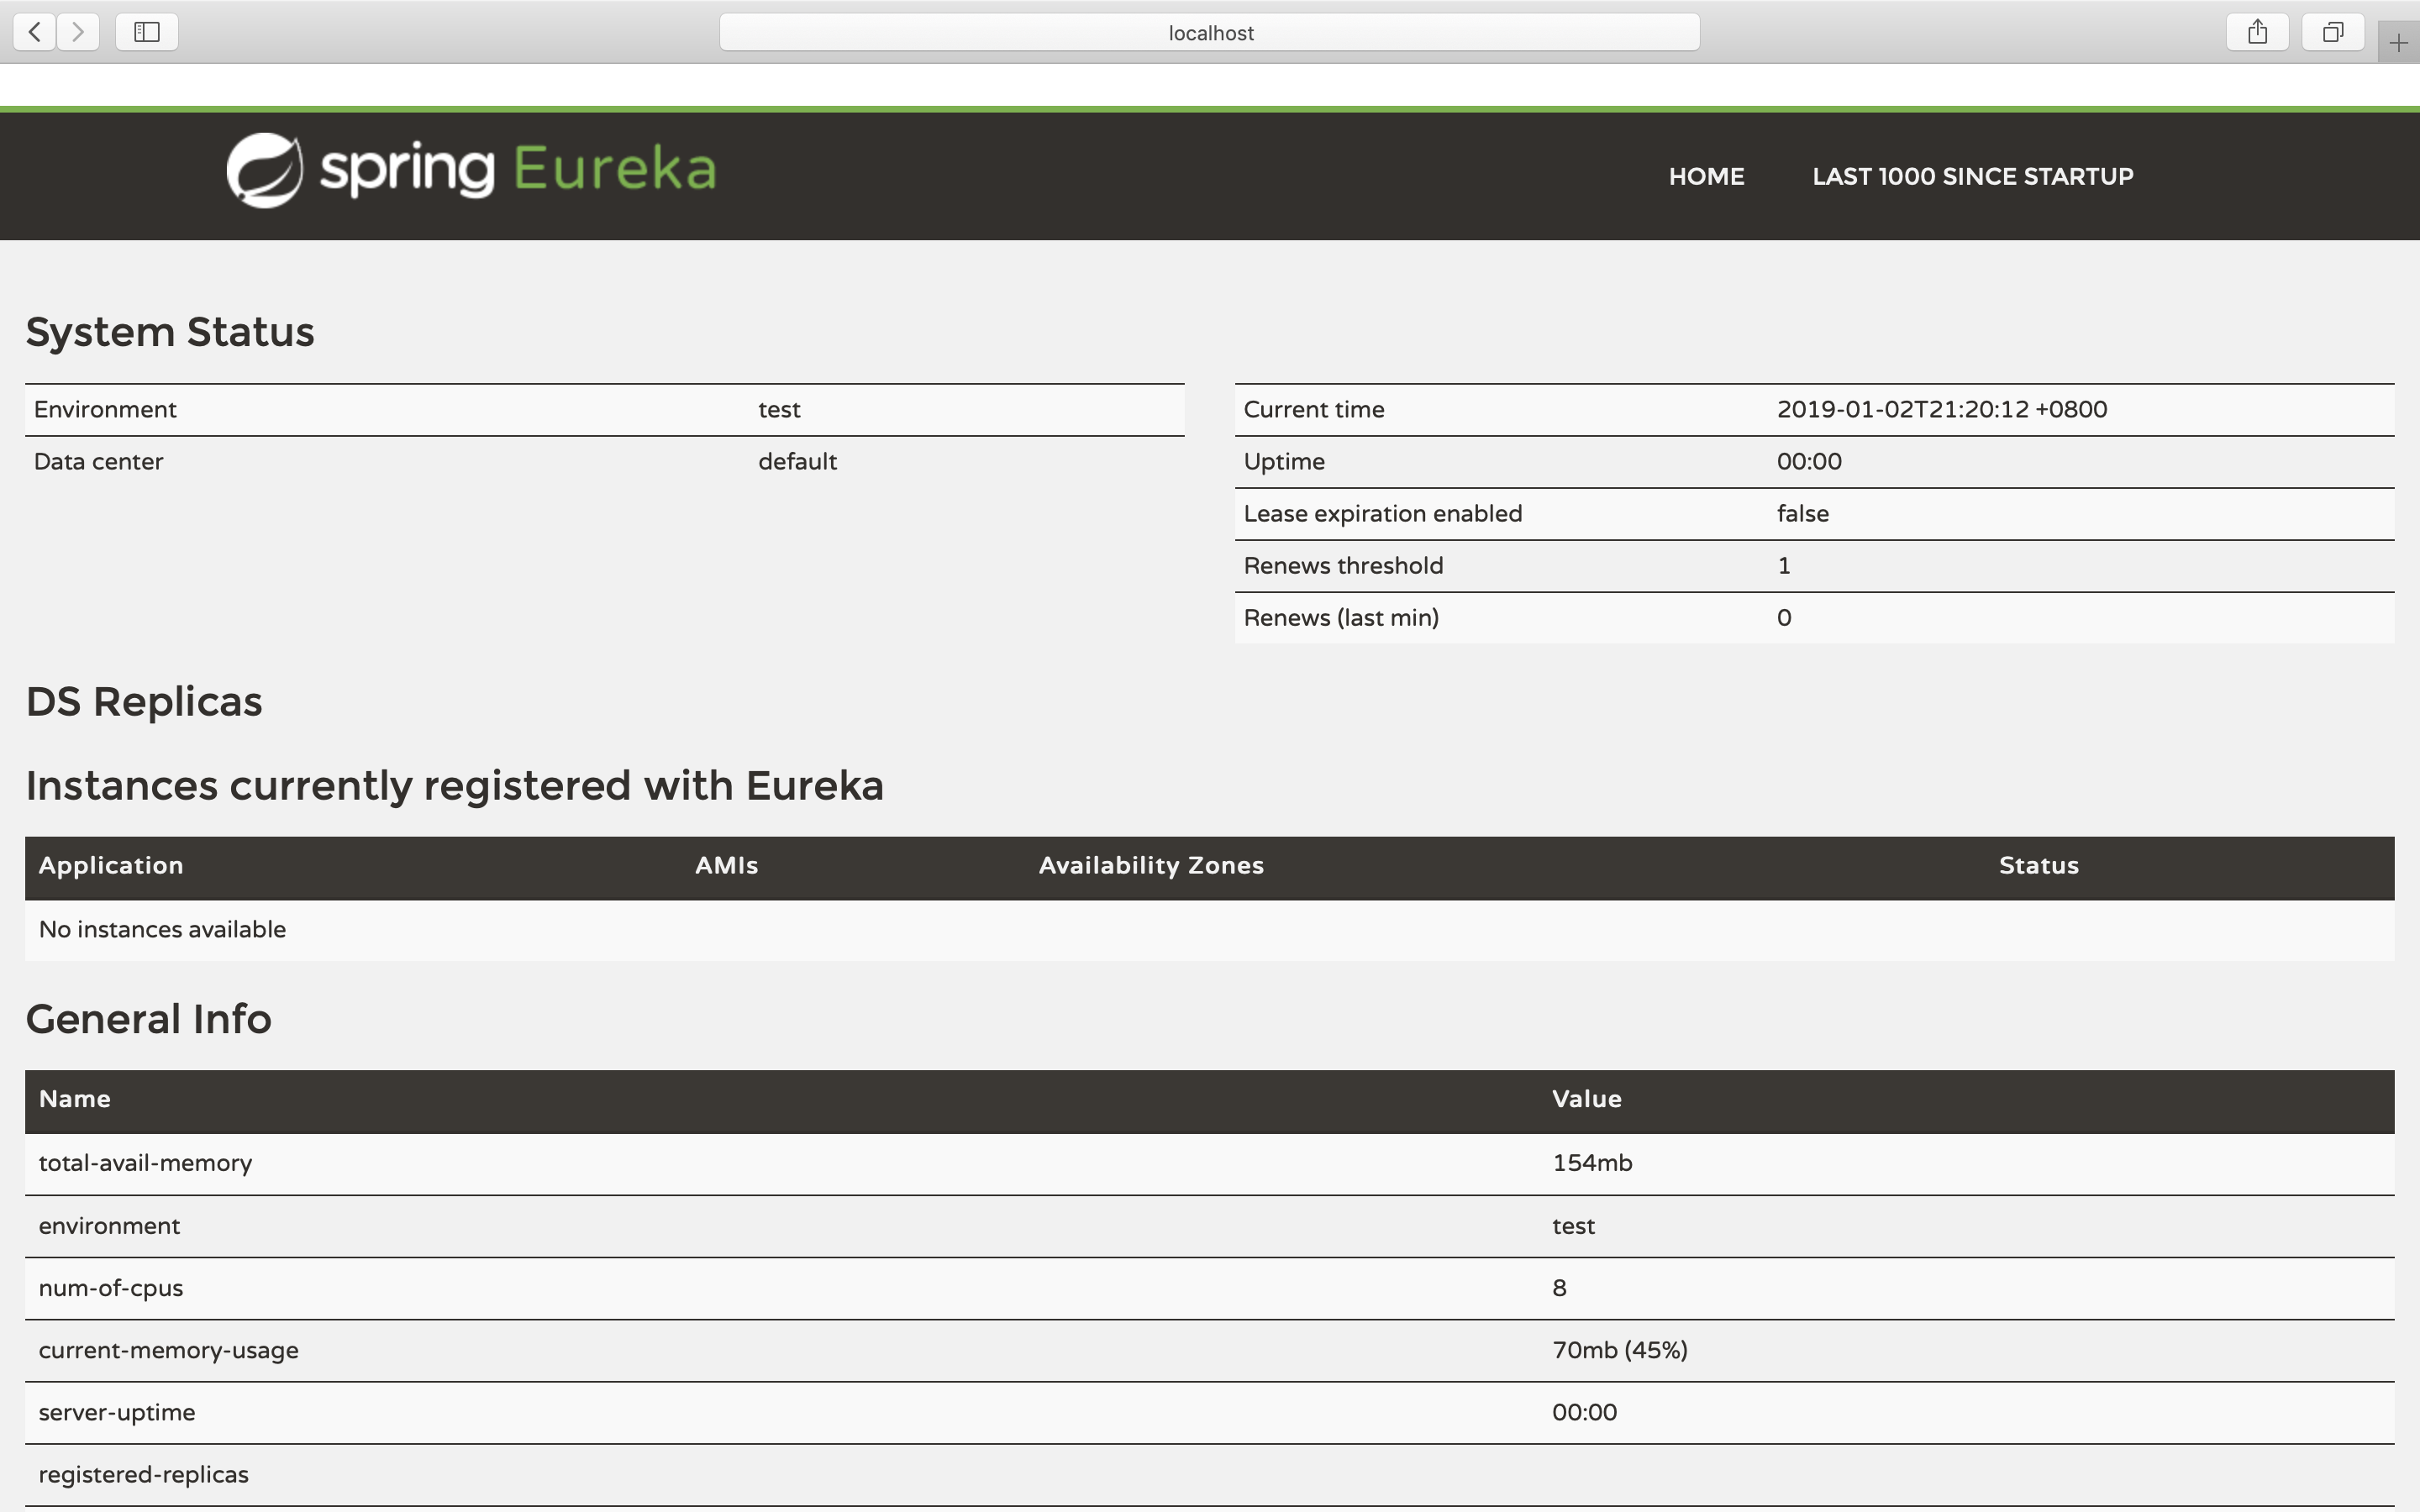
启动这个启动类,然后浏览器里输入:http://localhost:8888(8888是我spring boot的端口),然后看到如下页面,这个时候说明Spring boot eureka服务启动成功。
- 打开vs,创建一个.net core web api项目 ,使用nuget添加Pivotal.Discovery.ClientCore库。
- Startup.cs 中添加
public void ConfigureServices(IServiceCollection services)
        {
            // services.AddDiscoveryClient(Configuration);
            services.AddDiscoveryClient(Configuration);
            services.AddMvc().SetCompatibilityVersion(CompatibilityVersion.Version_2_1);
        }
public void Configure(IApplicationBuilder app, IHostingEnvironment env,ILoggerFactory loggerFactory)
        {
            loggerFactory.AddConsole(Configuration.GetSection("Logging"));
            loggerFactory.AddDebug();
            if (env.IsDevelopment())
            {
                app.UseDeveloperExceptionPage();
            }
            else
            {
                app.UseHsts();
            }
            app.UseDiscoveryClient();
            app.UseHttpsRedirection();
            app.UseMvc();
        }
需要using Pivotal.Discovery.Client;
- 修改端口,
- 打开launchSettings.json
- 修改端口为5000
"Demo": { "commandName": "Project", "launchBrowser": true, "launchUrl": "api/values", "applicationUrl": "http://localhost:5000", "environmentVariables": { "ASPNETCORE_ENVIRONMENT": "Development" }- 打开appsettings.json 添加eureka服务配置
{
  "Logging": {
    "LogLevel": {
      "Default": "Warning"
    }
  },
  "spring":{
    "application":{
      "name":"serviceone"
    }
  },
  "eureka":{
    "client":{
      "serviceUrl":"http://localhost:8888/eureka",
      "shouldFetchRegistry":false,
      "shouldRegisterWithEureka":true
    },
    "instance":{
      "port":5000,
    "hostName": "localhost"
    }
  }
}
- 打开appsettings.json 添加eureka服务配置
- 到此为止我们算是配置完成了一个简单的注册服务的小demo,我们先启动eureka服务,再启动.net core服务。这个时候在eureka服务的页面中发现名字为serviceone的客户端成功注册到了eureka服务中。

参考资料:
备注:最近先更新Spring Cloud知识,之后会使用完整的Spring Cloud + .net core完成一个完整的项目。
下周更新:搭建eureka群集。

 浙公网安备 33010602011771号