

感知节点@5@ ESP32+arduino+ 第三个程序FreeRTOS 上 LED灯显示 和 串口打印ASCII表
思路:
将 LED灯显示 作为 一个独立的 FreeROTS 任务
将串口打印ASCII表 作为 一个独立的 FreeROTS任务将已经调试好的 LED灯显示代码 和 串口打印ASCII表代码 复制使用,放到任务函数中。
1)观看视频,理解FreeROTS 多任务运行,复制程序实例
第二课:
https://www.bilibili.com/video/BV1RB4y1Q7be/?spm_id_from=333.1387.collection.video_card.click&vd_source=25818e6e97754951f67187083c89af5a
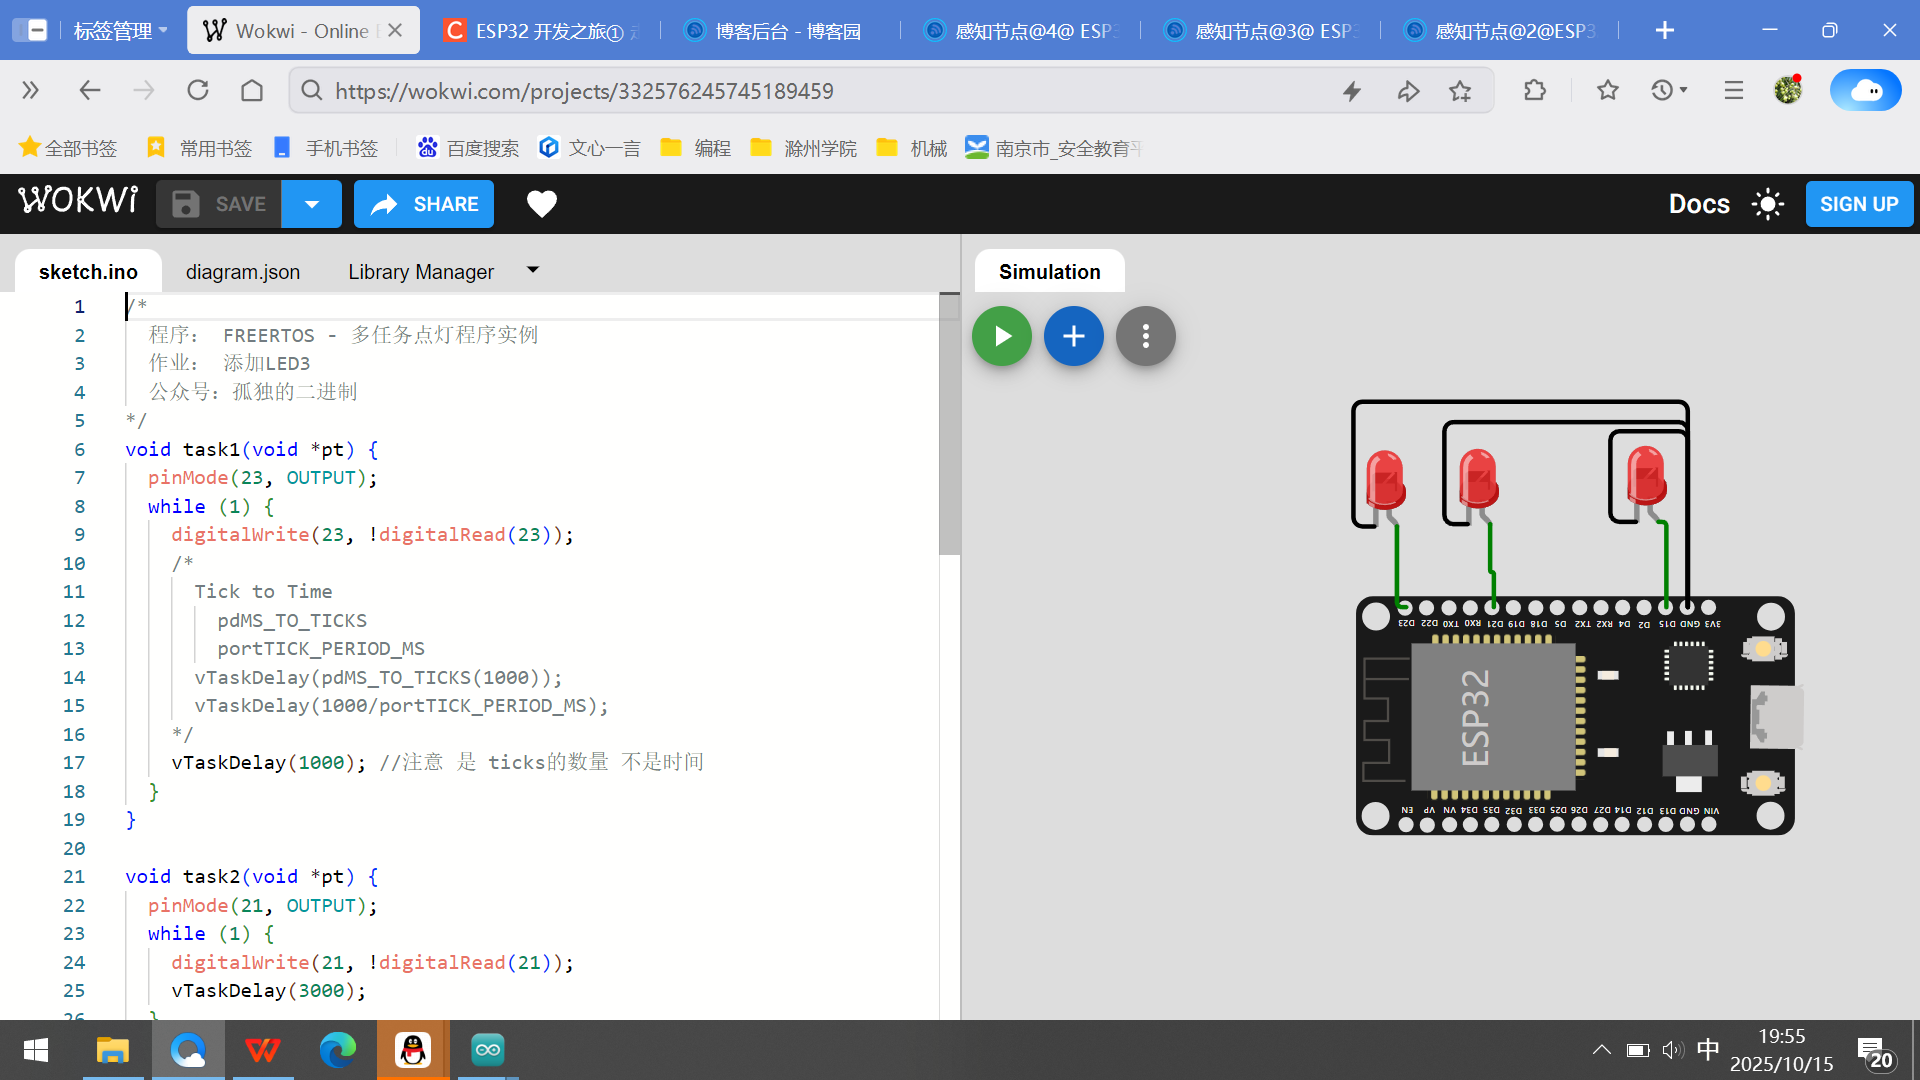
仿真链接:
第二课:程序实例: https://wokwi.com/projects/332576245745189459
2)复制程序实例,并修改初始化和任务函数,实现LED灯显示任务 和 串口打印ASCII表任务
举例将 第二个程序LED灯显示 整合到 FreeRTOS应用程序框架中。
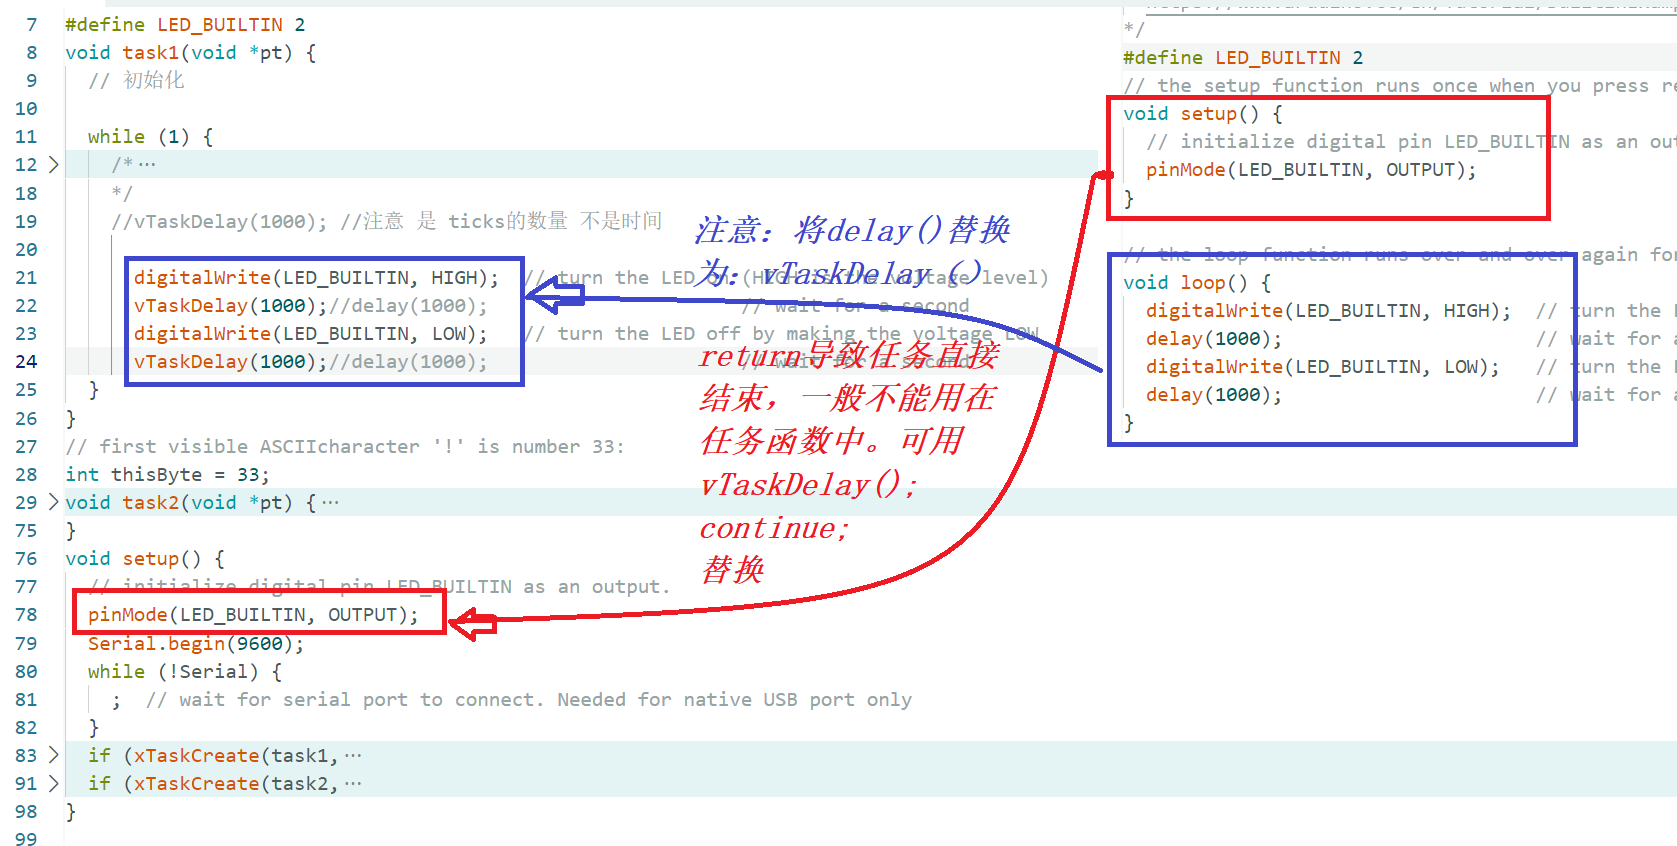
/*
  程序: FREERTOS - 多任务点灯程序实例
  作业: 添加LED3
  公众号:孤独的二进制
*/
//查看电路图,那个ESP32的引脚连接LED灯  图中看到是IO2
#define LED_BUILTIN 2
void task1(void *pt) {
  // 初始化

  while (1) {
    /*
      Tick to Time
        pdMS_TO_TICKS
        portTICK_PERIOD_MS
      vTaskDelay(pdMS_TO_TICKS(1000));
      vTaskDelay(1000/portTICK_PERIOD_MS);
    */
    //vTaskDelay(1000); //注意 是 ticks的数量 不是时间

      digitalWrite(LED_BUILTIN, HIGH);  // turn the LED on (HIGH is the voltage level)
      vTaskDelay(1000);//delay(1000);                      // wait for a second
      digitalWrite(LED_BUILTIN, LOW);   // turn the LED off by making the voltage LOW
      vTaskDelay(1000);//delay(1000);                      // wait for a second
  }
}
// first visible ASCIIcharacter '!' is number 33:
int thisByte = 33;
void task2(void *pt) {
  //pinMode(21, OUTPUT);

  // prints title with ending line break
  Serial.println("ASCII Table ~ Character Map");

  while (1) {
    // digitalWrite(21, !digitalRead(21));
    // vTaskDelay(3000);
  // prints value unaltered, i.e. the raw binary version of the byte.
  // The Serial Monitor interprets all bytes as ASCII, so 33, the first number,
  // will show up as '!'
  Serial.write(thisByte);

  Serial.print(", dec: ");
  // prints value as string as an ASCII-encoded decimal (base 10).
  // Decimal is the default format for Serial.print() and Serial.println(),
  // so no modifier is needed:
  Serial.print(thisByte);
  // But you can declare the modifier for decimal if you want to.
  // this also works if you uncomment it:

  // Serial.print(thisByte, DEC);
  Serial.print(", hex: ");
  // prints value as string in hexadecimal (base 16):
  Serial.print(thisByte, HEX);

  Serial.print(", oct: ");
  // prints value as string in octal (base 8);
  Serial.print(thisByte, OCT);

  Serial.print(", bin: ");
  // prints value as string in binary (base 2) also prints ending line break:
  Serial.println(thisByte, BIN);

  // if printed last visible character '~' or 126, stop:
  if (thisByte == 126) {  // you could also use if (thisByte == '~') {
    // This loop loops forever and does nothing
    while (true) {
      continue;
    }
  }
  // go on to the next character
  thisByte++;

  }
}
void setup() {
  // initialize digital pin LED_BUILTIN as an output.
  pinMode(LED_BUILTIN, OUTPUT);
  Serial.begin(9600);
  while (!Serial) {
    ;  // wait for serial port to connect. Needed for native USB port only
  }
  if (xTaskCreate(task1,
                  "Blink",
                  1024,
                  NULL,
                  1,
                  NULL) == pdPASS)
    Serial.println("Task1 Created.");

  if (xTaskCreate(task2,
                  "ASCII_table",
                  1024,
                  NULL,
                  1,
                  NULL) == pdPASS)
    Serial.println("Task2 Created.");
}

void loop() {
}
3)下载运行代码。观察是否串口打印ASCII表 ,LED闪烁
总结:
可以使用 FreeRTOS将模块程序结成为一个更复杂的系统程序。实现积木式开发。

 浙公网安备 33010602011771号