

Vue生命周期详解
一、什么是生命周期
生命周期就是一个事物从出生到消失的过程。
Vue 实例有一个完整的生命周期,也就是从开始创建、初始化数据、编译模版、挂载 Dom -> 渲染、更新 -> 渲染、卸载等一系列过程。
在Vue的整个生命周期中,它提供了一系列的事件,可以让我们在事件触发时注册js方法,可以让我们用自己注册的js方法控制整个大局,在这些事件响应方法中的this直接指向的是vue的实例。
二、钩子函数
1. 什么是钩子函数
钩子函数是Vue框架中内置的一些函数,随着Vue的生命周期阶段,自动执行。
2. 钩子函数的作用
特定的时间,执行特定的操作。
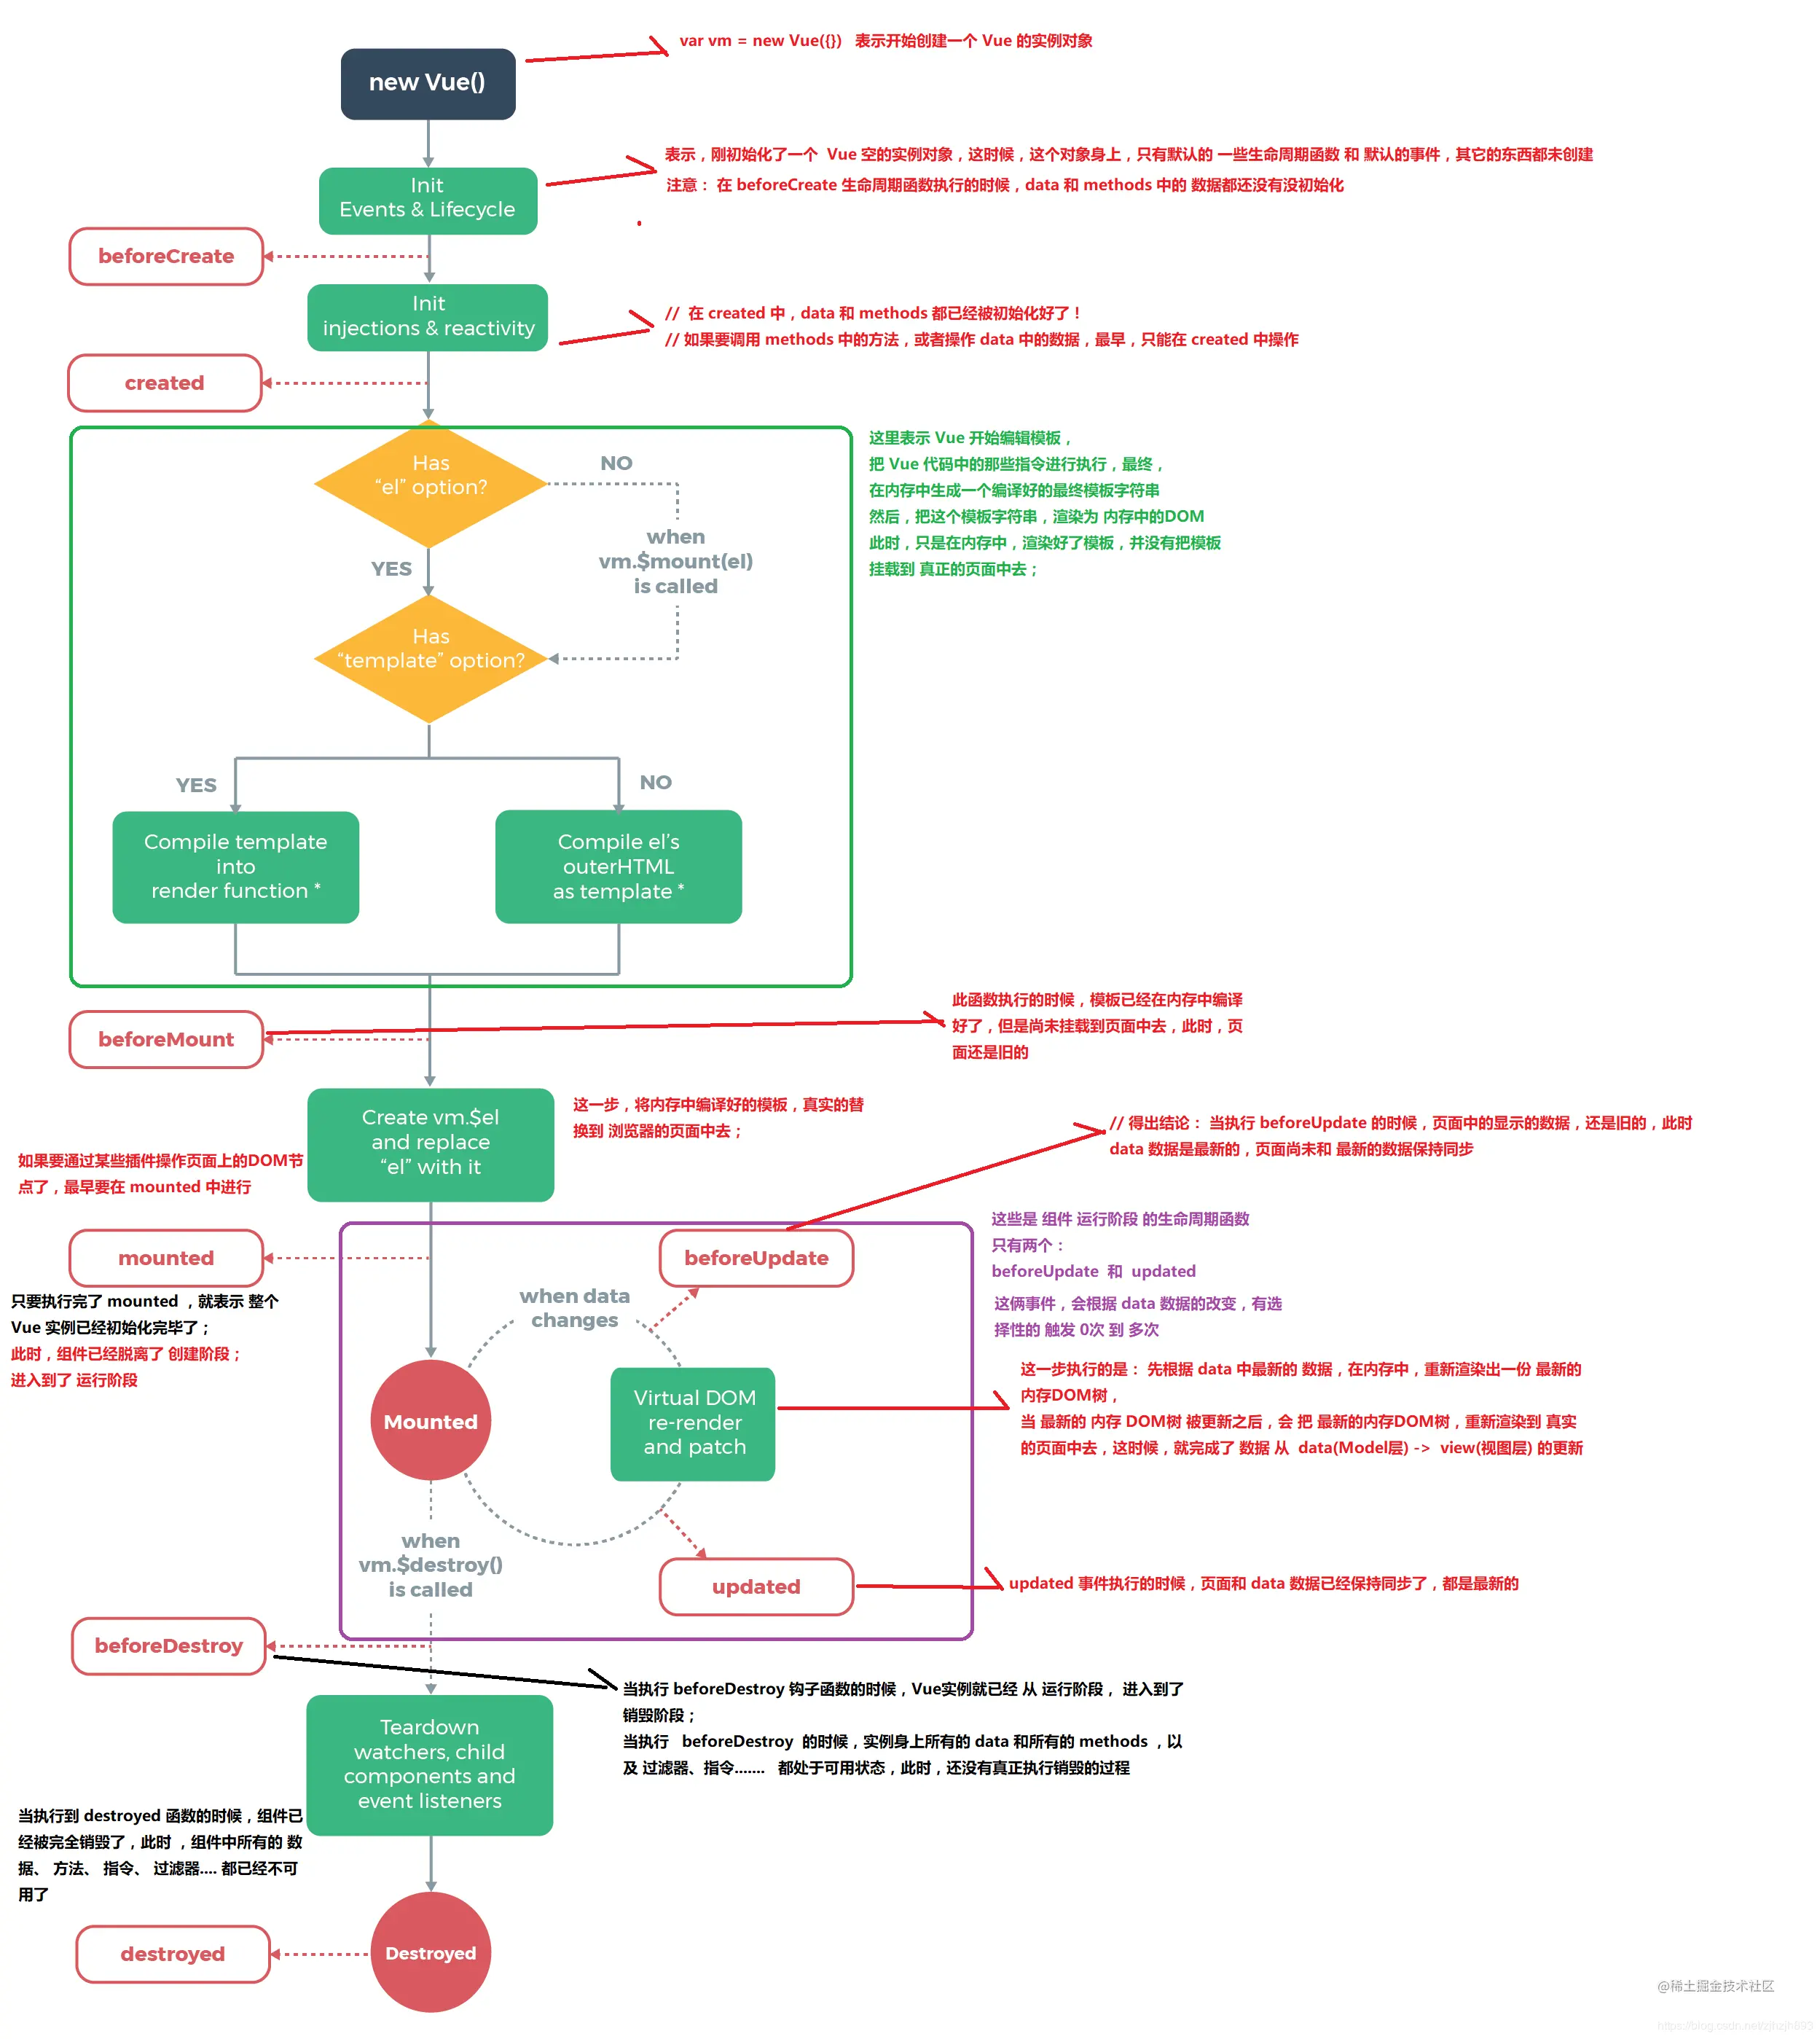
3. 各个钩子函数的用处
| 阶段 | 方法名 | 描述 |
| 初始化 | beforeCreate | 组件实例被创建之初,组件的属性生效之前 |
| created | 组件实例已经完全创建,属性也绑定,但真实 dom 还没有生成,$el 还不可用 | |
| 挂载 | beforeMount | 在挂载开始之前被调用:相关的 render 函数首次被调用 |
| mounted | el 被新创建的 vm.$el 替换,并挂载到实例上去之后调用该钩子 | |
| 更新 | beforeUpdate | 组件数据更新之前调用,发生在虚拟 DOM 打补丁之前 |
| update | 组件数据更新之后 | |
| 销毁 | beforeDestory | 组件销毁前调用 |
| destoryed | 组件销毁后调用 |
4. 示意图
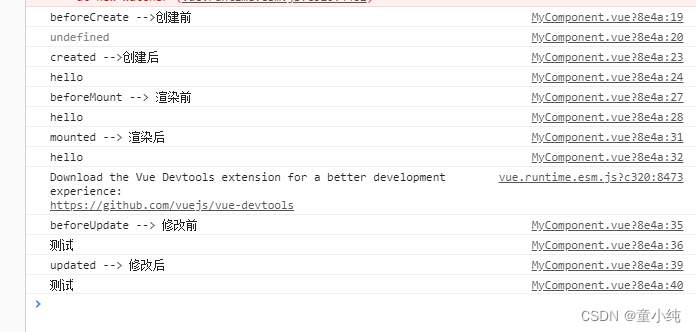
5. 代码执行示例
<template>
   <div>
       <h3>生命周期函数</h3>
       <button @click="message='测试'">修改数据</button>
       <p>{{ message }}</p>
   </div>
</template>

<script>
    export default {
        name: "life",
        data(){
            return {
                message:"hello"
            }
        },
        beforeCreate()
        {
            console.log("beforeCreate -->创建前");
            console.log(this.message);
        },
        created(){
            console.log("created -->创建后");
            console.log(this.message);
        },
        beforeMount(){
            console.log("beforeMount --> 渲染前");
            console.log(this.message);
        },
        mounted(){
            console.log("mounted --> 渲染后");
            console.log(this.message);
        },
        beforeUpdate(){
            console.log("beforeUpdate --> 修改前");
            console.log(this.message);
        },
        updated(){
            console.log("updated --> 修改后");
            console.log(this.message);
        },
        beforeDestroy(){
            console.log("beforeDestroy --> 销毁前");
            console.log(this.message);
        },
        destroyed(){
            console.log("destroyed --> 销毁后");
            console.log(this.message);
        }
    }
</script>
三、可以执行异步请求的生命周期
created、beforeMount、mounted 。
在这三个钩子函数中,data 已经创建,可以将服务端端返回的数据进行赋值。
推荐在 created 钩子函数中调用异步请求,优点如下:
① 能更快获取到服务端数据,减少页面 loading 时间;
② ssr 不支持 beforeMount 、mounted 钩子函数,所以放在 created 中有助于一致性;
四、可以访问操作DOM的阶段
五、父子组件里的生命周期执行顺序
Vue 的父组件和子组件生命周期钩子函数执行顺序可以归类为以下 4 部分:
-
加载渲染过程
父 beforeCreate -> 父 created -> 父 beforeMount -> 子 beforeCreate -> 子 created -> 子 beforeMount -> 子 mounted -> 父 mounted
-
子组件更新过程
父 beforeUpdate -> 子 beforeUpdate -> 子 updated -> 父 updated
-
父组件更新过程
父 beforeUpdate -> 父 updated
-
销毁过程
父 beforeDestroy -> 子 beforeDestroy -> 子 destroyed -> 父 destroyed
六、父组件如何监听到子组件的生命周期
在父组件引用子组件时通过 @hook 来监听即可(举例mounted)
//  Parent.vue
<Child @hook:mounted="doSomething" ></Child>

doSomething() {
   console.log('父组件监听到 mounted 钩子函数 ...');
},

//  Child.vue
mounted(){
   console.log('子组件触发 mounted 钩子函数 ...');
},

// 以上输出顺序为:
// 子组件触发 mounted 钩子函数 ...
// 父组件监听到 mounted 钩子函数 ...

 浙公网安备 33010602011771号