部署Vue+Django 04,ubuntu 24.04 LTS 安装 mysql 5.7
ubuntu 24.04 LTS 安装 mysql 5.7 【20250504,20260504】
用root用户操作下面:
更改权限
[zoro@localhost ~]$ su root
输入密码进来 管理者命令行
切换目录
[root@localhost zoro]# cd /root
下载安装包MySQL5.7 Linux版本
wget https://dev.mysql.com/get/Downloads/MySQL-5.7/mysql-5.7.44-linux-glibc2.12-x86_64.tar.gz
Length: 694785800 (663M) [application/x-tar-gz]
下载非常慢(33KB)。
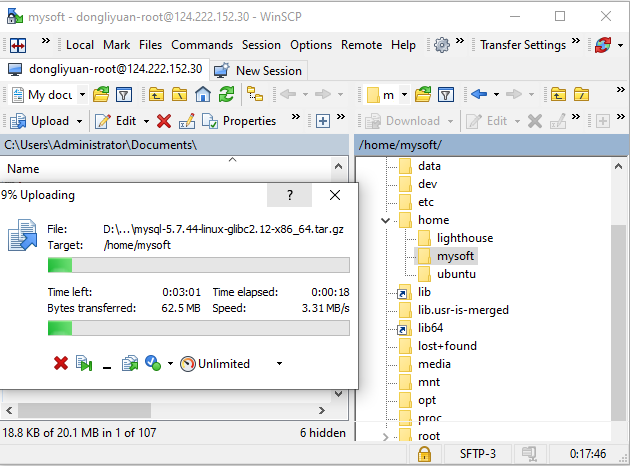
可以用迅雷下载,然后上传到服务器(使用WinSCP上传,3.3MB)。
打开目录有这么个包
[root@localhost ~]# ls
mysql-5.7.44-linux-glibc2.12-x86_64.tar.gz
安装依赖
apt install numactl libaio1t64 -y正在读取软件包列表... 完成
正在分析软件包的依赖关系树... 完成
正在读取状态信息... 完成
numactl 已经是最新版 (2.0.18-1ubuntu0.24.04.1)。
numactl 已设置为手动安装。
libaio1t64 已经是最新版 (0.3.113-6build1.1)。
libaio1t64 已设置为手动安装。
升级了 0 个软件包,新安装了 0 个软件包,要卸载 0 个软件包,有 22 个软件包未被升级。
如果还不行,就需要手动下载,然后进行安装【下面可行】:
-
curl -O http://launchpadlibrarian.net/646633572/libaio1_0.3.113-4_amd64.deb
-
sudo dpkg -i libaio1_0.3.113-4_amd64.deb
解压准备好的安装包
[root@localhost ~]# tar -zxvf mysql-5.7.44-linux-glibc2.12-x86_64.tar.gz
名字更改为mysql 并且修改位置
[root@localhost ~]# mv mysql-5.7.44-linux-glibc2.12-x86_64 /usr/local/mysql
[root@localhost ~]# cd /usr/local
创建mysql组,创建mysql用户,修改权限
[root@localhost local]# groupadd mysql
[root@localhost local]# useradd -g mysql mysql
//修改文件用户
[root@localhost local]# chown -R mysql mysql/
//修改文件用户组
[root@localhost local]# chgrp -R mysql mysql/
[root@localhost local]# ll
mysql 文件夹下创建data 目录
[root@localhost local]# mkdir /usr/local/mysql/data
编译安装并初始化mysql,务必记住初始化输出日志末尾的密码(数据库管理员临时密码)
cd /usr/local/mysql/bin
[root@localhost bin]# ./mysqld
--initialize --user=mysql --basedir=/usr/local/mysql/
--datadir=/usr/local/mysql/data/
--lc_messages_dir=/usr/local/mysql/share --lc_messages=en_US
错误如下:
./mysqld: error while loading shared libraries: libaio.so.1: cannot open shared object file: No such file or directory
解决方案:
https://www.cnblogs.com/emanlee/p/19972589
解决之后,继续执行上面的。
2025-05-05T15:26:25.163741Z 0 [Warning] TIMESTAMP with implicit DEFAULT value is deprecated. Please use --explicit_defaults_for_timestamp server option (see documentation for more details).
2025-05-05T15:26:25.534390Z 0 [Warning] InnoDB: New log files created, LSN=45790
2025-05-05T15:26:25.601536Z 0 [Warning] InnoDB: Creating foreign key constraint system tables.
2025-05-05T15:26:25.622252Z 0 [Warning] No existing UUID has been found, so we assume that this is the first time that this server has been started. Generating a new UUID: 4ed2d8ec-29c5-11f0-89a4-525400365808.
2025-05-05T15:26:25.624876Z 0 [Warning] Gtid table is not ready to be used. Table 'mysql.gtid_executed' cannot be opened.
2025-05-05T15:26:26.891650Z 0 [Warning] A deprecated TLS version TLSv1 is enabled. Please use TLSv1.2 or higher.
2025-05-05T15:26:26.891675Z 0 [Warning] A deprecated TLS version TLSv1.1 is enabled. Please use TLSv1.2 or higher.
2025-05-05T15:26:26.894559Z 0 [Warning] CA certificate ca.pem is self signed.
2025-05-05T15:26:27.154517Z 1 [Note] A temporary password is generated for root@localhost: 10yarn-----------------
特别提醒,复制上面最后一行的末尾的密码
修改配置文件
[root@localhost local]# vi /etc/my.cnf
复制下面的, 贴到 /etc/my.cnf 里面
[mysql]
# 设置mysql客户端默认字符集
default-character-set=utf8
socket=/var/lib/mysql/mysql.sock
[mysqld]
skip-name-resolve
#设置3306端⼝
port = 3306
socket=/var/lib/mysql/mysql.sock
# 设置mysql的安装⽬录
basedir=/usr/local/mysql
# 设置mysql数据库的数据的存放⽬录
datadir=/usr/local/mysql/data
# 允许最⼤连接数
max_connections=2000
# 服务端使⽤的字符集默认为8⽐特编码的latin1字符集
character-set-server=utf8
# 创建新表时将使⽤的默认存储引擎
default-storage-engine=INNODB
lower_case_table_names=1
max_allowed_packet=16M
cd /usr/local/mysql
[root@localhost mysql]# cp ./support-files/mysql.server /etc/init.d/mysqld
[root@localhost mysql]#
复制启动脚本到资源⽬录
[root@localhost mysql]# /etc/init.d/mysqld start
Starting mysqld (via systemctl): mysqld.service.
配置环境变量
[root@localhost ~]# vi /etc/profile
//添加下面一行到文件最后一行,然后 :wq保存退出
export PATH=$PATH:/usr/local/mysql/bin
[root@localhost ~]#
//
[root@localhost ~]# source /etc/profile
登录mysql 密码是初始化中的最后localhost:后面的密码
root@VM-4-7-ubuntu:~# mysql
mysql: error while loading shared libraries: libncurses.so.5: cannot open shared object file: No such file or directory
root@VM-4-7-ubuntu:~# find / -name 'libncurses*'
/usr/lib/x86_64-linux-gnu/libncursesw.so.6.4
/usr/lib/x86_64-linux-gnu/libncurses.so.6.4
/usr/lib/x86_64-linux-gnu/libncursesw.so.6
/usr/lib/x86_64-linux-gnu/libncurses.so.6
/usr/share/doc/libncurses6
/usr/share/doc/libncursesw6
/var/lib/dpkg/info/libncursesw6:amd64.shlibs
/var/lib/dpkg/info/libncurses6:amd64.shlibs
/var/lib/dpkg/info/libncurses6:amd64.triggers
/var/lib/dpkg/info/libncurses6:amd64.list
/var/lib/dpkg/info/libncursesw6:amd64.md5sums
/var/lib/dpkg/info/libncursesw6:amd64.list
/var/lib/dpkg/info/libncursesw6:amd64.triggers
/var/lib/dpkg/info/libncursesw6:amd64.symbols
/var/lib/dpkg/info/libncurses6:amd64.symbols
/var/lib/dpkg/info/libncurses6:amd64.md5sums
解决方法:
https://www.cnblogs.com/emanlee/p/18860905
[root@localhost mysql]# mysql -u root -p
Enter password:
Welcome to the MySQL monitor. Commands end with ; or \g.
Your MySQL connection id is 9
Server version: 5.7.44
Copyright (c) 2000, 2018, Oracle and/or its affiliates. All rights reserved.
Oracle is a registered trademark of Oracle Corporation and/or its
affiliates. Other names may be trademarks of their respective
owners.
Type 'help;' or '\h' for help. Type '\c' to clear the current input statement.
mysql>
mysql> SELECT host,user,Grant_priv,Super_priv FROM mysql.user;
+-----------+---------------+------------+------------+
| host | user | Grant_priv | Super_priv |
+-----------+---------------+------------+------------+
| localhost | root | Y | Y |
| localhost | mysql.session | N | Y |
| localhost | mysql.sys | N | N |
+-----------+---------------+------------+------------+
修改密码
mysql> set password for root@localhost = password('123456');
Query OK, 0 rows affected, 1 warning (0.00 sec)
开放远程连接
mysql> use mysql;
Reading table information for completion of table and column names
You can turn off this feature to get a quicker startup with -A
Database changed
mysql> update user set user.Host='%' where user.User='root';
Query OK, 1 row affected (0.00 sec)
Rows matched: 1 Changed: 1 Warnings: 0
mysql> SELECT host,user,Grant_priv,Super_priv FROM mysql.user;
+-----------+---------------+------------+------------+
| host | user | Grant_priv | Super_priv |
+-----------+---------------+------------+------------+
| % | root | Y | Y |
| localhost | mysql.session | N | Y |
| localhost | mysql.sys | N | N |
+-----------+---------------+------------+------------+
3 rows in set (0.00 sec)
mysql> flush privileges;
Query OK, 0 rows affected (0.00 sec)
mysql>quit
## 云服务器的 安全组规则未设置(3306端口开放)
防火墙设置:
(1)Ubuntu Server 开放端口 3306
sudo ufw allow 3306/tcp
(2)云服务器 开放端口 3306

 浙公网安备 33010602011771号