
Bean后置处理器 - SmartInstantiationAwareBeanPostProcessor#getEarlyBeanReference
示例
@Component
public class IndexA {

    @Autowired
    IndexB bbb;

    public IndexA() {
        System.out.println("IndexA constructor...");
    }

    public void printf(){
        System.out.println("indexA printf : ");
        System.out.println("indexB --> " + (bbb == null ? null : bbb.getClass().getName()));
    }
}

@Component
public class IndexB {

    @Autowired
    IndexA aaa;

    public IndexB() {
        System.out.println("IndexB constructor...");
    }

    public void printf(){
        System.out.println("indexB printf : ");
        System.out.println("indexA --> " + (aaa == null ? null : aaa.getClass().getName()));
    }
}

@Configuration
@ComponentScan({
         "com.study.ioc.cyc"
})
public class StartConfig {
}
测试代码:
public static void main(String[] args) {
    AnnotationConfigApplicationContext ac = new AnnotationConfigApplicationContext(StartConfig.class);
    IndexA a = ac.getBean(IndexA.class);
    System.out.println("spring's indexA --> " + a.getClass().getName());
    a.printf();
    System.out.println("======================");
    IndexB b = ac.getBean(IndexB.class);
    System.out.println("spring's indexB --> " + b.getClass().getName());
    b.printf();
}
运行结果:
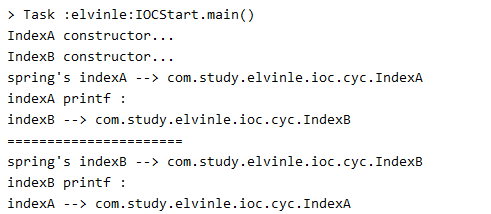
对于这种存在循环依赖的情况, 其大致过程是这样的:
1. 实例化 IndexA
2. 对 IndexA 进行属性注入, 此时发现 属性 IndexB
3. 实例化 IndexB
4. 对 IndexB 进行属性注入, 此时又发现了属性 IndexA
5. 对 IndexA 执行 getSingleton("indexA") (此时, 会调用后置处理器 SmartInstantiationAwareBeanPostProcessor), 拿到 IndexA
6. 回到 IndexB 属性注入的地方, 然后对 IndexB 进行初始化
7. IndexB 变成了一个 bean, 回到 IndexA 属性注入的地方, 然后对 IndexA 进行初始化
getSingleton的关键代码为:
org.springframework.beans.factory.support.DefaultSingletonBeanRegistry#getSingleton(java.lang.String, boolean)
此时, allowEarlyReference = true, 是写死的
@Nullable
protected Object getSingleton(String beanName, boolean allowEarlyReference) {
    //从map中获取bean如果不为空直接返回,不再进行初始化工作
    //讲道理一个程序员提供的对象这里一般都是为空的
    //1.先从一级缓存获取
    Object singletonObject = this.singletonObjects.get(beanName);
    //2.如果没获取到, 且 bean 还在创建中时
    if (singletonObject == null && isSingletonCurrentlyInCreation(beanName)) {
        synchronized (this.singletonObjects) {
            //3.再从二级缓存中获取
            singletonObject = this.earlySingletonObjects.get(beanName);
            //4. 还没获取到, 且允许循环依赖时
            if (singletonObject == null && allowEarlyReference) {
                //5. 最后从三级缓存中获取 对象的工厂, 通过 getObject 来获取对象
                ObjectFactory<?> singletonFactory = this.singletonFactories.get(beanName);
                if (singletonFactory != null) {
                    singletonObject = singletonFactory.getObject();
                    this.earlySingletonObjects.put(beanName, singletonObject);
                    this.singletonFactories.remove(beanName);
                }
            }
        }
    }
    return singletonObject;
}
看到这里, 需要回到
org.springframework.beans.factory.support.AbstractAutowireCapableBeanFactory#doCreateBean
看一句关键代码:
boolean earlySingletonExposure = (mbd.isSingleton() && this.allowCircularReferences &&
        isSingletonCurrentlyInCreation(beanName));
if (earlySingletonExposure) {
    if (logger.isTraceEnabled()) {
        logger.trace("Eagerly caching bean '" + beanName +
                "' to allow for resolving potential circular references");
    }
    //这里创建了一个匿名的 ObjectFactory 实现类, 他是一个工厂, 可以用来获取对象
    //addSingletonFactory中, 将这个工厂放到 singletonFactories 中去了. singletonFactories 是spring的三级缓存
    addSingletonFactory(beanName, () -> getEarlyBeanReference(beanName, mbd, bean));
}
singletonFactory.getObject() 调用的, 其实是 这里的 getEarlyBeanReference() 方法
protected Object getEarlyBeanReference(String beanName, RootBeanDefinition mbd, Object bean) {
    Object exposedObject = bean;
    if (!mbd.isSynthetic() && hasInstantiationAwareBeanPostProcessors()) {
        for (BeanPostProcessor bp : getBeanPostProcessors()) {
            if (bp instanceof SmartInstantiationAwareBeanPostProcessor) {
                SmartInstantiationAwareBeanPostProcessor ibp = (SmartInstantiationAwareBeanPostProcessor) bp;
                exposedObject = ibp.getEarlyBeanReference(exposedObject, beanName);
            }
        }
    }
    return exposedObject;
}
前面有看到过, SmartInstantiationAwareBeanPostProcessor 可以用来选择构造函数, 那么这里, 他还可以用来暴露 bean 的早期引用.
此例中, 就是暴露 IndexA 的早期引用. 此时 IndexA 还没有进行初始化, 是一个半成品.
如果有对 IndexA 进行 AOP , 那么也会在这里进行一次代理. 将代理过的对象暴露给 IndexB.
还是通过调试的方式, 来确定下, 这边有那些后置处理器能满足条件:
1. ConfigurationClassPostProcessor$ImportAwareBeanPostProcessor
2. AutowiredAnnotationBeanPostProcessor
ConfigurationClassPostProcessor$ImportAwareBeanPostProcessor
由其父类实现:
org.springframework.beans.factory.config.InstantiationAwareBeanPostProcessorAdapter#getEarlyBeanReference
@Override
public Object getEarlyBeanReference(Object bean, String beanName) throws BeansException {
    return bean;
}
ImportAwareBeanPostProcessor 在 创建 bean 的这整个过程中, 出现的频率蛮高的, 但是大部分都是来凑热闹的.
AutowiredAnnotationBeanPostProcessor
也是由其父类实现:
org.springframework.beans.factory.config.InstantiationAwareBeanPostProcessorAdapter#getEarlyBeanReference
@Override
public Object getEarlyBeanReference(Object bean, String beanName) throws BeansException {
    return bean;
}
从这里可以看出, 正常情况下(不需要代理时), 该是什么, 这里就返回什么, 不会对 bean 进行任何操作
上面说, 在这个后置处理器的处理里面, 可能会产生代理, 为了印证这个问题, 需要对实例代码进行一些小的修改:
@Component
@Aspect
public class Aopa {

    @Pointcut("execution(* com.study.ioc.cyc.IndexA.*(..))")
    public void pointCutMethodA() {
    }


    @Before("pointCutMethodA()")
    public void beforeA() {
        System.out.println("before invoke indexA.*() method -- Aopa");
    }
}


@EnableAspectJAutoProxy
@Configuration
@ComponentScan({
         "com.study.ioc.cyc"
        , "com.study.ioc.aop"
})
public class StartConfig {
}
此时, 再到方法里面进行调试, 会发现多出来一个后置处理器, 变成了三个:
1. ConfigurationClassPostProcessor$ImportAwareBeanPostProcessor
2. AnnotationAwareAspectJAutoProxyCreator
3. AutowiredAnnotationBeanPostProcessor
AnnotationAwareAspectJAutoProxyCreator
@Override
public Object getEarlyBeanReference(Object bean, String beanName) {
    Object cacheKey = getCacheKey(bean.getClass(), beanName);
    this.earlyProxyReferences.put(cacheKey, bean);
    return wrapIfNecessary(bean, beanName, cacheKey);
}
进 wrapIfNecessary 中看:
protected Object wrapIfNecessary(Object bean, String beanName, Object cacheKey) {
    if (StringUtils.hasLength(beanName) && this.targetSourcedBeans.contains(beanName)) {
        return bean;
    }
    if (Boolean.FALSE.equals(this.advisedBeans.get(cacheKey))) {
        return bean;
    }
    if (isInfrastructureClass(bean.getClass()) || shouldSkip(bean.getClass(), beanName)) {
        this.advisedBeans.put(cacheKey, Boolean.FALSE);
        return bean;
    }

    // Create proxy if we have advice.
    Object[] specificInterceptors = getAdvicesAndAdvisorsForBean(bean.getClass(), beanName, null);
    if (specificInterceptors != DO_NOT_PROXY) {
        this.advisedBeans.put(cacheKey, Boolean.TRUE);
        Object proxy = createProxy(
                bean.getClass(), beanName, specificInterceptors, new SingletonTargetSource(bean));
        this.proxyTypes.put(cacheKey, proxy.getClass());
        return proxy;
    }

    this.advisedBeans.put(cacheKey, Boolean.FALSE);
    return bean;
}
这里看到, 有一个创建代理的方法. 确实是通过这里, 产生了代理方法.
此例中, 如果aop里面, 把 IndexB 也加进去, 那么 IndexB 是不是也会在这里进行代理呢?
答案是否定的. IndexB在此例中, 不会进这个方法的. 对于 IndexB 来说, 其实是一个正常的创建过程.
IndexB 的代理, 会在别的地方进行.(initializeBean中 - 初始化之后的后置处理器中完成代理)
这个在后面就能看到

 浙公网安备 33010602011771号