cocos2d-x3.0+Eclipse配置说明
假如我们已经装了JavaJDK、Cygwin,也解压了2013-08-27之后最新的AndroidSDK,其实最新的AndroidSDK已经集成了eclipse,eclipse里面已经配置好了AndroidSDK的东西,如果我们要用到cocos2d-x3.0的话就简单很多了。
实际上在cocos2d-x3.0的cpp工程里面就已经包含了eclipse配置说明,
如:”cocos2d-x-3.0alpha0-pre\template\multi-platform-cpp\proj.android\README.md“,用计事本打开”README.md“文件,里面内容就是用eclipse生成apk的说明文档:
(这些英文都是比较常见的,不用再翻译了,按照步骤操作就行了,从”#### Setup Eclipse Environment (only once)“ 开始看。。)
## Prerequisites:
* Android NDK
* Android SDK **OR** Eclipse ADT Bundle
* Android AVD target installed
## Building project
There are two ways of building Android projects.
1. Eclipse
2. Command Line
### Import Project in Eclipse
#### Features:
1. Complete workflow from Eclipse, including:
* Build C++.
* Clean C++.
* Build and Run whole project.
* Logcat view.
* Debug Java code.
* Javascript editor.
* Project management.
2. True C++ editing, including:
* Code completion.
* Jump to definition.
* Refactoring tools etc.
* Quick open C++ files.
#### Setup Eclipse Environment (only once)
**NOTE:** This step needs to be done only once to setup the Eclipse environment for cocos2d-x projects. Skip this section if you've done this before.
1. Download Eclipse ADT bundle from [Google ADT homepage](http://developer.android.com/sdk/index.html)
**OR**
Install Eclipse with Java. Add ADT and CDT plugins.
2. Only for Windows
1. Install [Cygwin](http://www.cygwin.com/) with make (select make package from the list during the install).
2. Add `Cygwin\bin` directory to system PATH variable.
3. Add this line `none /cygdrive cygdrive binary,noacl,posix=0,user 0 0` to `Cygwin\etc\fstab` file.
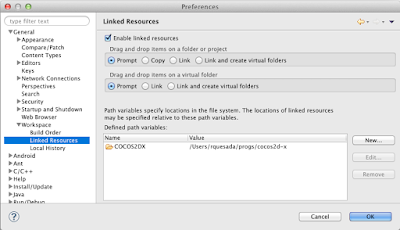
3. Set up Variables:
1. Path Variable `COCOS2DX`:
* Eclipse->Preferences->General->Workspace->**Linked Resources**
* Click **New** button to add a Path Variable `COCOS2DX` pointing to the root cocos2d-x directory.
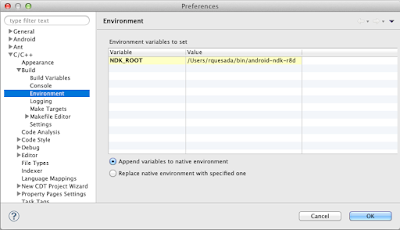
2. C/C++ Environment Variable `NDK_ROOT`:
* Eclipse->Preferences->C/C++->Build->**Environment**.
* Click **Add** button and add a new variable `NDK_ROOT` pointing to the root NDK directory.
* Only for Windows: Add new variables **CYGWIN** with value `nodosfilewarning` and **SHELLOPTS** with value `igncr`
4. Import libcocos2dx library project:
1. File->New->Project->Android Project From Existing Code.
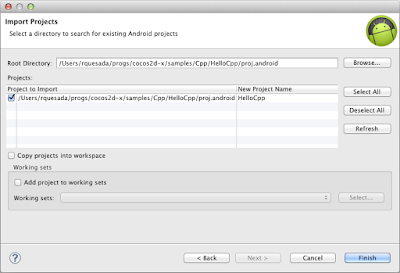
2. Click **Browse** button and open `cocos2d-x/cocos2dx/platform/android/java` directory.
3. Click **Finish** to add project.
#### Adding and running from Eclipse
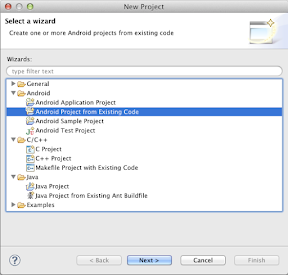
1. File->New->Project->Android Project From Existing Code
2. **Browse** to your project directory. eg: `cocos2d-x/cocos2dx/samples/Cpp/TestCpp/proj.android/`
3. Add the project
4. Click **Run** or **Debug** to compile C++ followed by Java and to run on connected device or emulator.
### Running project from Command Line
$ cd cocos2d-x/samples/Cpp/TestCpp/proj.android/
$ export NDK_ROOT=/path/to/ndk
$ ./build_native.sh
$ ant debug install
If the last command results in sdk.dir missing error then do:
$ android list target
$ android update project -p . -t (id from step 6)
$ android update project -p cocos2d-x/cocos2dx/platform/android/java/ -t (id from step 6)

 浙公网安备 33010602011771号