Spring Boot Actuator 配置和应用
一、Spring Boot Actuator简介
官方文档:https://docs.spring.io/spring-boot/docs/current/reference/html/production-ready-features.html
Spring Boot Actuator(以下简称SBA)主要用于Spring Boot应用的健康检查,配合K8S可用于服务部署,切换流量,监控报警等场景。
1. 举个例子:
(1) 账户服务,线上运行版本为1.0.0,准备上线1.1.0,要求上线过程不可中断客户请求;为此,我们需要在保持1.0.0运行的同时部署1.1.0,在部署完1.1.0并且保证其已经Ready之后,我们让网关把部分/全部流量切换进来(前者属于灰度发布,后者是蓝绿发布)。如果这个过程是自动化的,我们如何让程序感知1.1.0版本已经Ready呢?注意,Ready这个状态未必仅指应用启动,可能启动之后还需要加载数据,或者有其他初始化工作,只有这些工作全部完成才算Ready。
Spring Boot Actuator的readiness接口便是为此而设计的。
(2) 用户服务,它强依赖于账户服务,我们希望当账户服务无法访问的情况下,用户服务可以感知,并且主动拒绝外部请求。针对这种场景,可通过自定义HealthIndicator的方式来实现。
2. 本文的应用对象为Kubernetes环境下的健康检查。
二、liveness和readiness
Kubernetes有两个Probes(探针, 请求者),分别是liveness和readiness。相应的SBA也提供了两个接口,分别是liveness和readiness。
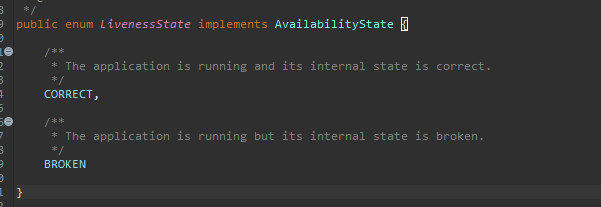
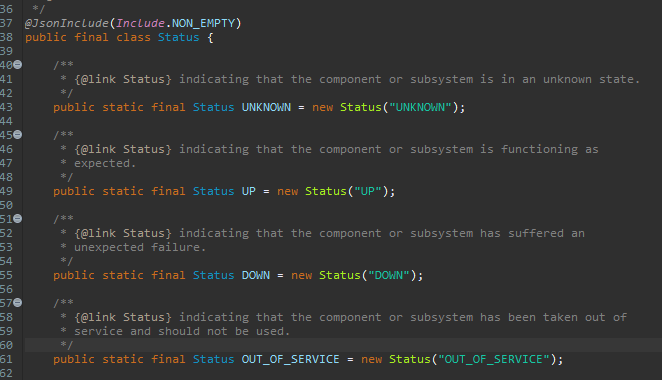
1. liveness,表示Spring Boot应用的存活状态。SBA认为,liveness的状态不应依赖外部系统的状态,外部系统包括数据库、中间件、外部接口等;它仅仅表示应用本身是否活着。取值如下:
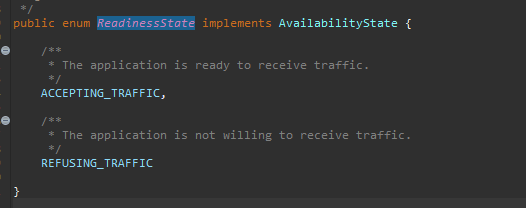
2. readiness,表示Spring Boot应用是否做好准备接受外部请求。SBA认为,readiness一定要考虑应用自身依赖的外部系统状态,例子2很好的说明了这一点。取值如下:
3. Spring Boot的生命周期
(1) 启动阶段
| 阶段 | Liveness状态 | Readiness状态 | 备注 |
| Starting | BROKEN | REFUSING_TRAFFIC | K8S检查"liveness"探针状态,如果长期没有影响,则重启服务。 |
| Started | CORRECT | REFUSING_TRAFFIC | 刷新Spring Boot应用上下文,执行其他启动任务,此时仍处于拒绝接受流量的状态。 |
| Ready | CORRECT | ACCEPTING_TRAFFIC | 启动完成,应用开始接受请求。 |
(2) 关闭阶段
| 阶段 | Liveness状态 | Readiness状态 | 备注 |
| Running | live | ready | Shutdown开始执行。 |
| Graceful shutdown | live | unready |
所谓优雅的关闭,是指让已经进入应用的请求处理完毕,且在此阶段拒绝接受新的请求进入。 |
| Shutdown complete | broken | unready | 完成关闭。 |
三、监控什么?
我们需要监控的,一定是影响应用运行的因素。根据空间的划分,我们可以把监控目标分为本地依赖和远程依赖。
1. 本地依赖主要包括:
(1) 内存空间
(2) 硬盘空间
(3) 环境变量
(4) 配置文件
2. 远程依赖又可分为:
(1) 远程软件依赖,比如数据库、中间件、FTP或搜索引擎等;
(2) 远程接口依赖。
四、怎样监控?
1. 本地依赖
(1) 内存空间,假设应用实例出现内存溢出,我们应该设置应用的liveness状态为down,使调度器感知,发出报警,切换流量到其他实例,并重启该实例,这样可以避免线上出现宕机;
(2) 磁盘空间,如果应用需要保存大量文件到本地,就有必要监控磁盘空间占有量,如果空置率低到一定水平,应该设置应用的readiness状态为down,使调度器将请求切换到其他实例;
2. 远程依赖
(1) 软件依赖,至少需要从连通性上进行监控,如果发现无法连同,则需要设置应用的readiness状态为down,使调度器将请求切换到其他实例,或拒绝请求;
(2) 接口依赖,主要围绕着接口的连通性和可用性进行监控,如果接口服务可以提供readiness接口,可直接访问该接口来实现。
五、Spring Boot Actuator重要概念
1. Endpoints
可以把Endpoints理解为一个功能模块,功能模块可以监控Spring Boot应用,甚至可以与Spring Boot进行交互(比如读取信息,关闭应用等操作)。Spring Boot内置了很多Endpoints,对我们来讲最重要的Endpoints是health,即健康检查模块。
除health外,常用的Endpoints还包括:
(1) env,用于输出环境变量;
(2) beans,用于显示应用中所有的bean对象;
(3) info,可以配置一些自定义信息。
a. 默认情况下,除shutdown以外,所有的Endpoints均是enable状态。如果希望disable所有Endpoints,可在application.properties中配置:
management.endpoints.enabled-by-default=false
b. 如果希望enable指定Endpoints,可配置:
management.endpoint.<name>.enabled=true
例如:
management.endpoint.info.enabled=true
c. 默认情况下,只有health和info两个Endpoints暴露在web环境下,可通过url访问,如果想暴露其他Endpoints,可配置:
management.endpoints.web.exposure.include=health,info,env
全部暴露可配置成*
management.endpoints.web.exposure.include=*
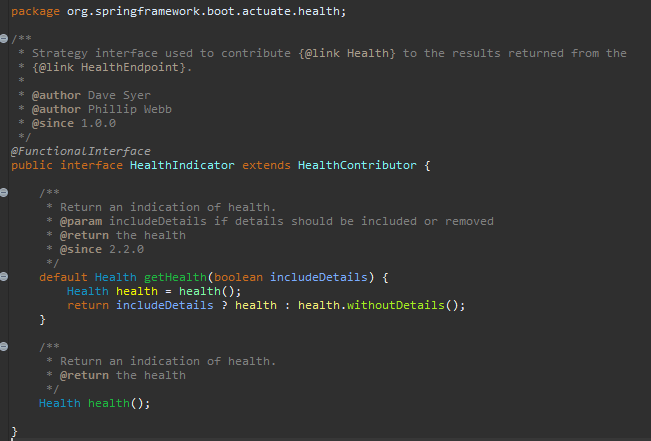
2. HealthIndicator(健康检查器)
从概念上讲,HealthIndicator从属于health这个Endpoints。
从代码上讲,它是一个接口,继承该接口并重写health方法便可自定义一个健康检查器。
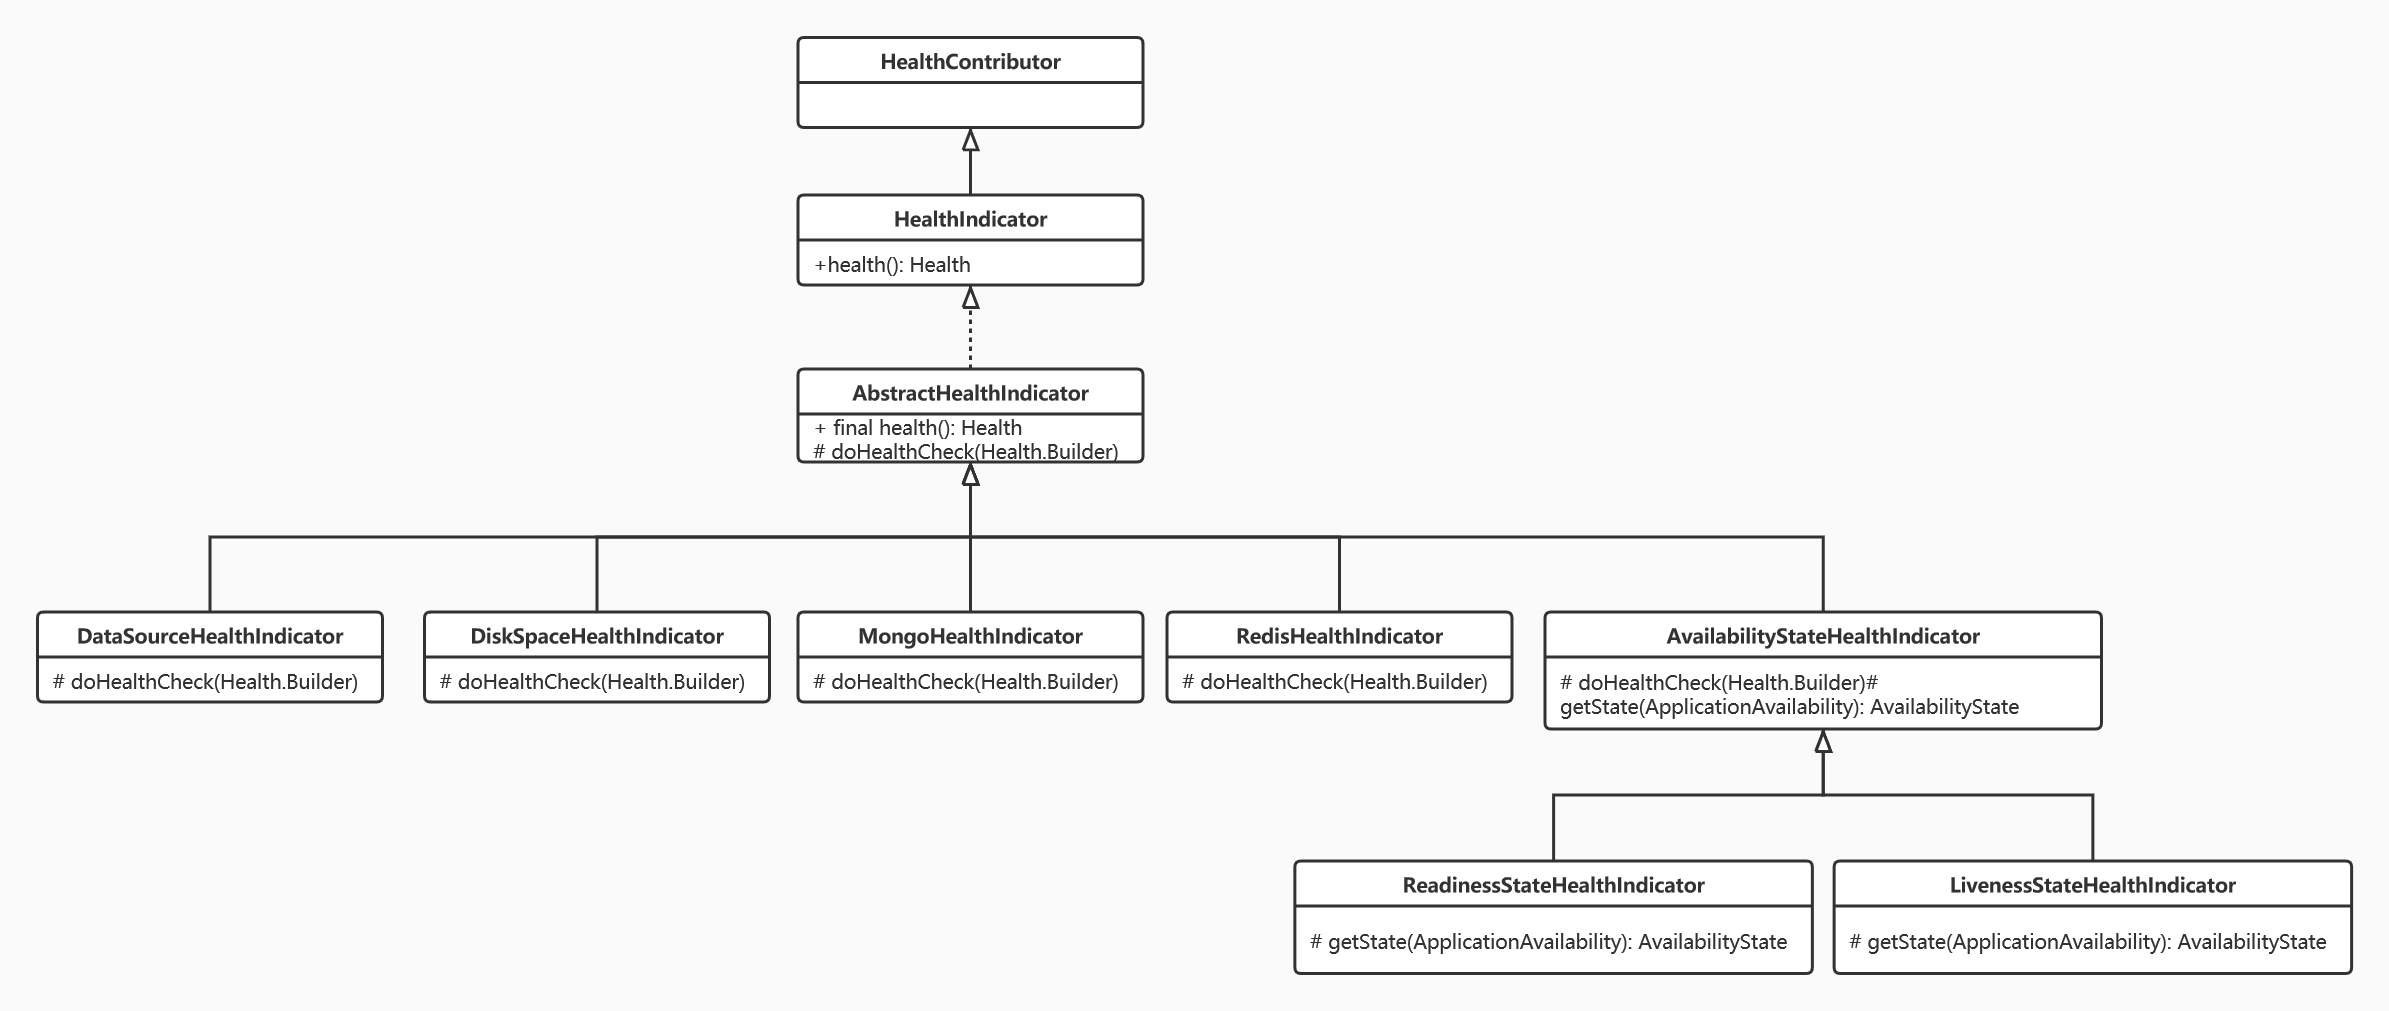
根据依赖目标的不同,检查器也不相同,围绕着常见的依赖,Spring Boot内置了许多Indicator:
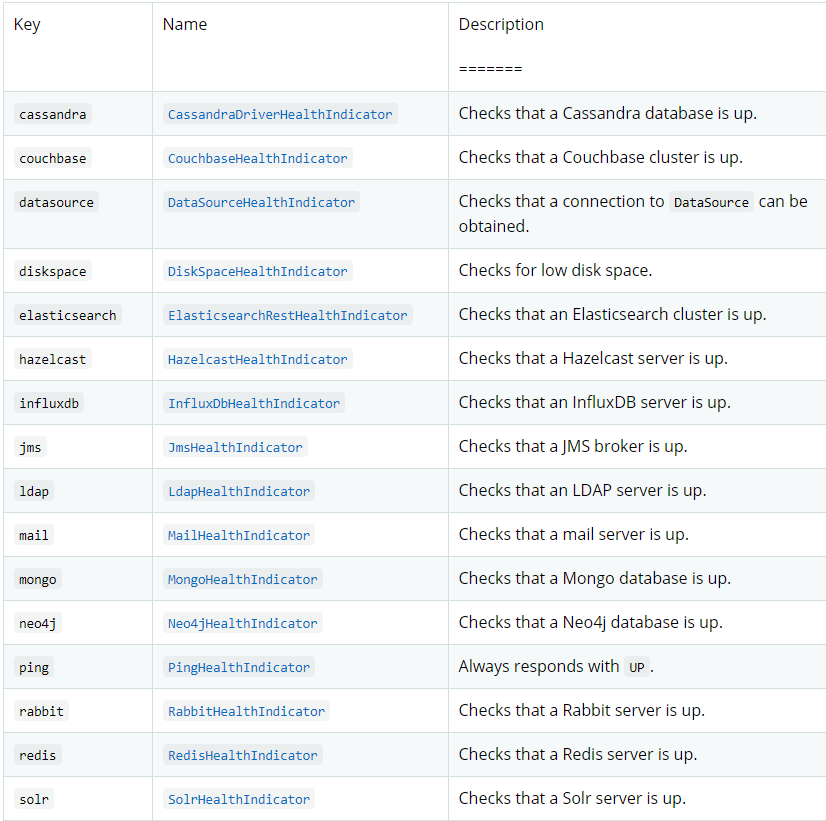
上面这些已经默认启动,下面这俩默认禁用。

首先,让我们看看这些自带HealthIndicator的继承关系:
以MongoHealthIndicator为例,让我们透过源码,看看这些HealthIndicator如何进行健康检查:
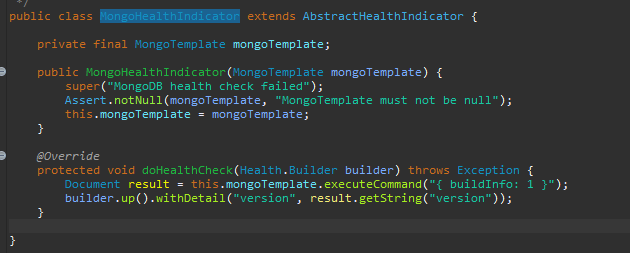
事实上,MongoHealthIndicator执行了一段Mongo命令"{ buildInfo: 1 }",以此来判断Mongo的连通性。
3. Health信息
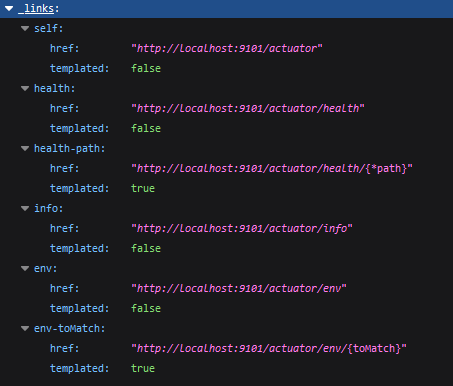
(1) Spring Boot启动后,访问
http://<Spring Boot Domain>/actuator
即可查看该实例所有已经暴露到Web的Endpoints。
(2) 查看健康信息
/actuator/health
如果希望得到详细的健康信息,则添加配置:
management.endpoint.health.show-details=always
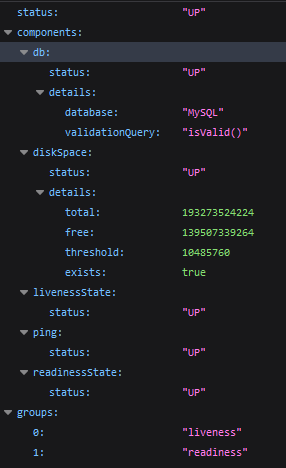
(3) Health状态
如果一切OK,则是UP状态;如果有依赖挂掉,则是DOWN状态。
(4) Health数据是如何产生的?
在(2)中我们看到,访问/actuator/health得到的是系统整体的健康信息。默认情况下,SBA自动enable了所有HealthIndicator。
如果想关掉所有默认打开的HealthIndicator,配置:
management.health.defaults.enabled=false
如果想enable指定的HealthIndicator,配置
management.health.<key>.enabled=true
key的取值参考五.2中的表格。
4. 自定义HealthIndicator
(1) 官网例子
import org.springframework.boot.actuate.health.Health;
import org.springframework.boot.actuate.health.HealthIndicator;
import org.springframework.stereotype.Component;

@Component
public class MyHealthIndicator implements HealthIndicator {
    @Override
    public Health health() {
        int errorCode = check(); //执行健康检查

        if (errorCode != 0) {
            return Health.down().withDetail("Error Code", errorCode).build();
        }

        return Health.up().build();
    }
}
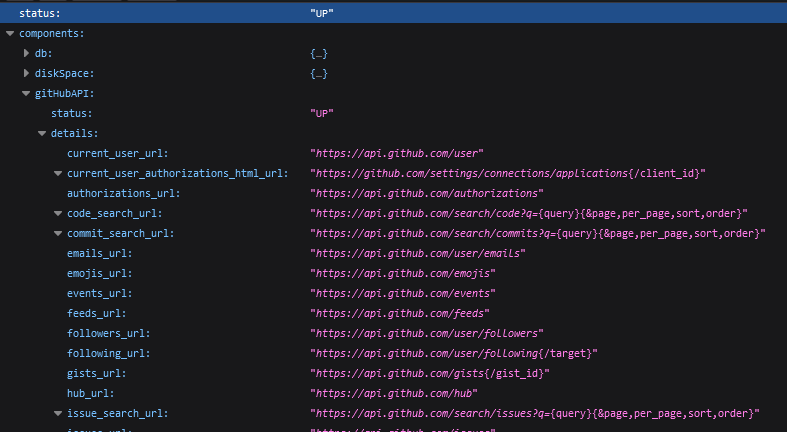
(2) 再来个栗子
假设我们的项目依赖https://api.github.com/
@Component
public class GitHubAPIHealthIndicator implements HealthIndicator {
    private final RestTemplate restTemplate;

    @Override
    public Health health() {
        try {
            ParameterizedTypeReference<Map<String, String>> reference = new ParameterizedTypeReference<Map<String, String>>() {};
            ResponseEntity<Map<String, String>> result = restTemplate.exchange("https://api.github.com/", HttpMethod.GET, null, reference);

            if (result.getStatusCode().is2xxSuccessful() && result.getBody() != null) {
                return Health.up().withDetails(result.getBody()).build();
            } else {
                return Health.down().withDetail("status", result.getStatusCode()).build();
            }
        } catch (RestClientException ex) {
            return Health.down().withException(ex).build();
        }
    }
}
访问/actuator/health
5. Health Groups
(1) 如果你想将若干指定的HealthIndicator捆绑起来构成一组健康检查,那么可配置:
management.endpoint.health.group.custom.include=db
访问
/actuator/health/custom
即可获得custom这个组的健康状态。
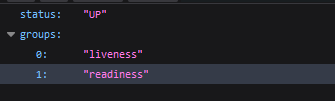
(2) SBA创建了两个默认的组,liveness和readiness。
默认情况下,只有当Spring Boot应用部署到K8S内,才可以访问liveness和readiness接口,如果你希望在本地访问这两个接口,需要配置:
management.endpoint.health.probes.enabled=true
接口访问方式为:
/actuator/health/liveness/actuator/health/readiness
(3) 既然liveness和readiness也是Health Groups,那么我们就可以自定义它们包含的HealthIndicator对象:
management.endpoint.health.group.liveness.include=livenessState,customCheck
management.endpoint.health.group.readiness.include=readinessState,db
此时liveness会执行LivenessStateHealthIndicator和CustomCheckHealthIndicator两个检查器,readiness会执行ReadinessStateHealthIndicator和数据库检查。
三、基本配置和应用
1. pom引用
<dependency>
    <groupId>org.springframework.boot</groupId>
    <artifactId>spring-boot-starter-actuator</artifactId>
</dependency>
作为spring-boot-starter-parent自带的组件,我们无需指定它的版本号。
2. 在application.properties中添加配置
management.endpoints.web.exposure.include=info, health, env
management.endpoint.health.show-details=always
management.endpoint.health.probes.enabled=true

 浙公网安备 33010602011771号