

Spring5入门-06-xml配置自动装配Bean
一、前言
-
参考视频:遇见狂神说-Spring5
-
参考文档:官方文档
-
使用:
- IDEA 2019.3
- Maven
- Spring 5.2.9.RELEASE
- Junit 4.12
目的:了解Bean使用xml配置时候的自动装配。
- 自动装配是Spring满足Bean依赖的一种方式。
- Spring会在上下文中自动寻找,并自动给Bean装配属性。
在Spring中装配的方式:
- 在xml中显式配置
- 在Java中显式配置
- 隐式的自动装配---------------本文主要内容
二、准备工作
2.1 依赖
注意:这里用到的应该是spring-context,但是spring-webmvc由于继承的关系会有一张依赖网:
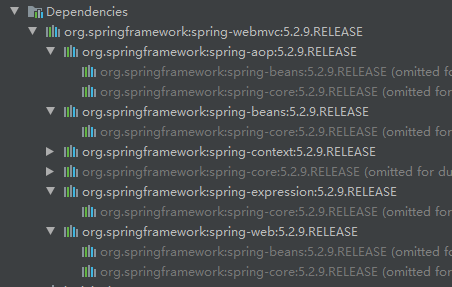
算是省心省力吧。
<!--Spring-->
<dependency>
    <groupId>org.springframework</groupId>
    <artifactId>spring-webmvc</artifactId>
    <version>${org.springframework.version}</version>
</dependency>

<!--JUnit-->
<dependency>
    <groupId>junit</groupId>
    <artifactId>junit</artifactId>
    <version>4.12</version>
    <scope>test</scope>
</dependency>
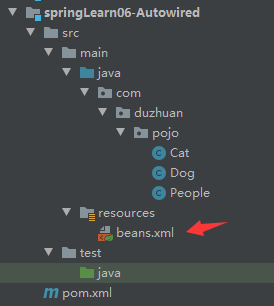
2.2 实体类
路径

代码
Cat.java
package com.duzhuan.pojo;

/**
 * @Autord: HuangDekai
 * @Date: 2020/9/28 20:46
 * @Version: 1.0
 * @since: jdk11
 */
public class Cat {
    public void shout(){
        System.out.println("miaomiao");
    }
}
Dog.java
package com.duzhuan.pojo;

/**
 * @Autord: HuangDekai
 * @Date: 2020/9/28 20:39
 * @Version: 1.0
 * @since: jdk11
 */
public class Dog {
    public void shout(){
        System.out.println("WangWang");
    }
}
People.java
package com.duzhuan.pojo;

/**
 * @Autord: HuangDekai
 * @Date: 2020/9/28 20:47
 * @Version: 1.0
 * @since: jdk11
 */
public class People {
    private Cat cat;
    private Dog dog;
    private String name;

    public Cat getCat() {
        return cat;
    }

    public void setCat(Cat cat) {
        this.cat = cat;
    }

    public Dog getDog() {
        return dog;
    }

    public void setDog(Dog dog) {
        this.dog = dog;
    }

    public String getName() {
        return name;
    }

    public void setName(String name) {
        this.name = name;
    }

    @Override
    public String toString() {
        return "People{" +
                "cat=" + cat +
                ", dog=" + dog +
                ", name='" + name + '\'' +
                '}';
    }
}
三、beans.xml本应的代码
按照之前所学,beans.xml应为如下:
路径
代码
<?xml version="1.0" encoding="UTF-8"?>
<beans xmlns="http://www.springframework.org/schema/beans"
       xmlns:xsi="http://www.w3.org/2001/XMLSchema-instance"
       xsi:schemaLocation="http://www.springframework.org/schema/beans http://www.springframework.org/schema/beans/spring-beans.xsd">

    <bean id="cat" class="com.duzhuan.pojo.Cat"/>
    <bean id="dog" class="com.duzhuan.pojo.Dog"/>

    <bean id="people" class="com.duzhuan.pojo.People">
        <property name="name" value="duzhuan"/>
        <property name="cat" ref="cat"/>
        <property name="dog" ref="dog"/>
    </bean>

</beans>
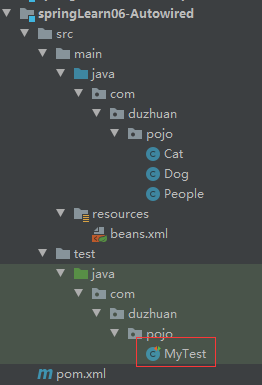
四、测试样例
路径
代码
package com.duzhuan.pojo;

        import org.junit.Test;
        import org.springframework.context.ApplicationContext;
        import org.springframework.context.support.ClassPathXmlApplicationContext;

/**
 * @Autord: HuangDekai
 * @Date: 2020/9/28 20:58
 * @Version: 1.0
 * @since: jdk11
 */
public class MyTest {
    @Test
    public void PeopleTest(){
        ApplicationContext context = new ClassPathXmlApplicationContext("beans.xml");
        People people = context.getBean("people", People.class);
        people.getCat().shout();
        people.getDog().shout();
    }
}
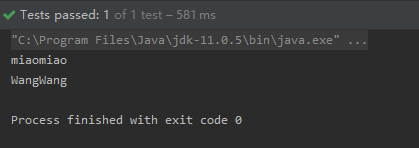
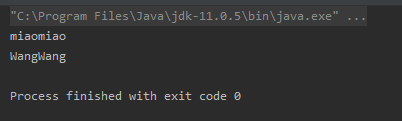
结果
五、修改beans.xml
5.1 byName
自动装配是使用autowire属性进行设置:
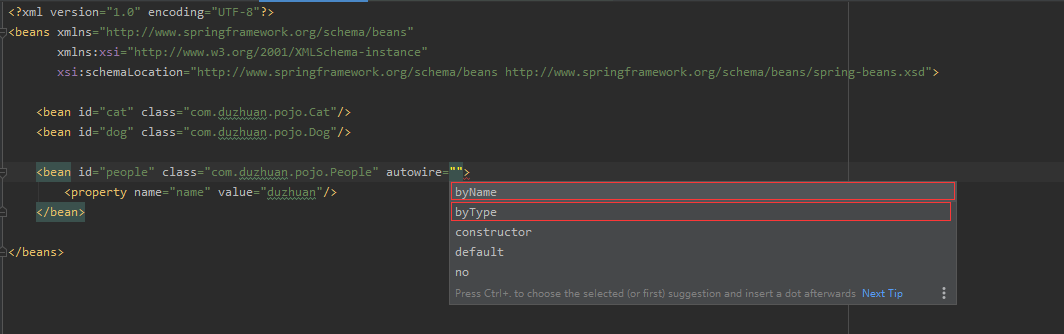
由上图可以看到自动装配使用的值。
其中byName和byType是比较好理解和应用的,余下的请自由查询。
<?xml version="1.0" encoding="UTF-8"?>
<beans xmlns="http://www.springframework.org/schema/beans"
       xmlns:xsi="http://www.w3.org/2001/XMLSchema-instance"
       xsi:schemaLocation="http://www.springframework.org/schema/beans http://www.springframework.org/schema/beans/spring-beans.xsd">

    <bean id="cat" class="com.duzhuan.pojo.Cat"/>
    <bean id="dog" class="com.duzhuan.pojo.Dog"/>

    <bean id="people" class="com.duzhuan.pojo.People" autowire="byName">
        <property name="name" value="duzhuan"/>
    </bean>

</beans>
修改为byName,运行之前的测试样例:
而一旦将bean的id修改:
<?xml version="1.0" encoding="UTF-8"?>
<beans xmlns="http://www.springframework.org/schema/beans"
       xmlns:xsi="http://www.w3.org/2001/XMLSchema-instance"
       xsi:schemaLocation="http://www.springframework.org/schema/beans http://www.springframework.org/schema/beans/spring-beans.xsd">

    <bean id="cat1" class="com.duzhuan.pojo.Cat"/>
    <bean id="dog1" class="com.duzhuan.pojo.Dog"/>

    <bean id="people" class="com.duzhuan.pojo.People" autowire="byName">
        <property name="name" value="duzhuan"/>
    </bean>

</beans>
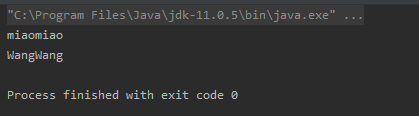
可以看到,将bean的id分别修改为cat1和dog1,再次运行测试样例:

显然,使用byName,需要使用byName的那个Bean中的需要自动注入的实例的名与context中有的bean的名字相同。
5.2 byType
将bean.xml修改为:
<?xml version="1.0" encoding="UTF-8"?>
<beans xmlns="http://www.springframework.org/schema/beans"
       xmlns:xsi="http://www.w3.org/2001/XMLSchema-instance"
       xsi:schemaLocation="http://www.springframework.org/schema/beans http://www.springframework.org/schema/beans/spring-beans.xsd">

    <bean id="cat1" class="com.duzhuan.pojo.Cat"/>
    <bean id="dog1" class="com.duzhuan.pojo.Dog"/>

    <bean id="people" class="com.duzhuan.pojo.People" autowire="byType">
        <property name="name" value="duzhuan"/>
    </bean>

</beans>
这次有autowire="byType",运行测试样例:
通过名字很容易类比得出,byType是自动注入与需要的实例同类型的bean。
那么我们加一个同类型的bean会怎么样?
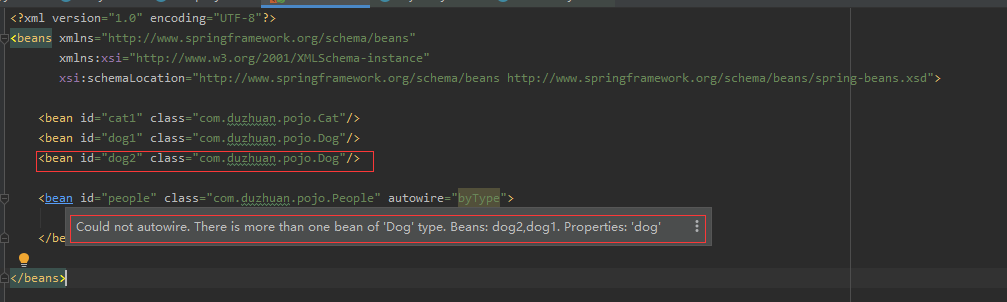
直接报错。

 浙公网安备 33010602011771号