SSM个人博客demo
前言
以前刚刚接触ssm时候,想着学习之余实战下,找了些模板资料,搭建了个简单的博客练手。先看看效果吧。前端页面的模板是找的一个大神的,文章尾给出资源地址。
一、预览
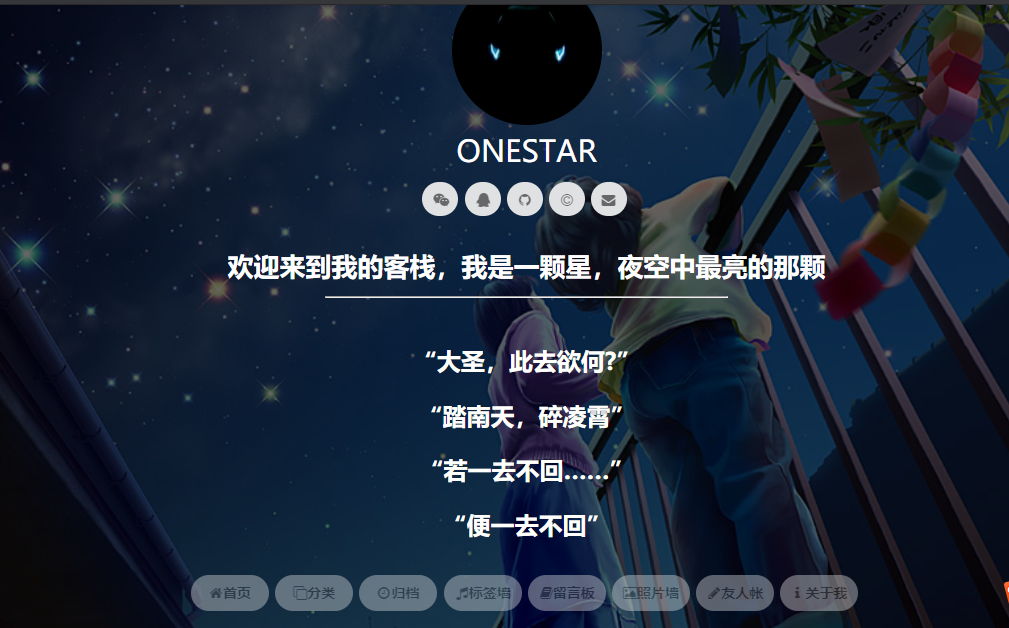
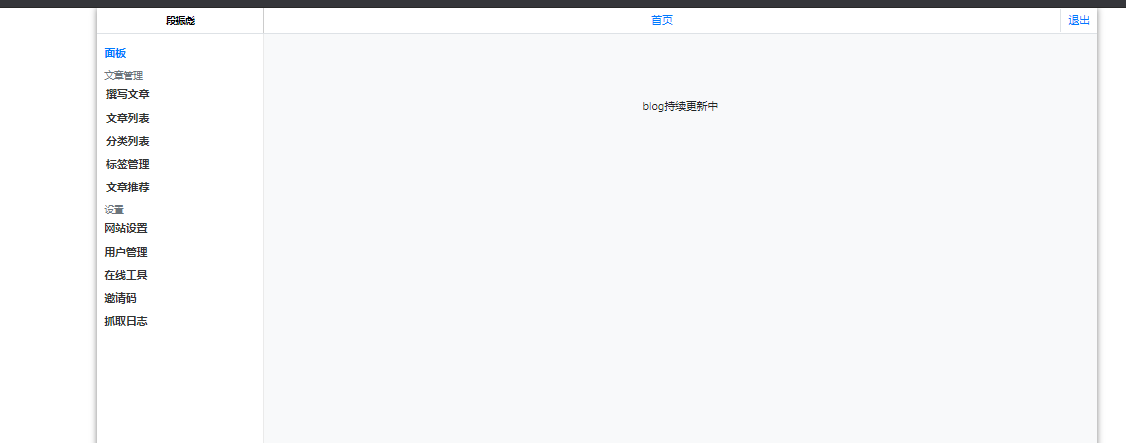
1.主页页面
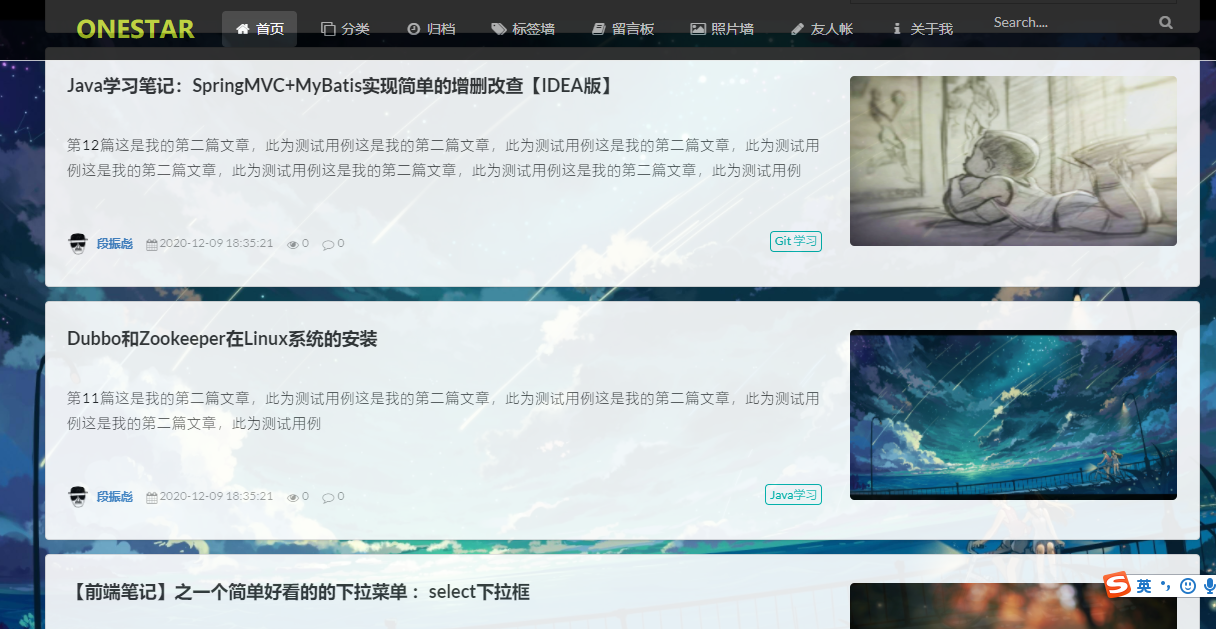
文章列表
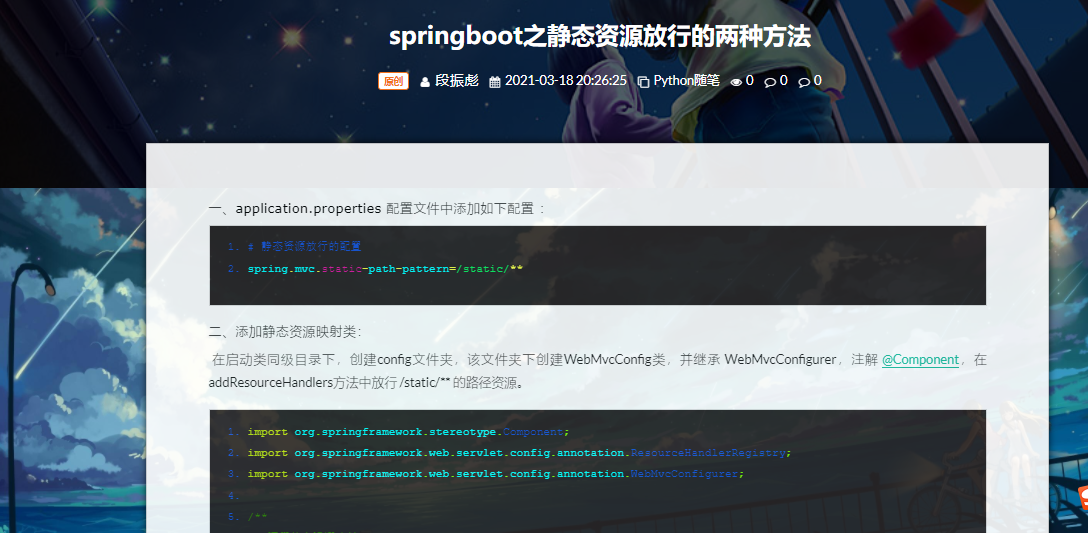
详情页
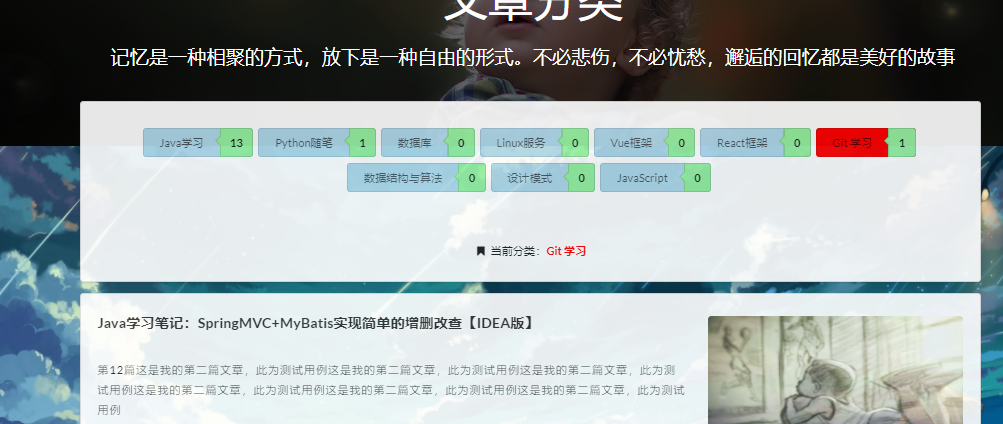
分类页
标签墙

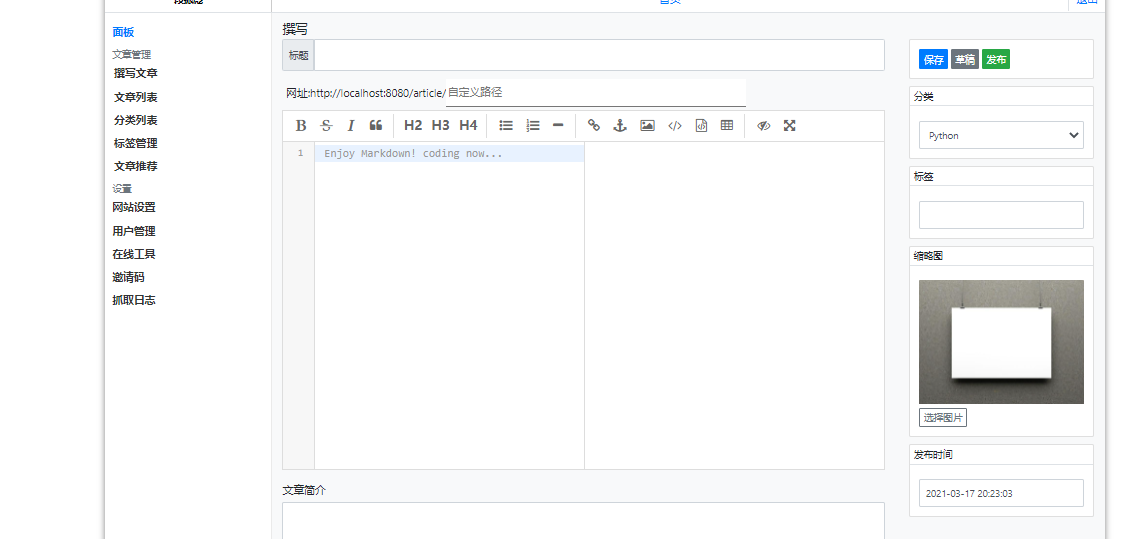
博客后台写文章
文章富文本编辑器样式
其他的就不截图了。
二、实现
1.创建maven项目骨架
idea 创建 maven 项目,勾选 Create from archetype 后选择 maven-archetype-webapp 创建,依着下图创建包文件。

2.导入依赖,tomcat插件运行项目
pom.xml中导入我们用到的依赖,并且在build标签中引入以下编译配置,最后我们选择使用tomcat7-maven-plugin 启动项目;
<resources>
    <!-- 编译之后包含xml -->
    <resource>
        <directory>src/main/java</directory>
        <includes>
            <include>**/*.xml</include>
        </includes>
        <filtering>true</filtering>
    </resource>
    <!-- 编译之后包含xml和properties -->
    <resource>
        <directory>src/main/resources</directory>
        <includes>
            <include>**/*</include>
        </includes>
        <filtering>true</filtering>
    </resource>
</resources>
tomcat7 插件
<plugins>
  <plugin>
    <artifactId>maven-clean-plugin</artifactId>
    <version>3.1.0</version>
  </plugin>
  <!-- 配置Tomcat插件 -->
  <plugin>
    <groupId>org.apache.tomcat.maven</groupId>
    <artifactId>tomcat7-maven-plugin</artifactId>
    <configuration>
      <path>/</path>
      <port>8080</port>
    </configuration>
  </plugin>
</plugins>
启动方法:
idea右上角 Edit Configurations ,点击之后左上角的添加,添加maven,如图:
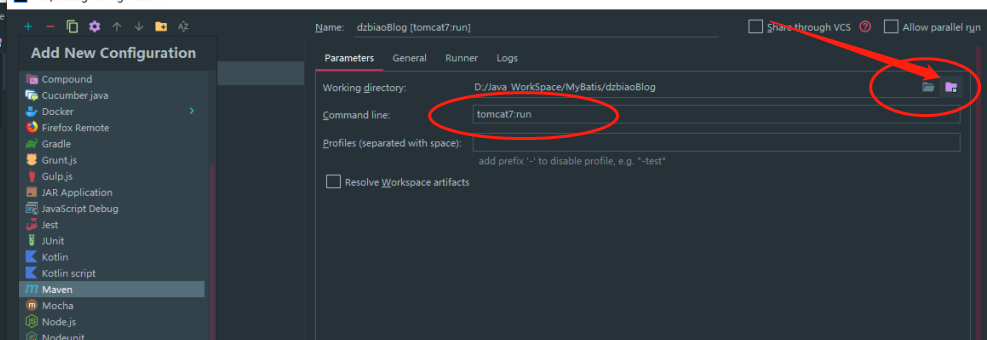
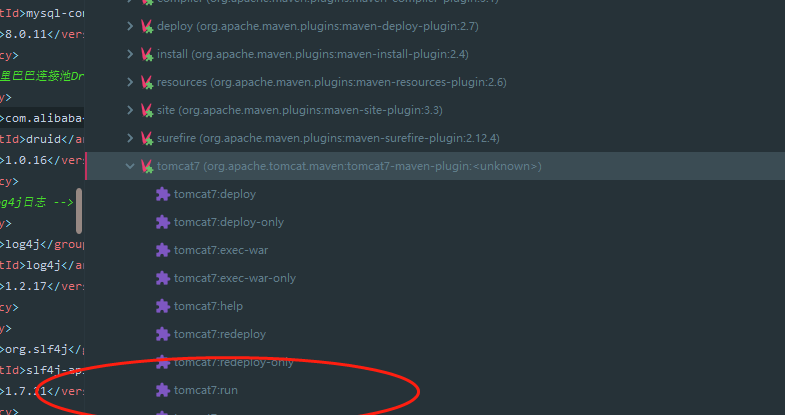
点击之后添加我们的项目模块,Command line 中输入 tomcat7:run ,确定。之后我们可以在右侧maven 管理的Plugins 中找到tomcat7:run ,启动项目的时候,点击它。
3、配置文件
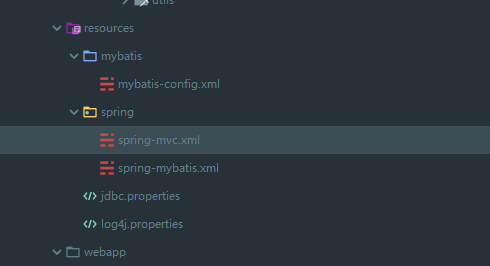
resources文件夹下的关于spring和mybatis的配置文件,我就不截图了,挑重要的配置贴代码。
spring-mvc.xml配置 component-scan扫描、视图解析器、文件上传解析器、静态资源映射等。
 <!-- controller 和service 的 扫描-->
    <context:component-scan base-package="com.dzb.blog" />

    <!-- 一个配置节解决映射器和适配器的配置注解配置 -->
    <mvc:annotation-driven></mvc:annotation-driven>

    <!-- 配置视图解析器 进行jsp解析,默认使用jstl标签,classpath下得有jstl的包-->
    <bean class="org.springframework.web.servlet.view.InternalResourceViewResolver" >
        <!--配置前缀和后缀,也可以不指定-->
        <property name="prefix" value="/views/"/>
        <property name="suffix" value=".jsp"/>
    </bean>

    <!--TODO: 文件上传 -->
    <bean id="multipartResolver" class="org.springframework.web.multipart.commons.CommonsMultipartResolver">
        <!--设置上传最大尺寸为50MB-->
        <property name="maxUploadSize" value="52428800"/>
        <property name="defaultEncoding" value="UTF-8"/>
    </bean>

    <!-- 静态资源映射 -->
    <mvc:resources mapping="/css/**" location="/resource/assets/css/"></mvc:resources>
    <mvc:resources mapping="/js/**" location="/resource/assets/js/"></mvc:resources>
    <mvc:resources mapping="/img/**" location="/resource/assets/img/"></mvc:resources>
    <mvc:resources mapping="/plugin/**" location="/resource/assets/plugin/"></mvc:resources>
    <mvc:resources mapping="/fonts/**" location="/resource/assets/fonts/"></mvc:resources>
    <mvc:resources mapping="/uploads/**" location="/resource/assets/uploads/"></mvc:resources>
spring-mybatis.xml 配置 druid连接池 、接口包的位置等。
<!--加载db.properties-->
<context:property-placeholder location="classpath:jdbc.properties"/>
<!--配置druid连接池-->
<bean id="dataSource" class="com.alibaba.druid.pool.DruidDataSource" init-method="init" destroy-method="close">
    <!-- 基本属性 url、user、password -->
    <property name="driverClassName" value="${jdbc.driver}" />
    <property name="url" value="${jdbc.url}" />
    <property name="username" value="${jdbc.username}" />
    <property name="password" value="${jdbc.password}" />

    <!-- 配置初始化大小、最小、最大 -->
    <property name="initialSize" value="1" />
    <property name="minIdle" value="1" />
    <property name="maxActive" value="20" />

    <!-- 配置获取连接等待超时的时间 -->
    <property name="maxWait" value="60000" />

    <!-- 配置间隔多久才进行一次检测,检测需要关闭的空闲连接,单位是毫秒 -->
    <property name="timeBetweenEvictionRunsMillis" value="60000" />

    <!-- 配置一个连接在池中最小生存的时间,单位是毫秒 -->
    <property name="minEvictableIdleTimeMillis" value="300000" />

    <property name="validationQuery" value="SELECT 'x'" />
    <property name="testWhileIdle" value="true" />
    <property name="testOnBorrow" value="false" />
    <property name="testOnReturn" value="false" />

    <!-- 打开PSCache,并且指定每个连接上PSCache的大小 -->
    <property name="poolPreparedStatements" value="true" />
    <property name="maxPoolPreparedStatementPerConnectionSize" value="20" />

    <!-- 配置监控统计拦截的filters,去掉后监控界面sql无法统计 -->
    <property name="filters" value="stat" />
</bean>

<bean id="sqlSessionFactory" class="org.mybatis.spring.SqlSessionFactoryBean">
    <!--数据库连接池-->
    <property name="dataSource" ref="dataSource"/>
    <!--加载mybatis全局配置文件-->
    <property name="configLocation" value="classpath:mybatis/mybatis-config.xml"/>
    <!--mapper.xml所在位置-->
    <property name="mapperLocations" value="classpath:com/dzb/blog/mapper/*.xml" />
    <!--指定需要使用别名的PO类所在的包-->
    <property name="typeAliasesPackage" value="com.dzb.blog.entity" />
</bean>


<bean class="org.mybatis.spring.mapper.MapperScannerConfigurer">

    <!-- 配置接口包的位置 -->

    <property name="basePackage"  value="com.dzb.blog.dao"/>

    <property name="sqlSessionFactoryBeanName" value="sqlSessionFactory" />

</bean>
mybatis-config.xml
其中 <setting name="useGeneratedKeys" value="true"/> 这个在写文章和更新文章的时候,是需要mybatis添加数据之后返回主键id,所以这个配置尤为重要。
<configuration>

    <!-- 全局配置 -->
    <settings>
        <!--允许 JDBC 支持自动生成主键-->
        <setting name="useGeneratedKeys" value="true"/>
        <!--是否开启自动驼峰命名规则(camel case)映射,即从经典数据库列名 A_COLUMN 到经典
            Java 属性名 aColumn 的类似映射。 -->
        <!--<setting name="mapUnderscoreToCamelCase" value="true"/>-->
    </settings>

    <plugins>
        <plugin interceptor="com.github.pagehelper.PageHelper">
            <!--<property name="dialect" value="mysql"/>-->
            <property name="offsetAsPageNum" value="false"/>
            <property name="rowBoundsWithCount" value="false"/>
            <property name="pageSizeZero" value="true"/>
            <property name="reasonable" value="true"/>
            <property name="supportMethodsArguments" value="false"/>
            <property name="returnPageInfo" value="none"/>
        </plugin>
    </plugins>
</configuration>
jdbc.properties
jdbc.driver=com.mysql.cj.jdbc.Driver
jdbc.url=jdbc:mysql://localhost:3306/myblog?serverTimezone=UTC&useSSL=false
jdbc.username=root
jdbc.password=root
jdbc.acquireIncrement=5
jdbc.initialPoolSize=10
jdbc.minPoolSize=5
jdbc.maxPoolSize=20
log4j.properties
# Configure logging for testing: optionally with log file
log4j.rootLogger=WARN, stdout, logfile
log4j.appender.stdout=org.apache.log4j.ConsoleAppender
log4j.appender.stdout.layout=org.apache.log4j.PatternLayout
log4j.appender.stdout.layout.ConversionPattern=%d %p [%c] - %m%n
log4j.appender.logfile=org.apache.log4j.FileAppender
log4j.appender.logfile.File=target/ForestBlog.log
log4j.appender.logfile.layout=org.apache.log4j.PatternLayout
log4j.appender.logfile.layout.ConversionPattern=%d %p [%c] - %m%n
其他的就不一一粘贴了,资源文章末尾自取吧。(粘贴的太多了)
三、功能
至于功能点,个人博客主要是浏览博文的,所以前端博客基本上是查询,返回博文,基于ssm + mybatis,不过值得一说的是:页面使用了com.googlecode.rapid-framework.rapid-core,我主要看中了它的页面继承能力。
<dependency>
  <groupId>com.googlecode.rapid-framework</groupId>
  <artifactId>rapid-core</artifactId>
  <version>4.0.5</version>
</dependency>
我们可以写一个base模板,其他页面继承该base.js 简单方便,让我想起了以前写Django的时候也是用的继承模板.......
写博客+博文回显
该项目博文模块的展示已经实现,以及 localhost:8080/admin,写博客的页面,博客的添加,主要讲讲后台写博客的流程,和博文回显的流程。
我们写撰写博客的地址是:localhost:8080/admin/write, 该博客富文本编辑器为 editormd (效果查看预览下的文章富文本编辑器样式图),当我们点击保存时,write_article.jsp 中的save()方法,会将数据通过ajax向后台请求。
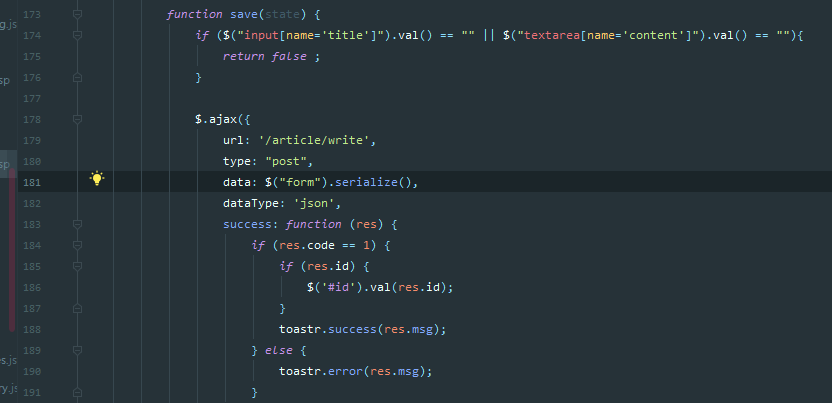
后台接口ArticleController.java 下的writeArticle 进行逻辑判断和添加更新。添加成功时,mybatis返回主键id,ajax 将返回的id 赋值到页面中($("#id").val(res.id));等到更新时,通过id进行文章更新。mybatis 返回主键id索要添加的属性:
<insert id="addArticle" useGeneratedKeys="true" keyProperty="id" ></insert>
至于数据回显,articleDetail.jsp 中需要注意的是:在该页面中添加 js支持。
<script src="/plugin/editor_md/lib/marked.min.js" ></script>
<script src="/plugin/editor_md/lib/prettify.min.js" ></script>
<script src="/plugin/editor_md/lib/raphael.min.js" ></script>
<script src="/plugin/editor_md/lib/underscore.min.js" ></script>
<script src="/plugin/editor_md/lib/sequence-diagram.min.js" ></script>
<script src="/plugin/editor_md/lib/flowchart.min.js" ></script>
<script src="/plugin/editor_md/lib/jquery.flowchart.min.js" ></script>
<script src="/plugin/editor_md/editormd.min.js" ></script>
<script type="text/javascript">
    /*editormd*/
    $(function () {
        editormd.markdownToHTML("content", {
            htmlDecode      : "style,script,iframe",  // you can filter tags decode
            emoji           : true,
            taskList        : true,
            tex             : true,  // 默认不解析
            flowChart       : true,  // 默认不解析
            sequenceDiagram : true,  // 默认不解析
        });
    })
</script>
回显区域HTML
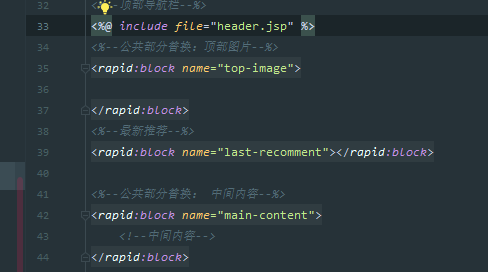
<!--中间主要内容部分-->
<div id="content" class="typo  typo-selection js-toc-content m-padded-lr-responsive m-padded-tb-large" style="min-height: 200px;">
    <textarea id="append-test" style="display:none;">${article.content}</textarea>
</div>
评论
还未实现.....(尴尬,哈哈)
四、来源
前端这个页面模板我很喜欢,所以用这个模板进行练手,贴出地址 : https://github.com/oneStarLR/myblog-page, 有兴趣可以去看看。
后台的写文章的编辑样式,是基于何三笔记的后台,是我以前写Flask时找到的素材改的,我也很喜欢他的文章编辑器的排版。该大佬的地址: https://www.h3blog.com/ (基于该博客源码.)
五、未完.....
该demo地址 : 链接:https://pan.baidu.com/s/1xRDy6uJgc--HhPILYOcn-Q 提取码:00iw
对了,数据库文件也在压缩包中。
这是个demo。
未完待续吧,写东西没动力.....(见谅)

 浙公网安备 33010602011771号