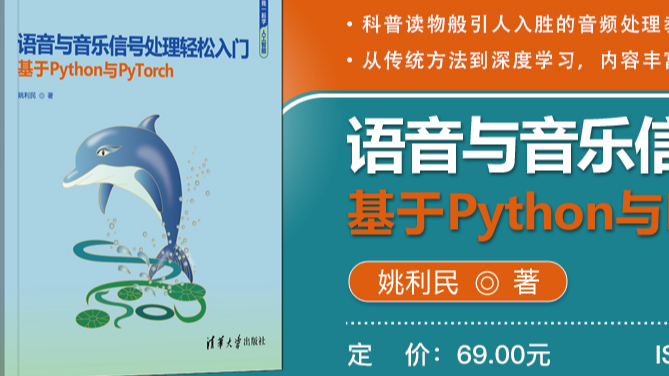
语音与音乐信号处理轻松入门(基于Python与PyTorch)
为了对音乐风格进行分类,需要提取音频的一些特征,在本案例中提取了MFCC、频谱质心等特征。Torchaudio中提供了相应的处理功能,不过为了保持本书的一贯性仍然使用了librosa进行处理。所有音频统一取前128帧的特征并组合成一个33维的特征向量,最后将提取的特征和标签数据保存为npy文件。特征提取阶段的代码如下:
第12章/prepare_data.
import librosa
import re
import numpy as np
root_dir = 'E:/Download/Genres/' #GTZAN数据集根目录
feature_file = 'features.npy' #特征数据文件
label_file = 'labels.npy' #标签数据文件
数据集中所有音乐风格分类
genre_list = ['blues', #布鲁斯
'classical', #古典音乐
'country', #乡村音乐
'disco', #迪斯科
'hiphop', #嘻哈
'jazz', #爵士乐
'metal', #金属乐
'pop', #流行音乐
'reggae', #雷盖乐
'rock'] #摇滚乐
训练用音频文件清单
def make_list(start_num, end_num):
#start_num:起始编号;end_num:截止编号
filelist = []
for i in range(len(genre_list)):
genre = genre_list[i]
dir = root_dir + genre + '/'
for id in range(start_num, end_num):
name = dir + genre + '.' + f'{id:05d}'+'.wav'
filelist.append(name)
return filelist
生成独热代码
def onehot(target):
code = np.zeros((target.shape[0], len(genre_list)))
for i, str in enumerate(target):
index = genre_list.index(str)
code[i, index] = 1
return code
提取音频特征
def get_features(file_list):
hop_length = 512
total = len(file_list) #文件数量
data = np.zeros((total, 128, 33), dtype=np.float64)
target = []
for i, file in enumerate(file_list):

    #加载文件并提取mfcc、频谱质心等特征
    y, sr = librosa.load(file, sr=22050)
    mfcc = librosa.feature.mfcc(
        y=y, sr=sr, hop_length=hop_length, n_mfcc=13
    )
    centroid = librosa.feature.spectral_centroid(
        y=y, sr=sr, hop_length=hop_length
    )
    chroma = librosa.feature.chroma_stft(
        y=y, sr=sr, hop_length=hop_length
    )
    contrast = librosa.feature.spectral_contrast(
        y=y, sr=sr, hop_length=hop_length
    )

    data[i, :,  0:13] = mfcc.T[0:128, :]
    data[i, :, 13:14] = centroid.T[0:128, :]
    data[i, :, 14:26] = chroma.T[0:128, :]
    data[i, :, 26:33] = contrast.T[0:128, :]

    #提取音乐风格名称
    genre = re.split("[ /]", file)[3]
    target.append(genre)

    #输出处理结果
    print('Feature extraction for No. %i of %i files finished.'
          % (i + 1, total))
return data, np.expand_dims(np.asarray(target), axis=1)
if name == "main":
#生成音频文件清单(每种风格前70个)
filelist = make_list(0, 70)
print('Total files: ', len(filelist))

#提取音频特征并保存为npy文件
features, target = get_features(filelist)
labels = onehot(target)
with open(feature_file, "wb") as f:
    np.save(f, features)
with open(label_file, "wb") as f:
    np.save(f, labels)

print('Feature extraction finished!')
上述代码运行后将生成features.npy和labels.npy两个数据文件供调用。由于每种音乐风格仅提取了前70个文件的特征,因此特征数据的维度为(700,128,33)。
12.3.3 模型及训练
接下来进入模型设计阶段。本案例采用LSTM模型,因而结构比较简单。训练的代码也并不复杂,每批样本数设为35个,这样批次共20批(700/35=20),考虑到处理速度,优先使用GPU进行训练。有关模型和训练过程的代码如下:
第12章/train.py
import os
import sys
import numpy as np
import torch
import torch.nn as nn
import torch.nn.functional as F
import torch.optim as optim
LSTM模型定义
class LSTM(nn.Module):
#模型初始化函数
def init(self, input_size, hidden_size, output_size, num_layers):
super(LSTM, self).init()
self.input_size = input_size
self.hidden_size = hidden_size
self.num_layers = num_layers
    self.lstm = nn.LSTM(self.input_size, self.hidden_size,
                        self.num_layers)  #LSTM层
    self.fc = nn.Linear(self.hidden_size, output_size)  #全连接层

#前向计算函数
def forward(self, input, hidden=None):
    out, hidden = self.lstm(input, hidden)
    logits = self.fc(out[-1])
    predict = F.log_softmax(logits, dim=1)
    return predict, hidden

#计算准确率的函数
def cal_accuracy(self, predictions, labels, batch_size):
    #获取最大值的索引值
    predict = torch.max(predictions.data, 1)[1]
    #预测准确次数
    correct_num = predict.eq(labels.data).sum()
    #计算准确率并返回
    accuracy = correct_num / batch_size

    return accuracy.item()
训练函数
def train(features, labels, model, criterion, optimizer, epochs,
num_batches, batch_size, byCuda):
#使用GPU时的转换
if byCuda:
    model = model.cuda()
    criterion = criterion.cuda()

#训练循环
for epoch in range(epochs):

    #初始化
    losses = 0.0
    accuracy = 0.0
    hidden_state = None

    #处理一个批次
    for i in range(num_batches):

        #提取一批次数据
        feature = features[i * batch_size: (i + 1) * batch_size, ]
        label = labels[i * batch_size: (i + 1) * batch_size, ]

        #根据模型和损失函数要求对数据进行调整
        feature = feature.permute(1, 0, 2)  #转置函数
        label = torch.max(label, 1)[1]      #NLLLoss函数要求格式

        #张量转移到GPU上
        if by_cuda:
            feature = feature.cuda()
            label = label.cuda()

        #梯度清零
        model.zero_grad()

        #前向传播
        pred, _ = model(feature, hidden_state)

        #计算损失函数值
        loss = criterion(pred, label)

        #反向传播
        loss.backward()

        #对网络进行优化
        optimizer.step()

        #累计损失函数值并计算准确率
        losses += loss.item()
        accuracy += model.cal_accuracy(pred, label, batch_size)

    #输出此轮训练结果
    print('Epoch:  %d | NLLoss: %.4f | Accuracy rate: %.2f'
          % (epoch+1, losses / num_batches, 100.0 * accuracy / num_batches))
if name == "main":
feature_file = 'features.npy'   #特征数据文件
label_file = 'labels.npy'       #标签数据文件

#检查是否存在npy文件
if (os.path.isfile(feature_file) and os.path.isfile(label_file)):
    print('Loading npy files')
    feature_data = np.load(feature_file)
    label_data = np.load(label_file)
else:
    print('Preprocessed files does not exist, please check!')
    sys.exit()

#转换成张量并输出shape
features = torch.from_numpy(feature_data).type(torch.Tensor)
labels = torch.from_numpy(label_data).type(torch.LongTensor)
print('Features shape: ' + str(feature_data.shape))
print('Labels shape: ' + str(label_data.shape))

epochs = 200        #训练轮数
batch_size = 35     #每批样本数
num_batches = int(features.shape[0] / batch_size)  #700÷35=20批

#构建LSTM模型并输出模型参数
print('Building LSTM model ...')
model = LSTM(33, 128, 10, 2)
criterion = nn.NLLLoss()
optimizer = optim.Adam(model.parameters(), lr=0.001)
print(model.parameters)

#检查是否有Cuda
by_cuda = torch.cuda.is_available()
if by_cuda:
    print('Training on GPU ...')
else:
    print('Training on CPU ...')

#训练过程
train(features, labels, model, criterion,
      optimizer, epochs, num_batches, batch_size, by_cuda)
上述代码先检查是否有处理好的特征数据和标签数据文件,确认无误后开始构建模型,其间将输出如图12-19所示的信息。


 近年来人工智能技术突飞猛进,以语音识别为代表的音频处理技术取得了大量突破,但该领域内理论结合实战的入门书籍却较为缺乏,本书旨在为有志学习音频信号处理的读者提供一本实用的入门书籍。
本书共13章,第1章和第2章是基础部分,包括声学基础知识及Python基础等内容;第3到4章介绍了音频信号的获取及分析方法;第5~8章介绍了语音识别基础、传统语音识别技术及语音识别、语音合成的实战技术;第9章和第10章介绍了常用的音乐分析方法及Python编曲等内容;第11~13章介绍了深度学习的基础知识及如何用PyTorch对语音和音乐信号进行分析处理。

 浙公网安备 33010602011771号