
Python基础(7)——redis、加密(md5、base64)、接口开发、网络编程
正文
一、redis
1、安装模块:
pip install redis
2、连接redis
插入key-value,查找
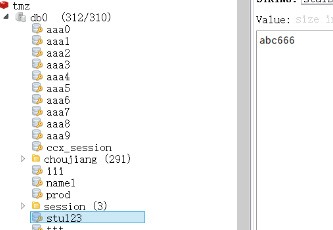
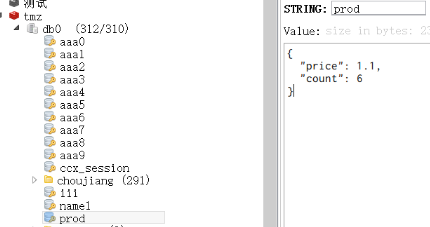
import redis
r=redis.Redis(
    host='127.0.0.1',
    password='123456',
    port=6379,
    db=0
)
r.set('stu123','abc666') #v只能字符串
r.set('prod','{"price":1.1,"count":6}')
print(r.get('prod'))

3、字节类型 <---转换--> 字符串
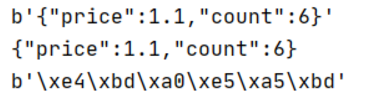
print(r.get('prod'))#b'{"price":1.1,"count":6}'
#bytes 字节类型
# f=open('a.jpg','wb') #bytes
data=r.get('prod')
print(data.decode())  #bytes 字节类型转换成字符串
s='你好'
print(s.encode())#变成bytes类型
4、删除key
print(r.get('prod'))#b'{"price":1.1,"count":6}'
r.delete('prod')   #删除
5、过期时间
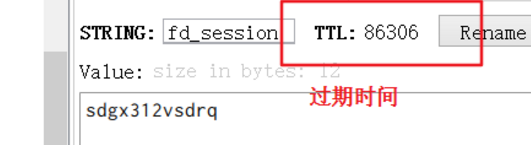
r.set('prod','123')
expire_time = 60*60*24  #过期时间  单位s
r.set('fd_session','sdgx312vsdrq',expire_time)
6、哈希类型
1)插入数据、查找
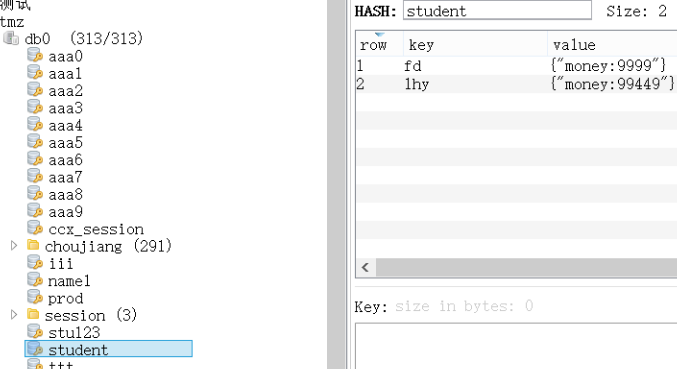
r.hset('student','fd','{"money:9999"}')
r.hset('student','ds','{"money:991299"}')
r.hset('student','lhy','{"money:99449"}')

print(r.hget('student','ds'))
print(r.hgetall('student'))

2)删除
#hash
r.hset('student','fd','{"money:9999"}')
r.hset('student','ds','{"money:991299"}')
r.hset('student','lhy','{"money:99449"}')

print(r.hget('student','ds'))
print(r.hgetall('student'))
r.expire('student',100)#指定某个key的过期时间
r.hdel('student','ds') #删除hash中某个key
3)转化为字典
#转化为字典
d= r.hgetall('student')
new_d={}
for k,v in d.items():
    new_d[k.decode()]=v.decode()
print(new_d)

#其他方法:
#当添加加参数decode_responses=True返回的直接就是字典
# r=redis.Redis(
#     host='118.24.3.40',
#     password='HK139bc&*',
#     port=6379,
#     db=0,
#    decode_responses=True
# )

4)其他方法
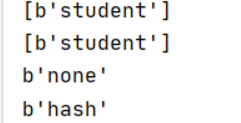
print(r.keys()) #获取当前库中所有key
print(r.keys('s*'))
print(r.type('stu'))
print(r.type('student'))
# print(r.flushdb())#清空当前数据库所有key
# print(r.flushall())#清空所有数据库所有key
# print(r.exists('abc'))#判断某个key是否存在
5)管道
适用于数据大的,不会每次交互,批量执行,耗时短
p = r.pipeline()#建立管道
p.hset('students','fd','{"money:9999"}')
p.hset('students','ds','{"money:991299"}')
p.hset('students','lhy','{"money:99449"}')
# p.set()
# p.get()
print(p.exists('students'))#判断某个key是否存在
p.execute()#执行
print(r.exists('students'))#判断某个key是否存在

p = r.pipeline()
p.hgetall('students')
s=p.execute()#执行
print(s)

6)key中建立文件夹
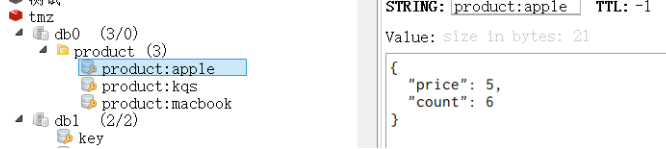
#key中建立文件夹
r.set('product:kqs','{"price":1.1,"count":6}')
r.set('product:macbook','{"price":9999,"count":6}')
r.set('product:apple','{"price":5,"count":6}')
练习:服务器迁移
r=redis.Redis(
    host='xxx.xxx.xxx.xxx',
    password='xxxxx',
    port=6378,
    db=0,
    decode_responses=True
)
r2=redis.Redis(
    host='xxx.xxxx.xxx.xxx',
    password='xxxxx',
    port=6378,
    db=0,
    decode_responses=True
)
p=r2.pipeline()
for k in r.keys():
    key_type=r.type(k)
    if key_type=='string':
        value=r.get(k)
        p.set(k,value)
    elif key_type=='hash':
        hash_data=r.hgetall(k) #{'xx':xxx}
        for filed,data in hash_data.items():
            p.hset(k,filed,data)
p.execute()
二、加密
1、md5
import  hashlib
s='123456'
s=s.encode()
m = hashlib.md5(s)  #md5必须传bytes类型
#md5加密是不可逆的
result = m.hexdigest() #16进制
print(result)
#同样的字符串,md5出来的结果都一样
#可以把用户输入的密码加密后,与数据库比对
2、加盐
在加密字符串后再自行定义一串字符串与原字符串拼接后再加密
import  hashlib

s = '123456' + 'dghcsb#$'  # 加盐
s = s.encode()
m = hashlib.md5(s)  # md5必须传bytes类型
n = hashlib.sha256(s) #位数更长
result = m.hexdigest()
print(result)
练习:定义一个函数给传入的字符串md5加密
def my_md5(s):
    s = str(s)
    s = s.encode()
    m = hashlib.md5(s)  # md5必须传bytes类型
    result = m.hexdigest()
    return result
3)base64
加密解密:
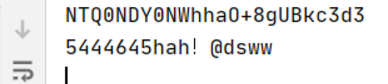
import base64

#加密
s='5444645hah!@dsww'
r = base64.b64encode(s.encode())
result=r.decode()
print(result)

#解密
r =base64.b64decode(result)
print(r.decode())
三、接口开发
1、安装
pip install flask
pip install fastapi
pip install uvicorn
2、mock接口——使用fastapi
会自己生成接口文档:http://127.0.0.1:8888/docs
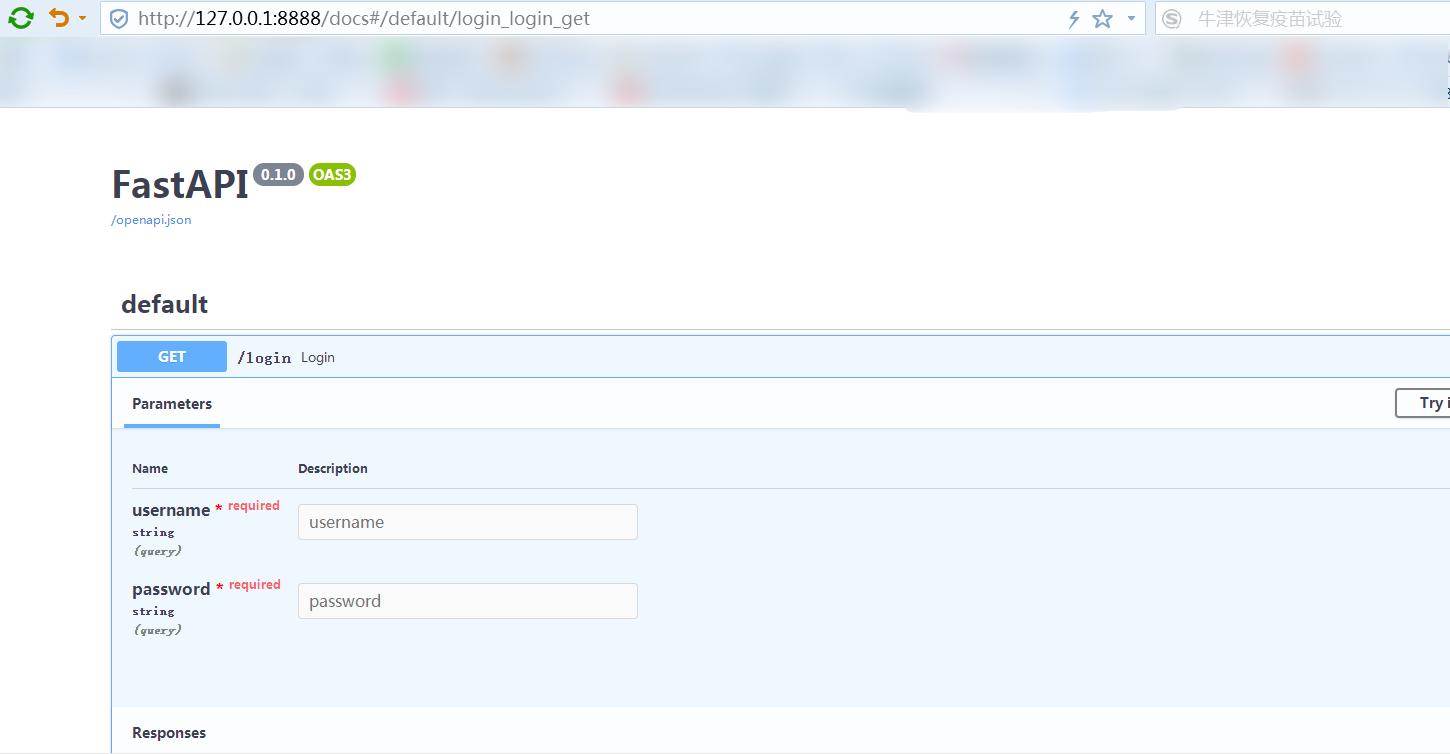
1)get方法
举例:
import fastapi
import  uvicorn

server = fastapi.FastAPI()

@server.get('/login')
def login(username:str,password:str):
    return {'username':username,'password':password,'code':'0000'}

uvicorn.run(server,port=8888,debug=True)

入参与返回参数:
@server.get('/product')
def product():
    return {
        'code':0,
        'data':[
            {'product_name':'zhaozhaoying1','status':0},
            {'product_name': 'zhaozhaoying1', 'status': 0},
            {'product_name': 'zhaozhaoying1', 'status': 0}
        ]
    }
@server.get('/pay')
def pay(money:float,status='1'): #默认值
    if status=='0':
        return {'code':1,'status':'fail'}
    elif status=='1':
        return {'code':1,'status':'success','balance':money}
url:http://127.0.0.1:8888/pay?money=1.1

练习:注册与登陆接口
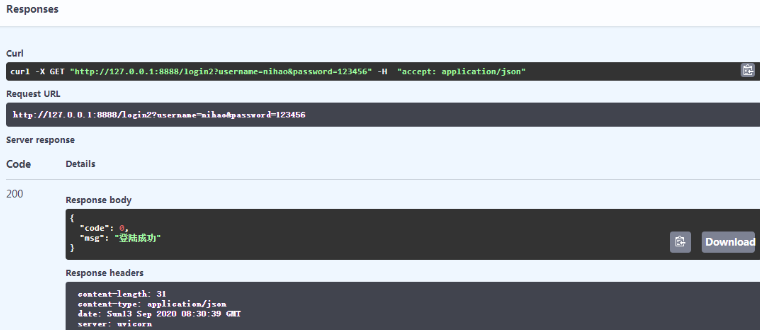
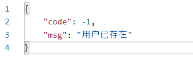
@server.get('/reg')
def reg(username:str,password:str,cpassword:str):
    if username.strip() and password.strip() and cpassword.strip():
        sql="select * from app_myuser where username='%s';"%username
        if tools.execute_sql(sql):
            return {'code':-1,'msg':'用户已存在'}
        else:
            p=tools.my_md5(password)
            insert_sql="insert into app_myuser(username,passwd) value('%s','%s')"%(username,p)
            tools.execute_sql(insert_sql)
            return {'code':0,'msg':'注册成功!'}
    else:
        return {'code':-1,'msg':'必填项不得为空'}

@server.get('/login2')
def login2(username:str,password:str):
    if username.strip() and password.strip() :
        sql = "select * from app_myuser where username='%s';" % username
        result=tools.execute_sql(sql)
        if result:
            p = tools.my_md5(password)
            sql2 = "select * from app_myuser where username='%s' and passwd='%s' ;" %(username,p)
            result2 = tools.execute_sql(sql)
            if result2:
                return {'code': 0, 'msg': '登陆成功'}
        else:
            return {'code': -1, 'msg': '用户不存在'}
    else:
        return {'code': -1, 'msg': '必填项不得为空'}

uvicorn.run(server,port=8888,debug=True)
2)post接口
举例:请求数据在url里:
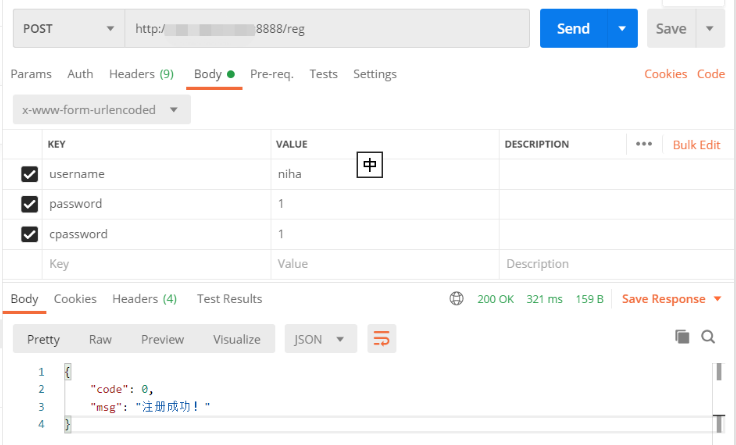
@server.post('/reg')
def reg(username:str,password:str,cpassword:str):
    if username.strip() and password.strip() and cpassword.strip():
        sql="select * from app_myuser where username='%s';"%username
        if tools.execute_sql(sql):
            return {'code':-1,'msg':'用户已存在'}
        else:
            p=tools.my_md5(password)
            insert_sql="insert into app_myuser(username,passwd) value('%s','%s')"%(username,p)
            tools.execute_sql(insert_sql)
            return {'code':0,'msg':'注册成功!'}
    else:
        return {'code':-1,'msg':'必填项不得为空'}
uvicorn.run(server,port=8888,debug=True,host='0.0.0.0')  # 访问ip地址
这种方式的接口请求数据在url后而不是body里
请求参数在body中
import fastapi
import uvicorn
import tools  #调用上述练习中md5加密方法

from fastapi import Form
from starlette.requests import Request
server = fastapi.FastAPI()

#pip install python-multipart
@server.post('/reg')
def reg(request:Request,username:str=Form(...),password:str=Form(...),cpassword:str=Form(...)):
    if username.strip() and password.strip() and cpassword.strip():
        sql="select * from app_myuser where username='%s';"%username
        if tools.execute_sql(sql):
            return {'code':-1,'msg':'用户已存在'}
        else:
            p=tools.my_md5(password)
            insert_sql="insert into app_myuser(username,passwd) value('%s','%s')"%(username,p)
            tools.execute_sql(insert_sql)
            return {'code':0,'msg':'注册成功!'}
    else:
        return {'code':-1,'msg':'必填项不得为空'}
2、mock接口——使用flask
fastapi与flask区别: 1、fastapi只能写接口;flask是轻量级的web开发框架 2、fastapi返回字典;flask返回json串 3、flask加代码后自动重启
使用方法:
举例:登陆与注册
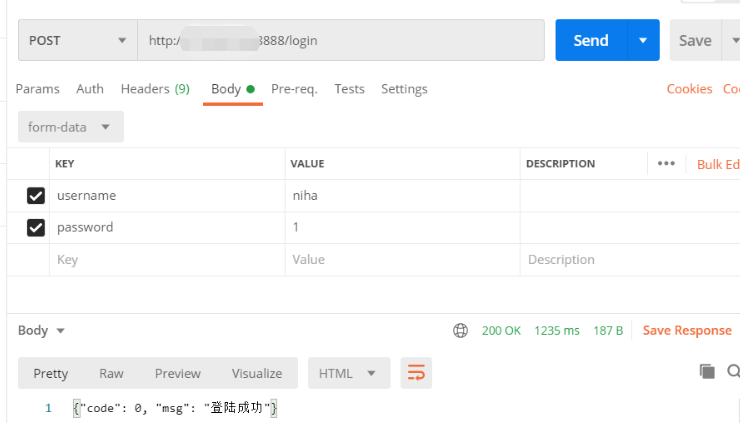
import flask
import tools  #md5加密/连接数据库
import json

server = flask.Flask(__name__)
@server.route('/login',methods=['post','get'])
def login():
    #传参数无论是在url或是form-data都能获取到
    username=flask.request.values.get('username')
    password=flask.request.values.get('password')
  # flask.json.get('xxxx') #如果入参是json类型的话
  # flask.request.cookies.get('xxx')#获取cookie里面的数据
  # flask.request.headers.get('xxx')
  # flask.request.files.get("xxx")#文件

    if username.strip() and password.strip() :
        sql = "select * from app_myuser where username='%s';" % username
        result=tools.execute_sql(sql)
        if result:
            p = tools.my_md5(password)
            sql2 = "select * from app_myuser where username='%s' and passwd='%s' ;" %(username,p)
            result2 = tools.execute_sql(sql)
            if result2:
                #flask返回json串
                return json.dumps({'code': 0, 'msg': '登陆成功'},ensure_ascii=False)
        else:
            return json.dumps({'code': -1, 'msg': '用户不存在'},ensure_ascii=False)
    else:
        return json.dumps({'code': -1, 'msg': '必填项不得为空'},ensure_ascii=False)


@server.route('/reg',methods=['post','get'])
def reg():
    username = flask.request.values.get('username')
    password = flask.request.values.get('password')
    cpassword = flask.request.values.get('cpassword')
    if username.strip() and password.strip() and cpassword.strip():
        sql = "select * from app_myuser where username='%s';" % username
        if tools.execute_sql(sql):
            return json.dumps({'code': -1, 'msg': '用户已存在'},ensure_ascii=False)
        else:
            p = tools.my_md5(password)
            insert_sql = "insert into app_myuser(username,passwd) value('%s','%s')" % (username, p)
            tools.execute_sql(insert_sql)
            return json.dumps({'code': 0, 'msg': '注册成功!'},ensure_ascii=False)
    else:
        return json.dumps({'code': -1, 'msg': '必填项不得为空'},ensure_ascii=False)


server.run(host='0.0.0.0',port=8888,debug=True)
# server.run(host='127.0.0.1',port=8888,debug=True)
url:http://127.0.0.1:8999/login?username=nihao&password=123456

四、网络编程
1、使用urllib
1)post
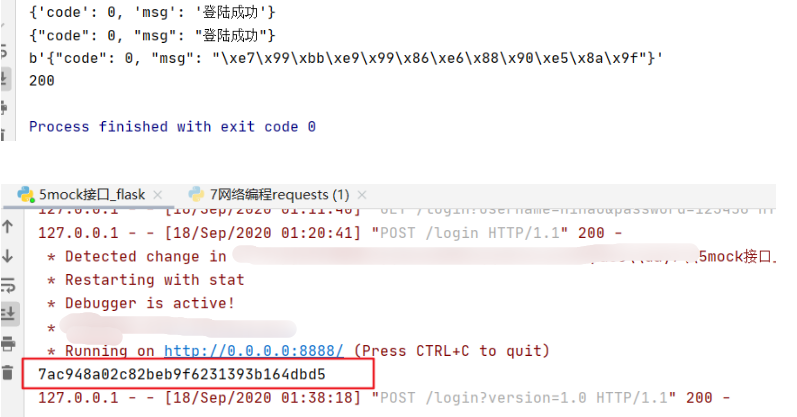
from  urllib import request
import json

# # 开发好一个接口 server
# # 测试请求接口client
#发get请求test
url = 'http://127.0.0.1:8888/login?username=nihao&password=123456'
req = request.urlopen(url)#get请求
print(req.read())
print(req.read().decode())
返回结果:
b'{"code": 0, "msg": "\xe7\x99\xbb\xe9\x99\x86\xe6\x88\x90\xe5\x8a\x9f"}'
{"code": 0, "msg": "登陆成功"}
#把返回参数变为字典
url = 'http://127.0.0.1:8888/login?username=nihao&password=123456'
req = request.urlopen(url)#get请求
dic = json.loads(req.read().decode())
print(dic)
返回结果:
{'code': 0, 'msg': '登陆成功'}
2)get
from  urllib import request
from  urllib.parse import urlencode
import json
#2、发post请求
url = 'http://127.0.0.1:8888/login'
data = {'username':'nihao','password':'123456'}  #请求数据
print(urlencode(data)) #请求数据由字典变为字符串
req=request.urlopen(url,urlencode(data).encode()) #.encode()请求数据转换为bytes类型
dic = json.loads(req.read().decode())#返回数据由json再转为字典
print(dic)
返回结果:
username=nihao&password=123456
{'code': 0, 'msg': '登陆成功'}
2、使用request(推荐)
1)get
import requests

url = 'http://127.0.0.1:8888/login'
data = {'username':'nihao','password':'123456'}  #请求数据
r=requests.get(url,data)
print(r.json()) #->字典
print(r.text)#字符串格式
print(r.content) #二进制返回参数,bytes类型的
print(r.status_code)#返回的状态码
返回结果:
{'code': 0, 'msg': '登陆成功'}
{"code": 0, "msg": "登陆成功"}
b'{"code": 0, "msg": "\xe7\x99\xbb\xe9\x99\x86\xe6\x88\x90\xe5\x8a\x9f"}'
200
2)post请求
url = 'http://127.0.0.1:8888/login'
data = {'username':'nihao','password':'123456'}  #请求数据
r=requests.post(url,data)
# r=requests.post(url,data=data,params={"version":1.0})  #当url中需要传参数写在params,body中form-data写在data中
print(r.json()) #->返回的是字典  d.get('')
print(r.text)#字符串格式 保存时
print(r.content) #二进制返回参数,bytes类型的
print(r.status_code)#返回的状态码
返回结果:
{'code': 0, 'msg': '登陆成功'}
{"code": 0, "msg": "登陆成功"}
b'{"code": 0, "msg": "\xe7\x99\xbb\xe9\x99\x86\xe6\x88\x90\xe5\x8a\x9f"}'
200
3)cookie
#服务端:
server = flask.Flask(__name__)
@server.route('/login',methods=['post','get'])
def login():
    #传参数无论是在url或是form-data都能获取到
    username=flask.request.values.get('username')
    password=flask.request.values.get('password')
    print(flask.request.cookies.get('PHPSESSID'))
。。。
url = 'http://127.0.0.1:8888/login'
data = {'username':'nihao','password':'123456'}  #请求数据
cookie = {'PHPSESSID':'7ac948a02c82beb9f6231393b164dbd5'} #方法1直接定义一个字典
r=requests.post(url,data=data,params={"version":1.0},cookies=cookie)
print(r.json()) #->返回的是字典  d.get('')
print(r.text)#字符串格式 保存时
print(r.content) #二进制返回参数,bytes类型的
print(r.status_code)#返回的状态码
获取cookie方法2:
url = 'http://127.0.0.1:8888/login'
data = {'username':'nihao','password':'123456'}  #请求数据
#方法2直接传header
headers = {
    'user-agent':'xxx',
    'cookie':'PHPSESSID=7ac948a02c82beb9f6231393b164dbd5;oschina_new_user=false; user_locale=zh-CN; tz=Asia%2FShanghai; '}
r=requests.post(url,data=data,params={"version":1.0},headers=headers)
print(r.json()) #->返回的是字典  d.get('')
print(r.text)#字符串格式 保存时
print(r.content) #二进制返回参数,bytes类型的
print(r.status_code)#返回的状态码
4)传json
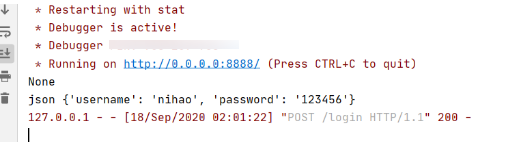
#服务端
server = flask.Flask(__name__)
@server.route('/login',methods=['post','get'])
def login():
    username=flask.request.values.get('username','') #如果取不到默认为空
    password=flask.request.values.get('password','')
    print(flask.request.cookies.get('PHPSESSID'))
    print('json',flask.request.json)
。。。
url = 'http://127.0.0.1:8888/login'
data = {'username':'nihao','password':'123456'}  #请求数据
r=requests.post(url,json=data)
print(r.json()) #->返回的是字典  d.get('')
print(r.text)#字符串格式 保存时
print(r.content) #二进制返回参数,bytes类型的
print(r.status_code)#返回的状态码

5)传文件
url='http://xxxxx/api/file/file_upload'
data={'file':open('student.xls','rb')}
r=requests.post(url,files=data)
返回结果:
{'error_code': 0, 'msg': '操作成功!'}
{
"error_code": 0,
"msg": "操作成功!"
}
b'{\n "error_code": 0,\n "msg": "\xe6\x93\x8d\xe4\xbd\x9c\xe6\x88\x90\xe5\x8a\x9f\xef\xbc\x81"\n}'
200
6)下载文件
例:下载图片
r=requests.get('https://ss2.bdstatic.com/70cFvnSh_Q1YnxGkpoWK1HF6hhy/it/u=293407302,1362956882&fm=26&gp=0.jpg')
#若请求https报错加verify=False
#r=requests.get('https://ss2.bdstatic.com/70cFvnSh_Q1YnxGkpoWK1HF6hhy/it/u=293407302,1362956882&fm=26&gp=0.jpg',verify=False)
print(r.content)
f=open('a.jpg','wb')
f.write(r.content)
f.close()
print(r.status_code)#返回的状态码
#清空当前数据库所有key

 浙公网安备 33010602011771号