SpringSecurity(安全) 与shiro
web开发中,安全第一位!
以前的项目安全方面主要就是过滤器、拦截器。
设计最初的时候,我们就要考虑安全问题!
shiro、springSecurity
认证 授权(vip1,vip2,vip3)原来是在拦截器里写大量的配置,来实现不同角色的不同权限。
springSecurity(身份验证和权限控制 框架) 可以满足自定义的需求
功能权限
访问权限
菜单权限
原来用过滤器、拦截器,需要大量的原生代码,太冗余了!——为此SpringSecurity诞生了, 它就是为了方便快捷的进行权限认证!
具体使用
在开发阶段可以关闭权限验证,临时禁用SpringSecurity,可以通过下面两种方法:

1.在启动类上配置排除SecurityAutoConfiguration,关闭权限验证:
@SpringBootApplication(exclude = {SecurityAutoConfiguration.class})
2配置文件

spring.autoconfigure.exclude=org.springframework.boot.autoconfigure.security.servlet.SecurityAutoConfiguration
导入依赖
<dependency>
    <groupId>org.springframework.boot</groupId>
    <artifactId>spring-boot-starter-security</artifactId>
</dependency>
<dependency>
    <groupId>org.springframework.boot</groupId>
    <artifactId>spring-boot-starter-thymeleaf</artifactId>
</dependency>
<dependency>
    <groupId>org.springframework.boot</groupId>
    <artifactId>spring-boot-starter-web</artifactId>
</dependency>

<dependency>
    <groupId>org.springframework.boot</groupId>
    <artifactId>spring-boot-starter-test</artifactId>
    <scope>test</scope>
</dependency>
配置文件
spring.thymeleaf.cache=false
新建config包
@EnableWebSecurity
public class SecurityConfig extends WebSecurityConfigurerAdapter {

    @Override
    protected void configure(HttpSecurity http) throws Exception {
        //首页所有人可以访问,功能页只有对应有权限的人才能访问
        //请求授权的规则
        http.authorizeRequests()
                .antMatchers("/").permitAll()
                .antMatchers("/level1/**").hasRole("vip1")
                .antMatchers("/level2/**").hasRole("vip2")
                .antMatchers("/level3/**").hasRole("vip3");
//没有权限就返回到登录页面,需要开启登录的页面
http.formLogin();

//防止网站工具:get post
http.csrf().disable();

//注销, 开启注销功能,跳到首页
http.logout().logoutSuccessUrl("/");

//开启记住我功能  给cookie中丢了一个value   默认14天
http.rememberMe();
    }

//    认证
//从缓存中 inMemory
//    密码编码:passwordEncoder(new BCryptPasswordEncoder())
//    密码加密
//     这些数据正常从数据库中读取
    @Override
    protected void configure(AuthenticationManagerBuilder auth) throws Exception {
        auth.inMemoryAuthentication().passwordEncoder(new BCryptPasswordEncoder())
                .withUser("longge").password(new BCryptPasswordEncoder().encode("123456")).roles("vip2","vip3")
                .and()
                .withUser("root").password(new BCryptPasswordEncoder().encode("123456")).roles("vip1","vip2","vip3")
                .and()
                .withUser("guest").password(new BCryptPasswordEncoder().encode("123456")).roles("vip1");
    }
}
//从数据库中 jdbcAuthentication()
@EnableConfigurationProperties
public class JDBCConfig {
@Autowired
private DataSource dataSource;
@Autowired
public void configureGlobal(AuthenticationManagerBuilder auth) throws Exception{
User.UserBuilder users = User.withDefaultPasswordEncoder();
auth
.jdbcAuthentication()
.dataSource(dataSource)
.withDefaultSchema()
.withUser(users.username("longge").password("123456").roles("vip2","vip3"))
.withUser(users.username("root").password("123456").roles("vip1","vip2","vip3"))
.withUser(users.username("guest").password("123456").roles("vip1"));
}
}
shiro apache下的
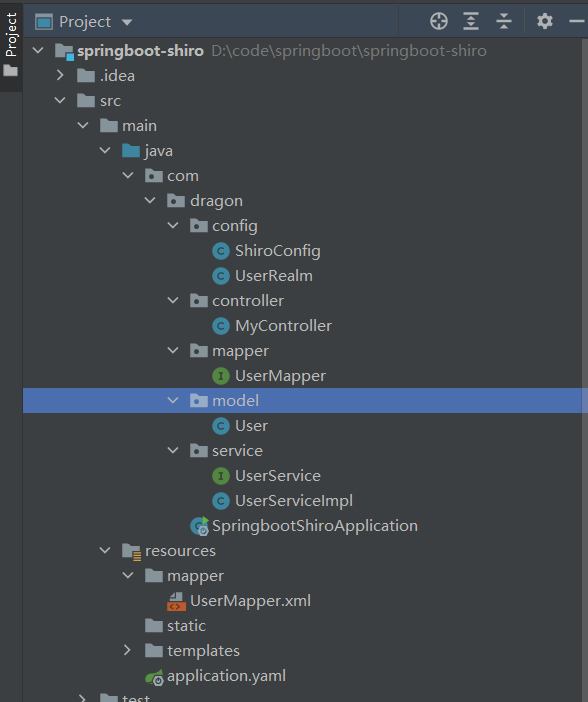
导入相关依赖——在resources的templates 定制首页index————controller层——————config层
<!--subject 用户
    securityManager 管理全部用户
    Realm 连接数据-->
        <dependency>
            <groupId>org.apache.shiro</groupId>
            <artifactId>shiro-spring-boot-web-starter</artifactId>
            <version>1.5.0</version>
        </dependency>
        <dependency>
            <groupId>org.springframework.boot</groupId>
            <artifactId>spring-boot-starter-thymeleaf</artifactId>
        </dependency>
        <dependency>
            <groupId>org.springframework.boot</groupId>
            <artifactId>spring-boot-starter-web</artifactId>
        </dependency>

        <dependency>
            <groupId>org.springframework.boot</groupId>
            <artifactId>spring-boot-starter-test</artifactId>
            <scope>test</scope>
        </dependency>
    </dependencies>
@Controller
public class MyController {

    //首页
    @RequestMapping({"/","/index"})
    public String toIndex(Model model)
    {
        model.addAttribute("msg","hello,Shiro!");
        return "index";
    }

    @RequestMapping("/user/add")
    public String add() {
        return "user/add";
    }

    @RequestMapping("/user/update")
    public String update() {
        return "user/update";
    }

    @RequestMapping("/toLogin")
    public String toLogin() {
        return "login";
    }

    @RequestMapping("/login")
    public  String login(String username,String password,Model model) {

        //Subject是Shiro的一个抽象概念,包含了当前的用户信息
        Subject subject = SecurityUtils.getSubject();

        //UsernamePasswordToken:Shiro用来封装用户的登录信息(账号,密码),使用登录信息来创建 令牌Token
        UsernamePasswordToken token = new UsernamePasswordToken(username, password);
        try {
            subject.login(token);//执行登录的方法,如果没有异常就说明ok

            return "index";
        } catch (UnknownAccountException e) {//用户名不存在
            e.printStackTrace();
            model.addAttribute("msg", "用户名错误");
            return "login";
        } catch (IncorrectCredentialsException e) {//密码不存在
            e.printStackTrace();
            model.addAttribute("msg", "密码错误");
            return "login";
        }
    }

    @RequestMapping("/noauth")
    @ResponseBody
    public String unauthorized(){
        return "未经授权无法访问此页面";
    }

}
config——————ShiroConfig
@Configuration
public class ShiroConfig {

    //ShiroFilterFactoryBean
    @Bean
    public ShiroFilterFactoryBean shiroFilterFactoryBean(@Qualifier("defaultWebSecurityManager") DefaultWebSecurityManager defaultWebSecurityManager){
        ShiroFilterFactoryBean bean = new ShiroFilterFactoryBean();
        //设置安全管理器
        bean.setSecurityManager(defaultWebSecurityManager);
        //添加shiro的内置过滤器  实现登录拦截
        /*
        anon:无需认证就可访问
        authc:必须认证才能访问
        user:必须拥有 记住我 功能才能用
        perms: 拥有对某个资源的权限才能访问
        role:拥有某个角色权限才能访问
        */

        //拦截  链式的 用linkedhashMap
        Map<String , String> filterMap = new LinkedHashMap<>();

        //授权 正常情况下,没有权限会跳转到未授权的页面
        filterMap.put("/user/add","perms[user:add]");
        filterMap.put("/user/update","perms[user:update]");
//      filterMap.put("/user/*","authc");

        bean.setFilterChainDefinitionMap(filterMap);

        //设置登录的请求
        bean.setLoginUrl("/toLogin");

        //未授权页面
        bean.setUnauthorizedUrl("/noauth");

        return bean;
    }

    //DefaultWebSecurityManager
    @Bean
    public DefaultWebSecurityManager defaultWebSecurityManager(@Qualifier("userRealm") UserRealm userRealm){
        DefaultWebSecurityManager securityManager = new DefaultWebSecurityManager();
        //关联UserRealm
        securityManager.setRealm(userRealm());
        return securityManager;
    }

    //创建 realm对象  需要自定义
    @Bean
    public UserRealm userRealm(){
        return new UserRealm();
    }

    //整合ShiroDialect:用来整合shiro和thymeleaf

    @Bean
    public ShiroDialect getShiroDialect(){
        return new ShiroDialect();
    }

}
UserRealm
//自定义的UserRealm      extends AuthorizingRealm
public class UserRealm extends AuthorizingRealm{

    @Autowired
    UserService userService;
    //授权
    @Override
    protected AuthorizationInfo doGetAuthorizationInfo(PrincipalCollection principalCollection) {
        System.out.println("执行了=》授权doGetAuthorizationInfo");

        SimpleAuthorizationInfo info = new SimpleAuthorizationInfo();

//        info.addStringPermission("user:add");

        //拿到当前登录的这个对象
        Subject subject = SecurityUtils.getSubject();

        User currentUser = (User)subject.getPrincipal(); //拿到user对象

        info.addStringPermission(currentUser.getPerms()); //获取当前对象的权限
        return info;
    }

    //认证
    @Override
    protected AuthenticationInfo doGetAuthenticationInfo(AuthenticationToken authenticationToken) throws AuthenticationException {
        System.out.println("执行了=》认证doGetAuthorizationInfo");

        //用户名,密码  数据中取
//        String name ="root";
//        String password ="123456";

        UsernamePasswordToken userToken = (UsernamePasswordToken) authenticationToken;
        //连接真实的数据库

        User user = userService.queryUserByName(userToken.getUsername());
        if(user==null){
               return null;
           }
//          if(!userToken.getUsername().equals(name)){
//            return null; //抛出异常 UnknownAmountException
//        }

        //添加session
        Subject subject = SecurityUtils.getSubject();
        subject.getSession().setAttribute("loginUser",user);

        //可以加密 MD5  MD5盐值加密
        //密码认证 shiro做
        return new SimpleAuthenticationInfo(user,user.getPwd(),"");

    }
}
shiro整合thymeleaf
1、
<!--Shiro整合Thymeleaf-->
<!-- https://mvnrepository.com/artifact/com.github.theborakompanioni/thymeleaf-extras-shiro -->
<dependency>
<groupId>com.github.theborakompanioni</groupId>
<artifactId>thymeleaf-extras-shiro</artifactId>
<version>2.0.0</version>
</dependency>
2、在ShiroConfig类中也需要配置,并交给Spring管理
//整合ShiroDialect:用来整合Shiro Thymeleaf
@Bean
public ShiroDialect getShiroDialect(){ return new ShiroDialect(); }
3.html页面判断
- xmlns:shiro=“http://www.thymeleaf.org/thymeleaf-extras-shiro”(整合shiro标签)
<!DOCTYPE html>
<html lang="en" xmlns:th="http://www.thymeleaf.org"
xmlns:shiro="http://www.thymeleaf.org/thymeleaf-extras-shiro">
<head>
<meta charset="UTF-8">
<title>Title</title>
</head>
<body>
<h1>首页</h1>
<p th:text="${msg}"></p>
<!--从session中判断值-->
<div th:if="${session.loginUser==null}">
<a th:href="@{/toLogin}">登录</a>
</div>
<div shiro:hasPermission="user:add">
<a th:href="@{/user/add/}">add</a>
</div>
<div shiro:hasPermission="user:update">
<a th:href="@{/user/update}">update</a>
</div>
</body>
</html>
4.认证成功后,将User信息放到session,方便前端判断用户是否登录
在controller层或者UserRealm都可以
//添加session
Subject subject = SecurityUtils.getSubject();
subject.getSession().setAttribute("loginUser",user);
具体可以参考一下这个链接
https://blog.csdn.net/weixin_45953673/article/details/120859645

 浙公网安备 33010602011771号