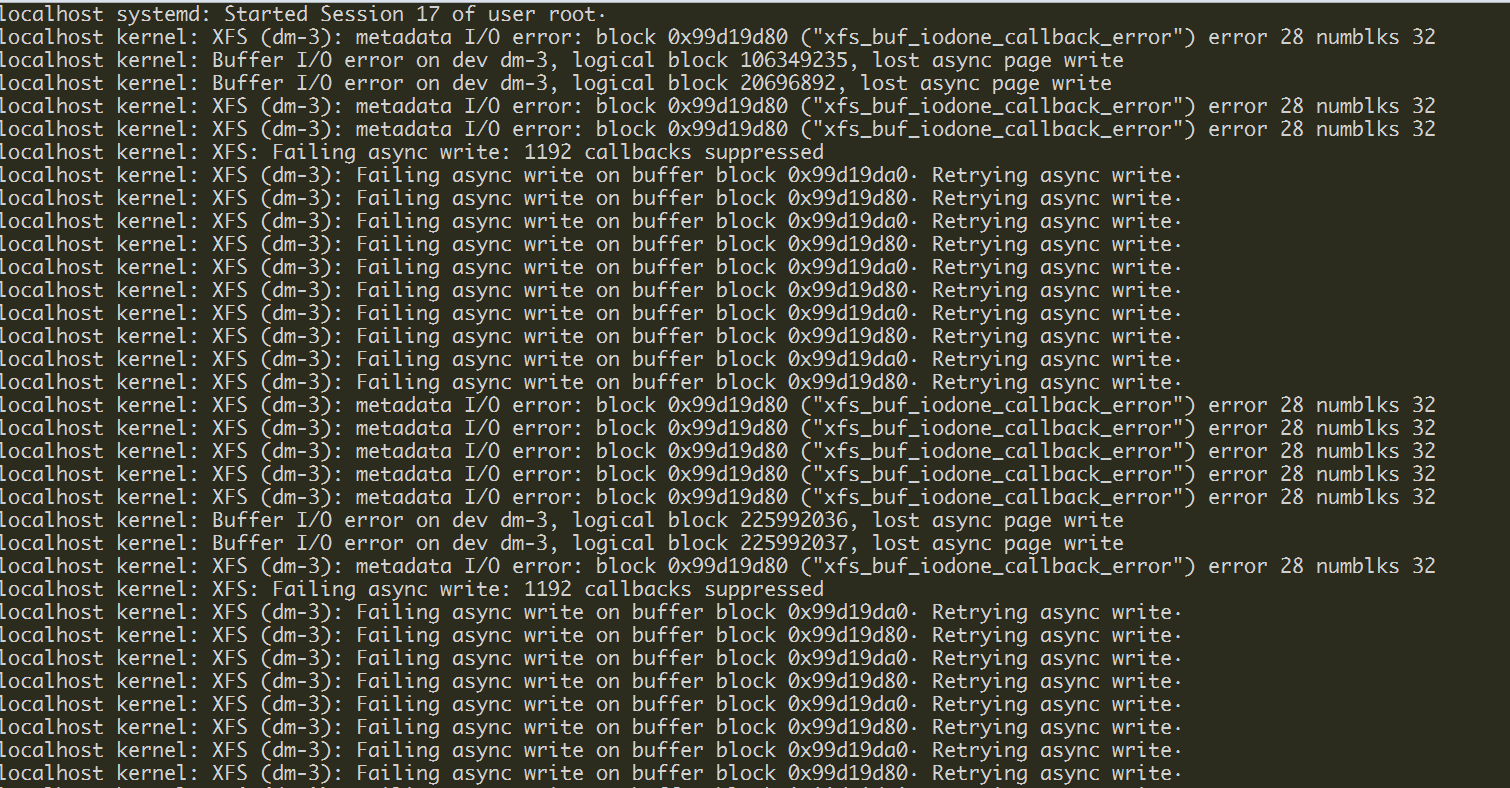
kernel: blk_update_request: I/O error, dev fd0, sector 0
原因:
拷贝文件时,vsphere虚拟机卡死,无法连接。
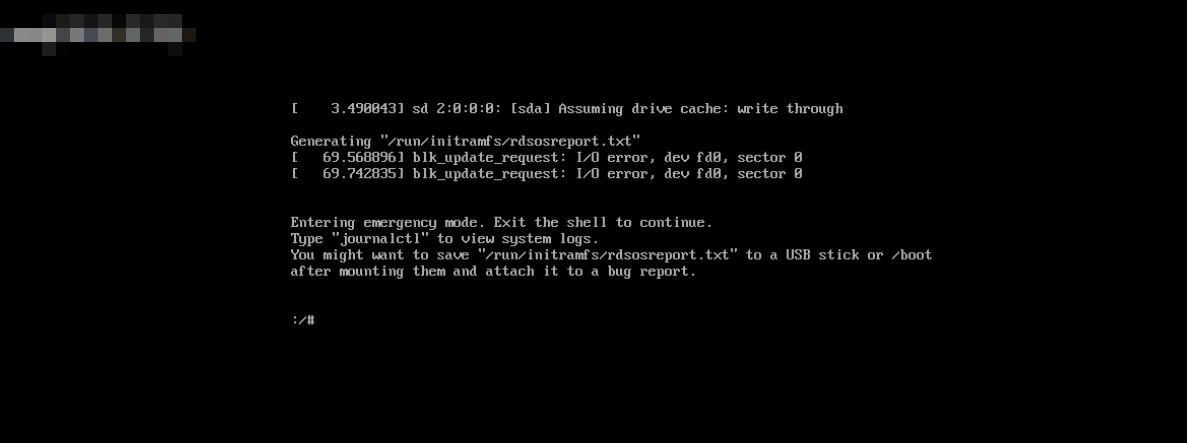
经检查控制台也无法登录。重启虚拟机然后报下图
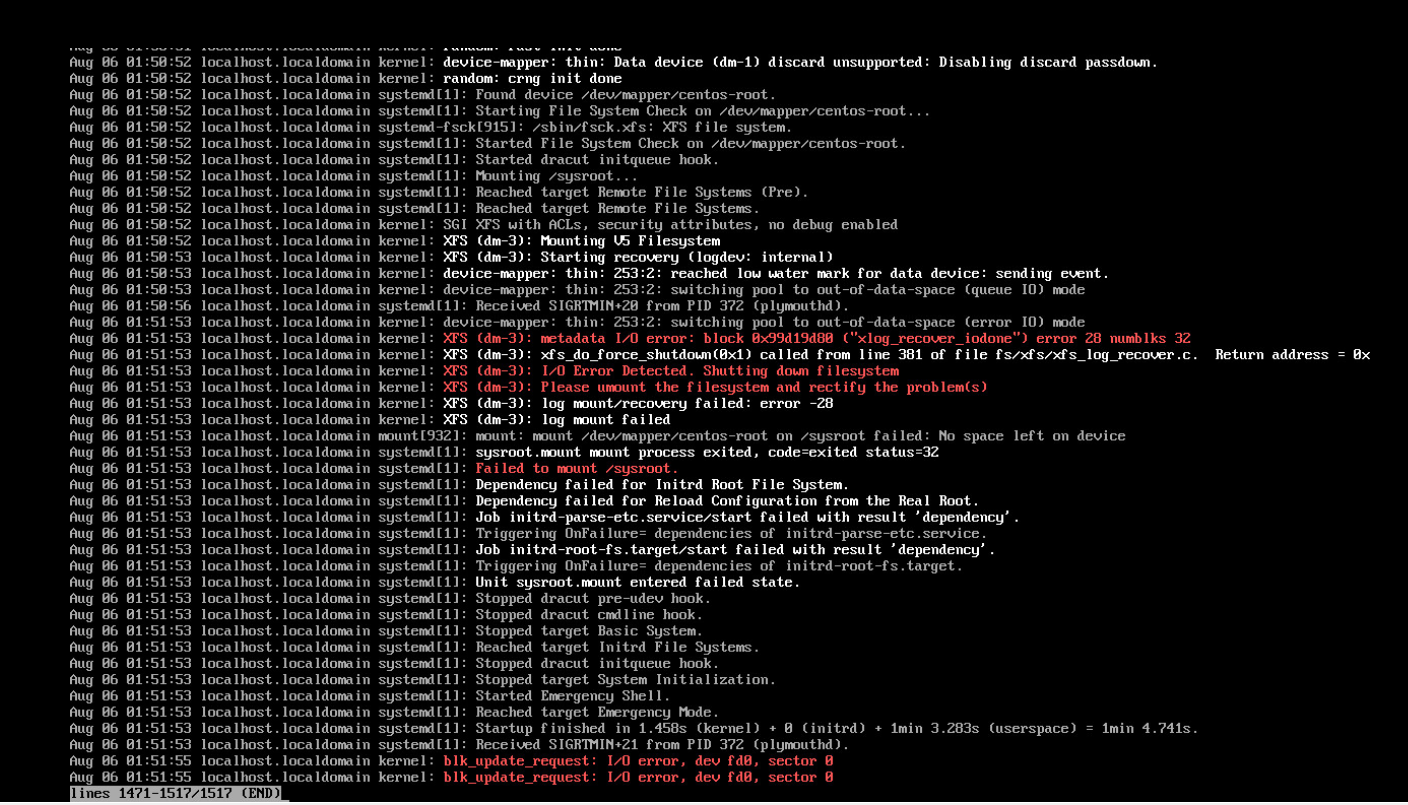
然后执行journalctl显示如下
系统messages日志
原因查找中。。。
解决方案
重启后图1的位置输入如下两条命令
1 xfs_repair -L /dev/centos/root
2
3 init  6
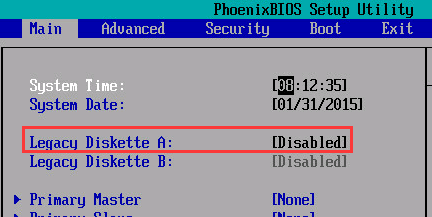
然后进入虚拟机bios,关闭软盘
解决方法参考:
https://community.oracle.com/message/14003871#14003871
https://www.cnblogs.com/awakenedy/articles/9156059.html
情况1:
[sda] Assuming drive cache: write through
Internal error xfs XFS_WANT_CORRUPTED_GOTO at line 1662 of file fs/xfs/libxfs/xfs_alloc.c Caller xfs_free_extent+0x130 [xfs]
Internal error xfs_trans_cancel at line 990 of file fs/xfs/xfs_trans.c.Caller xlog_recover_process_efi +0x16b/0x190 [xfs]
Corruption of in-memory data detected. Shutting down filesystem
Please umount the filesystem and rectify the problem(s)
Failed to recover EFIs
Generating "/run/initramfs/rdsosreport.txt"


如果是LVM管理分区的
ls -l /dev/mapper
xfs_repair /dev/mapper/cl_muban-root
若提示

xfs_repair -L /dev/mapper/cl_muban-root
最后重启
init 6
情况2:
[sda] Assuming drive cache: write through
Metadata corruption detected at xfs_agi_read_verify+0x5e/0x110 [xfs], xfs_agi block 0x2
Unmount and run xfs_repair
First 64 bytes of corrupted metadata buffer:
XFS (dm-0):metadata I/O error: block 0x2 ("xfs_trans_read_buf_map") error 117 numblks 1


修复步骤:
ls -l /dev/mapper
mkdir /mnt
mount /dev/mapper/cl_muban-root /mnt # 这里也可以操作 提示中的 dm-0 (即 /dev/dm-0,其实/dev/mapper/cl_muban-root是链接到 /dev/dm-0 )
umount /mnt
xfs_repair /dev/mapper/cl_muban-root # 或 xfs_repair /dev/dm-0
init 6 (reboot重启系统)
xfs_repair使用方法:
xfs_repair -h
xfs_repair: invalid option -- 'h'
Usage: xfs_repair [options] device

Options:
-f The device is a file
-L Force log zeroing. Do this as a last resort.
-l logdev Specifies the device where the external log resides.
-m maxmem Maximum amount of memory to be used in megabytes.
-n No modify mode, just checks the filesystem for damage.
-P Disables prefetching.
-r rtdev Specifies the device where the realtime section resides.
-v Verbose output.
-c subopts Change filesystem parameters - use xfs_admin.
-o subopts Override default behaviour, refer to man page.
-t interval Reporting interval in minutes.
-d Repair dangerously.
-V Reports version and exits.


 浙公网安备 33010602011771号