

springboot手写源码总结
先创建spring容器,然后将配置类(也就是启动类,因为上面有标注@ComponentScan和@Configuration注解)注册到spring容器中去,进行扫描。然后将spring容器绑定到servlet中,将servlet添加到tomcat容器中。
具体是现是下面的这一行代码:
tomcat.addServlet(contextPath, "dispatcher", new DispatcherServlet(applicationContext));
子项目依赖父项目,怎样让父项目中的某个jar包不传递到子项目中,解决办法是是将父项目中的那个jar包下面添加上optional标签。
<dependency>
    <groupId>org.apache.tomcat.embed</groupId>
    <artifactId>tomcat-embed-core</artifactId>
    <version>9.0.60</version>
    <optional>true</optional>
</dependency>
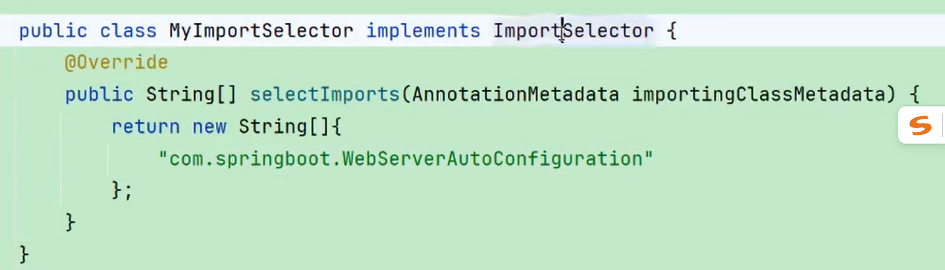
使用ImportSelector接口,可以批量的向ioc容器中导入配置类。
springboot为了提高启动速度,这些自动配置类不是都需要进行加载的,那么他是怎样进行判断的,答案是通过自动配置类上面的@ConditionnalOnClass注解进行判断的,以
//
// Source code recreated from a .class file by IntelliJ IDEA
// (powered by FernFlower decompiler)
//

package org.springframework.boot.autoconfigure.amqp;


@Configuration(
    proxyBeanMethods = false
)
// 会判断RabbitTemplate和Channel这两个类是否在容器中存在
// 要想判断这两个类是否存在,需要先加载RabbitAutoConfiguration类,然后再加载@ConditionalOnClass注解标注的这两个类,这对springboot来说是非常耗费时间的,所以springboot做了提前映射。
@ConditionalOnClass({RabbitTemplate.class, Channel.class})
@EnableConfigurationProperties({RabbitProperties.class})
@Import({RabbitAnnotationDrivenConfiguration.class})
public class RabbitAutoConfiguration {
    public RabbitAutoConfiguration() {
    }

    // 省略代码
}
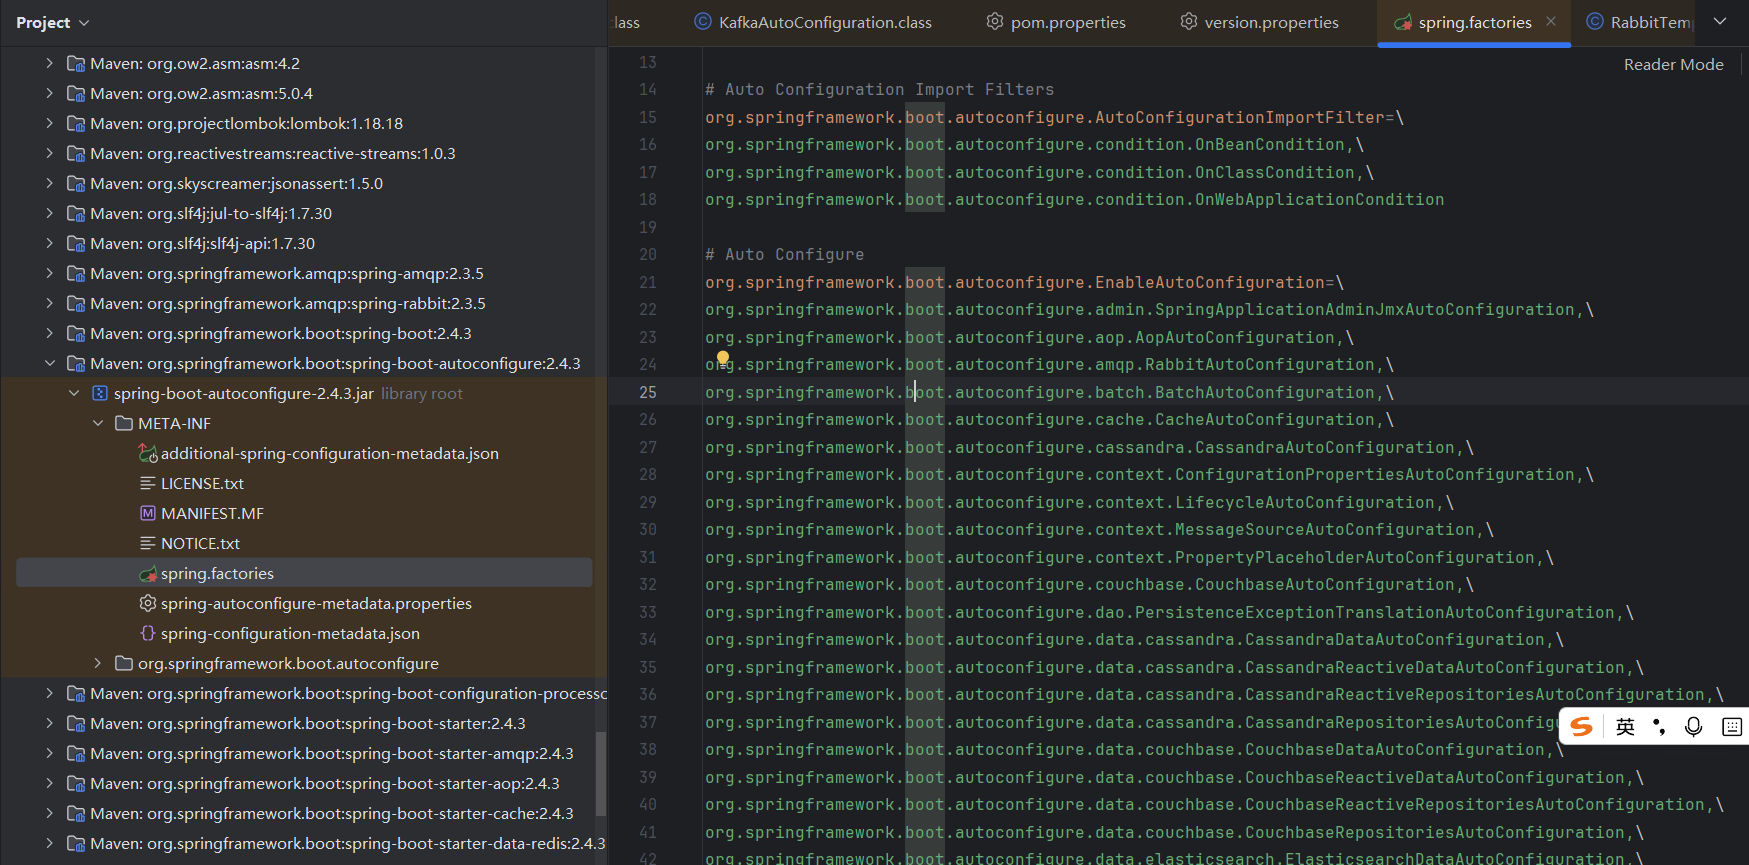
在spring-autoconfigure-metadata.properties配置文件中
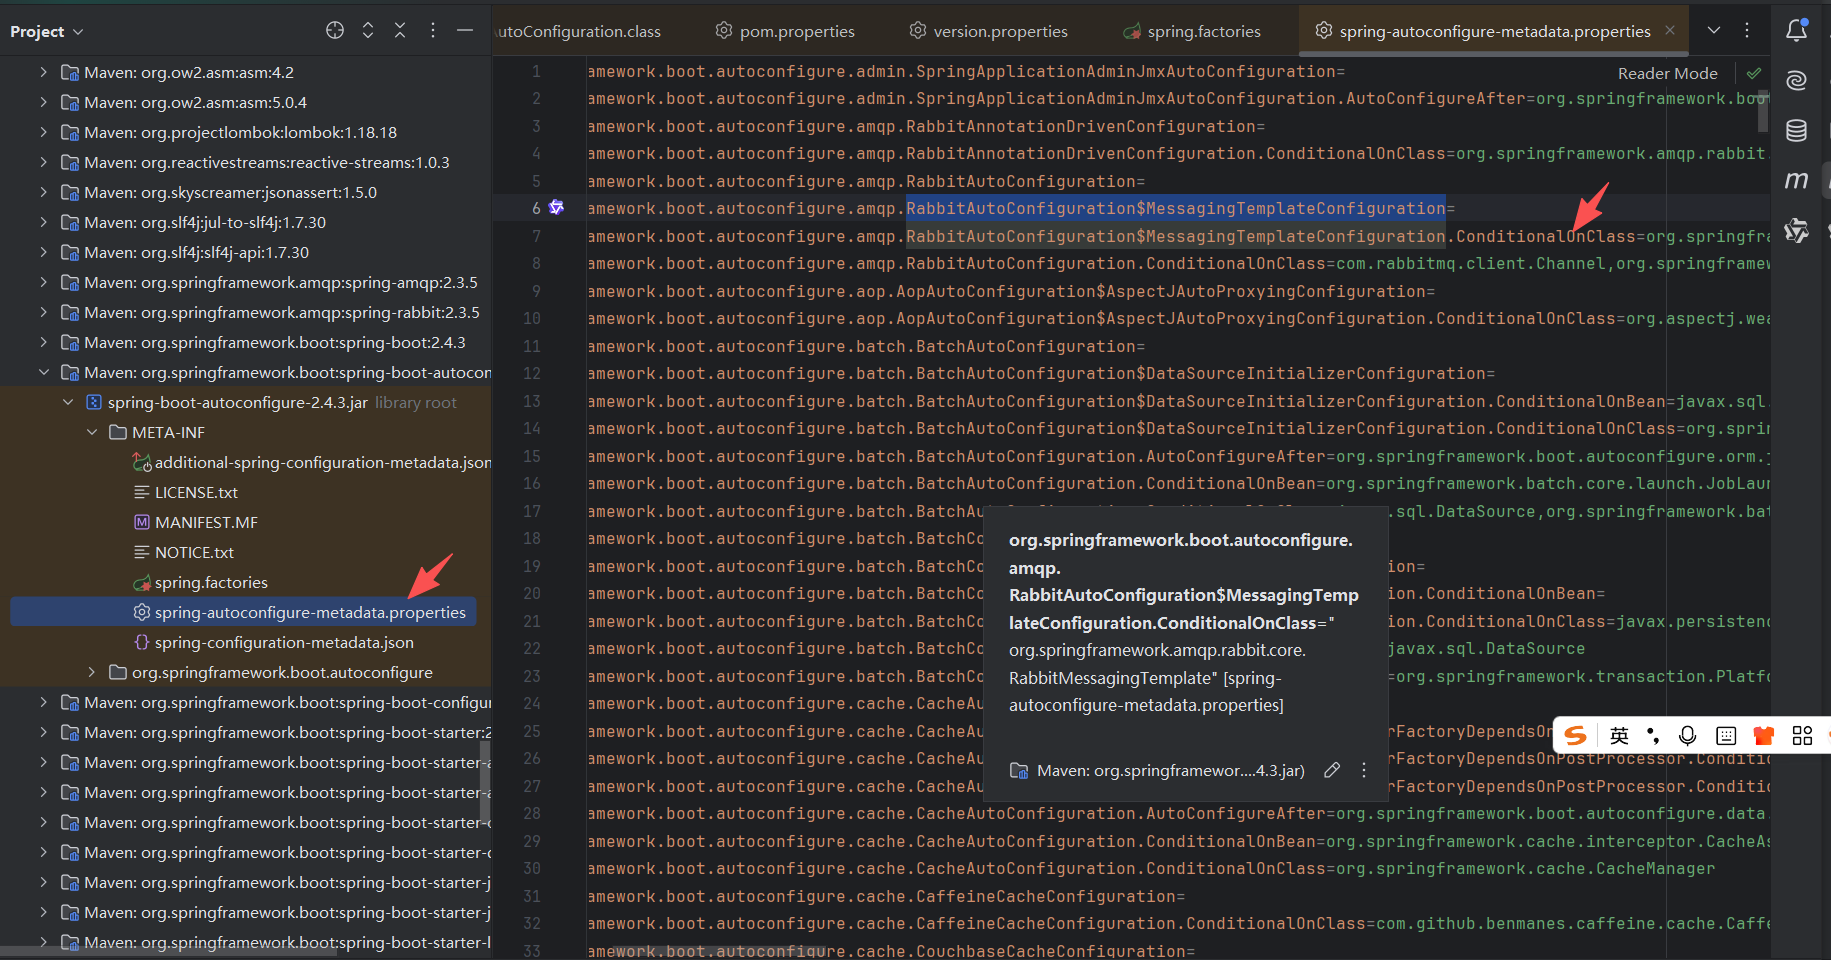
org.springframework.boot.autoconfigure.amqp.RabbitAutoConfiguration.ConditionalOnClass=com.rabbitmq.client.Channel,org.springframework.amqp.rabbit.core.RabbitTemplate
这样springboot就不用加载RabbitAutoConfiguration类了。
在springboot3中做了优化,不会再去加载spring.factories配置文件了,而是把自动配置类单独抽取出来放到了一个配置文件中了。
下来看看徐庶老师讲解的springboot3新特性。


 浙公网安备 33010602011771号