

Spring中@Import的三种情况
我们在使用Spring框架中,特别是框架级的功能,经常看到有@Import导入功能,
![]()
我就介绍下它能导入什么,首先声明下@Import是注解,导入类型可分为三类:
1. 导入配置 @Configuration,类似于spring早期版本2.5的import xml文件一样,
<?xml version="1.0" encoding="UTF-8"?>
<beans xmlns="http://www.springframework.org/schema/beans"
       xmlns:xsi="http://www.w3.org/2001/XMLSchema-instance"
       xsi:schemaLocation="
       http://www.springframework.org/schema/beans http://www.springframework.org/schema/beans/spring-beans-2.5.xsd
       ">

    <import resource="cms-validator-service.xml"/>
    <import resource="cms-validator-dao.xml"/>

</beans>
只是现在注解抢了风头,但目的一样,用于使用所有标有@configuration注解的配置。
下面我就写个小例子,怎么建java项目就略了
先建java主包com.spring, 然后分别建子包
com.spring.service, com.spring.service.impl, com.spring.config, com.spring.test1.1 建立服务接口
package com.spring.service;

/**
 *
 * @author dgm
 * @describe "日志服务接口"
 */
public interface LogService {

    void print(String message);
}
1.2 建立服务实现类,分三种情况,控制台、文件和数据库mysql
package com.spring.service.impl;

import org.springframework.stereotype.Component;
import com.spring.service.LogService;

/**
 * @author dgm
 * @describe "日志到控制台"
 */
@Component
public class StdOutLogServiceImpl implements LogService {

	@Override
	public void print(String message) {
        System.out.println(message);
        System.out.println("写日志到控制台!");
	}
}


import java.io.File;
import java.io.FileWriter;
import java.io.IOException;

import org.springframework.stereotype.Component;
import com.spring.service.LogService;

/**
 *
 * @author dgm
 * @describe "日志到文件"
 */
@Component
public class FileLogServiceImpl implements LogService {

	private static final String FILE_NAME="d://LogService.txt";
	@Override
	public void print(String message) {
		try {
			File file = new File(FILE_NAME);
			FileWriter fw = null;
			// true:表示是追加的标志
			fw = new FileWriter(file, true);
			fw.write(message+"\n");
			fw.close();

	        System.out.println(message);
			System.out.println("写日志入文件!");
		} catch (IOException e) {
		}
	}
}


/**
 * @author dgm
 * @describe "写日志入mysql数据库"
 */
@Component
public class MysqlLogServiceImpl implements LogService {

	@Override
	public void print(String message) {
        System.out.println(message);
        System.out.println("写日志入数据库");
	}
}
1.3 写配置类,三个服务实现类对应三个@Configuration
package com.spring.config;

import org.springframework.context.annotation.Bean;
import org.springframework.context.annotation.Configuration;

import com.spring.service.LogService;
import com.spring.service.impl.StdOutLogServiceImpl;

@Configuration
public class StdOutConfig {

	@Bean(name="stdOutLogServiceImpl")
	public LogService stdOutLogServiceImpl(){
		return new StdOutLogServiceImpl();
	}
}


import org.springframework.context.annotation.Bean;
import org.springframework.context.annotation.Configuration;

import com.spring.service.LogService;
import com.spring.service.impl.FileLogServiceImpl;

@Configuration
public class FileLogConfig {

	@Bean(name="fileLogServiceImpl")
	public LogService fileLogServiceImpl(){
		return new FileLogServiceImpl();
	}
}

import org.springframework.context.annotation.Bean;
import org.springframework.context.annotation.Configuration;

import com.spring.service.LogService;
import com.spring.service.impl.MysqlLogServiceImpl;

@Configuration
public class MysqlLogConfig {

	@Bean(name="mysqlLogServiceImpl")
	public LogService mysqlLogServiceImpl(){
		return new MysqlLogServiceImpl();
	}
}
然后@Import注解登场了
import org.springframework.context.annotation.Configuration;
import org.springframework.context.annotation.Import;

@Configuration
@Import({StdOutConfig.class, FileLogConfig.class, MysqlLogConfig.class})
public class LogParentConfig {

}
1.4 建立测试类看效果
import org.springframework.context.annotation.AnnotationConfigApplicationContext;
import com.spring.config.LogParentConfig;
import com.spring.service.*;

/**
 * @author dgm
 * @describe "java configuration bean"
 */
public class LogConfigurationAppTest {
	public static void main(String[] args) {
		AnnotationConfigApplicationContext  context = new AnnotationConfigApplicationContext(
				LogParentConfig.class);
		//控制台
		LogService obj = (LogService) context.getBean("stdOutLogServiceImpl");
		System.out.println(obj);
		obj.print("控制台输出");
		//file
		obj = (LogService) context.getBean("fileLogServiceImpl");
		System.out.println(obj);
		obj.print("文件输出");
		//mysql
		obj = (LogService) context.getBean("mysqlLogServiceImpl");
		System.out.println(obj);
		obj.print("数据库mysql");

		context.close();
	}
}
输出效果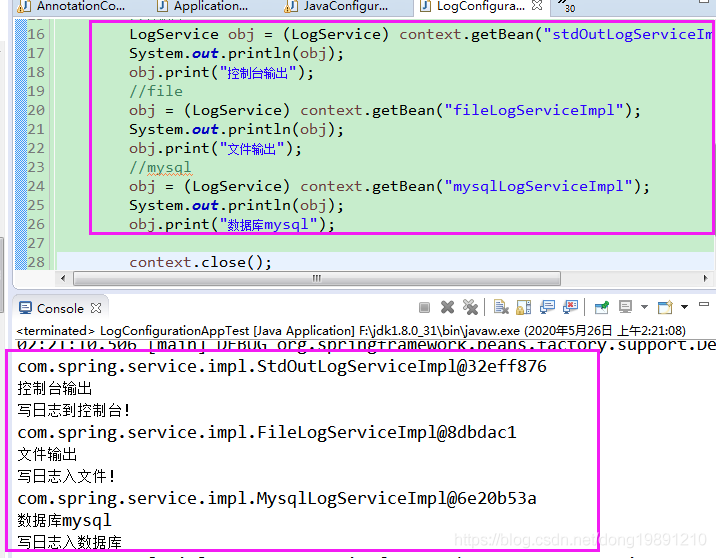

2. 导入实现ImportSelector接口或子接口DeferredImportSelector的类
@Import annotation can also be configured with an ImportSelector implementation to select @Configuration classes programmatically, based on some selection criteria.
下面我也演示下,这个很重要,框架里和spring扩展开发用的多,先建立备用子包com.spring.bean和com.spring.importSelector,然后建立配置文件目录conf
2.1 实现了ImportSelector
2.1.1 建立辅助类ApplicationProperties.java和外置配置文件myapp.properties
package com.spring.bean;

public class ApplicationProperties {
	private String connectionUrl;
	private String connectionName;

	public String getConnectionUrl() {
		return connectionUrl;
	}

	public void setConnectionUrl(String connectionUrl) {
		this.connectionUrl = connectionUrl;
	}

	public String getConnectionName() {
		return connectionName;
	}

	public void setConnectionName(String connectionName) {
		this.connectionName = connectionName;
	}

	@Override
	public String toString() {
		return "ApplicationProperties [connectionUrl=" + connectionUrl
				+ ", connectionName=" + connectionName + "]";
	}
}
然后在conf目录下建立配置文件myapp.properties,内容如下:
app.url=https://github.com/dongguangming
app.name=dongguangming
2.1.2 建立@Configuration配置类
@Configuration
@PropertySource("classpath:conf/myapp.properties")
public class AppConfig {
	@Autowired
	ConfigurableEnvironment environment;

	@Bean
	ApplicationProperties appProperties() {
		ApplicationProperties bean = new ApplicationProperties();
		bean.setConnectionUrl(environment.getProperty("app.url"));
		bean.setConnectionName(environment.getProperty("app.name"));
		return bean;
	}
}
2.1.3 建立实现了ImportSelector接口的导入类,返回列表里的值是有标志@Configuration
public class LogImportSelector implements  ImportSelector{

	@Override
	public String[] selectImports(AnnotationMetadata importingClassMetadata) {

		    return new String[]{"com.spring.config.AppConfig","com.spring.config.LogParentConfig"};
	}

}
2.1.4 建立有@import功能的配置类,导入2.1.3的实现类
package com.spring.config;

import org.springframework.context.annotation.Configuration;
import org.springframework.context.annotation.Import;

import com.spring.importSelector.LogImportSelector;

@Configuration
@Import(LogImportSelector.class)
public class LogImportSelectorConfig {

}
2.1.5 编写测试类
import org.springframework.context.annotation.AnnotationConfigApplicationContext;

import com.spring.bean.ApplicationProperties;
import com.spring.config.LogImportSelectorConfig;
import com.spring.service.*;

/**
 * @author dgm
 * @describe "java configuration bean"
 */
public class LogImportSelectorConfigurationAppTest {
	public static void main(String[] args) {
		AnnotationConfigApplicationContext context = new AnnotationConfigApplicationContext(
				LogImportSelectorConfig.class);
		// 控制台
		LogService obj = (LogService) context.getBean("stdOutLogServiceImpl");
		System.out.println(obj);
		obj.print("控制台输出");
		// file
		obj = (LogService) context.getBean("fileLogServiceImpl");
		System.out.println(obj);
		obj.print("文件输出");
		// mysql
		obj = (LogService) context.getBean("mysqlLogServiceImpl");
		System.out.println(obj);
		obj.print("数据库mysql");

		//
		ApplicationProperties ap = context.getBean(ApplicationProperties.class);
		System.out.println(ap);

		context.close();
	}
}
输出效果: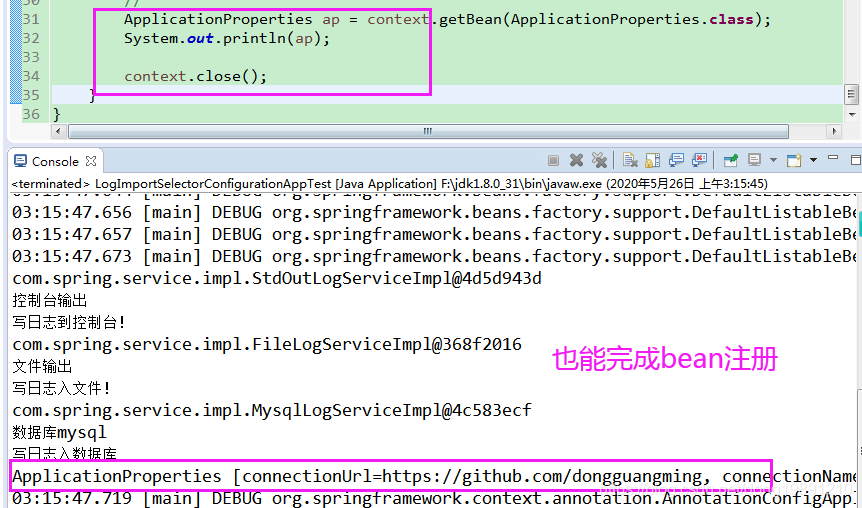
![]()
效果不错,也能完成bean的注册
还有一种基于注解的变体,我也示例下,先建个子包com.spring.annotation
建立自定义注解:
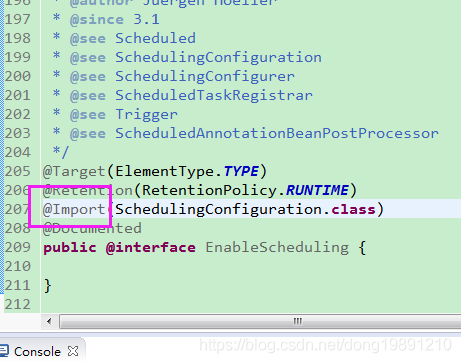
@Target(ElementType.TYPE)
@Retention(RetentionPolicy.RUNTIME)
@Documented
@Import(LogImportSelector.class)
/**
 * @author dgm
 * @describe "自定义Enable功能"
 */
public @interface EnableLogService {
	//默认日志输出到控制台
	String logType() default "stdout";

	@AliasFor("value")
	String[] basePackages() default {};

	@AliasFor("basePackages")
	String[] value() default {};
}
然后修改导入选择器实现类,根据启用日志功能时传的参数绝对加载哪个bean
AnnotationAttributes attributes = AnnotationAttributes
				.fromMap(importingClassMetadata.getAnnotationAttributes(
						EnableLogService.class.getName(), false));
		System.out.println(attributes);

		//根据日志类型确定加载bean
		String logType = attributes.getString("logType");

		if (logType.equalsIgnoreCase("StdOut")) {
			return new String[] { "com.spring.config.AppConfig",
					"com.spring.config.StdOutConfig" };
		} else if (logType.equalsIgnoreCase("File")) {
			return new String[] { "com.spring.config.AppConfig",
					"com.spring.config.FileLogConfig" };
		} else if (logType.equalsIgnoreCase("Mysql")) {
			return new String[] { "com.spring.config.AppConfig",
					"com.spring.config.MysqlLogConfig" };
		} else {
			return new String[] { "com.spring.config.AppConfig",
					"com.spring.config.LogParentConfig" };
		}
修改配置类,追加自定义注解@EnableLogService,并设置参数为file(可选stdout,file,mysql)
@Configuration
//@Import(LogImportSelector.class)
@EnableLogService(logType="file")
public class LogImportSelectorConfig {

}
修改测试类,此时不再是三种日志实现的bean都加载,按配置参数加载
LogService obj = (LogService) context.getBean("fileLogServiceImpl");
		System.out.println(obj);
obj.print("文件输出"); 
![]()
就因为配置了@EnableLogService(logType="file"),只加载了一个日志实现bean
2.2 实现了 DeferredImportSelector
public interface DeferredImportSelector extends ImportSelector {
}
可是看出它是2.1的子接口
The configuration class directly registered with the application context given preference over imported one. That means a bean of type T, configured in the main configuration will be used instead of a bean of the same type T from imported configuration. That applies to ImportSelector as well. On the other hand, DeferredImportSelector applies after all other configuration beans have been processed.
我们可以比较下实现两种接口的区别
在主选择器的配置类LogImportSelectorConfig.java中增加
@Bean
	LogBean logBean() {
		return new LogBean();
	}

	@Bean(name = "fileLogServiceImpl")
	public LogService fileLogServiceImpl() {
		return new FileLogServiceImpl(" 来自LogImportSelectorConfig  ");
	}
在文件配置类FileLogConfig.java中修改为
@Bean(name="fileLogServiceImpl")
	public LogService fileLogServiceImpl(){
		return new FileLogServiceImpl("来自  FileLogConfig");
	}
选择器实现类还是
public class LogImportSelector implements ImportSelector {。。。}执行测试代码
LogBean bean = context.getBean(LogBean.class);
bean.printMessage(); 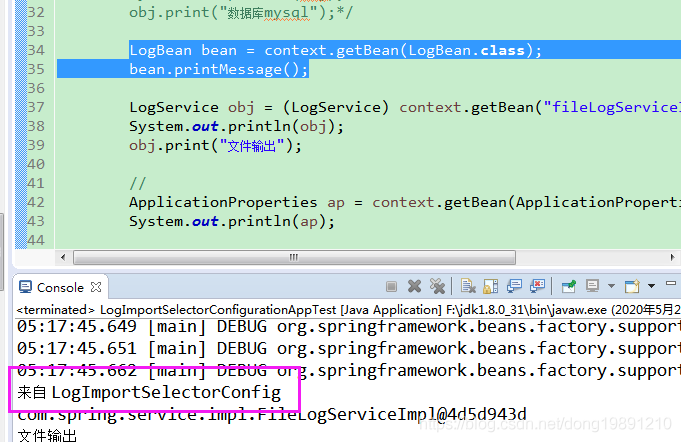
![]()
此时修改选择器实现的接口改为DeferredImportSelector,其它不改
public class LogImportSelector implements DeferredImportSelector {。。。}
再次执行测试

3 导入实现了ImportBeanDefinitionRegistrar接口的类
可以先瞄下接口的如何定义和定义了什么
public interface ImportBeanDefinitionRegistrar {

	public void registerBeanDefinitions(
                            AnnotationMetadata importingClassMetadata,
                            BeanDefinitionRegistry registry);

}
This Interface is to be implemented by types that register additional bean definitions when processing @Configuration classes.
具体可参考还记得我以前写的博文Spring Bean注册的几种方式https://blog.csdn.net/dong19891210/article/details/105798650吗,详细看第5.2小节,这里就不再重复啰嗦写了。
想了几天还是花点时间写上,毕竟放到个人电脑上不安全,我就一步一步开始完善
3.1 建立自定义组件注解标识和扫描包注解
@Documented
@Indexed
//@Target({ElementType.TYPE, ElementType.FIELD, ElementType.METHOD, ElementType.PARAMETER})
@Target(ElementType.TYPE)
@Retention(RetentionPolicy.RUNTIME)
/**
 * @author dgm
 * @describe "自定义组件注解标识"
 * @date 2020年5月27日
 */
public @interface CustomComponent {
    String value() default "";
}
然后再建扫描包注解
@Target(ElementType.TYPE)
@Retention(RetentionPolicy.RUNTIME)
@Documented
@Indexed
@Import(CustomImportBeanDefinitionRegistrar.class)
public @interface CustomComponentScan {
	 @AliasFor("basePackages")
	 String[] value() default {};

	 @AliasFor("value")
	 String[] basePackages() default {};

	 Class<?>[] basePackageClasses() default {};
}
重点看@Import(CustomImportBeanDefinitionRegistrar.class)
3.2 定义实现了ImportBeanDefinitionRegistrar接口的类
public class CustomImportBeanDefinitionRegistrar implements
		ImportBeanDefinitionRegistrar, ResourceLoaderAware {

	private ResourceLoader resourceLoader;

	@Autowired
	ConfigurableEnvironment environment;
	@Autowired
	ApplicationProperties applicationProperties;

	@Override
	public void registerBeanDefinitions(
			AnnotationMetadata importingClassMetadata,
			BeanDefinitionRegistry registry) {

		AnnotationAttributes annotationAttributes = AnnotationAttributes
				.fromMap(importingClassMetadata.getAnnotationAttributes(
						CustomComponentScan.class.getName(), false));
		//System.out.println(annotationAttributes);

		String[] basePackages = (String[]) annotationAttributes
				.get("basePackages");
		System.err.println("要扫描的包是:" + Arrays.asList(basePackages));

		if (basePackages == null || basePackages.length == 0) {
			String basePackage = null;
			try {
				basePackage = Class
						.forName(importingClassMetadata.getClassName())
						.getPackage().getName();
			} catch (ClassNotFoundException e) {
				e.printStackTrace();
			}
			basePackages = new String[] { basePackage };
		}

		MapperBeanDefinitionScanner scanner = new MapperBeanDefinitionScanner(
				registry, false);
		scanner.setResourceLoader(resourceLoader);
		// scanner.registerFilters();
		scanner.addIncludeFilter(new AnnotationTypeFilter(CustomComponent.class));
		scanner.doScan(basePackages);
	}

	@Override
	public void setResourceLoader(ResourceLoader resourceLoader) {
		this.resourceLoader = resourceLoader;
	}

	public class MapperBeanDefinitionScanner extends
			ClassPathBeanDefinitionScanner {
		public MapperBeanDefinitionScanner(BeanDefinitionRegistry registry,
				boolean useDefaultFilters) {
			super(registry, useDefaultFilters);
		}

		protected void registerFilters() {
			addIncludeFilter(new AnnotationTypeFilter(CustomComponent.class));
		}

		@Override
		protected Set<BeanDefinitionHolder> doScan(String... basePackages) {
			return super.doScan(basePackages);
		}
	}
}
3.3 定义配置类,预设组件扫描的包是com.spring.mapper
@Configuration
@CustomComponentScan(basePackages= { "com.spring.mapper" })
public class CustomComponentConfiguration {

}
3.4 建立自定义组件扫描的包com.spring.mapper,略
然后在自定义包下建立自定义组件,注意类上有自定义组件标识@CustomComponent
@CustomComponent
public class CustomDataMapper {

	public List printData() throws SQLException {
		List<String> list = new ArrayList<>();

		list.add("dongguangming");
		list.add("张三");
		list.add("李四");

		return list;
	}
}
3.5 编写测试
/**
 * @author dgm
 * @describe "测试ImportBeanDefinitionRegistrar,自定义组件"
 */
public class CustomImportBeanDefinitionRegistrarTest {

	public static void main(String[] args) throws SQLException {

        //引入两个配置类MysqlDatabaseConfiguration和CustomComponentConfiguration(由于MysqlDatabaseConfiguration关联代码多,所以没有在文章里写,测试时可去掉)
		AnnotationConfigApplicationContext applicationContext = new AnnotationConfigApplicationContext(
				MysqlDatabaseConfiguration.class, CustomComponentConfiguration.class);

		//就是我刚才自定义的组件类
		CustomDataMapper data =  applicationContext.getBean(CustomDataMapper);
		System.out.println(data);
		System.out.println(data.printData());

        //从数据库里查询用户列表
		UserMapper userMapper = (UserMapper) applicationContext.getBean("userMapper");
		System.out.println(userMapper);
		userMapper.queryMysql();

		applicationContext.close();
	}
}
注意:引入两个配置类MysqlDatabaseConfiguration和CustomComponentConfiguration(由于MysqlDatabaseConfiguration关联代码多,所以没有在文章里写,测试时可去掉不引入MysqlDatabaseConfiguration.class)
AnnotationConfigApplicationContext applicationContext = new AnnotationConfigApplicationContext(
MysqlDatabaseConfiguration.class, CustomComponentConfiguration.class);
输出效果: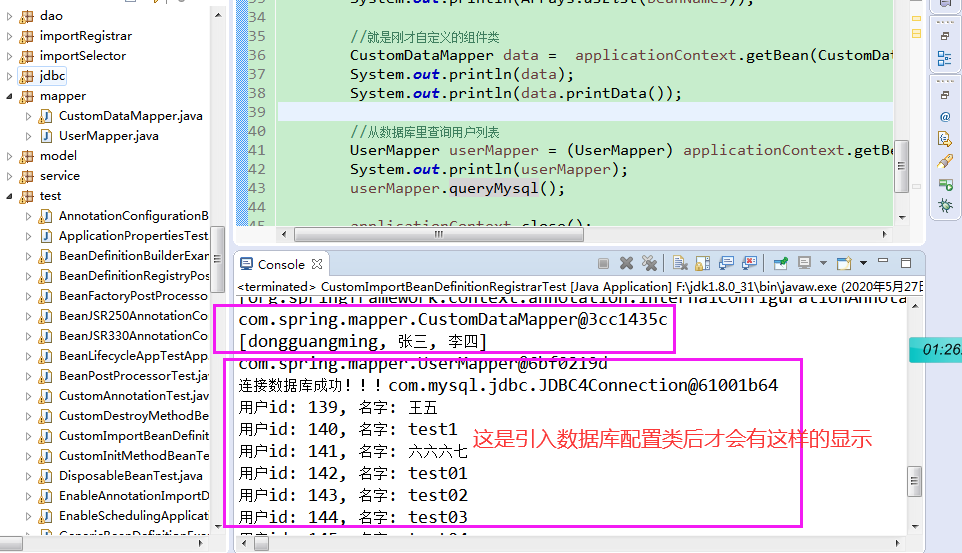
其实你搞懂了Bean,spring本身、及衍生的第三方扩展, 99.99%的问题都不再是问题了!!!
小结:一图

务必掌握好2和3,写扩展很有用,甚至spring本身都在大量使用,如下
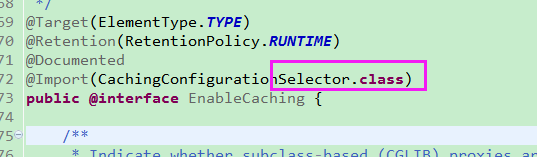
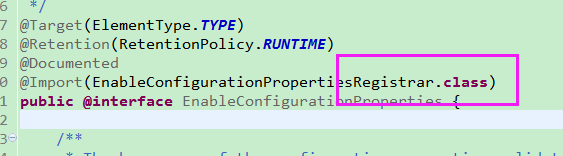
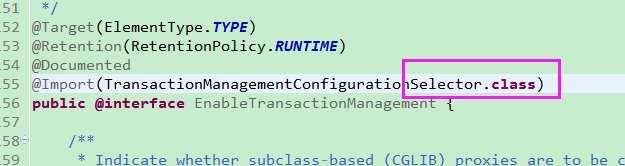
spring围绕着bean运转的,注册的几种方式,每种注册方式的条件性选择
最后请慢慢学会忘记xml格式的配置文件,现在或往后都是注解式了,虽然xml配置并不影响功能!

![]()
附部分注解图一张:

![]()
参考:
0. @Import Annotation in Spring Framework
https://javabeat.net/use-import-importing-javaconfig-files-spring-projects/
1. Spring向容器注册Bean的高级应用 https://cloud.tencent.com/developer/article/1497795
2. how spring import annotation parse(要FQ) https://laptrinhx.com/spring-import-annotation-source-parsing-3074679655/
注意我说的墙不是下面这样的墙

 浙公网安备 33010602011771号