

Get请求和Post请求+Boss项目准备(2.2)
一、同步提交与异步提交:
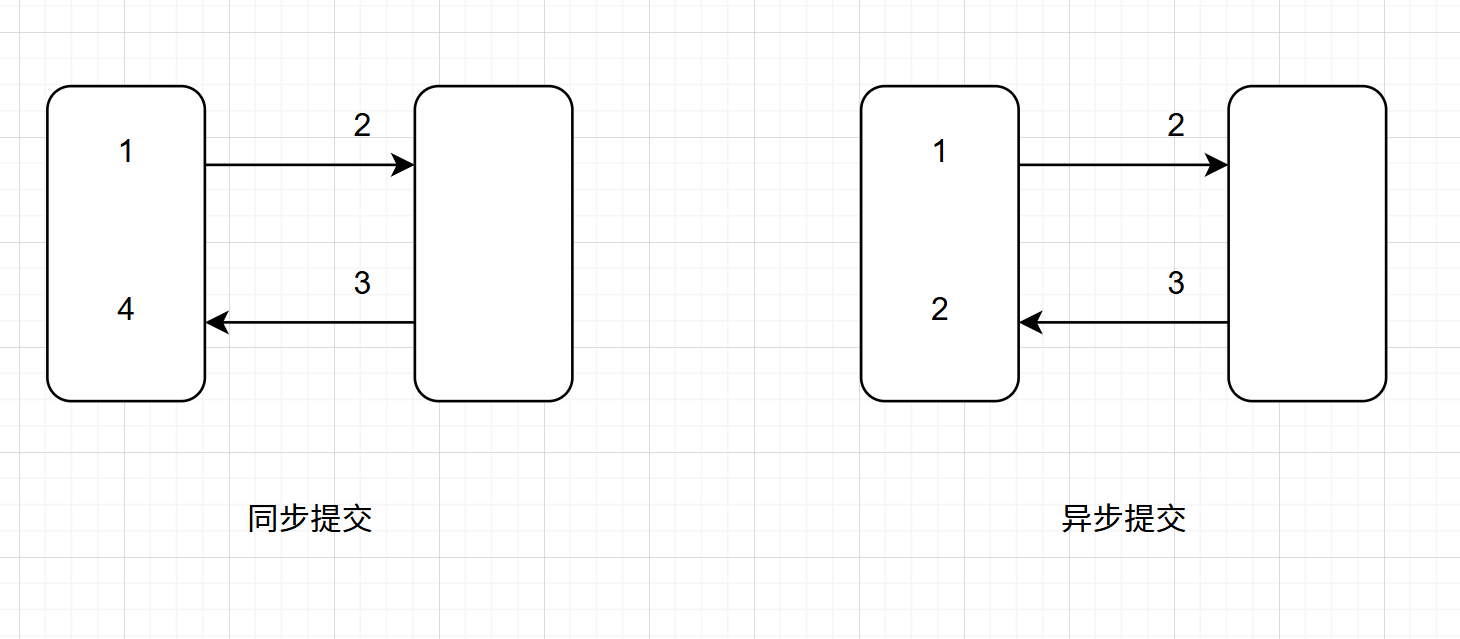
同步提交:一次调用,等待结果,再走下一步。
异步提交:一次提交,立即返回,后台处理,后续通知。
二、Get请求和Post请求:
①首先需要在静态文件(static)下创建js/axios包,再导入axios1.13.4.js,最后在page1.html中引用:
<script src="/js/axios/axios1.13.4.js"></script>
②static下的page1.html:
<!DOCTYPE html>
<html lang="en">
<head>
    <meta charset="UTF-8">
    <title>Title</title>
</head>
<body>

<div>
    <a href="#" id="link1">link1</a >
</div>
<div>
    <form action="/form2" id="form2" method="post">
        用户名<input type="text" name="username" id = "username">
        密码<input type="password" name="password" id="password">
        <input type="submit" value="登录">
    </form>
</div>


<script src="/js/axios/axios1.13.4.js"></script>

<script>
    document.getElementById("link1").onclick = function (e) {
        e.preventDefault(); //抑制默认行为
        console.log("你点击了link1");
        // 发送 ajax 请求,从 controller 中获取数据
        axios.get("/link1", {
            params:{
                id: 12345,
                name: "maomao"
            }
        }).then(function (res) { // 从 controller 中返回后调用的方法
            console.log(res);
            console.log(res.data);
            document.getElementById("link1").innerText =res.data.name + ":" + res.data.id;
            if(res.data.id){
                window.location.href="/page22";
            }
        }).catch(function (error) {
            console.log("请求失败:", error);
        });
    }
    document.getElementById("form2").onsubmit = function (e) {
        e.preventDefault(); //抑制默认行为

        if(!document.getElementById("username").value){
            console.log("用户名不能为空");
            return;

        }
        if(!document.getElementById("password").value){
            console.log("密码不能为空");
            return;

        }
        let data ={
            username:document.getElementById("username").value,
            password:document.getElementById("password").value
        }
        axios.post(e.target.action, data, {
            headers: {
                'Content-Type': 'application/json'
            }
        })
            .then(function (res) {
                console.log(res.data);
                document.getElementById("username").value ="hello" + res.data.username;
                document.getElementById("password").value ="hello" + res.data.password ;
            })
            .catch(function (error) {
                console.log(error);
            });

    }
</script>

</body>
</html>
③controller下的Page2Controller:
@Controller
public class Page2Controller {
    //跳转到page2页面
    @GetMapping("/link1")
    @ResponseBody
    public Map<String, Object> link1(Long id,String name) {
        Map<String, Object> map = new ConcurrentHashMap<>();
        map.put("id", id);
        map.put("name", name);
        return map;
    }
    @PostMapping("/form2")
    @ResponseBody
    public Map<String, Object> form2(@RequestBody User user) {
        Map<String, Object> map = new ConcurrentHashMap<>();
        map.put("username", user.getUsername());
        map.put("password", user.getPassword());
        return map;
    }
}
三、Boss项目配置:
1.application.yml配置文件:
server:
  port: 8000

spring:
    application:
        name: Boos

    datasource:
        driver-class-name: com.mysql.cj.jdbc.Driver
        url: jdbc:mysql://localhost:3306/crm?serverTimezone=GMT%2B8&characterEncoding=utf8&useUnicode=true&useSSL=false
        username: root
        password: 1234

    freemarker:
      expose-session-attributes: true
      suffix: .ftl
2.pom.xml:
除了创建项目时添加的依赖:Lombok、Spring Web、Spring Boot DevTools、MySQL Driver、MyBatis Framework外还有:
 <!-- Thymeleaf模板引擎:页面数据渲染 -->
        <dependency>
            <groupId>org.springframework.boot</groupId>
            <artifactId>spring-boot-starter-thymeleaf</artifactId>
        </dependency>
        <!-- freemarker  -->
        <dependency>
            <groupId>org.springframework.boot</groupId>
            <artifactId>spring-boot-starter-freemarker</artifactId>
        </dependency>
        <dependency>
            <groupId>commons-codec</groupId>
            <artifactId>commons-codec</artifactId>
        </dependency>
        <dependency>
            <groupId>org.aspectj</groupId>
            <artifactId>aspectjweaver</artifactId>
        </dependency>
        <!-- PageHelper:MyBatis分页插件,自动整合SpringBoot -->
        <dependency>
            <groupId>com.github.pagehelper</groupId>
            <artifactId>pagehelper-spring-boot-starter</artifactId>
            <version>1.4.6</version>
        </dependency>
3.导入static和templates的资源
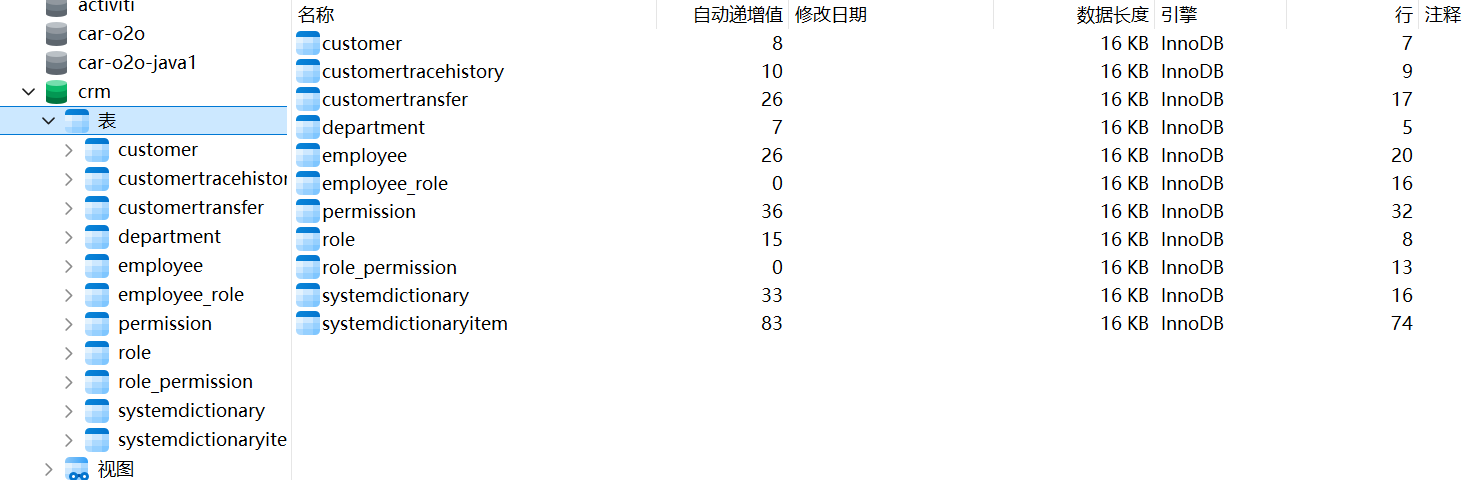
4.数据库:
5.配置项目结构:
dmain:
Employee类
@Data
@AllArgsConstructor
@NoArgsConstructor
public class Employee {

    private Long id;
    private String name;
    private String password;
    private String email;
    private Integer age;
    private Boolean admin;
    private Long deptId;

}
mapper:
EmployeeMapper接口
public interface EmployeeMapper {
}
service:
①impl包下EmployeeServiceImpl实现类:
@Service
public class EmployeeServiceImpl implements EmployeeService {

}
②EmployeeService接口:
public interface EmployeeService {
  j
}
controller:
LoginController类:
@RestController
public class LoginController {

}
四、功能实现:
1.登录功能:
①login.html:
 <script>
        <!-- $(function(){}) 页面加载完成后,执行代码- window.load=function(){} -->
        $(function () {
            $(".submitBtn").click(function () {
                // var params = $("#loginForm").serialize();//一次性获取表单中的所有参数
                // $.post('/loginUser.do',params,function (data) { //jsonresult
                //     if(data.success){
                //         window.location.href = "/department/list.do";
                //     }else{
                //         alert(data.msg)
                //     }
                // })
                axios.post("/loginUser",document.querySelector('#loginForm'),{
                    headers: {
                        'Content-Type': 'application/json'
                    }
                }).then(function (res) {
                    if(res.data.success){
                        window.location.href = "/department/list.do";
                    }else{
                        alert(res.data.msg)
                    }
                })

            })
        })
    </script>
②创建util.Result类:
@Data
@AllArgsConstructor
@NoArgsConstructor
public class Result {
    private Boolean success;
    private String msg;

    public static Result success() {
        return new Result(true, "操作成功");
    }
    public static Result success(String msg) {
        return new Result(true, msg);
    }

    public static Result fail() {
        return new Result(false, "系统错误");
    }
    public static Result fail(String msg) {
        return new Result(false, msg);
    }

}
③创建vo.UserVo类:
vo值对象|DTO数据传输对象
@Data
@AllArgsConstructor
@NoArgsConstructor
public class UserVo {
    private String username;
    private String password;
}
④controller.LoginController类:
不要忘了在主启动类中配置@MapperScan(basePackages = "cn.wolfcode.mapper")
//让当前类下的所有方法,默认都返回 JSON/XML 这类响应体数据,而非跳转页面
@RestController
public class LoginController {

    @Autowired
    private EmployeeService employeeService;

    @RequestMapping("/loginUser")
    public Result login(@RequestBody UserVo userVo, HttpSession session) {

        if(StringUtils.isEmpty(userVo.getUsername())){
            return Result.fail("用户名不能为空");
        }
        if(StringUtils.isEmpty(userVo.getPassword())){
            return Result.fail("密码不能为空");
        }
        try {
            Employee employee = employeeService.login(userVo);
            employee.setPassword("");
            session.setAttribute("employee", employee);
            return Result.success();
        } catch (Exception e) {
            e.printStackTrace();
            return Result.fail(e.getMessage());
        }

    }
}
⑤EmployeeService接口中创建Employee login(UserVo userVo);
在EmployeeServiceImpl中:
@Service
public class EmployeeServiceImpl implements EmployeeService {


   @Resource
   private EmployeeMapper employeeMapper;

   @Override
   public Employee login(UserVo userVo) {
       //1.根据用户名查询用户信息
       Employee employee = employeeMapper.findByName(userVo.getUsername());
       //2.对明文进行加密,判断密码是否正确
       //3.返回用户信息

       return null;
   }

}
未完待续... o (≧v≦) o

 浙公网安备 33010602011771号