

SpringBoot基础配置拓展:配置类+拦截器(1.31)
一、基础配置:
1.application.properties
spring.application.name=BootTest

#数据库连接
spring.datasource.url=jdbc:mysql://localhost:3306/javafk?serverTimezone=GMT%2B8&characterEncoding=utf8&useUnicode=true&useSSL=false
spring.datasource.username=root
spring.datasource.password=1234
spring.datasource.driver-class-name=com.mysql.cj.jdbc.Driver
#修改端口号
server.port=8001
#缓存关闭
spring.thymeleaf.cache=false
#允许Spring容器中存在循环依赖的Bean
spring.main.allow-circular-references=true
#日志级别配置项
logging.level.cn.wolfcode.mapper=debug
配置文件中存在大量重复的spring,为了减少所占字节数,提出yaml格式或yml格式文件
2.application.yaml
以 : 形式缩进,: 后边带空格
server:
  port: 8082
3.application.yml
server:
  port: 8083
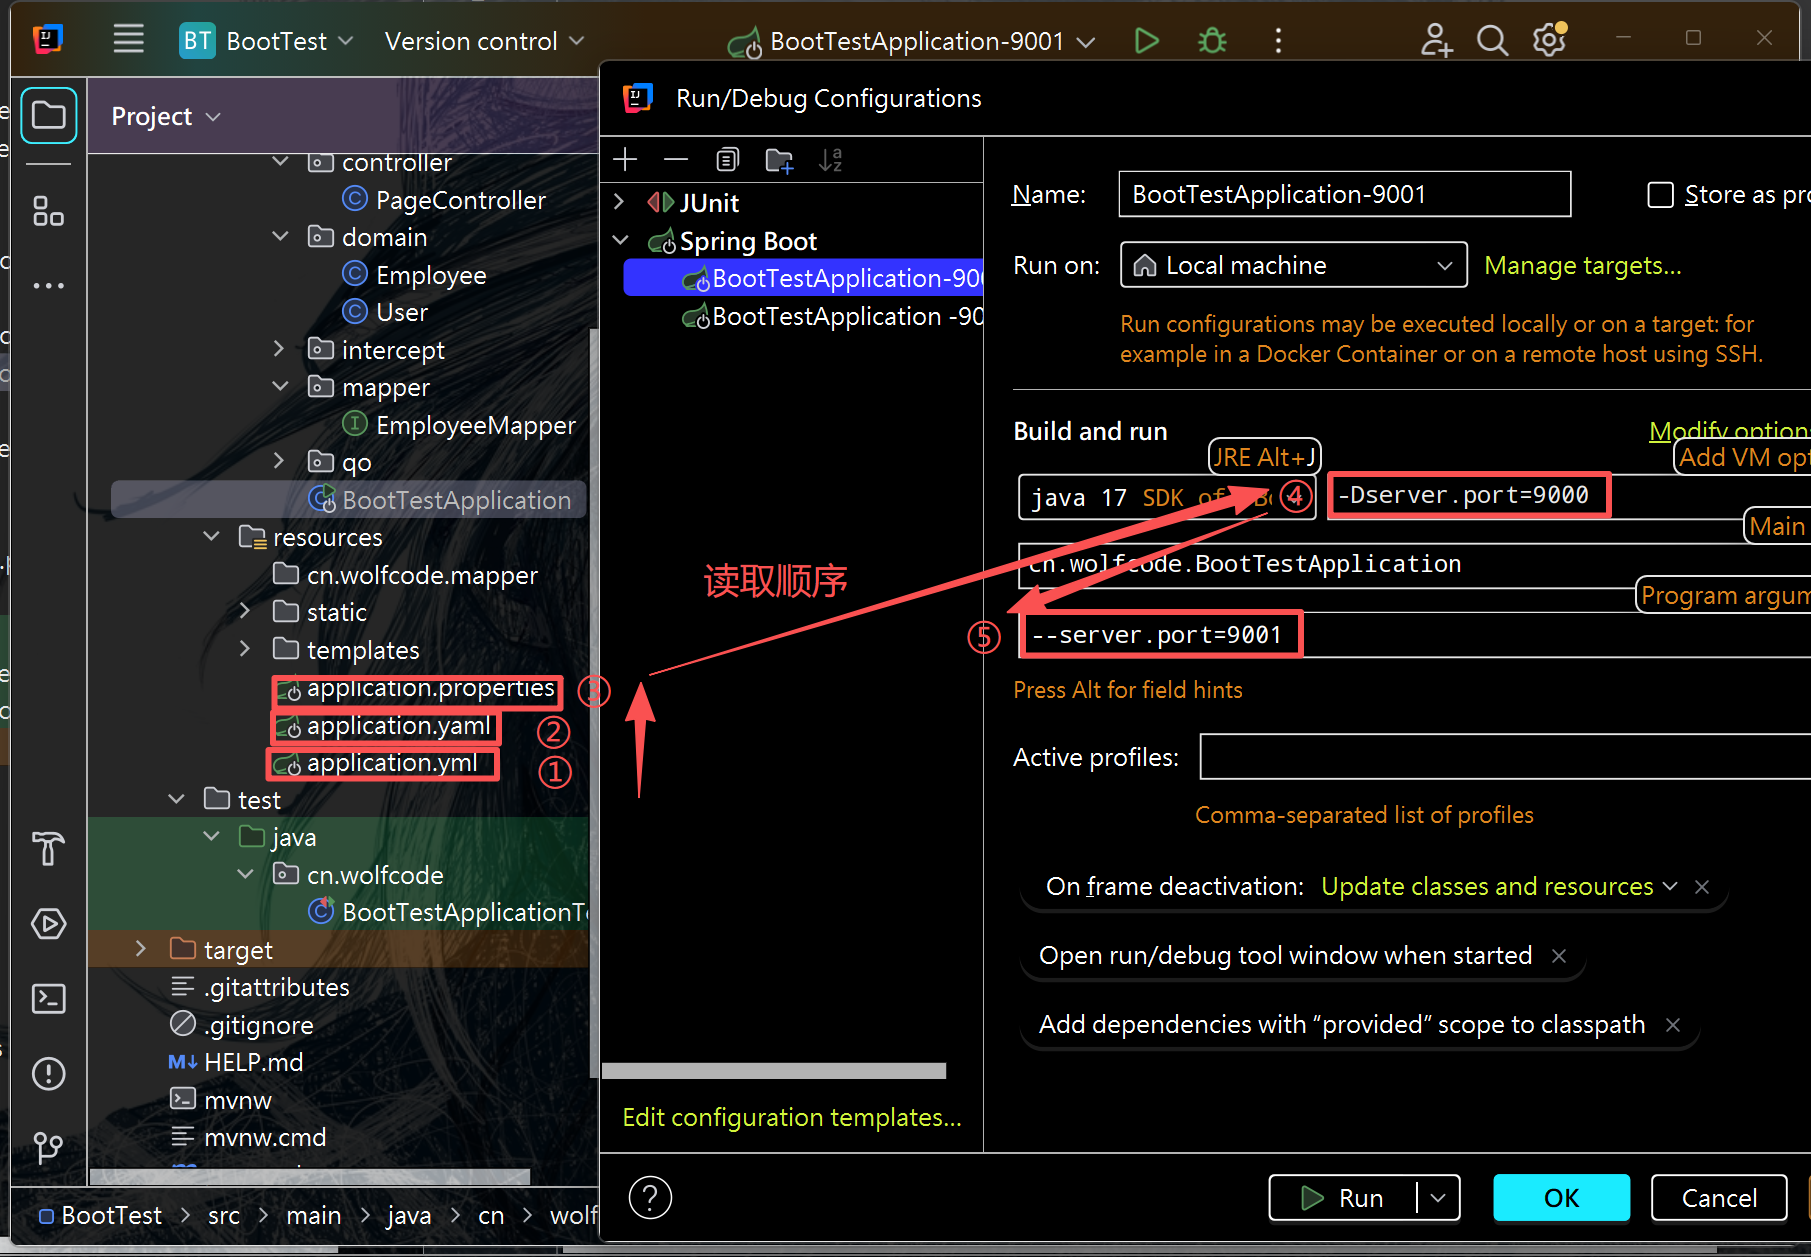
小结:优先级和读取顺序
同目录下:application.properties 优先级 > application.yaml = application.yml
程序读取的顺序:application.yml --->application.yaml --->application.properties
即程序会按优先级由低到高读取配置文件,最终高优先级会覆盖低优先级中的重复配置项
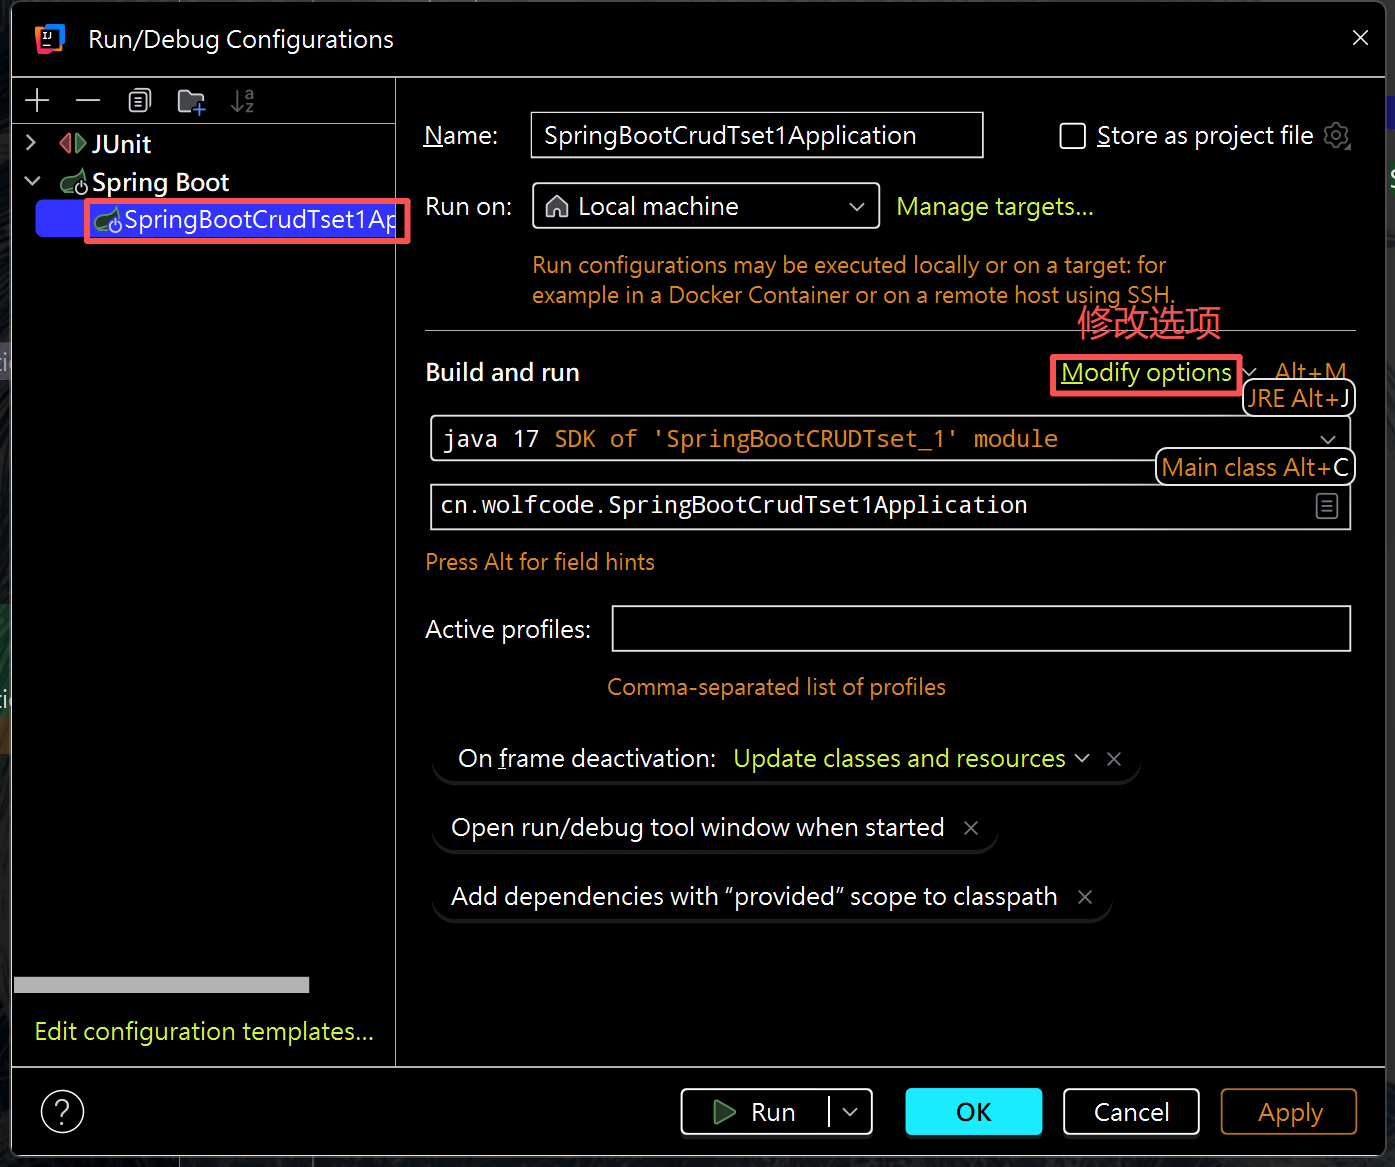
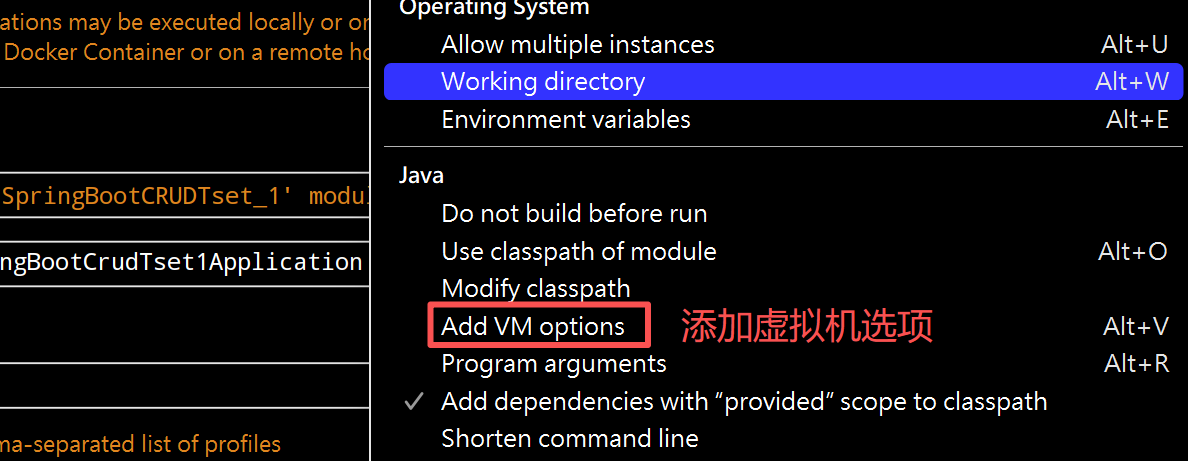
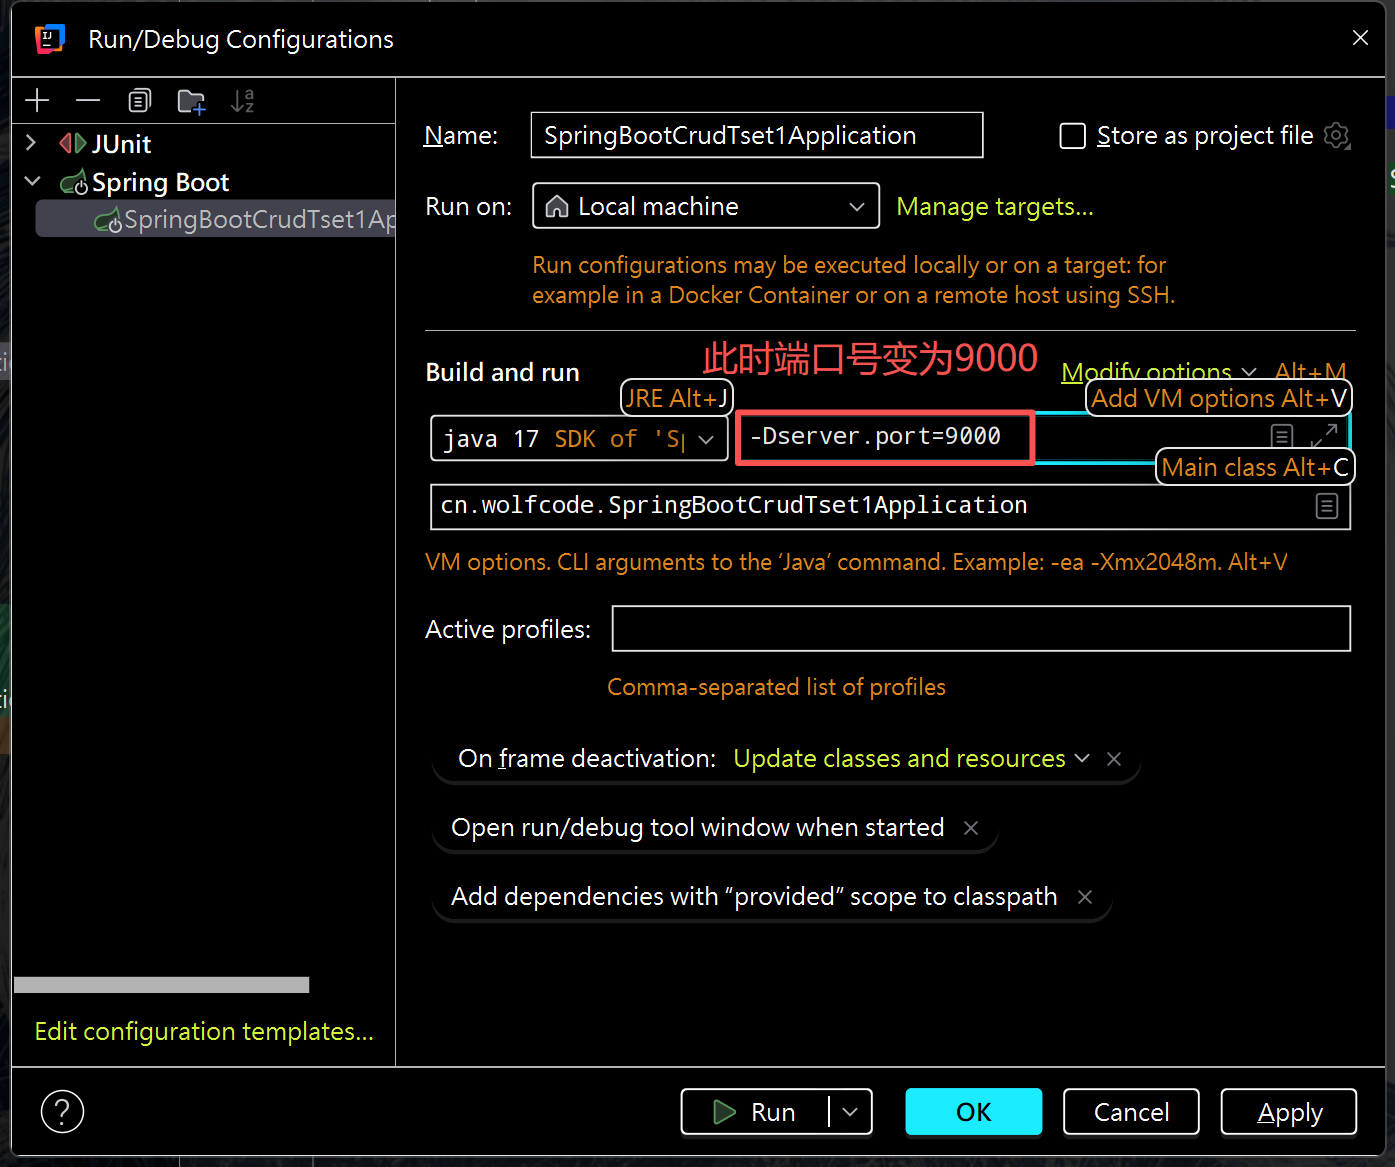
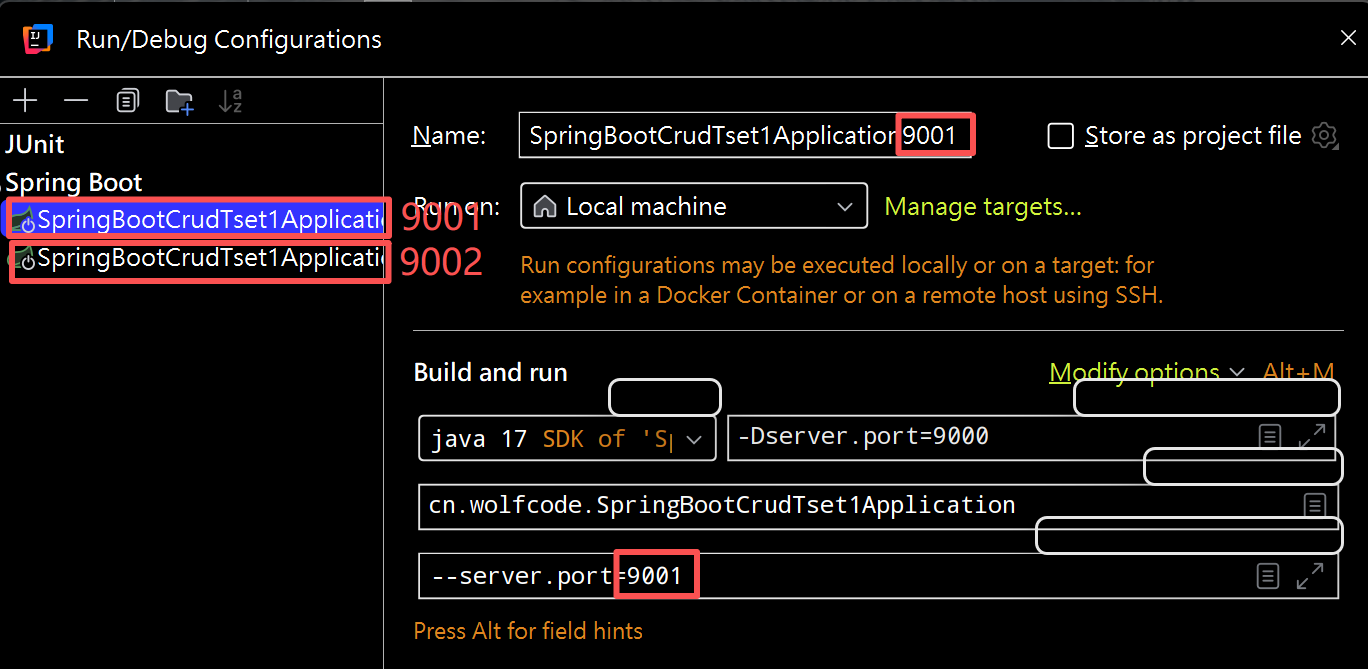
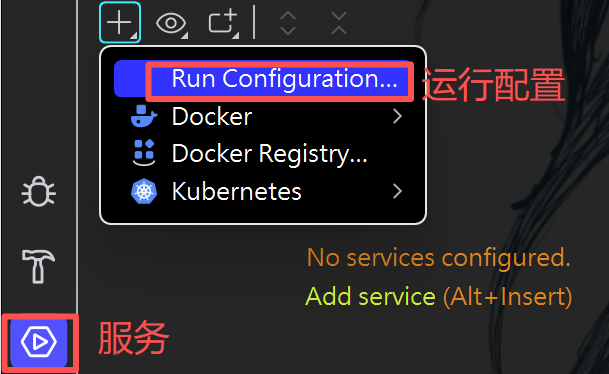
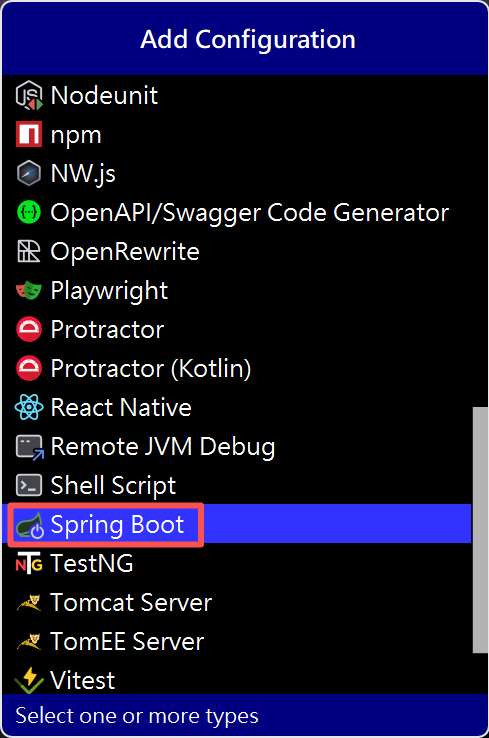
4.动态改变的配置文件:
(1)虚拟机修改端口号
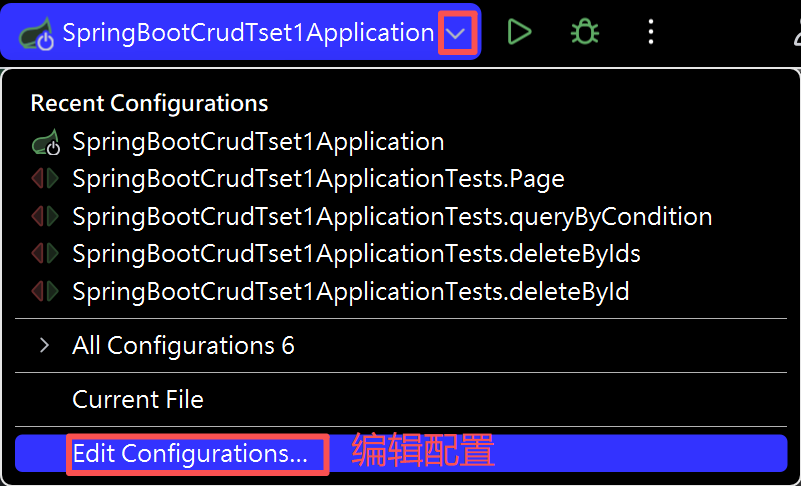
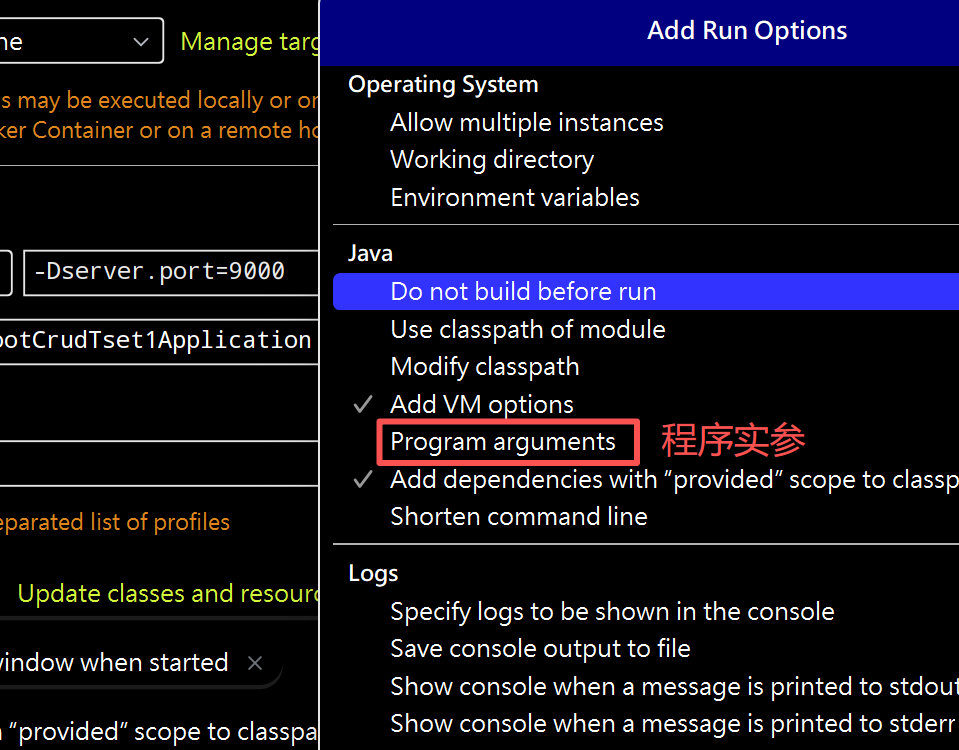
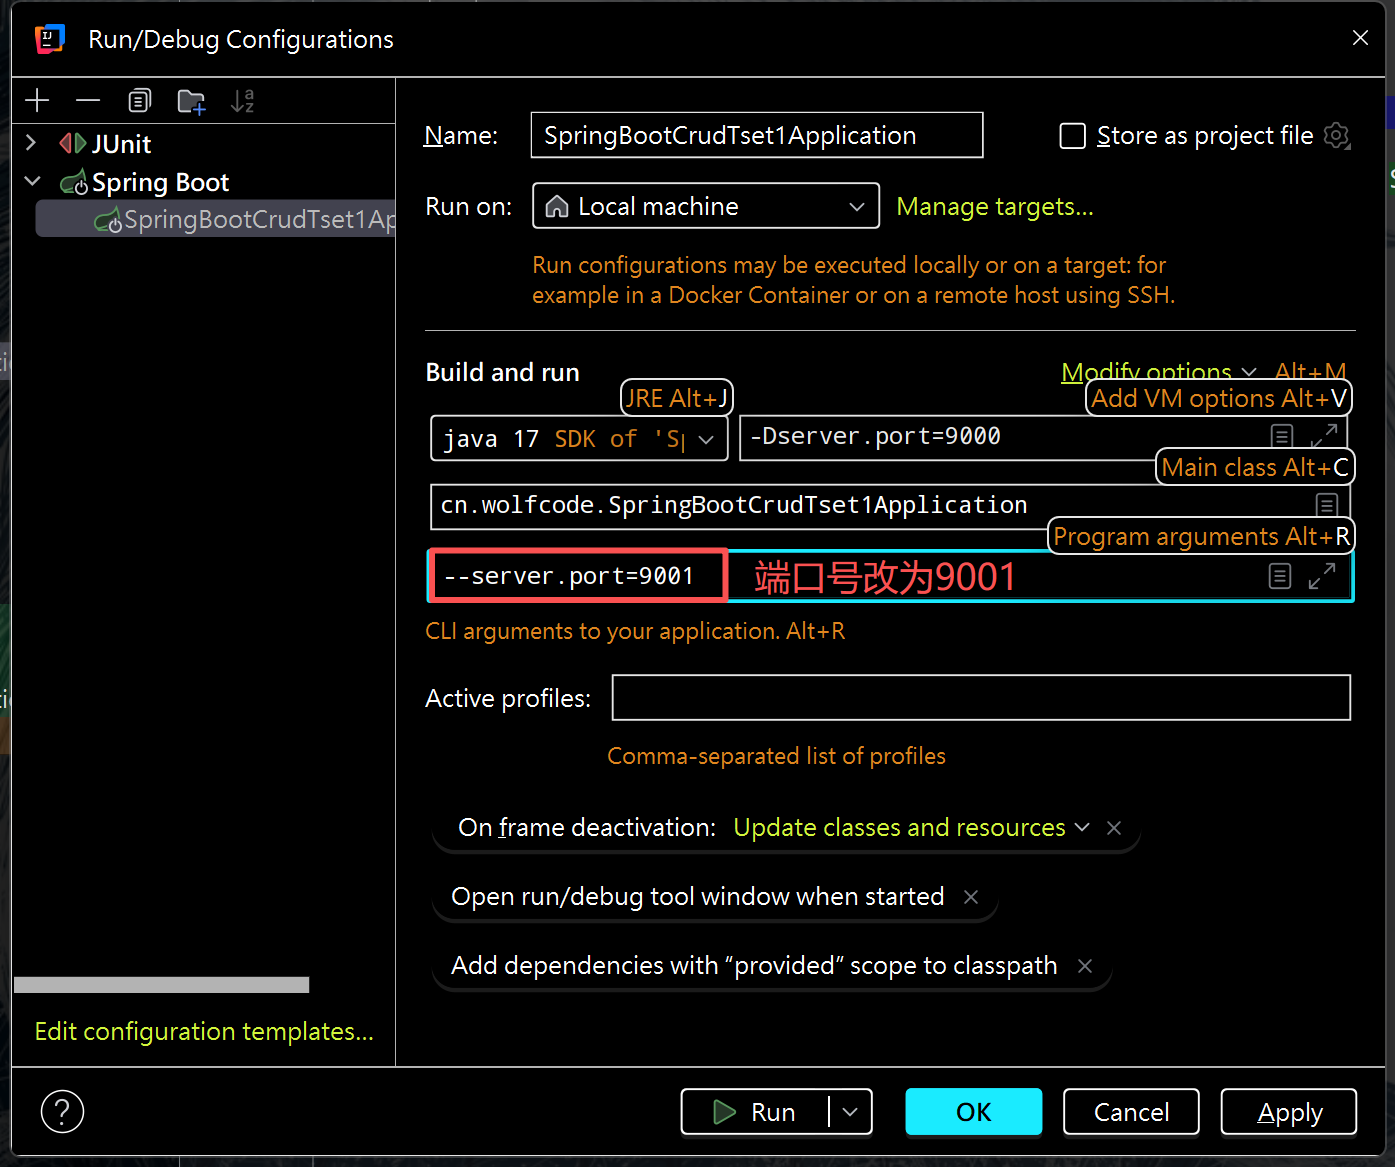
(2)程序实参修改端口号
总结:五个配置文件的优先级和读取顺序
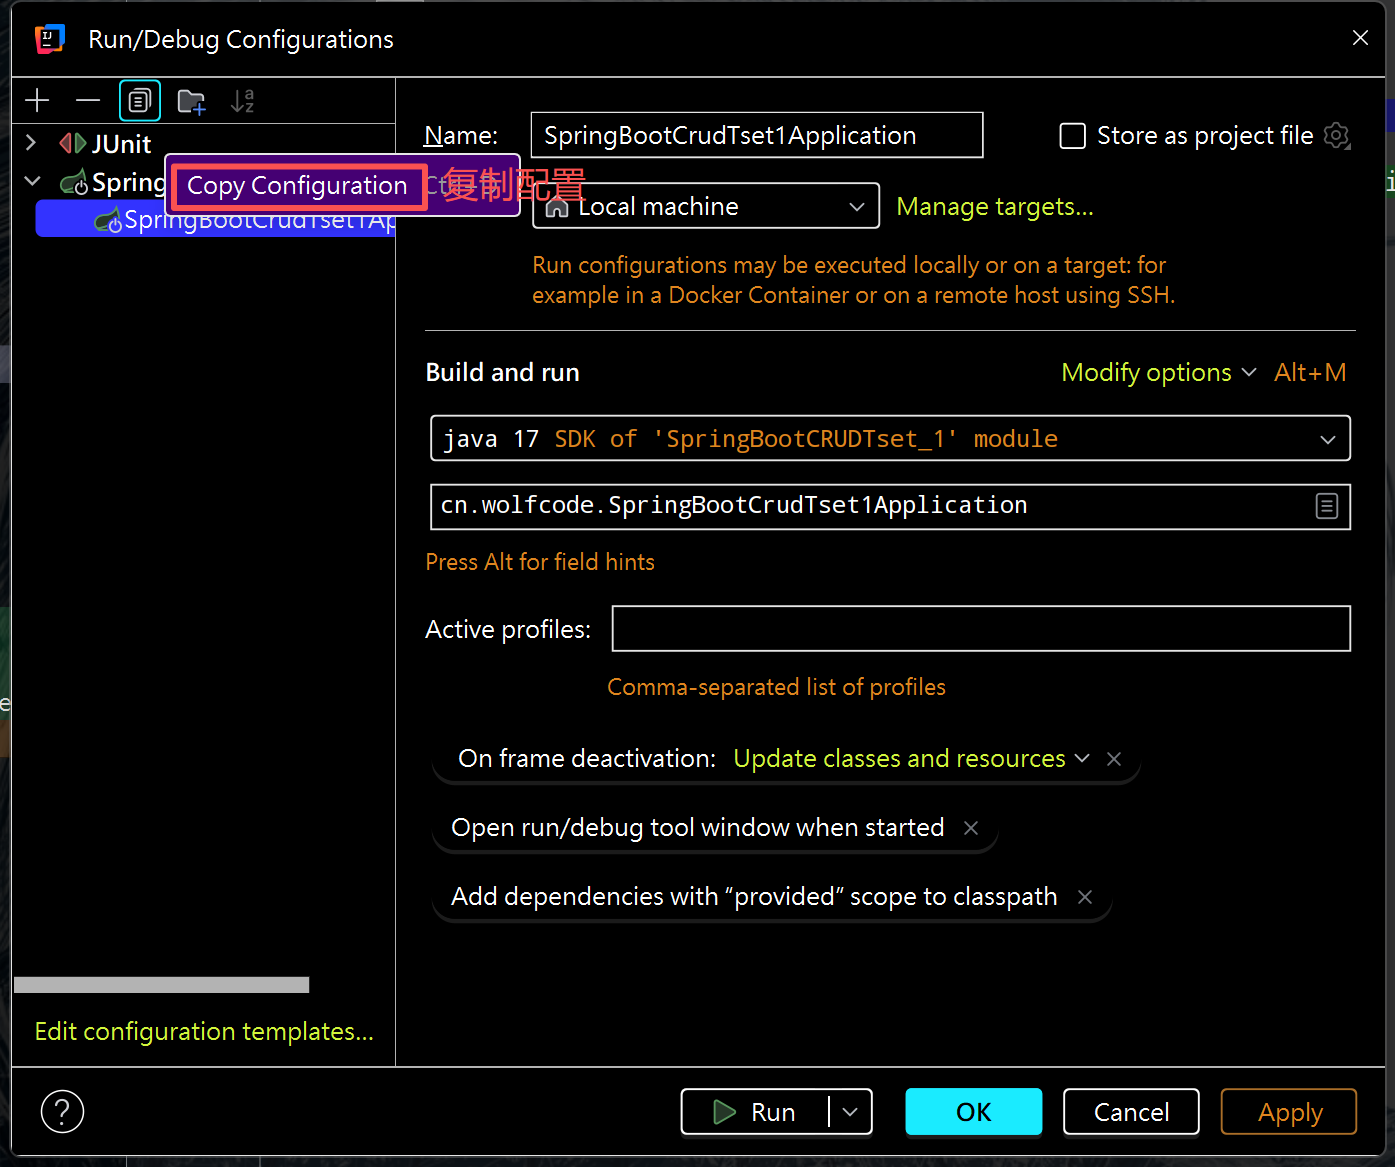
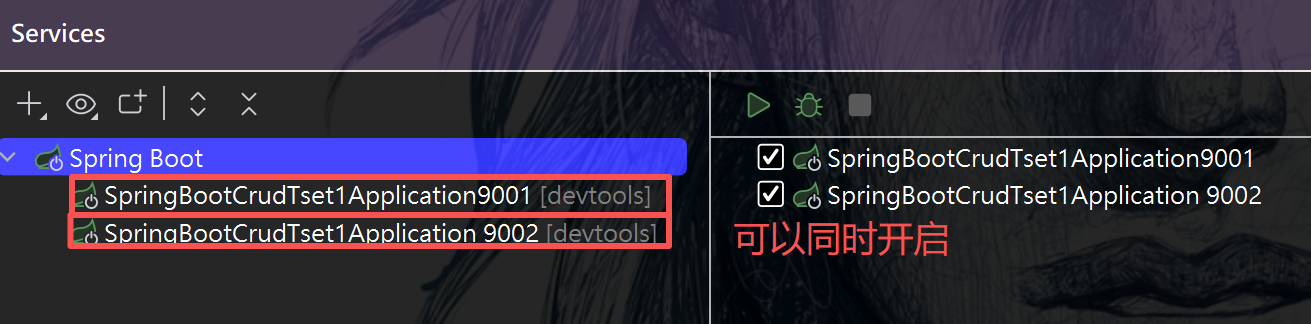
(3)集群:提供同一功能的不同服务节点的服务体系。一套程序布置在两个不同的地方
(4)mapper层的@mapper注解配置:
在主类SpringBootCrudTset1Application上加入:
@MapperScan(basePackages = "cn.wolfcode.mapper")
二、配置类:
1.往IOC里面放对象的方式:
-
4个注解(类上)
@Controller // 控制层
@Service // 业务逻辑层
@Repository // 数据访问层
@Component // 通用组件层
-
方法上的注解
@Bean //配置类中
2.示例:
①新建domain.User类
@Data
@AllArgsConstructor
@NoArgsConstructor
public class User {

    private String name;
    private String password;
}
②新建config.BeanConfiguration类
@Configuration //配置文件类的注解
public class BeanConfiguration {

    @Bean
    public User user(){

        return new User("mao1", "123456");
    }

}
③test类:
 	@Autowired
    private User user;
    @Test
    void testBean() {
        System.out.println(user);
    }
输出:User(username=mao1, password=123456)
问题是: return new User("mao1", "123456"); 值是写死的,如何动态出来?
①在application.properties配置中写入:
user:
  name: "mao11"
  password: "23456"
②BeanConfiguration类:
@Configuration
public class BeanConfiguration {
   	//@Autowired 把Bean取下来
	//@Value 把属性取下来
    @Value("${user.name}")//配置文件中的名字
    private String name;
    @Value("${user.password}")
    private String password;

    @Bean
    public User user(){
		//修改为对应字段
        return new User(name, password);
    }

}
问题1:若方法名不一致,还能取下来吗?
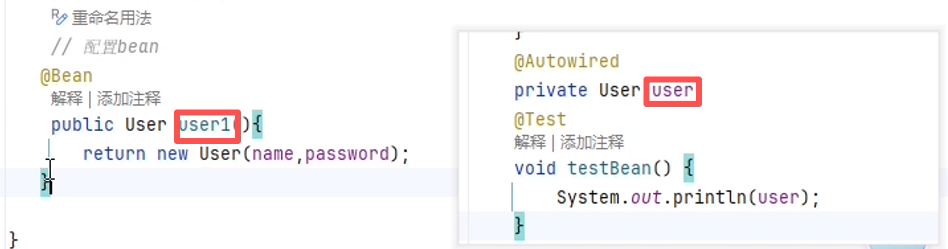
答案:能。因为@Autowired 的默认注入规则是先按类型匹配,只要 IOC 容器中存在唯一的 User 类型 Bean,不管这个 Bean 的名称是 user1(方法名)还是其他,都能成功注入到 private User user 这个属性中。
问题2:那如果写俩个user呢?
@Configuration
public class BeanConfiguration {

    @Value("${user.name}")
    private String name;
    @Value("${user.password}")
    private String password;

	//user1
    @Bean
    public User user1(){

        return new User(name, password);
    }
	//user2
    @Bean
    public User user2(){

        return new User(name+"2", password);
    }
}
那就会报错了,因为@Autowired找到了两个方法。
那如何解决呢?
答案是使用@Resource注解,它是以名称优先。
	//Bean
    @Resource
    private User user1;//user1
    @Test
    void testBean() {
        System.out.println(user1);//user1
    }
	//结果为 user1
或者使用@Qualifier()注解,
@Autowired指定类型,@Qualifier()指定对象。
@Qualifier("user2")就是明确告诉 Spring:我要的是那个名字叫 user2 的 User 对象。
 	@Autowired
    @Qualifier("user2")
    private User user;//名称可以随便写
    @Test
    void testBean() {
        System.out.println(user);
    }
三、拦截器:
①新建intercept.TimeIntercept类
public class TimeIntercept implements HandlerInterceptor {

    @Override
    public boolean preHandle(HttpServletRequest request, HttpServletResponse response, Object handler) throws Exception {

       System.out.println("拦截器执行了,记录开始时间~");
       long t1 = new Date().getTime();
       request.setAttribute("startTime", t1);

        return true;
    }

    @Override
    public void postHandle(HttpServletRequest request, HttpServletResponse response, Object handler, ModelAndView modelAndView) throws Exception {

        Long t1 = (Long)request.getAttribute("startTime");

        long t2 = new Date().getTime();
        System.out.println(request.getRequestURL() + "耗时:" + (t2-t1));

    }
}
将拦截器添加到配置文件中
②新建config.WebConfiguration
@Configuration
public class WebConfiguration implements WebMvcConfigurer {

    @Bean
    public TimeIntercept timeIntercept(){
        return new TimeIntercept();
    }

    @Autowired
    private TimeIntercept timeIntercept;

    @Override
    public void addInterceptors(InterceptorRegistry registry) {
        registry.addInterceptor(timeIntercept).addPathPatterns("/**");
    }
}

 浙公网安备 33010602011771号