


聚合网络

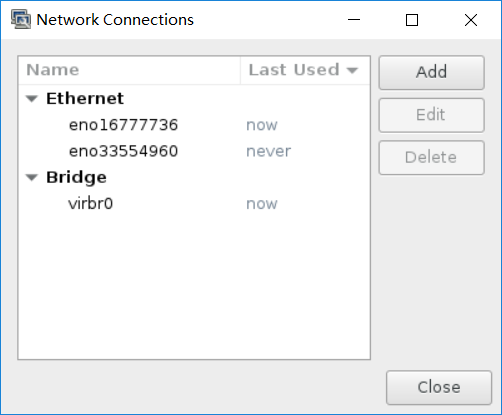
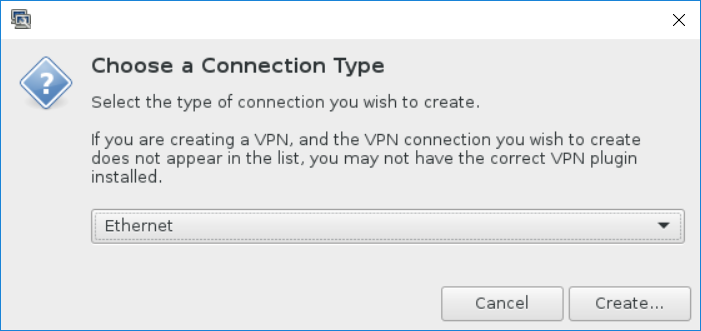
图形化界面配置
# nm-connection-editor &
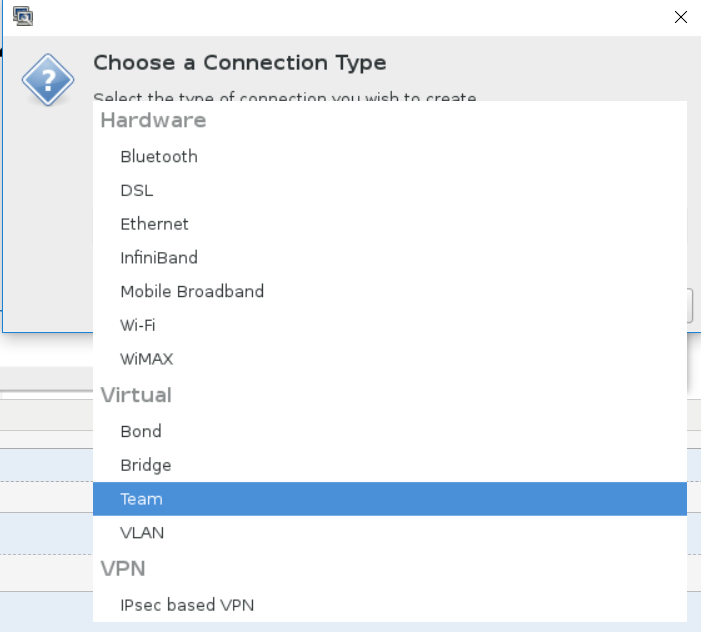
选择team
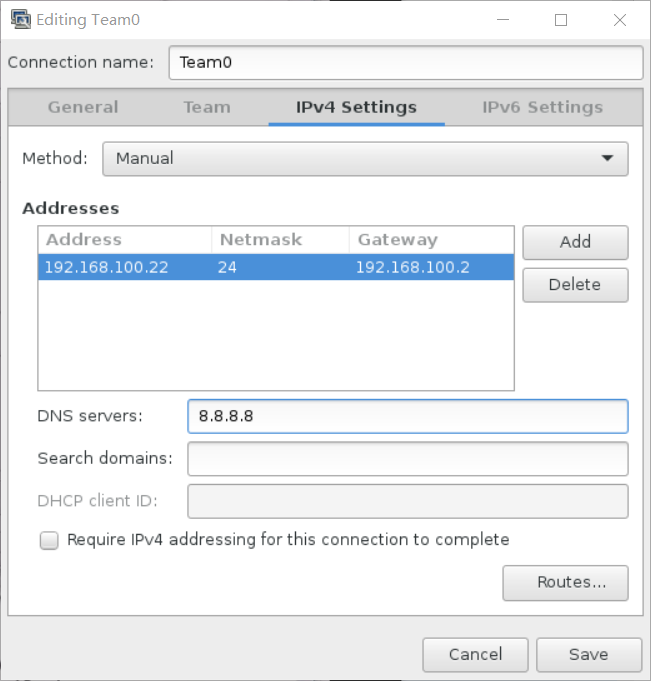
设置网络
点击添加
选择以太网
eth0对应team0_1
eth1对应team0_2
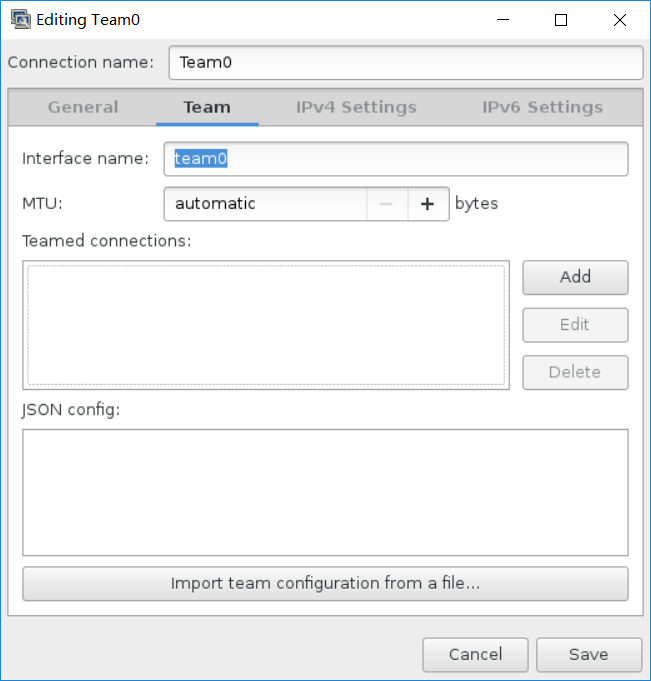
添加一下内容:
{"runner":{"name":"activebackup"}}
保存

此时的Mac地址都变成一样的了
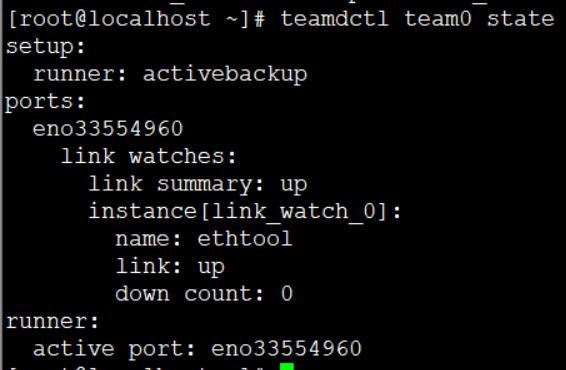
# teamdctl team0 state
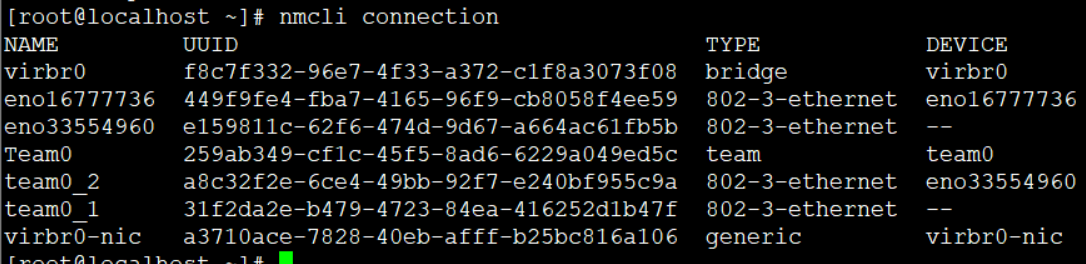
# nmcli connection
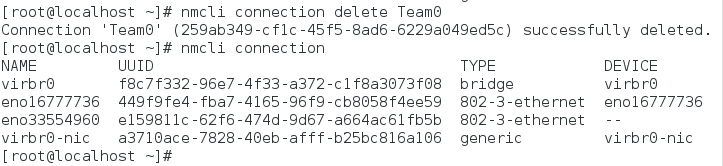
删除所有配置
#nmcli connection delete team0_1
#nmcli connection delete team0_2
#nmcli connection delete team0
命令行配置runner
1、先创建一个team0
# nmcli connection add type team con-name team0 ifname team0 \
config '{"runner":{"name":"activebackup"}}'

2、为这个team0配置必要的网络信息
# nmcli connection modify team0 ipv4.addresses "192.168.100.26/24"
# nmcli connection modify team0 ipv4.gateway "192.168.100.2"
# nmcli connection modify team0 ipv4.dns "8.8.8.8"
# nmcli connection modify team0 ipv4.method manual

3、得指定team0上面具体工作的网卡是谁
# nmcli connection add type team-slave con-name team0_1 ifname eno16777736 master team0
# nmcli connection add type team-slave con-name team0_2 ifname eno33554960 master team0

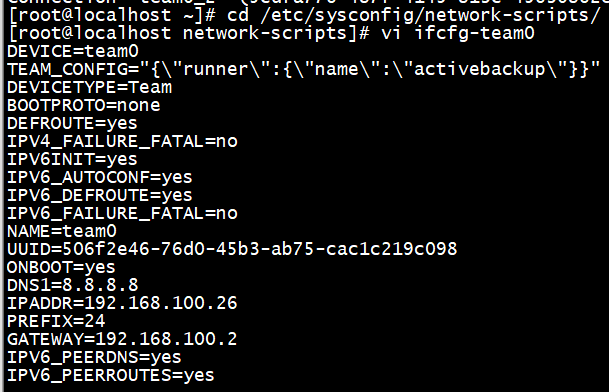
查看配置文件信息
# cd /etc/sysconfig/network-scripts/
# vi ifcfg-team0
# vi ifcfg-team0_1

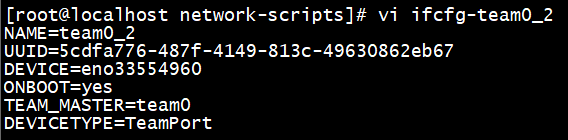
# vi ifcfg-team0_2
# nmcli connection

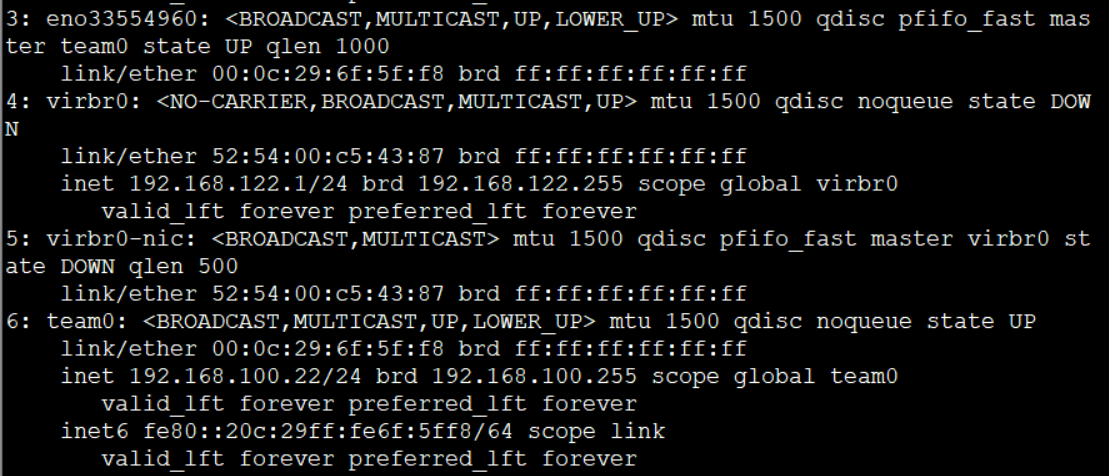
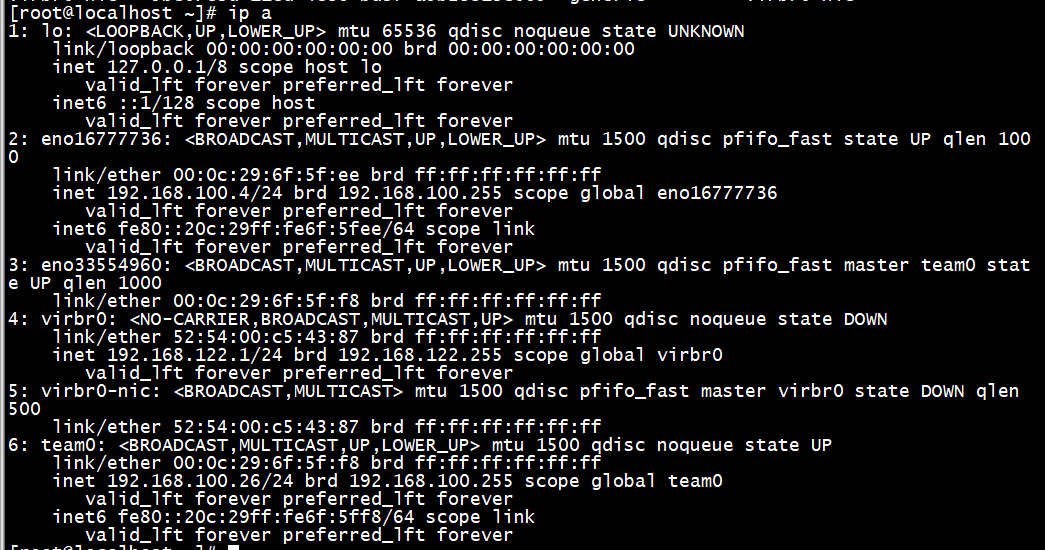
# ip a
# teamdctl team0 state
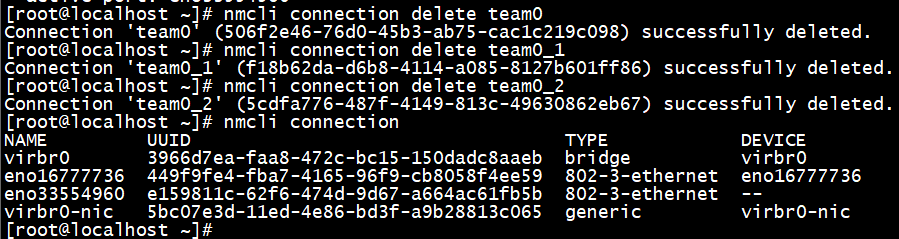
删除所有连接
# nmcli connection delete team0
# nmcli connection delete team0_1
# nmcli connection delete team0_2
修改配置文件
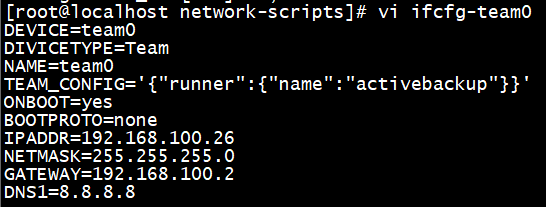
# cd /etc/sysconfig/network-scripts/
# vi ifcfg-team0
DEVICE=team0
DIVICETYPE=Team
NAME=team0
TEAM_CONFIG='{"runner":{"name":"activebackup"}}'
ONBOOT=yes
BOOTPROTO=none
IPADDR=192.168.100.26
NETMASK=255.255.255.0
GATEWAY=192.168.100.2
DNS1=8.8.8.8
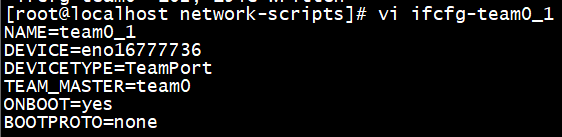
# vi ifcfg-team0_1
NAME=team0_1
DEVICE=eno16777736
DEVICETYPE=TeamPort
TEAM_MASTER=team0
ONBOOT=yes
BOOTPROTO=none
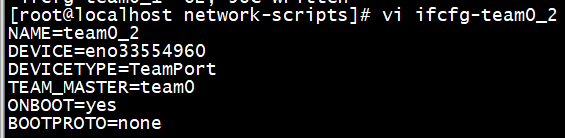
# vi ifcfg-team0_2
NAME=team0_2
DEVICE=eno33554960
DEVICETYPE=TeamPort
TEAM_MASTER=team0
ONBOOT=yes
BOOTPROTO=none

 浙公网安备 33010602011771号