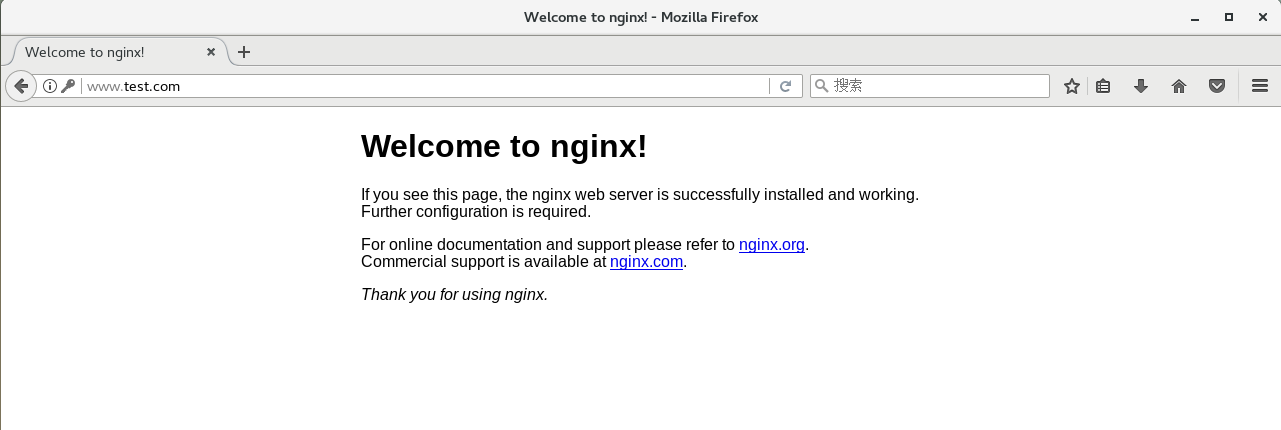
nginx网站服务
nginx网站服务
一、nginx服务基础
1. nginx概述
nginx是一款高性能、轻量级的web服务软件,具有以下特点:
- 稳定性高
- 系统资源消耗低
- 对HTTP并发连接的处理能力高(单台物理服务器可支持30000~50000个并发请求)
2. nginx和apache的差异
- nginx是一个基于事件的web服务器,apache是一个基于流程的服务器;
- nginx所有请求都由一个线程处理,apache单个线程处理单个请求;
- nginx避免子进程的概念,apache是基于子进程的;
- nginx在内存消耗和连接方面更好,apache在内存消耗和连接方面一般;
- nginx的性能和可伸缩性不依赖于硬件,apache依赖于CPU和内存等硬件;
- nginx支持热部署,apache不支持热部署;
- nginx对于静态文件处理具有更高效率,apache相对一般;
- nginx在反向代理场景具有明显优势,apache相对一般。
二、编译安装nginx
1. 关闭防火墙,将安装nginx软件包传到/opt目录下
[root@localhost ~]# systemctl stop firewalld
[root@localhost ~]# systemctl disable firewalld
[root@localhost ~]# setenforce 0
setenforce: SELinux is disabled
[root@localhost opt]# cd /opt
[root@localhost opt]# ls
nginx-1.12.0.tar.gz  nginx-1.12.2.tar.gz  rh
2. 安装依赖包
ngnix的配置及运行需要pcre、zlib等软件包的支持,因此需要安装这些软件的开发包,以便提供相应的库和头文件。
[root@localhost opt]# yum install -y pcre-devel zlib-devel gcc gcc-c++ make
3. 创建运行用户、组
nginx服务程序默认以nobody身份运行,建议为其创建专门的用户账号,以便更准确地控制其访问权限。
[root@localhost nginx-1.12.0]# useradd -M -s /sbin/nologin nginx
4. 编译安装nginx
[root@localhost opt]# tar zxvf nginx-1.12.0.tar.gz -C /opt/
[root@localhost opt]# cd nginx-1.12.0/
[root@localhost nginx-1.12.0]# ./configure \
> --prefix=/usr/local/nginx \       #指定nginx的安装路径
> --user=nginx \                    #指定用户名
> --group=nginx \                   #指定组名
> --with-http_stub_status_module    #启用http_stub_status_module模块以支持状态统计
[root@localhost nginx-1.12.0]# make -j 2 && make install
#编译并安装
[root@localhost nginx-1.12.0]# ln -s /usr/local/nginx/sbin/nginx /usr/local/sbin
#让系统识别nginx的操作命令
5. 检查、启动、重启、停止nginx服务
- 检查
[root@localhost nginx-1.12.0]# nginx -t     #检查配置文件是否配置正确
nginx: the configuration file /usr/local/nginx/conf/nginx.conf syntax is ok
nginx: configuration file /usr/local/nginx/conf/nginx.conf test is successful
- 启动
[root@localhost nginx-1.12.0]# nginx #启动nginx
- 查看nginx进程号的几种方法
方法一:cat nginx.pid文件
方法二:prep nginx
方法三:lsof -i:端口号
方法四:ps aux/-elf | grep nginx
方法五:netstat/ss -natp | grep nginx
[root@localhost nginx-1.12.0]# cat /usr/local/nginx/logs/nginx.pid
11212
[root@localhost nginx-1.12.0]# pgrep nginx
11212
11213
[root@localhost nginx-1.12.0]# lsof -i:80
COMMAND   PID  USER   FD   TYPE DEVICE SIZE/OFF NODE NAME
nginx   11212  root    6u  IPv4 111057      0t0  TCP *:http (LISTEN)
nginx   11213 nginx    6u  IPv4 111057      0t0  TCP *:http (LISTEN)
[root@localhost nginx-1.12.0]# ps aux | grep nginx
root      11212  0.0  0.0  20496   604 ?        Ss   04:55   0:00 nginx: master process nginx
nginx     11213  0.0  0.0  23024  1384 ?        S    04:55   0:00 nginx: worker process
root      11253  0.0  0.0 112676   976 pts/1    R+   04:59   0:00 grep --color=auto nginx
[root@localhost nginx-1.12.0]# ps -elf | grep nginx
1 S root      11212      1  0  80   0 -  5124 sigsus 04:55 ?        00:00:00 nginx: master process nginx
5 S nginx     11213  11212  0  80   0 -  5756 ep_pol 04:55 ?        00:00:00 nginx: worker process
0 R root      11264   2211  0  80   0 - 28169 -      05:00 pts/1    00:00:00 grep --color=auto nginx
[root@localhost nginx-1.12.0]# ss -natp | grep nginx
LISTEN     0      128          *:80                       *:*                   users:(("nginx",pid=11213,fd=6),("nginx",pid=11212,fd=6))
[root@localhost nginx-1.12.0]# netstat -natp | grep nginx
tcp        0      0 0.0.0.0:80              0.0.0.0:*               LISTEN      11212/nginx: master
- 停止nginx的几种方法
方法一:kill -3 进程号
方法二:kill -s QUIT 进程号
方法三:killall -3 nginx
方法四:killall -s QUIT nginx
[root@localhost nginx-1.12.0]# kill -3 11212
[root@localhost nginx-1.12.0]# nginx
[root@localhost nginx-1.12.0]# cat /usr/local/nginx/logs/nginx.pid
11337
[root@localhost nginx-1.12.0]# kill -s QUIT 11337
[root@localhost nginx-1.12.0]# nginx
[root@localhost nginx-1.12.0]# killall -3 nginx
[root@localhost nginx-1.12.0]# nginx
[root@localhost nginx-1.12.0]# killall -s QUIT nginx
- 重载nginx的集中方法
方法一:kill -1 进程号
方法二:kill -s HUP 进程号
方法三:killall -1 nginx
方法四:killall -s HUP nginx
[root@localhost nginx-1.12.0]# nginx
[root@localhost nginx-1.12.0]# cat /usr/local/nginx/logs/nginx.pid
11427
[root@localhost nginx-1.12.0]# kill -1 11427
[root@localhost nginx-1.12.0]# cat /usr/local/nginx/logs/nginx.pid
11427
[root@localhost nginx-1.12.0]# kill -s HUP 11427
[root@localhost nginx-1.12.0]# killall -1 nginx
[root@localhost nginx-1.12.0]# killall -s HUP nginx
- 日志分割,重新打开日志文件
[root@localhost nginx-1.12.0]# cat /usr/local/nginx/logs/nginx.pid
11427
[root@localhost nginx-1.12.0]# kill -USR1 11427
- 平滑升级
[root@localhost nginx-1.12.0]# cat /usr/local/nginx/logs/nginx.pid
11427
[root@localhost nginx-1.12.0]# kill -USR2 11427
- 新版本升级
[root@localhost opt]# tar -zxvf nginx-1.12.2.tar.gz
[root@localhost nginx-1.12.2]# ./configure \
> --prefix=/usr/local/nginx \
> --user=nginx \
> --group=nginx \
> --with-http_stub_status_module \
> --with-http_ssl_module
[root@localhost nginx-1.12.2]# make
[root@localhost nginx-1.12.2]# mv /usr/local/nginx/sbin/nginx /usr/local/nginx/sbin/nginx_old
[root@localhost nginx-1.12.2]# cp objs/nginx /usr/local/nginx/sbin/nginx
[root@localhost nginx-1.12.2]# make upgrade   #也可先killall nginx,再/usr/local/nginx/sbin/nginx
[root@localhost nginx-1.12.2]# nginx -v
nginx version: nginx/1.12.2
- 添加nginx系统服务
方法一
[root@localhost nginx-1.12.2]# cat /etc/init.d/nginx
#!/bin/bash
#chkconfig: - 99 20
#description:Nginx Service Control Script
COM="/usr/local/nginx/sbin/nginx"
PID="/usr/local/nginx/logs/nginx.pid"
case "$1" in
start)
  $COM
;;

stop)
  kill -s QUIT $(cat $PID)
;;

restart)
  $0 stop
  $0 start
;;

reload)
  kill -s HUP $(cat $PID)
;;

*)
echo "Usage:$0 {start|stop|restart|reload}"
  exit 1

esac
exit 0
[root@localhost nginx-1.12.2]# chmod +x /etc/init.d/nginx
[root@localhost nginx-1.12.2]# chkconfig --add nginx           #添加为系统服务
[root@localhost nginx-1.12.2]# systemctl stop nginx
[root@localhost nginx-1.12.2]# systemctl start nginx
方法二
[root@localhost nginx-1.12.2]# chmod 754 /lib/systemd/system/nginx.service
[root@localhost nginx-1.12.2]# cat /lib/systemd/system/nginx.service
[Unit]                      #服务的说明
Description=nginx           #描述服务
After=network.target        #依赖,当依赖的服务启动之后再启动自定义的服务

[Service]                                 #服务运行参数的设置
Type=forking                              #forking是后台运行的形式,使用此启动类型应同时指定PIDFile=,以便systemd能够跟踪服务的主进程。
PIDFile=/usr/local/nginx/logs/nginx.pid   #进程号文件的查看路径
ExecStart=/usr/local/nginx/sbin/nginx     #服务的具体运行命令
ExecReload=/bin/klll -s HUP $MAINPID      #重载命令
ExecStop=/bin/kill -s QUIT $MAINPID       #停止命令
PrivateTmp=true                           #表示给服务分配独立的临时空间

[Install]                                 #服务安装的相关设置,可设置为多用户
WantedBy=multi-user.target

[root@localhost nginx-1.12.2]# systemctl stop nginx.service
[root@localhost nginx-1.12.2]# systemctl start nginx.service
[root@localhost nginx-1.12.2]# systemctl enable nginx.service
Created symlink from /etc/systemd/system/multi-user.target.wants/nginx.service to /usr/lib/systemd/system/nginx.service.
注:启动、重启、停止等命令全部要求使用绝对路径
三、nginx访问控制
1. 认识ngnix服务的主配置文件nginx.conf
vim /usr/local/nginx/conf/nginx.conf
- 全局配置
#user nobody;                #运行用户,若编译时未指定则默认为nobody
worker_process 1;            #工作进程数量,可配置成服务器内核数*2,如果网站访问量不大,一般设为1就够用了
#error_log logs/error.log;   #错误日志文件的位置
#pid logs/nginx.pid;         #PID文件的位置
- I/O事件配置
events {
    use epoll;               #使用epoll模型,2.6及以上版本的系统内核,加你使用epoll模型以提高性能
    worker_connections 1024; #每个进程处理1024个连接
}
若提高每个进程的链接数还需执行"ulimit -n 65535"命令临时修改本地每个进程可以同时打开的最大文件数。
在Linux平台上,在进行高并发TCP连接处理时,最高的并发数量都要受到系统对用户单一进程同时可打开文件数量的限制(这是因为系统为每个TCP连接都要创建一个socket句柄,每个socket句柄同时也是一个文件句柄)。
可使用"ulimit -a"命令查看系统允许当前用户进程打开的文件数限制。
3. HTTP配置
http {
    ##文件扩展名与文件类型映射表
    include       mime.types;
    ##默认文件类型
    default_type  application/octet-stream;

    ##日志格式设定
    #log_format  main  '$remote_addr - $remote_user [$time_local] "$request" '
    #                  '$status $body_bytes_sent "$http_referer" '
    #                  '"$http_user_agent" "$http_x_forwarded_for"';

    ##访问日志位置
    #access_log  logs/access.log  main;

    ##支持文件发送(下载)
    sendfile        on;
    ##此选项允许或禁止使用socket的TCP_CORK的选项(发送数据包前下缓存数据),此选项仅在使用sendfile的时候使用
    #tcp_nopush     on;

    ##连接保持的最大时间,单位为秒
    #keepalive_timeout  0;
    keepalive_timeout  65;

    ##gzip模块设置,设置是否再起gzip压缩输出
    #gzip  on;

    ##web服务的监听配置
    server {
        ##监听地址及端口
        listen       80;
        ##站点域名,可以有多个,用空格隔开
        server_name  localhost;

        ##网页的默认字符集,可修改为万国字符集utf-8
        #charset koi8-r;

        #access_log  logs/host.access.log  main;

        ##根目录配置
        location / {
            ##网站根目录位置默认为/usr/local/nginx/html
            root   html;
            ##默认首页文件名
            index  index.html index.htm;
        }

        #error_page  404              /404.html;

        # redirect server error pages to the static page /50x.html
        #
        ##内部错误的反馈页面
        error_page   500 502 503 504  /50x.html;
        ##错误页面配置
        location = /50x.html {
            root   html;
        }

        # proxy the PHP scripts to Apache listening on 127.0.0.1:80
        #
        #location ~ \.php$ {
        #    proxy_pass   http://127.0.0.1;
        #}

        # pass the PHP scripts to FastCGI server listening on 127.0.0.1:9000
        #
        #location ~ \.php$ {
        #    root           html;
        #    fastcgi_pass   127.0.0.1:9000;
        #    fastcgi_index  index.php;
        #    fastcgi_param  SCRIPT_FILENAME  /scripts$fastcgi_script_name;
        #    include        fastcgi_params;
        #}

        # deny access to .htaccess files, if Apache's document root
        # concurs with nginx's one
        #
        #location ~ /\.ht {
        #    deny  all;
        #}
    }
1)日志格式设定
$remote_addr与$http_x_forwarded_for用以记录客户端的ip地址;
$remote_user:用来记录客户端用户名称;
$time_out:用来记录访问时间与时区;
$request:用来记录请求的url与http协议;
$status:用来记录请求状态,成功是200;
$body_bytes_sent:记录发送给客户端文件主体内容大小;
$http_referer:用来记录从哪个页面链接访问过来;
$http_user_agent:记录客户浏览器的相关信息;
通常web服务器放在反向代理的后面,这样就不能获取到客户的IP地址了,通过$remote_add拿到的IP地址。反向代理服务器在转发请求的http头信息中,可以增加x_forwarded_for信息,用以记录原有客户端的IP地址和原来客户端的请求的服务器地址。
2)location的配置
location常见配置指令root、alias、proxy_pass
root为根路径配置
alias为别名设置
proxy_pass为反向代理配置
2. 访问状态统计配置
- 先使用命令“/usr/local/nginx/sbin/nginx -V”查看已安装的nginx是否包含“HTTP_STUB_STATUS”模块
- 修改nginx.conf配置文件,指定访问位置并添加stub_status配置
vim /usr/local/nginx/conf/nginx.conf
......
    server {
        listen       80;
        server_name  www.test.com;

        charset utf-8;

        #access_log  logs/host.access.log  main;

        location / {
            root   html;
            index  index.html index.htm;
        }

        location /status {
            stub_status on;
            access_log off;
        }
    }
......
- 重启服务,访问测试
[root@localhost conf]# systemctl restart nginx
[root@localhost conf]# echo "192.168.122.10 www.test.com" >> /etc/hosts
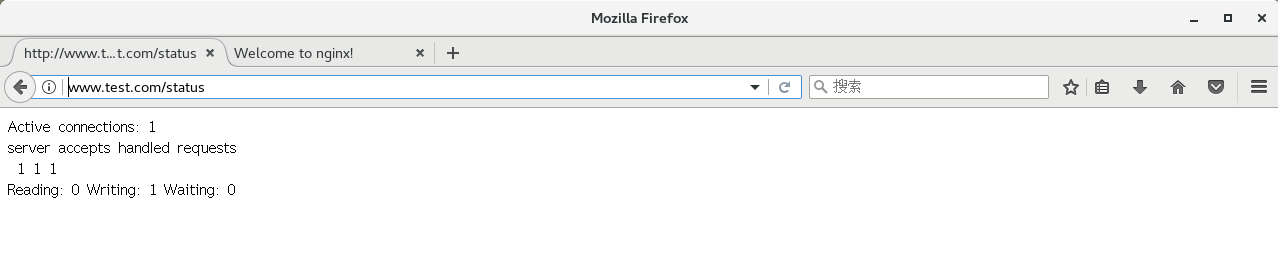
Active connections: 1              #当前的活动链接数
server accepts handled requests    #已经处理的连接信息
 1 1 1                             #已处理的连接数、成功的TCP握手次数、已处理的请求数
Reading: 0 Writing: 1 Waiting: 0   #正在读、写以及等待的连接数
可使用“curl www.test.com/status”结合awk与if语句进行性能监控
[root@localhost opt]# cat connect.sh
#!/bin/bash

curl -s www.test.com/status > active.txt
connect=$(awk '/Active/ {print $3}' active.txt)
if [ $connect -ge 1 ];then
  echo "当前链接数为$connect,链接数过高,请注意!"
fi
[root@localhost opt]# ./connect.sh
当前链接数为1,链接数过高,请注意!
3. 基于授权的访问控制
- 生成用户密码认证文件
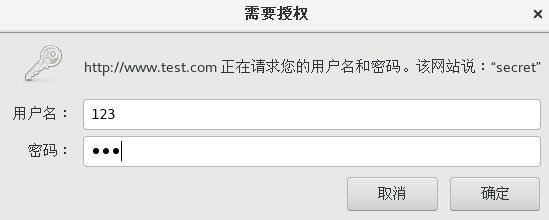
[root@localhost opt]# yum install -y httpd-tools
[root@localhost opt]# htpasswd -c /usr/local/nginx/passwd.db 123
New password:
Re-type new password:
Adding password for user 123
[root@localhost opt]# chown nginx /usr/local/nginx/passwd.db
[root@localhost opt]# chmod 400 /usr/local/nginx/passwd.db
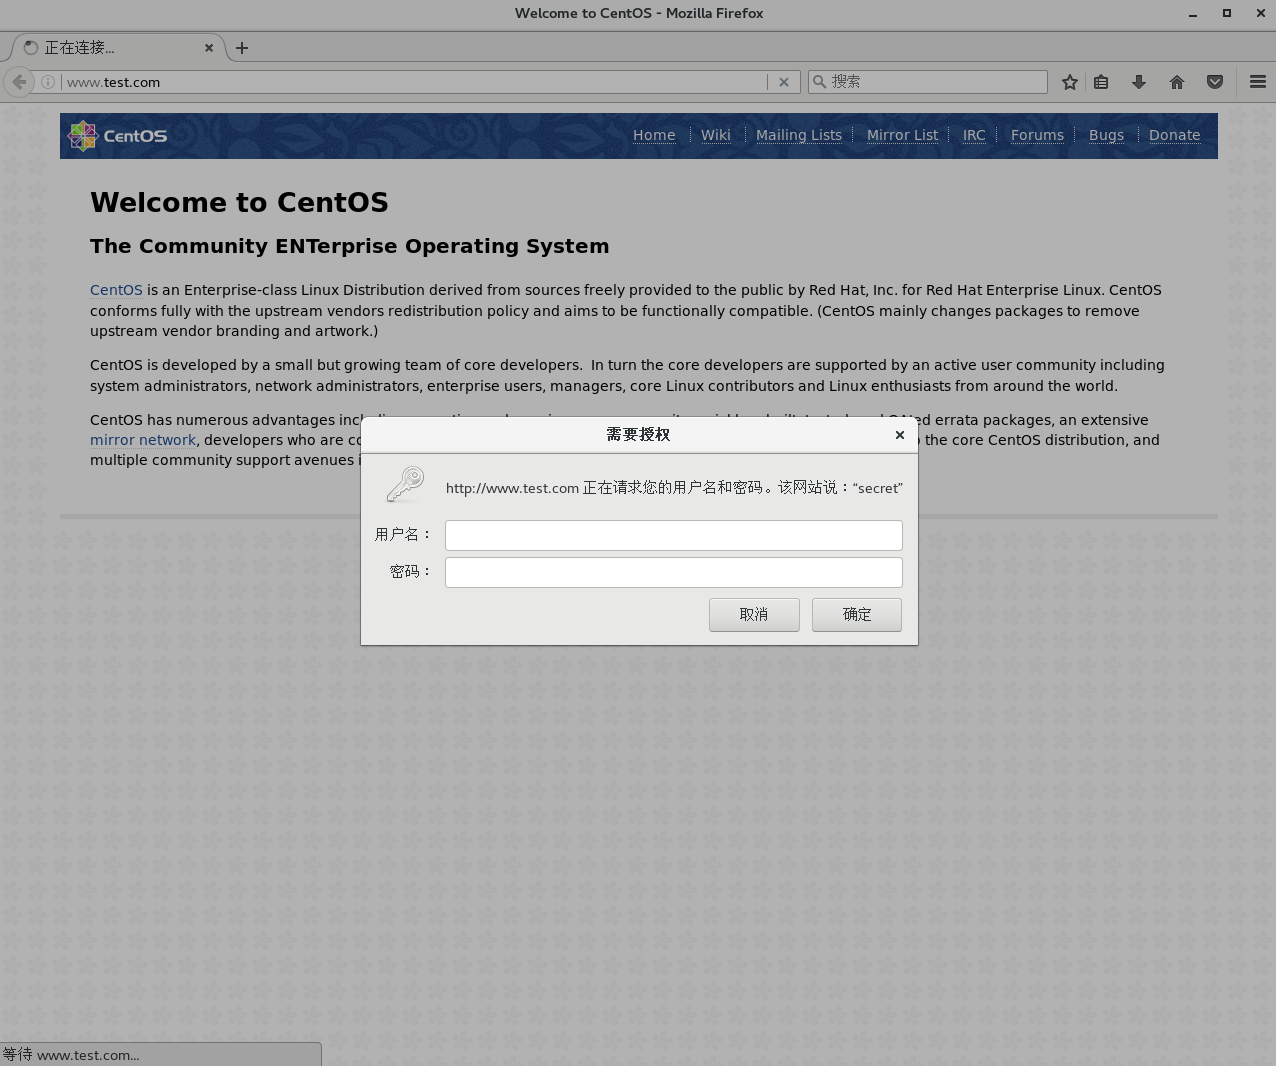
- 修改主配置文件相对应目录,添加认证配置项
vim /usr/local/nginx/conf/nginx.conf
......
        location / {
            root   html;
            index  index.html index.htm;
            ##添加认证配置
            auth_basic "secret";      ##设置密码提示框文字信息
            auth_basic_user_file /usr/local/nginx/passwd.db;
        }
......
- 重启服务,访问测试
[root@localhost opt]# nginx -t
nginx: the configuration file /usr/local/nginx/conf/nginx.conf syntax is ok
nginx: configuration file /usr/local/nginx/conf/nginx.conf test is successful
[root@localhost opt]# systemctl restart nginx
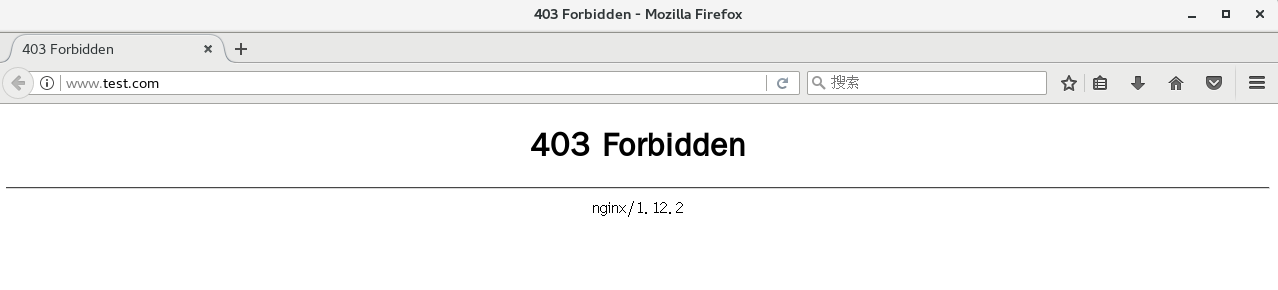
4. 基于客户端的访问控制
访问控制规则如下:
deny IP/IP段:拒绝某个IP或IP段的客户端访问;
allow IP/IP段:允许某个IP或IP段的客户端访问。
规则从上往下执行,若匹配则停止,不再往下匹配
······
        location / {
            root   html;
            index  index.html index.htm;
            auth_basic "secret";
            auth_basic_user_file /usr/local/nginx/passwd.db;
            deny 192.168.122.10;
            allow all;
        }
······
四、nginx虚拟主机
1. 基于域名的nginx虚拟主机
- 为虚拟主机提供域名解析
[root@localhost conf]# echo "192.168.122.10 www.test.com www.abc.com" >> /etc/hosts
- 为虚拟主机准备网页文档
[root@localhost logs]# mkdir -p /var/www/html/test
[root@localhost logs]# mkdir -p /var/www/html/abc
[root@localhost logs]# echo "<h1>www.test.com</h1>" > /var/www/html/test/index.html
[root@localhost logs]# echo "<h1>www.abc.com</h1>" > /var/www/html/abc/index.html
- 修改nginx的配置文件
......
    server {
        listen       80;
        server_name  www.test.com;

        charset utf-8;

        access_log  logs/test.access.log;

        location / {
            root   /var/www/html/test;
            index  index.html index.htm;
        }
    }

    server {
        listen       80;
        server_name  www.abc.com;

        charset utf-8;

        access_log  logs/abc.access.log;

        location / {
            root   /var/www/html/abc;
            index  index.html index.htm;
        }
    }
......
- 重启服务,访问测试
[root@localhost logs]# nginx -t
nginx: the configuration file /usr/local/nginx/conf/nginx.conf syntax is ok
nginx: configuration file /usr/local/nginx/conf/nginx.conf test is successful
[root@localhost logs]# systemctl restart nginx


2. 基于IP的nginx虚拟主机
- 添加网卡
[root@localhost logs]# ifconfig ens33:0 192.168.122.11 netmask 255.255.255.0
[root@localhost logs]# ifconfig
ens33: flags=4163<UP,BROADCAST,RUNNING,MULTICAST>  mtu 1500
        inet 192.168.122.10  netmask 255.255.255.0  broadcast 192.168.122.255
        inet6 fe80::7350:3abe:ece6:290d  prefixlen 64  scopeid 0x20<link>
        ether 00:0c:29:59:be:be  txqueuelen 1000  (Ethernet)
        RX packets 615077  bytes 887122536 (846.0 MiB)
        RX errors 0  dropped 0  overruns 0  frame 0
        TX packets 69849  bytes 5350698 (5.1 MiB)
        TX errors 0  dropped 0 overruns 0  carrier 0  collisions 0

ens33:0: flags=4163<UP,BROADCAST,RUNNING,MULTICAST>  mtu 1500
        inet 192.168.122.11  netmask 255.255.255.0  broadcast 192.168.122.255
        ether 00:0c:29:59:be:be  txqueuelen 1000  (Ethernet)
- 修改nginx的配置文件
......
    server {
        listen 192.168.122.10:80;
        server_name  www.test.com;

        charset utf-8;

        access_log  logs/test.access.log;

        location / {
            root   /var/www/html/test;
            index  index.html index.htm;
        }
    }

    server {
        listen 192.168.122.11:80;
        server_name  www.abc.com;

        charset utf-8;

        access_log  logs/abc.access.log;

        location / {
            root   /var/www/html/abc;
            index  index.html index.htm;
        }
    }
......
- 重启服务,访问测试
[root@localhost logs]# nginx -t
nginx: the configuration file /usr/local/nginx/conf/nginx.conf syntax is ok
nginx: configuration file /usr/local/nginx/conf/nginx.conf test is successful
[root@localhost logs]# systemctl restart nginx


3. 基于端口的nginx寻主机
- 修改nginx的配置文件
......
    server {
        listen 192.168.122.10:80;
        server_name  www.test.com;

        charset utf-8;

        access_log  logs/test.access.log;

        location / {
            root   /var/www/html/test;
            index  index.html index.htm;
        }
    }

    server {
        listen 192.168.122.10:8888;
        server_name  www.abc.com;

        charset utf-8;

        access_log  logs/abc.access.log;

        location / {
            root   /var/www/html/abc;
            index  index.html index.htm;
        }
    }
......
- 重启服务,访问测试
[root@localhost logs]# nginx -t
nginx: the configuration file /usr/local/nginx/conf/nginx.conf syntax is ok
nginx: configuration file /usr/local/nginx/conf/nginx.conf test is successful
[root@localhost logs]# systemctl restart nginx


 浙公网安备 33010602011771号