vue之路由(跳转、多级路由、守卫)、localStorage
一、vue-router使用
1、
//引入VueRouter
   import VueRouter from 'vue-router'
   //引入Luyou 组件
   import About from '../components/About'
   import Home from '../components/Home'

   //创建router实例对象,去管理一组一组的路由规则
   const router = new VueRouter({
   	routes:[
   		{
   			path:'/about',
   			component:About
   		},
   		{
   			path:'/home',
   			component:Home
   		}
   	]
   })

   //暴露router
   export default router
2、
标签跳转:<router-link,
控制页面跳转:$router.push
# 1 html 中通过标签跳转
    <router-link :to="about_url">
      <button>点我调到about-->标签的跳转</button>
    </router-link>

     <router-link to="/about">
          <button>点我调到about-->标签的跳转</button>
      </router-link>

# 2 js 控制页面跳转
	  // 方式一:直接放地址形式
      // this.$router.push('/about')
      // 方式二:对象形式
      // this.$router.push({name: 'about'})
      // this.$router.push({path: '/about'})
3、
this.$router.push(path): 相当于点击路由链接(可以返回到当前路由界面)

this.$router.replace(path): 用新路由替换当前路由(不可以返回到当前路由界面)

this.$router.back(): 请求(返回)上一个记录路由

this.$router.go(-1): 请求(返回)上一个记录路由

this.$router.go(1): 请求下一个记录路由
$route.query 中取
以/xx/:id/:name 携带参数,需要从 $route.params中取
http://localhost:8081/login?user_id=9&age=18
跳转的时候:
    	-标签跳转:
            <router-link to="/userinfo?user_id=9">
            <router-link :to="{name:userinfo,query:{user_id:88}}">

        -js跳转
            this.$router.push("/userinfo?user_id=9")
            this.$router.push({name:'userinfo',query:{user_id:88}})

取值的时候:
	  this.$route.query.user_id
方式二:/xx/:id/:name
配置路由:
        {
        path: '/userinfo/:id/:name',
        name: 'userinfo',
        component: UserDetail
   	 },

跳转的时候:
    	-标签跳转:
            <router-link to="/userinfo/88/lqz">
            <router-link :to="{name:'userinfo',params:{id:88,name:lqz}}">
        -js跳转
	    this.$router.push("/userinfo/88/lqz")
            this.$router.push({name:userinfo,params:{id:88,name:lqz}})

取值的时候:
		this.$route.params.id
<template>
  <div class="home">

    <h1>首页</h1>
    <button @click="handleClick">点我调到about</button>
    <br>
    <!--        <router-link to="/about">-->
    <!--          <button>点我调到about–>标签的跳转</button>-->
    <!--        </router-link>-->

    <router-link :to="about_url">
      <button>点我调到about-->标签的跳转</button>
    </router-link>

    <hr>
    <router-link to="/userinfo?user_id=9">
      <button>点我跳转到userinfo,携带用户id</button>
    </router-link>
    <br>

    <button @click="handleClick2()">js跳转点我跳转到userinfo,?携带用户id</button>

    <br>
    <router-link to="/userinfo/88/lqz">
      <button>点我跳转到userinfo,携带用户id</button>
    </router-link>

    <hr>

    <div>
      <div class="head"> 头部标题</div>

      <div class="main">

        <el-row :gutter="20">
          <el-col :span="4">
            <el-menu
                default-active="2"
                class="el-menu-vertical-demo"
                @open="handleOpen"
                @close="handleClose"
                background-color="#545c64"
                text-color="#fff"
                active-text-color="#ffd04b">
              <router-link to="/index">
                <el-menu-item index="1">
                  <i class="el-icon-menu"></i>

                  <span slot="title">首页</span>

                </el-menu-item>
              </router-link>
              <router-link to="/order">
                <el-menu-item index="2">
                  <i class="el-icon-menu"></i>

                  <span slot="title">订单</span>

                </el-menu-item>
              </router-link>

            </el-menu>
          </el-col>
          <el-col :span="20">
            <div class="right">
              <router-view/>
            </div>
          </el-col>
        </el-row>

      </div>

    </div>

  </div>
</template>

<script>


export default {
  name: 'HomeView',
  data() {
    return {
      // about_url: '/about',
      // about_url: {'name': 'about'},
      about_url: {'path': '/about'},
    }
  },
  methods: {
    handleClick() {
      // 方式一:直接放地址形式
      // this.$router.push('/about')
      // 方式二:对象形式
      // this.$router.push({name: 'about'})
      // this.$router.push({path: '/about'})


      // replace的使用
      this.$router.replace({name: 'about'})

    },
    handleClick2() {
      // this.$router.push('/userinfo/77/aaa')
      this.$router.push({
        name: 'userinfo',
        params: {id: 77, name: 'aaa'},
        query: {aa: 'aaa'}
      })
    }
  }
}
</script>
<style>

.head {
  height: 50px;
  background-color: aqua;
}

.left {
  background-color: blanchedalmond;
  height: 300px;
}

.right {
  background-color: chartreuse;
  height: 300px;
}
</style>

### 接收
<template>
  <div class="home">

    <h1>用户详情</h1>
    {{ user_id }}

  </div>
</template>

<script>

export default {
  name: 'UserDetail',
  data() {
    return {
      // user_id: this.$route.query.user_id
      user_id: ''
    }
  },
  created() {
    // this.$route代指当前路由对象
    console.log(this.$route)
    // this.$route.query 代指当前路由对象传递的参数  ? 后的
    // this.user_id = this.$route.query.user_id
    this.user_id = this.$route.params.id
  }
}
</script>
children: []
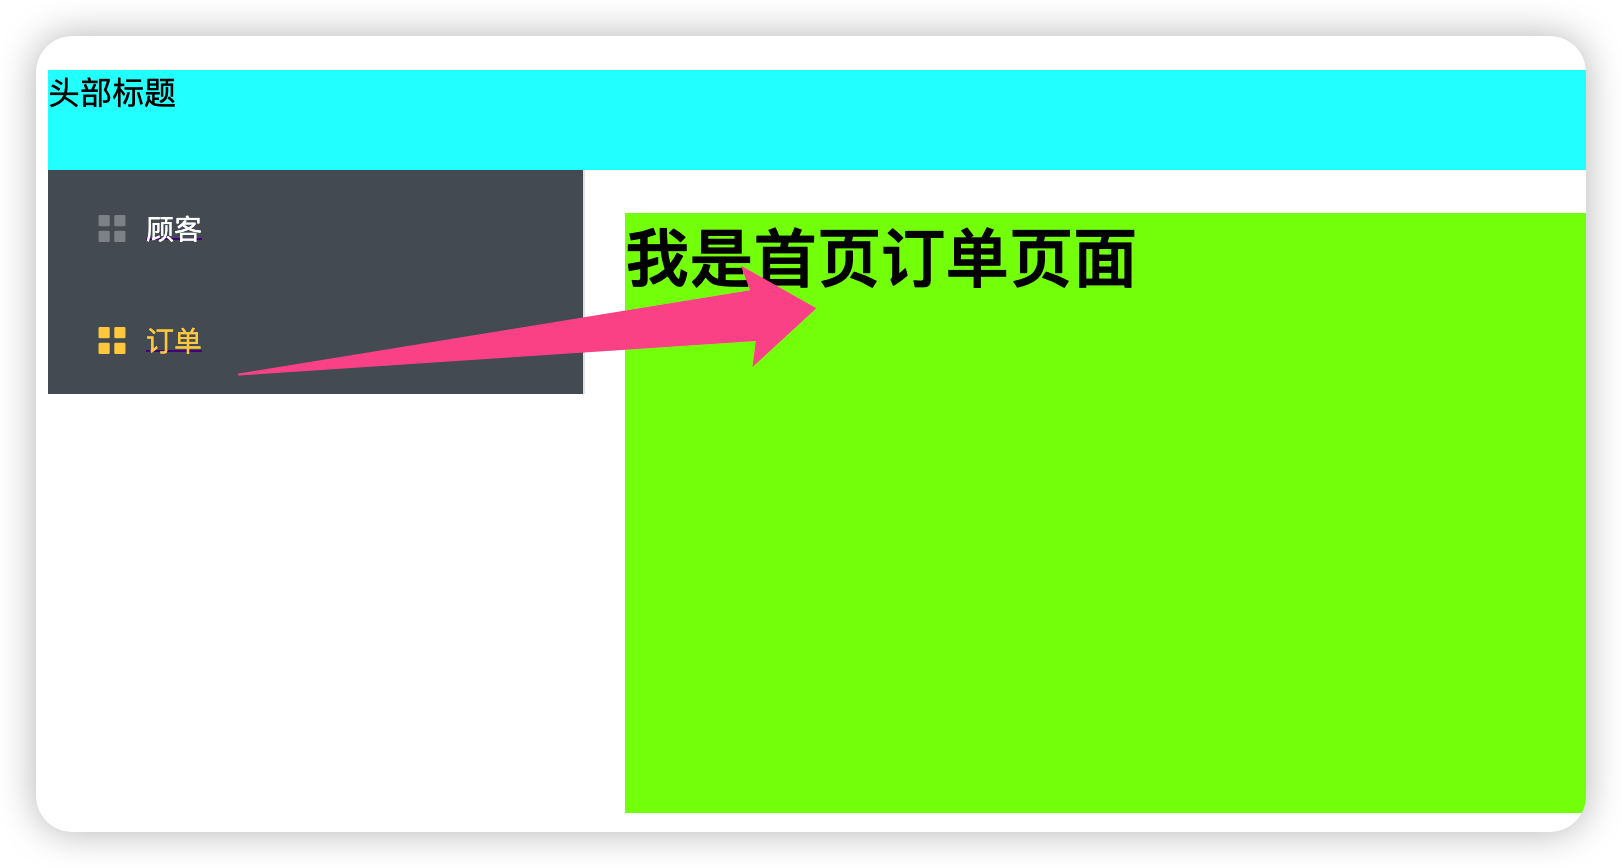
# 1 新建一个首页HomeView,一个IndexView和OrderView
	-构建出骨架,以后想点击只有这个位置变,就放一个 <router-view/>

   	-IndexView和OrderView正常写

# 2 定义多级路由
	 {
        path: '/',
        name: 'home',
        component: HomeView,
        children: [ //通过children配置子级路由
            {
                path: 'index', //此处一定不要写:/news
                component: IndexView
            },
            {
                path: 'order',//此处一定不要写:/message
                component: OrderView
            }
        ]
    },

# 3 路由跳转:js,html
跳转:
<router-link to="/order">
                <el-menu-item index="2">
                  <i class="el-icon-menu"></i>
                  <span slot="title">订单</span>
                </el-menu-item>
</router-link>
需动态改变的地方:
 <el-col :span="20">
            <div class="right">
              <router-view/>
            </div>
          </el-col>
vue代码:
<template>
  <div class="home">
    <h1>首页</h1>
    <div>
      <div class="head"> 头部标题</div>
      <div class="main">
        <el-row :gutter="20">
          <el-col :span="4">
            <el-menu
                default-active="2"
                class="el-menu-vertical-demo"
                @open="handleOpen"
                @close="handleClose"
                background-color="#545c64"
                text-color="#fff"
                active-text-color="#ffd04b">
              <router-link to="/index">
                <el-menu-item index="1">
                  <i class="el-icon-menu"></i>
                  <span slot="title">顾客</span>
                </el-menu-item>
              </router-link>
              <router-link to="/order">
                <el-menu-item index="2">
                  <i class="el-icon-menu"></i>
                  <span slot="title">订单</span>
                </el-menu-item>
              </router-link>
            </el-menu>
          </el-col>
          <el-col :span="20">
            <div class="right">
              <router-view/>
            </div>
          </el-col>
        </el-row>
      </div>

    </div>

  </div>
</template>

<script>


export default {
  name: 'HomeView',
  data() {
    return {
      // about_url: '/about',
      // about_url: {'name': 'about'},
      about_url: {'path': '/about'},
    }
  },
  methods: {
    handleClick() {
      // 方式一:直接放地址形式
      // this.$router.push('/about')
      // 方式二:对象形式
      // this.$router.push({name: 'about'})
      // this.$router.push({path: '/about'})


      // replace的使用
      this.$router.replace({name: 'about'})

    },
    handleClick2() {
      // this.$router.push('/userinfo/77/aaa')
      this.$router.push({
        name: 'userinfo',
        params: {id: 77, name: 'aaa'},
        query: {aa: 'aaa'}
      })
    }
  }
}
</script>


<style>
.head {
  height: 50px;
  background-color: aqua;
}

.left {
  background-color: blanchedalmond;
  height: 300px;
}

.right {
  background-color: chartreuse;
  height: 300px;
}
</style>
作用:对路由进行权限控制
全局守卫(全局路由文件)
//全局前置路由守卫————初始化的时候被调用、每次路由切换之前被调用
router.beforeEach((to,from,next)=>{
	console.log('前置路由守卫',to,from)
	if(to.meta.isAuth){ //判断是否需要鉴权
		if(localStorage.getItem('name')==='lqz'){
			next()
		}else{
			alert('名不对,无权限查看!')
		}
	}else{
		next()
	}
})

//全局后置路由守卫————初始化的时候被调用、每次路由切换之后被调用
router.afterEach((to,from)=>{
	console.log('后置路由守卫',to,from)
	document.title = to.meta.title || 'lqz系统'
})

export default router
独享守卫(某个页面的路由)
// 该文件专门用于创建整个应用的路由器
import VueRouter from 'vue-router'
//引入组件
import About from '../pages/About'
import Home from '../pages/Home'
import News from '../pages/News'
import Message from '../pages/Message'
import Detail from '../pages/Detail'

//创建并暴露一个路由器
const router =  new VueRouter({
	routes:[
		{
			name:'guanyu',
			path:'/about',
			component:About,
			meta:{title:'关于'}
		},
		{
			name:'zhuye',
			path:'/home',
			component:Home,
			meta:{title:'主页'},
			children:[
				{
					name:'xinwen',
					path:'news',
					component:News,
					meta:{isAuth:true,title:'新闻'},
					beforeEnter: (to, from, next) => {
						console.log('独享路由守卫',to,from)
						if(to.meta.isAuth){ //判断是否需要鉴权
							if(localStorage.getItem('name')==='lqz'){
								next()
							}else{
								alert('名不对,无权限查看!')
							}
						}else{
							next()
						}
					}
				},
				{
					name:'xiaoxi',
					path:'message',
					component:Message,
					meta:{isAuth:true,title:'消息'},
					children:[
						{
							name:'xiangqing',
							path:'detail',
							component:Detail,
							meta:{isAuth:true,title:'详情'},

						}
					]
				}
			]
		}
	]
})

export default router
注意:meta: { isAuth: false } 是在路由里面定义好的
组件内守卫(组件内)
  //进入守卫:通过路由规则,进入该组件时被调用
   beforeRouteEnter (to, from, next) {
   },
   //离开守卫:通过路由规则,离开该组件时被调用
   beforeRouteLeave (to, from, next) {
   }


	//通过路由规则,进入该组件时被调用
		beforeRouteEnter (to, from, next) {
			console.log('About--beforeRouteEnter',to,from)
			if(to.meta.isAuth){ //判断是否需要鉴权
				if(localStorage.getItem('school')==='atguigu'){
					next()
				}else{
					alert('学校名不对,无权限查看!')
				}
			}else{
				next()
			}
		},

		//通过路由规则,离开该组件时被调用
		beforeRouteLeave (to, from, next) {
			console.log('About--beforeRouteLeave',to,from)
			next()
		}
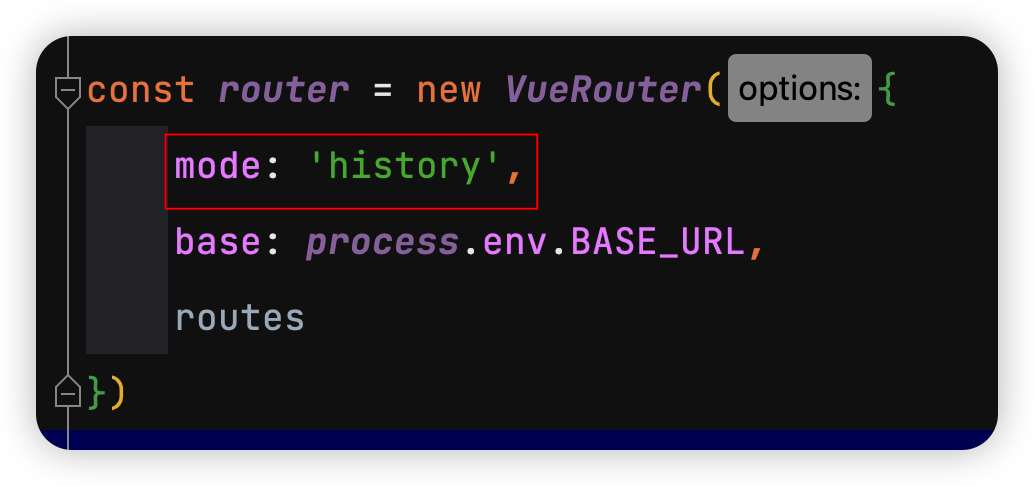
1 对于一个url来说,什么是hash值?—— #及其后面的内容就是hash值。

2 hash值不会包含在 HTTP 请求中,即:hash值不会带给服务器。

3 hash模式:
地址中永远带着#号,不美观 。
若以后将地址通过第三方手机app分享,若app校验严格,则地址会被标记为不合法。
兼容性较好。

4 history模式:
地址干净,美观 。
兼容性和hash模式相比略差。
应用部署上线时需要后端人员支持,解决刷新页面服务端404的问题
二、localStorage系列
1、前端存储数据,可以存在哪?
# localStorage
# sessionStorage
# cookie
- 可以放到cookie中,cookie有过期时间,一旦过期就清理了

- 可以当到localStorage,永久存储,除非使用代码删除,清理浏览器

- 可以存到sessionStorage,关闭浏览器就没了

# 用户登录状态----》token串--->cookie中
2、LocalStorage的存、读、删
一下都是定义点击事件来模拟
     saveLocalStorage() {
      // 保存对象呢?
      var userinfo = {'name': 'lqz', 'age': 19}
      localStorage.setItem('userinfo', JSON.stringify(userinfo))
    },

    getLocalStorage() {
      var res = JSON.parse(localStorage.getItem('userinfo'))
      console.log(res)
    },

    deleteLocalStorage() {
      localStorage.clear()
      localStorage.removeItem('username')
    }
3、session的存、读、删
    savesessionStorage() {
      // 保存对象呢?
      var userinfo = {'name': 'lqz', 'age': 19}
      sessionStorage.setItem('userinfo', JSON.stringify(userinfo))
    },
    getsessionStorage() {
      var res = JSON.parse(sessionStorage.getItem('userinfo'))
      console.log(res)
    },
    deletesessionStorage() {
      sessionStorage.clear()
      sessionStorage.removeItem('username')
    },
4、cookie --->js操作---》借助于第三方操作cookie
安装vue-cookies
npm install vue-cookies -S
在main.js引入
import VueCookies from "vue-cookies";

Vue.use(VueCookies);
cookie的存、读、删
    savecookie() {
      // 保存对象呢?
      this.$cookies.set('name', 'lqz')
    },
    getcookie() {
      console.log(this.$cookies.get('name'))
    },
    deletecookie() {
      this.$cookies.remove('name')
    },
三、vue3介绍
1、tree-shaking、typeScript
# tree-shaking是一种消除死代码的性能优化理论
# TypeScript
	-javascript:坑---》填坑---》弱类型
    -typeScript:强类型语言
2、组合式api和配置项api
<template>
  <div>
    <button @click="increment">{{ count }}</button>
  </div>
</template>

<script>
export default {
  data() {
    return {
      count: 0
    };
  },
  methods: {
    increment() {
      this.count++;
    }
  }
};
</script>
集中在setup中
<template>
  <div>
    <button @click="increment">{{ count }}</button>
  </div>
</template>

<script>
import { ref } from 'vue';

export default {
  setup() {
    const count = ref(0);

    function increment() {
      count.value++;
    }

    return {
      count,
      increment
    };
  }
};
</script>

 浙公网安备 33010602011771号