为Python编写一个简单的C语言扩展模块
最近在看pytorh方面的东西,不得不承认现在这个东西比较火,有些小好奇,下载了代码发现其中计算部分基本都是C++写的,这真是要我对这个所谓Python语音编写的框架或者说是库感觉到一丢丢的小失落,细细看了一下其中主要的思想就是逻辑控制部分都是用Python写的,计算部分这是用C++语言为其编写的扩展模块,而这扩展模块接口这是用纯C语言编写的,不得不说Python和C++真是从C发展处理的,不好用的时候就调用C,然后就搞定了,言归正传,其思路是用C和SSE和CUDA做连接,说白了就是C扩展模块一部分是在CPU上做运算的,这部分是用C++和SSE(向量计算来操作的),另一部分是在GPU上用CUDA来操作的,由此我便在好奇之下对这C扩展有了一些小好奇,本文则是对此进行了一些阐述。
本文是在 Python Cookbook 第三版 15.2 编写简单C语言扩展模块的 基础上继续的。
目录结构如下:
![]()
其中,sample 文件夹如下:
![]()
其中的 sample.c sample.h 为标准C语言程序和头文件,具体如下:
/* sample.h */

extern int gcd(int x, int y);
extern int in_mandel(double x0, double y0, int n);
extern int divide(int a, int b, int *remainder);
/* sample.c */
#include <math.h>

/* Compute the greatest common divisor */
int gcd(int x, int y) {
    int g = y;
    while (x > 0) {
        g = x;
        x = y % x;
        y = g;
    }
    return g;
}

/* Test if (x0,y0) is in the Mandelbrot set or not */
int in_mandel(double x0, double y0, int n) {
  double x=0,y=0,xtemp;
  while (n > 0) {
    xtemp = x*x - y*y + x0;
    y = 2*x*y + y0;
    x = xtemp;
    n -= 1;
    if (x*x + y*y > 4) return 0;
  }
  return 1;
}

/* Divide two numbers */
int divide(int a, int b, int *remainder) {
  int quot = a / b;
  *remainder = a % b;
  return quot;
}
gcc -shared -fPIC sample.c -o libsample.so
可以把 这个标准C文件编译成标准动态库 ,即 libsample.so
该操作在本文中没有任何意义,只为了证明该C语言文件正确。
在上一级目录执行如下命令:
python3 setup.py build_ext --inplace
![]()
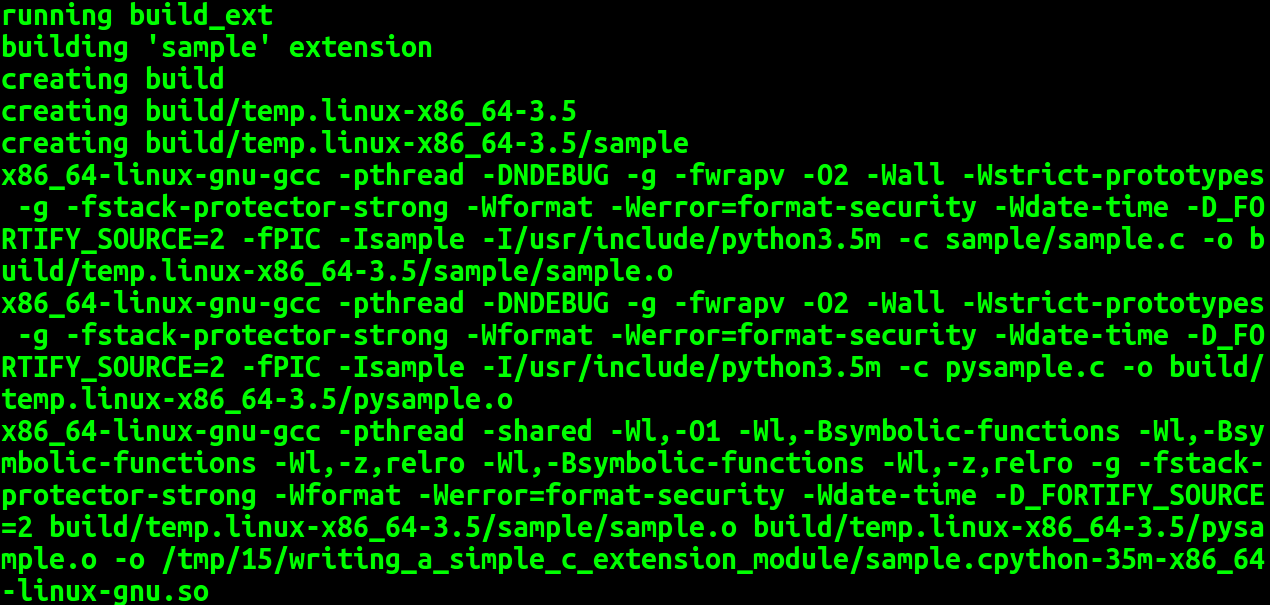

其中,sample.cpython-35m-x86_64-linux-gnu.so 就是编译好的动态链接库,也就是我们的扩展模块。
以上编译操作中的 setup.py 文件内容如下:
# setup.py
from distutils.core import setup, Extension

setup(name="sample",
      ext_modules=[
        Extension("sample",
                  ["sample/sample.c", "pysample.c"],
                  include_dirs = ['sample'],
                  )
        ]
)
其中,name 是指编译好以后的Python包名称,这里面我们并没有实际意义,因为我们编译好以后只要这个模块即.so文件。
["sample/sample.c", "pysample.c"] 是我们编写的C语言代码,其中sample.c 是我们编写的功能代码, pysample.c 则是负责 C语言与Python 之间的语言交互。
Extension("sample",  是模块名称,  即 .so 文件名称。该名称不能随意更改,必须与pysample.c 的定义相同,否则 Python中是无法识别出模块的内容的。


其实,给Python写C语言扩展重要的,或者说难度较大的不一定是功能代码,这里则是sample.c 代码,  而是负责在两个环境中做数值转换的代码,也就是  pysample.c , 该代码才是真正扩展所要解决的。

某种程度上 pysample.c 更像是接口,  就像 头文件对于标准c文件一样。


测试编译好以后的扩展是否可用:

#example.py

import sample
print(sample.gcd(35,42))
print(sample.in_mandel(0,0,500))
print(sample.in_mandel(2.0,1.0,500))
print(sample.divide(42,8))
=========================================================================
以下则是核心代码,也就是接口代码或者说是 环境转换代码:
pysample.c
#include "Python.h"
#include "sample.h"

/* int gcd(int, int) */
static PyObject *py_gcd(PyObject *self, PyObject *args) {
  int x, y, result;

  if (!PyArg_ParseTuple(args,"ii", &x, &y)) {
    return NULL;
  }
  result = gcd(x,y);
  return Py_BuildValue("i", result);
}

/* int in_mandel(double, double, int) */
static PyObject *py_in_mandel(PyObject *self, PyObject *args) {
  double x0, y0;
  int n;
  int result;

  if (!PyArg_ParseTuple(args, "ddi", &x0, &y0, &n)) {
    return NULL;
  }
  result = in_mandel(x0,y0,n);
  return Py_BuildValue("i", result);
}

/* int divide(int, int, int *) */
static PyObject *py_divide(PyObject *self, PyObject *args) {
  int a, b, quotient, remainder;
  if (!PyArg_ParseTuple(args, "ii", &a, &b)) {
    return NULL;
  }
  quotient = divide(a,b, &remainder);
  return Py_BuildValue("(ii)", quotient, remainder);
}

/* Module method table */
static PyMethodDef SampleMethods[] = {
  {"gcd",  py_gcd, METH_VARARGS, "Greatest common divisor"},
  {"in_mandel", py_in_mandel, METH_VARARGS, "Mandelbrot test"},
  {"divide", py_divide, METH_VARARGS, "Integer division"},
  { NULL, NULL, 0, NULL}
};

/* Module structure */
static struct PyModuleDef samplemodule = {
  PyModuleDef_HEAD_INIT,
  "sample",           /* name of module */
  "A sample module",  /* Doc string (may be NULL) */
  -1,                 /* Size of per-interpreter state or -1 */
  SampleMethods       /* Method table */
};

/* Module initialization function */
PyMODINIT_FUNC
PyInit_sample(void) {
  return PyModule_Create(&samplemodule);
}
接口文件中:
/* Module initialization function */
PyMODINIT_FUNC
PyInit_sample(void) {
  return PyModule_Create(&samplemodule);
}
是接口的初始化代码,也是接口代码中唯一的一个非STATIC函数,该函数非静态允许在Python类中调用,也就是 import sample 时候的操作。
返回类型 PyMODINIT_FUNC 说明返回的是 模块 的创建对象,也就是 import sample 中 的模块。
PyInit_sample 该函数名的前部分是固定不变的, PyInit_ 是固定格式, 后面跟着的 sample 则是模块名称。
PyModule_Create 是具体的 模块创建代码, 其中 的参数则是 模块结构的说明变量的 地址, 也就是本文的 samplemodule 变量。
/* Module structure */
static struct PyModuleDef samplemodule = {
  PyModuleDef_HEAD_INIT,
  "sample",           /* name of module */
  "A sample module",  /* Doc string (may be NULL) */
  -1,                 /* Size of per-interpreter state or -1 */
  SampleMethods       /* Method table */
};
其中, “sample” 是模块名称, “ A sample module” 是模块的文档, -1 表示该模块不能被多个Python解释器同时公用(也就是不能保证并发访问的安全性)。
重点的是 SampleMethods 这个是模块中方法的描述变量,也就是方法表。
模块的描述变量中 比较要人不理解的是这个变量 PyModuleDef_HEAD_INIT , 这个变量形式上来看应该是一个宏定义的变量,这个变量的存在好像并没有什么意义。
为了进一步了解 宏定义变量 PyModuleDef_HEAD_INIT 查询了以下资料:
https://docs.python.org/3/c-api/module.html#c.PyModuleDef.m_base
PyModuleDef-
The module definition struct, which holds all information needed to create a module object. There is usually only one statically initialized variable of this type for each module.
- PyModuleDef_Base
m_base -
Always initialize this member to
PyModuleDef_HEAD_INIT.
- PyModuleDef_Base
由此可以看出这个变量在Python的C 扩展中是固定不变的,并没有必要继续深究,固定如此就好。
不过好奇心使然又接着继续研究了以下,发现下面的资料:
http://blog.csdn.net/cleverwyq/article/details/12130577
已经编译好的代码附上:
https://files.cnblogs.com/files/devilmaycry812839668/writing_a_simple_c_extension_module.tar.gz
环境为 Ubuntu 16.04 x86_64
gcc5.0
python3.5
posted on 2018-02-13 16:34 Angry_Panda 阅读(1252) 评论(0) 收藏 举报


 浙公网安备 33010602011771号