【Serverless】看完这篇,帮你用认证服务快速实现Twitter统一登录
【关键字】
Java、认证服务、Twitter统一登录
【介绍】
AGC Auth SDK在传统登录方式基础上新增了Twitter的统一登录方式,开发者可以在应用中集成Twitter认证方式SDK,让您的用户可以使用自己的Twitter帐号进行AppGallery Connect身份验证。下面将快速集成Twitter统一登录SDK实现Twitter认证登录。
【成果展示】
【开发步骤】
集成准备
-
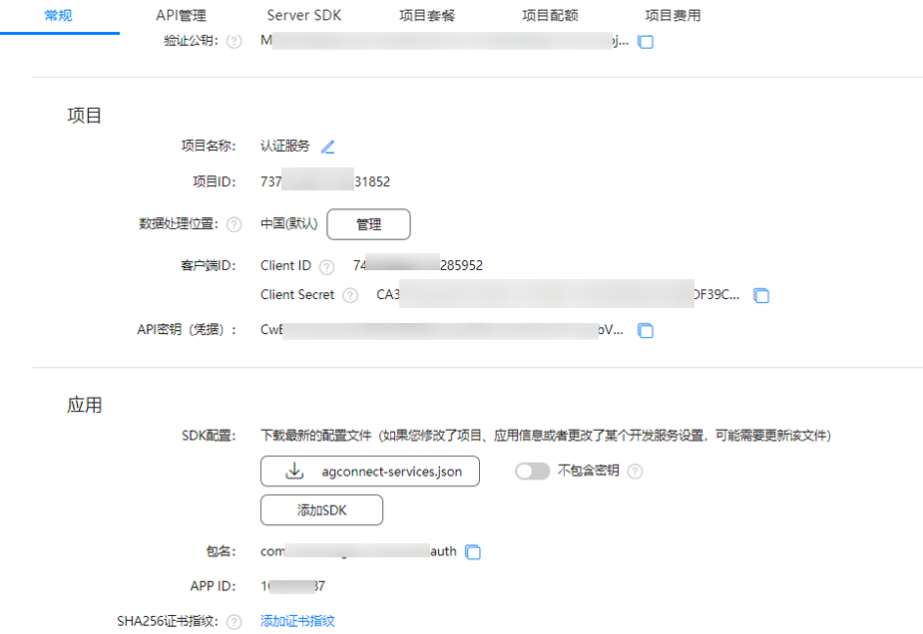
在AGC创建工程并开通认证服务。
![cke_5601.png]()
![cke_7112.png]()
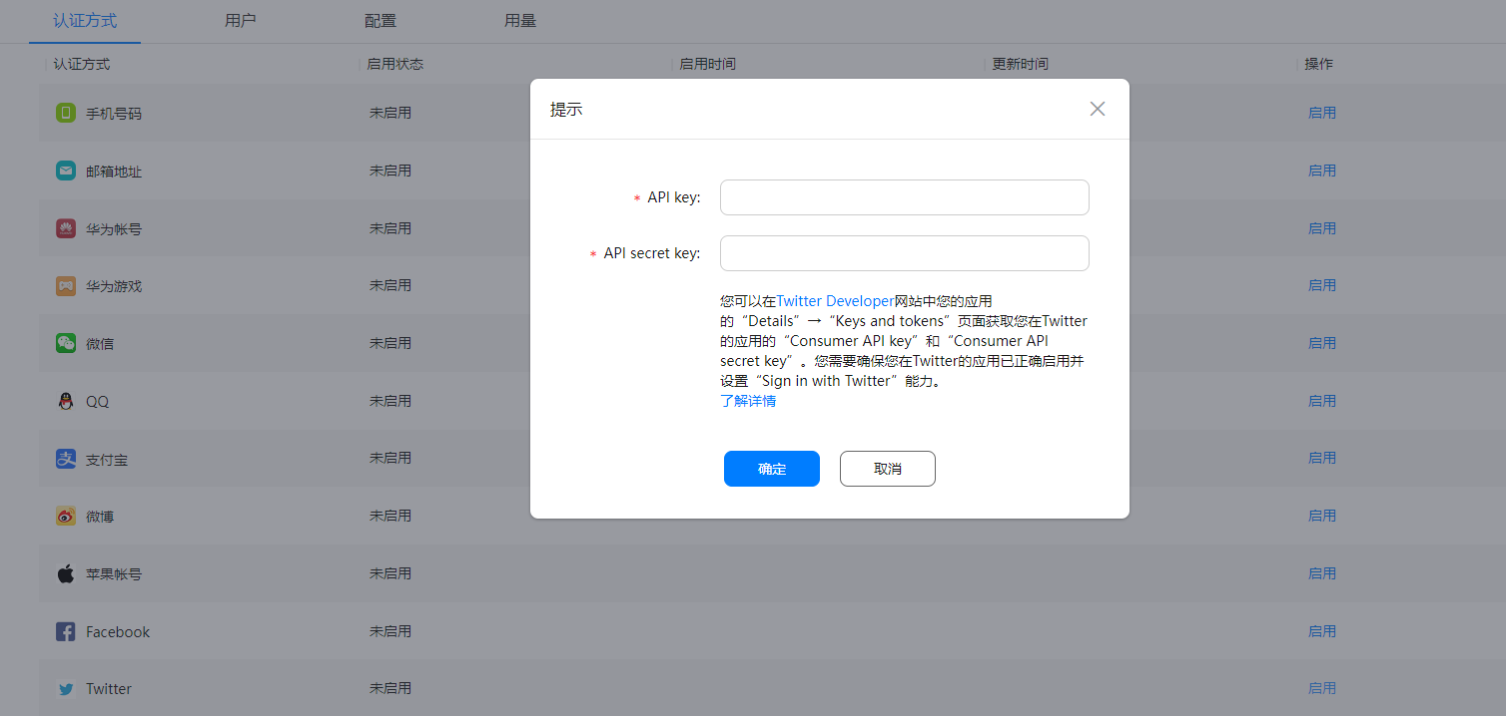
- 开启twitter登录的认证方式,并填写准备好的appid和appsecret(Twitter三方认证方式仅在海外站点支持,当您选择数据处理位置为德国、新加坡或俄罗斯时可以使用此认证方式)。
![cke_9336.png]()
-
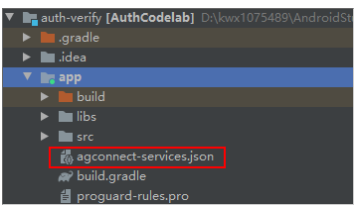
在Android Studio中创建一个工程,将agconnect-services.json文件拷贝到项目的app目录下。
![cke_11591.png]()
-
在项目级build.gradle中配置AGC插件地址。
buildscript { dependencies { //增加Android Gradle插件版本号配置,{version}为实际的Gradle插件版本号,例如7.3.1。 classpath 'com.android.tools.build:gradle:7.3.1' //增加AGC插件配置,请您参见AGC插件依赖关系选择合适的AGC插件版本。 classpath 'com.huawei.agconnect:agcp:1.8.1.300' } }![]()
-
在settings.gradle文件中配置华为maven地址。
pluginManagement { repositories { google() mavenCentral() gradlePluginPortal() maven { url 'https://developer.huawei.com/repo/' } } } dependencyResolutionManagement { repositoriesMode.set(RepositoriesMode.FAIL_ON_PROJECT_REPOS) repositories { google() mavenCentral() maven { url 'https://developer.huawei.com/repo/' } } }![]()
-
在应用级build.gradle中添加编译依赖和集成SDK
apply plugin: 'com.android.application' apply plugin: 'com.huawei.agconnect' dependencies { … implementation "com.huawei.agconnect:agconnect-core:1.8.1.300" implementation "com.huawei.agconnect:agconnect-auth:1.8.1.300" implementation "com.huawei.agconnect:agconnect-auth-twitter:1.8.1.300" implementation 'net.openid:appauth:0.11.1' }![]()
-
同步工程配置
![cke_22306.png]()


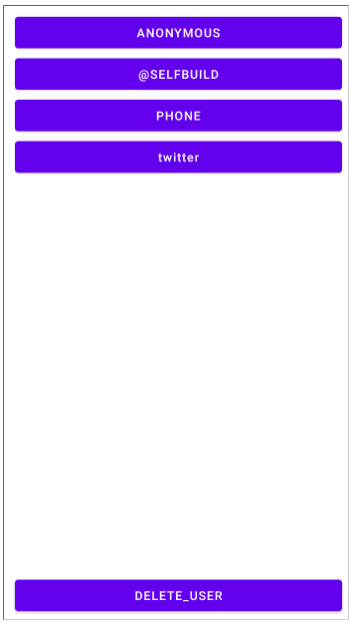
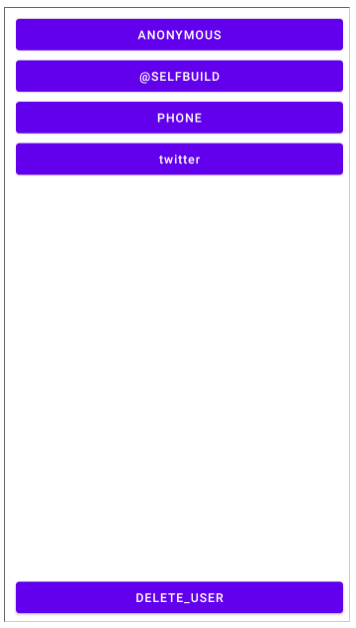
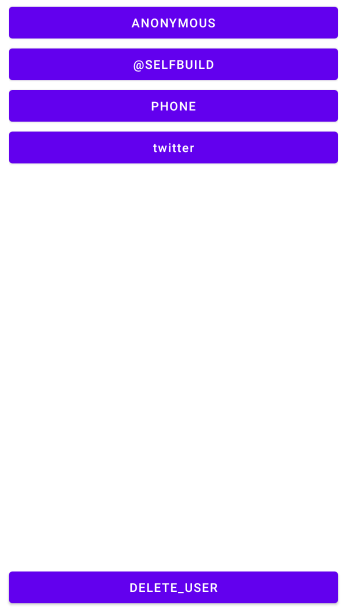
布局设计
参考如下设置布局,具备Twitter登录和删除用户的功能。
<?xml version="1.0" encoding="utf-8"?>
<androidx.constraintlayout.widget.ConstraintLayout xmlns:android="http://schemas.android.com/apk/res/android"
    xmlns:app="http://schemas.android.com/apk/res-auto"
    xmlns:tools="http://schemas.android.com/tools"
    android:layout_width="match_parent"
    android:layout_height="match_parent"
    tools:context=".MainActivity">

    <ScrollView
        android:id="@+id/scrollView2"
        android:layout_width="0dp"
        android:layout_height="0dp"
        android:layout_marginStart="16dp"
        android:layout_marginTop="16dp"
        android:layout_marginEnd="16dp"
        app:layout_constraintBottom_toTopOf="@+id/delete"
        app:layout_constraintEnd_toEndOf="parent"
        app:layout_constraintStart_toStartOf="parent"
        app:layout_constraintTop_toTopOf="parent">

        <LinearLayout
            android:layout_width="match_parent"
            android:layout_height="wrap_content"
            android:orientation="vertical">

            <Button
                android:id="@+id/anonymous"
                android:layout_width="match_parent"
                android:layout_height="wrap_content"
                android:text="@string/anonymous" />

            <Button
                android:id="@+id/selfbuild"
                android:layout_width="match_parent"
                android:layout_height="wrap_content"
                android:text="@string/selfbuild" />

            <Button
                android:id="@+id/phone"
                android:layout_width="match_parent"
                android:layout_height="wrap_content"
                android:text="@string/phone" />


            <Button
                android:id="@+id/twitter"
                android:layout_width="match_parent"
                android:layout_height="wrap_content"
                android:text="@string/twitter"
                android:textAllCaps="false"/>

        </LinearLayout>
    </ScrollView>

    <Button
        android:id="@+id/delete"
        android:layout_width="0dp"
        android:layout_height="wrap_content"
        android:layout_marginStart="16dp"
        android:layout_marginTop="16dp"
        android:layout_marginEnd="16dp"
        android:layout_marginBottom="16dp"
        android:text="@string/delete_user"
        app:layout_constraintBottom_toBottomOf="parent"
        app:layout_constraintEnd_toEndOf="parent"
        app:layout_constraintStart_toStartOf="parent"
        app:layout_constraintTop_toBottomOf="@+id/scrollView2" />
</androidx.constraintlayout.widget.ConstraintLayout>
效果展示
功能实现
-
在AndroidManifest.xml中配置登录Twitter所需的参数。
<activity android:name=".activity.auth.TwitterActivity" android:exported="true" android:label="@string/twitter" > <intent-filter> <action android:name="android.intent.action.VIEW" /> <category android:name="android.intent.category.DEFAULT" /> <category android:name="android.intent.category.BROWSABLE" /> <data android:host="agctwitter123" android:path="/testapp" android:scheme="hjapptest" /> </intent-filter> </activity>![]()
配置Twitter认证所需的appid和appsecret
TwitterAuthConfig authConfig = new TwitterAuthConfig(getString(R.string.twitter_app_id), getString(R.string.twitter_app_secret)); TwitterConfig twitterConfig = new TwitterConfig.Builder(this).twitterAuthConfig(authConfig).build(); Twitter.initialize(twitterConfig); twitterAuthClient = new TwitterAuthClient(); AGConnectApi.getInstance().getOptions().setOption("/twitter/client_id", "WnF5SUFEbTI4U0g0eEtzWlhYZUI6MTpjaQ"); AGConnectApi.getInstance().getOptions().setOption("/twitter/redirect_url", "hjapptest://agctwitter123/testapp");![]()
-
添加生命周期回调
protected void onActivityResult(int requestCode, int resultCode, Intent data) { super.onActivityResult(requestCode, resultCode, data); AGConnectApi.getInstance().activityLifecycle().onActivityResult(requestCode, resultCode, data); }![]()
-
调用AGConnectAuth.signIn,登录Twitter帐号
AGConnectAuth.getInstance().signIn(this, AGConnectAuthCredential.Twitter_Provider) .addOnSuccessListener(signInResult -> { Log.i(TAG, "login success"); }).addOnFailureListener(e -> { Log.e(TAG, e.toString()); });![]()
-
登出账号
protected void logout() { auth.signOut(); updateUI(); }![]()
功能测试
在Android Studio运行项目,在测试手机中安装APK
点击“twitter”按钮,使用工程中事先配置好的appid与appsecret登陆成功。

【相关参考】
Twitter认证参考文档:https://developer.huawei.com/consumer/cn/doc/development/AppGallery-connect-Guides/agc-auth-android-twitter-0000001053492677
欲了解更多更全技术文章,欢迎访问https://developer.huawei.com/consumer/cn/forum/?ha_source=zzh

 浙公网安备 33010602011771号