01 Spring Boot 环境配置与入门项目
2019年10月26日23:06:27 By ddhhdd
Spring Boot 环境配置与入门项目
1.1 环境要求
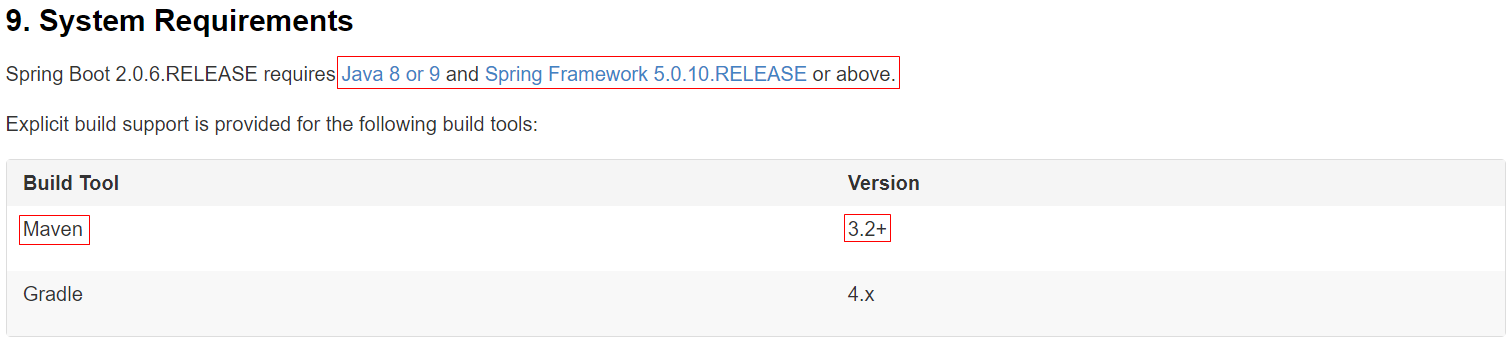
Spring Boot 官方文档中 9. System Requirements 中说明有系统环境要求。本次 Spring Boot 学习在 web 开发前使用的是2.0.6.RELEASE版本,之后使用的是2.1.0.RELEASE版本。
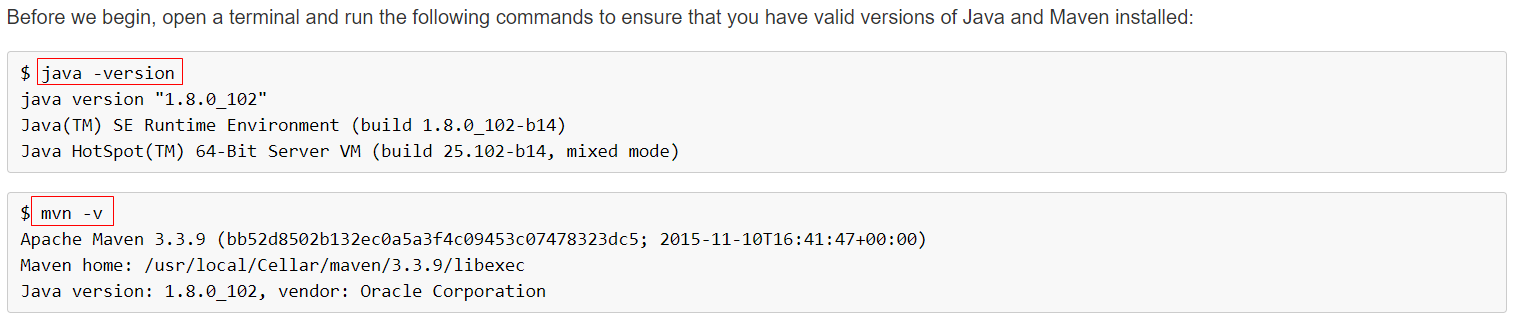
1. 查看 Java 版本:win+r->cmd->java -version

2. 修改 Maven 配置文件:apache-maven-3.3.9->conf->settings.xml
- 在
55行左右,更改下载依赖的存放路径(目录需要已经创建好,不会自动帮你创建;为了更好的管理 Maven 下载的文件)
<!-- localRepository
   | The path to the local repository maven will use to store artifacts.
   |
   | Default: ${user.home}/.m2/repository
  <localRepository>/path/to/local/repo</localRepository>
  -->
<!--更改下载依赖的存放路径,以下目录需要已经创建-->
<localRepository>D:\learningSoftware\javasource\maven-repository</localRepository>
- 在
147行左右,在<mirrors>标签下添加"阿里云 Maven 私服库"(因为国外仓库下载速度太慢,所以要换成阿里云 Maven)
<!-- mirrors
   | This is a list of mirrors to be used in downloading artifacts from remote repositories.
   |
   | It works like this: a POM may declare a repository to use in resolving certain artifacts.
   | However, this repository may have problems with heavy traffic at times, so people have mirrored
   | it to several places.
   |
   | That repository definition will have a unique id, so we can create a mirror reference for that
   | repository, to be used as an alternate download site. The mirror site will be the preferred
   | server for that repository.
   |-->
  <!--在 mirrors 标签下添加阿里云 maven 私服库-->
  <mirrors>
    <mirror>
     <id>alimaven</id>
     <mirrorOf>central</mirrorOf>
     <name>aliyun maven</name>
     <url>http://maven.aliyun.com/nexus/content/groups/public/</url>
    </mirror>
    <!-- mirror
     | Specifies a repository mirror site to use instead of a given repository. The repository that
     | this mirror serves has an ID that matches the mirrorOf element of this mirror. IDs are used
     | for inheritance and direct lookup purposes, and must be unique across the set of mirrors.
     |
    <mirror>
      <id>mirrorId</id>
      <mirrorOf>repositoryId</mirrorOf>
      <name>Human Readable Name for this Mirror.</name>
      <url>http://my.repository.com/repo/path</url>
    </mirror>
     -->
  </mirrors>
- 在
190行左右,在<profiles>标签下指定 jdk 版本(这个可以省略)
<profile>
  <id>jdk-1.8</id>
  <activation>
      <activeByDefault>true</activeByDefault>
      <jdk>1.8</jdk>
  </activation>
  <properties>
      <maven.compiler.source>1.8</maven.compiler.source>
      <maven.compiler.target>1.8</maven.compiler.target>
      <maven.compiler.compilerVersion>1.8</maven.compiler.compilerVersion>
  </properties>
</profile>
配置 Maven 环境变量:(和配置 Java 环境变量一样,当然你也可以不配置,mvn命令就放在 Maven 安装目录下的 bin 目录下,在那里运行就可以)
MAVEN_HOMED:\learningSoftware\javasource\apache-maven-3.3.9(根据自己的 Maven 安装目录来配置)Path:%MAVEN_HOME%\bin(注意,依据情况选择是否要加上;)
3. 查看 Maven 版本:win+r->cmd->mvn -v

1.2 IntelliJ IDEA 设置
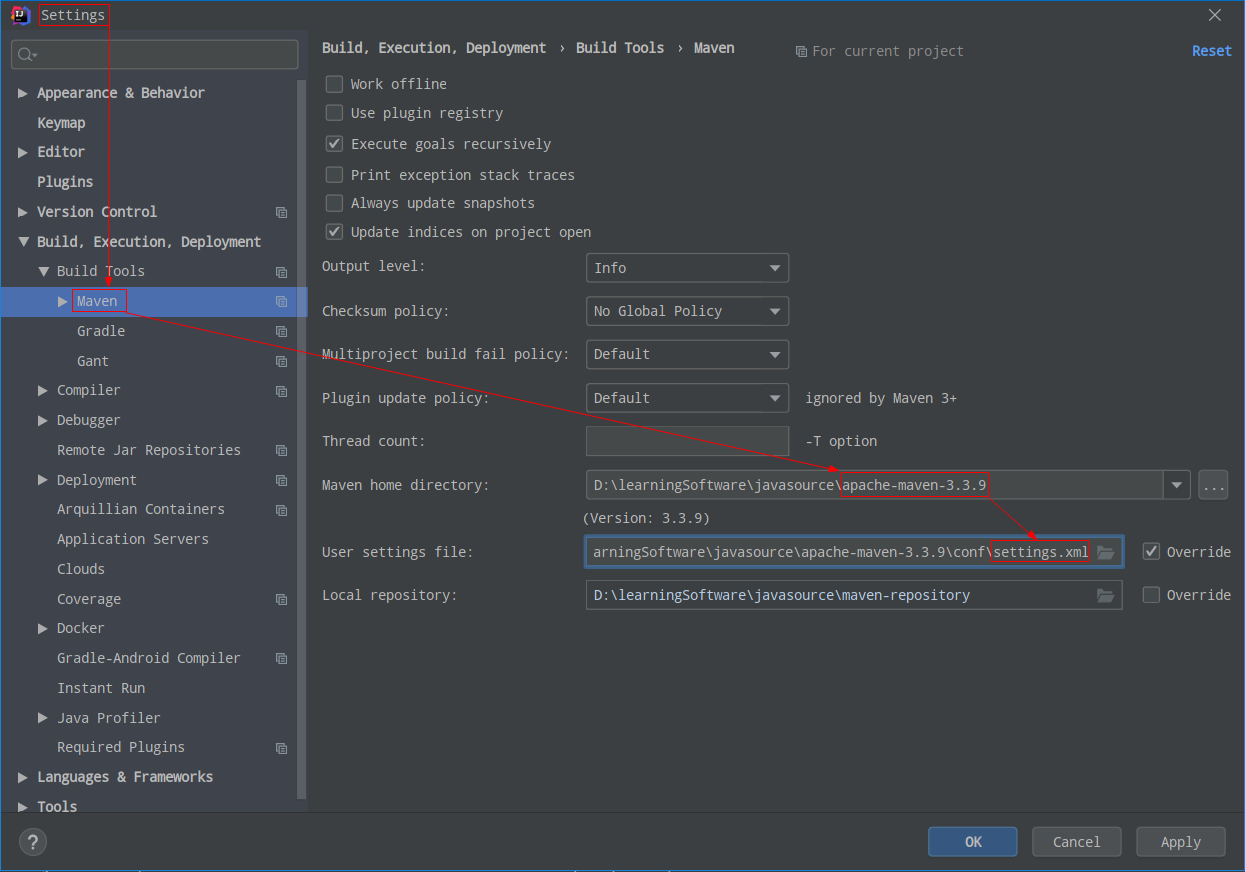
导入自己配置好的 Maven :settings->Build,Execution,Deployment->Build Tools->Maven(由于导入自己配置好的 Maven 在创建项目的时候会出现一些错误,所以我用的是 IDEA 自带的 Maven,只在 IDEA 自带的 Maven 的settings.xml中添加了阿里云仓库)
已解决,2020年7月11日22:06:18,重新装了一下莫名就好了,附加一篇没有使用的博客:https://blog.csdn.net/kealina/article/details/79040168
Maven home directory:选择自己安装 Maven 目录;User setting file:apache-maven-3.3.9/conf/settings.xml;Local repository:会自动导入刚刚配置好的下载依赖的存放路径;
1.3 快速构建 Spring Boot 项目
- 需求:浏览器发送 /hello 请求,服务器接受请求并处理,响应 Hello World 字符串;
- 分析 :构建 Spring Boot 项目,事实上建立的就是一个 Maven 项目;
Spring Boot 官方文档中11. Developing Your First Spring Boot Application有开始项目的范例;
11. Developing Your First Spring Boot Application下面有要构建 Spring Boot 项目的环境要求。
- 11.1 Creating the POM说明了构建 Spring Boot 项目就是构建一个 Maven 项目

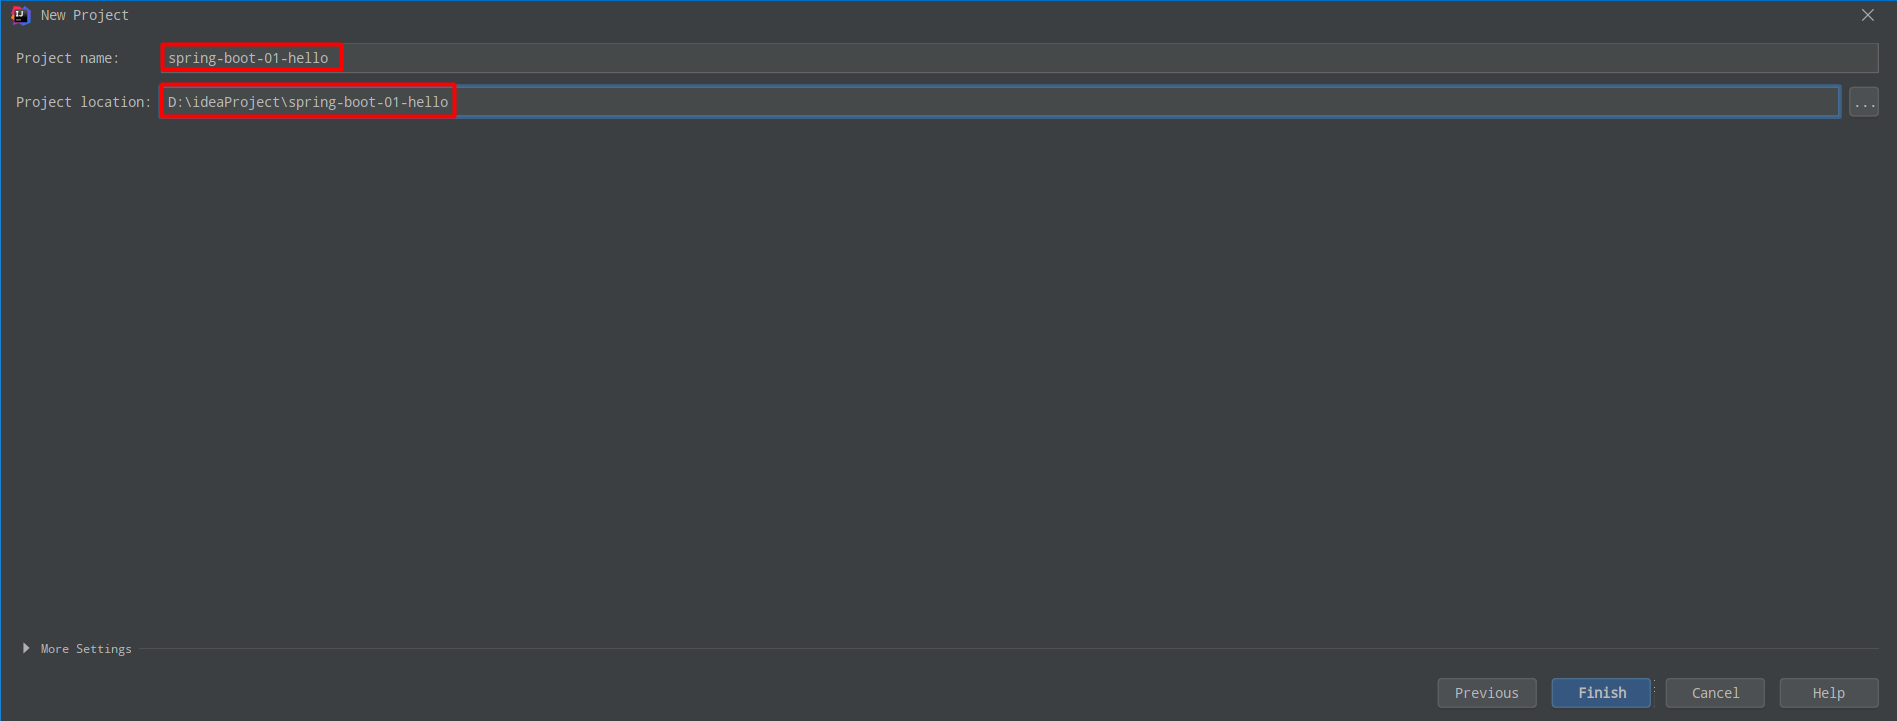
1.3.1 创建 Maven 工程
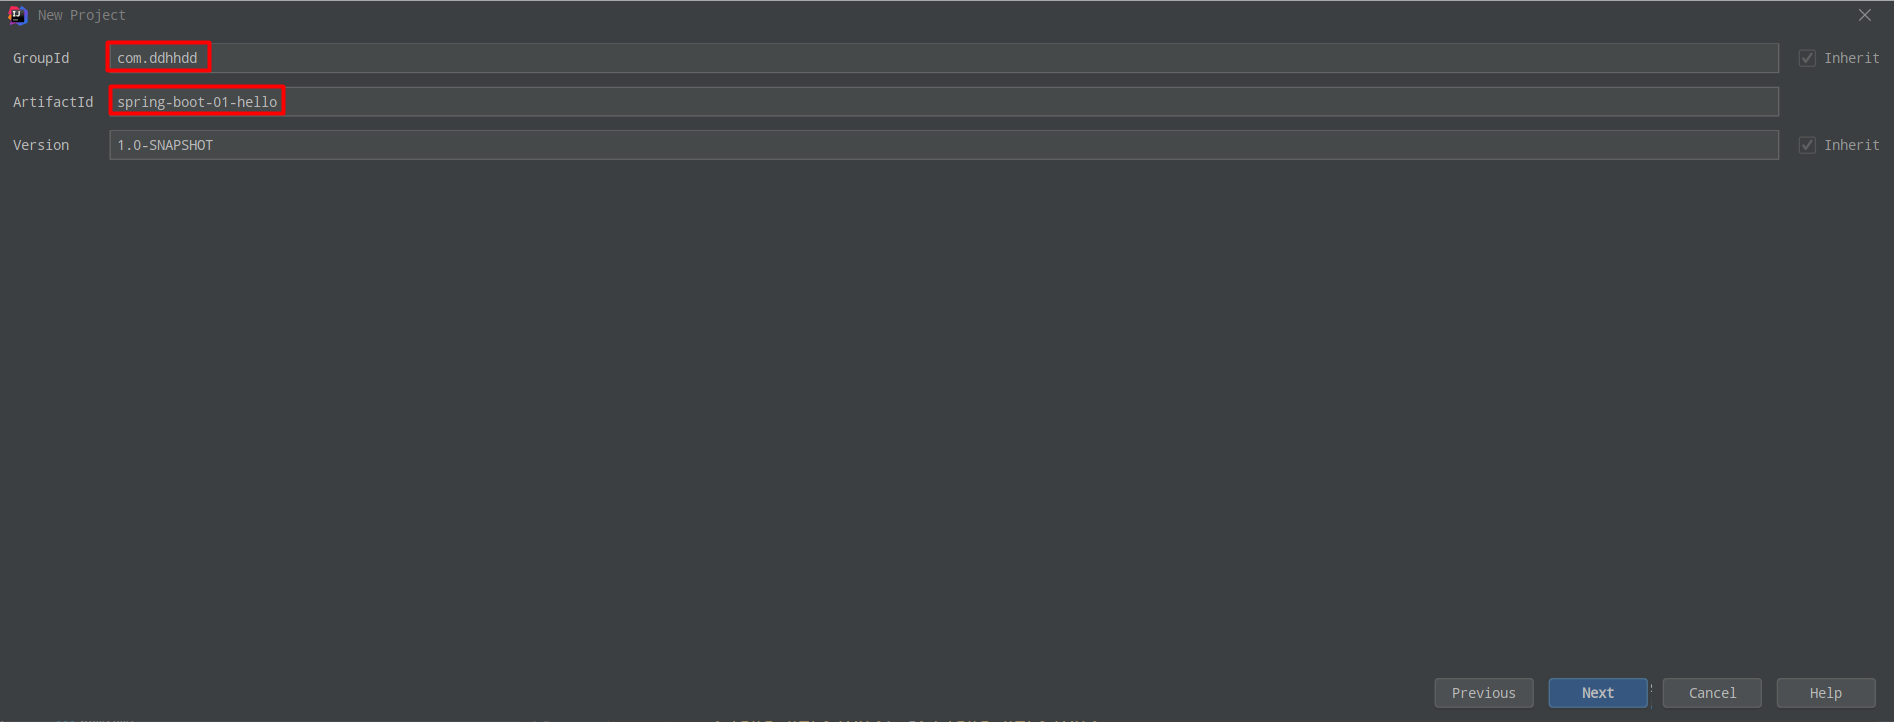
- 在 IDEA 上新建一个空的 jar 类型的 Maven 工程
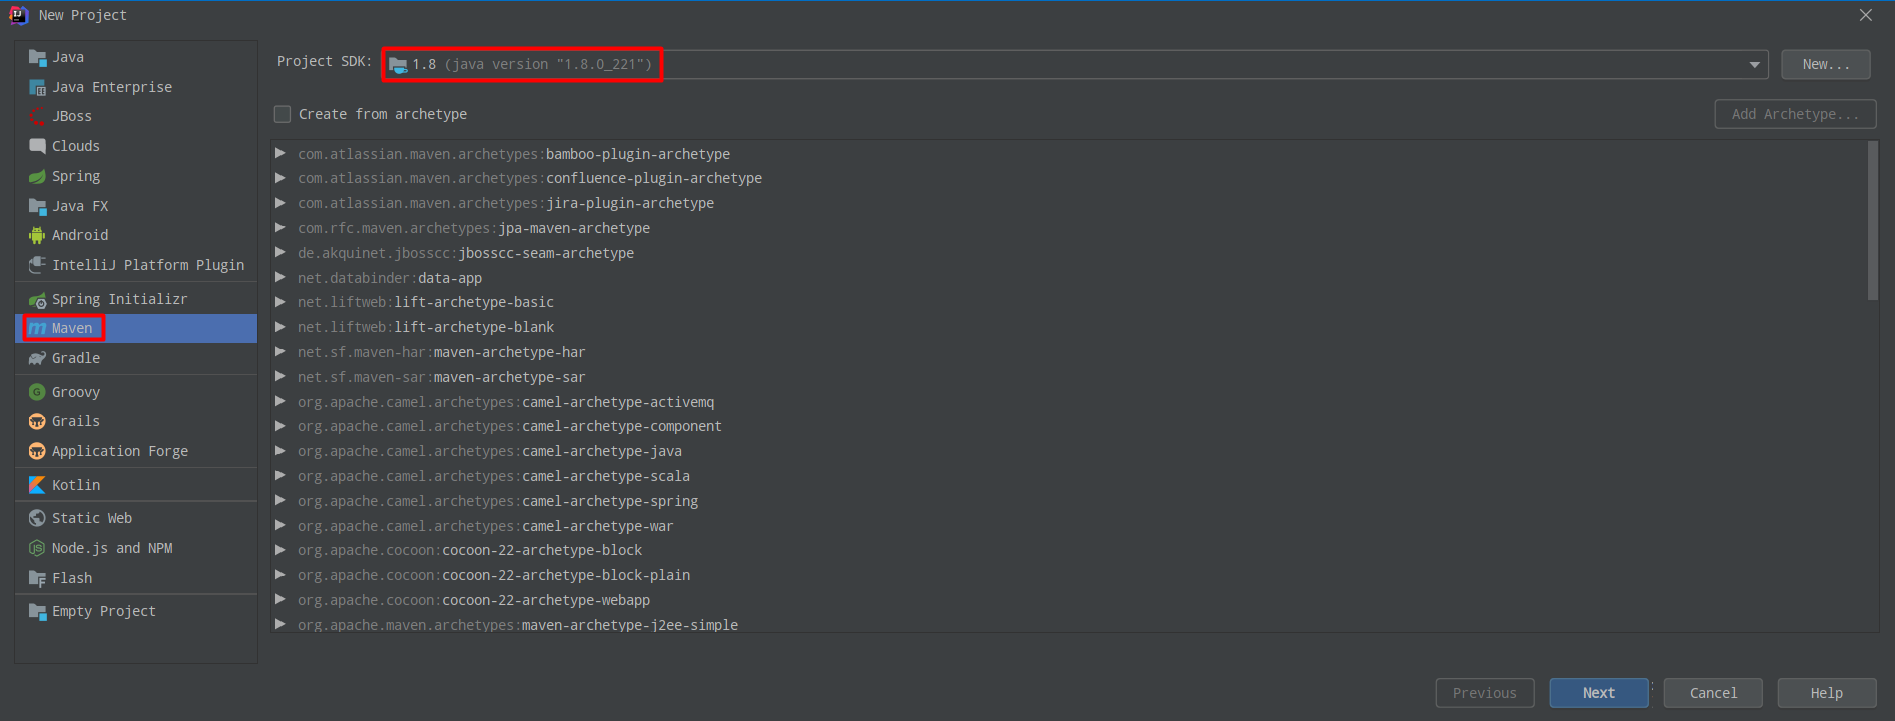
丶 GroupId:坐标,如 com.ddhhdd;
丶 ArtifactId:工程名,如 spring-boot-01-hello;
1.3.2 修改 pom.xml
Spring Boot 官方文档中,11. Developing Your First Spring Boot Application->++11.1 Creating the POM++中:

即是要在 pom.xml 中添加
<parent> 依赖spring-boot-starter-parent
<parent>
	<groupId>org.springframework.boot</groupId>
	<artifactId>spring-boot-starter-parent</artifactId>
	<version>2.0.6.RELEASE</version>
</parent>
继续往下翻文档11.2 Adding Classpath Dependencies,文档说明要在 pom.xml 中继续添加 web 依赖spring-boot-starter-web

<dependencies>
    <!--spring-boot-starter-web 构建web项目,比如:tomcat springmvc-->
	<dependency>
		<groupId>org.springframework.boot</groupId>
		<artifactId>spring-boot-starter-web</artifactId>
	</dependency>
</dependencies>
丶 在 pom.xml 中添加 Spring Boot 相关的父级依赖, spring-boot-starter-parent是一个特殊的 starter,它
提供了项目相关的默认依赖,使用它之后 ,常用的包依赖可以省去<version>
标签;
丶 在<dependencies>添加构建 web 项目相关的依赖;
1.3.3 创建控制器 Controller
继续往下翻文档11.3 Writing the Code,文档说明:By default, Maven compiles sources from
src/main/java,所以在src/main/java下创建com.ddhhdd.springboot.controller.HelloController(包名+类名)

创建好HelloController.java后如下,是否勾选Compact Middle Packages,目录会有不同的层级显示(方便查看与编写代码)

- com.ddhhdd.springboot.
controller.HelloController(对官方文档进行了一点改变)
@Controller
public class HelloController {

    @ResponseBody
    @RequestMapping("/hello")
    public String hello() {
        return "hello World...";
    }

}
丶 @Controller:表明是控制层;
丶 @RequestMapping("/hello"):请求路径;接收到 localhost:8080/hello 请求就会访问到hello()方法;
丶 @ResponseBody:一般是使用在单独的方法上的,需要哪个方法返回 json 数据格式,就在哪个方法上使用,具有针对性;
1.3.4 创建一个引导类
-
主要作用是作为启动 Spring Boot 项目的入口;
-
com.ddhhdd.spring.
HelloMainApplication
(快捷键psvm或main,快速创建main()方法)
@SpringBootApplication
public class HelloMainApplication {

    public static void main(String[] args) {
        SpringApplication.run(HelloMainApplication.class, args);
    }

}
丶 @SpringBootApplication:用于标识一个引导类,说明当前是一个 Spring Boot 项目;
丶 SpringApplication.run(HelloMainApplication.class, args);
运行main()后控制台输出:

并在浏览器中访问 localhost:8080/hello:

感慨:这比 Spring MVC 简单太多了,哈哈...
1.3.5 简化部署
继续往下翻文档11.5 Creating an Executable Jar,文档说明:要创建一个可执行的 jar,要先在 pom.xml 加入spring-boot-maven-plugin依赖。

<!--可以将当前项目打成一个 jar 包进行运行-->
<build>
	<plugins>
		<plugin>
			<groupId>org.springframework.boot</groupId>
			<artifactId>spring-boot-maven-plugin</artifactId>
		</plugin>
	</plugins>
</build>
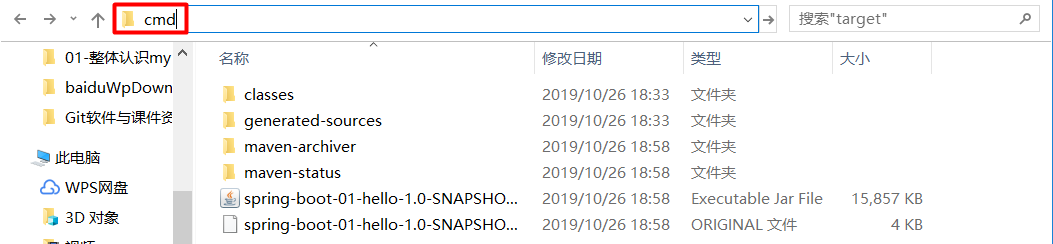
- 如下操作进行打成 jar 包, 从控制台可发现打成的 jar 包所在目录(也可以用命令,参考11.5 Creating an Executable Jar)
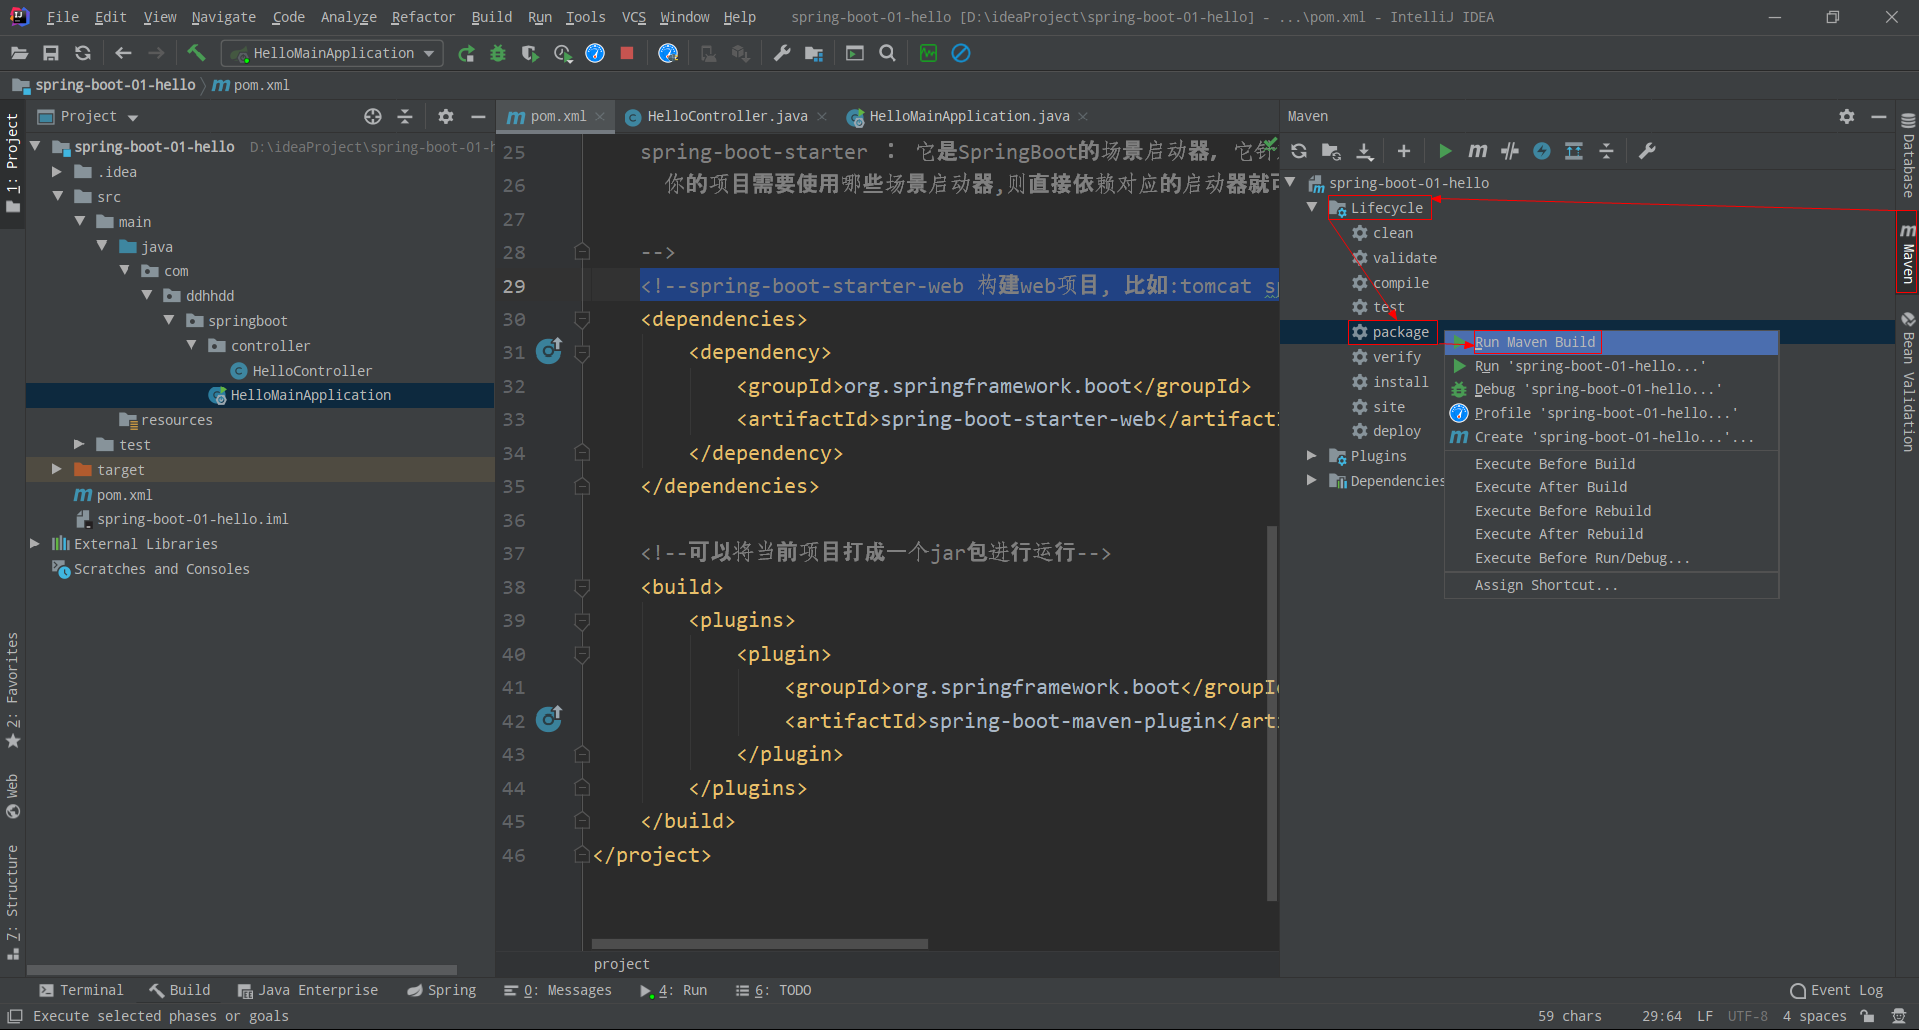
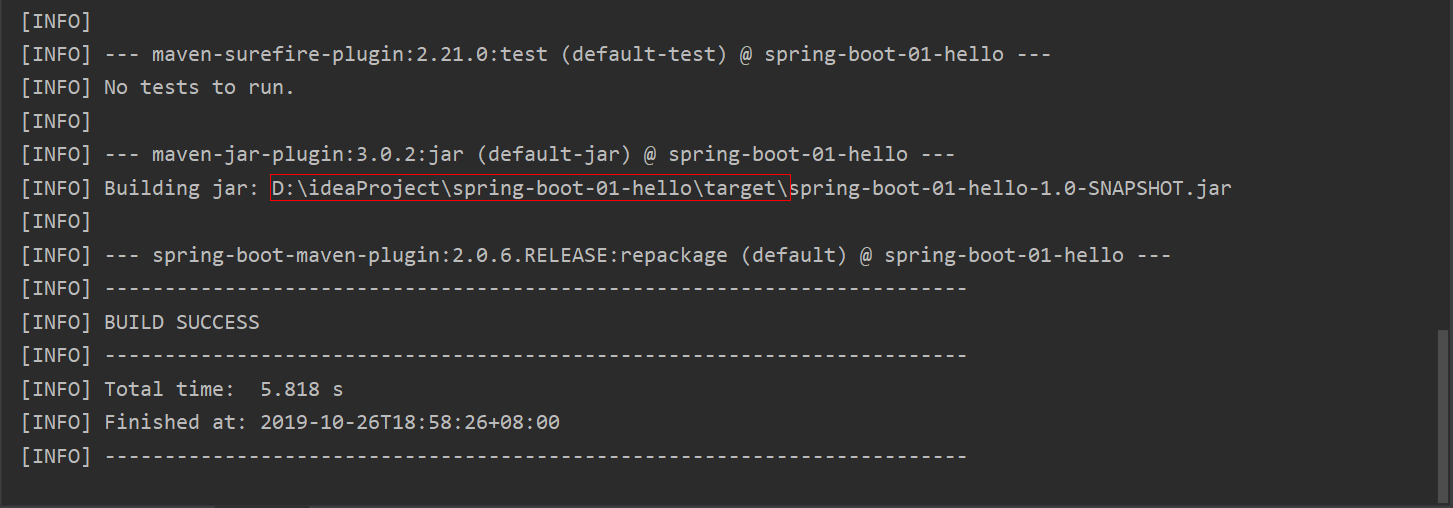
把 IDEA 中运行的程序关闭,然后进入到 jar 包所在的目录,通过cmd执行jar包;直接在目录上输入cmd即可在当前目录下打开cmd,通过java -jar <name>.jar执行jar包(访问 localhost:8080/hello 效果一样,这里不进行演示)

1.4 Spring Boot 项目底层原理
1.4.1 pom.xml 文件
spring-boot-starter-parent
在 pom.xml 中,Ctrl+左键进入 spring-boot-starter-parent
<parent>
    <groupId>org.springframework.boot</groupId>
    <artifactId>spring-boot-starter-parent</artifactId>
    <version>2.0.6.RELEASE</version>
</parent>
丶 spring-boot-starter-parent:是当前项目的父级依赖;
丶 spring-boot-starter:Spring Boot 场景启动器,Spring Boot 将所有的功能场景抽取出来,做成一个个的 starters(启动器),只需项目里引入相关场景的 starter,就会将它所有依赖导入进来。要用什么功能就导入什么场景的启动器。(各种启动器可参见官方文档13.5. Starters)
丶 spring-boot-starter-parent:它父依赖 spring-boot-dependencies,参见下面:
发现引用了 ++spring-boot-dependencies++,(继续进入看看代码)
<parent>
    <groupId>org.springframework.boot</groupId>
    <artifactId>spring-boot-dependencies</artifactId>
    <version>2.0.6.RELEASE</version>
    <relativePath>../../spring-boot-dependencies</relativePath>
</parent>
往下翻到27行左右的<properties>标签,发现定义了很多组件的版本;
<properties>
    <activemq.version>5.15.6</activemq.version>
    <antlr2.version>2.7.7</antlr2.version>
    <appengine-sdk.version>1.9.66</appengine-sdk.version>
    <artemis.version>2.4.0</artemis.version>
    ...
</properties>
丶 spring-boot-dependencies:管理了 Spring Boot 项目中的所有依赖版本;
丶 以后我们导入依赖默认不需要写版本号,也就是可以省去<version> 标签,Spring Boot 内部已经帮我们测试通过了,就不用纠结于选哪个版本了;(当前没有在spring-boot-dependencies里面管理的依赖自然需要声明版本号)
spring-boot-starter-web
进入 spring-boot-starter-web 里面去看看
<dependency>
    <groupId>org.springframework.boot</groupId>
    <artifactId>spring-boot-starter-web</artifactId>
</dependency>
往下翻到44行左右的<dependencies>标签,发现有很多构建 web 项目最核心的依赖,如tomcat、spring-webmvc(这就是你为什么在单独搞 Spring MVC 项目很麻烦,又要自己启动 Tomcat,而在 Spring Boot 项目可以轻松搞定的原因之一)
...
<dependency>
    <groupId>org.springframework.boot</groupId>
    <artifactId>spring-boot-starter-tomcat</artifactId>
    <version>2.0.6.RELEASE</version>
    <scope>compile</scope>
</dependency>
...
<dependency>
    <groupId>org.springframework</groupId>
    <artifactId>spring-webmvc</artifactId>
    <version>5.0.10.RELEASE</version>
    <scope>compile</scope>
</dependency>
...
1.4.2 引导类
HelloMainApplication.java(引导类在com.ddhhdd.springboot包下面,Spring Boot 会扫描当前包及其子包下面的所有组件,加载到 Spring 容器里面,从而进行使用)
@SpringBootApplication
public class HelloMainApplication {

    public static void main(String[] args) {
        SpringApplication.run(HelloMainApplication.class, args);
    }
}
丶 通常有一个名为*Application(一般这样命名) 的入口类,里面定义一个main()方法,使用SpringApplication.run(HelloMailAppliation.class, args); 来启动 Spring Boot 应用项目;
丶 @SpringBootApplication 注解主要组合了:(点进去看看代码)
@SpringBootConfiguration@EnableAutoConfiguration@ComponentScan
丶 @SpringBootApplication 注解说明:标注在某个类上,说明这个类是 Spring Boot 的引导类,Spring Boot 就应该运行这个类的main()方法来启动 SpringBoot 应用;
- org.springframework.boot.autoconfigure.SpringBootApplication
@Target({ElementType.TYPE})
@Retention(RetentionPolicy.RUNTIME)
@Documented
@Inherited
@SpringBootConfiguration
@EnableAutoConfiguration
@ComponentScan(
    excludeFilters = {@Filter(
    type = FilterType.CUSTOM,
    classes = {TypeExcludeFilter.class}
), @Filter(
    type = FilterType.CUSTOM,
    classes = {AutoConfigurationExcludeFilter.class}
)}
)
public @interface SpringBootApplication {
...
1. @SpringBootConfiguration(点进去看看代码)
@Target({ElementType.TYPE})
@Retention(RetentionPolicy.RUNTIME)
@Documented
@Configuration
public @interface SpringBootConfiguration {
}
1.1 @Configuration(是 Spring 底层的一个注解,用于定义 Spring 的配置类,点进去看看代码)
@Target({ElementType.TYPE})
@Retention(RetentionPolicy.RUNTIME)
@Documented
@Component
public @interface Configuration {
    @AliasFor(
        annotation = Component.class
    )
    String value() default "";
}
1.1.1 @Component:添加到 Spring 容器中,表示是一个组件(配置类也是容器中的一个组件)
@Target({ElementType.TYPE})
@Retention(RetentionPolicy.RUNTIME)
@Documented
@Indexed
public @interface Component {
    String value() default "";
}
2.@EnableAutoConfiguration(告诉 Spring Boot 开启自动配置功能,这样 Spring Boot 会自动根据你导入的依赖 jar 包来自动配置项目,点进去看看代码)
@Target({ElementType.TYPE})
@Retention(RetentionPolicy.RUNTIME)
@Documented
@Inherited
@AutoConfigurationPackage
@Import({AutoConfigurationImportSelector.class})
public @interface EnableAutoConfiguration {
    String ENABLED_OVERRIDE_PROPERTY = "spring.boot.enableautoconfiguration";

    Class<?>[] exclude() default {};

    String[] excludeName() default {};
}
2.1 @AutoConfigurationPackage(会将引导类(@SpringBootApplication标注的类)所在的包及下面所有子包里面的所有组件扫描到 Spring 容器,点进去看看代码)
@Target({ElementType.TYPE})
@Retention(RetentionPolicy.RUNTIME)
@Documented
@Inherited
@Import({Registrar.class})
public @interface AutoConfigurationPackage {
}
2.1.1 @Import({Registrar.class})(导入了一个Registrar类,点进去看看代码)
static class Registrar implements ImportBeanDefinitionRegistrar, DeterminableImports {
        Registrar() {
        }

        public void registerBeanDefinitions(AnnotationMetadata metadata, BeanDefinitionRegistry registry) {
            AutoConfigurationPackages.register(registry, (new AutoConfigurationPackages.PackageImport(metadata)).getPackageName());
        }

        public Set<Object> determineImports(AnnotationMetadata metadata) {
            return Collections.singleton(new AutoConfigurationPackages.PackageImport(metadata));
        }
    }
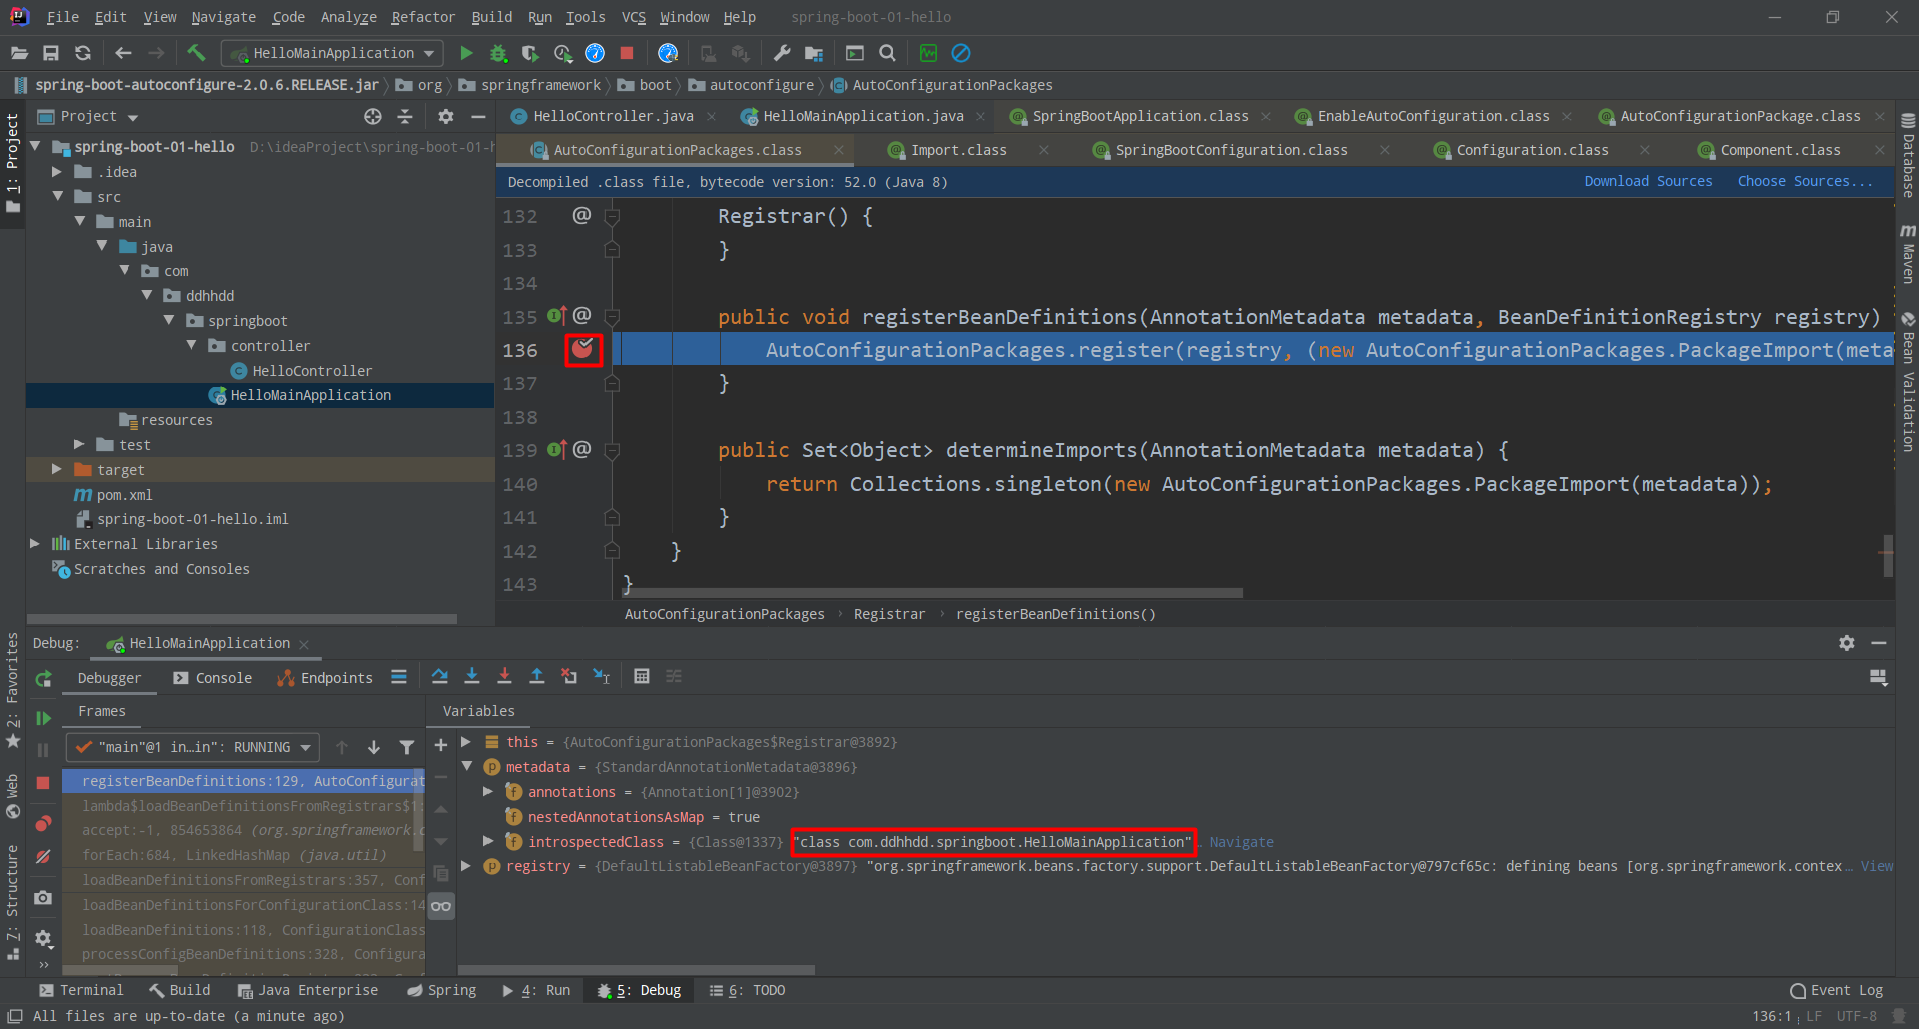
丶 看Registrar类中的第一个方法,里面有一个register()会把metadata(元数据)加载进来(元数据是什么呢?就是会把你这个类(引导类HelloMainApplication)的完整包给扫描进来)
进行调试,在如下这行地方打一个断点,以
Debug模式运行HelloMainApplication会停在这个断点,可以在metadata中看到已经把com.ddhhdd.springboot.HelloMainApplication给加载进来了
2.2 Import({AutoConfigurationImportSelector.class})(导入了一个AutoConfigurationImportSelector类,点进去看看)
在67行,有如下代码:
List<String> configurations = this.getCandidateConfigurations(annotationMetadata, attributes);
在该行代码处打一个断点,进行断点调试,然后点下一步(
Step Over)
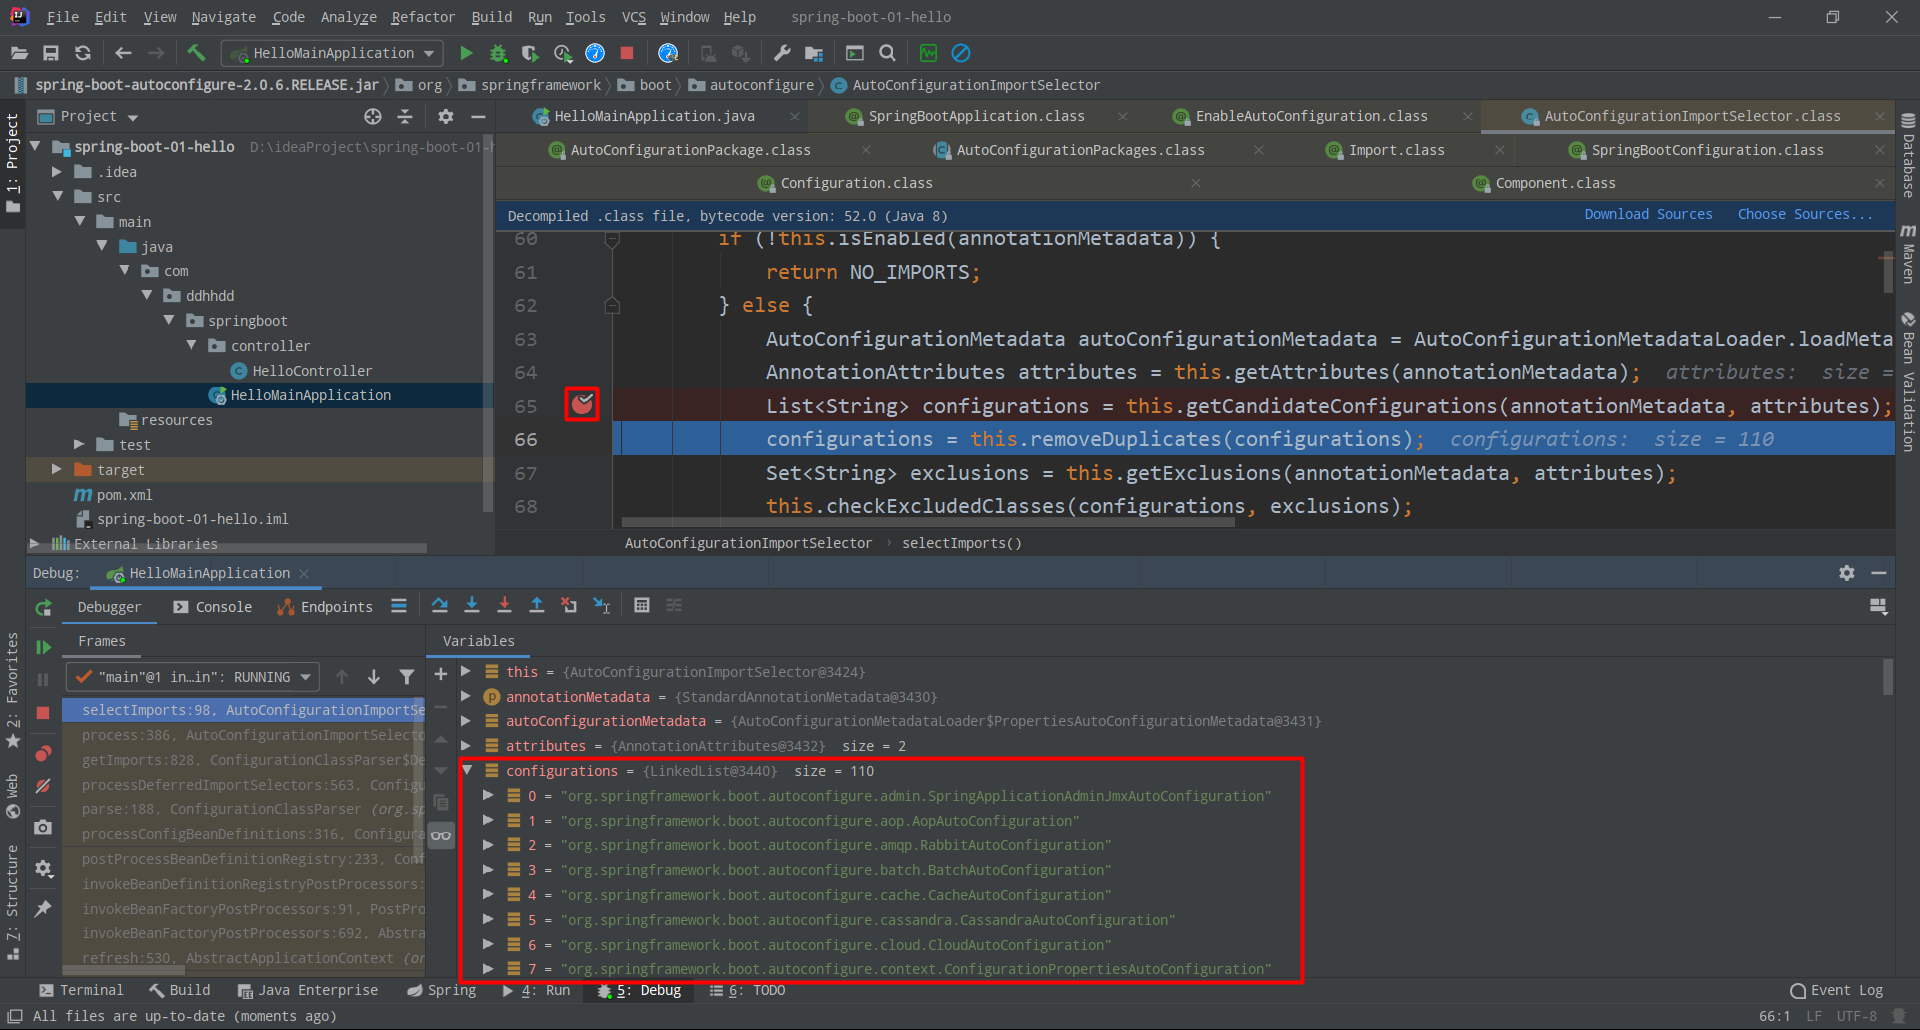
作用就是:
丶 将所有需要导入的组件以全类名的方式返回;这些组件就会被添加到容器中;
丶 会给容器导入非常多的自动配置类(xxxxAutoConfiguration
),就是导入并配置好当前项目中所需要的组件,省去我们手动编写配置去注入组件;
2.2.1 getCandidateConfigurations()(点进去看看配置类是怎么加载进来的)
98行左右有如下一行代码:
List<String> configurations = SpringFactoriesLoader.loadFactoryNames(this.getSpringFactoriesLoaderFactoryClass(), this.getBeanClassLoader());
loadFactoryNames(继续点进去加载工厂名看看)
public static List<String> loadFactoryNames(Class<?> factoryClass, @Nullable ClassLoader classLoader) {
    String factoryClassName = factoryClass.getName();
    return (List)loadSpringFactories(classLoader).getOrDefault(factoryClassName, Collections.emptyList());
}
返回loadSpringFactories(继续点进去看看是什么)
private static Map<String, List<String>> loadSpringFactories(@Nullable ClassLoader classLoader) {
        MultiValueMap<String, String> result = (MultiValueMap)cache.get(classLoader);
        if (result != null) {
            return result;
        } else {
            try {
                Enumeration<URL> urls = classLoader != null ? classLoader.getResources("META-INF/spring.factories") : ClassLoader.getSystemResources("META-INF/spring.factories");
                LinkedMultiValueMap result = new LinkedMultiValueMap();
丶 classLoader.getResources("META-INF/spring.factories"),可以看出在类路径下加载了一个资源文件
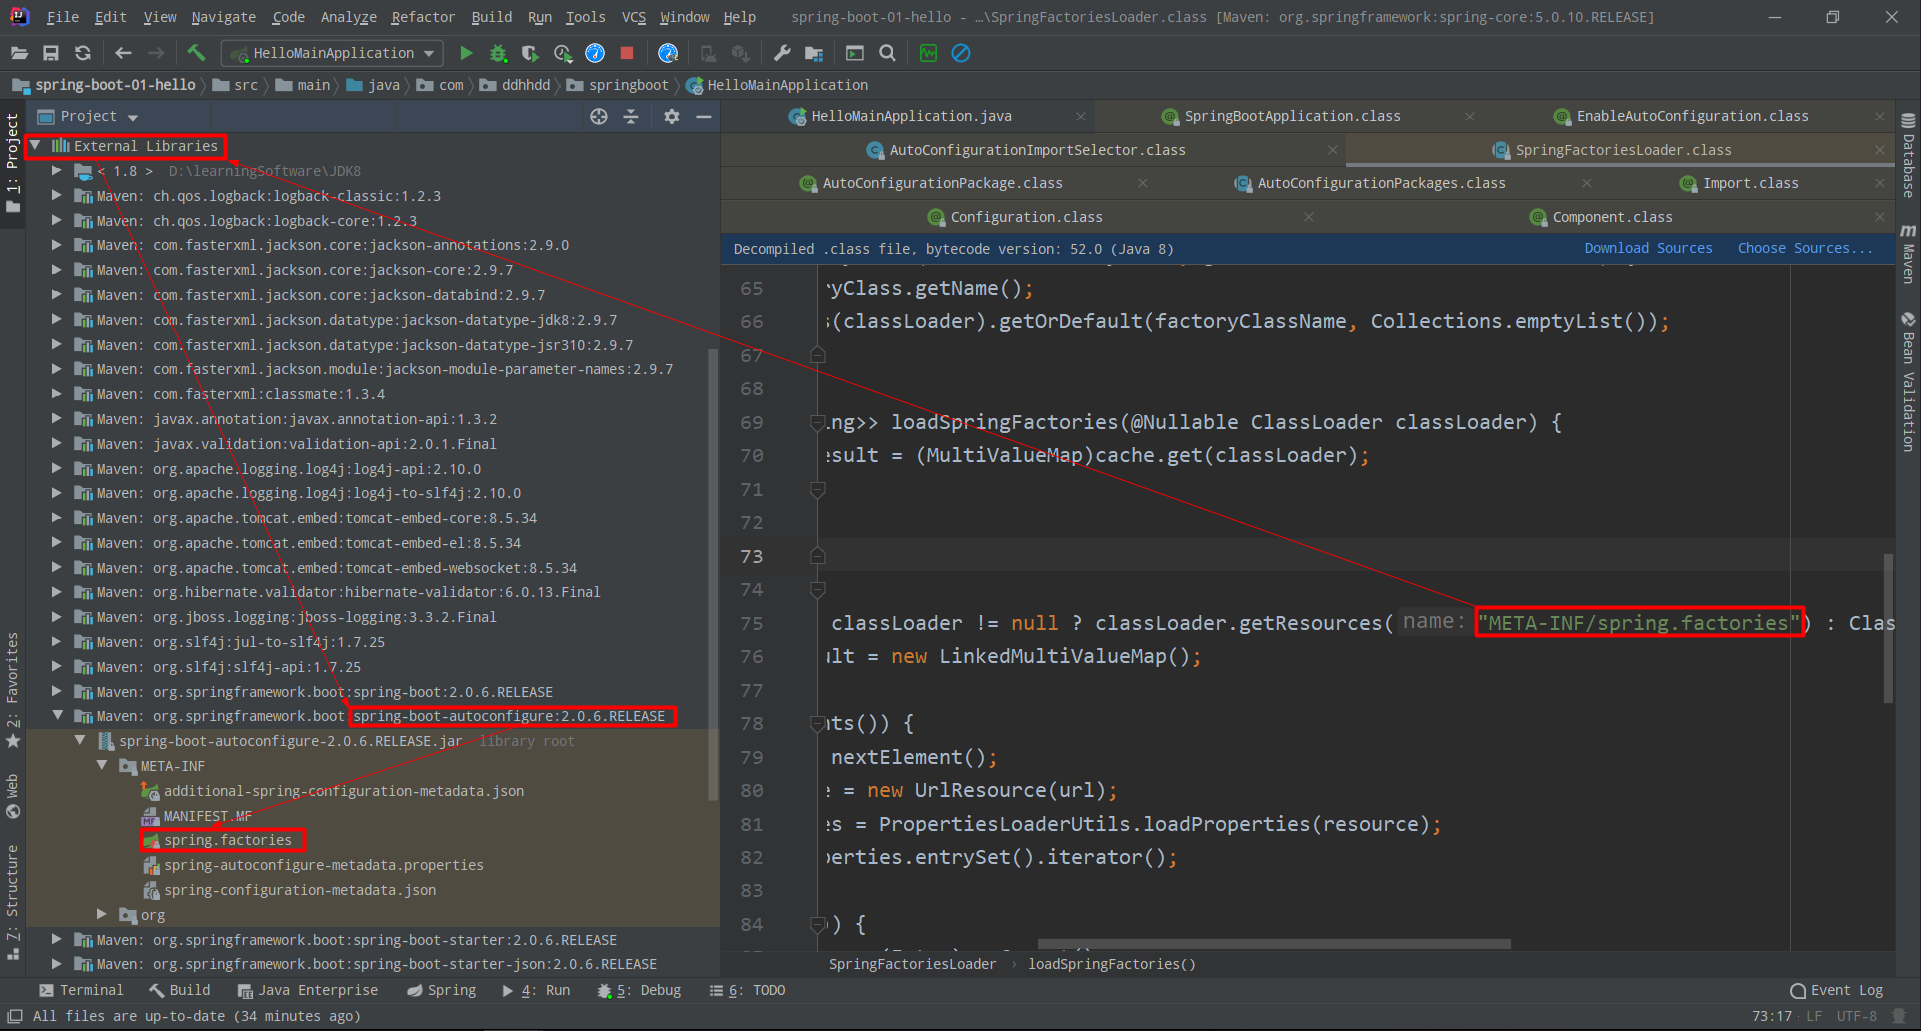
- spring.factories(里面配置的自动配置类都会自动扫描进来)
# Auto Configure
org.springframework.boot.autoconfigure.EnableAutoConfiguration=\
org.springframework.boot.autoconfigure.admin.SpringApplicationAdminJmxAutoConfiguration,\
org.springframework.boot.autoconfigure.aop.AopAutoConfiguration,\
org.springframework.boot.autoconfigure.amqp.RabbitAutoConfiguration,\
...
3. @ComponentScan(被该注解标识的类,会被 Spring 容器自动进行管理,Spring 里面的知识)
@Retention(RetentionPolicy.RUNTIME)
@Target({ElementType.TYPE})
@Documented
@Repeatable(ComponentScans.class)
public @interface ComponentScan {
...
感慨:看源码的能力很重要啊!
总结:
@SpringBootApplication 是以下3个注解的总和
@SpringBootConfiguration:用于定义一个 Spring Boot 的配置类("配置类"等同"配置文件");- 引用了
@Configuration注解,是 Spring 底层的一个注解,用于定义 Spring 的配置类; - 配置类也是容器中的一个组件
@Component;
- 引用了
@EnableAutoConfiguration:- 告诉 Spring Boot 开启自动配置功能,这样 Spring Boot 会自动根据你导入的依赖 jar 包来自动配置项目。
@AutoConfigurationPackage->@Import({Registrar.class})- 会将引导类(
@SpringBootApplication标注的类)所在的包及下面所有子包里面的所有组件扫描到 Spring 容器;
- 会将引导类(
@Import({AutoConfigurationImportSelector.class})- 将所有需要导入的组件以全类名的方式返回;这些组件就会被添加到容器中;
- 会给容器导入非常多的自动配置类(
xxxxAutoConfiguration
),就是导入并配置好当前项目中所需要的组件,省去我们手动编写配置去注入组件;
@ComponentScan:该注解标识的类,会被 Spring 自动扫描并且装入 bean 容器;
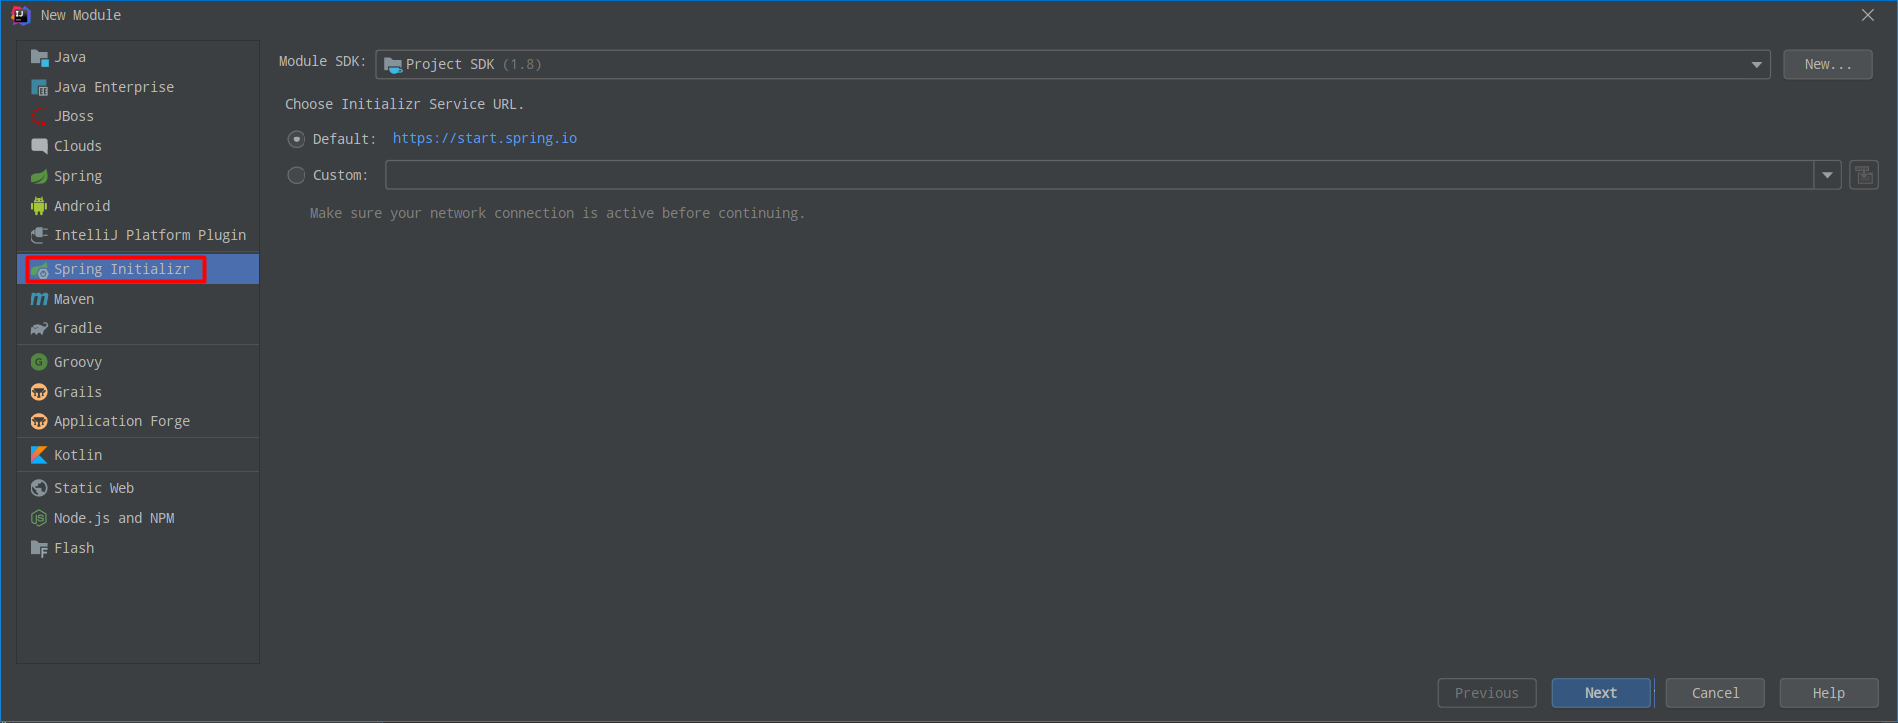
1.5 使用 Spring 初始化器创建 Spring Boot 项目
不需要配置 pom.xml 文件,自动生成一个 Spring Boot 模板项目;(注:初始化向导需要联网创建 Spring Boot 项目,最好是能FQ的网,不然可能创建很慢或者创建不了)
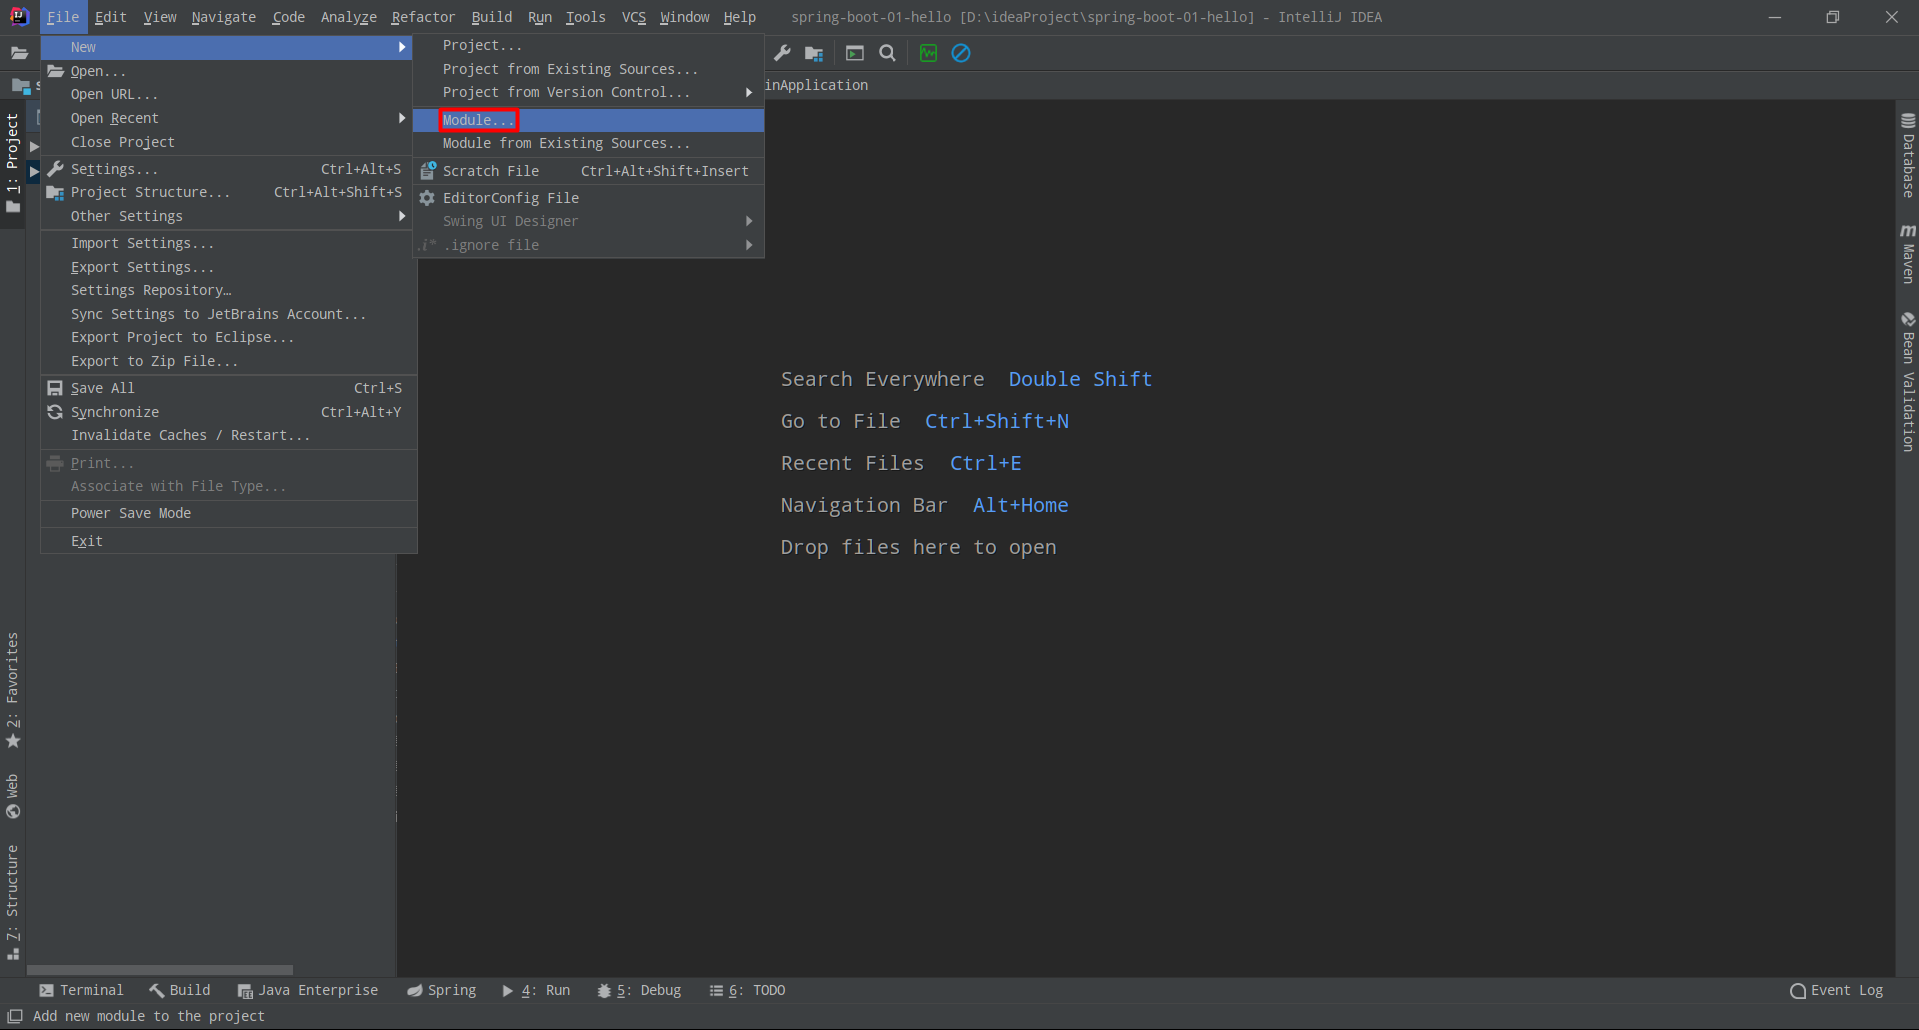
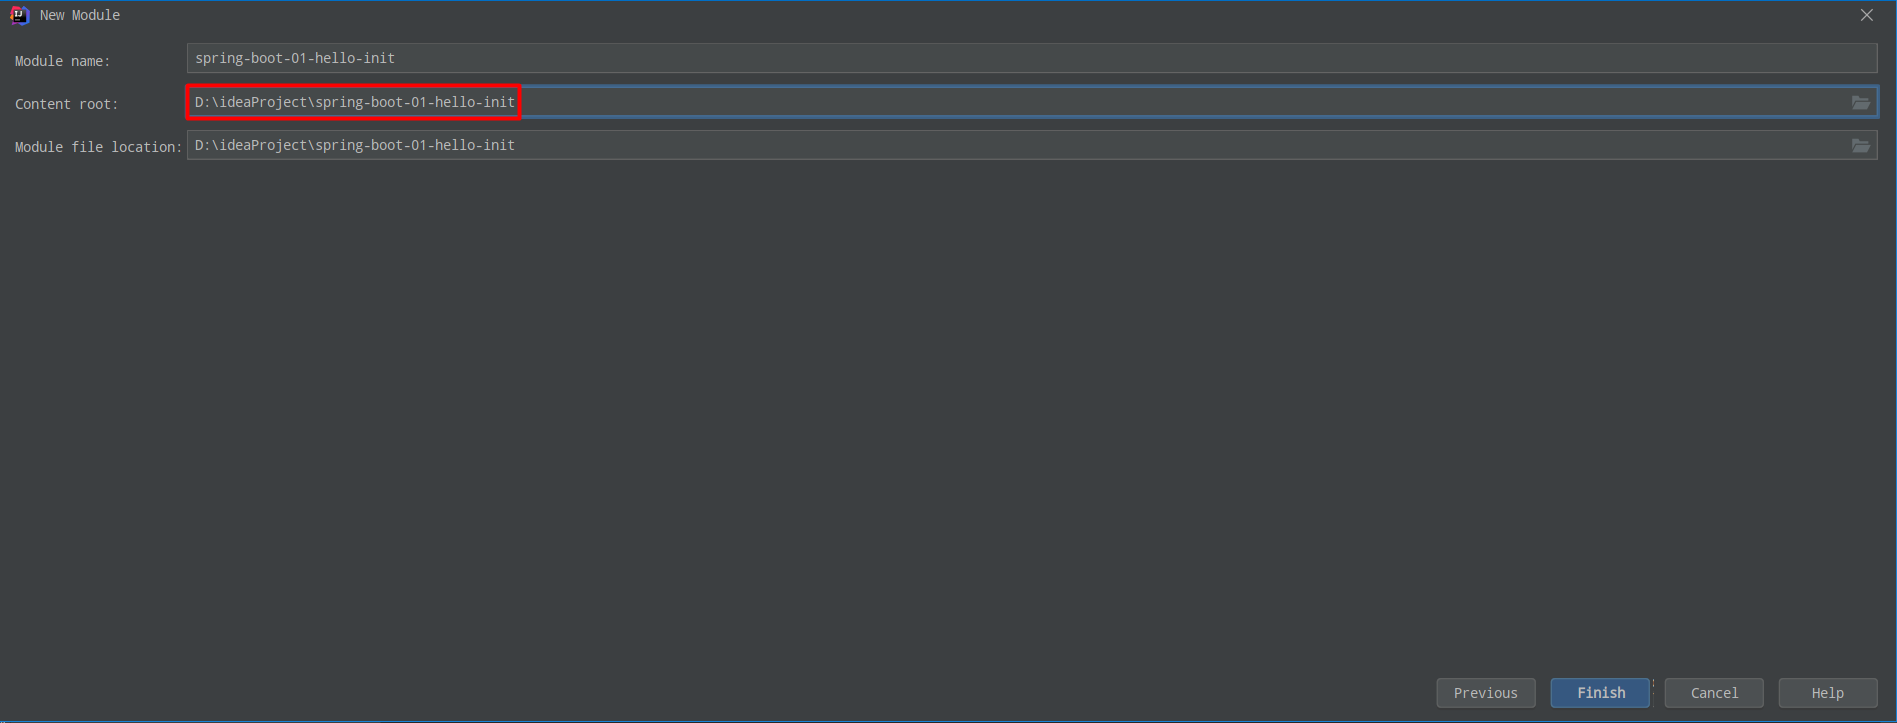
为了展示方便,选择Module...创建新项目,可以在与旧项目同一个窗口中显示新建的项目(如果选择Project...则会在新窗口打开新项目)
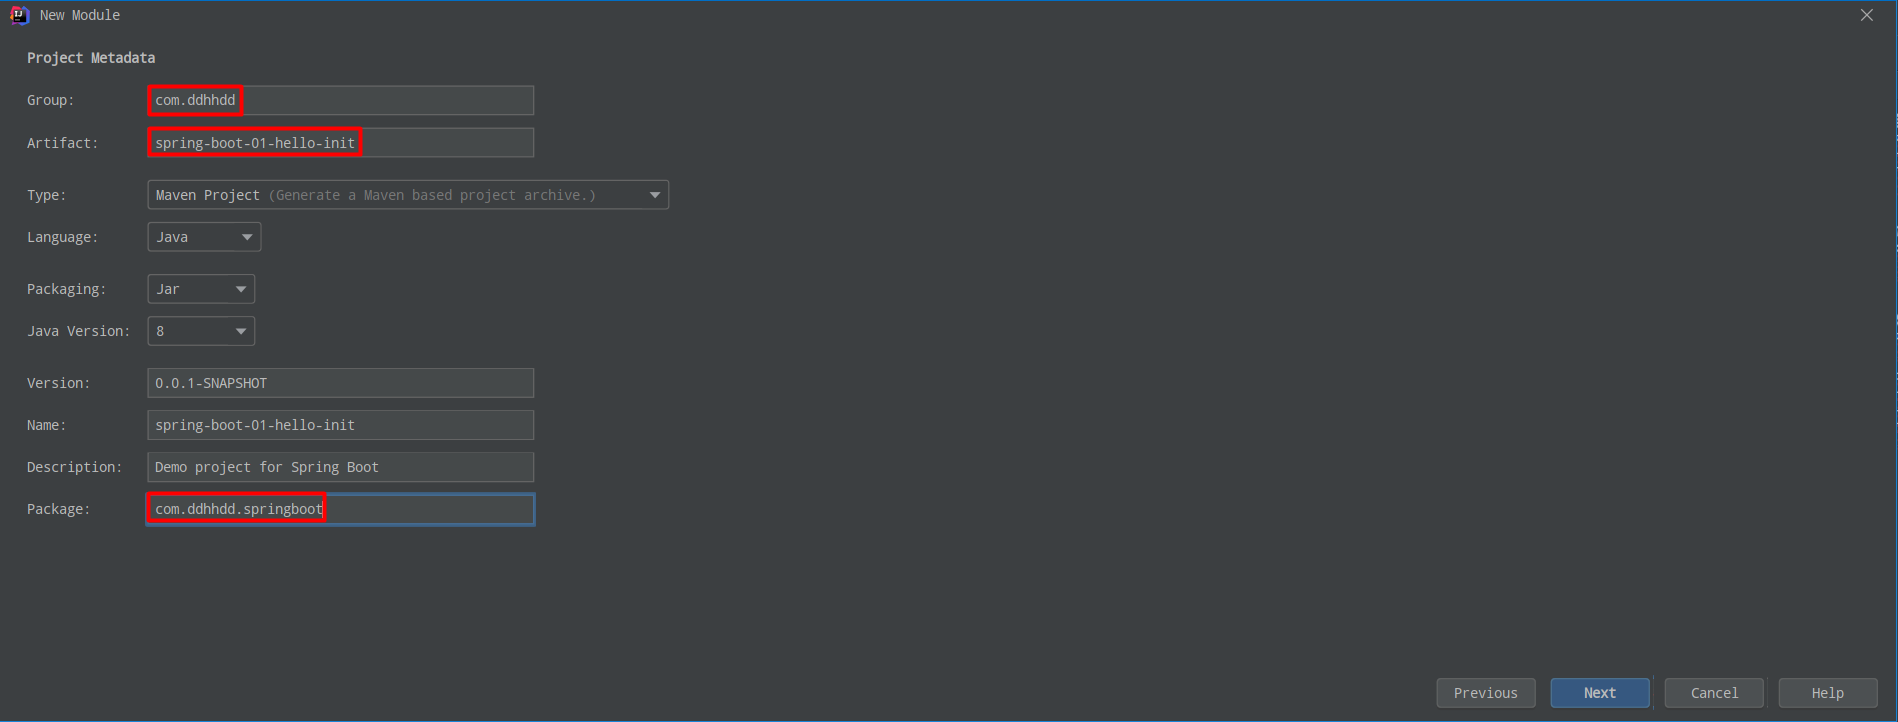
丶 注意包名 Package
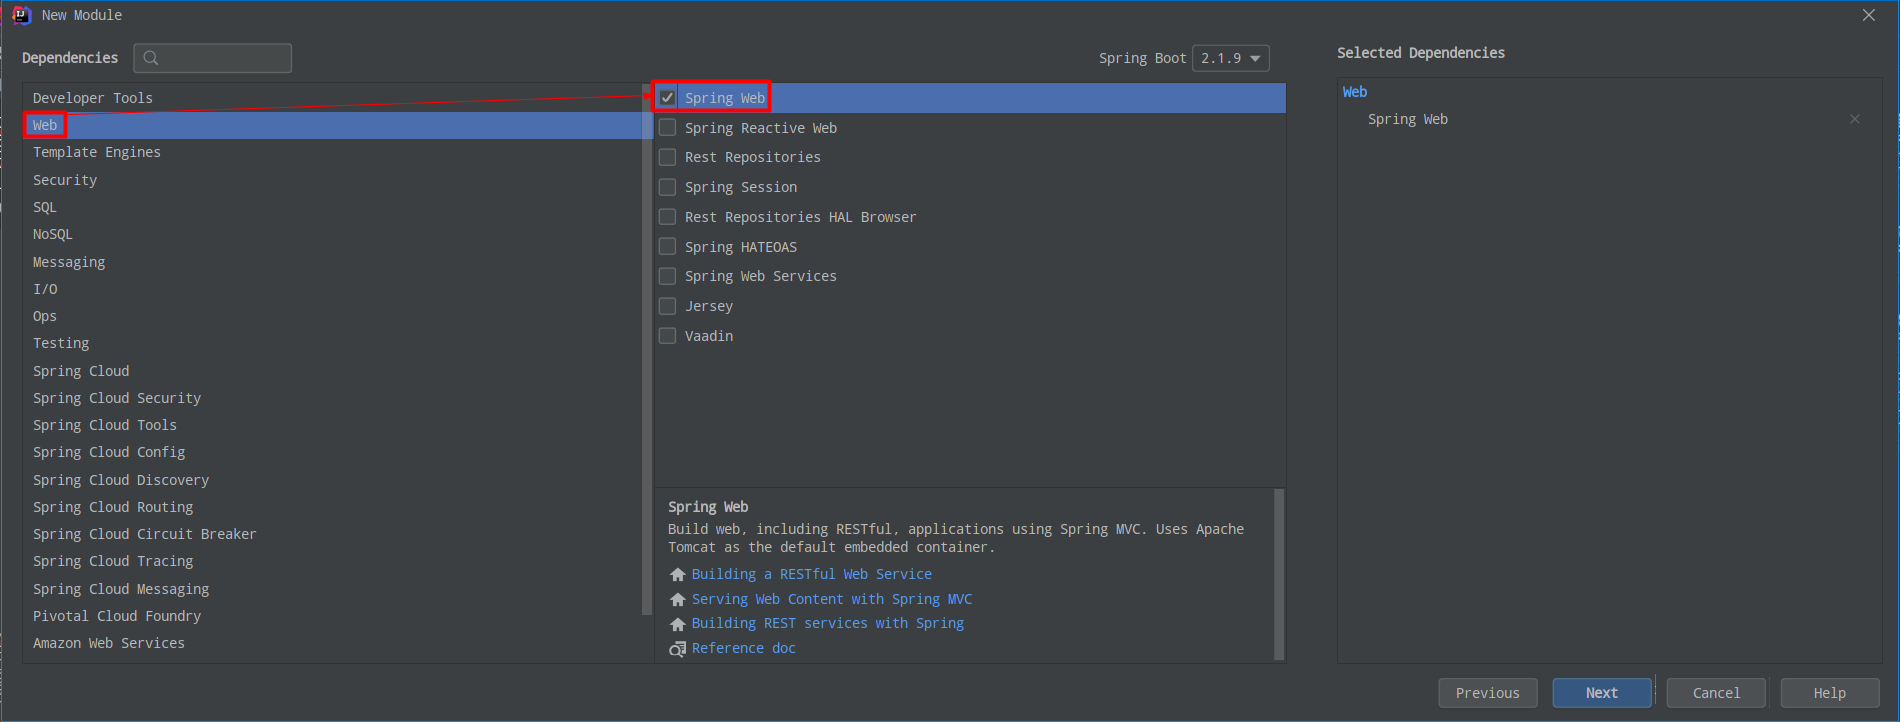
丶 引入功能模块(这里√选就可以了,不用在 pom.xml 中写了)
丶 为了展示,把该项目于spring-boot-01-hello放在同一目录下
丶 默认生成的 Spring Boot 项目,可以看到 pom.xml 已经写好了一些依赖;(修改 Spring Boot 的版本,因为在引入功能模块界面找不到2.0.6.RELEASE,现在都是新版本了),删除暂时用不到文件和目录
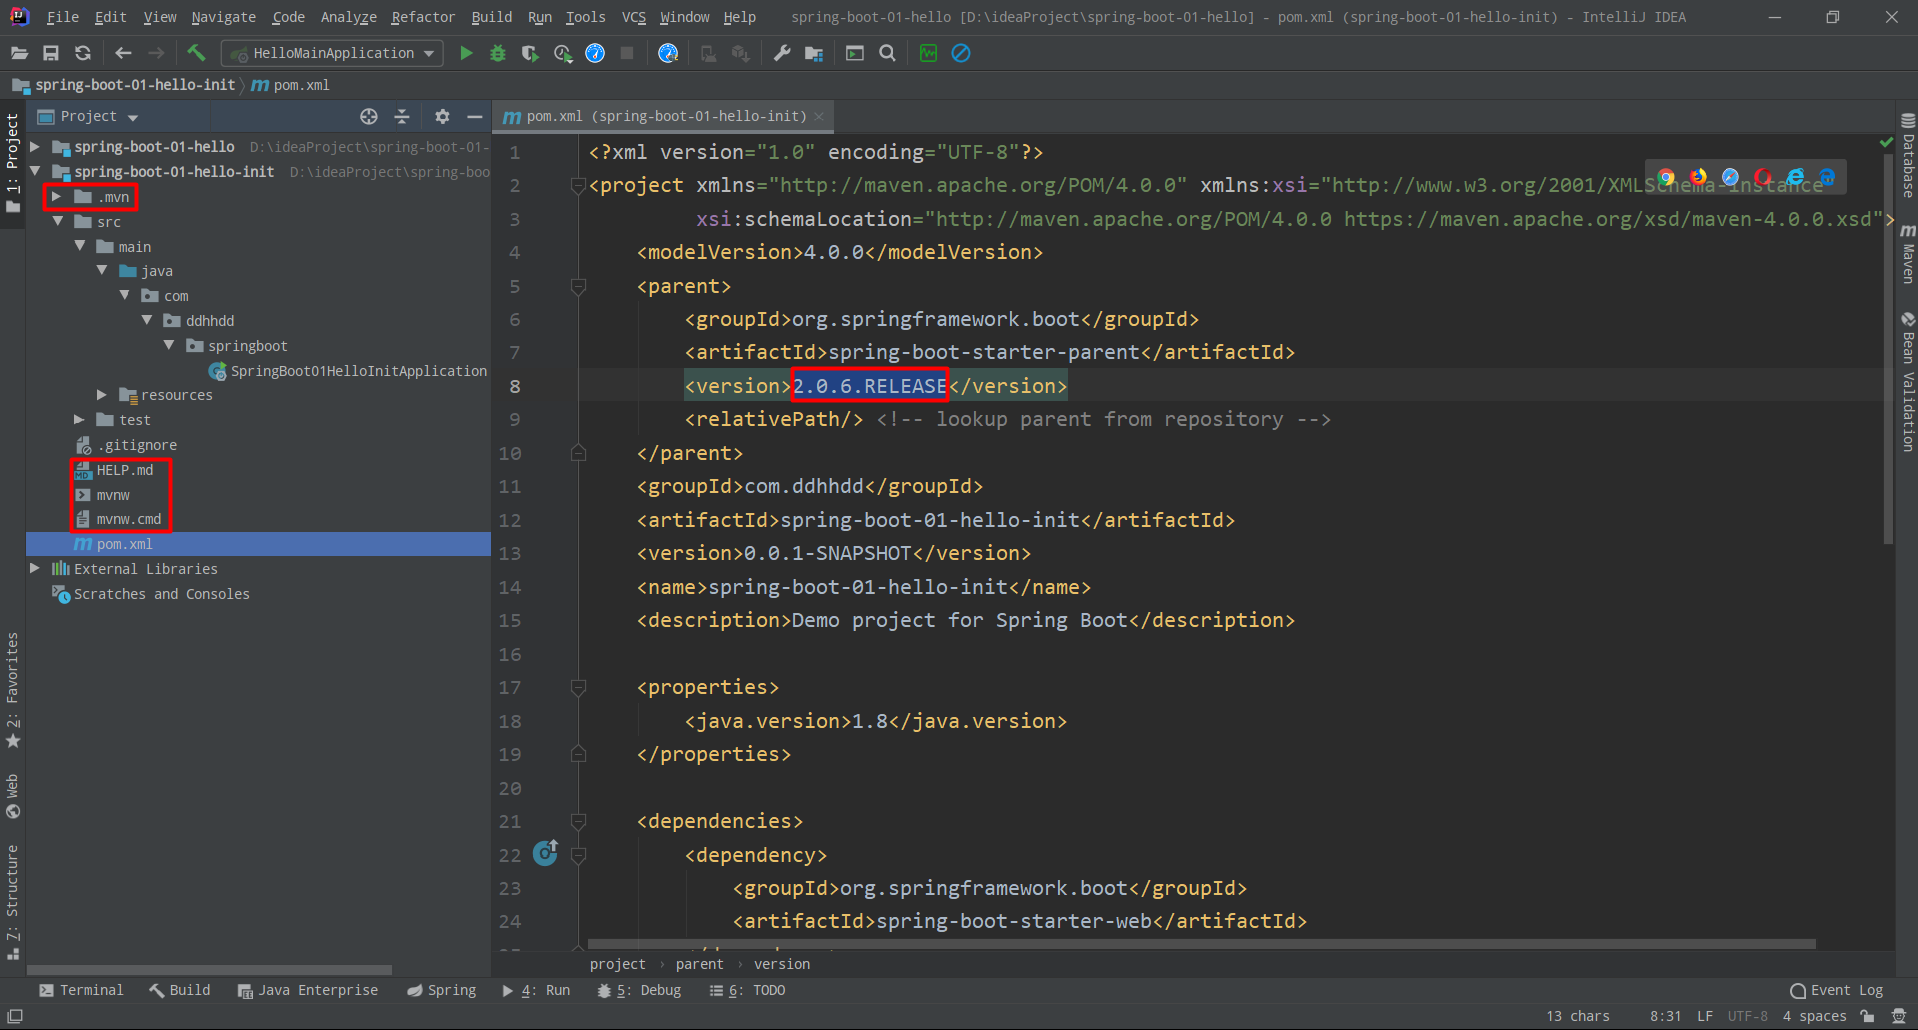
丶 引导类(SpringBoot01HelloInitApplication)已经生成了,我们只需要实现业务即可(自己写一个com.ddhhdd.springboot.controller.HelloController 去试试,效果和通过 Maven 创建的项目效果一样)
@SpringBootApplication
public class SpringBoot01HelloInitApplication {

    public static void main(String[] args) {
        SpringApplication.run(SpringBoot01HelloInitApplication.class, args);
    }
}
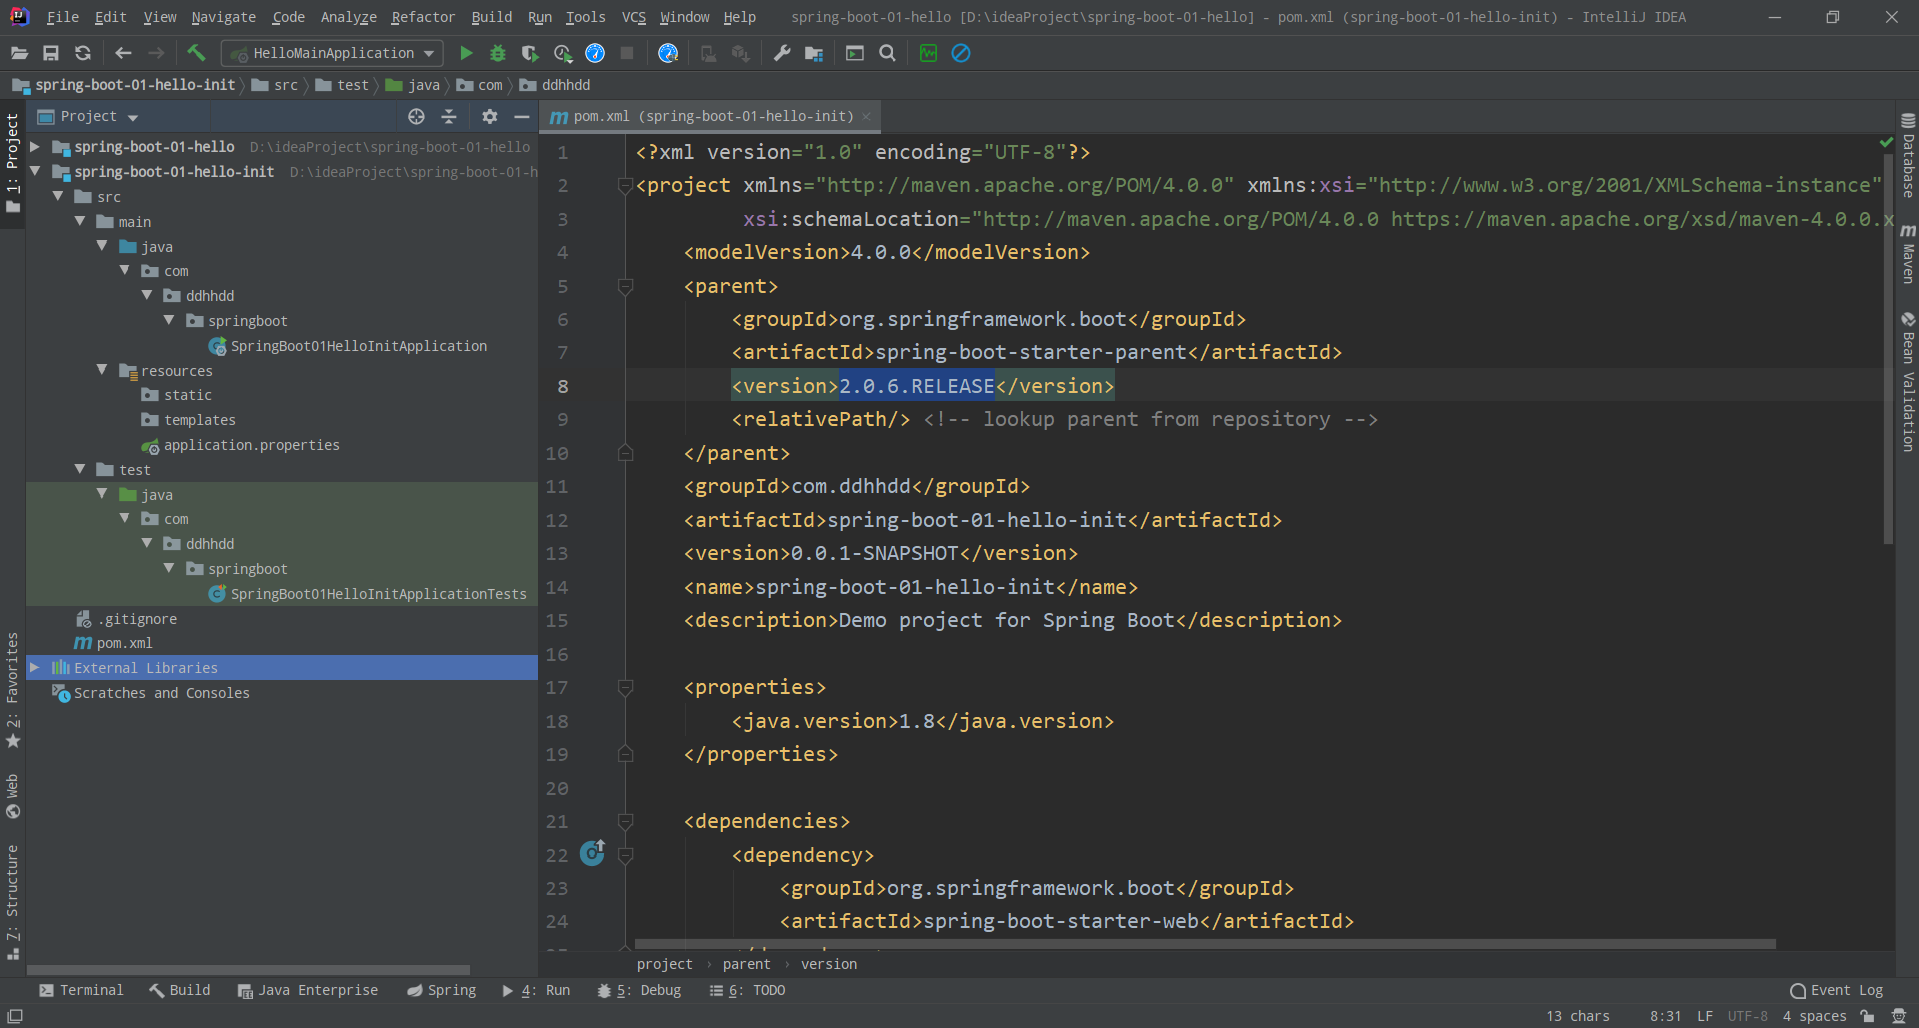
resources文件夹中目录结构:
static:保存所有的静态资文件,js、css、imagestemplates:保存所有的模板页面(Spring Boot 默认 jar 包使用嵌入式的 Tomcat,默认不支持 JSP 页面),可以使用模板引擎(freemarker、thymeleaf);application.properties:Spring Boot应用的配置文件;可以修改一些默认设置;如修改默认端口 server.prot=8081

 浙公网安备 33010602011771号