
MAC Vmware Fusion+redhat +Oracle10gRAC
- 环境配置
虚拟机共享磁盘
更改虚拟机源文件
#shared disks configure
disk.locking="false"
diskLib.dataCacheMaxSize="0"
diskLib.dataCacheMaxReadAheadSize="0"
diskLib.DataCacheMinReadAheadSize="0"
diskLib.dataCachePageSize="4096"
diskLib.maxUnsyncedWrites="0"
scsi0:1.deviceType="disk"
scsi0:1.mode = "independent-persistent"
scsi0.sharedBus = "VIRTUAL"
按照hosts文件配置两个节点的网卡,public ip一定要指定网关!
安装包
Yum install -y compat-* glibc*
Cat /etc/hosts
# Public Network - (eth0)
172.168.1.11 rac1
172.168.1.12 rac2
# Private Interconnect - (eth1)
10.0.0.11 rac1-priv
10.0.0.12 rac2-priv
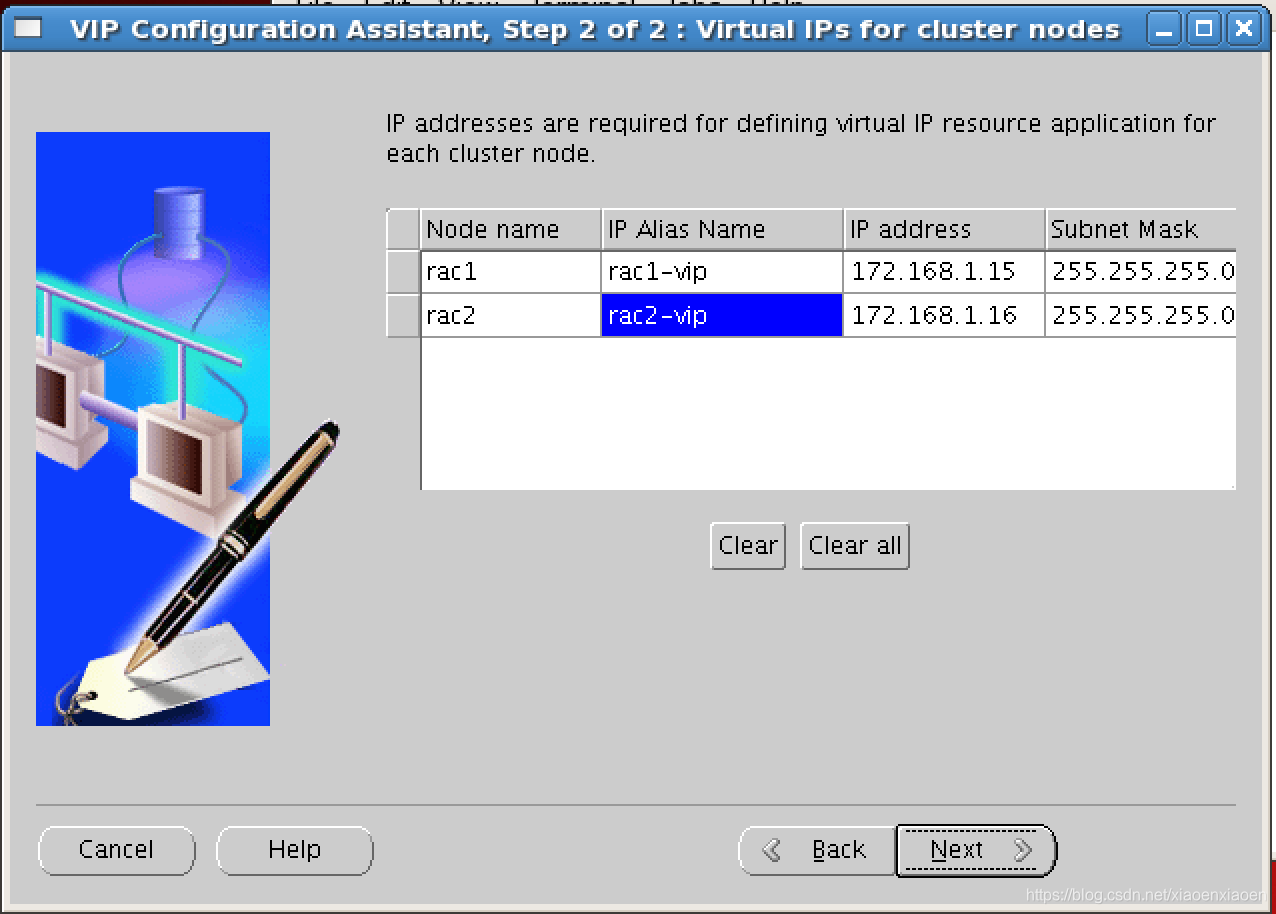
# Public Virtual IP (eth0:xx)
172.168.1.15 rac1-vip
172.168.1.16 rac2-vip
172.168.1.17 scan-ip
在rac1将磁盘分区初始化为rawdevice:
vi /etc/udev/rules.d/60-raw.rules
ACTION=="add", KERNEL=="sdb1", RUN+="/bin/raw /dev/raw/raw1 %N"
ACTION=="add", KERNEL=="sdb2", RUN+="/bin/raw /dev/raw/raw2 %N"
ACTION=="add", KERNEL=="sdb3", RUN+="/bin/raw /dev/raw/raw3 %N"
ACTION=="add", KERNEL=="sdb5", RUN+="/bin/raw /dev/raw/raw4 %N"
ACTION=="add", KERNEL=="sdb6", RUN+="/bin/raw /dev/raw/raw5 %N"
ACTION=="add", KERNEL=="sdb7", RUN+="/bin/raw /dev/raw/raw6 %N"
ACTION=="add", KERNEL=="sdb8", RUN+="/bin/raw /dev/raw/raw7 %N"
KERNEL=="raw[1-7]", MODE="0660", GROUP="asmadmin", OWNER="grid"
重新启动udev
start_udev
在rac2同步磁盘分区信息
partprobe /dev/sda
fdisk -l
cat /proc/partitions
在rac2将磁盘分区初始化为rawdevice:
vi /etc/udev/rules.d/60-raw.rules
ACTION=="add", KERNEL=="sdb", RUN+="/bin/raw /dev/raw/raw1 %N"
ACTION=="add", KERNEL=="sdc", RUN+="/bin/raw /dev/raw/raw2 %N"
ACTION=="add", KERNEL=="sdd", RUN+="/bin/raw /dev/raw/raw3 %N"
ACTION=="add", KERNEL=="sde", RUN+="/bin/raw /dev/raw/raw4 %N"
ACTION=="add", KERNEL=="sdb6", RUN+="/bin/raw /dev/raw/raw5 %N"
ACTION=="add", KERNEL=="sdb7", RUN+="/bin/raw /dev/raw/raw6 %N"
ACTION=="add", KERNEL=="sdb8", RUN+="/bin/raw /dev/raw/raw7 %N"
KERNEL=="raw[1-7]", MODE="0660", GROUP="asmadmin", OWNER="grid"
重新启动udev
start_udev
配置NTP:server --> rac1
vi /etc/sysconfig/ntpd
--------------------------------------------
OPTIONS="-x -u ntp:ntp -p /var/run/ntpd.pid"
vi /etc/ntp.conf
restrict 127.0.0.1
restrict -6 ::1
restrict 172.16.244.0 mask 255.255.255.0 nomodify notrap
server 127.127.1.0
重新启动ntp服务
service ntpd restart
chkconfig ntpd on


INFO: PRVF-5408 : NTP Time Server ".LOCL." is common only to the following nodes "rac1"
INFO: PRVF-5416 : Query of NTP daemon failed on all nodes
INFO: Clock synchronization check using Network Time Protocol(NTP) failed
INFO: PRVF-9652 : Cluster Time Synchronization Services check failed
client --> rac2
vi /etc/sysconfig/ntpd
--------------------------------------------
OPTIONS="-x -u ntp:ntp -p /var/run/ntpd.pid"
vi /etc/ntp.conf
server 172.16.244.128
restrict 172.16.244.128 mask 255.255.255.0 nomodify notrap noquery
。检查ntp server的防火墙。可能是server的防火墙屏蔽了upd 123端口。
可以用命令
#service iptables stop
客户端与服务端时间同步命令 (大概要5分钟后,客户端才能与之同步)
重新启动ntp服务
service ntpd restart
chkconfig ntpd on
ntpdate -u 172.16.244.128 (ntp server ip)
配置grid用户的信任关系
su - grid
ssh-keygen -t rsa
ssh-keygen -t dsa
cd .ssh
cat *.pub > authorized_keys

scp authorized_keys grid@rac2:/home/grid/.ssh/keys_dbs
cat keys_dbs >> authorized_keys
scp authorized_keys grid@rac1:/home/grid/.ssh/

ssh rac1 date
ssh rac2 date
ssh rac1-priv date
ssh rac2-priv date
--------------------------------------------------------------
配置oracle用户的信任关系
su - oracle
ssh-keygen -t rsa
ssh-keygen -t dsa
cd .ssh
cat *.pub >> authorized_keys

scp authorized_keys oracle@rac2:/home/oracle/.ssh/keys_dbs
cat keys_dbs >> authorized_keys
scp authorized_keys oracle@rac1:/home/oracle/.ssh/

ssh rac1 date
ssh rac2 date
ssh rac1-priv date
ssh rac2-priv date- 参数配置
建用户
 groupadd -g 5000 asmadmin
 groupadd -g 5001 asmdba
 groupadd -g 5002 asmoper
 groupadd -g 6000 oinstall
 groupadd -g 6001 dba
 groupadd -g 6002 oper

 useradd -g oinstall -G asmadmin,asmdba,asmoper grid
 echo "grid"|passwd --stdin grid

 useradd -g oinstall -G dba,asmdba oracle
 echo "oracle"|passwd --stdin oracle
创建目录
 mkdir /grid_base
 mkdir /grid_home
 chown grid:oinstall /grid_base
 chown grid:oinstall /grid_home
 mkdir /oracle
 chown oracle:oinstall /oracle
echo "grid   soft   nofile    131072
grid   hard   nofile    131072
grid   soft   nproc    131072
grid   hard   nproc    131072
grid   soft   core    unlimited
grid   hard   core    unlimited
grid   soft   memlock    50000000
grid   hard   hemlock    50000000" >> /etc/security/limits.conf
echo "kernel.shmmax = 4294967296
kernel.shmmni = 4096
kernel.shmall = 2097152
kernel.sem = 250 32000 100 128
fs.file-max = 6815744
fs.aio-max-nr = 1048576
net.ipv4.ip_local_port_range = 1024 65500
net.core.rmem_default = 262144
net.core.rmem_max = 4194304
net.core.wmem_default = 262144
net.core.wmem_max = 1048586" >> /etc/sysctl.conf
修改grid用户配置文件
vi .bash_profile
export ORACLE_BASE=/u01/app/oracle
export ORACLE_HOME=/u01/grid
export ORACLE_OWNER=oracle
export ORACLE_SID=+ASM1 #rac2节点为ORACLE_SID=+ASM2
export ORACLE_TERM=vt100
export THREADS_FLAG=native
export LD_LIBRARY_PATH=$ORACLE_HOME/lib:$LD_LIBRARY_PATH
export PATH=$ORACLE_HOME/bin:$PATH
export LANG=en_US
alias sqlplus='rlwrap sqlplus'
alias lsnrctl='rlwrap lsnrctl'
alias asmcmd='rlwrap asmcmd'
修改oracle用户配置文件
vi .bash_profile
export ORACLE_BASE=/u01/app/oracle
export ORACLE_HOME=$ORACLE_BASE/product/10.2.0/db_1
export ORACLE_OWNER=oracle
export ORACLE_SID=orcl1 #rac2节点为ORACLE_SID=orcl2
export ORACLE_TERM=vt100
export THREADS_FLAG=native
export LD_LIBRARY_PATH=$ORACLE_HOME/lib:$LD_LIBRARY_PATH
export PATH=$ORACLE_HOME/bin:$PATH
export EDITOR=vi
export SQLPATH=/home/oracle
export LANG=en_USalias sqlplus='rlwrap sqlplus'
alias lsnrctl='rlwrap lsnrctl'
alias rman='rlwrap rman'
alias dgmgrl='rlwrap dgmgrl'- 安装grid
Grid 用户
gunzip 10201
Cpio -idmv /tmp/10201_cluster
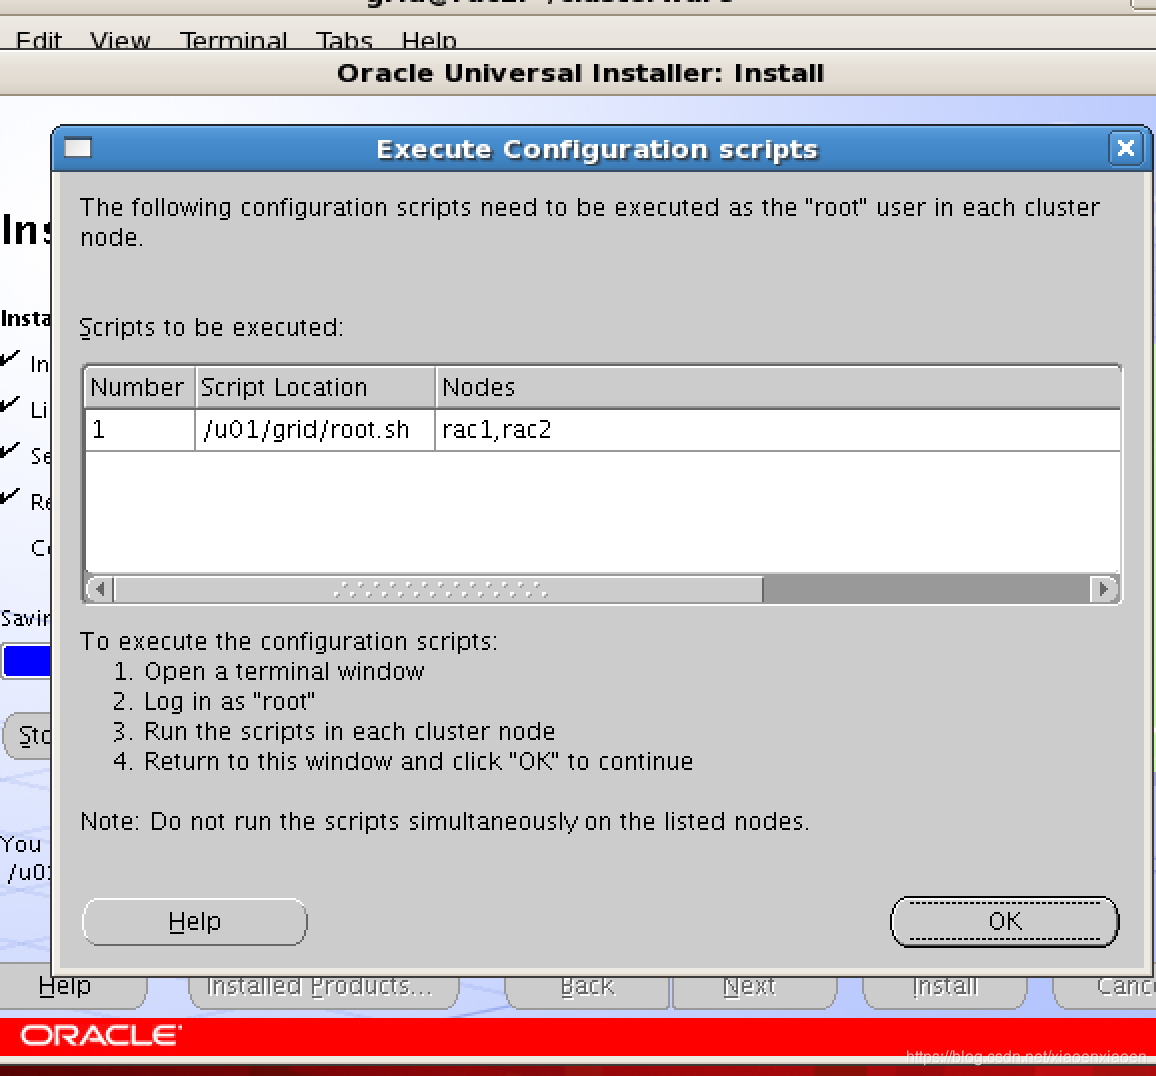
执行root脚本之前完成如下:
- 替换文件,修复bug
发布的补丁包p4679769_10201_Linux-x86-64.zip
cp clsfmt.bin /u01/grid/bin/clsfmt.bin
scp clsfmt.bin root@rac2:/u01/grid/bin/clsfmt.bin
2.修改vipca,srvctl文件
cd /u01/grid/bin
cp vipca vipcabak
cp srvctl srvctlbak
[root@rac2 bin]# /u01/grid/root.sh
Checking to see if Oracle CRS stack is already configured
Setting the permissions on OCR backup directory
Setting up NS directories
Oracle Cluster Registry configuration upgraded successfully
clscfg: EXISTING configuration version 3 detected.
clscfg: version 3 is 10G Release 2.
Successfully accumulated necessary OCR keys.
Using ports: CSS=49895 CRS=49896 EVMC=49898 and EVMR=49897.
node <nodenumber>: <nodename> <private interconnect name> <hostname>
node 1: rac1 rac1-priv rac1
node 2: rac2 rac2-priv rac2
clscfg: Arguments check out successfully.
NO KEYS WERE WRITTEN. Supply -force parameter to override.
-force is destructive and will destroy any previous cluster
configuration.
Oracle Cluster Registry for cluster has already been initialized
Startup will be queued to init within 90 seconds.
Adding daemons to inittab
Expecting the CRS daemons to be up within 600 seconds.
CSS is active on these nodes.
rac1
rac2
CSS is active on all nodes.
Oracle CRS stack installed and running under init(1M)
Running vipca(silent) for configuring nodeapps
Error 0(Native: listNetInterfaces:[3])
[Error 0(Native: listNetInterfaces:[3])]
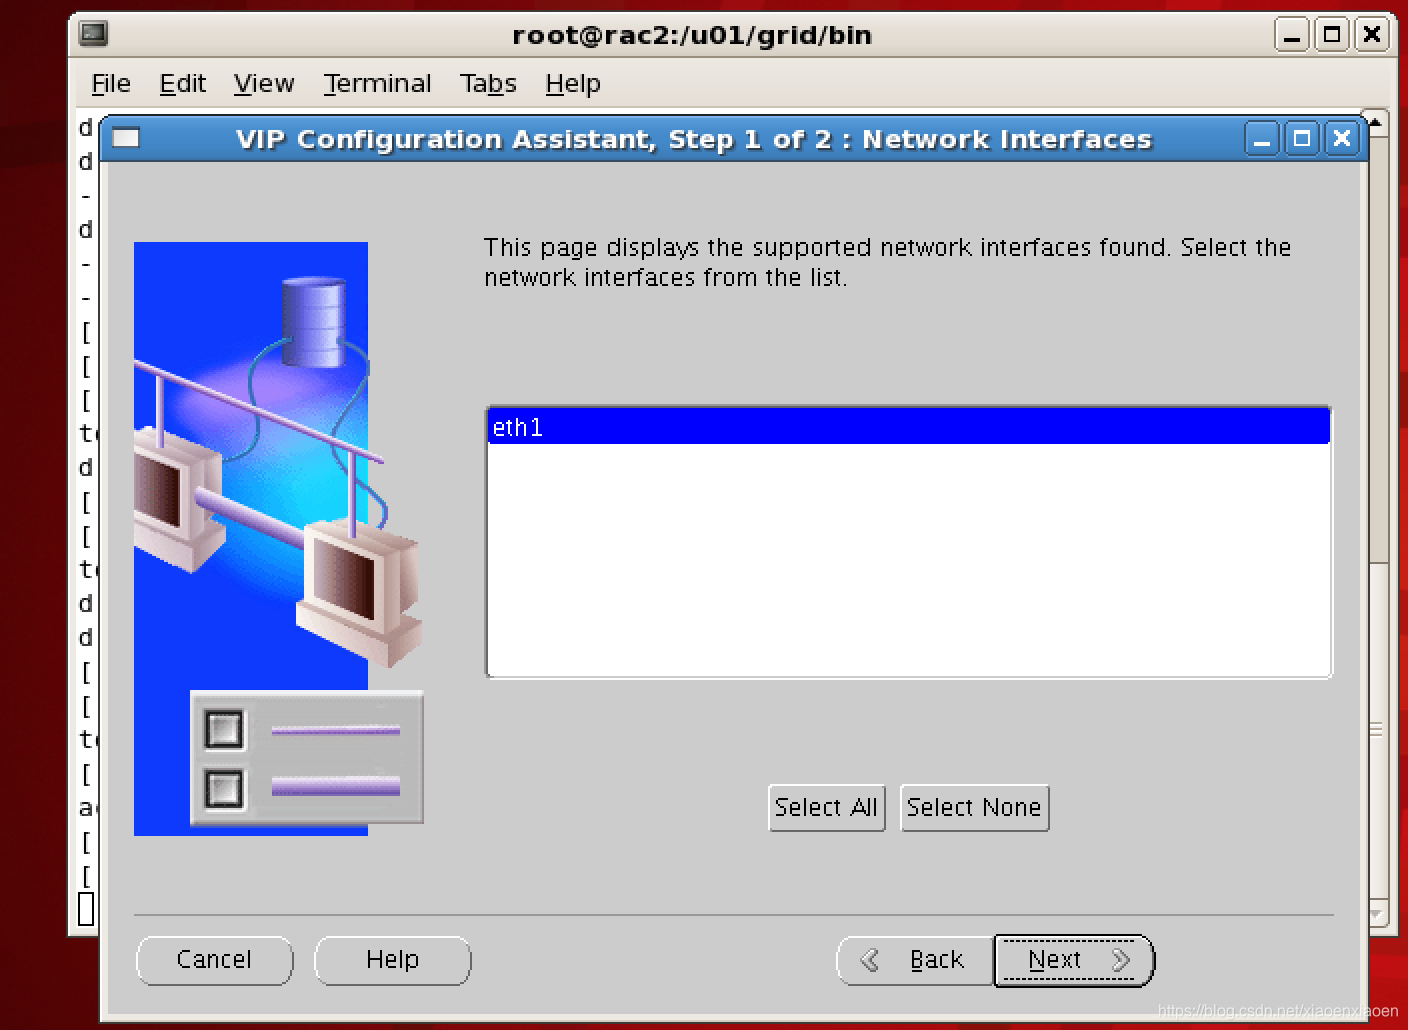
root脚本报错,手动配置vip
Error 0(Native: listNetInterfaces:[3])
[root@rac1 bin]# ./oifcfg getif
[root@rac1 bin]#  ./oifcfg iflist
eth0  172.16.244.0
eth1  172.168.1.0
eth2  10.0.0.0
[root@rac1 bin]# ./oifcfg setif -global eth1/172.168.1.0:public
[root@rac1 bin]# ./oifcfg setif -global eth2/10.0.0.0:cluster_interconnect
[root@rac1 bin]# ./oifcfg getif
eth1  172.168.1.0  global  public
eth2  10.0.0.0  global  cluster_interconnect
[root@rac1 bin]#  ./oifcfg iflist
eth0  172.16.244.0
eth1  172.168.1.0
eth2  10.0.0.0
[root@rac1 bin]#
任意一个节点,root执行/u01/grid/bin/vipca

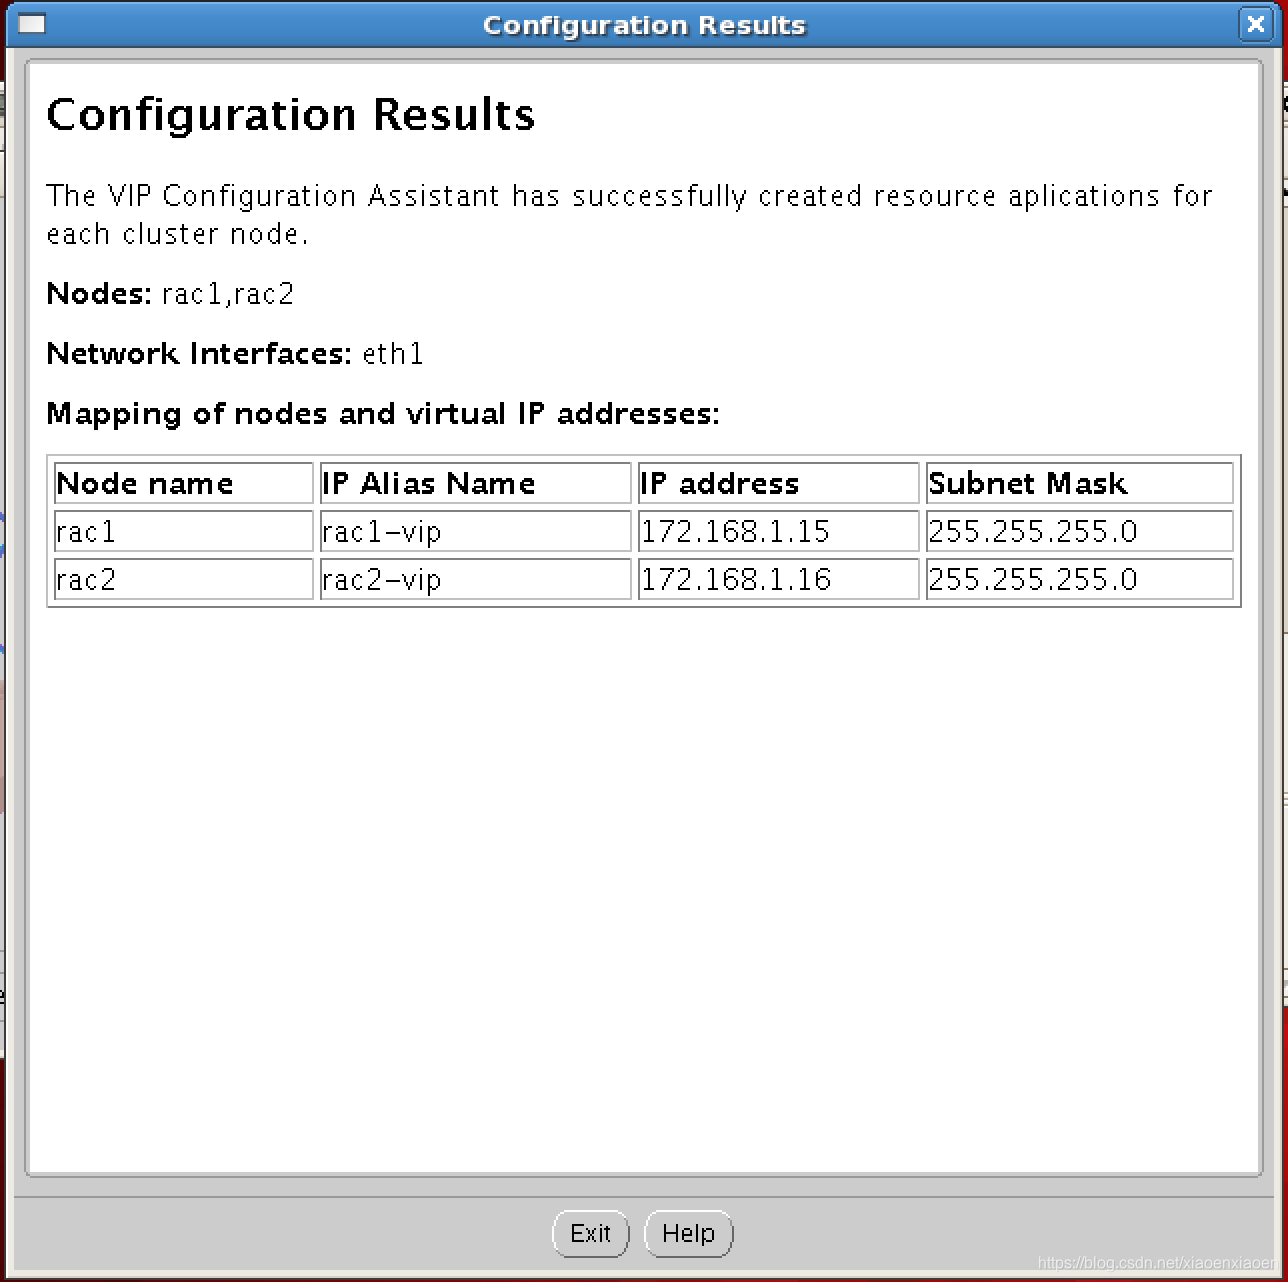
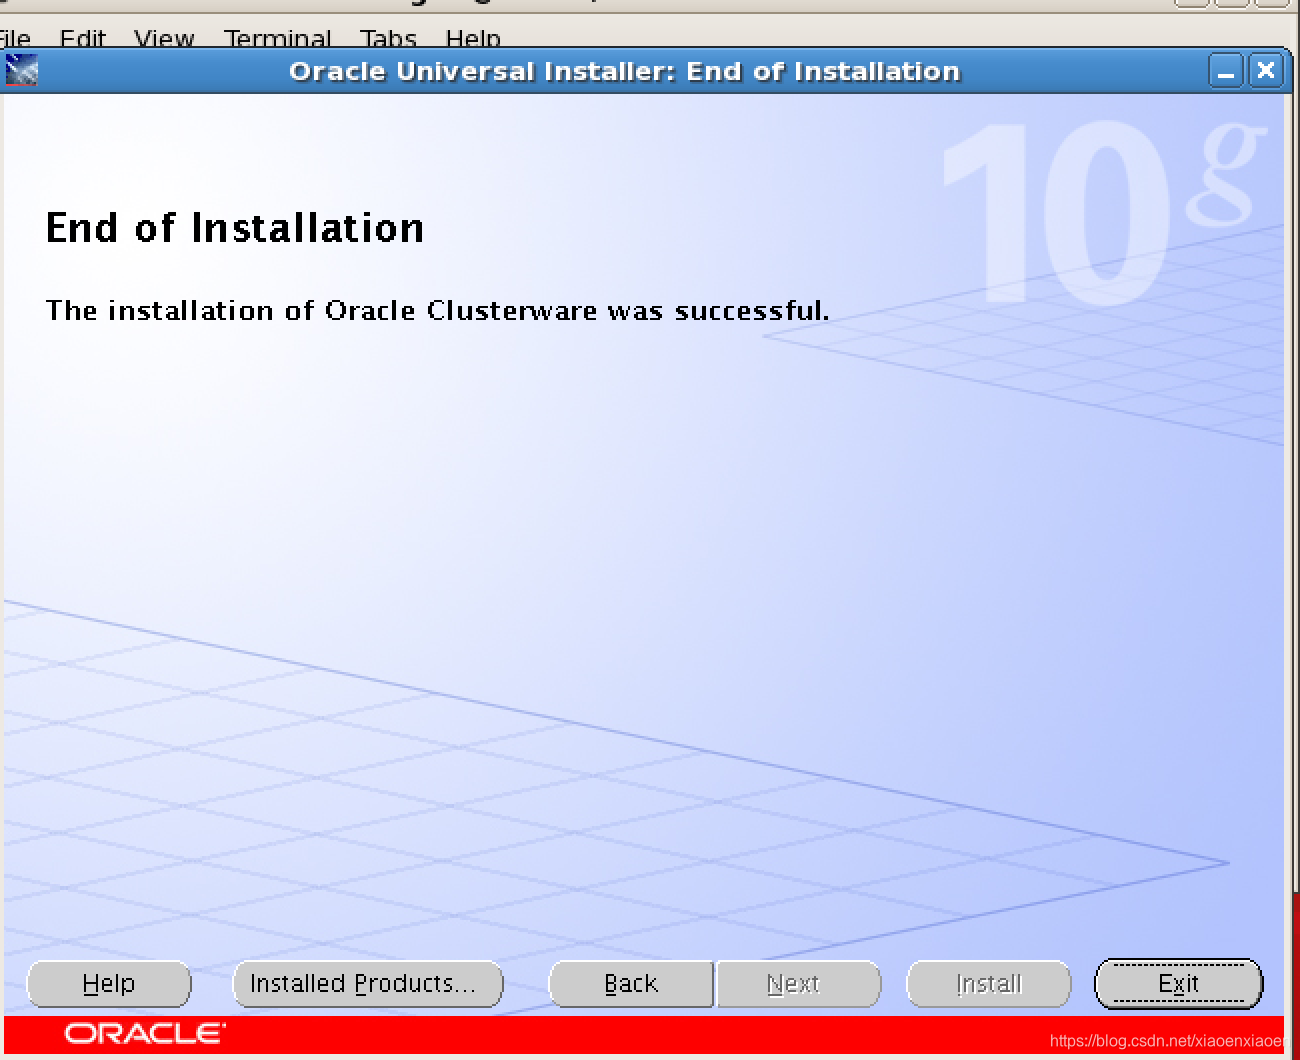
备注:继续安装grid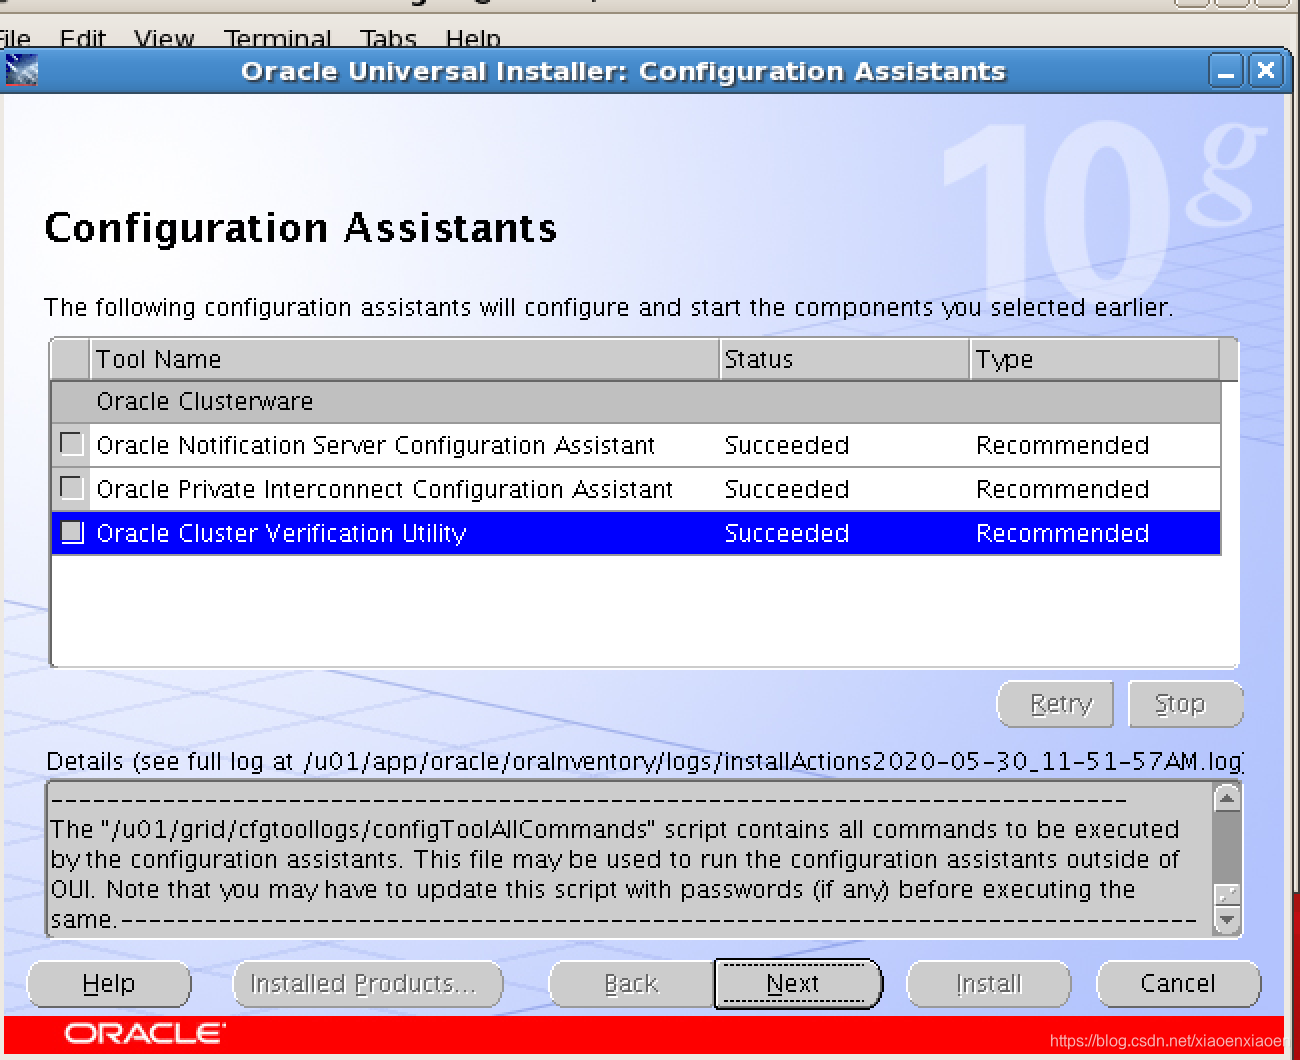
查看ip
   [root@rac1 bin]# ip a
1: lo: <LOOPBACK,UP,LOWER_UP> mtu 16436 qdisc noqueue
    link/loopback 00:00:00:00:00:00 brd 00:00:00:00:00:00
    inet 127.0.0.1/8 scope host lo
2: eth0: <BROADCAST,MULTICAST,UP,LOWER_UP> mtu 1500 qdisc pfifo_fast qlen 1000
    link/ether 00:0c:29:93:7c:70 brd ff:ff:ff:ff:ff:ff
    inet 172.16.244.132/24 brd 172.16.244.255 scope global eth0
3: eth1: <BROADCAST,MULTICAST,UP,LOWER_UP> mtu 1500 qdisc pfifo_fast qlen 1000
    link/ether 00:0c:29:93:7c:7a brd ff:ff:ff:ff:ff:ff
    inet 172.168.1.11/24 brd 172.168.1.255 scope global eth1
    inet 172.168.1.15/24 brd 172.168.1.255 scope global secondary eth1:1
4: eth2: <BROADCAST,MULTICAST,UP,LOWER_UP> mtu 1500 qdisc pfifo_fast qlen 1000
    link/ether 00:0c:29:93:7c:84 brd ff:ff:ff:ff:ff:ff
inet 10.0.0.11/24 brd 10.0.0.255 scope global eth2
节点2
[root@rac2 bin]# ip a
1: lo: <LOOPBACK,UP,LOWER_UP> mtu 16436 qdisc noqueue
    link/loopback 00:00:00:00:00:00 brd 00:00:00:00:00:00
    inet 127.0.0.1/8 scope host lo
    inet6 ::1/128 scope host
       valid_lft forever preferred_lft forever
2: eth0: <BROADCAST,MULTICAST,UP,LOWER_UP> mtu 1500 qdisc pfifo_fast qlen 1000
    link/ether 00:0c:29:69:d0:f2 brd ff:ff:ff:ff:ff:ff
    inet 172.16.244.133/24 brd 172.16.244.255 scope global eth0
    inet6 fe80::20c:29ff:fe69:d0f2/64 scope link
      valid_lft forever preferred_lft forever
3: eth1: <BROADCAST,MULTICAST,UP,LOWER_UP> mtu 1500 qdisc pfifo_fast qlen 1000
    link/ether 00:0c:29:69:d0:fc brd ff:ff:ff:ff:ff:ff
    inet 172.168.1.12/24 brd 172.168.1.255 scope global eth1
    inet 172.168.1.16/24 brd 172.168.1.255 scope global secondary eth1:1
    inet6 fe80::20c:29ff:fe69:d0fc/64 scope link
      valid_lft forever preferred_lft forever
4: eth2: <BROADCAST,MULTICAST,UP,LOWER_UP> mtu 1500 qdisc pfifo_fast qlen 1000
    link/ether 00:0c:29:69:d0:06 brd ff:ff:ff:ff:ff:ff
    inet 10.0.0.12/24 brd 10.0.0.255 scope global eth2
    inet6 fe80::20c:29ff:fe69:d006/64 scope link
       valid_lft forever preferred_lft forever
5: sit0: <NOARP> mtu 1480 qdisc noop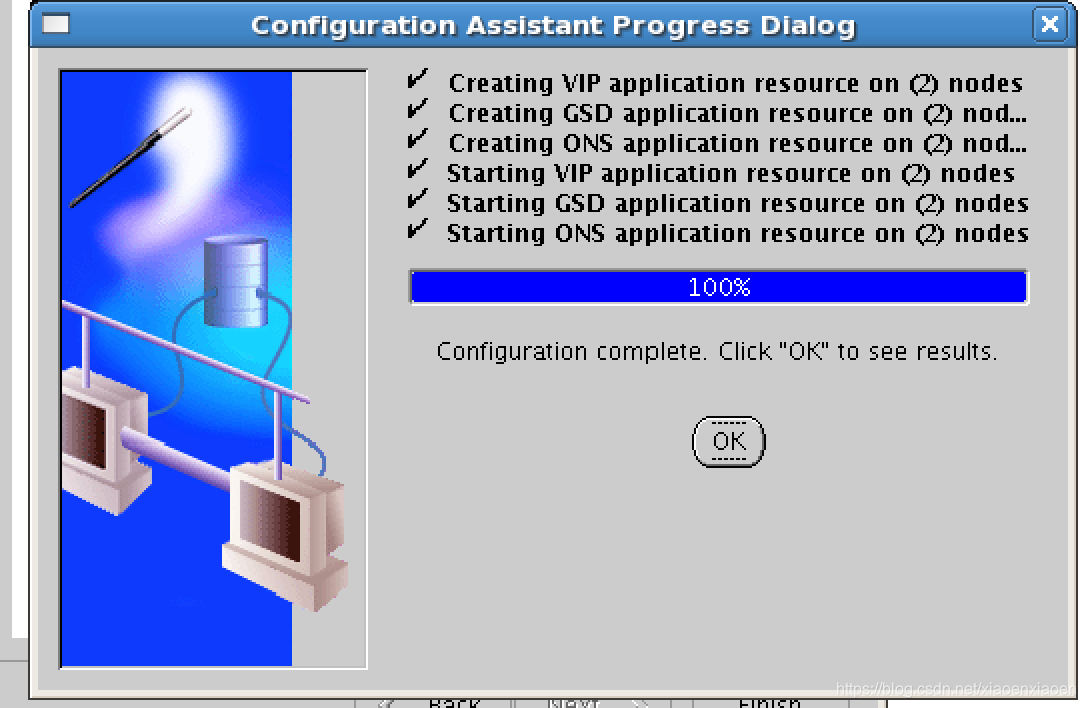
link/sit 0.0.0.0 brd 0.0.0.0vipca工具配置成功后,检查crs状态,两个节点的crs都已正常运行
[root@rac2 bin]# ./crs_stat -t
Name           Type           Target    State     Host
------------------------------------------------------------
ora.rac1.gsd   application    ONLINE    ONLINE    rac1
ora.rac1.ons   application    ONLINE    ONLINE    rac1
ora.rac1.vip   application    ONLINE    ONLINE    rac1
ora.rac2.gsd   application    ONLINE    ONLINE    rac2
ora.rac2.ons   application    ONLINE    ONLINE    rac2
ora.rac2.vip   application    ONLINE    ONLINE    rac2
- 安装database
[oracle@rac1 ~]$ gunzip 10201_database_linux_x86_64.cpio.gz
[oracle@rac1 ~]$ cpio -imdv < 10201_database_linux_x86_64.cpio

Attachhome
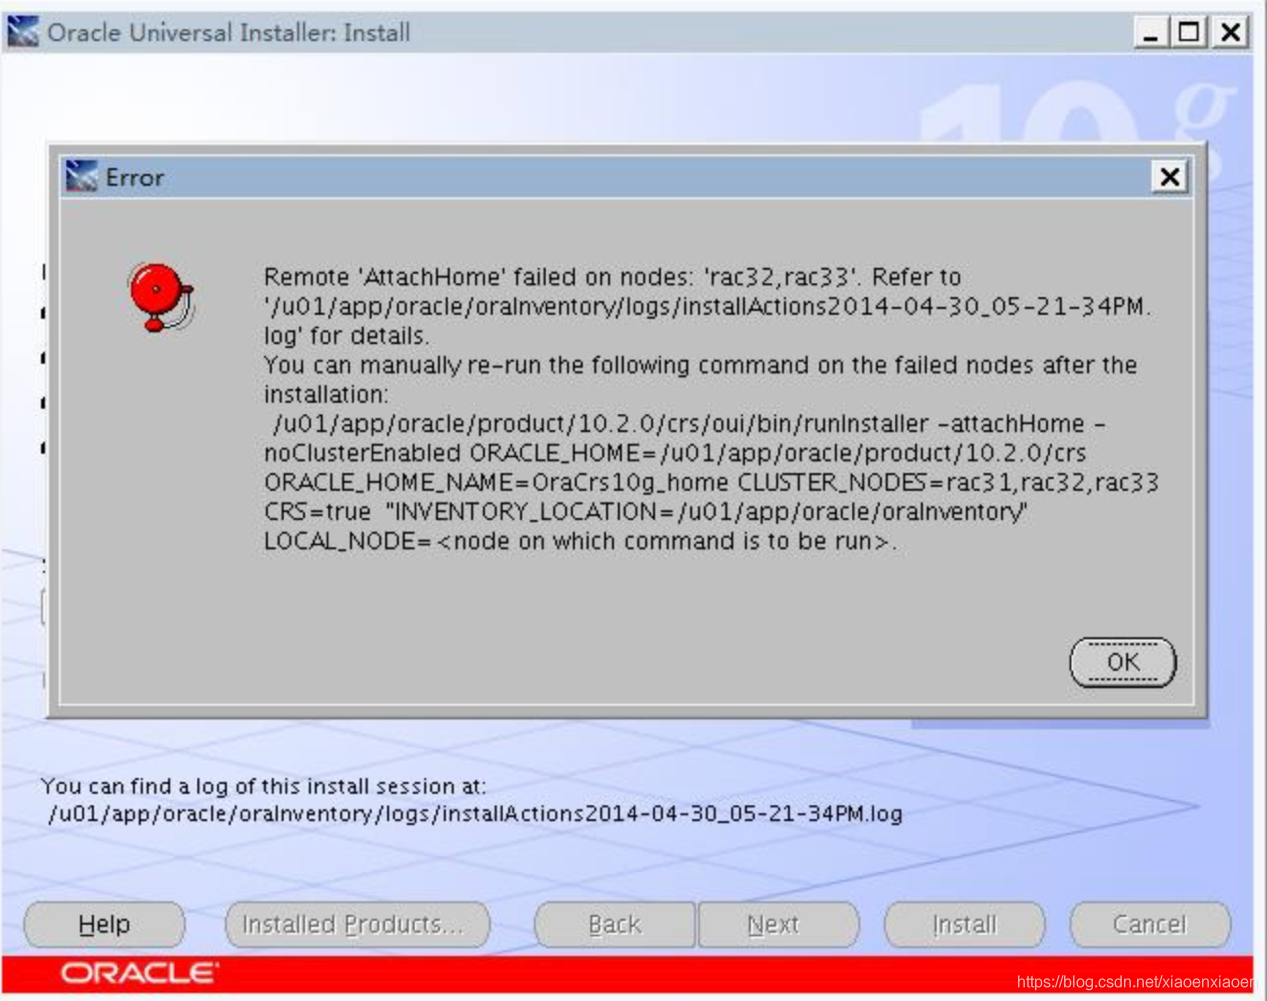
Solution:
[oracle@rac2 bin]$ /home/oracle/oracle/product/10.2.0/db_1/oui/bin/runInstaller -attachHome -noClusterEnabled ORACLE_HOME=/home/oracle/oracle/product/10.2.0/db_1/ ORACLE_HOME_NAME=OraDb10g_home1 CLUSTER_NODES=rac1,rac2 "ORACLE_HOME=/u01/app/oracle/oraInventory" LOCAL_NODE=rac2

You do not have sufficient permissions to access the inventory '/u01/app/oracle/oraInventory/logs'. Installation cannot continue. Make sure that you have read/write permissions to the inventory directory and restart the installer.: Permission denied

[oracle@rac2 bin]$ /home/oracle/oracle/product/10.2.0/db_1/oui/bin/runInstaller -attachHome -noClusterEnabled ORACLE_HOME=/home/oracle/oracle/product/10.2.0/db_1/ ORACLE_HOME_NAME=OraDb10g_home1 CLUSTER_NODES=rac1,rac2 "ORACLE_HOME=/u01/app/oracle/oraInventory" LOCAL_NODE=rac2

Starting Oracle Universal Installer...

[oracle@rac1 ~]$ sqlplus -v
SQL*Plus: Release 10.2.0.1.0 – Production
升级至10.2.0.4
停掉监听,数据库,cluster
安装cluster psu
图形化一步到位
执行脚本
查询版本
./crsctl query crs softwareversion

/u01/grid/bin/crsctl stop crs   (2个节点)
/u01/grid/install/root102.sh      (root rac1)
/u01/grid/install/root102.sh       (root rac2)


[root@rac1 bin]# ./crsctl query crs softwareversion
CRS software version on node [rac1] is [10.2.0.1.0]
[root@rac1 bin]# /u01/grid/bin/crsctl stop crs
Stopping resources.
Error while stopping resources. Possible cause: CRSD is down.
Stopping CSSD.
Unable to communicate with the CSS daemon.
[root@rac1 bin]# /u01/grid/bin/crsctl stop crs
Stopping resources.
Error while stopping resources. Possible cause: CRSD is down.
Stopping CSSD.
Unable to communicate with the CSS daemon.
[root@rac1 bin]# /u01/grid/install/root
root102.sh         rootconfig         rootdeletenode.sh  rootinstall
rootaddnode.sbs    rootdeinstall.sh   rootdelete.sh      rootupgrade

[root@rac1 bin]# /u01/grid/install/root102.sh
Creating pre-patch directory for saving pre-patch clusterware files
Completed patching clusterware files to /u01/grid
Relinking some shared libraries.
Relinking of patched files is complete.
Preparing to recopy patched init and RC scripts.
Recopying init and RC scripts.
Startup will be queued to init within 30 seconds.
Starting up the CRS daemons.
Waiting for the patched CRS daemons to start.
  This may take a while on some systems.
.
10204 patch successfully applied.

clscfg: EXISTING configuration version 3 detected.
clscfg: version 3 is 10G Release 2.
Successfully accumulated necessary OCR keys.
Using ports: CSS=49895 CRS=49896 EVMC=49898 and EVMR=49897.
node <nodenumber>: <nodename> <private interconnect name> <hostname>
node 1: rac1 rac1-priv rac1
Creating OCR keys for user 'root', privgrp 'root'..
Operation successful.
clscfg -upgrade completed successfully

[root@rac1 bin]# ./crsctl query crs softwareversion
CRS software version on node [rac1] is [10.2.0.4.0]
升级数据库
[oracle@rac1 ~]$ sqlplus -v
SQL*Plus: Release 10.2.0.1.0 – Production


Oracle用户
Cd DISK1/
./runInstaller
图形化,直接下一步


执行root脚本(2个节点)
[root@rac1 ~]# /u01/app/oracle/product/10.2.0/db_1/root.sh
Running Oracle10 root.sh script...
The following environment variables are set as:
  ORACLE_OWNER= oracle
    ORACLE_HOME=  /u01/app/oracle/product/10.2.0/db_1

Enter the full pathname of the local bin directory: [/usr/local/bin]:
The file "dbhome" already exists in /usr/local/bin.  Overwrite it? (y/n)
[n]: y
   Copying dbhome to /usr/local/bin ...
The file "oraenv" already exists in /usr/local/bin.  Overwrite it? (y/n)
[n]: y
   Copying oraenv to /usr/local/bin ...
The file "coraenv" already exists in /usr/local/bin.  Overwrite it? (y/n)
[n]: y
   Copying coraenv to /usr/local/bin ...
Entries will be added to the /etc/oratab file as needed by
Database Configuration Assistant when a database is created
Finished running generic part of root.sh script.
Now product-specific root actions will be performed.


[oracle@rac2 ~]$ sqlplus -v
SQL*Plus: Release 10.2.0.4.0 – Production
图形化无法调出
[oracle@rac1 ~]$ cat /etc/redhat-release
Red Hat Enterprise Linux Server release 5.11 (Tikanga)
更改Disk1中
[oracle@rac1 install]$ pwd
/home/oracle/Disk1/install/oraparam.ini


Linux=redhat-3,SuSE-9,SuSE-10,redhat-4,redhat-5,UnitedLinux-1.0,asianux-1,asianux-2,asianux-3,redhat-5.7,redhat-5.11

[oracle@rac1 install]$cat /etc/redhat-release
Red Hat Enterprise Linux Server release 5.11 (Tikanga)
Crs卸载
现在把彻底卸载crs过程记录如下:
1、删除crs home文件夹
  CRS_HOME:/u01/crs/oracle/product/10.2/
  e.g: rm -rf /u01/crs/oracle/product/10.2/*
创建crs目录:
        a、 mkdir crs
        b、chown -R oracle:oinstall crs/
c、chmod -R 777 crs/2、删除ORACLE_BASE下所有文件
  ORACLE_BASE:/u01/app/oracle
  e.g: rm -rf /u01/app/oracle/*
3、删除自启动脚本
    rm -rf /etc/oracle/*
    mv -f /etc/init.d/init.cssd /etc/init.d/init.cssd.bak
    mv -f /etc/init.d/init.crs /etc/init.d/init.crs.bak
    mv -f /etc/init.d/init.crsd /etc/init.d/init.crsd.bak
    mv -f /etc/init.d/init.evmd /etc/init.d/init.evmd.bak
    mv -f /etc/inittab.crs /etc/inittab.crs.bak
    rm -f /etc/rc2.d/K96init.crs
    rm -f /etc/rc2.d/S96init.crs
    rm -f /etc/rc3.d/K96init.crs
    rm -f /etc/rc3.d/S96init.crs
    rm -f /etc/rc5.d/K96init.crs
    rm -f /etc/rc5.d/S96init.crs
    mv -f /etc/inittab /etc/inittab.bak
    cp -f  /etc/inittab.orig /etc/inittab
4、删除ocr路径信息,一般在 /etc/oracle/ocr.loc
5、格式化ocr
dd if=/dev/zero f=/dev/raw/raw1 bs=8192 count=2560
dd if=/dev/zero f=/dev/raw/raw2 bs=8192 count=12800

 浙公网安备 33010602011771号