oerv的pretask2
-
任务二:在 openEuler RISC-V 系统上通过 obs 命令行工具 osc,从源代码构建 RISC-V 版本的 rpm 包,比如
pcre2。 -
(提示首先需要在 openEuler的 OBS什么是 OBS? 上注册账号 https://build.tarsier-infra.isrc.ac.cn)
可以先不用管OBS具体是什么东西,先去网站注册个账号,再说了。
https://build.tarsier-infra.isrc.ac.cn/
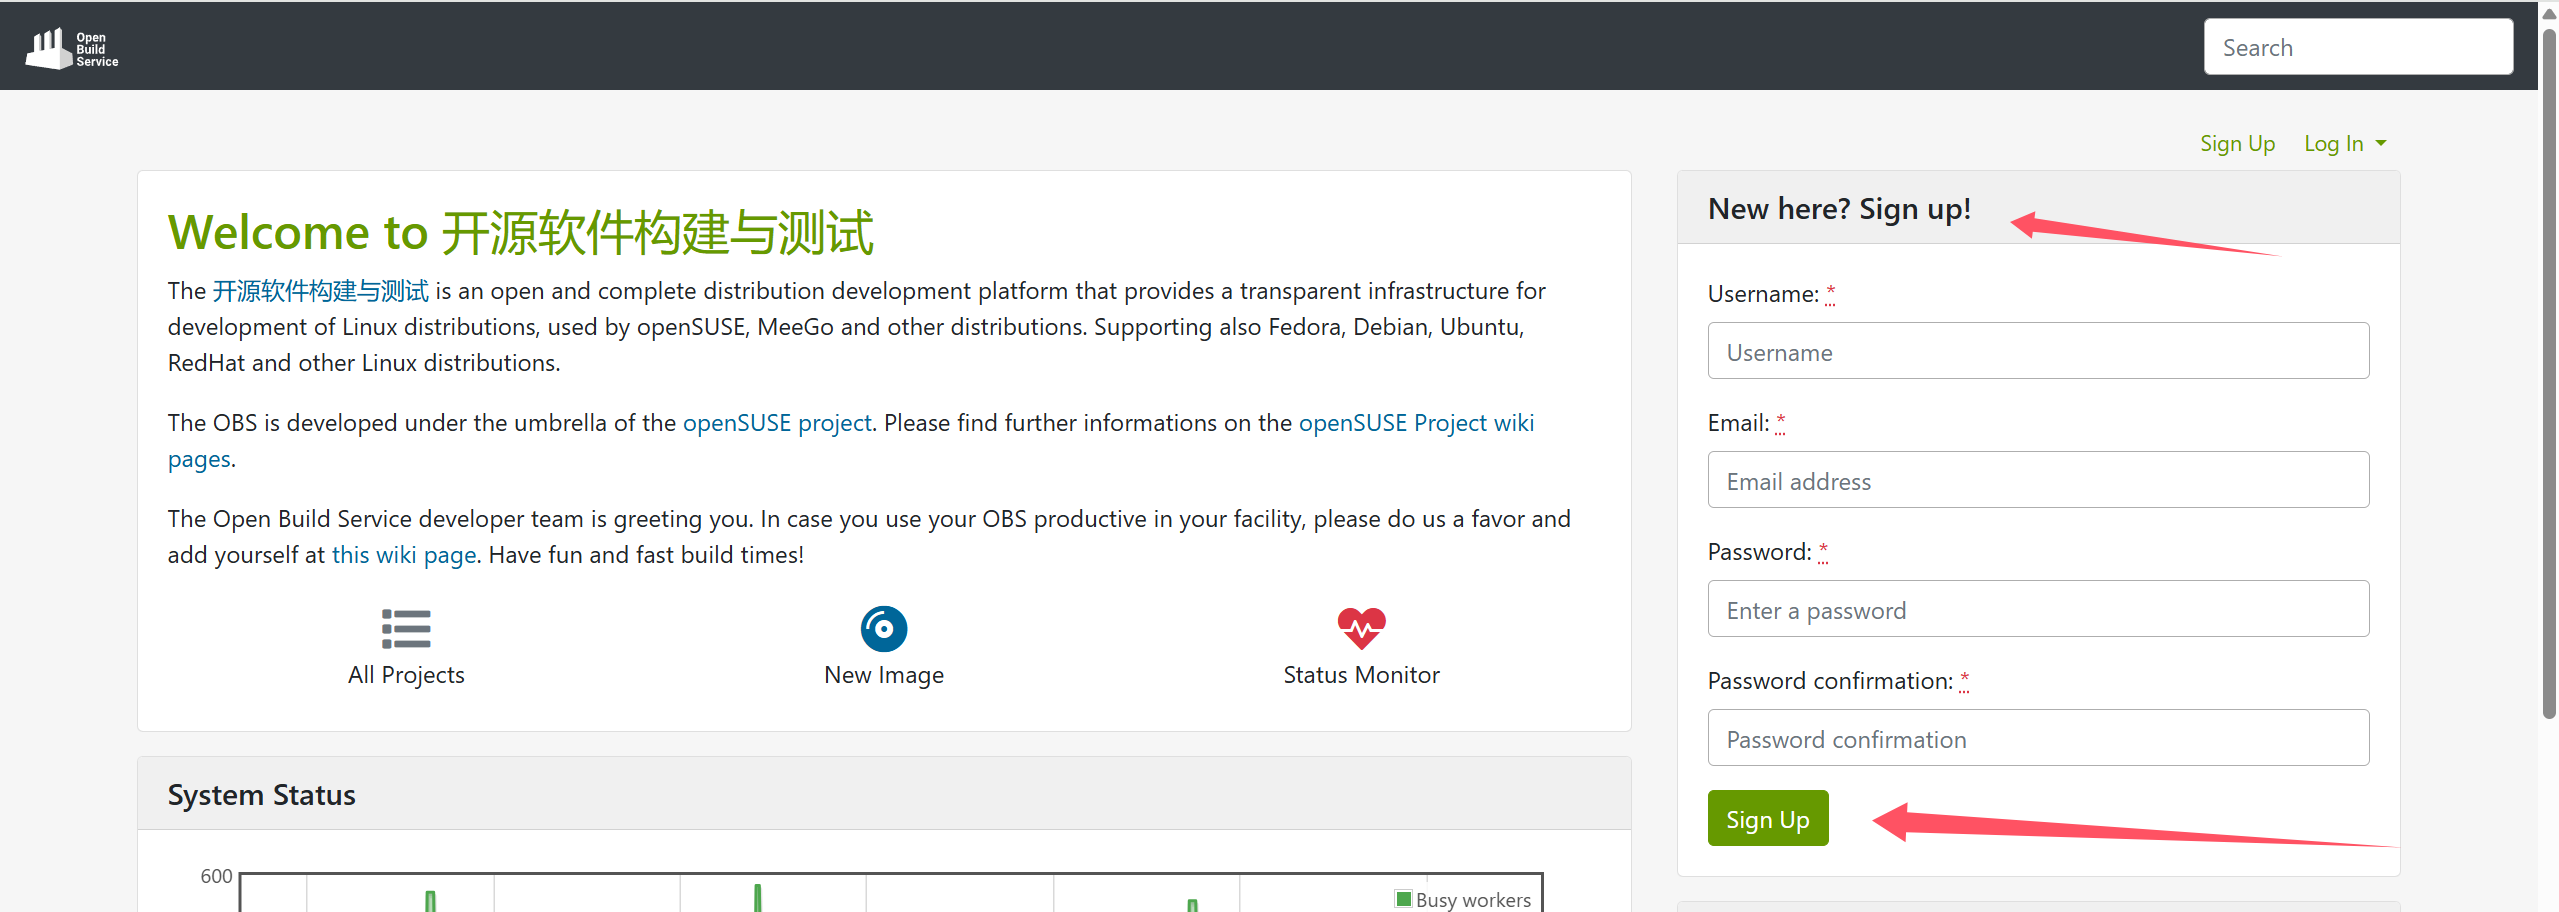
注册就不说了,甚至不会验证你的邮箱。
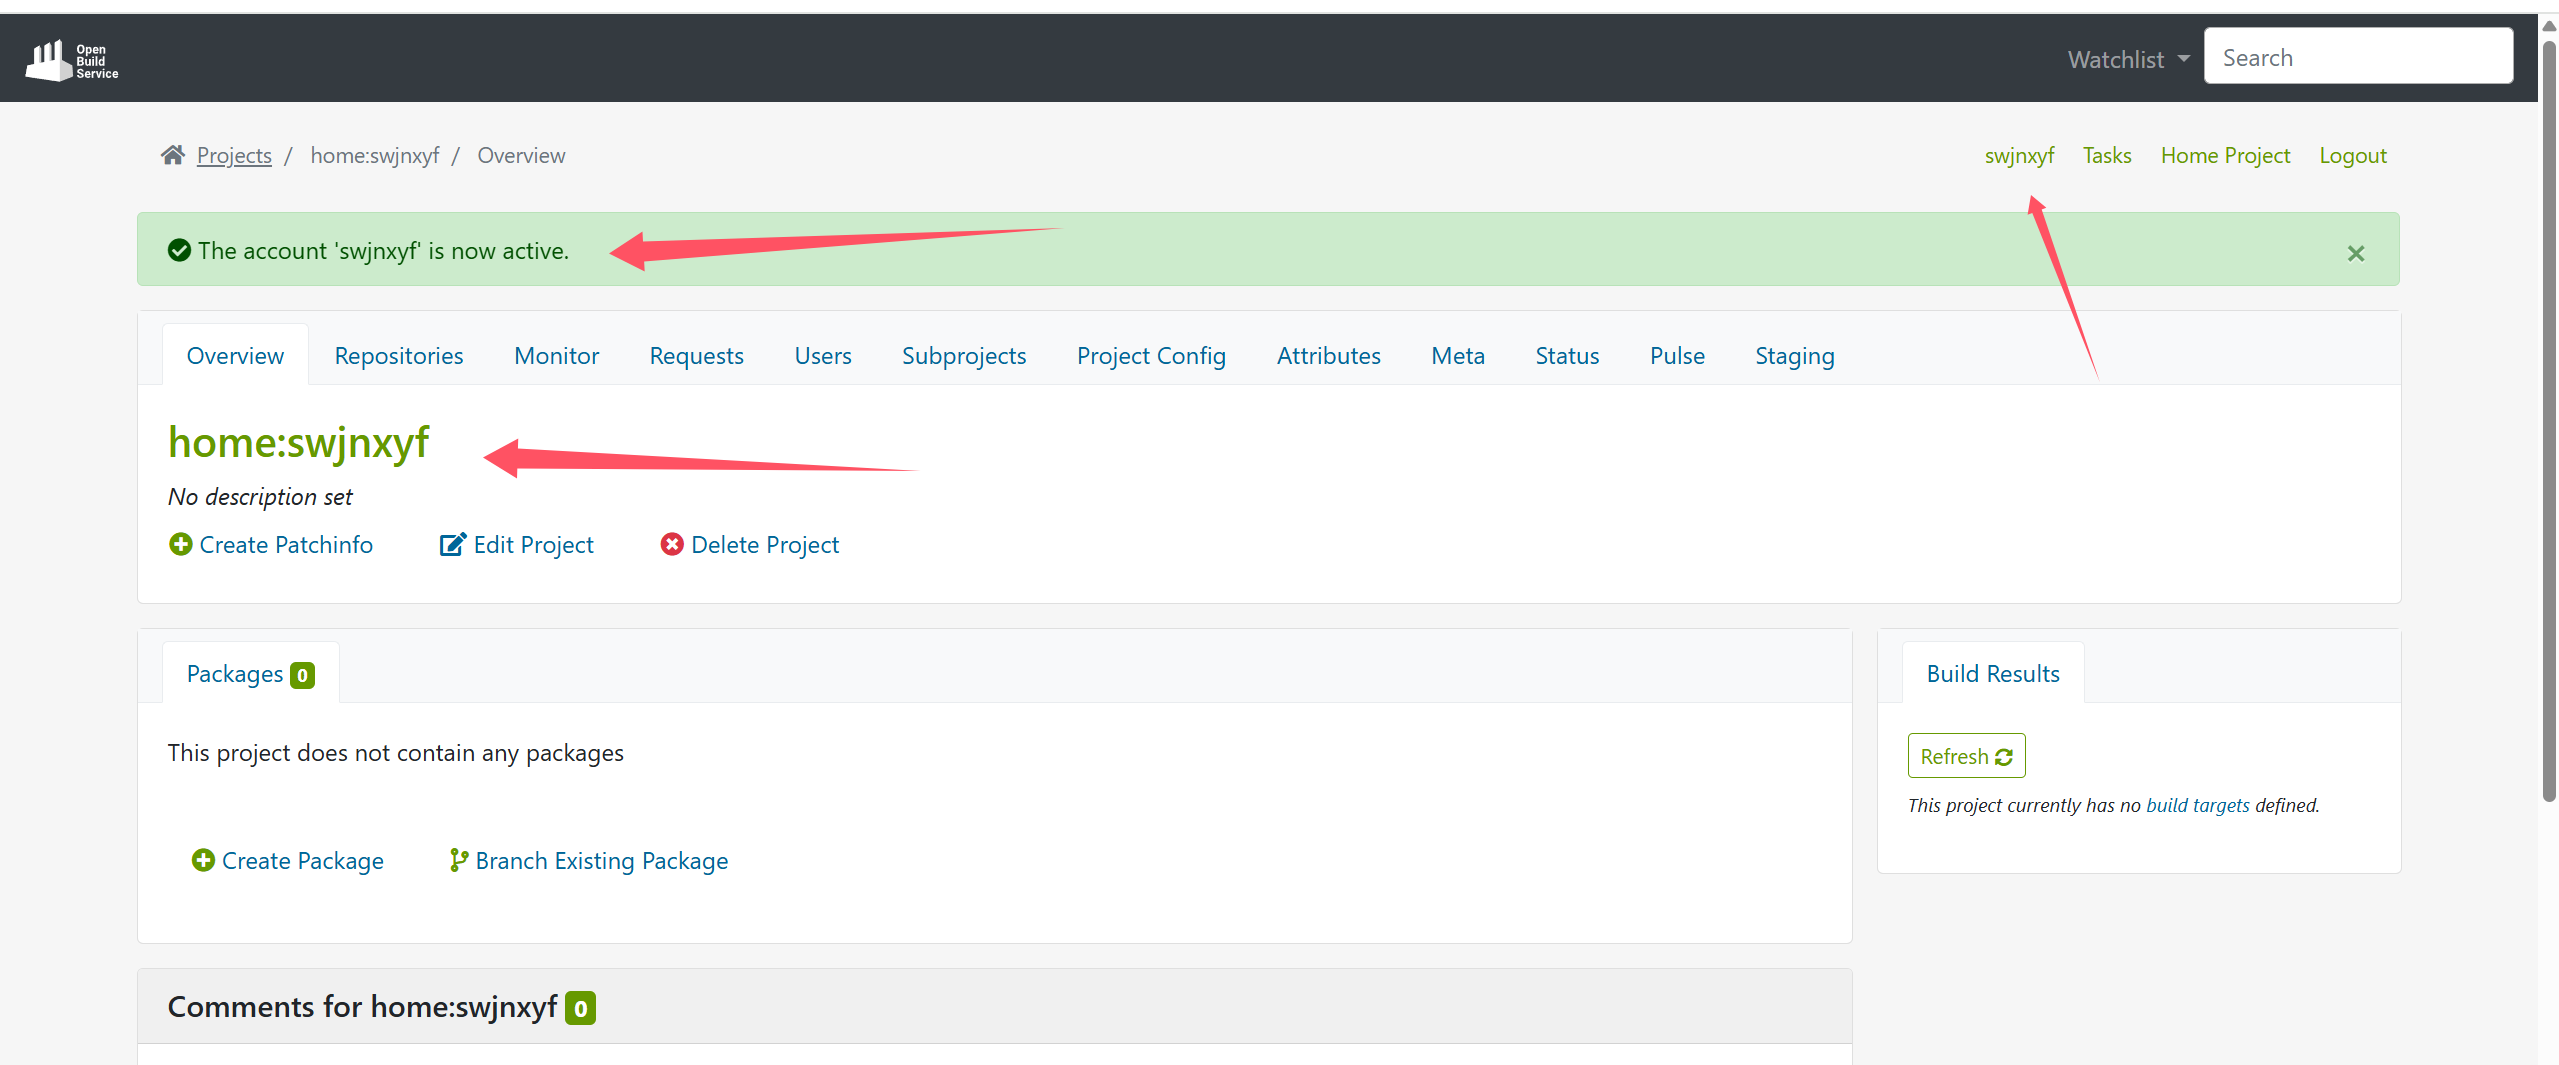
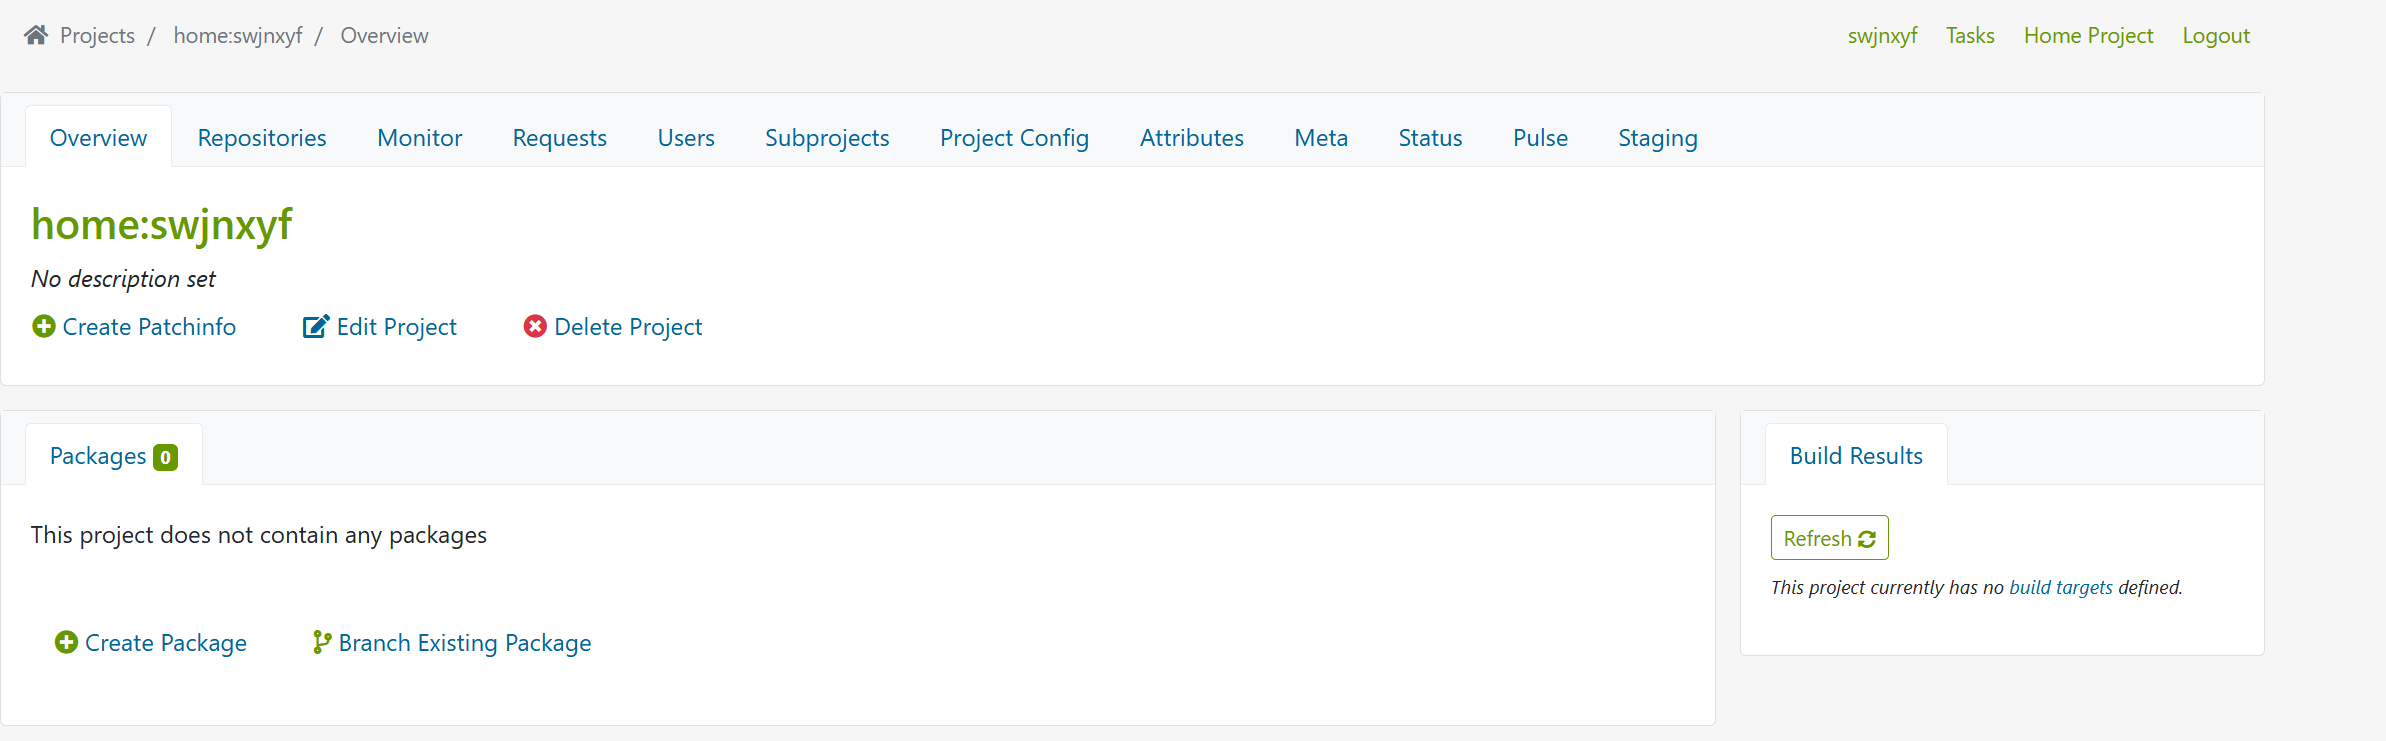
可以看见,新注册的还是空的。然后就是在网站上随便点点,熟悉一下。
https://build.tarsier-infra.isrc.ac.cn/project
#进入这个网址,能看见很多Projects
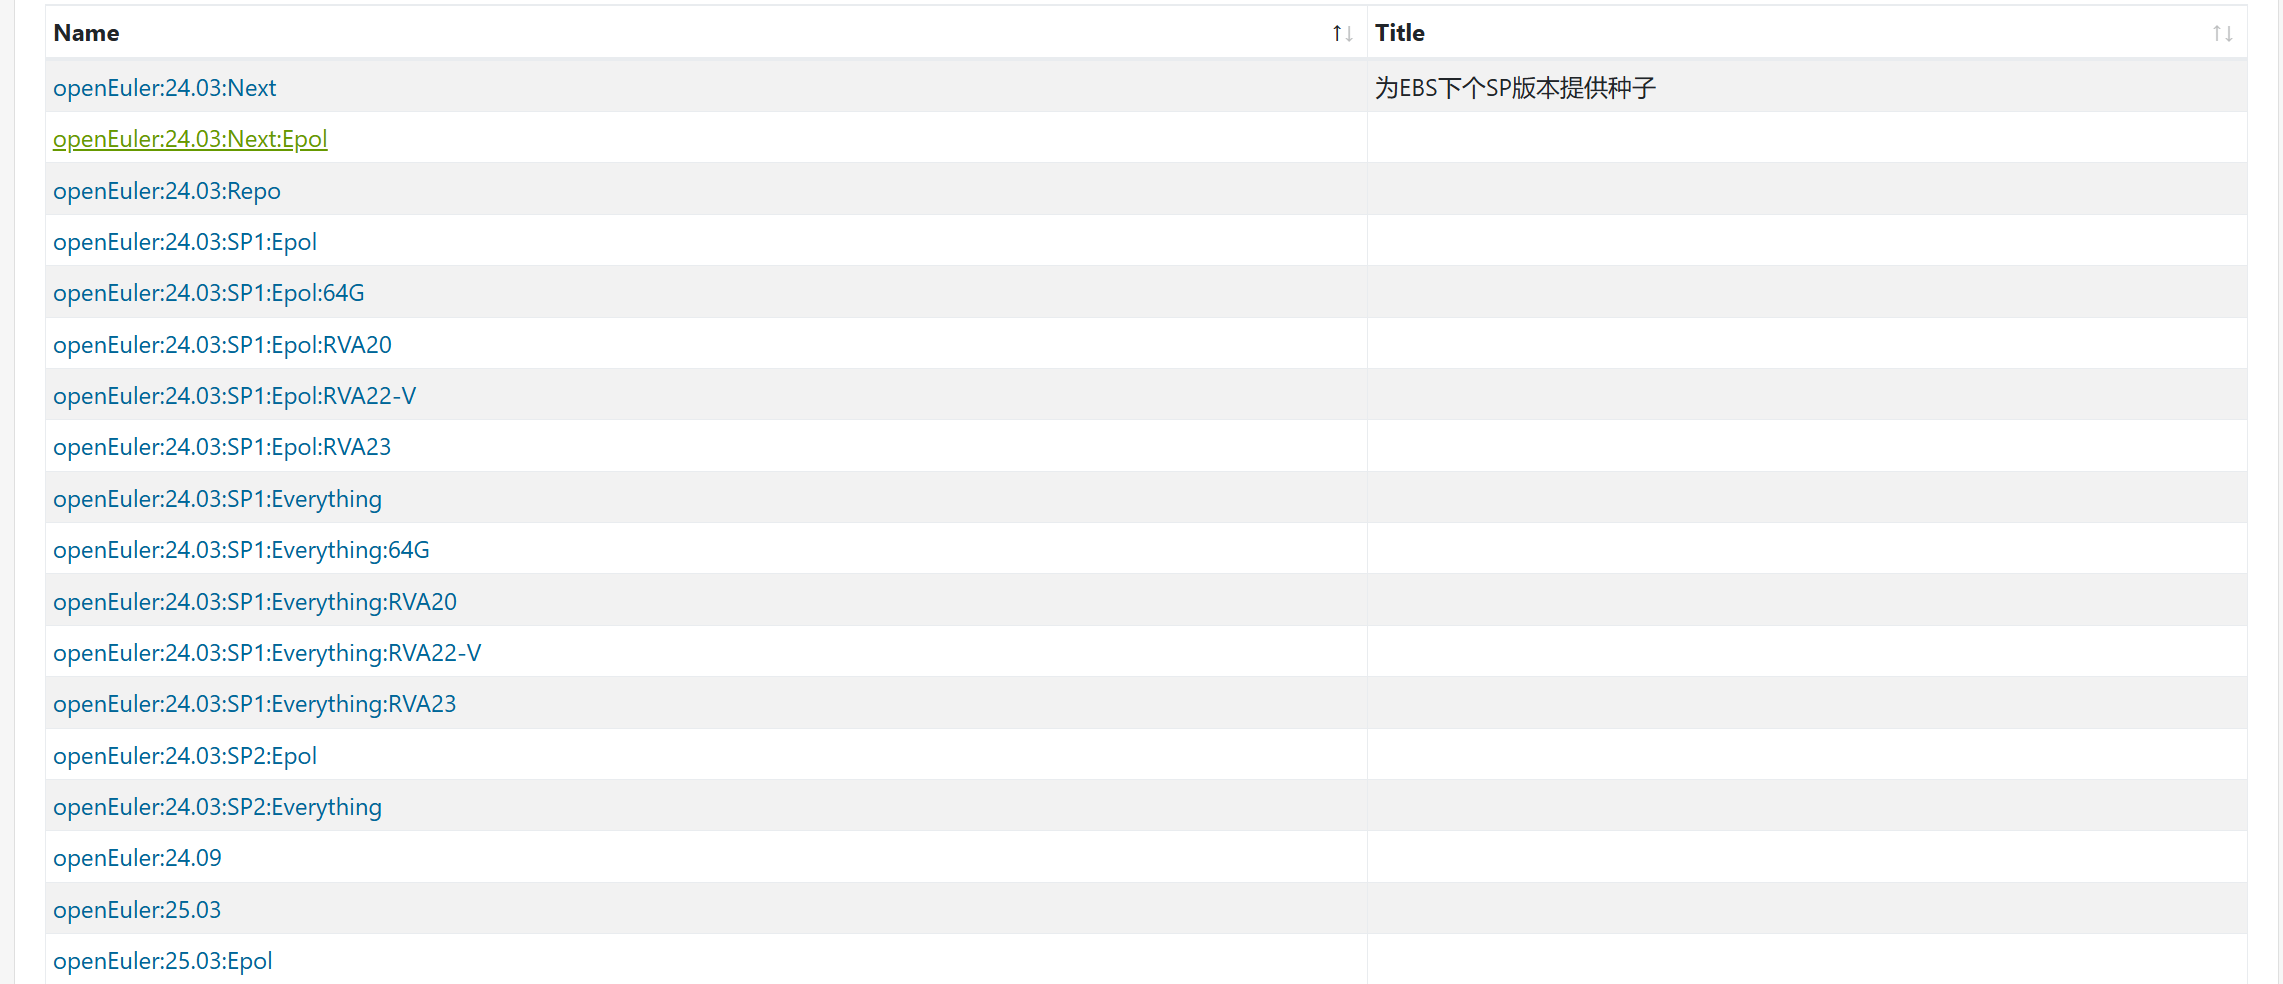
当然了,这个和你的系统版本没有关系,随便哪个都可以,不过我们系统是openeuler25.03,那不妨选个一样的。
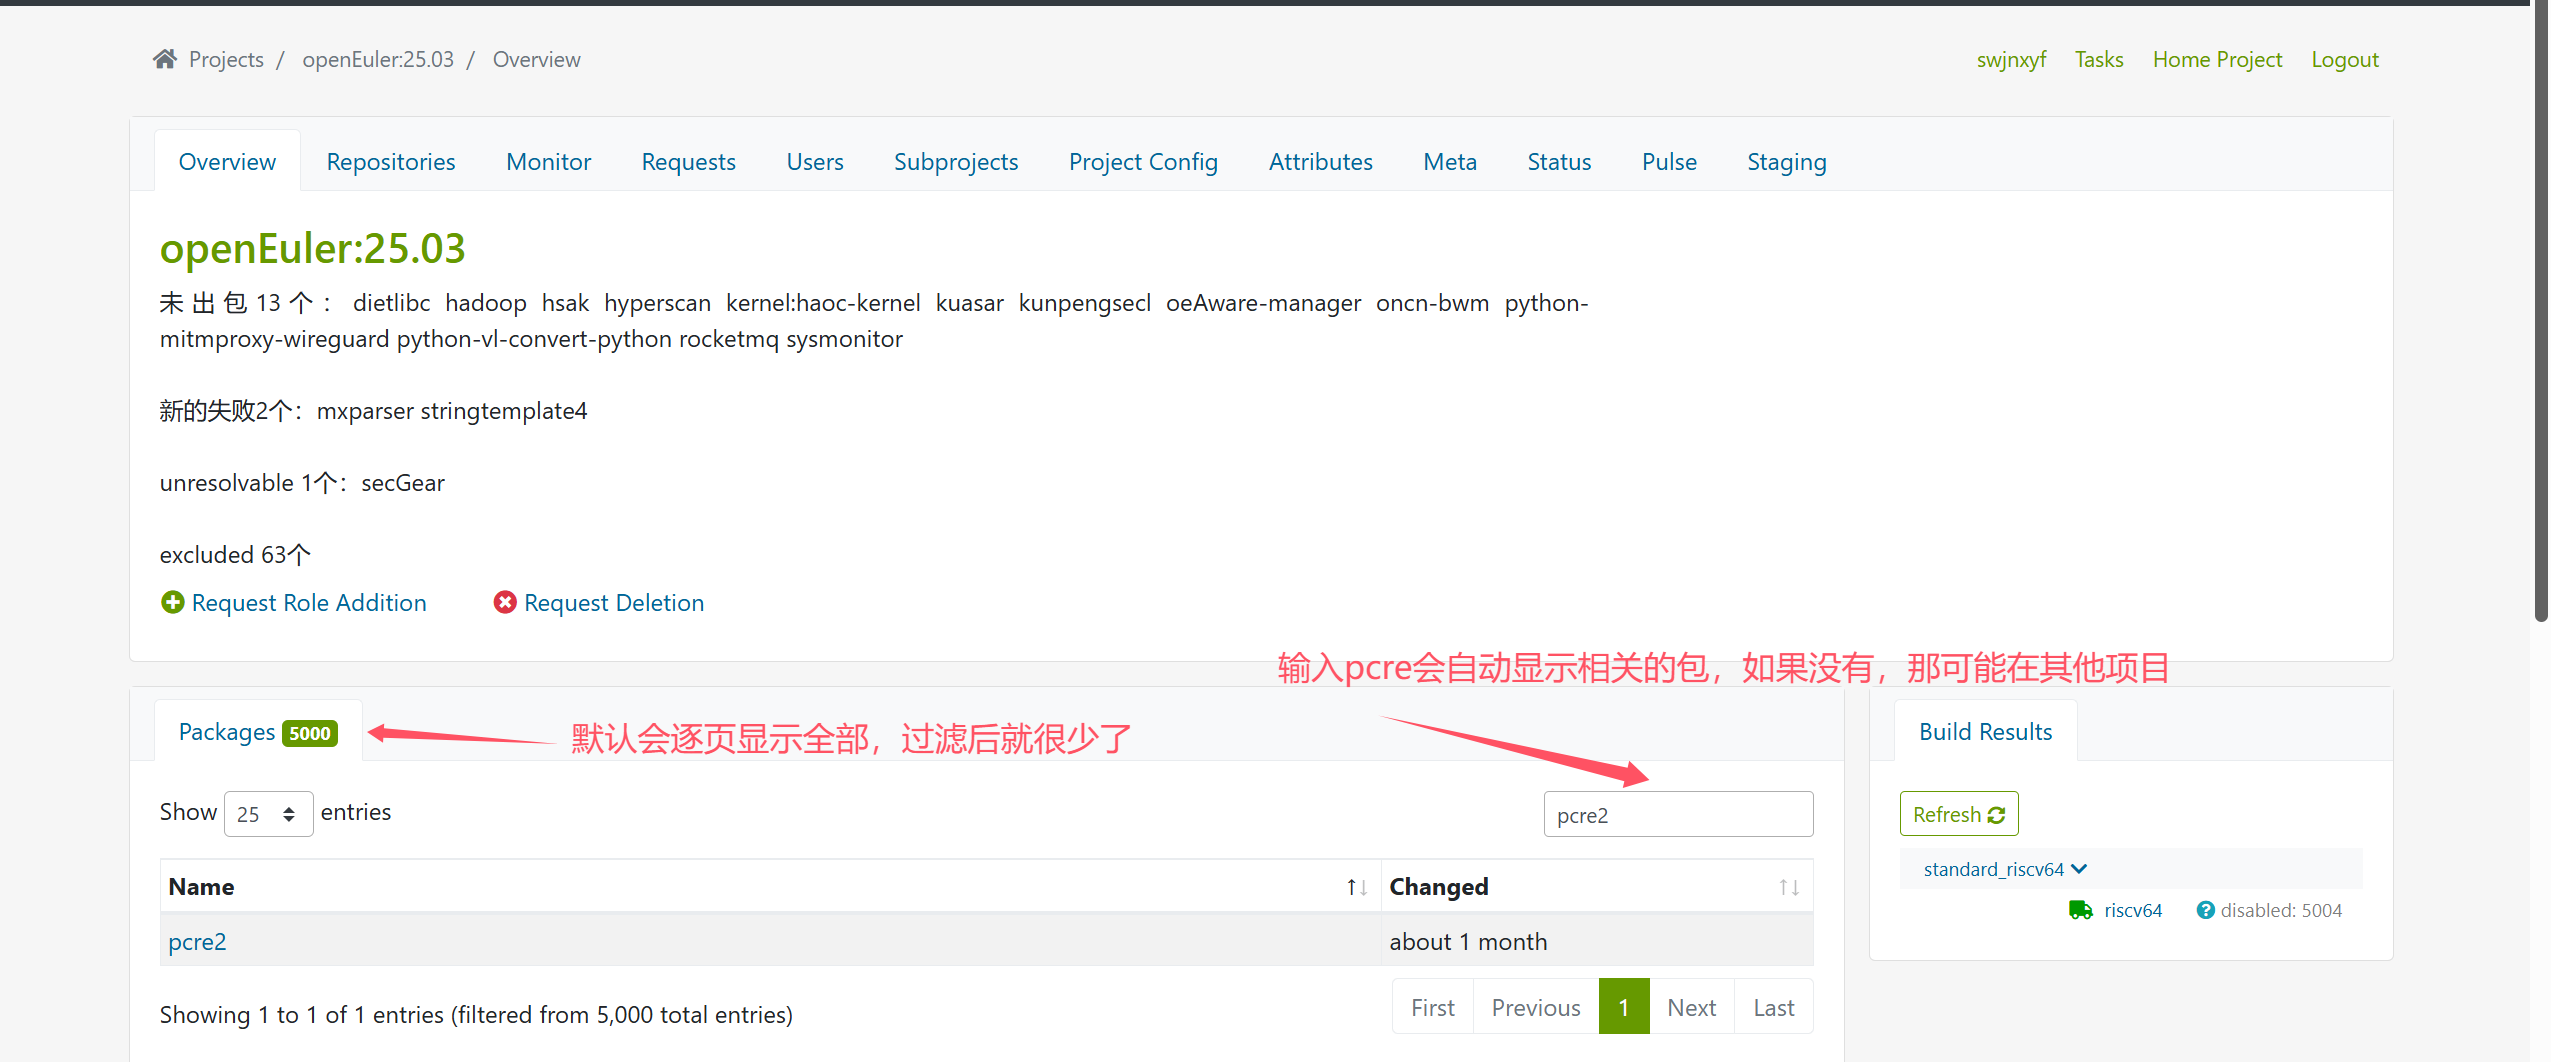
任务介绍是pcre2,那不妨就采用它吧。
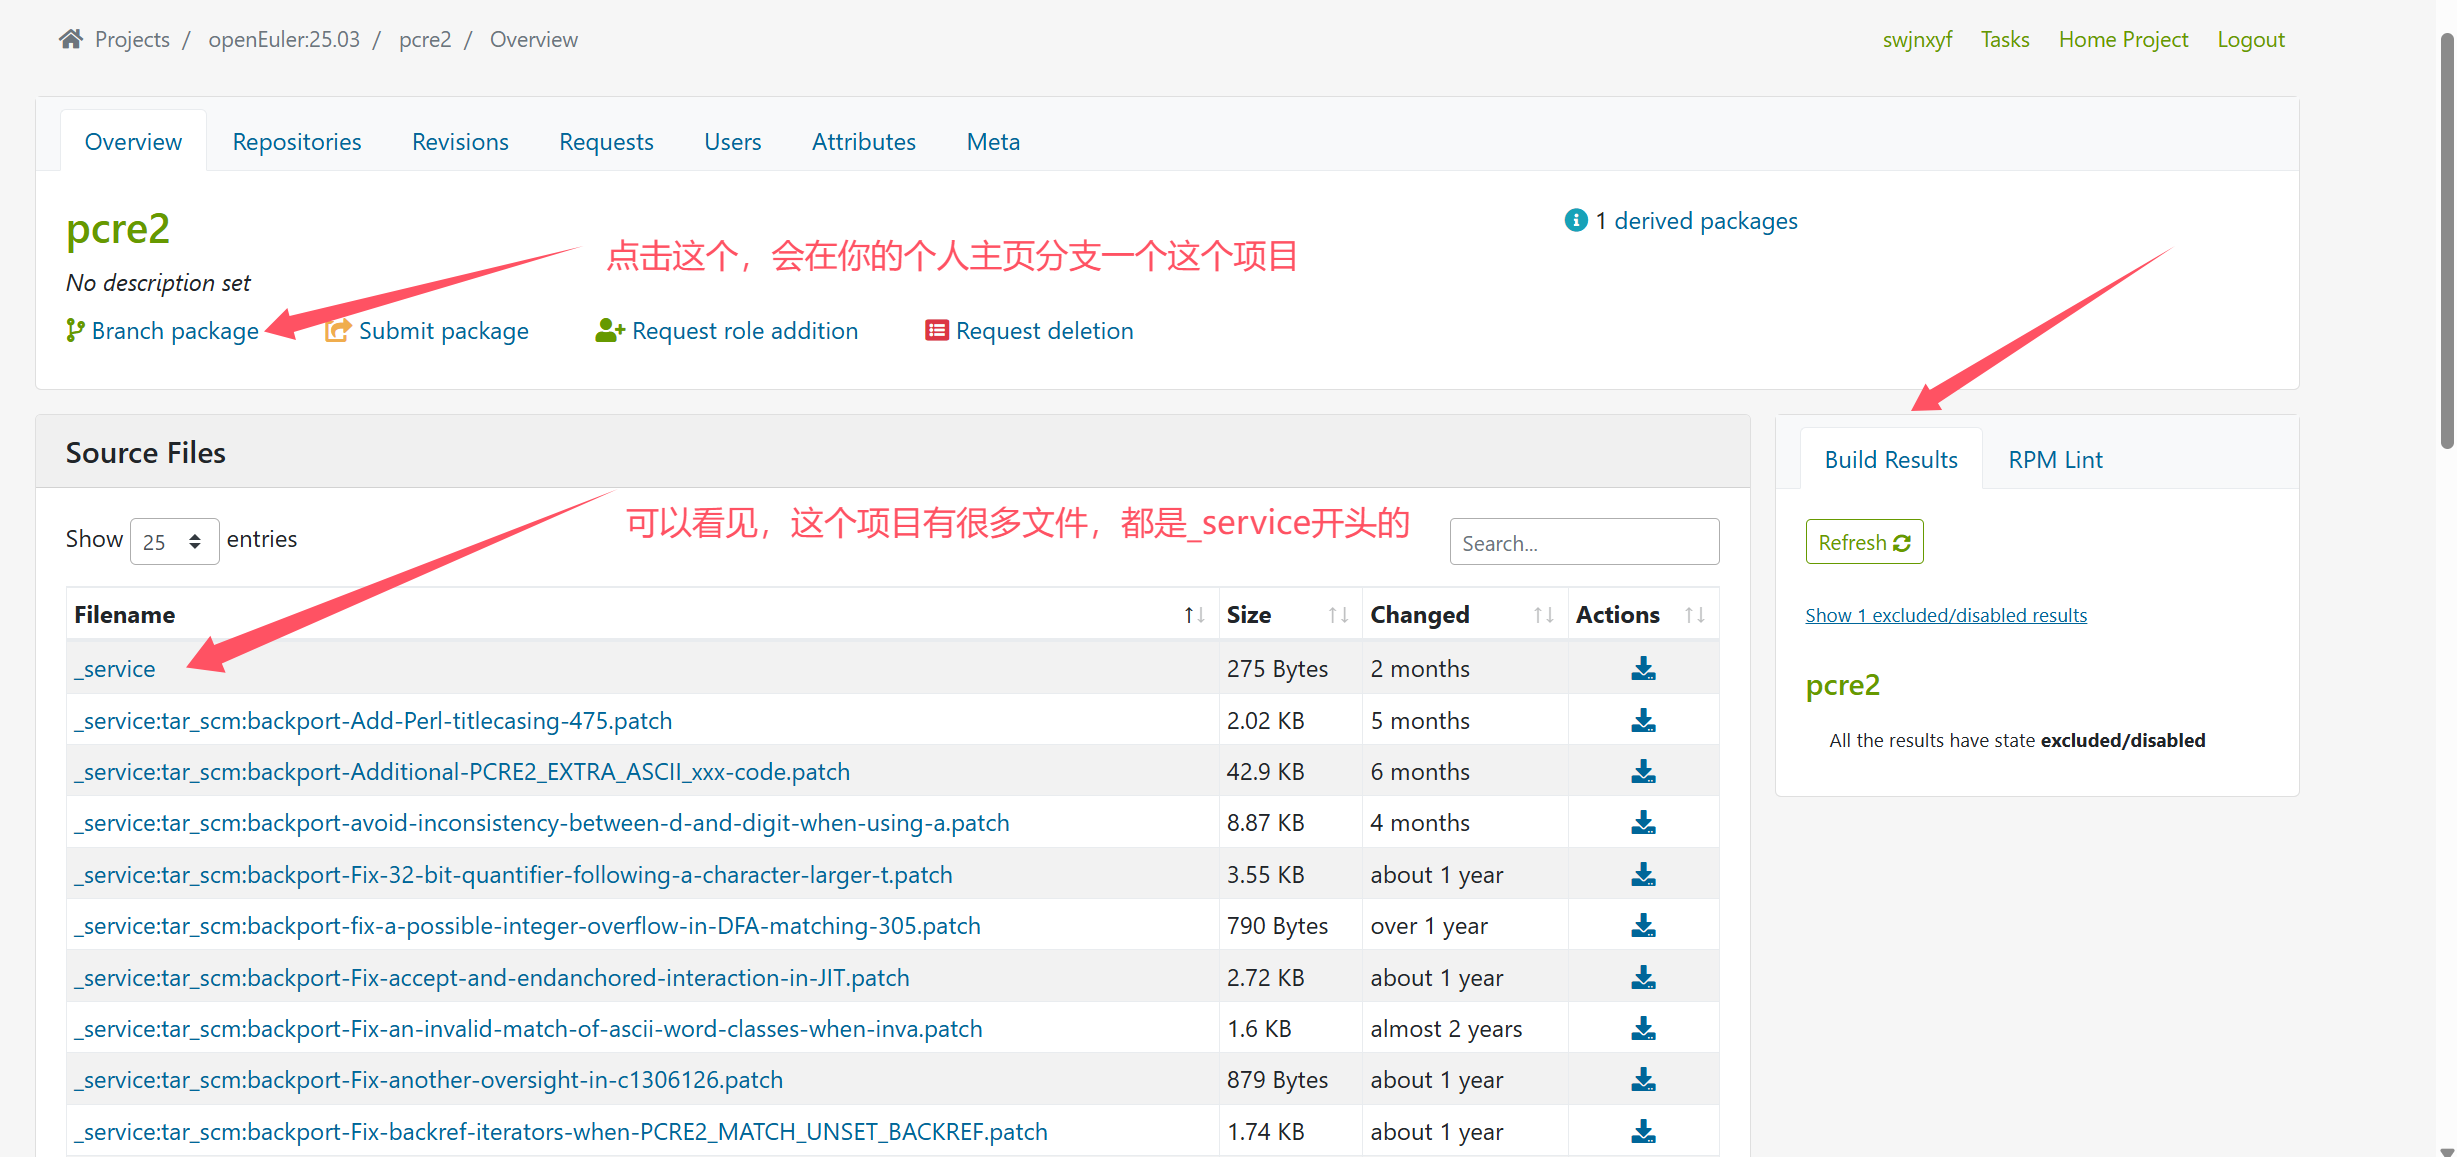
点击右边构建结果的这个Show 1 excluded/disabled results,会展示构建结果。

点击disabled,就能看见日志了,换成其他包也可能是成功或者失败的状态。

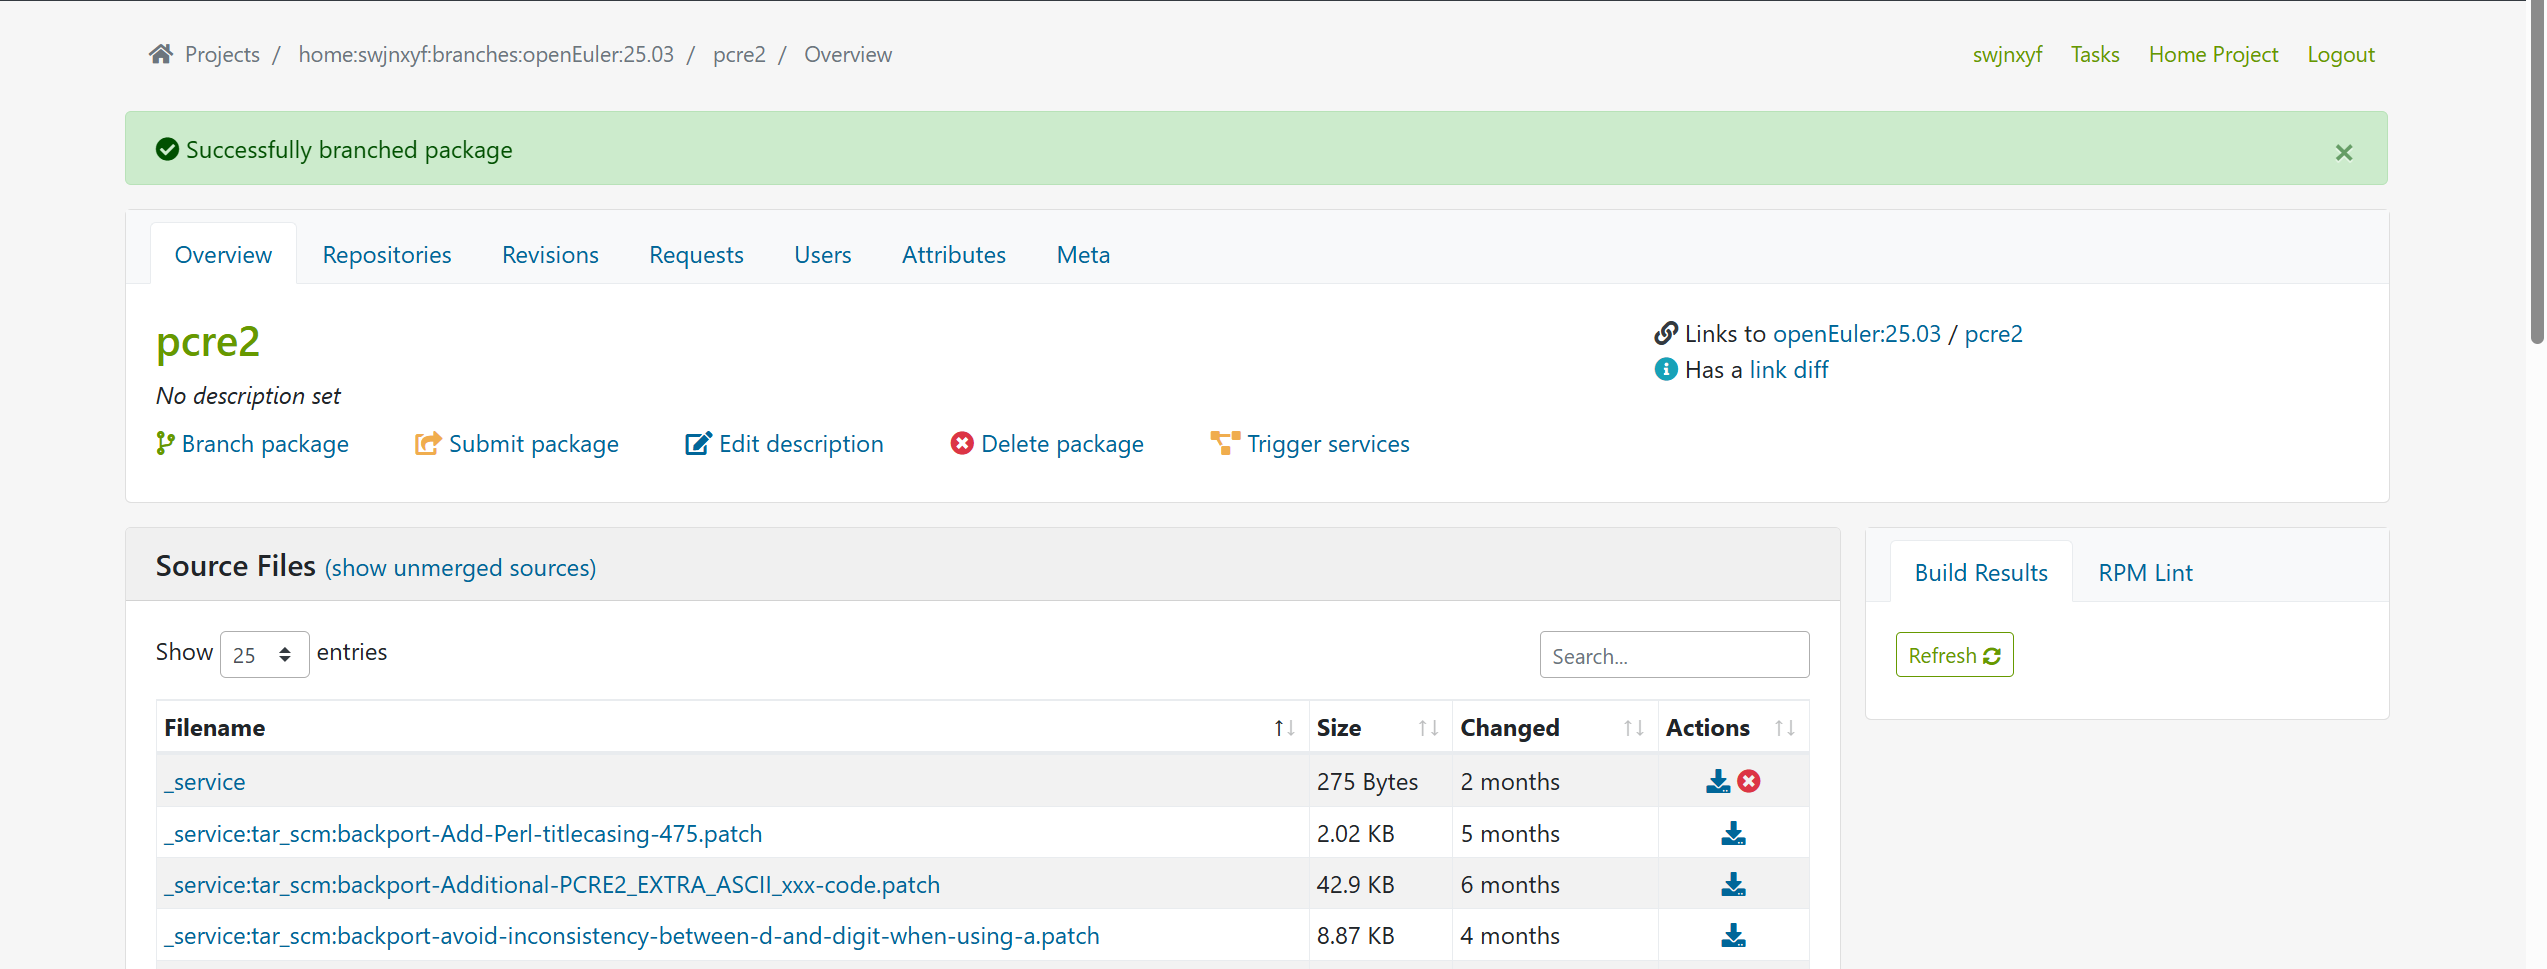
回到刚才的页面,点击Branch package.会弹出下面这个。

点击Accept,就跳转到你的分支项目的这个包里了。
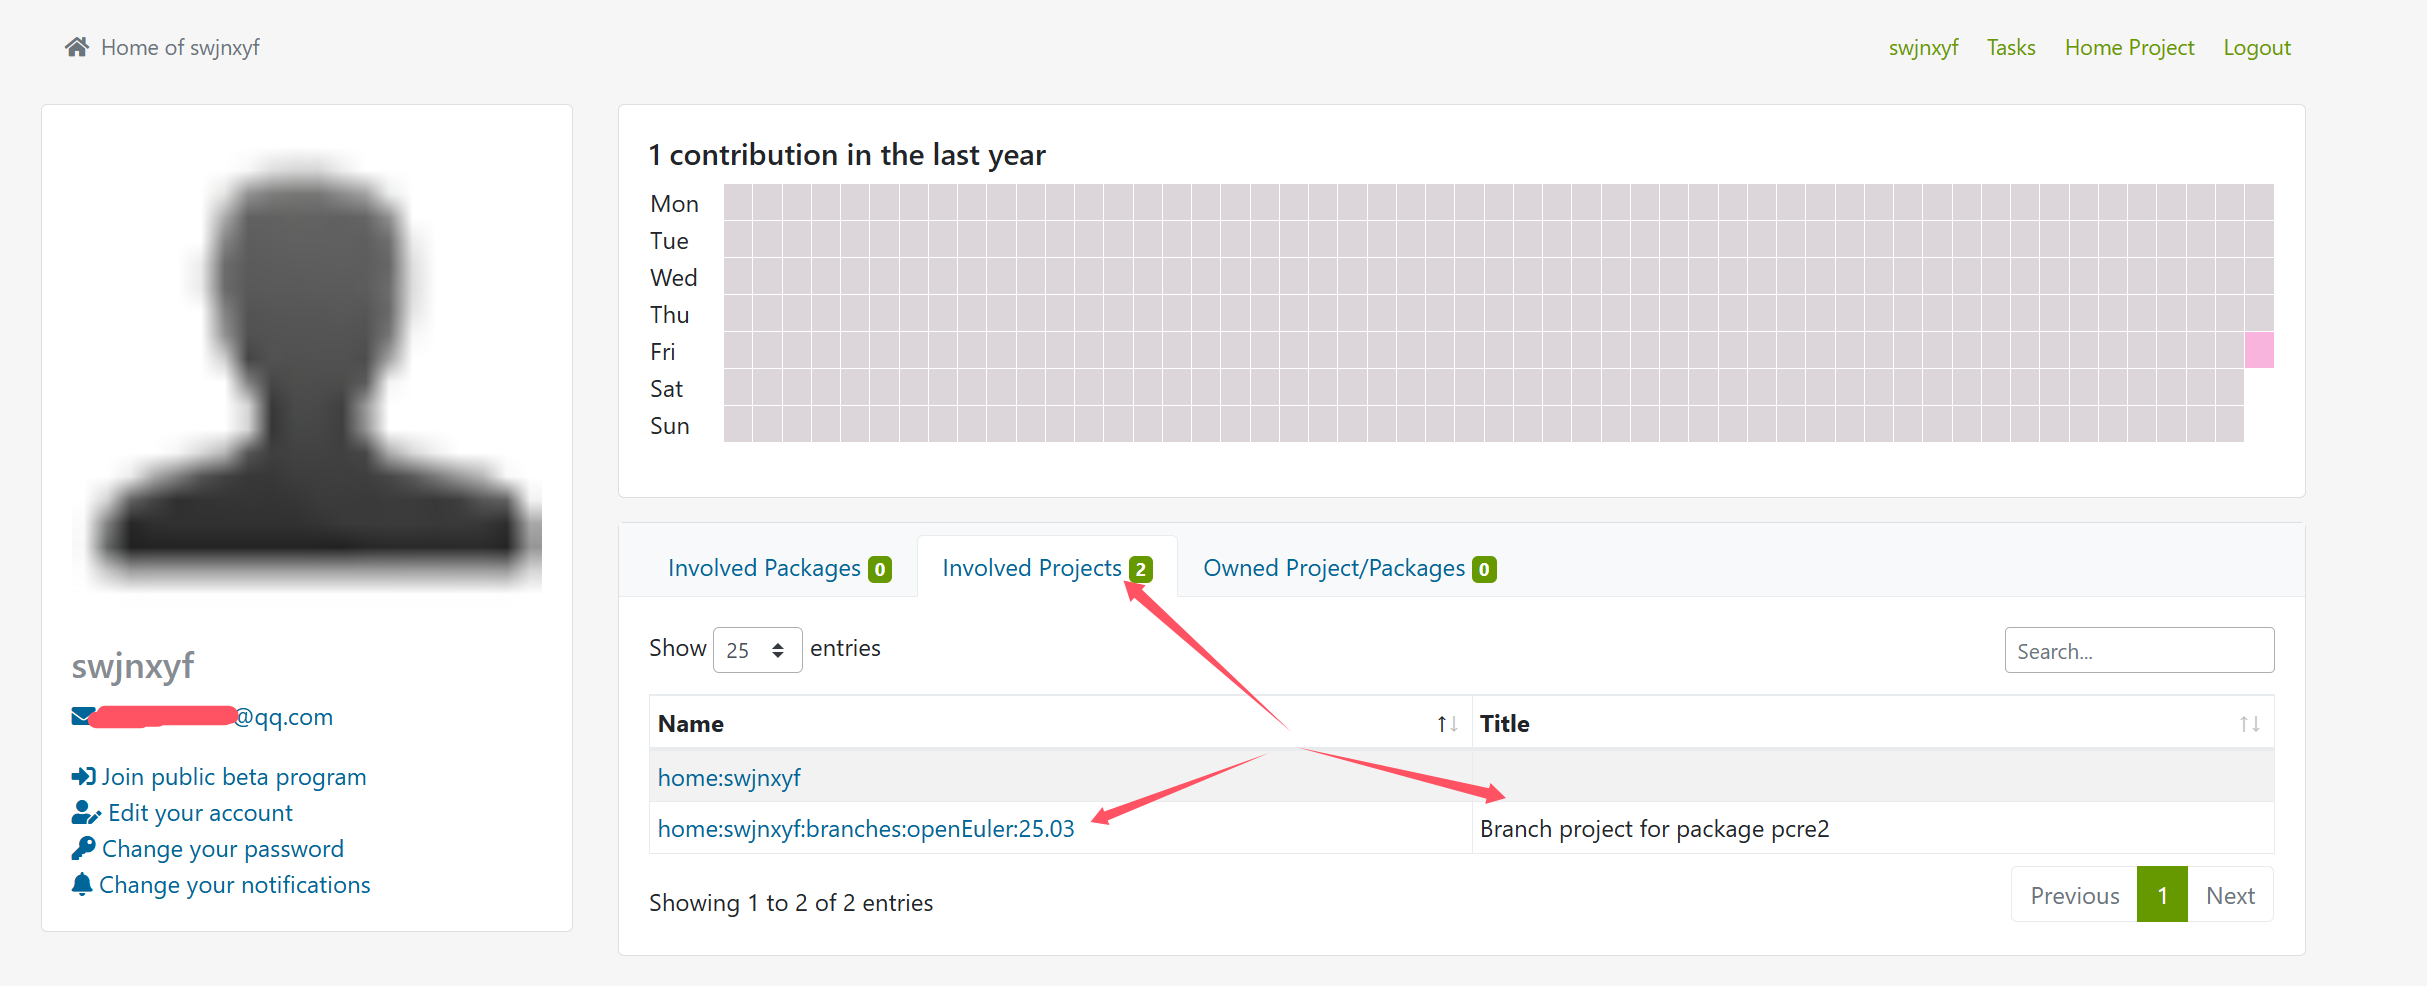
在个人主页,也能看见这个分支的项目,点进去,也会看见这个包。
注意分支出来的项目名称:home:swjnxyf:branches:openEuler:25.03,后面会用到
注意:只有对一个项目第一次分支才会在你的主页创建这个分支项目,后面再分支其他包,就会直接出现在你分支项目里面。
接下来,可以做一下pretask3任务的准备工作:(主要是现在这个系统比较干净,没有额外的东西)
可以点击链接任务二实操直接跳转到任务二的具体操作
尝试使用 qemu user & nspawn 或者 docker 加速完成任务二
当然了,要加速也可以使用其他的方式,比如chroot,需要openeuler25.03版本的根文件系统。
https://mirror.iscas.ac.cn/openeuler-sig-riscv/openEuler-RISC-V/preview/openEuler-23.09-V1-riscv64/
这里面最新的只有23.09版本的,其他地方好像暂时也没有高版本系统的根系统,所以可以自己做一个,思路也很简单,从qcow2里面复制出来就好了。
以下来自于Grok并结合实际进行修改,实测可靠
是的,可以从QEMU运行的RISC-V OpenEuler系统中提取根文件系统(root filesystem)。以下是提取根文件系统的一般步骤:
1. 确认根文件系统位置
根文件系统就在之前解压的qcow2文件中:openEuler-25.03-riscv64.qcow2(qemu虚拟机已关机)
2. 挂载镜像文件
要提取根文件系统,需要将镜像文件挂载到宿主机上。以下是具体步骤:
a. 检查镜像格式
使用qemu-img检查镜像格式:(这个其实pretask1里面确认了)
qemu-img info openEuler-25.03-riscv64.qcow2
确认格式(如qcow2、raw等)。
b. 挂载镜像 (挂载失败的话,请考虑跳过这部分内容)
可以点击链接任务二实操)直接跳转到任务二的具体操作
-
对于qcow2格式:
使用qemu-nbd将qcow2镜像挂载为块设备:sudo modprobe nbd sudo qemu-nbd -c /dev/nbd0 rootfs.img然后,检查分区:
sudo fdisk -l /dev/nbd0根文件系统在
/dev/nbd0p2(第二个分区),挂载分区:sudo mkdir /mnt/rootfs sudo mount /dev/nbd0p2 /mnt/rootfs
c. 验证挂载
挂载成功后,进入/mnt/rootfs检查根文件系统内容:
ls /mnt/rootfs
你应该能看到类似bin、etc、usr等目录。
3. 提取根文件系统
-
复制文件:
将挂载的根文件系统内容复制到指定目录:sudo cp -a /mnt/rootfs /path/to/extracted_rootfs使用
-a确保保留文件权限和属性。 -
创建压缩文件(可选):
如果需要打包根文件系统,可以生成tar或tar.gz文件:cd /mnt/rootfs sudo tar -czf /path/to/rootfs.tar.gz .
4. 清理
完成提取后,卸载并清理:
sudo umount /mnt/rootfs
sudo qemu-nbd -d /dev/nbd0  # 如果使用了qemu-nbd
5. 注意事项
- 权限问题:确保以
root或具有足够权限的账户操作。 - 文件系统类型:OpenEuler可能使用
ext4、xfs等文件系统,挂载时需确保宿主机支持。 - 分区复杂性:如果镜像包含LVM或加密分区,可能需要额外工具(如
vgchange或cryptsetup)激活逻辑卷或解密。 - QEMU运行时的修改:如果在QEMU运行时修改了根文件系统,需确保提取的是最新状态(可能需要先关闭QEMU)。
- OpenEuler版本:不同版本的OpenEuler可能有不同的分区布局或文件系统配置,建议参考官方文档或镜像的构建说明。
6. 验证提取结果
提取后,检查目标目录是否包含完整的根文件系统结构(/bin、/etc、/lib等)。可以用chroot测试:
root@yyjeqhc:~/qemu_oe2503_rootfs/rootfs# pwd
/root/qemu_oe2503_rootfs/rootfs
root@yyjeqhc:~/qemu_oe2503_rootfs/rootfs# ls
afs  bin  boot  chroot.sh  dev  etc  home  lib  lib64  media  mnt  opt  proc  root  run  sbin  srv  sys  tmp  unmount.sh usr  var
#我把它提取到了这里,为了方便主机启动后快速挂载和卸载,准备了两个简易脚本。
chroot.sh
#!/bin/bash

# 定义目标根文件系统目录
ROOTFS_DIR="/root/qemu_oe2503_rootfs/rootfs"

# 检查目标目录是否存在
if [ ! -d "$ROOTFS_DIR" ]; then
    echo "错误:目标根文件系统目录 $ROOTFS_DIR 不存在!"
    exit 1
fi

# 检查是否需要挂载虚拟文件系统
mount_if_needed() {
    local src="$1"
    local dest="$2"
    local type="$3"
    if ! mountpoint -q "$dest"; then
        echo "挂载 $src 到 $dest ..."
        sudo mount $type "$src" "$dest"
    else
        echo "$dest 已经挂载,跳过"
    fi
}

# 挂载必要的虚拟文件系统
mount_if_needed /proc "$ROOTFS_DIR/proc" "-t proc"
mount_if_needed /sys "$ROOTFS_DIR/sys" "--bind"
mount_if_needed /dev "$ROOTFS_DIR/dev" "--bind"
mount_if_needed /dev/pts $ROOTFS_DIR/dev/pts "--bind"

# 进入 chroot 环境
echo "进入 chroot 环境..."
sudo chroot "$ROOTFS_DIR" /bin/bash
unmount.sh
#!/bin/bash

# 定义目标根文件系统目录
ROOTFS_DIR="/root/qemu_oe2503_rootfs/rootfs"

# 检查目标目录是否存在
if [ ! -d "$ROOTFS_DIR" ]; then
    echo "错误:目标根文件系统目录 $ROOTFS_DIR 不存在!"
    exit 1
fi

# 检查并卸载挂载点
umount_if_needed() {
    local mount_point="$1"
    if mountpoint -q "$mount_point"; then
        echo "卸载 $mount_point ..."
        sudo umount "$mount_point"
    else
        echo "$mount_point 未挂载,跳过"
    fi
}

# 卸载虚拟文件系统
umount_if_needed "$ROOTFS_DIR/dev/pts"
umount_if_needed "$ROOTFS_DIR/dev"
umount_if_needed "$ROOTFS_DIR/sys"
umount_if_needed "$ROOTFS_DIR/proc"

echo "所有挂载点已卸载"
#甚至,可以在$home目录下创建快捷方式
root@yyjeqhc:~# ln -s ./qemu_oe2503_rootfs/rootfs/chroot.sh chroot
root@yyjeqhc:~# ln -s ./qemu_oe2503_rootfs/rootfs/unmount.sh unmount
oot@yyjeqhc:~# ./chroot
挂载 /proc 到 /root/qemu_oe2503_rootfs/rootfs/proc ...
挂载 /sys 到 /root/qemu_oe2503_rootfs/rootfs/sys ...
挂载 /dev 到 /root/qemu_oe2503_rootfs/rootfs/dev ...
挂载 /dev/pts 到 /root/qemu_oe2503_rootfs/rootfs/dev/pts ...
进入 chroot 环境...


Welcome to 6.11.0-24-generic

System information as of time: 	2025年 04月 25日 星期五 01:53:46 UTC

System load: 	0.00
Memory used: 	7.5%
Swap used: 	0%
Usage On: 	12%
IP address: 	192.168.126.102
IP address: 	100.92.192.51
IP address: 	172.17.0.1
Users online: 	0

#进去以后,也可以重新编译一下fastfetch,看下编译时间的区别。
[100%] Building C object CMakeFiles/libfastfetch.dir/src/3rdparty/yyjson/yyjson.c.o
[100%] Built target libfastfetch
[100%] Building C object CMakeFiles/fastfetch.dir/src/fastfetch.c.o
[100%] Linking C executable fastfetch
[100%] Built target fastfetch

real	6m59.643s
user	9m37.391s
sys	8m32.555s
#每次运行,时长都是不固定的,但可以确定,速度还是会快很多的。
接下来,实操任务二吧:(启动qemu并进入)
首先配置osc账号,使用上面注册的账号密码
[root@localhost ~]# osc config

Your user account / password are not configured yet.
You will be asked for them below, and they will be stored in
/root/.config/osc/oscrc for future use.

Creating osc configuration file /root/.config/osc/oscrc ...
Username [api.opensuse.org]: swjnxyf
Password [swjnxyf@api.opensuse.org]:
To use keyrings please install python3-keyring.

NUM NAME              DESCRIPTION
1   Transient         Do not store the password and always ask for it [secure, in-memory]
2   Obfuscated config Store the password in obfuscated form in the osc config file [insecure, persistent]
3   Config            Store the password in plain text in the osc config file [insecure, persistent]
Select credentials manager [default=1]: 3
done
Too few arguments
#这个路径就是osc的配置文件,需要调整下网址
[root@localhost ~]# vim /root/.config/osc/oscrc
#默认是这样
···
apiurl=https://api.opensuse.org

[https://api.opensuse.org]
···
#替换为下面的
···
apiurl = https://build.tarsier-infra.isrc.ac.cn/
no_verify = 1

[https://build.tarsier-infra.isrc.ac.cn]
···
然后设置一个脚本
#因为包里面文件名称在本地需要进行修改。
echo "alias fix='rm -f _service;for file in \`ls\`;do new_file=\${file##*:};mv \$file \$new_file;done'" >> ~/.bashrc
source ~/.bashrc
#设置好以后,进入包目录,直接fix就可以直接构建了。
准备就绪,就是下载包到本地
[root@localhost ~]# pwd
/root
#下面这个命令,只会把该project下的pcre2包进行元数据下载,项目名称就是前面注意的
[root@localhost ~]# osc checkout home:swjnxyf:branches:openEuler:25.03 pcre2
A    home:swjnxyf:branches:openEuler:25.03
A    home:swjnxyf:branches:openEuler:25.03/pcre2
/root/home:swjnxyf:branches:openEuler:25.03/pcre2/.osc/sources/_service | Elapsed Time: 0:00:00
A    home:swjnxyf:branches:openEuler:25.03/pcre2/_service
At revision 687eb348c5c3ed50b99c6767f5f715d7.
[root@localhost ~]# cd home\:swjnxyf\:branches\:openEuler\:25.03/pcre2/
[root@localhost pcre2]# ls
_service
#没有网站看见的其他文件,还需要一步操作
[root@localhost pcre2]# osc up -S
/root/home:swjnxyf:branches:openEuler:25.03/pcre2/_service:tar_scm:backport-Add-Perl-titlecasing-475.patch / Elapsed Time: 0:/root/home:swjnxyf:branches:openEuler:25.03/pcre2/_service:tar_scm:backport-Add-Perl-titlecasing-475.patch | Elapsed Time: 0:00:00
......
root@localhost pcre2]# ls
_service
_service:tar_scm:backport-Additional-PCRE2_EXTRA_ASCII_xxx-code.patch
_service:tar_scm:backport-Add-Perl-titlecasing-475.patch
_service:tar_scm:backport-avoid-inconsistency-between-d-and-digit-when-using-a.patch
_service:tar_scm:backport-Fix-32-bit-quantifier-following-a-character-larger-t.patch
···
#运行fix之前要先配置好fix命令
[root@localhost pcre2]# fix
[root@localhost pcre2]# ls
backport-Additional-PCRE2_EXTRA_ASCII_xxx-code.patch
backport-Add-Perl-titlecasing-475.patch
backport-avoid-inconsistency-between-d-and-digit-when-using-a.patch
···
#现在,文件名称都正常了,可以直接构建
[root@localhost pcre2]# osc build
Building pcre2.spec for standard_riscv64/riscv64
Using local file: pcre2.spec
Getting buildconfig from server and store to /root/home:swjnxyf:branches:openEuler:25.03/pcre2/.osc/_buildconfig-standard_riscv64-riscv64
Getting buildinfo from server and store to /root/home:swjnxyf:branches:openEuler:25.03/pcre2/.osc/_buildinfo-standard_riscv64-riscv64.xml
Updating cache of required packages

The build root needs packages from project 'openEuler:25.03'.
Note that malicious packages can compromise the build result or even your system.
Would you like to ...
0 - quit (default)
1 - always trust packages from 'openEuler:25.03'
2 - trust packages just this time
? 1
#直接选1就好了,自己的机器还是可以信任的哈,然后就会开始构建了,过程也会漫长,可以做点其他的事情。
#经历漫长的构建过程:
[ 1608s] ++ jobs -p
[ 1608s] + exit 0
[ 1609s] Executing(rmbuild): /bin/sh -e /var/tmp/rpm-tmp.bOJ0RU
[ 1609s] + umask 022
[ 1609s] + cd /home/abuild/rpmbuild/BUILD
[ 1609s] + rm -rf pcre2-10.42 pcre2-10.42.gemspec
[ 1609s] + RPM_EC=0
[ 1609s] ++ jobs -p
[ 1609s] + exit 0
[ 1609s]
[ 1609s] RPM build warnings:
[ 1609s]     line 51: It's not recommended to have unversioned Obsoletes: Obsoletes:      pcre2-utf16 pcre2-utf32 pcre2-tools
[ 1609s]     line 75: It's not recommended to have unversioned Obsoletes: Obsoletes:   pcre2-static
[ 1612s] ... checking for files with abuild user/group
[ 1613s]
[ 1613s]  finished "build pcre2.spec" at Fri Apr 25 03:01:33 UTC 2025.
[ 1613s]

/var/tmp/build-root/standard_riscv64-riscv64/home/abuild/rpmbuild/SRPMS/pcre2-10.42-13.oe2503.src.rpm

/var/tmp/build-root/standard_riscv64-riscv64/home/abuild/rpmbuild/RPMS/noarch/pcre2-help-10.42-13.oe2503.noarch.rpm
/var/tmp/build-root/standard_riscv64-riscv64/home/abuild/rpmbuild/RPMS/riscv64/pcre2-devel-10.42-13.oe2503.riscv64.rpm
/var/tmp/build-root/standard_riscv64-riscv64/home/abuild/rpmbuild/RPMS/riscv64/pcre2-10.42-13.oe2503.riscv64.rpm
#可以直接使用dnf进行安装,不做演示。
到这里,pretask2也就结束了。不过不妨探索一下osc的其他命令。
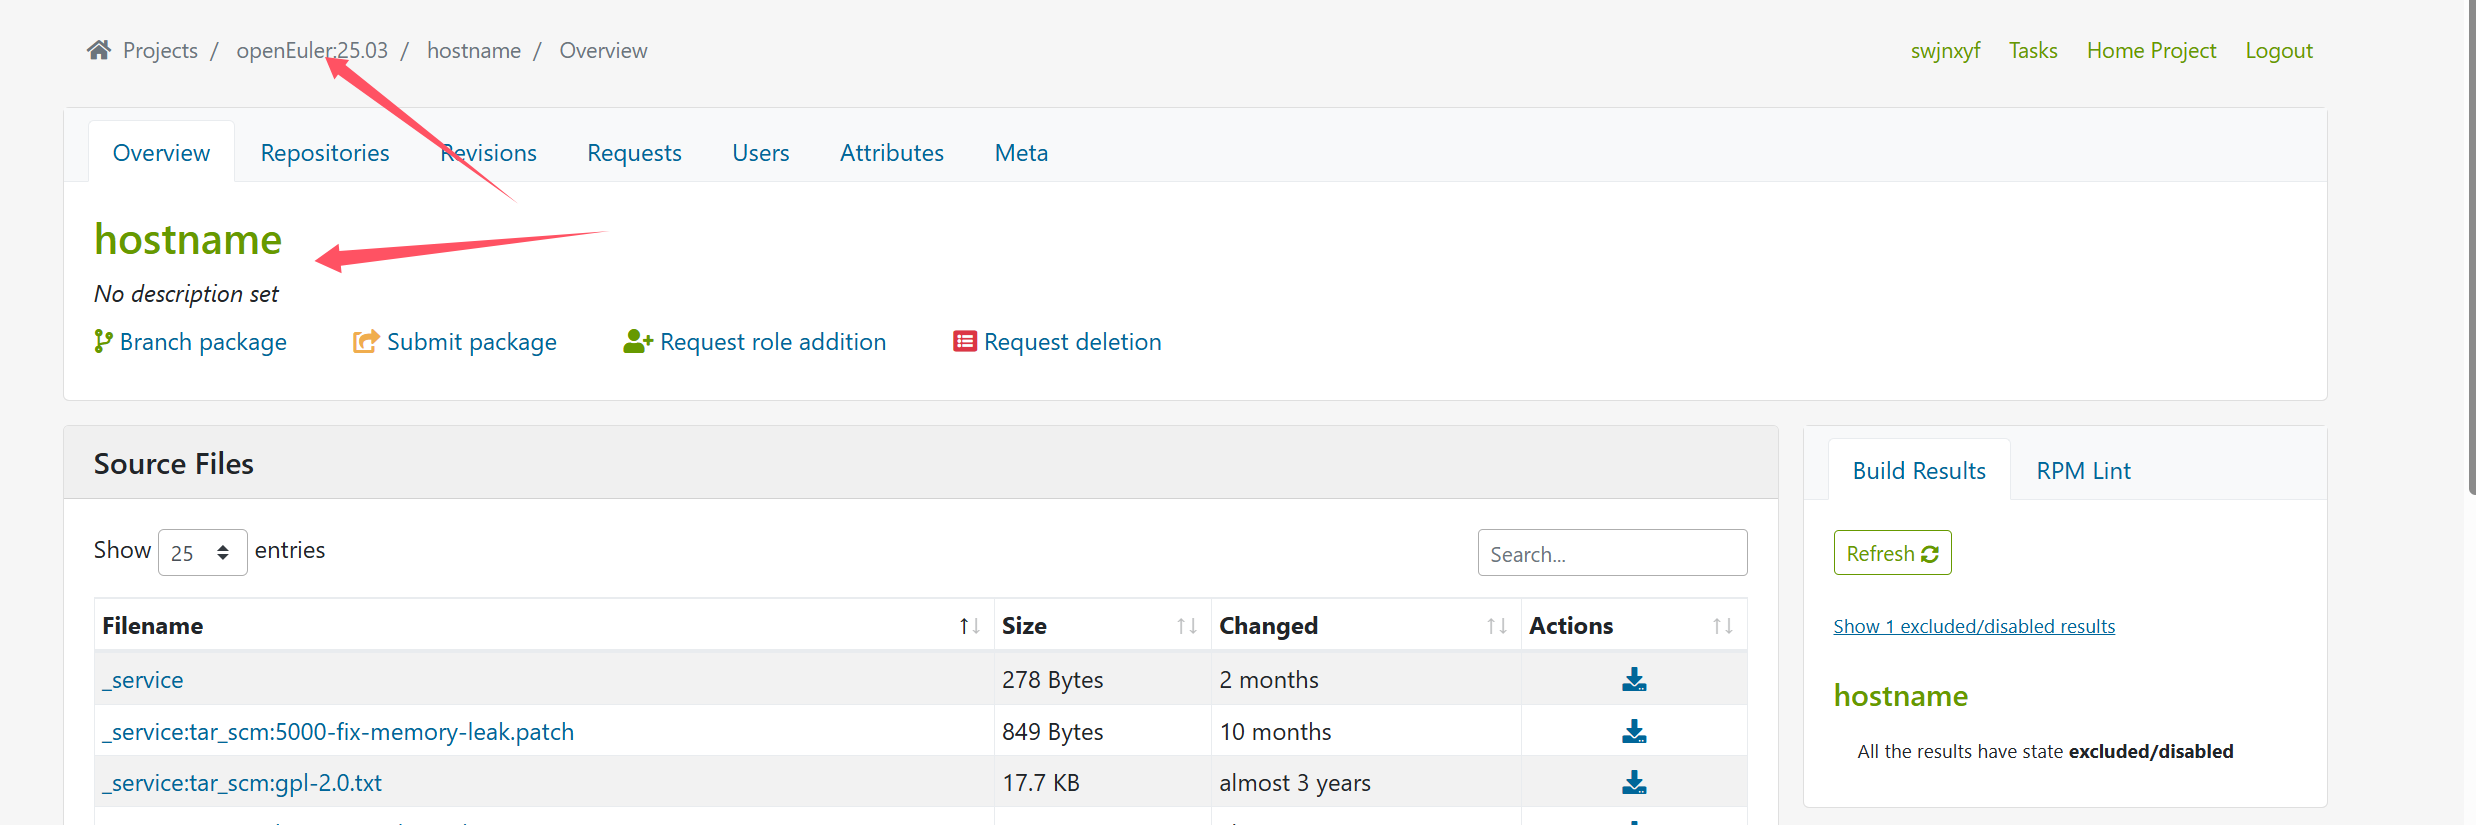
还是去官网找一个包,这次不点击网页了,直接使用命令行进行分支。
#这是网址 https://build.tarsier-infra.isrc.ac.cn/package/show/openEuler:25.03/hostname
#也就是网址的最后两项出现在branch后面
#回到/root,然后运行
[root@localhost ~]# osc branch openEuler:25.03 hostname
A working copy of the branched package can be checked out with:

osc -A https://build.tarsier-infra.isrc.ac.cn co home:swjnxyf:branches:openEuler:25.03/hostname
#然后给了你一个语句,执行就好了。
[root@localhost ~]# osc -A https://build.tarsier-infra.isrc.ac.cn co home:swjnxyf:branches:openEuler:25.03/hostname
A    home:swjnxyf:branches:openEuler:25.03/hostname
/root/home:swjnxyf:branches:openEuler:25.03/hostname/.osc/sources/_service | Elapsed Time: 0:00:00
A    home:swjnxyf:branches:openEuler:25.03/hostname/_service
At revision eb58b04723c26fd0e8966c8e9802d471.
[root@localhost ~]# cd home\:swjnxyf\:branches\:openEuler\:25.03/
[root@localhost home:swjnxyf:branches:openEuler:25.03]# ls
hostname  pcre2
[root@localhost home:swjnxyf:branches:openEuler:25.03]# cd hostname/
[root@localhost hostname]# ls
_service
#后面的操作就一样了。
#osc up -S
#fix
#osc build
命令行分支以后,官网也会同步出现变化。

回到根目录,探索一下使用其他的命令。
看官网,这个项目,还是空的,除了从其他项目branch外,还可以自己加一个包。
不如使用之前的fastfetch,观察官网的其他项目进行操作。
首先编辑项目的配置文件,参考之前分支的项目(-e是编辑模式,不加就是查看了)
基本就是复制过去,改一下第一行的name就好了。字段具体的含义应该很明显了。
osc meta prj -e home:swjnxyf:branches:openEuler:25.03
<project name="home:swjnxyf:branches:openEuler:25.03">
  <title>Branch project for package pcre2</title>
  <description>This project was created for package pcre2 via attribute OBS:Maintained</description>
  <person userid="swjnxyf" role="maintainer"/>
  <publish>
    <disable/>
  </publish>
  <repository name="standard_riscv64">
    <path project="openEuler:25.03" repository="standard_riscv64"/>
    <arch>riscv64</arch>
  </repository>
</project>
osc meta prj -e home:swjnxyf(这个配置只需要一次,针对project的)
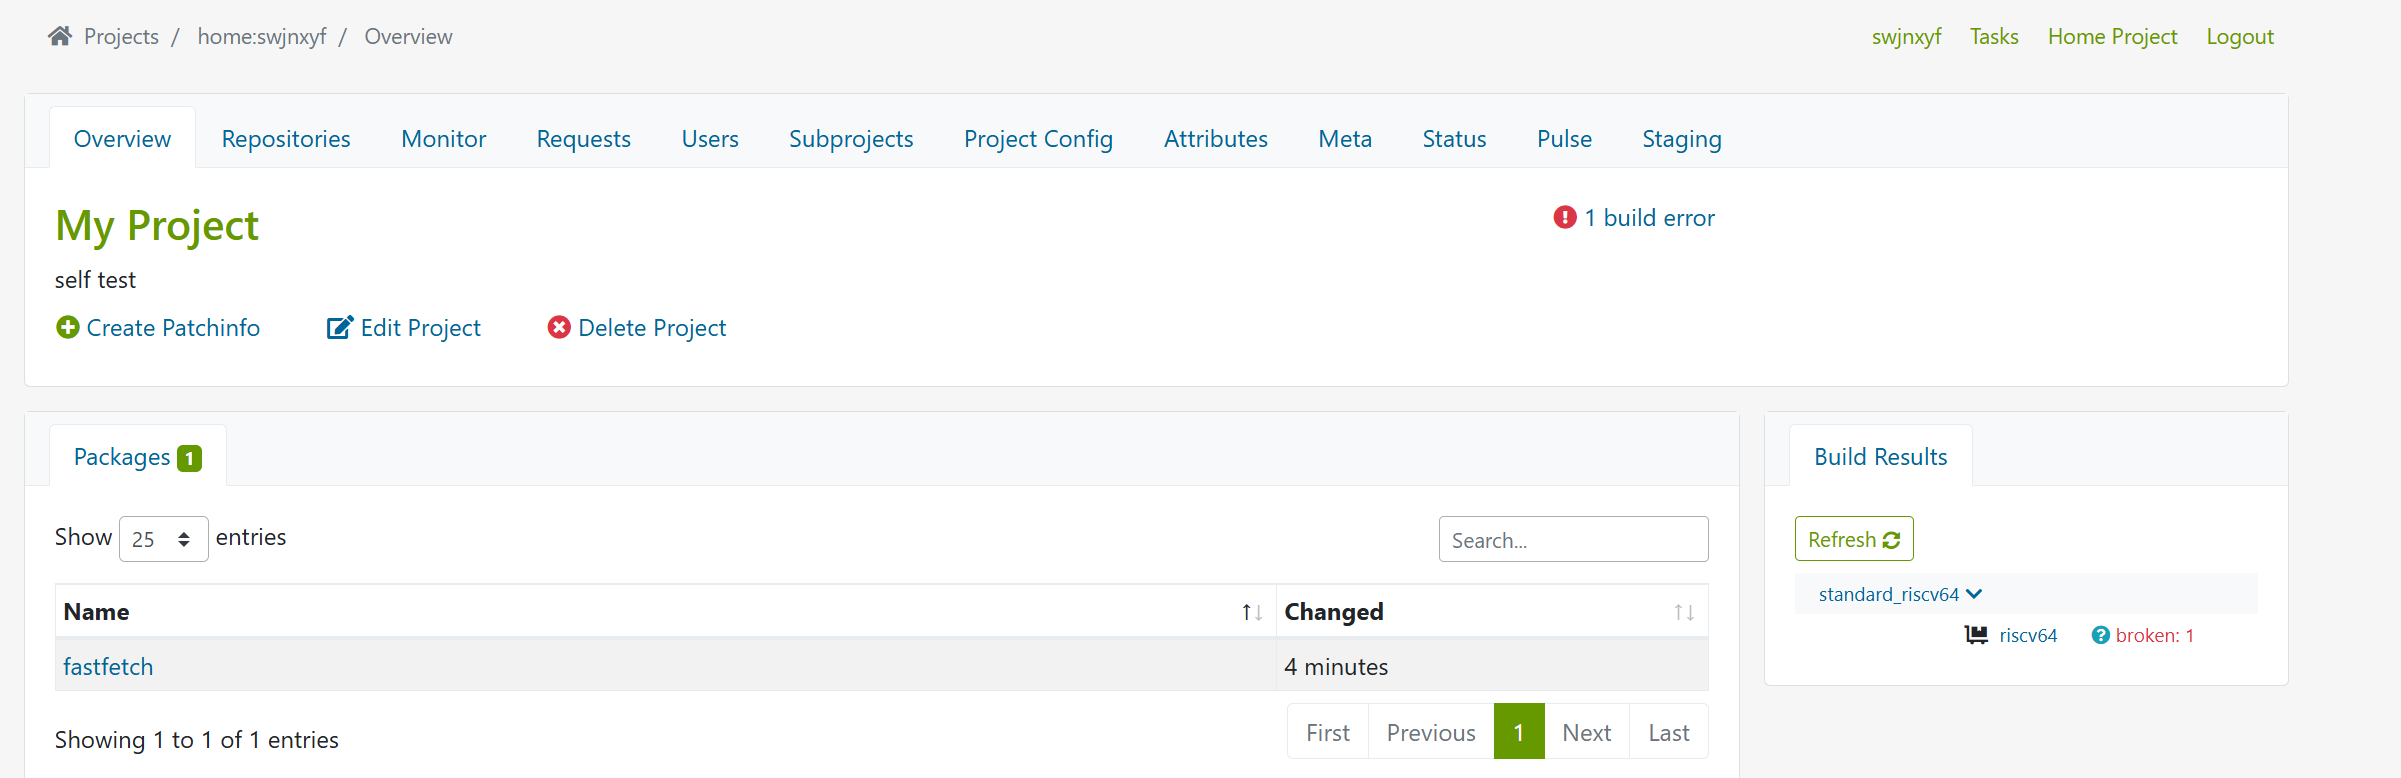
<project name="home:swjnxyf">
  <title>My Project</title>
  <description>self test</description>
  <person userid="swjnxyf" role="maintainer"/>
  <publish>
    <disable/>
  </publish>
  <repository name="standard_riscv64">
    <path project="openEuler:25.03" repository="standard_riscv64"/>
    <arch>riscv64</arch>
  </repository>
</project>
"/tmp/osc_metafile.6i5ux6q2.xml" 12L, 365B written
Sending meta data...
Done.
#编辑以后,有变化就会同步到官网
osc meta pkg home:swjnxyf:branches:openEuler:25.03 hostname
<package name="hostname" project="home:swjnxyf:branches:openEuler:25.03">
  <title/>
  <description/>
</package>
osc meta pkg -e home:swjnxyf fastfetch (这个配置针对项目具体的某个包)
"/tmp/osc_metafile.4usyuups.xml" 41L, 992B written
Sending meta data...
Done.
#稍微修改下描述,有变化,就会同步到官网,然后官网会创建这个包,本地就可以checkout下来了
#接下来就可以创建fafsfetch包了,还是回到根目录/root
#网址https://build.tarsier-infra.isrc.ac.cn/project/show/home:swjnxyf
[root@localhost ~]# pwd
/root
[root@localhost ~]# osc checkout home:swjnxyf fastfetch
A    home:swjnxyf/fastfetch
At revision None.
[root@localhost ~]# cd home\:swjnxyf
[root@localhost home:swjnxyf]# ls
fastfetch
[root@localhost home:swjnxyf]# cd fastfetch/
#理所当然是空的了
[root@localhost fastfetch]# ls
#首先是下载代码压缩包
[root@localhost fastfetch]# wget https://github.com/fastfetch-cli/fastfetch/archive/refs/tags/2.40.4.zip -O fastfetch-2.40.4.zip
--2025-04-25 03:20:33--  https://github.com/fastfetch-cli/fastfetch/archive/refs/tags/2.40.4.zip
Resolving github.com (github.com)... 20.205.243.166
Connecting to github.com (github.com)|20.205.243.166|:443... connected.
HTTP request sent, awaiting response... 302 Found
Location: https://codeload.github.com/fastfetch-cli/fastfetch/zip/refs/tags/2.40.4 [following]
--2025-04-25 03:20:35--  https://codeload.github.com/fastfetch-cli/fastfetch/zip/refs/tags/2.40.4
Resolving codeload.github.com (codeload.github.com)... 20.205.243.165
Connecting to codeload.github.com (codeload.github.com)|20.205.243.165|:443... connected.
HTTP request sent, awaiting response... 200 OK
Length: unspecified [application/zip]
Saving to: ‘fastfetch-2.40.4.zip’

fastfetch-2.40.4.zi     [           <=>      ]   1.65M   740KB/s    in 2.3s

2025-04-25 03:20:38 (740 KB/s) - ‘fastfetch-2.40.4.zip’ saved [1730450]
#然后是编写spec文件,可以参考其他项目的spec文件
[root@localhost fastfetch]# vim fastfetch.spec
fastfetch.spec
Name:           fastfetch
Version:        2.40.4
Release:        1%{?dist}
Summary:        A modern system information tool for Linux

License:        MIT
URL:            https://github.com/fastfetch-cli/fastfetch
Source0:        %{name}-%{version}.zip

BuildRequires:  cmake git pkg-config gcc-c++ libpciaccess-devel hostname
Requires:       libpciaccess

%description
Fastfetch is a CLI tool to display system information, designed for speed and minimalism.

%prep
%setup -q

%build
mkdir -p build
cd build
cmake -DCMAKE_BUILD_TYPE=Release -DCMAKE_INSTALL_PREFIX=%{_prefix} ..
make %{?_smp_mflags}

%install
mkdir -p %{buildroot}/usr/bin
mkdir -p %{buildroot}/usr/share/fastfetch
cp build/fastfetch %{buildroot}/usr/bin/
cp build/flashfetch %{buildroot}/usr/bin/
cp -r presets/* %{buildroot}/usr/share/fastfetch/ 2>/dev/null || :

%files
%{_bindir}/fastfetch
%{_bindir}/flashfetch
%{_datadir}/fastfetch/
[root@localhost fastfetch]# ls
fastfetch-2.40.4.zip  fastfetch.spec
#准备完毕,直接构建就好了。
root@localhost fastfetch]# osc build
Building fastfetch.spec for standard_riscv64/riscv64
Using local file: fastfetch.spec
Getting buildconfig from server and store to /root/home:swjnxyf/fastfetch/.osc/_buildconfig-standard_riscv64-riscv64
Getting buildinfo from server and store to /root/home:swjnxyf/fastfetch/.osc/_buildinfo-standard_riscv64-riscv64.
···
#慢慢构建即可
#此时,本地构建了,但是官网这个包还是空的
[root@localhost fastfetch]# osc add *
A    fastfetch-2.40.4.zip
A    fastfetch.spec
[root@localhost fastfetch]# osc commit -m "first commit"
Sending    fastfetch-2.40.4.zip
Sending    fastfetch.spec
Transmitting file data .
Committed revision 1.

commit以后,官网就有包了,并且正常构建。这个使用过程,很像git吧,可以对比学习
[  458s] + cd /home/abuild/rpmbuild/BUILD
[  458s] + rm -rf fastfetch-2.40.4 fastfetch-2.40.4.gemspec
[  459s] + RPM_EC=0
[  459s] ++ jobs -p
[  459s] + exit 0
[  462s] ... checking for files with abuild user/group
[  463s]
[  463s]  finished "build fastfetch.spec" at Fri Apr 25 03:54:44 UTC 2025.
[  463s]

/var/tmp/build-root/standard_riscv64-riscv64/home/abuild/rpmbuild/SRPMS/fastfetch-2.40.4-1.oe2503.src.rpm

/var/tmp/build-root/standard_riscv64-riscv64/home/abuild/rpmbuild/RPMS/riscv64/fastfetch-2.40.4-1.oe2503.riscv64.rpm
#很快啊,这个构建没有什么额外的东西,和直接源代码cmake构建差不多速度
dnf install -y 下面那个rpm路径
#会自动解决一些依赖然后安装
Installed:
  fastfetch-2.40.4-1.oe2503.riscv64          hwdata-0.390-1.oe2503.noarch
  libpciaccess-0.18.1-1.oe2503.riscv64

Complete!
[root@localhost fastfetch]# cd /root
[root@localhost ~]# fastfetch
                 `.cc.`                     root@localhost
             ``.cccccccc..`                 --------------
          `.cccccccccccccccc.`              OS: openEuler 25.03 riscv64
      ``.cccccccccccccccccccccc.``          Host: riscv-virtio,qemu
   `..cccccccccccccccccccccccccccc..`       Kernel: Linux 6.6.0-72.6.0.56.oe2503.riscv64
`.ccccccccccccccc/++/ccccccccccccccccc.`    Uptime: 1 hour, 54 mins
.cccccccccccccccmNMMNdo+oso+ccccccccccc.    Shell: bash 5.2.37
.cccccccccc/++odms+//+mMMMMm/:+syso/cccc    Display (QEMU Monitor): 1280x800 @ 75 Hz in 15"
.cccccccccyNNMMMs:::/::+o+/:cdMMMMMmcccc    Cursor: Adwaita
.ccccccc:+NmdyyhNNmNNNd:ccccc:oyyyo:cccc    Terminal: vt220
.ccc:ohdmMs:cccc+mNMNmyccccccccccccccccc    CPU: rv64gch (8)
.cc/NMMMMMo////:c:///:cccccccccccccccccc    GPU: RedHat Virtio 1.0 GPU
.cc:syysyNMNNNMNyccccccccccccccccccccccc    Memory: 378.62 MiB / 7.50 GiB (5%)
.cccccccc+MMMMMNyc:/+++/cccccccccccccccc    Swap: Disabled
.cccccccccohhhs/comMMMMNhccccccccccccccc    Disk (/): 2.81 GiB / 135.53 GiB (2%) - ext4
.ccccccccccccccc:MMMMMMMM/cccccccccccccc    Local IP (eth0): 10.0.2.15/24
.ccccccccccccccccsNNNNNd+cccccccccccccc.    Locale: en_US.UTF-8
`..cccccccccccccccc/+/:cccccccccccccc..`
   ``.cccccccccccccccccccccccccccc.``
       `.cccccccccccccccccccccc.`
          ``.cccccccccccccc.``
              `.cccccccc.`
                 `....`
[root@localhost ~]#
最后,还需要设置一下包的下载源
[root@yyjeqhc /]# vim /etc/yum.repos.d/openEuler.repo
#主要是添加上下面这几行,然后把原来的OS source everything之外的enables改为0,否则,每次下载包可能会比较慢
[oerv]
name=oerv
baseurl=https://build-repo.tarsier-infra.isrc.ac.cn/openEuler:/25.03:/Epol/standard_riscv64/
enabled=1
gpgcheck=0

 浙公网安备 33010602011771号